• Training
    • Injury Prevention
    • Training Tips
  • How To
    • Bike Fit
    • Gear
  • Nutrition
    • Nutrition Tips
    • Weight Loss
  • Repair
  • Reviews
  • Stories
    • Funny Stories
    • Jokes
    • Quotes
    • Videos
    • Funny Videos

I Love Bicycling

I Love Bicycling is a website that is geared towards cycling for beginners with road cycling tips, training articles, nutrition tips, weight loss, how to’s and bike repair articles.

What is Cyclocross?

September 20, 2015 by Adam Farabaugh

What is CyclocrossWhat is Cyclocross?

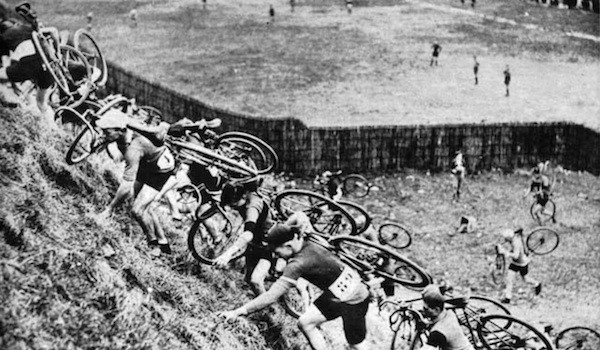
Cyclocross is a discipline within cycling that is a crossover of mountain biking and road biking. Back in the day in colder climates, riders needed a way to keep riding their bike through the winter months. A standard road ride was too long and cold. A mountain bike ride could have snow and other inconvenient factors along with being too long as well. They needed a way to ride that limited their time in the cold as well as was hard enough to keep them warm. The answer was cyclocross. Cyclocross is a cycling discipline that is ridden on a short, technical course of pavement, grass, dirt, mud, sand, and snow which includes features such as barriers and run-ups which force riders to dismount their bike.

What Races Consist Of

The main discipline within cyclocross is ‘cross racing. Races are thirty to sixty minutes in length, depending upon your category, and are raced on a taped off course that is about two to four kilometers long, or about five to fifteen minutes per lap.

Races typically start out on a long opening straight of pavement or dirt, and then take a turn to pretty much anything. The surface is always changing and is often very technical with turns. Races, a lot of the time, are run in parks so they take advantage of whatever features are around and can be utilized. Things like steep hills, stairs, sand volleyball courts, and off-camber sections are used a lot to create a difficult course for you to ride a bike on, let alone race. To top these features off, wooden barriers are used to force you off your bike, unless you’re a real savvy bike rider and can bunny hop them. Also, super steep sections are often placed on the course so you have to dismount and run up them.

If you’re not already a good bike handler, the technical nature of ‘cross racing will definitely make you better. Along with being a good bike handler, the races require you to go really hard for a short amount of time so you have to be able to ride your bike well while at your physical limit.

What Kind of Bike is Used

A special bike is ridden that is a “cross” between a mountain bike and a road bike. The bike more closely resembles that of a road bike but with mountain influences. The first thing that is different from a road bike is that the tires are bigger but smaller than mountain. The tires are also knobby to give traction through the corners and up hills. To allow the wider tires, the frame has a larger fork along with a wider rear end of the bike. The clearance not only allows the tires to fit but also creates room for mud to accumulate without bogging down your wheels.

The brakes are also a bit different to allow the larger tires along with having the option of disc brakes like a mountain bike. Aside from those minor differences, everything else is the same as a road bike; the shifters, the derailleurs, except for the gearing. A bit smaller gears are used as the speeds are slower than down an open road. A ‘cross bike for racing is also a great tool that can be ridden on gentle trails, dirt roads, and in some snowy conditions making it a great all around bike to ride.

The Culture

Just like any other sport, cyclocross has its own niche culture. It’s not road and it’s not quite mountain. ‘Cross culture has a bit of the seriousness of road with the laid back atmosphere of mountain. Riders can take their training, racing, as well as equipment very seriously but at the same time they’ll have a few bottles of Belgian beer to heckle the other racers as well as to enjoy after their race with friends.

‘Cross culture in Europe, particularly in Belgium where pro riders are celebrities and races are watched by thousands, is another level of craziness. Courses are more challenging and the support riders receive is unmatched but North American ‘cross races have their own awesome culture that gets riders hooked from their first weekend of racing.

Cyclocross is growing tremendously all over the world and for good reason. Because of how awesome it is. Just riding the courses are a lot of fun and racing adds another level of fun to it. That along with the ‘cross culture creates an appealing sport not only for those who ride road or mountain but anyone in general. ‘Cross is a great way to get into the sport of cycling. Although a ‘cross bike is best for a ‘cross race, a mountain bike can still suffice. A road bike will not however. And as you get hooked you can easily make the switch to a ‘cross bike. Cyclocross is not only quite the sport within cycling but quite the sport in general. Get hooked now otherwise when you do in the future, you’ll have wished you did before.

How To Pick Indoor Cycling Stands

September 17, 2015 by U.M.

How To Pick Indoor Cycling Stands
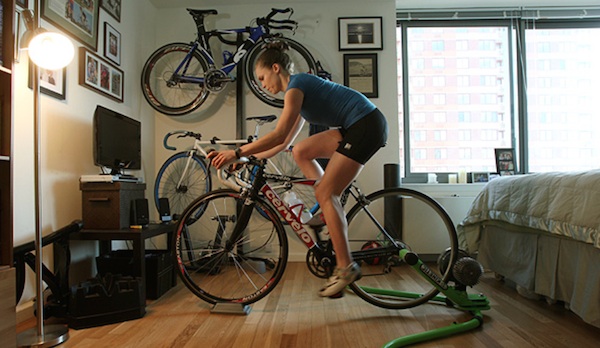
The best part of picking up biking either as a sport or as exercise is that you can bike outdoors and indoors. By buying a nice indoor cycling stand you can get in the training you need while avoiding extreme weather, tending to a child at home, watching TV, or simply enjoying the great indoors. No matter what your reasoning is there are a few things you’ll want to keep in mind when you buy an indoor cycling stand.

The Many Types

Indoor cycling stands are not all uniform. Some stands sacrifice increasing resistance for easy setup. Others are ideal for mountain bikes but not racing bikes. The most popular indoor stands are:

  • Wind trainer
  • Magnetic trainer
  • Rim trainer
  • Fluid trainer
  • Pivot trainer
  • Roller trainer
  • Virtual-reality trainer

The difference between these stands is the resistance mechanism on the stand. For example, a wind stand uses fan blades to produce resistance while a magnetic stand uses a roller-driven magnetic flywheel to generate resistance. It is not the type of resistance mechanism you should worry about so much as the kind of resistance each generates.

Resistance

If you’re only biking indoors because you have to, the cycling stand you’ll probably like best is one that offers differing resistance. For example, if you increase your cycling speed, the stand will increase the resistance it gives you. This is great for sports training and maintaining a semblance of what you’ll experience when you’re on your outside route. Stands that offer realistic resistance are:

  • Wind
  • Magnetic
  • Fluid
  • Virtual reality

Noise And Vibrations

Many people prefer a quieter stand in order to hear music, television, or other people. Also, a really noisy bike stand can be incredibly obnoxious. A stand that vibrates too much will feel unstable and probably make you nervous when you use it. This is a sign of poorly constructed stand. You want to be able go as fast as you can for as long as you can without worrying about breaking something. Good and quiet stands include magnetic, rim, and fluid stands.

Weight, Storage, Easy Setup

Most bike stands weigh anywhere from 15-35 lbs so moving your bike stand around shouldn’t be too difficult. Many bike stands usually come with the added feature of being foldable. This makes them easy to store in closets, corners, and garages. However, keep in mind that not all bike stand models are foldable.

Lastly, you’ll want an easy setup. Bike stands often have easy-to-use lock mounting gears, skewer clamps, or quick lock cam levers. However, calibrating the resistance mechanism is usually what determines an easy setup or a difficult setup. Some resistance mechanisms need fine tuning each time you use the stand and others just go without any help. The most difficult stands to set up are the virtual-reality and rim stands.

When you go to buy a bike stand keep in mind the type of resistance mechanism that would work best for you. This is the most critical part of the bike stand as it is what determines how realistic your indoor ride is, as well as how easy the stand is to set up and use.

The Rise Of Indoor Cycling

September 17, 2015 by U.M.

The Rise Of Indoor Cycling
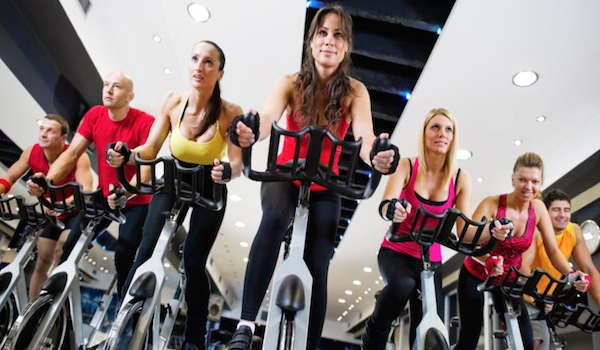
Indoor cycling, often referred to as spinning, is a worldwide exercise phenomenon. Today it is one of the most popular group classes in fitness clubs and gyms around the world, attracting millions of people each year. Indoor cycling is a favorite of many fitness gurus and outdoor cyclists who use it to stay in shape during the off-season, too.

The Very Beginning

Indoor cycling began where a lot of great things seem to begin: a garage. Johnny Goldberg, a South African immigrant living in California, was a fitness instructor, endurance cyclists, and a competitor in cross-country and ultra-marathon races. He recognized a need for training indoors and subsequently thought of a way in which to replicate road cycling in his garage. He used his new indoor training regimen to break a record when he biked across Arizona (544 miles) non-stop for over 29 hours.

A year after breaking this record he started the first indoor cycling class in Santa Monica. His classes were open to large groups and focused on heart rate training, motivation, and breathing exercises. His new class used stationary bikes with sophisticated ergonomics and geometry to closely resemble a racing bike. With the help of a fellow cyclist, John Baudhuin, they installed 150 of these stationary bikes in several different gyms and fitness centers.

The Rolling Stone

In 1993, Rolling Stone magazine reported that indoor cycling was the ‘hot’ new fitness regimen not only for cyclists in their off-season, but for the general public as well. This led to a whole new market of people who could use indoor cycling to get in shape and stay in shape.

1994: A Big Year

Mad Dogg Athletics, Inc. was found by Goldberg and Baudhuin in 1994 with the idea that the start-up company would further develop indoor cycling as a valid fitness regimen. This was when they also trademarked the word Spinning. Business boomed and stationary bikes began pouring out of manufacturers and into fitness centers everywhere.

By the following year, Mad Dogg developed a teacher’s certification program for people looking to teach Spin classes. That program is now the standard for indoor cycling certification and education around the world.

Modern Spinning

Today, there are five stationary bikes produced by Mad Dogg and their affiliate, the Spinning program, for use in gyms and fitness centers. Another six models are produced for in-home use from this provider. There are many other brands that offer these types of bicycles as well. Then there are lines of spinning gear, accessories, DVDs, and full classes and programs for people to choose from. Millions of people use indoor cycling to get in shape while avid amateur and professional cyclists use indoor cycling to maintain their fitness in the off-season or when the weather prohibits outdoor riding.

Indoor cycling was designed to help athletes in the sport of cycling keep training no matter what. Cyclists could build an indoor training regimen and use it to break records and meet goals just as Johnny Goldberg did in Arizona. However, the benefits of indoor cycling are so numerous and so enticing that indoor cycling spread to the general population as a fitness and exercise routine.

Staying Upright: Risk Averse Riding

September 14, 2015 by Adam Farabaugh

Staying Upright: Risk Averse Riding
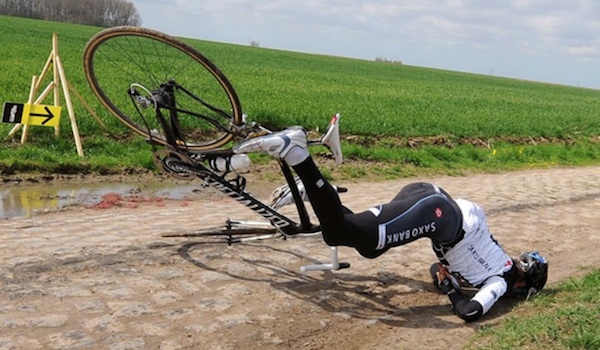
Whether you are a five year old kid learning to ride a bike or a Tour de France veteran, bike riding involves risk and how we handle that risk is what keeps us coming back for more or taking up another sport entirely. Risk, in the simplest sense, is how likely a bad outcome is to happen. Some aspects of bike riding, such as downhill mountain biking, bring a high level of risk but it’s that high level of risk that creates the thrill, rush, and fun. It can have a price though and for some, it’s a risk worth taking. For other aspects of riding, such as road riding, the level of risk can still be high but steps can be taken to lower that level of risk. Another element of risk in cycling is how comfortable you are in the same risky situation. As your riding improves, not only will you be a better bike handler but you will also be more comfortable being in those risky situations as you know you have the skills to avoid crashing.

Riding Ability

One of the biggest influences on how risky a riding situation, whether it’s a corner or avoiding a crashed cyclist in front of you, is how good you can ride your bike. The better a rider you are and the more experience you have, the less likely you are to crash. Say you enter a corner with a bit too much speed. You not only know how to handle your bike but you can do the proper things just through reaction without even really thinking about it. The less experienced cyclist is probably going to overreact and not know what to do in that small timeframe. Simply, the more you ride and practice things like cornering and bunny hopping, the less risk you will have of crashing and potentially injuring yourself.

Attention

After riding ability, how focused you are to the task at hand will influence how likely you are to having an accident. Whether it’s going down a trail, a road by yourself, or riding in a group, seeing what’s coming up to allow you ample time to react will substantially lower your risk of crashing. When riding down a trail or road you want to keep your attention on what lies ahead of you. Thinking about other things as well as looking at the sites takes your attention away from potential obstacles. You can let your attention waiver at times but make sure it’s the right time. When you’re riding on the road in a group, you must not only pay attention but also look further ahead than just in front of your front wheel. Seeing an incident a few riders ahead of you will give you added time to slow and avoid the crash or obstacle in the road.

Avoiding Risk

The thing with riding is that there is always going to be risk. Past making sure that your riding ability is up to the level of risk you’re willing to take along with paying attention, riding in a way that errors on the side of caution will lessen your risk of an incident even further.

Cornering

Crashes occur most often in corners whether riding on a trail or the road typically because of too much speed. With too much speed, traction becomes marginal and combining that with other riders in a group, wheels can easily overlap and when a rider ahead of you goes down, it’s hard to avoid piling into the back of them. The best way to stay safe in the corners is to just slow down a bit more. You will have to reaccelerate a bit more but it is worth your skin to do so.

When riding in a group, you can’t always slow as much as you would like but you can open up a little bit of a gap between you and the rider in front of you. This will allow you to not only slow more but also give you more time and space to react and avoid a rider if they do crash in front of you.

Along with opening up a small gap, staying to the inside of a corner takes away the possibility of a rider to your inside sliding out and taking you with them. And then if there is a crash, you can avoid it by turning sharper to the inside as on the outside there is going to be no place to go besides off the road or into oncoming traffic.

Overlapping Wheels

On straight stretches of road, crashes are most commonly caused by riders overlapping wheels. This is mostly caused by riders not paying close enough attention to where they’re riding and what’s in front of them. The best way to avoid this is to not overlap wheels so you don’t have to rely on the rider in front of you not wavering off of a straight line.

Other Riders Crashing

When riding in a group, other riders are going to crash. A lot of being able to avoid it is based on luck but you can increase your chances of avoiding it by always paying attention a few riders ahead of you and always having an out. This means that you are never so close to the rider ahead of you, as well as to both sides, to not have any place to go if there is a crash. You have to always be thinking if there is a crash right now, where are you going to. It will only be reaction when there is a crash but having yourself set up so there is a place to go in your reaction will help you avoid the crash.

Risk is a part of cycling but how you manage that risk is what is going to keep you safer on the bike. When you’re looking a few riders ahead of you, you should also be looking for obstacles in the road. Never position yourself so all you can see is the back of the rider in front of you. You want to be able to see around them to see what’s coming up. If you can’t see farther ahead you are just relying on luck to keep you safe. Whether on the trail or road, pay attention and practice your skills to get you out of a tight spot when the situation arises. Stay proactive at all times and you will lower your chances of crashing greatly.

The Convenience Store Stop: How to Make it the Most Efficient

September 12, 2015 by Adam Farabaugh

The Convenience Store Stop: How to Make it the Most Efficient
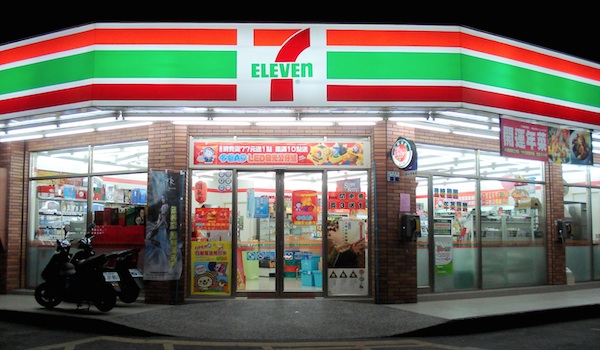
As rides start to get longer and longer, stops mid-way for food and water are going to become more frequent as well as important. The coffee shop is a great place to stop for a while and have great conversation over a few brews but during training rides you want to be in, out, and on your way in a timely manner. You also want to get what you need to fuel properly for the remainder of the ride. Knowing what you want to eat and drink prior to going into a store will help prevent you from milling around looking at every possibility which we’ve all done before, especially if we’re already a bit depleted from the ride.

The Drink

Hydrating properly mid-ride is super important because if you don’t, it doesn’t matter what you get to eat, you are going to be suffering the rest of the ride. Typically you are going to want more than just water. Water is good but you want it along with something with electrolytes at the very least because your body depends on them to function properly. It depends on the store but typically you don’t want to pay for water. Take one of your bottles into the store as a lot of stores have a fountain drink dispenser with an option for water. If they don’t, then buying it is the next best choice. Some people opt to fill their bottles in the bathroom but you never know the quality of the water. If you are with a few people, get a gallon jug of it and split it; way cheaper that way.

Electrolyte Drinks

For the electrolyte drink, some fountain drink dispensers have a sports drink which can be a lot cheaper than buying them individually from the refrigerators. Just remember to take it to the counter and tell the cashier what it is to pay for it. If you can’t get a sports drink from the fountain drink dispensers then getting a big bottle of Gatorade or PowerAid can be good as they also have carbohydrates and sugar to continue fueling your ride.

Again, if you are with others, many stores have a “Buy 2” price, so see what you can get for a deal by splitting it. Some sports drinks come with a zero calorie option. This is typically always a bad idea for two reasons. One, you should always fuel for your rides as otherwise you are riding in a depleted state and can’t reach your maximum riding potential. Second, because they are zero-calorie they have to make them taste good with other additives which are never good for you. If you are trying to lose weight, the place to do it is not on the bike. Fuel properly for your rides and then eat less and the right foods off the bike.

Cheapest Drink Option

The cheapest drink option a lot of the time, other than water from the fountain drinks dispenser, is the big cans or jugs of iced tea. These are not the best way to hydrate as they don’t have many electrolytes, and they have a lot of sugar, but drinking them along with a sports drink can be a good cheap option. With these however, you have to look out for high fructose corn syrup if you are trying to avoid it as a lot of them will have them listed as the second ingredient, meaning there is a lot of it in the product.

The Sodas

Soda is one other drink option that many riders swear by mid-ride. Sodas shouldn’t be looked toward to hydrate so much but rather to give you a good boost toward the end of a ride. The high sugar content as well as the potential caffeine can give you a good kick to finish off a ride strong. The trick with soda though is timing it right, because if you have it too early in a ride you can burn through all the sugar before the end of your ride and then you’re left bonked. You want to make sure you have it close enough to the end of your ride or that you have another soda ready to keep you going until the end.

The Food

After you pick out the best drinks for you to finish your ride strong, you need to find the best foods. Drinks are easy comparatively as there are endless food options. The first place to start is; what kind of a ride are you doing?

The Hard Ride

If you are riding hard, at threshold and above, you need foods that are easily digestible along with a high carbohydrate and sugar content and low protein and fat content. Simple granola bars without too many nuts can be a good healthy option. Other foods that are often thought of as bad for you can actually be a good choice mid-ride. Foods like cookies, pop-tarts, pastries, and other little sweets have a lot of carbohydrates and calories packed into a small goodie. The fire with these is that a lot of them are highly processed and contain a lot of ingredients so if you are trying to avoid all that, go with a good quality cookie or pastry that contains fewer ingredients as well as nothing that you can’t pronounce.

Other good options for the end of a hard ride are candy bars. These too are thought of as “junk food” but they contain a lot of sugar that your body pretty much burns exclusively when you are riding hard above threshold. Be careful not to get any that contain too many nuts but otherwise go with what you like. Snickers tend to be a lot of cyclist’s favorite.

The Endurance Ride

When you are training at a lower intensity you still need the carbohydrates to keep you rolling strong but you don’t need as many and the ones you do need don’t need to be from sugar. You are burning calories at a slower rate so you want longer burning fats and proteins along with the carbohydrates. Easy pocketable items include more nut based bars as well as protein bars provided you can stomach them and they don’t contain too much protein. Another option, although it’s not quite as quick, is to get a small sandwiches or wraps that many convenience stores have pre-made. This gives you some of the carbs in the bread along with the protein in the meat. Don’t eat too much at one time though as you don’t want a heavy brick in your stomach.

Depending upon where you live, there can be many options for where to stop to refuel. In most parts of the country, gas stations with convenience stores tend to be the most frequented as they are around from the big city to the only place around for miles and miles in parts of the American West. Plan ahead and know where you are going to stop mid-ride. You’ll not only get into a routine of which places you stop at, but also which food and drink you get at each place. Making good choices in the store will keep you going strong on the rest of your ride.

How to Ride in a Paceline

September 12, 2015 by Adam Farabaugh

How to Ride in a Paceline
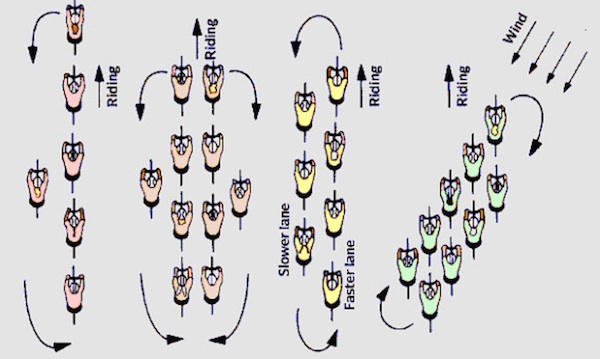
Riding in a group can bring a lot of benefits that you can’t get while riding on your own. A paceline is how a group of riders rotate through trading spots riding the front in the wind. Riding in this way is the fastest and the most efficient way down the road. However, knowing how to ride in a paceline is imperative as if you can’t, you not only pose a risk to yourself but others as well due to the possibility of crashing. Riders in the group can also give you pointers as you get the feel for how things roll.

The Rotation

A paceline starts with two lines of riders riding single file with one line moving forward while the other one moves backwards. This allows for a constant changing of the front two riders that are in the wind allowing the work to be spread over the group more evenly. The rotation is always continuous giving it the name “rotating paceline”.

When You’re at the Front

As you approach the front, the rider ahead of you will slide to the left and slow down a little. As he or she does this, you keep pedaling at the same speed. Do not accelerate. Stay the same speed and continue straight in your line. As you’re doing this look over your shoulder or under your arm to see where the rider is that just pulled off. Once you see that they are far enough back, slide over in front of them taking care to not take out their front wheel.

Once you are here, keep pedaling but take about two “soft” pedal strokes where there is not much pressure on the pedals. This will slow you a little but not so much as the rider now behind you has to slow. You are only slowing the difference in speed of the line that’s moving forward and the line moving backwards. Since the paceline is rotating, you do not need to do anything to signal the rider behind you to pull through. However, if you are taking longer turns on the front, give a slight “flick” of the elbow out as you slide to the side. This indicates that you are done pulling on the front and for them to pull through.

When You’re at the Back

As you slide backwards in the group you will eventually get to the back and have to switch lines to the one moving forward. You will probably have an idea of about how big your group is so when you are getting close, be ready to slide over. As the last rider slides over and is moving back up past the rider whose wheel they were just on, they should say something such as “last” or “last rider”. This gives the rider moving back a heads up that they are now last and that they need to slide over and reaccelerate to get on the wheel that’s now moving forward.

Always look to make sure that there is no one there otherwise you could ride straight into someone. To avoid sliding too far off the back and having to reaccelerate hard, you should start accelerating before the last rider comes past you. As you reaccelerate, you should start to slide to the side and end up having your front wheel move past the other rider’s rear just as you’re going the same speed as them. This takes practice but you’ll get the gist quick.

Clockwise or Counter-Clockwise

Pacelines don’t always rotate in the same direction due to the wind. If there is no wind then riders should rotate in a counter-clockwise direction as it’s easier with traffic. (Except if you’re in the UK or Australia, yours will be the opposite.) When there is wind however, you should always pull off into the wind. This means that if the wind is coming from the left, you ride counter-clockwise, and if the wind’s from the right, you ride clockwise. Riders will always be sliding to the side of the wheel in front of them that’s more out of the wind.

If the group is rotating in the wrong direction, as the first rider slides over, they risk taking out the front wheel of the rider that’s behind them. If the group is rotating in the wrong direction, yell that you are switching the rotation as you get to the front. When you are on the front, don’t pull off but rather keep riding to allow the riders sliding back to slide back a bit and then pull off in the other direction. If you need to make room for you to pull off, slide slightly to the opposite direction and moving the riders immediately behind you over, and then pull off.

The Double Paceline

When a group’s riding fast they will typically always ride a rotating paceline. When a group’s out for more of a training ride or relaxed ride, they will ride a double paceline. This is where the two lines ride side by side at the same speed and two riders on the front are in the wind at the same time. This allows for longer pulls of the riders on the front as well as for everyone to be able to have a conversation instead of just riding past each other. Pulls can be as short as one minute or as long as ten to twenty minutes depending upon the group and riding.

When the two riders on the front are ready to pull off, they first make sure that there is no traffic and then one slides right and the other left, moving backwards down the side of the two lines. When they get to the back, they reaccelerate and pick up the last two spots in line. Pulling off in this way can only be done when on wide enough roads. When the roads are narrow and/or there is not enough room due to traffic to ride four wide, the group rides a slowed rotating paceline essentially. When the two riders on the front are ready to pull off, one accelerates a little moving ahead of the other while the other one slows and moves back. The rider on the side that just moved up now slides forward and takes their spot on the front of the bunch. The group should rotate twice as much as when the rider is on the front, they are on the front for two turns essentially. Rotating in this way also allows you to talk to different people as the double paceline only really allows you to talk to the same person if there is an even number of people.

Some sort of paceline is typically how any group rides aside from a race or an event that has full use of the roads and where you can ride more than two abreast. Knowing the different kinds and how to ride in each of them will allow you to comfortably ride in a group along with being less sketchy and avoiding causing a crash. Also, an easy way to pick out a newer rider in a group is how they ride. If you mess up as well as ride sketchy, meaning you ride in a way that could cause a crash, you will probably be heckled as well as tried to drop. Everyone is new at some point but knowing how things work and then getting a few pointers in your first few group rides will allow you to fully enjoy and take full advantage of them.

The Echelon: Riding in the Wind with a Group

September 10, 2015 by Adam Farabaugh

The Echelon: Riding in the Wind with a Group
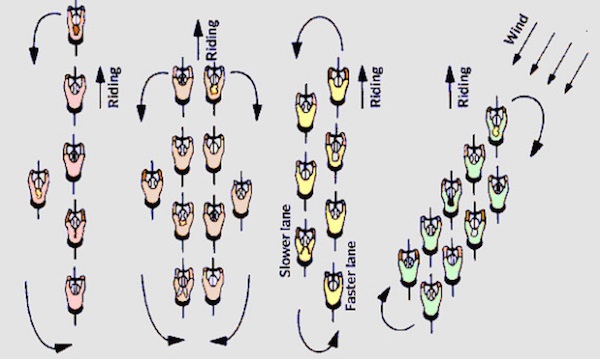
Two things that slow you down in cycling are uphill’s and wind. Some look to avoid them while others embrace them. Riding in the wind can be a drag but it’s going to happen so you should know how to get through it the most efficiently.  The wind can also have some good benefits, one being that you can ride a lot faster than you otherwise could when it’s at your back. When you are in a group riding into a headwind you can actually get more of a draft behind the other riders allowing you to pedal with much less effort. A side wind can give you a real advantage if you know how to ride in it as the other riders that you’re with will have to pedal that much harder because they are poorly positioned.  As with anything in cycling, the more you do it the better you’ll be at it.
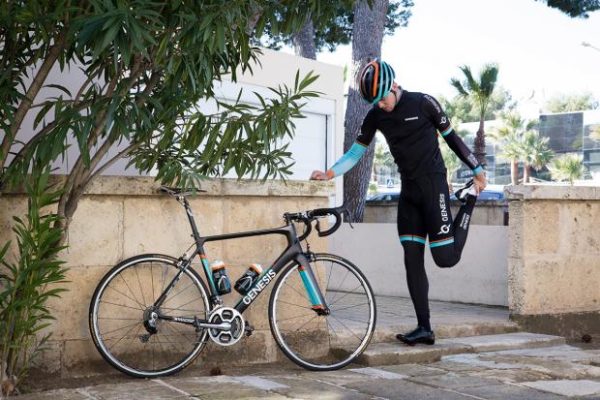
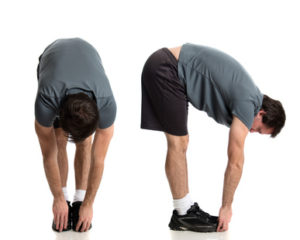
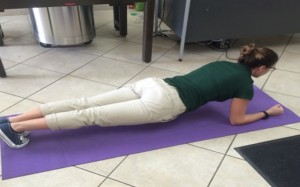
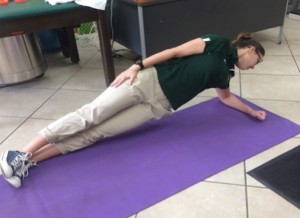
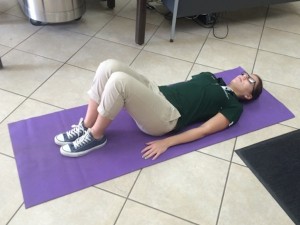
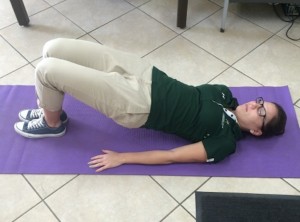
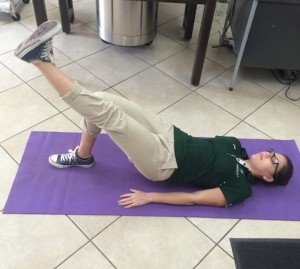
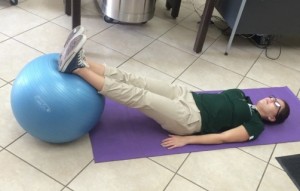
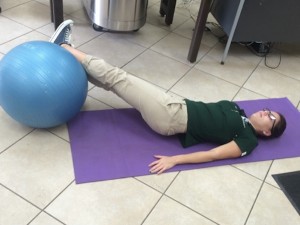
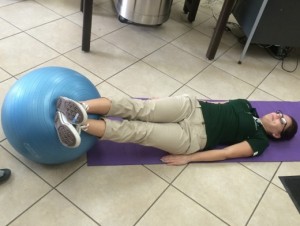
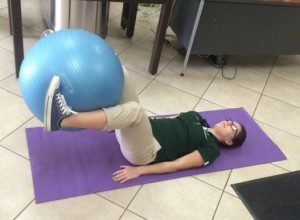
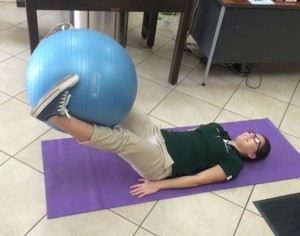
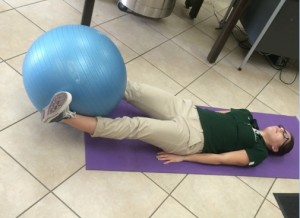
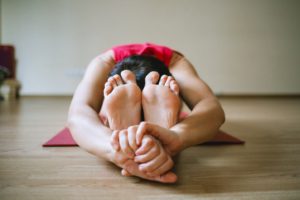
The Headwind

On solo rides or rides with one or two others, headwinds can slow your ride dramatically while you have to pedal much harder. In a group however, the draft of a rider is magnified. The first rider still has to pedal extra hard, as they would on a solo ride, but the riders behind don’t have to pedal with nearly the same amount of effort. Since you are in a group, everyone can take shorter turns on the front in the wind keeping your speed closer to what it otherwise would have been.

The Tailwind

Tailwinds are fun whether you are solo or with a group. You can ride at speeds almost like you have a motor on your bike. The downside is when you have to turn around. The one drawback from tailwinds in a group is that you get less of a draft behind the rider ahead. Even though the first rider can go X amount faster, the riders behind are going to have to pedal at a closer effort to the rider on the front. You all are still going faster though so it’s still a benefit to all.

The Crosswind

Riding in a cross, or side-wind, in a group is really where knowing what position to ride in will benefit you. The first thing is that you obviously can’t see the wind, unless you spot a flag or something else blowing, so you have to feel it. When it’s a strong wind this is easy but when it’s only slight there is still an advantage to riding downwind of the rider in front of you. You just have to then know where that downwind is. Overtime you will get good at feeling where the wind is coming from.

Where to Ride

First we will simplify things down to two riders riding in the wind. The wind is coming from the left. Downwind, or where the best draft for the second rider, is going to be slightly behind the first rider and to the right. This will be just slightly to the right, the closer the wind is to a head or tail wind and when it’s closer to ninety degrees from the left, the draft will be further to the right of the first rider rather than being slightly behind them.

As you first start riding, you should avoid overlapping your front wheel with the rear wheel of the rider in front of you. As you get better as well as the riders you ride with, you will overlap your front wheel to get into the “sweet spot” of the draft. When you do this however you need to pay the utmost attention as the slightest movement to the right of the rider in front of you will cause them to hit your front wheel, thus crashing you. To avoid this, any movement the rider ahead of you makes you need to replicate.  When they move right, you move right keeping your front wheel in the clear.

Making the Switch

Now in our two rider scenario, the first rider took a short pull on the front and is going to move back behind the other rider. The first rider eases off the pedals slowly and moves slightly to the left and back. The second rider then slides left at the same speed filling the position the first rider was just in.  The rider pulling off then slides right passing their front wheel behind the now, first rider’s rear wheel and then slightly forward and to the right where the “sweet spot” is.

Pro Tip: When pulling into the front position it is important to keep a steady pace, one that you were holding while drafting. Many novices hammer on the pedals and force a gap behind them making the echelon less efficient and creating an accordion effect that forces people drafting to use excessive energy.

Adding it to a Group

Now taking the above scenario and adding riders to it gives an echelon.  It is the exact same thing except that behind the second rider is a third and so on. Because each rider is riding, in our scenario, slightly to the right of the rider in front of them, the echelon can only be so wide as you run out of road to the right. What then happens is a second echelon is formed with a bit of space before the first. Often times before this happens however is that a trail of riders will be riding down the extreme side of the road trying to get a draft. They can’t get as good of a draft as the riders in the rotating echelon so they will often lose ground when they tire.

In a rotating echelon no one takes a full pull on the front but rather rolls through the first position in the wind. As soon as a rider hits the first position they slide back and move gradually to the right one by one ensuring that they don’t hit their front wheel on any of the riders in the first row but no further back. This creates two lines of riders. It’s like a pace line, just tilted. When the rider moving backwards down the line reaches the last rider they accelerate forward into the last riders draft and follow them in that same position as the front row continues to slide left.

The Gutter

If you are in that situation where there is a cross-wind and no one is riding an echelon you’ll be forced to ride down the very edge of the road, often known as the gutter. The key to riding in this position well is being able to see past the rider in front of you so you can see where the exact side of the road is and if there is anything sticking out. A good trick to do here is to ride with your body slightly to the right of where you would normally sit on the bike with your head tilted even further to the right. This will give you that extra little bit to be able to see what’s coming up.  And if anything does come up, just push your bike back to the left, in our scenario.

Riding in the wind takes practice and even if you know how to, others in the group may not know how which can be frustrating. Cross-winds can be dangerous with the overlapping of wheels so just make sure you pay attention as to not cause a crash as well as to look out for others who might cause a crash. Riding in the wind isn’t always fun but at the very least it can be made a bit more enjoyable if you know how to ride it. Stay in the right position on the wheel in front of you and being a bit more aero always helps too.

Best Stretches For Cycling

September 2, 2015 by Adam Farabaugh

What if there was something that you could do to improve comfort on the bike, increase performance, enhance recovery, as well as help prevent injuries? Turns out there is- stretching.

That being said, just reaching down and touching your toes isn’t enough to help your muscles. You need to know what stretches to do, when to do them, as well as for how long. Incorporating a regular daily stretching routine should be done by everyone and especially if you are riding.

Best Stretches For Cycling

The biggest thing with stretching is making sure that you are doing them properly, because if you’re not you can cause injury. The focus with cycling is obviously the legs, but the core and upper body can’t be neglected either.

This stretching routine is only a base, and can and should be built upon.

Cycling Stretching Routine

Hamstrings

Best Stretches For Cycling

Start by standing with your legs straight and reaching down toward your toes. It shouldn’t be painful and don’t bounce. Hold it for twenty to sixty seconds (More on that below.) Then cross one leg in front of the other and do the same. Switch legs. This is a great stretch for the hamstrings and the back of the whole leg because of the angle that is created between your upper and lower body on the bike.

Quads

Next focus on your quads. The quads are used a lot in cycling and need to be focused on. Find a wall or something to hold on to, and stand on one leg with the other bent behind you at the knee. Grab your ankle with the hand that’s on the same side of the knee that is bent and pull gently up toward your buttocks. The trick is to keep your hips level without tilting them forward. Do this by sucking your stomach in and almost trying to push your tail bone down and forward toward the floor. Do both legs.

Calves

The calves are another big area that, depending upon your position on the bike, can receive a lot of abuse. Find a wall and place both hands on it at about face level. Now take one leg and straighten it back behind you keeping your heal on the ground or as close to it. Your other leg should be bent with your foot directly beneath your head.  Now take the leg that’s straight and slightly bend your knee keeping your heal on the ground. You should feel the stretch throughout your calf. If not bend a little farther but make sure you don’t feel any pain.

Glutes

Next, find a bed or counter that’s about as high as your quad. Place one foot on the bed, or other surface, with your knee almost at the most it can bend but not quite. You don’t want any pressure felt through the knee. Then press your chest straight forward to the inside of your knee. You should feel the stretch through the buttocks. Do the same for the other leg.

Best Stretches For CyclingLegs & Back

Now sit down on the floor with your legs straight out in front of you. Your feet should be together with no bend in your knees, or as little as possible.  Now with your toes pointed straight up, bend forward at the hips reaching for your toes with your hands. Try to keep your back straight without arching your shoulders farther forward so you can reach further. You should feel the stretch all the way down the backs of your legs as well as up into the back.

These stretches above are the basic stretches to start with for cycling. Any sport, and cycling in particular, uses many muscles throughout the body and they all should be stretched, but these are the big ones to focus on.

When should you be stretching?

You should be doing these stretches after you ride. You never want to stretch cold muscles before a ride, always warm up and make sure you are limber. If your legs are sore immediately after a ride, stretching can help to relieve them, but be extra gentle. Your muscles are already fatigued and injury can result much easier if they are overstretched.

How long should you be stretching for?

Each stretch should be held for a minimum of twenty seconds if you are pressed for time, but ideally around a minute. Less than a minute is good for recovery, more than a minute is good for lengthening muscles if they are constantly tight. Hamstrings are a big area that tend to be tight which can also result in back tightness and pain. If you have muscle tightness in your back, there’s a good chance that you have tight hamstrings. In general it’s always better to have loose, flexible muscles than tight.

These stretches listed above are just a base. They need to be added onto with additional stretching routines for cyclists.

Stretching can be a great way to help your riding and prevent, as well as overcome, injuries. The biggest thing in stretching is to do them properly so if you are unsure ask someone who knows and can teach you. Taking the time to learn once will pay huge dividends in the long run of your cycling endeavors.

Triathlon Vs Road Shoes

June 25, 2015 by Dyani Herrera

Triathlon Vs Road Shoes

road vs tri shoeWhen beginning in the cycling community there is much debate as to whether one should purchase triathlon or road shoes. Each of these shoes has their advantages as well as disadvantages. Depending on what needs you have, you may use the following factors to help you determine which cycling shoe is the most appropriate for training or racing.

Transition

If you participate in triathlons regularly then there are a few advantages of having triathlon shoes versus road shoes. Due to the ease of having one or two Velcro straps, triathlon shoes are a lot easier to slide on and off; with these, you don’t have to worry about any buckles or adjustments. This can come in handy during your swim to bike transition, in which you can clip the shoes on your bike, run barefoot through transition, and slide into your shoes once you’re on the bike. However, if you don’t feel comfortable with doing a flying dismount during your next triathlon, and prefer putting on your shoes before mounting your bike, triathlon shoes are easier to put on. Although, the seconds lost putting on triathlon shoes versus road shoes is minimal. Moreover, triathlon shoes also carry the advantage that they’re seamless and don’t require socks therefore minimizing blisters.

Pedal Stroke

Of all the factors distinguishing these two shoes, the advantage of an improved pedal stroke is my personal favorite. Prior to switching to road shoes, I would ride in Shimano WT-52 shoes, which were great for comfort and learning ease in transition. However, I was beginning to get a lot of stress on my IT band as well as toe numbness on longer rides. After a year of making minor adjustments with no resolve I decided to make the switch to road shoes. What a difference it made!

Road shoes have less lateral gliding motion on the clips, which prevents stress on your hip abductor muscles such as the TFL which tapers into the IT band. I no longer felt that nagging pain during my longer rides or numbness in my toes. Also, road shoes tend to be narrower than triathlon shoes and this fit aids with a more efficient pedal stroke. Due to the fit and minimal glide movement, it allows for increased efficiency which translates to more power on the bike. I’ve definitely noticed an improvement in riding comfort and power with my road shoes, especially on rides greater than 35 miles. Therefore, losing a few seconds in transition doesn’t compare to the overall effects experienced during the bike leg of a triathlon.

Cost

The cost between these two types of shoes depends on the brand, model year, and size (if purchasing online). However, most of the time triathlon shoes tend to more expensive than road shoes. A way to deter these costs is by purchasing an older model that the shop is trying to get rid of to make room for the newer models. In addition, amazon.com has great deals on both triathlon and road shoes (i.e. louis garneu, pearl izumi).

When trying to determine which shoe is the most appropriate option I’d suggest thinking of the following questions: Do you have a wide or narrow foot? Do you train often and have frequent long rides? Are you experiencing pain or discomfort in your foot, patella, or lateral knee? Are you a triathlete who is comfortable with transitioning or still learning? These are the questions you should be asking yourself when purchasing cycling shoes rather than using cost as a determining factor. It is better to have a comfortable fit that is conducive to your cycling regime, than have cheaper shoes which create more problems for you in the long run.

Core Exercises to Eliminate Back Pain

December 21, 2014 by Dyani Herrera

Core Exercises to Eliminate Back Pain

If you’ve ever experienced back pain you know how insufferable it may seem especially when you’re trying to stay fit through a non-weight bearing exercise like cycling. First, make sure you visit your local bike shop and rule out an improper bike fit. In addition, if you’re feeling any numbness/tingling radiating down your leg, visit an Orthopedist to ensure you do not have a herniated or bulging disk. Once these causes have been eliminated, then the problem could be due to a weak core. Perhaps you’re asking yourself what exactly is considered the core? The core is a group of muscles that includes the erector spinae, paraspinals, rectus abdominus, internal and external obliques, and the gluteus maximus acts as an accessory muscle. When the core is weak and required to perform exercise which it is not prepared for, it can react by creating muscle spasms. If the erector spinae muscles or paraspinals begin to spasm, the pain can become a nightmare. However, here are some beginner exercises you can perform to strengthen your core and prepare yourself for pain-free cycling. It is ideal to perform these three times a week, with a day of rest in between.

Planks:

Planks are great to strengthen not only your back muscles, but also your abdominals. Make sure when performing planks you aren’t lifting your butt in the air in order to compensate for weakness. The whole body should be in a straight line, with your head looking up. You will need a timer for this exercise. You can start with 20 seconds and as you become stronger, increase in increments of 10 seconds. Before you know it, you will be able to hold this position for a 1 minute or more! Perform 3 sets of planks.

Core Exercises to Reduce Back Pain

Side Planks:

Side planks should be performed bilaterally and if possible with a partner. Your partner can assist you with verbal cues to ensure you are executing the proper form. However, if you cannot complete these with a partner, start out doing these in front of a mirror so you can fix your position throughout. It is important to keep your whole body in a straight line. Some common mistakes include sticking out the butt or leaning forward with the shoulders to compensate for weakness, and make the exercise easier. You can start with 20 seconds and increase in increments of 10 seconds as you become stronger. It is not uncommon for one side to be stronger than another. Typically, we have a dominant side in our body. This exercise helps with working on each side individually, without compensation from the stronger side. Perform 3 sets, bilaterally.

Core Exercises to Reduce Back Pain while riding

Basic Glute Bridges:

Since the Gluteus Maximus is an accessory muscle to the core it is important we strengthen it as well, to avoid any compensation patterns along our kinetic chain, which could lead to injury. In this exercise you will lie on your back, have your hands at your side, dig your heels into the ground , and squeeze your Glute muscles (butt) as you pop up; hold the position for about 5 seconds before you come down and perform the next repetition. Make sure your hips do not touch the floor as you come down. Complete 3 sets of 15 repetitions.

As this method becomes easier you can maintain this same position, but now instead of having both heels on the ground, raise one leg up, fully extended. The most advanced form of this exercise can be found in 7 Exercises to Cure and Treat IT Band Syndrome.

Core Exercises to Reduce Back Pain When Riding

Core Exercises for back pain

Core Exercises to Decrease Back Pain When Riding

Quadruped Arm and Leg Raise:

This exercise helps you improve balance (aka stabilization) as you strengthen your spinal muscles simultaneously. Make sure you tighten your Glute and Abdominal muscles as you perform this to maintain balance. This is another exercise that would be helpful if performed with a partner. However, if this isn’t possible then one tip I’ve found to be helpful is to place a small stick on my lower back, to serve as feedback. I know I’m in a parallel position if the stick does not fall off; but, when it does it may mean my hips are rotating, or my back is not in a straight line.

You will be in a facedown position on the floor, on all fours. Then, lift the left arm, fully extended out in front of you and extend the right leg at the same time. Hold this position for about 5 seconds before doing the next repetition. Repeat the same motion by lifting the right arm and left leg. Repeat 3 sets of 10, bilaterally.

Core Exercises to Decrease Back Pain When Riding

Core Exercises for back pain

Hip Rotation:

When performing hip rotation, it aids with strengthening your oblique muscles. You will need a large, medicine ball for this exercise. Lie face up on the floor with your legs on the medicine ball and arms at your side. Then, roll side to side as far as you can without falling off. Make sure as you complete this exercise your shoulders are on the floor and you aren’t arching your back. It also helps if you tighten your abdominals as you rotate side to side. Perform 3 sets of 10 repetitions.

Core Exercises for back pain

Core Exercises to Eliminate Back Pain

Core Exercises to Eliminate Back Pain

Ball Lift:

The ball lift helps with strengthening your lower abdominal muscles. You must lie on the floor, face up, place the large medicine ball between your lower legs, and place the legs in a 90 degree position. Then, at this height, extend and flex the legs. Make sure your shoulders and back remain flat on the floor in order to maintain proper technique. Once this becomes too easy you can progress, by maintaining the ball between your legs, fully extended, raising your legs, and lowering them all the way down before touching the floor. Perform 3 sets of 10 repetitions.  

Core Exercises to Eliminate Back Pain 

Core Exercises to Eliminate Back Pain

Core Exercises to Eliminate Back Pain

Although these exercises may prove to be difficult initially, they will help you obtain a strong core, which in turn will decrease your pain and risk of injury. These six exercises should be an integral part of your cycling regime.

What core exercises do you do to eliminate back pain?

« Previous Page
Next Page »
  • Facebook
  • Tumblr
  • Twitter

Latest Articles

JOIN Cycling: A New Training Platform for Cyclists

May 27, 2024 By Eric Lister

cold exposure

The Benefits of Cold Exposure for Cycling & Life

June 13, 2023 By Eric Lister

hill climb

The Ultimate Hill Climb Training Guide

May 31, 2023 By Eric Lister

shoulder pain cycling

How to Treat & Avoid Shoulder Pain While Cycling

April 12, 2023 By Eric Lister

psoas stretch

The Importance of the Psoas Stretch for Cyclists

April 6, 2023 By Eric Lister

cycling neck pain

The Ultimate Guide to Cycling Neck Pain: Causes and Solutions

March 21, 2023 By Eric Lister

Useful Info

  • Contact
  • Finally, A Global Cycling Club That Is Focused On Community And Love Of Cycling!
  • Privacy Policy
  • Share Your Story!
  • Terms And Conditions Of Use
  • Welcome to I Love Bicycling
  • What Happened When I Stretched Every Day For a Month

Recent Posts

  • JOIN Cycling: A New Training Platform for Cyclists
  • How to Hang Bikes in Your Garage: 4 Inexpensive Options
  • Gravel Bike Vs. Road Bike: Which One Is Better For You?
  • The 6 Types of Mountain Bikes & How to Choose the Best One for You
  • What Is a Touring Bike Good For? 5 Benefits We Know You’ll Love

Search I Love Bicycling

Connect with Us

  • Facebook
  • RSS
  • Tumblr
  • Twitter

Copyright © 2025 · Magazine Pro Theme on Genesis Framework · WordPress · Log in