• Training
    • Injury Prevention
    • Training Tips
  • How To
    • Bike Fit
    • Gear
  • Nutrition
    • Nutrition Tips
    • Weight Loss
  • Repair
  • Reviews
  • Stories
    • Funny Stories
    • Jokes
    • Quotes
    • Videos
    • Funny Videos

I Love Bicycling

I Love Bicycling is a website that is geared towards cycling for beginners with road cycling tips, training articles, nutrition tips, weight loss, how to’s and bike repair articles.

How To

  • Bike Fit
  • Gear

Riding Rollers – How To Do It

February 5, 2016 by Wade Shaddy

riding rollers

You’ve probably seen them before at a race, ride, or event. Riding rollers is a way to ride your bike in place without having to hook it up to a trainer or other contraption. The drums the wheels rest on spin to keep the rider upright but that doesn’t mean they’re easy to ride. Just how is riding rollers done?

Riding Rollers – The Benefits

Rollers can be intimidating and may even evoke fear in the hearts of some cyclists.  They’re simple enough but in the wrong hands, can be dangerous. Once you get the hang of rollers, you’re in for a ride that offers you benefits of balance, bike handling, and fitness.

Rollers Have Evolved

At least part of a new outlook on rollers comes from evolution. Contemporary rollers employ smaller drums and upgraded bearings that allow for more control. They’re overall easier to use than older, clunky rollers from the past.

For Starters

Before starting a roller session, always check that the rollers are on a perfectly flat surface. You don’t want them to rock from corner to corner, tip, slope or tilt.

Check the Length

Check that the rollers fit your bike. Stand the bike on the rollers. Draw a visual line vertically down from your front axle. The axle should be just behind the apex or top of the roller. In other words, the position of the roller should be just longer than the wheel base of the bike. If not, the front drum is typically adjustable. The two drums in the back are not.

The Safety Net

Place an object on both sides of the rollers for you to hang on to. You can use two high-backed chairs,  or something that you can brace yourself against. One option is to set the rollers inside a doorway and use the sides of the doorway for balance. Once you get on, you can lean your shoulders against the doorway to regain balance and prevent falling.

Check Your Gearing

Start with your bike in an easy gear so when you start pedaling you can quickly bring your wheels up to speed which is what will keep you upright. As you get rolling, you can then shift down to a harder gear for added resistance.
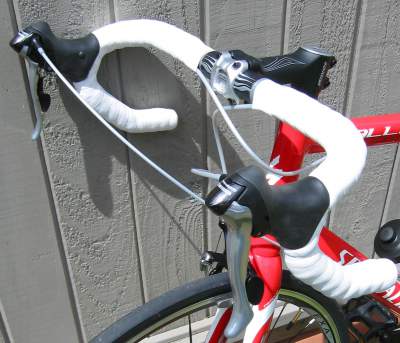
Getting on The Bike

To get on the bike, first place it so both wheels are on the rollers. Then if getting on from the left side, place your left foot on the roller stand so you can get high enough to swing your other leg over the back wheel and sit your butt on the saddle. With one hand on the bars and another on a chair or something else stable, bring your left foot to the pedal and clip both in.

Starting to Pedal

With one hand still holding on to something to balance and one hand on the handlebars, start pedaling slowly. Keep the front wheel straight and ideally in the center of the drums. The magic of balancing a bike happens because of the gyroscopic effect of the turning wheels which is what keeps you upright while riding rollers. It will be very difficult to balance while pedaling slowly so speed up by pedaling harder and shifting to a harder gear. You will feel the bike become less twitchy and more stable. Keep holding onto the support for a few minutes until you start to get comfortable.

Riding Without Support

Once you feel comfortable, start lifting your hand away from the support but holding it in the air just above it should you need it. As you get more comfortable you can move it closer to the bars and eventually completely on the bars. This will take some time and practice to get t0 and to be comfortable with so it’s alright if you can’t do this right away.

Keeping Your Focus

The good, or bad thing with riding rollers compared to a trainer is that you have to pay attention. If you don’t, you will ride off the side of them or fall over. Particularly when starting out, you will have to focus hard on staying in the center of the rollers and keeping your balance. As you get better and better your focus can drift.

One Minute Per Gear

When you get the hang of it, shift to the easiest gear in back while keeping a high cadence. A good starting workout for a beginner is to ride one minute in each gear, shifting to a harder gear after one minute. If you have ten gears that’s ten minutes, each progressively harder if you’re keeping an even cadence. If that’s not enough, repeat running through the gears for a total of twenty minutes. Three times through or thirty minutes could be something to work toward.

Getting Off the Rollers

To get off the rollers, stop pedaling and put one hand on whatever you’re using to balance. Then un-clip the foot opposite that you’re getting off on and then un-clip the side that you are getting off on. Place the foot of the side you’re getting off on onto the roller stand and swing your other leg over the back of the bike to get off. It may be awkward at first but you’ll get the hang of it quick.

Basic Tips

  • Set the rollers up between two objects: chairs, doorway etc.
  • Use the right gears to start; easier is better.
  • Focus a few feet ahead. Don’t look down just at your front wheel
  • Don’t use a death grip or tense up. Hold the handlebars lightly.
  • Use you hips to drive the pedals. If you get wobbly, add speed.

Game Changing Cycling Gadgets

February 4, 2016 by Wade Shaddy

The cool thing about cycling gadgets, is that they come from the innovative minds of cyclists. And who knows better what a cyclist needs — or doesn’t need for that matter. Some cycling gadgets are are purely whimsical, while others are game changing.

Hidden Tools cycling gadgets

It’s a never a good feeling to reach for your tools in your saddle bag when you have a repair on the lonely highway, only to find that something missing from your tool kit. What if you had backup tools? This cycling gadget, the Incog Bike Multitool, is designed to fit the majority of handlebars. The entire tool bends like a snake so it can be pushed in past any curves in the bar. The InCOG retails for $60 and is currently in its pre-order stage.

Mini-Mini Air Pump Mobo Pocket 4" Air Pump

All cyclists face flat tires, it’s a given. Have you ever reached for your air pump, only to find it’s been damaged, missing the collar,  jammed full of dirt, or otherwise doesn’t work? A Mobo Pocket 4″ Air Pump will get you back on the road. It’s so small it fits inside  saddle bags, pants, or jersey pockets. The sleek, lightweight aluminum design, can even deliver 100 psi. It weighs only two ounces and is compatible with Presta and Schrader valves. It also has a mounting rack.

On The Bike Flat Fix patch and ride

This simple tool may revolutionize flat fixing on the road. It’s pure genius. The Patchnride hand-held tool is not much bigger than a tire lever. It works by inserting a small plug in the puncture while the tire is still on the bike. Air up the tire with your mini pump and you’re on the road again in minutes — or less. It’s so new, that you may have to pre-order it.

Reflective Socks Rock GEAR-017 BAND socks w/3M reflective - HEISEL - 1

It’s official, cyclists love socks. Reflective socks are not exactly cycling gadgets, but they’re still a cool innovative design that aids a cyclist. If for no reason other than they’re cool, and oh, yea, make you safer on the road, reflective socks just rock.

Jacket With Turn Signals visijax jacket

While we’re on the subject of game saving gadgets that make you safer, how about a jacket that has motion-activated turn signals. The Visijax smart jackets are perfect for commuting, road riding in inclement weather, or anytime during the day or night. The very fact that they light up can save your life.

Solar Powered Tail Lights 

Why didn’t someone think of this one before. Maybe it’s because modern technology has actually made one that works the way it’s supposed to. Requiring no batteries, one full charge from the sun will give the Solar Energy Bike Tail Light Solar four to eight hours of light time. Using two bright LED bulbs, this light has three modes for safety. Never allow your batteries to run down again. It’s waterproof so you can use it in even the worst weather.

Light Speaker cycling gadgets

No cycling gadget list would be complete without delving into the whimsical. The Buckshot Pro is a bomb-proof light that also serves as a speaker. It mounts to your handlebars, can really take a hit or deal with water. With wireless connectivity to almost any Bluetooth device, it charges at home via your computer, or any other device with USB.

High-Performance Saddle Infinity N-Series Bike Seat

The N-Series seat by Infinity is gorgeous. This is probably one of the most serious gadgets — if you can call it a cycling gadget — that has been introduced regarding saddles in years. It looks like a skeleton. This no-frills saddle weighs in at just 210 grams. The N-Series Seat is made of injection-molded nylon. It has two purposes — comfort and performance.  Don’t let its looks fool you, it’s at home on the 3000-mile RAM for example —  but equally at home on a ride across town.

Airbag Helmet cycling gadgets

Borrowing technology from vehicle air bag systems. The Hövding AirBag For Cyclists is one of the most innovative safety devices ever conceived for cyclists.You’ve just have to see this one for yourself.

It’s a Hood

The airbag is designed like a hood. It’s made with nylon fabric that won’t rip when scraped against the ground. The hood protects nearly all of the head when inflated, while leaving the field of vision open. The airbag uses accelerometers to detect that a fall is occurring and quickly inflates the airbag before impact with the ground.

Soft and Gentle

The inflated airbag covers a much larger area than a traditional cycle helmet and is designed in consultation with current accident statistics. The protective airbag provides extremely soft and gentle shock absorption. The pressure remains constant long enough to  withstand multiple head impacts during the same accident. After that, the airbag deflates slowly.

Cold Inflation

The gas inflator that inflates the airbag is placed in a holder in the collar on the cyclist’s back. The gas inflator is “cold inflation”, meaning that it uses helium.

Cycling Gadgets Going too Far?

Has cycling innovation gone too far? Would you discard your traditional helmet for an airbag? Do you need a solar powered tail light or a jacket that lights up? Maybe yes, maybe not. The important thing is, you have the choice. The innovators and inventors of cycling gadgets keep pushing the limits. They should be applauded and supported whenever possible for making cycling safer and more fun. Keep the gadgets coming.

Cycling in Cuba

February 3, 2016 by Ryan Taylor

Cycling in Cuba

There is an old saying “a man cannot walk into the same river twice, as both the man and the river have changed.”

My entire adult life I have wanted to go to Cuba to explore the small island nation that had stood up against its mighty neighbour, and won…. forming a very unique place in our world.

I wanted to see how its people live their day to day lives after its well known revolution, and in what state the country was in first hand. With Cuba’s communist ways quickly softening, I felt that the sooner I started this adventure the better. The river that is Cuba is quickly changing and, in upcoming years, that change is sure to be in leaps and bounds.

When a friend asked me if I wanted to join him on a 14 day cycling trip in November to Cuba, I quickly jumped at the chance. This trip would be settling two scores for me.

Number one; I wanted to see Cuba at the ground level. The best way to do this is, of course, by bike.

Number two; after a very busy work year I wanted to escape from society, ever so briefly, and simplify my life to riding a bike, seeing good friends, and relaxing. The trip was shaping up nicely.

I was very curious about the north eastern province of Cuba called Holguin. When I put ‘Cycling in Holguin’ into Google, almost nothing came up. I had no idea about its roads, the people, the terrain,…the best rides. All of these were things that I picked up only after I arrived and was able to talk to people and explore.

There are signs of the revolution all over!

Holguin is the area where Fidel Castro was born in the small town of Brian in 1926 and also where he returned to start the revolution with Che Guevara in the early 50’s. Watching movies such as the ‘Motor Cycle Diaries’ or the two movie series called ‘CHE’ before your visit would add a lot of value to your stay as you explore the area.

Che portraits are everywhere.

The revolutionaries lived in the mountains around Holguin for years gaining strength and attacking the American supported Batista regime before overthrowing the government in 1953. While riding in Cuba one is sure to encounter many monuments commemorating Cuba’s very active history.

This would be an average quality road in Cuba.

As soon as I threw a leg over my bike it became apparent that Cuba has great quality roads….but not many of them! This is an area where most transportation and farming are done with horse and carriage. Dirt roads are the veins of this system. Exploring Cuba is best done on a gravel grinder, or modified cyclocross bike. My race ready, DI2 equipped road bike worked great, but to get to the meat and potatoes of Cuba, you need to access dirt roads. Think 30c tires minimum. I felt like there was a hidden world only accessible through exploring these side roads, and for my next adventure I would be sure to take a different bike.

When riding from the resorts you will find your options are either riding ‘left’ or ‘right’ as an out and back on paved roads. This is where the cross bike comes in handy as there are thousands of roads and mountains to explore in Cuba, BUT most of them aren’t paved. That being said if you are there for a week you won’t get tired of the paved routes.

If you are looking for a guide while in Holguin you will be greeted with very capable locals who tend to hang out in front of the resorts in the mornings. Some will be using bikes from the 70’s that should have been retired in that decade. They most likely will be using running shoes, but don’t let this fool you as they are very very strong riders. Most of the cycling gear Cuban’s use has been given to them by visiting cyclists, so expect to see shoes that don’t fit and parts working together that would make Joe Friel cry. Wheels and tires that are so thread bare that these locals are taking their life in their hands using them.

Should you take a selection of jerseys, helmets, parts, tubes or such as gifts, it is greatly appreciated. Most of the gear is distributed amongst the cycling community to those who need newer parts, or those who it fits best.

IMG_2324
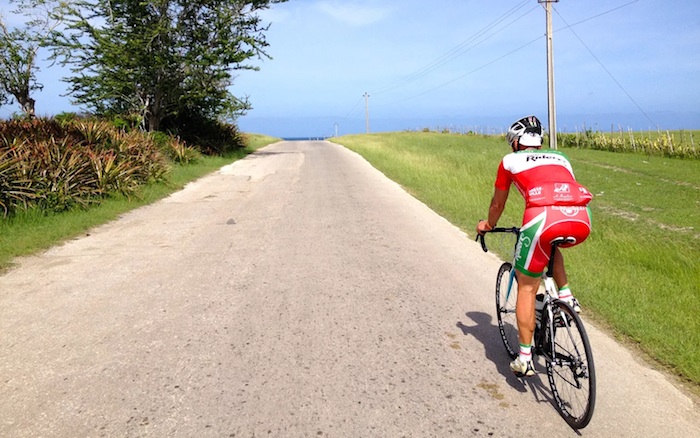
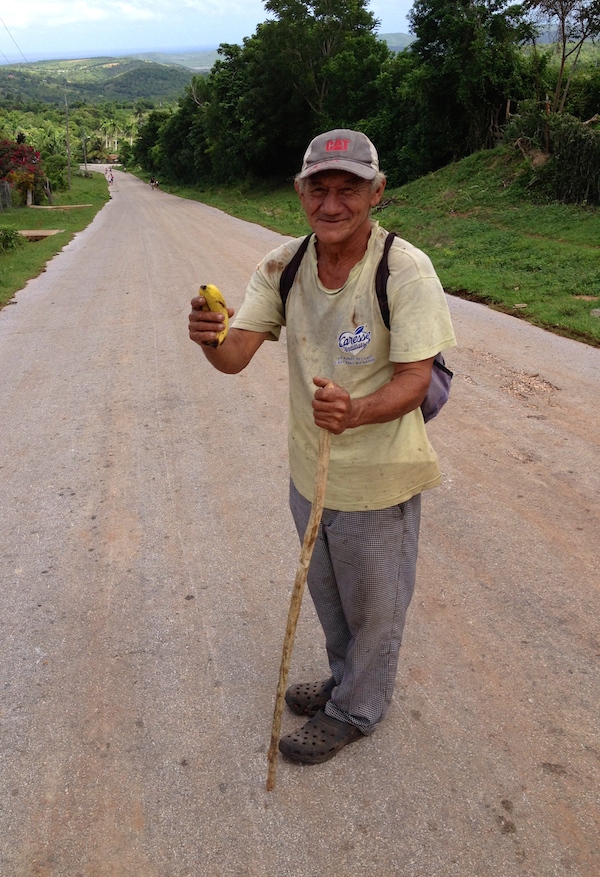
I stayed on a resort in the North Eastern part of the island. There is a large concentration of resorts in this area, and if you’re looking for a relaxing cycling trip this is the way to go. It is nice to romanticize about touring from one end of the island to the other while sleeping in a tent, and surviving on nothing but bananas and sugar cane. It’s equally nice knowing that after a long day in 30 degree Celsius heat you will have a shower, a bed, a meal and a place to let loose or even relax for the evening.

The resorts use the ‘star’ system most people are accustomed to. Don’t let a low star rating fool you however. The ‘stars’ system in Holguin Cuba doesn’t seem to indicate quality, but rather what type of trip you want, and amenities offered. Out of the blue I stumbled upon a very small resort which was only rated as 1 star, and was very inexpensive, yet beautiful, quiet and the definition of ‘middle of no-where’. The only prevailing noise was the waves from the beach and the wind in the palm trees. Instead of monstrous buildings, we were greeted with individual cabins that ran along the beach. If you were looking for some time to get away with someone special, and hide from the world I would recommend taking the time to check out locations in relation to the beach, and read forums and reviews. Cuba’s lodgings can be diamonds in the rough, and reward people who put in some work in the form of price, quaintness and beauty.

There are all modes of transport in Cuba, cars, bikes, busses, horses, buggies. Everything is utilized.

Cars and bicycles will forever be fighting for real estate, and one of the most interesting parts about Cuba are the cars. They are mostly made up of Russian era Ladas, with a few 50’s Chevrolets thrown in, and the odd Chinese car whose name no primary english speaker can pronounce.

Diesel is the fuel of Cuba, and as a result expect to be covered in grime after every ride. Because a Lada from the 50’s costs the equivalent of $20 000 CDN, you don’t see many cars on the road. Horse and buggy are the primary source of transportation. Overall, riding 2×2 you generally feel pretty safe as drivers seem accustomed to going around horse and buggies.

IMG_2525
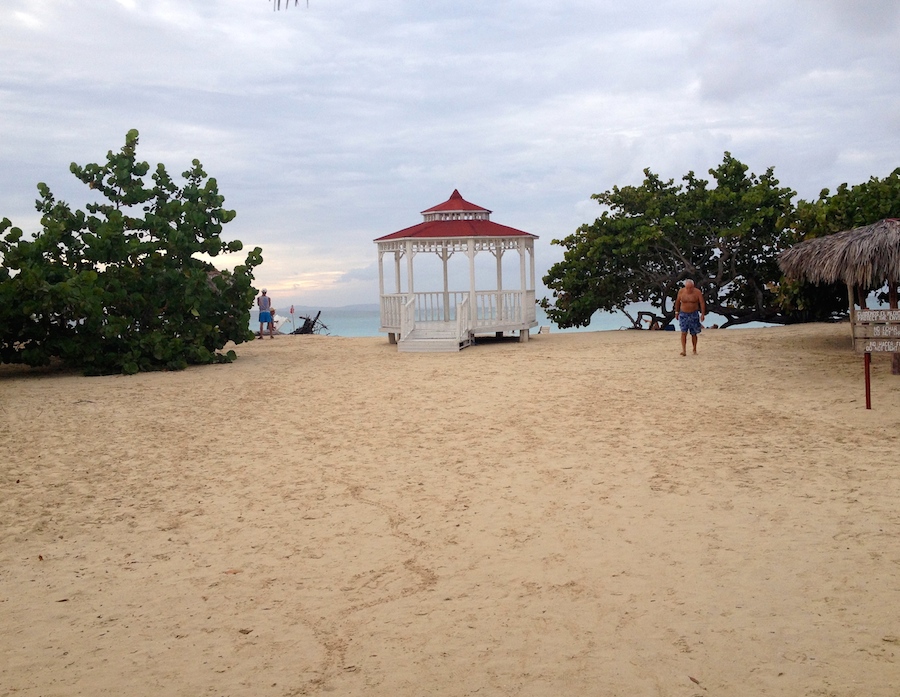
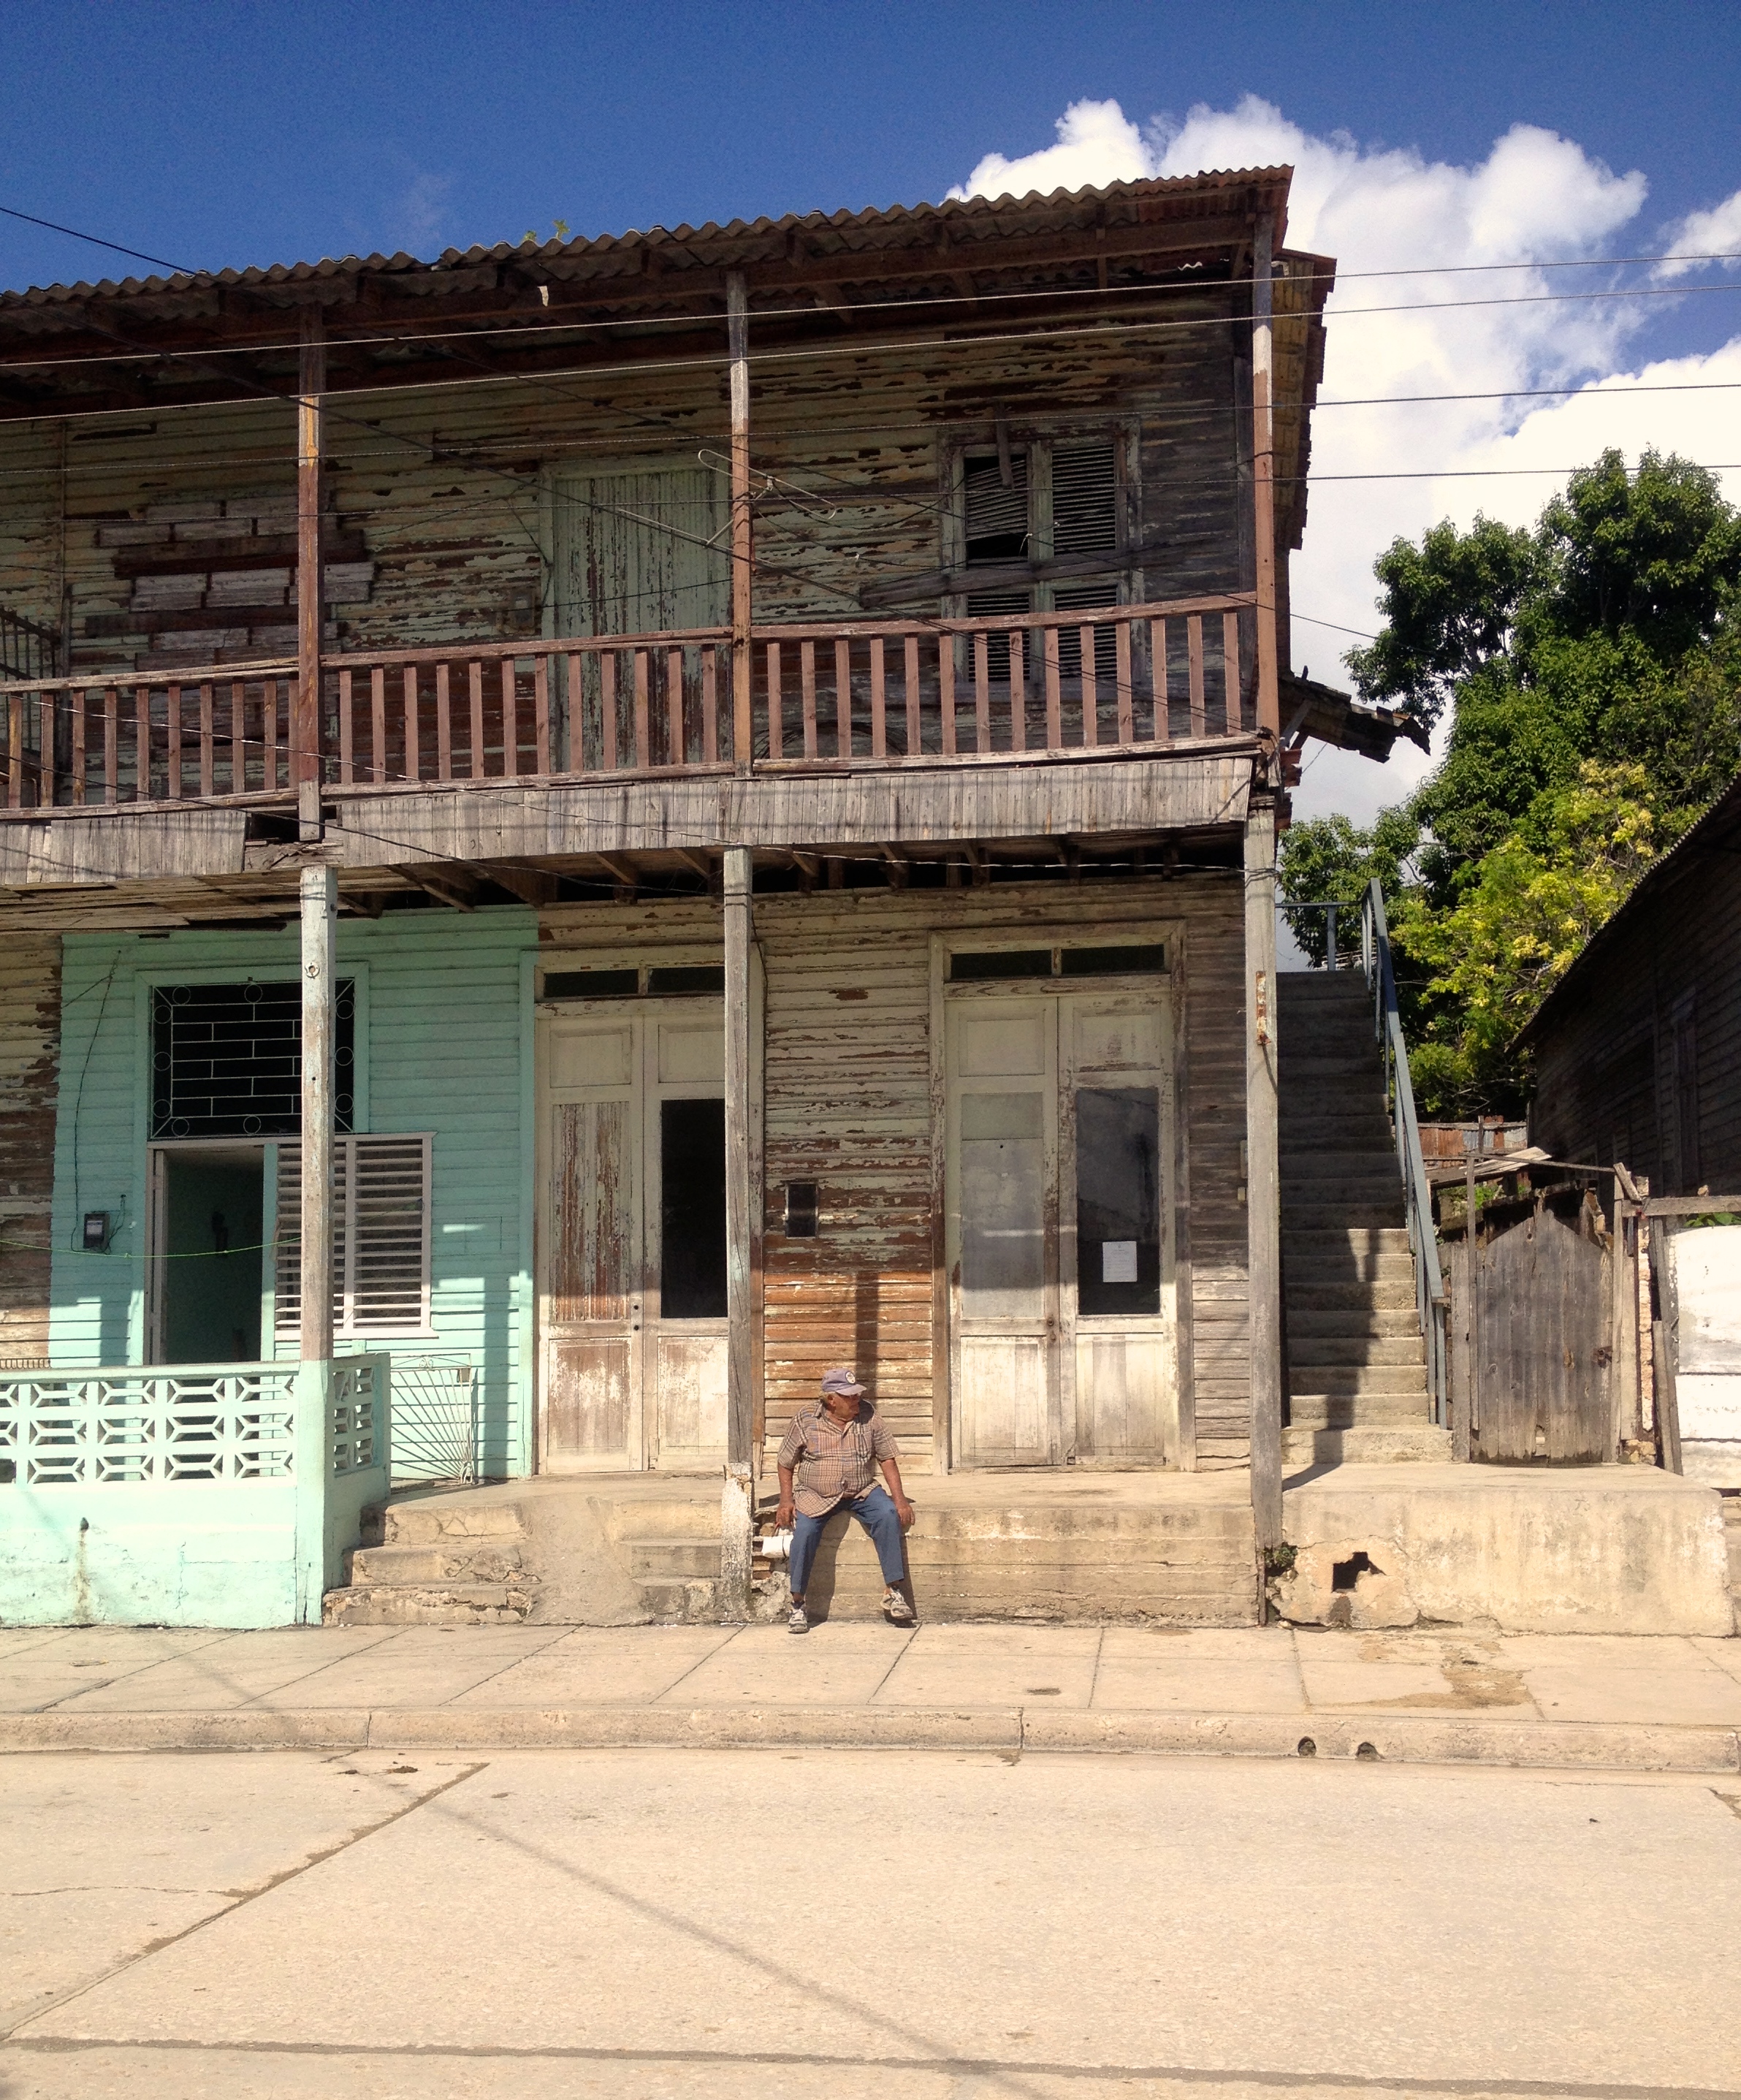
As expected, the beaches in Cuba are fantastic. The best ones are always the ‘locals only’ ones. Fortunately they are not hard to find. I would recommend Playa Blanco, which also hosts a monument to Christopher Columbus who landed in the area in 1492. It is worthwhile to relax and take some time in this area. There are a number of great ‘for locals’ restaurants, and also ones which have catered themselves to tourists, but in a charmingly Cuban way. These bear no flash or refinements North Americans are accustomed to, and the payoff is incredibly delicious and fresh fish usually caught hours before the meal.

A menu at a roadside restaurant in Cuba.

There are 2 currencies in Cuba. Any tourist can change their currency for the ‘Convertable” where $1 CDN is worth about .75 CUC. To put this in perspective, 1 CUC is worth about $25 Cuban dollars which can buy a bag of cement. Cubans are loaned their land from the government, but have to build on it if there isn’t a house on it. So $1 CDN is a small fortune to them. Only recently have Cubans been able to spend the ‘Convertable’ currency as freely as the Cuban Dollar.

Road side support!
Road side support!

Be sure to tip often. Although there are very few stores while riding through Cuba, there are often people who will sell you a plantain or banana on the side of the road. Even in November temperatures hover in the 30’s with high humidity. 1CUC for a couple of bananas is a lifesaver to both you and the fellow you bought them from.

Make a point to ride through the smaller towns in Holguin Provence. It’s important to remember that this small country primarily trades with other Spanish speaking countries and was put in a tough spot with the fall of the USSR which was its primary supplier of goods, fuel, farm machinery, and other foods. You get a sense that a lot of farmers were forced to revert back to farming with oxen as regular parts and farm machinery left with the Soviets. As a result some things deemed a necessity by North American standards are either too expensive, have long waits to receive it, or are simply unavailable.

IMG_2483
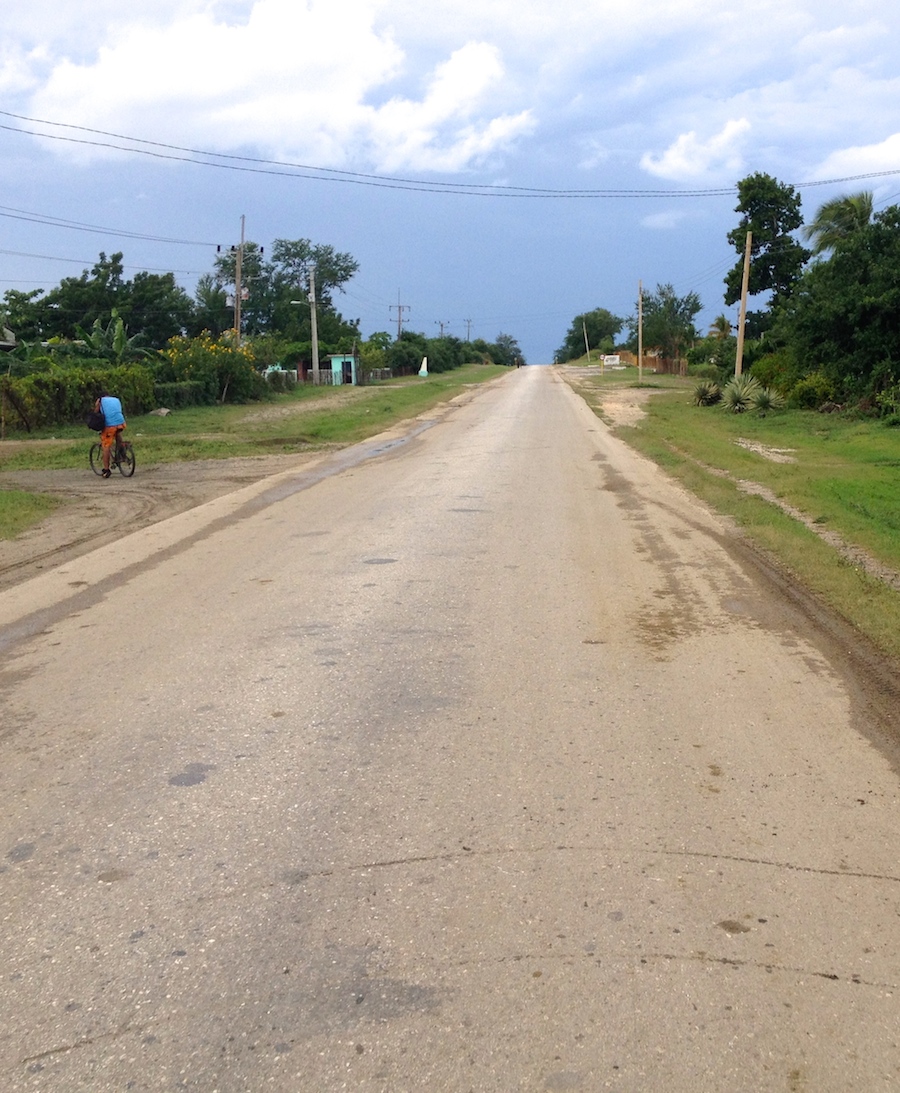
The rides for the most part are largely out and backs. If you wanted to do loops, expect to be in the saddle for over 150 km, unless you have a cross bike and a guide. The mapping system that I have seen only covers the larger arteries of the island.

Internet is sparse in Cuba. At the resorts you can typically buy it for around $2 an hour, but getting the cards to give you access is sometimes difficult. It is important to remember this is not a ‘supply and demand society’. The internet is still a new thing in Cuba and most locals simply don’t have ANY access to it. I’ve been told that some civilians do have it, such as doctors, to keep up with current studies and trends.

IMG_2427
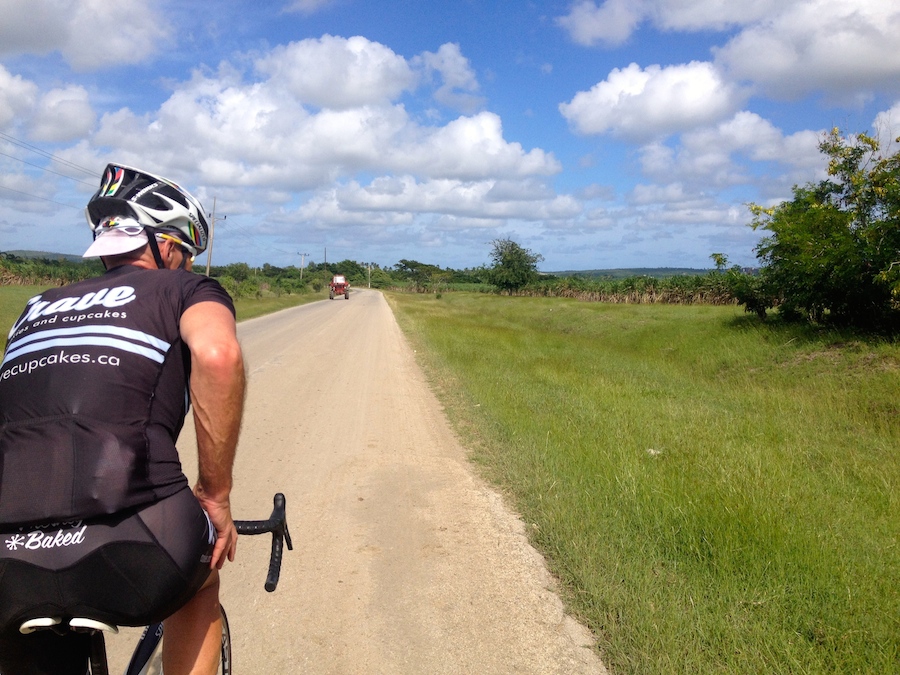
Overall Cuba is a land of contradictions. It is stuck in its adolescence in the world market, but has a very tumultuous history. As its communist ways soften it has shown its defiance to one parent, while building its relationship with the other, and as a result offers a very unique experience. Cuban history is still very much apparent, and easy to find.

In the next 50 years I feel Cuba will become a power house in cycle tourism. However, the raw, true experience that many want to see, will be watered down with each year passing as Cuba grows and evolves.

Ten Best Folding Bikes for Traveling

February 2, 2016 by Wade Shaddy

A folding bike is bicycle that can be compacted by folding or separating some of its components. Older designs were primarily for leisure, touring, and commuting. Contemporary folding bikes include sleek road bikes and mountain bikes. They are designed to be as lightweight as possible and can be folded easily without using tools. Are folding bikes something you can use? Here are the best folding bikes and a brief run down of what folding bikes are.

Old-School Folders

Early folding bikes were hard to ride, heavy, crude, slow to fold, and often collapsed in a heap. But the early ’90s changed all that when rail operators and airlines began to tighten restrictions on conventional bike transportation. The concept of a super-compact foldable bike caught on, partly because they could still travel for free, and they were lighter in design and materials.

New Designs Rule

Contemporary designers have developed at least 150 folding bike designs and thanks to developments in smaller tires, technology and frame materials, the ride quality, weight  and performance of the best folding bike is similar to that of their rigid cousins.

Some Distinct Advantages

Foldable bikes offer distinct advantages over conventional machines. It’s the freedom to travel anywhere with your folding bike that gives it a magic quality. A folding bike opens up entirely new ways of traveling.

Things to Consider in a Folding Bike

  • You’ll be carrying the bike by hand. The more you pay, the lighter the machine (typically). Generally speaking. folding bikes are more expensive than their non-folding counterparts.
  • Folded size is important too. If you expect to travel by air, the smaller the better.
  • Small wheels usually give lighter steering but a harder ride.
  • If you can’t live with small wheels, folding bikes are available with standard wheels, but they won’t fold as small.
  • Anything with a tire bigger than 20-inch will fold slowly, with more difficulty.
  • Bikes with 16 or 18-inch wheels have a limited range, but the best are still capable of 50-100 mile rides.
  • Avoid production or department store folding bikes. They tend to be heavy, with weird or clumbsy folding mechanisms and are just all-in-all a bad purchase.

The Ten Best Folding Bikes

In no particular order, here are ten different models to look at and consider.  Note that bicycle specifications, availability, and stated prices may vary without notice in different regions. Always check specifications with your local supplier.

The Montague Boston best folding bikes

Use this one for city touring, around town for errands, commuting or appointments.

  • Full size, 700c wheels
  • Folds in 20 seconds
  • Weighs in at 24 lbs
  • Single speed
  • 19 or 21 inch frame
  • $699.95
  • Buy Here

Pacific If Mode

Think of it as the Tesla of folding bikes, high-end and luxurious.

  • For city commuters who use public transport.
  • Looks at home folded up on a subway train or in an office.
  • Performs on the street like any full size bike.
  • Dual speed system
  • 14.7 kg
  • $2,850
  • Buy Here

Montague Swiss Bike X90 Mountain Folding Bike

This is your folding mountain bike option. Go anywhere, mud, dirt, and it climbs like crazy.

  • Front suspension
  • 26-inch all-terrain tires
  • Folded Size: 36-by-28-by-12
  • 32 lbs
  • Frame sizes 16, 18 and 20-inch
  • $629.95
  • Buy Here

The Ritchey Break-Away Steel Cross Frameset

Frameset only, but can be purchased fully built. Great for a cyclocross option. Rugged. It splits in half.


Break-Away Steel Cross Frameset


  • Full size bike can be split apart to fit into travel case
  • For serious roadies who travel by air
  • Add your own components and wheels
  • $1,499.95

Brompton M3L

This company has a long-standing reputation for quality and stability in compact folding bikes.Brompton ML3

  • Fold size 22.2-by-21.5-by-10.6 inches — one of the most compact among comparable folding bikes.
  • 16-inch wheels.
  • Three-speed gearing
  • 25.3 pounds
  • Retailing from $1,280

Dahon Speed D7

A good folding bike without breaking the bank. Provides a surprisingly smoothDahon Speed D7

and stable ride for a folding bike. A budget price that gets high marks for value.

  • Seven speeds
  • 20-inch wheels
  • 15 second fold down
  • 28 lbs
  • Folded size 11.7-by-25-by-25 inches
  • Retailing from $1,280
  • Buy Here

Bike Friday 1st Class tikit

Reported to be the fastest compact foldable bike on the market. Ggets high marks for its excellent ride quality and easy-to-use folding mechanism. reviewers say the bike is solidly built and has a comfortable ride. The quality of the ride defines the Tikit.

  • Folded dimensions: 35-by-24-by-15 inches
  • 16-inch wheels
  • 25.8 pounds
  • Shimano Nexus eight-speed internal hub (thus the speed)
  • $1,998

Dahon Tournado

Full-sized luxury in a folding road bike. A good choice for tourists and travelers who want a packable bike for touring or exploring. The frame comes apart into two pieces, so that after some additional disassembly the entire bike fits into an airline-legal suitcase

  • Full sized, 700c wheels
  • 24 pounds
  • Folded size of 11.7-by-29.3-25.7 inches.
  • 10 to 15 minutes to fold up
  • Comes with it’s own travel bag on wheels
  • Triple-ring drivetrain

Citizen Barcelona

Affordable, compact and reliable. Even BARCELONA Citizen Bike 20" 3-speed Folding Cruiser with Alloy Frame
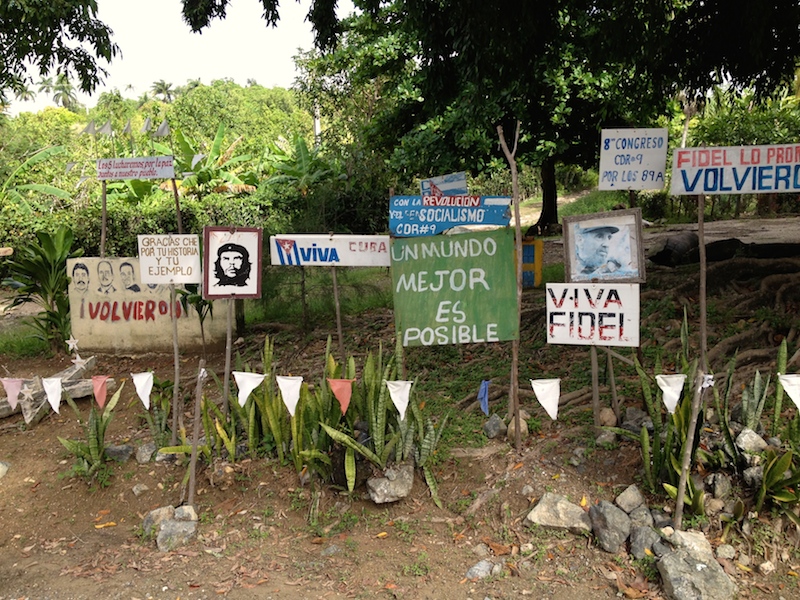
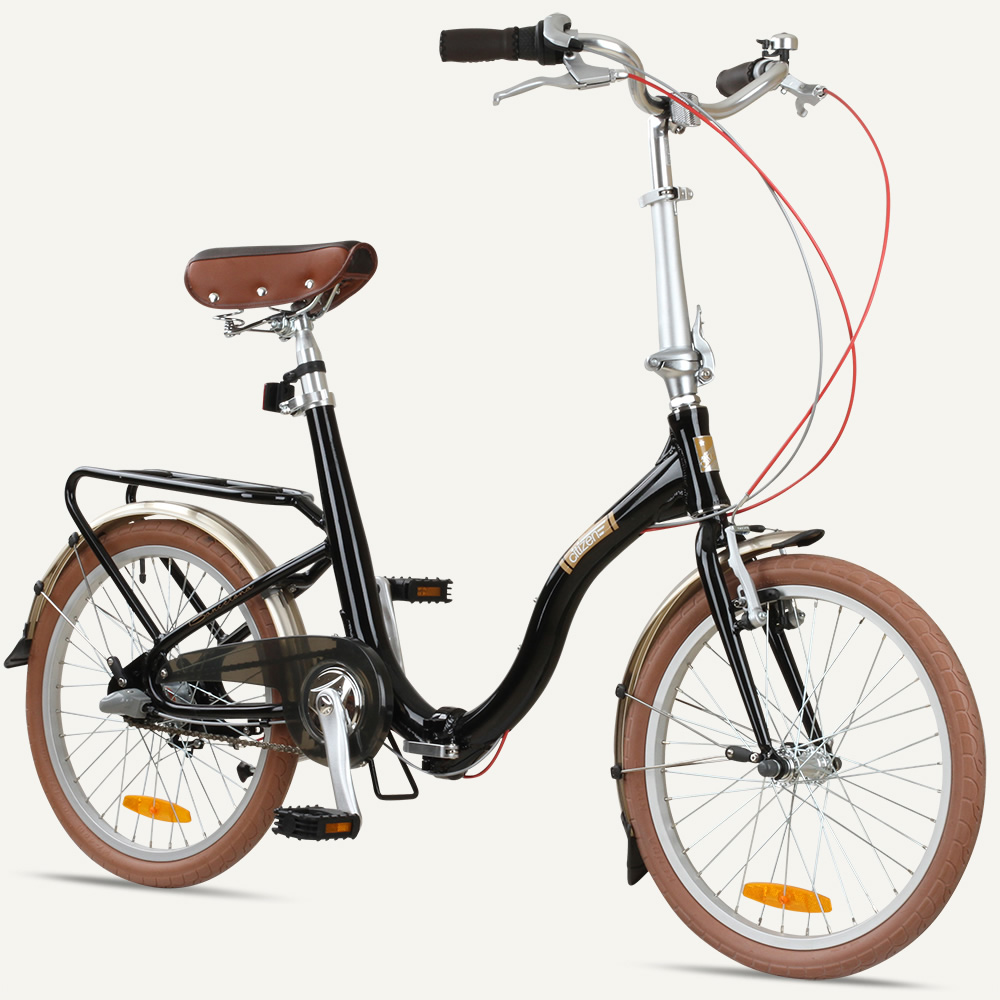
though the Citizen Bike Barcelona doesn’t have the smallest fold, reviewers say it is comfortable to ride and the price is hard to beat. If comfort and value trump speed and compactness, then you’ll appreciate this bike’s laid-back sensibility

  • 20-inch wheels
  • Three speeds
  • 30 lbs
  • 30-by-27-by-15 inches
  • $399

Ravello Bikes – Modifying Your Current Bike Into a Folding Bike

Ravello Bikes takes your existing bike, aluminum or steel, cuts it in half at strategic points and travel bike couplersplaces flanges in place to disassemble and reassemble the bike. This is a great option if you already have a bike and want it smaller for travel. The flanges add some weight by functionality wise it is more or less the same.

Bike Packing List for a Bike Tour

January 30, 2016 by Wade Shaddy

bike packing list

A bike packing list can be minimal or extensive. It should take into account days in the saddle, miles between stops, and possible combinations of weather. It should include items for the level of comfort you expect and all the tools needed to repair your bike. A bike packing list will also vary depending on what type of bike tour you’re planning. You can’t take everything but it’s a good idea to be as self-sufficient as possible on a bicycle tour.

Two  Types of Touring

Some people plan to spend nights in the comfort of hotels or bed and breakfast, with actual beds. Other cyclists plan to sleep in a tent on the ground, and prepare their own food.

Light and Fast Bike Packing List

Basic items are all you need to travel light and fast. All you really need is a credit card. The major advantage of traveling with little or almost no gear, is that you can take your carbon-fiber, or otherwise lightweight road bike and rack up the miles fast. It’s not uncommon to travel 500 miles in a single week traveling light and fast. But there are a few items you need on your bike when traveling light and fast.

  • Smaller, nylon bags designed to fit on your handlebars, under your top tube, or behind your saddle are great at holding the essentials on a light and fast tour.
  • Credit cards and personal Identification
  • Deodorant, soap and shampoo (in case your hotel doesn’t have it), toothbrush and toothpaste
  • Warm, lightweight gloves, foldable rain gear and nylon shell or windbreaker
  • Leg Warmers: These are good to keep you warm on cooler days without adding bulk
  • Extra socks, shorts and jerseys (optional depending on your tour, and if you have room for them)
  • Medical kit that includes your prescription meds, along with aspirin, antacids etc. Gauze and items to deal with minor accidents.
  • Water-proof maps if not relying on a phone or gps
  • Sunscreen
  • TP (toilet paper) or tissues — you never know how much you might need it

On The Road Washing

Light and fast means you cant take much in the way of extra clothing. Small towns across the country often have facilities where you can wash your shorts, jerseys and bodies. Truck stops are good for this, they have showers. Hotels often have laundry facilities also. Utilize them. You can also wash your kit in the sink. To do this, simple body wash or bar soap works fine. Scrub and wring out as good as you can. Then lay out a towel and lay your kit on it minimizing overlap. Then roll it up from one end, like a pumpkin roll. and twist both ends in opposite directions as far as you can go. Then use coat hangers to hang in front of a window or fan ven

Self-Contained Touring Bike Packing List

Self-contained touring includes everything from the fast and light list, but you’ll need considerable more gear.  Self-contained, self-sufficient bike touring is a different animal. You need to pack for every imaginable situation, plus all the gear needed to camp.

Start With Panniers

First of all, you’ll need panniers. These additions to your touring bike should be pretty much impervious to rain, snow or mud. The choices in sizes and types are varied, but your panniers should give you the piece of mind that your possessions will be be dry and clean for the duration of your tour. Along with everything you need for camping and day to day life, don’t forget the things you would need on a regular bike ride. Things like:

  • Water Bottles or Hydration Pack (Camelbak )
  • Lights: LED tail Light and headlight, detachable is nice in campsites
  • Frame mount air Pump. Don’t skimp on pumps, get a beefy one that won’t let you down
  • Patch kit and tire Levers
  • At least two spare tubes
  • Presta to Schrader valve adapter. You might not appreciate these until you really need them
  • Bicycle multi tool
  • Spoke wrench

Spare Parts

Depending on how serious your tour is or how much room you have, you can include spare parts to repair your bike on the road. Things that might come in handy include:

  • Extra spokes and cables
  • Electrical tape
  • Chain lube
  • Brake pads
  • Spare tire
  • Zip-ties
  • Spare nuts and bolts
  • Chain tool and master links

Camping Gear

The bike pacing list for camping gear can be extensive and you should know what works or what you prefer to prepare for your type of touring. Try to get stuff that will stuff into a stuff sack. Here are a few things you will probably need to camp.

  • Tent, including all the stuff needed to set it up.
  • Poly Ground Sheet — this might double as a rain protector on the road.
  • Air Mattress/Sleeping pad
  • Air Pillow-optional. You can use clothes in stuff sack as a pillow.
  • Lightweight Backpacking Stove
  • Fuel Bottle
  • Cook pot set
  • Utensils: Spork, or spoon, fork and knife set
  • Other options for weather-related issues might include plastic tarps and bungee cords.

Off-Bike Clothes and Foul Weather Gear

You may be doing extended stays at campsites or towns. The choices of off-bike clothing are up to you, but you can’t really walk around all the time in your cycling gear. Foul weather gear should include rain jackets and pants, long-sleeved jerseys and thin layer underwear. Again, it depends on your tour, time of year, and climate.

Additions For Her

It’s widely accepted that females aren’t comfortable with a level of cleanliness that most guys adhere to. Guys are more likely to leave certain items out of a bike packing list that may make a tour more comfortable for women. But most items are unisex, and there’s really no reason for guys not to use at least some of them. If you’ve ever traveled by bike with a woman, you’ll recognize some of the items.

  • Tank tops and T-shirts: Don’t get anything skin tight, you’ll appreciate the ventilation when it gets hot. Some women prefer cotton, while others hate it. It’s your choice.
  • Flip flops or Crocs: Good to have so you can get out of your shoes and wear in showers at campgrounds, laundry rooms, etc.
  • Personal hygiene ( not sure if this one even needs mentioned)
  • Hand wipes: Again unisex maybe, but women are typically cleaner than guys
  • Hand Sanitizer: Again, should be a must in any tour
  • Skin lotion: Women just appreciate it more than guys
  • Insect Repellent: This one is also unisex, but guys typically forget it
  • Extra sports bras and underwear.

A Typical Day

The bike packing list for a bike tour is somewhat personal. Only you know for sure what you need for your individual taste and style. It helps to visualize a typical day on the road and add things to your own list. Start planning and packing ahead of time so you aren’t rushing around last minute; that’s when you forget something essential. A bike tour is super rewarding and allows you to see so much more from a differing perspective. Get out there and have fun.

How to Tighten a Headset

January 27, 2016 by Adam Farabaugh

how to tighten a headset

Knowing how to tighten a headset is simple and is something that could save your ride if yours is loose for whatever reason, without a trip to the bike shop. There are only three bolts on most stem/headset combos but you have to know which ones to tighten first and how much.

First – Test Your Headset Tightness

To determine if your headset is too loose or tight, lift your front wheel off the ground and spin the bars back and forth. They should turn with ease and not bind in any one place. If they do your headset is likely too tight or in more rare cases, your headset bearings may need replaced. Second, with your wheel on the ground, lock the front brake and rock the bike forward and back. What you are looking for is to see if the steerer tube rocks forward in relation to the frame. It should not move at all and if it does, your headset is too loose and needs to be tightened.

How to Tighten a Headset – Starting From Scratch

First with how to tighten a headset, loosen all the bolts on the stem that tighten down onto the fork. Secondly, take the top-cap bolt on the top of the steerer tube/fork completely off. The top cap will now come off as well. The way the headset works is that the spacers, or the stem itself (depending on how many spacers you have) press down on the outside of the steerer tube. The top cap does not press on, or even touch, the steerer tube/fork. This means that you have to have enough of the spacers or stem sticking up above the steerer tube. You can see this in the image below. Also, remember that when you tighten down the top cap, that gap is going to shrink and could be enough to cause the top cap to touch the steerer tube. You may need to add another small spacer.

tightening a headset

Install the Top Cap

Once you have enough of a gap put the top cap and bolt back on and tighten it down snug but not too tight as if you over tighten it you won’t be able to turn the handle bars as the bearings will be compressed. Also make sure your handle bars are straight with your front wheel otherwise you’re going to have to re-loosen everything to line it back up.

Tightening the Stem Clamp Bolts

Once you have the top cap tight enough, now tighten the two bolts (normally two) on the side of the stem to cinch the stem to the steerer tube. Tighten them down evenly meaning tighten one a little and then do the other. Again, these should be snug but not overly tight as you can strip the bolt or crush the steerer tube particularly if it’s carbon.

There you have it; how to tighten a headset. Your headset should now be properly tightened. You can test it by doing the headset tightness test again to make sure it’s not too loos or too tight.

How to Properly Blow a Snot Rocket

January 27, 2016 by Adam Farabaugh

snot rocket

With the colder months bringing cold rides, your nose wants to do nothing but run. You should have told it you were going on a bike ride, not a run. There’s only one real solution to a runny and stuffy nose while riding; the snot rocket. It may seem a bit “gross” or un-gentleman or un-women like, but while riding, it’s a perfectly acceptable practice.

Knowing how to properly blow a snot rocket as well as when and where it’s appropriate are the prerequisites to blowing one. If you don’t do it right, you’re not allowed; you risk getting snot all over yourself, the people around you, and just look like a fool. Follow these tips and you’ll be doing it right and breathing snot free on your next ride.

The Technique of the Snot Rocket

Before you need to know when and where you can do one, you need to make sure you’re doing a snot rocket correctly.

  • First you need a stuffy or runny nose. Go ride in the cold to get one.
  • Second, you want to plug your one nostril by pressing with one finger on the outside.
  • Third, you want to take a deeper breath in through your mouth.
  • Fourth, you exhale forcefully through your non-plugged nostril while moving your head down to that same side as to not just blow it straight down on yourself.
  • Fifth, repeat on the other side.

Gauging the Wind

The wind can cause problems with the snot rocket particularly if it’s hard from the side. If the wind is from your left, you will want to blow both of your snot rockets to your right side off the bike. Do this by using your right hand to plug your right nostril and blow under your right arm. Then to rocket out the right nostril, plug your left nostril with the second knuckle of your index finger and blow over your right shoulder.

The Snot Rocket With People Around

Nothing is worse than getting snot rocketed on. Make sure before you do it that there is no one even close to the projectile range and don’t forget to gauge the wind. In a group, you should wait until you’re at the back. If you can’t get to the back, ride further to the side of the road and get your head as low as possible as to not get the rider immediately behind you. If you stop and are in the company of non-cyclists, say outside the coffee shop, let it wait. Cyclists know what you’re doing. Others do not.

An Added Tip to Spitting in the Wind and Not Getting the Rider Behind You

In addition to the snot rocket, no one wants to be spit on either. When you’re riding, there is always wind and if you just spit normally to the side you’re likely going to get the rider behind you. To avoid this, get your head as low as possible and give a forceful spit. At the same time, take your arm on that side and put it down almost so you’re spitting down it. This will make sure it doesn’t blow back and hit the person behind you.

When you master the snot rocket and the spitting technique and where it’s appropriate to do, you will be pre-approved to do it at your leisure. Just be careful of the rider ahead of you who hasn’t been pre-approved. There’s always someone.

Bike Travel – Tips to Traveling to Ride Your Bike

January 22, 2016 by Adam Farabaugh

bike travel

You’re exhausted after finishing a seemingly never ending day of travel but are now exploring the outskirts of a far off town with the feeling and excitement of a little kid who just got a new 10-speed. Nothing can take that smirky grin off your face as you try and explore as much as you can before it’s pitch black even though the coming days are going to be filled with incredible riding and experiences.

Bike travel anywhere away from home, it doesn’t have to be the epic roads of Europe, although that would be sweet, can give you that incredible feel of exploration along with being the trip of a lifetime. If you haven’t done it before, or even if you have, knowing a few good tips around bike travel will go a long way to ensure that your trip doesn’t have any major hiccups and leaves you wanting more before you’ve even returned home.

Bike Travel – Planning Your Trip

The basis of any great trip starts with the planning. Sure you can just go on a whim and it can be fantastic but that’s throwing a lot to luck. Some of the homework that you should do prior to a bike travel trip includes the following:

  • Where to go: You want to choose a location that has ample roads and the terrain you’re looking for whether it be mountains or coastal scenic roads. You will want to make sure that they are cycling friendly and that people go there to ride. There are a lot of cool places where people don’t ride but you’ll have to do extra work ahead of time to make sure that it meets your expectations.
  • What the weather is like: Make sure you check and see what the weather is like in the place you’re looking to go for the time of year you’re traveling. Don’t assume anything unless you’re prepared for it, a bike travel holiday in the cold and rain isn’t very pleasant.
  • The fitness level that you’ll have: Plan your trip along with the fitness level you will have at that time of year. You don’t want to be struggling through all your rides on your trip as you won’t enjoy it nearly as much. Make sure you have enough time to gain the fitness you need for your trip.
  • Look at what else you can do in the area: When considering destinations, think about what else you want to do on your trip aside from riding. Things like ample restaurants with good food, a beer and/or wine scene, hiking and other outdoor activities, and arts and entertainment are all things to consider when choosing where you want to go.
  • Where to stay: Depending on where you’re looking to go, there may be a lot of lodging options or relatively few. Considering price and quality as well as availability can be the deciding factor in where you end up going. A good thing to consider is to try and take advantage of the off-peak seasons of locations such as ski areas in summer and coastal locations in cooler months.
  • Important documents and credit card authorization: Depending on where you’re traveling, make sure you have the proper visas, identification, travel insurance declarations, and any other necessary documents before you leave. Also call your credit card company to notify them where and when you’re traveling if you’re headed out of the country so you can use your card abroad and not have it put on hold.

Bring Your Bike or Rent a Bike

Another difficult bike travel decision is if you want to bring your own bike or rent one when you get to your destination. This largely depends on how many days you will be riding at your destination and how in love you are with your own bike.

If you’re driving, bring your own bike. If you’re flying, bike fees can range from a normal bag fee of $25-ish to $300 round trip. Rental bikes typically cost anywhere from $100 per week to over $300 for a nicer bike. See what bike rentals are available in your destination and do the calculations to see how much you can save.

An expert bike travel tip is to get a small bike bag such as an Oru Case and bring your own bike which can get by the airline bike baggage fees. You’ll have to be a bit mechanically inclined to take apart and put your bike back together however, but that’s any easy skill to learn and a good one to have anyway. Another expert bike travel tip is to take a small carry-on and put the rest of you clothing and anything else you may need in with your bike to cut down on the number of bags you need to bring. Just make sure you don’t go over your airline weight limit, typically fifty pounds.

What to Bring

Riding compared to other sports always requires more gear but if you plan accordingly you can bring everything you need. This brief lists gets at the important bits that aren’t always thought about:

  • Extra Clothing: Even if you’re riding in the dead of summer you never know what the weather is going to do. Always bring: leg warmers, arm warmers, a base layer, a rain jacket, gloves, a vest, and a cycling cap; more if it’s going to be colder.
  • Spare parts and tools: If bringing your own bike, throw in two extra tubes, a spare tire, an extra derailleur cable, and the right size spokes and nipples for both your front and rear wheel and the tools to make use of them. These are items that have a higher tendency of breaking or can be hard to find, namely the right size spokes.
  • A dirty rag: Bring an old rag that you can use to wipe down your bike as when staying in accommodations you don’t want to bring in a dirty bike and make a mess. In addition, it’s always nice to ride a clean bike particularly if you’re on holiday.

Packing Ahead of Time

With any trip let alone a bike travel trip, you shouldn’t pack at the last minute as that leaves a pretty good chance that you’re going to forget something important. Start packing a few days ahead of time starting with a list of everything you’re going to want to bring down to how many pairs of underwear. Also, when packing, make an extra effort to have everything organized so you know exactly where it is and can easily access it when needed. Typically when traveling your suitcase goes from neat and organized to messy and cluttered as the trip goes on. Starting with it organized will help to keep it orderly throughout your trip.

When You Arrive

The hard part of traveling is getting everything organized and planned ahead of time. Once you arrive, hopefully you can do what you set out to do with minimal stress and maximal fun. These few bike travel tips will help you once you arrive at your destination:

  • If you’re in a foreign country the first thing you should do, at the airport or after you cross the border, is to obtain the local currency. Depending on how far money goes in the country you’re in, $100 is typically enough to get you started. Then any transactions you do, whether dinners or the hotel bill, should be on your credit card to minimize the amount of cash you have to take out, carry around, and use. Cash is basically your backup should you need it. And then any leftover at the end of your trip, you can just exchange back.
  • Talk to locals to find out the ins and outs of the local area. They don’t have to be bike riders but anyone as they will at least have an idea of the good roads to check out, the cool local sites to see, and restaurants and other local cultural things to explore and experience. A bike shop of course is always a good option for all of this as well.
  • The first day you arrive, ideally in the evening of the first day, you should try and do an easy ride to shake out the legs from the travel and get a feel for the local area. The best way to do this is to simply just go out and explore the town or city you’re staying in. The best way to check places out is by bike as you’re going slow enough to see and experience things but fast enough to see a good chunk of the area. Also keep an eye out for places you want to check out such as restaurants or coffee shops.

Traveling with your bike can be some of the greatest holidays you go on as the amount of things you can see and the experiences gained are unlike that of any other trip. Bike travel does take some planning and know-how particularly for everything to go off without a hitch but hopefully with these few tips you’re heading in the right direction for the trip of a lifetime on the bike.

How to Shift Gears on a Bike

January 22, 2016 by Adam Farabaugh

how to shift gears on a bike

Shifting gears on a bike is one of the first things to learn as a new rider. After steering and the brakes, shifting is going to allow you to more easily and effectively navigate the terrain that you’re riding. Because of the complexity of gears and shifting, learning how to shift gears on a bike is not always straightforward and simple. There are a lot of parts on a bike and each one has a specific job. Knowing how to shift gears on a bike and how the actual shifters work and how to use them will make your riding more functional as well as more enjoyable.

The Breakdown

There are six main components to shifting gears. The first two are the shift levers on both the right and left side of your handle bars. These are then connected with a cable that attaches to the next two important parts; the derailleurs. There is a front derailleur, which is operated by the left shifter, and a rear derailleur, which is operated by the right derailleur. The derailleurs shift the chain up or down the front chainrings or up and down the rear cassette or cluster of gears. That’s basically all there is to propelling the simple machine of a bicycle forward except that there are a number of different types of shifters.

Types of Shifters

The derailleurs, chainrings, and cassettes are more or less the same on most bikes. They will differ in construction but they still do the same basic thing whereas the shifters are operated in a different way across types. Once you know how each one works you be able to easily tell which type of shifters you have so you know how to shift gears on a bike, any bike.

Lever or Downtube Shifters

Downtube_shifters

Lever or downtube shifters are the older style of shifters often found on old steel road bikes. The right one shifts the rear derailleur and the left, the front. Pulling the left, or front, lever backwards tightens the cable and pushes the chain up to a bigger front chainring. To shift down, simply push the lever in the opposite direction. To shift the rear derailleur down to a harder gear, press the lever up and pull down to shift up to an easier gear. You will feel the gears shift as you move the lever so if the gear isn’t lined up well, you may have to adjust the position of the lever a little to get it to line up perfectly with the gears. Newer and improved downtube shifters are indexed meaning that there is a click that corresponds to each gear.

Road Brake Lever Shifters

Now-a-days road bikes have indexed shifting meaning that there is a click for each gear. Also the shifting is done with the brake lever and/or another paddle that shifts the opposite way. Each of the major three companies making shifters has a bit different approach so here are all three.

Shimano

shimano shifter

Shimano is one of the most widely used road bike shifting mechanisms. They use two methods to shift. The first you will find on older Shimano shifters as well as lower end ones. These shift by pressing the brake lever inward toward the center of the bike to shift down to a harder gear on the rear cassette while the left, front lever shifts the front derailleur up to a hard gear. To go the opposite direction, there is a small thumb button on the inside of hood. Instead of using the thumb button, newer and higher end Shimano shifters use a paddle that is just to the inside of the brake lever. This is simply pressed inward toward the center of the bike on its own, ie. not with the brake lever.

SRAM

Sram Shifter

Sram uses as similar approach that Shimano does with the inner paddle but instead of having a second button or paddle, this one does it all. For the rear derailleur, press the right paddle (the brake lever does not move) in about one centimeter to shift down to a harder gear. To shift up to an easier gear, simply press the paddle further inward, approximately three centimeters. For the left, front shifter, shifting slightly in shifts down while making a larger swipe inward shifts your front chainring up.

Campagnolo

Campy Shifter

Campy’s design is similar to that of Shimanos older and lower end shifters as they use an inner paddle from the brake lever and a thumb button on the inside of the hood. The difference is that Campy has pretty high end shifters with the similar design.

Mountain Thumb Shifters

mountain thumb shifter

Older style mountain bike shifters use a simple lever that is pushed one way to shift up and the other to shift down. It will depend if you need to shift forward or back depending on where the shifter is mounted and if it’s the front or rear shifter. An easy way to figure out which way to go is the for the right, rear shifter it will be harder to press in one direction while you are pedaling. This direction will shift up to and easier gear while shifting in the easier direction will shift down to a harder gear.

Mountain – Twin Lever Indexed Shifters

mountain bike shifter

On most modern day mountain bikes you will find this type of twin lever shifting. There are a few different styles with some having two levers below the bars while some have one lever above and one below. Typically for the rear shifter, the lower lever shifts up to and easier gear while the upper shifts down to a harder gear. For the front shifter this is reversed.

Twist or Grip-Shifters

twist grip shifter

Twist grip shifters typically come on many lower level mountain bikes as well as kid’s bikes. They operate with a simple twist forward or back. Typically there will also be numbers displayed showing you which gear you are in. For the right, rear shifter, rotating forward to a larger number shifts down to a harder gear while rotating back toward you shifts up to and easier smaller number. For the left, front shifter, rotating forward shifts down to an easier gear and a smaller number while rotating backwards shifts up to a harder and larger number.

How to Shift Gears on a Bike – The Technique of When

Now that you know how to shift gears on a bike, you need to know when to shift. Typically you want to keep a steady pedal stroke that isn’t either too slow and hard, nor too easy and fast. Finding the right gear for what you’re comfortable with along with the type of terrain your riding will come with practice. Typically as you ride slower, say up a hill, you will shift to the smaller front chain ring with the left shifter while you also shift up to and easier gear in the back with the right shifter. If you’re going faster, say on flat smooth ground or down a hill, you shift the front chainring up to a harder gear with the left shifter and shift down to a harder gear in the back with the right shifter.

Learning how to shift gears on a bike is one of those things that you learn when starting to ride and as you ride more, you will get good at it. Just make sure to practice in a safe area, say an empty parking lot or driveway, as your focus will be on the shifting, not and traffic or other hazards that may be around.

10 Ways to Improve Bike Comfort

January 21, 2016 by Wade Shaddy

bike comfort

There are a lot of variables to improve bike comfort; saddle, saddle height and position, reach to the handlebar, handlebar height, the shape of the handlebar, crank length, stem, tires, the list goes on. If you’ve grown accustomed to your bike, it might just be that you’ve adapted to things that weren’t right in the first place. It pays to take a good hard look at your bike and not only improve your bike comfort but also to make your riding more efficient. Here are ten ways to improve bike comfort.

One: Bike Fit

First and foremost, get a bike fit from a professional. Taking your bike to a professional rules out most issues. For example: If your bike simply doesn’t fit you, a bike fit will determine that you might need an entirely different bike. Secondly, a bike fitter can diagnose individual issues specific to you and correct for them vastly improving bike comfort.

Why it Works

You may have a longer torso with shorter legs or vice versa. A bike fitter can tell you without wasting time or money on the wrong size bike or trying to extensively modify components to make the wrong size bike to fit you. A bike fit is probably the best investment you can make as even if your existing bike is the right one, the fitter will improve your position making it more comfortable and more efficient which will also lesson the likelihood of overuse injuries from occurring.

Two: Tires

The most common road bike tire is 23mm. The old-school thinking was that the skinnier the tire, the less rolling resistance. Because it is so skinny, it also requires high pressure to prevent pinch flats. Engineers in the cycling industry are trending toward the wider, 25mm tire as it has less rolling resistance and is more aerodynamic with a wider rim, not to mention that it has less of a likelihood of flatting. The majority of riders in the pro peloton are on 25mm tires rather than 23’s for most road stages these days.

Why it Works

A wider tire has more air in it which allows the tire to flex more thus soaking up vibration and increasing the amount of cushioning you get from the tire. Also, with the larger diameter, you can lower the air pressure in the tire giving even more of a supple ride.

Three: Stem

Reversing the stem is one of the most effective ways to make your bike more comfortable as it raises your handlebars to a more comfortable position. The majority of stems can be flipped as they are angled for two handlebar heights. One position is aggressive and flat, the other is angled upward for a more upright torso which can alleviate stress on the lower back as well as the amount of weight on the hands. Take a look at your stem. If it has a high degree of tilt in either direction, it can typically be reversed depending on what you need to get comfortable.

Stem Swap

Stems are also made in a variety of lengths which are often swapped out when getting a new bike or being fitted. If your reach is too far, get a shorter stem. If you have persistent numbing in your wrists or hands, it could be that the stem is too short. Get a longer one.

Four: Handlebars

Handlebars are easy to take for granted but they play a critical role in your ride quality and comfort. Thanks to constant innovation and evolving shapes and sizes, handlebar comfort has never been easier to achieve. The proper handlebar puts your hands in the right position to support your upper body without putting excessive strain on your wrists, shoulders, and neck. Handlebars should balance your weight between the front and back wheels for the best handling. New shapes, like compact bends, offer improved ergonomics and control.

Why They Work

Traditional drop bars might be over-sized for smaller riders or women. Compact bars are designed with a very short reach and shallow drop. Replacing your traditional drop bars for compact bars can reduce your reach. Ergonomic bars have a flat spot on the curve, replacing the sharp curve in drop bars. The flat spot feels better on your hands. Take it a step further, if you want to spend the money, and add carbon-fiber handlebars. They reduce road vibration, and offer a flat surface on top for resting your palms when cruising in an upright position. The downside with carbon bars is that if you crash you need to replace them as it’s very difficult to tell if they’ve been damaged.

Five: Bar Wrap

One of the easiest and most effective ways of making your bike more comfortable is by changing or modifying the padding on your handlebars. Some types of bar tape contain gel integrated into the fabric to make it even more forgiving. If regular tape or gel tape doesn’t provide enough comfort, other effective improvements can be made by inserting strips of padding under the tape and hoods. You can also put two layers of tape on your bars for even added thickness.

Six: Saddle

Having an uncomfortable saddle is one of the biggest bike comfort problems riders face. Saddles are very personal so you have to try a few. The first step is finding the right size. It might be tempting to go with a wider saddle that has a lot of padding; don’t fall for it. Wider saddles can place pressure in the wrong places and cause chaffing.

Why More Padding Doesn’t Work

If you’re choosing a seat for longer rides, don’t choose a saddle with lots of padding. Saddles that absorb your weight, instead of supporting your weight, are counterproductive on longer rides. Long distance cyclists know that highly padded seats become terribly uncomfortable the longer you ride because the padding puts more pressure on your crotch, right where you don’t want it. You want the weight placed on your sit-bones which is why getting the right size saddle is so important.

Adjustments to Make Your Bike More Comfortable

It’s one thing to just swap out components on your bike to make it more comfortable, but certain adjustments are just as critical and should be included on any bike comfort list.

Seven: Brake/Shifter Levers

It’s surprising how many cyclists simply accept that their brake/shifter levers are positioned correctly on the handlebars. They may be positioned at an unnatural angle, or otherwise don’t fit you. You should be able to comfortably reach the levers from the hoods or drops. A simple adjustment is typically all that’s necessary to give you better control, and more comfort. Also, on many newer models the levers can be adjusted inward for smaller hands. Take advantage of this if you need it. It can make a big difference.

Eight: Cleats

Have your shoe cleats professionally adjusted if possible. If the cleats on your shoes are set up incorrectly, you loose power and in some cases, risk causing muscle strain and injury. If you choose to adjust on your own, the basic idea is to set the rotation of the cleat so that it correlates with the way your foot is naturally positioned. An easy way to do this is in your bare-feet, jump, and then look and see what position your feet are in when you land. Are they toed in? Straight? Or pointed outward? Line up your cleats to replicate this angle. (See “Cleat Position” in this article for a full rundown.)

Nine: New Cables and Housing

Dirty,old, sticky cables make shifting sluggish and troublesome and in some cases a pain in your wrist, literally, from having to push so hard to shift.  Smooth, clean cables reduce shifting effort and improve precision making the ride much more enjoyable. Replace your cables and housings on a regular basis and also keep your derailleurs clean and properly lubed with a light oil on the pivots.

Ten: Wash Your Bike for Improved Bike Comfort

As with new cables and housing, washing your bike may not seem like it will directly improve bike comfort. However, part of comfort is ease of riding and washing your bike and having it well maintained ensures that it shifts smoothly, brakes easily, and is just all and all dialed in and ready to ride.  Riding a clean bike just feels great so improves overall bike comfort.

« Previous Page
Next Page »
  • Facebook
  • Tumblr
  • Twitter

Latest Articles

JOIN Cycling: A New Training Platform for Cyclists

May 27, 2024 By Eric Lister

cold exposure

The Benefits of Cold Exposure for Cycling & Life

June 13, 2023 By Eric Lister

hill climb

The Ultimate Hill Climb Training Guide

May 31, 2023 By Eric Lister

shoulder pain cycling

How to Treat & Avoid Shoulder Pain While Cycling

April 12, 2023 By Eric Lister

psoas stretch

The Importance of the Psoas Stretch for Cyclists

April 6, 2023 By Eric Lister

cycling neck pain

The Ultimate Guide to Cycling Neck Pain: Causes and Solutions

March 21, 2023 By Eric Lister

Useful Info

  • Contact
  • Finally, A Global Cycling Club That Is Focused On Community And Love Of Cycling!
  • Privacy Policy
  • Share Your Story!
  • Terms And Conditions Of Use
  • Welcome to I Love Bicycling
  • What Happened When I Stretched Every Day For a Month

Recent Posts

  • JOIN Cycling: A New Training Platform for Cyclists
  • How to Hang Bikes in Your Garage: 4 Inexpensive Options
  • Gravel Bike Vs. Road Bike: Which One Is Better For You?
  • The 6 Types of Mountain Bikes & How to Choose the Best One for You
  • What Is a Touring Bike Good For? 5 Benefits We Know You’ll Love

Search I Love Bicycling

Connect with Us

  • Facebook
  • RSS
  • Tumblr
  • Twitter

Copyright © 2026 · Magazine Pro Theme on Genesis Framework · WordPress · Log in