• Training
    • Injury Prevention
    • Training Tips
  • How To
    • Bike Fit
    • Gear
  • Nutrition
    • Nutrition Tips
    • Weight Loss
  • Repair
  • Reviews
  • Stories
    • Funny Stories
    • Jokes
    • Quotes
    • Videos
    • Funny Videos

I Love Bicycling

I Love Bicycling is a website that is geared towards cycling for beginners with road cycling tips, training articles, nutrition tips, weight loss, how to’s and bike repair articles.

How To

  • Bike Fit
  • Gear

Getting Into Cycling – The Basics

January 15, 2016 by U.M.

getting into cycling

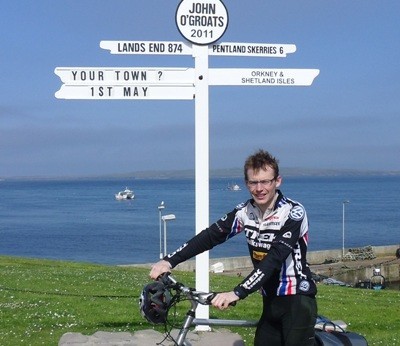
Beginning riders usually face a sort of trial by fire, getting into cycling by jumping into the sport and then learning from any mistakes along the way. By taking some time up front to do a bit of research however, can help you avoid those early stumbling blocks and make getting into cycling much smoother and enjoyable.

Getting Into Cycling – The Basic Equipment

The first thing you need, of course, is a bike. Many beginners often go out and spend a lot of money on a top-of-the-line bike right away. This is a mistake. At the beginning, any type of bike is going to suit your needs. This is because you don’t know your habits yet. You don’t know if you’re going to be an avid cyclist or if your interest will wane after the first few weeks. You don’t know if you’ll enjoy riding on trails or road biking or a combination of both. The best thing you can do as a beginner is to save your money until you have a good idea of what kind of riding you’ll be doing.

On the flip side of this is going the route of a cheap department store bike. Getting one of these cheap bikes is also a mistake as they are poorly designed and built and along with breaking and requiring more money to keep them running, ride like, well, crap. If you were to start out on one of these bikes you would most likely give it up right away due to having a miserable experience trying to get the bike to do what you want, namely shift, brake, steer…kind of the essentials to a bike.

When To Upgrade

After you’ve been riding for awhile and know you love riding and want to continue doing more and more of it, it’s then time to upgrade your bike. You don’t need to go over the top but having a well functioning, comfortable bike is going to take your riding to places you’ve never imagined. You’ll simply get a lot of fun and enjoyment out of it.

When you do upgrade, it’s not a bad idea to spend a little extra money on a professional bike fit. Some bike shops offer a fit with the purchase of a bike which can get you started to make sure you’re in roughly the correct position on the bike. Spending more money just to make sure the bike fits you may seem like an over-the-top indulgence, but if you’re going to be riding regularly, you need to make sure you’re not putting any undue strain on your body which could require time off the bike to heal along with the potential for hospital and physical therapy visits.

Gear to Go Along With Your Bike

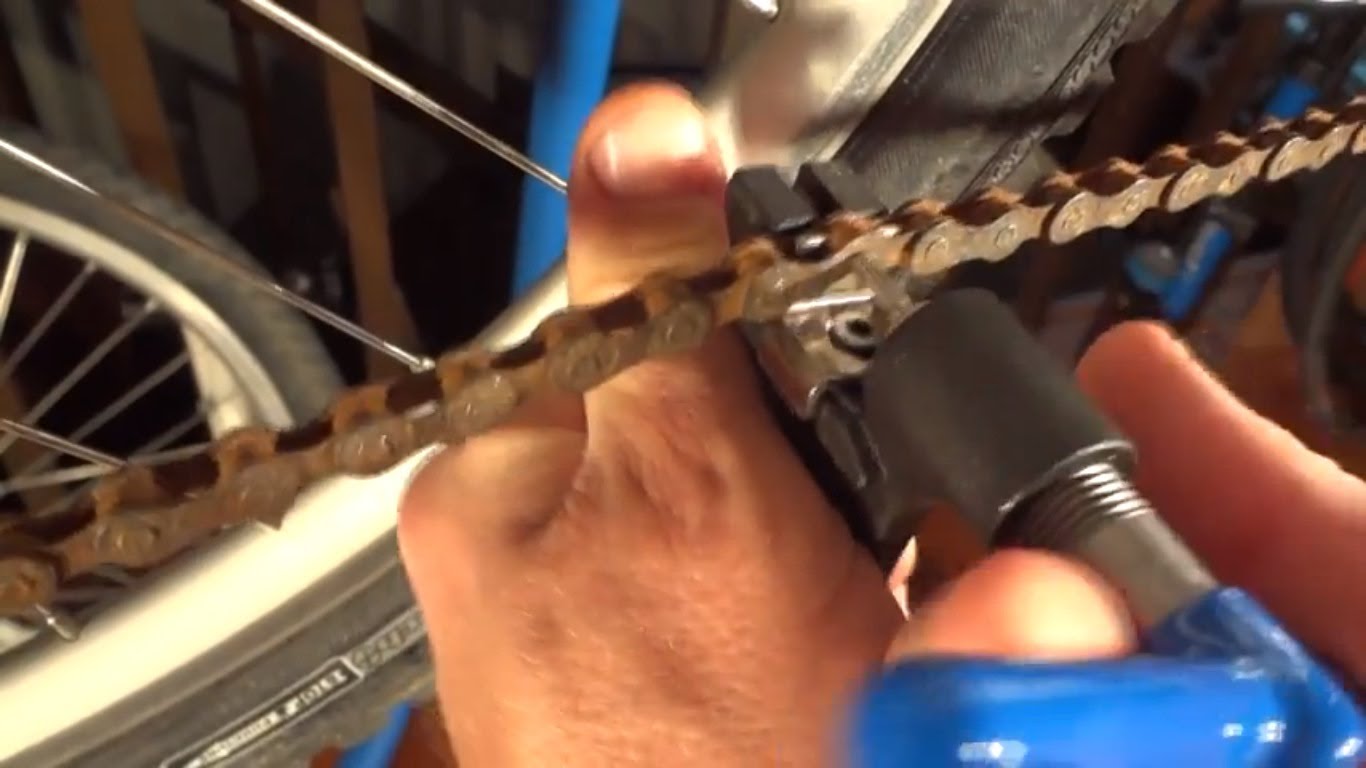
As far as gear goes, you don’t need to invest in a ton of it right up front, but you will need a few basics. A good helmet is essential for safety and you should never ride without one. Find a helmet that fits well and is comfortable. Other items you’ll need right away are a water bottle, a bicycle pump, and a simple repair kit.

Getting into Cycling – The Riding and Pedaling Part

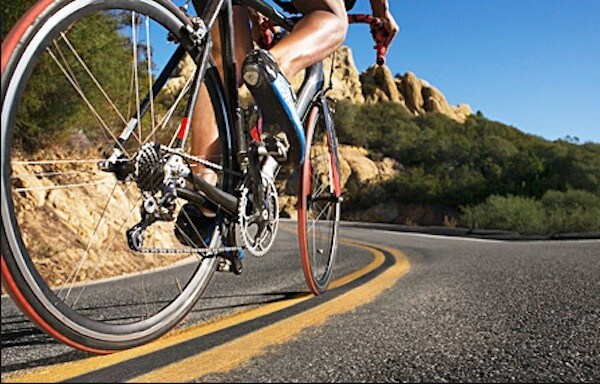
The proper way to ride is to constantly pedal. Many beginning riders fall into a pedal-coast routine that is not aerobically challenging. The best way to bike for fitness is to find a long stretch of road where you won’t have to brake for stoplights or stop-signs  and can fall into a pedal-pedal-pedal rhythm.
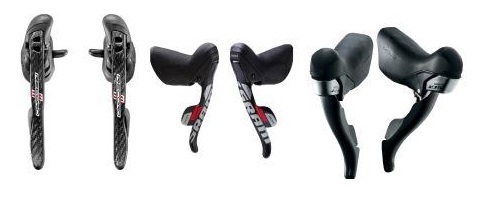
Shifting

Learn to use your gears. Many bicyclists ride in a high gear that doesn’t provide the type of resistance that’s going to challenge their heart and muscles. Alternately, you don’t want to be in such a low gear that you find yourself struggling to turn the pedals over. Ideally, you want to ride at a pace that has you making 80-90 pedal rotations per minute.

Stay on Track

Biking is a low-impact sport that’s easy on the joints. That said, you should still start slow in order to avoid injury work up to mileage goals gradually. Give your muscles and tendons time to get adjusted to the particular demands of biking. Plan plenty of recovery time between rides and be sure to stay hydrated and eat well.

Keeping the Motivation

Give yourself challenges to help you stay motivated. Interval training can increase your speed. Charity rides or races will give you a goal to look forward to. Many cities have riding groups where you can meet people as committed to the sport as you are, as well as more experienced riders who can provide guidance. Also riding with even one other person can do wonders for getting you out the door especially if they are at the same level you are and are just getting into cycling as well.

Mistakes are bound to happen when getting into cycling. Often, it’s how we learn. But avoiding a whole lot of mistakes early on will keep you from getting discouraged and help you stay motivated to ride.

Cycling in the UK – 10 Best Cycling Routes in England

January 14, 2016 by U.M.

cycling in the UK

As a cyclist, you will always be looking out for new routes to experience. After all, much of the fun of cycling is discovering new places and experiencing them in a way that wouldn’t be possible by any other means. For those who are interested in cycling in the UK and taking a cycling holiday in England, one of the key parts of planning should be finding routes that will offer the most enjoyment.

For those who don’t know where to start cycling in the UK, we have compiled a list of the best cycling routes in England.

  1. Forest of Dean, Gloucestershire (map link)

Gloucestershire is an absolutely beautiful area in its own right, but the stunning Forest of Dean truly has to be seen to be believed. Happily, the forest is also friendly to cyclists, so you could spend an entire day getting lost in nature and enjoying a good ride in the process.

  1. Hardknott Pass, Cumbria (map link)

A regular fixture in many competitive cycling races in England, Hardknott Pass is a challenging road for people who really want to push themselves. It’s extremely steep and has a number of hairpin bends, but the rewards for managing to successfully navigate it are immense.

  1. The Camel Trail, Cornwall (map link)

The Camel Trail is 17 miles of some of the most beautifully scenic views that England has to offer. It is one of the best cycling routes in England because it takes in the gorgeous views offered by the stunning River Camel.

  1. Bakewell, Calton Lees and Edensor circuit, Derbyshire (map link)

The Peak District is one of the most stunning areas of natural beauty in England and this 10 mile, dedicated trail will ensure you see the best of it. It’s a fairly easy route, outside of a couple of steep hills and a fairly difficult downhill section near the end.

  1. B3387, Dartmoor (to Haytor) (map link)

This is a road that has become a regular fixture of the Tour of Britain, so if you want to experience the thrills that professional cyclists enjoy there is simply no better cycling route in England. You’ll have to face up to some difficult climbs to get it done though.

  1. The Cuckoo Trail, Sussex (map link)

This 11 mile stretch of old, disused railway track will get you up close and personal with nature. It’s an easy ride, as you wouldn’t expect a railway track to have steep gradients, but you get to see plenty of woods and farmland as your ride.

  1. Cambridge to Wicken Fen, Cambridgeshire (map link)

This is a great ride for family cycling as it is long enough to make a day of the ride, while also being an easy enough ride to ensure that everybody enjoys themselves. You’ll ride plenty of traffic free paths and country lanes along the way.

  1. Putney Bridge, London to Weybridge (map link)

The Putney Bridge trail is one of the best cycling routes in England for people who want to take in a little bit of nature. It takes you through the heart of Richmond Park where you will see plenty of wildlife in addition to enjoying a nice, relaxing ride.

  1. Bath Two Tunnels circuit, Somerset (map link)

History fans will love this route, as it takes in a gorgeous castle, an aqueduct and a pair of tunnels that all hearken to England’s roots. It’s mostly made up of a riverside path and is a fairly easy ride to complete, so you don’t need to be at peak levels of fitness to take it all in.

  1. Land’s End to John O’Groats (map link)

This is the ultimate cycling route in England and will see you trekking from one end of Britain to the other, completing the circuit in Scotland. You will need to dedicate time and energy to training for this one, as it is 1,000 miles of varied riding. If you do decide to take it on then you are going to need to dedicate your entire holiday to it.

Cycling in the UK offers some of the greatest riding to be had anywhere with it’s diversity and spectacular scenery. Hopefully you get the chance to take in some of these rides and a few of the amenities of the surrounding towns.

Cycling Abroad – The Ins and Outs to Having the Best Experience

January 13, 2016 by Lee Agur

cycling abroad

Vastly different roads, long expanses of countryside, differences in culture, a plethora of unique foods, and the potential for fewer vehicles on the roads are just some of the reasons that make cycling abroad such an appealing activity. Whether you’re training for a century ride, or just engaging in your hobby with a few friends, it’s important to get to know a little bit more about your destination and the ins and outs of cycling abroad before taking to the road.

Cycling Abroad – Why Do It?

As fun as it is to traverse your local area on two wheels, it can be quite the exhilarating feel to explore an unknown location or journey down roads that go on for miles without knowing what’s around the next bend. One such location in the world is around the Mediterranean Sea which has an abundance of roads that run across the countryside, hills, and mountains not to mention snake their way through quaint old towns that have incredible food, coffee, wine, beer, and locals to accentuate your ride.

When compared to other locations around the world, the Mediterranean has far less cars on the road, meaning that cyclists can often go on for miles without bumping into a single vehicle. Even the smallest islands play host to some of the most extensive roads such as Mallorca or Sicily and this allows cyclists to travel from location to location unhindered.

Pushing the Limits

Most competitive cyclists are keen to enhance their endurance levels and what better way than by literally having to cycle across entire expanses of land? Your cardiovascular health will come in to play and if your body isn’t ready for a long ride, then it definitely won’t be prepared for consecutive days of long riding. That’s a major reason why cycling abroad has become such a popular pastime for cyclists everywhere as when doing a trip abroad you just want to see more, ride more, and experience more.

Dealing with the Change in Climate

If there’s one thing that’s guaranteed to cause a shock to the system, it’s the change in climate when you’re abroad. Whether you’re visiting Europe, Australia, Africa or Asia, the temperatures in the summer can reach incredible heights. If you’re traveling to the Northern Hemisphere, then a great time to cycle is between September and December, where the temperatures are cool enough to train in.

If you’re planning a trip to the Southern Hemisphere, then January to March is a better time to cycling abroad. Just be sure to take plenty of water and make frequent stops to recover unless you’re able to push further. Wherever you’re planning to ride, it’s a good idea to prepare a kit just in case you find yourself in need of assistance. The sparsely populated regions are often miles away from amenities!

  • Plenty of fresh water is vital. Drinking water isn’t always available, so stock up.
  • Repair kits are a must and although it’s unlikely that your tires will blow-out, they may still suffer punctures.
  • A working cell-phone can go a long way, so check your coverage in the country you’re in before setting out.

Training Routes

Most countries will feature routes for cyclists that may be marked with signs or shown in a local map. Popping in to the local authority to grab a few maps will go a long way and it’s always a good idea to stick to the routes as opposed to going off-road. If you’re training for a competition that involves off-road cycling however, then be extra safe since you’re in an unknown land potentially without the immediate access to help if needed.

If there’s one complaint to be had about cycling routes, particularly in remote areas, it’s that they can sometimes fall in to disrepair. Certain markings or signs can become hard to read especially if they are in another language, or they may have worn away entirely. If you’re ever unsure, you may have to seek advice or simply navigate with the logical due care and attention!

Making the Most of your Cycling Abroad

When cycling abroad, you want to make the most of your time there. To do so, you should make sure you’re in shape enough to enjoy the riding that you’re doing. If you’re planning on going someplace mountainous, make sure your weight is in check and that you incorporate some good training and mountain riding to prepare for it. There’s nothing worse than getting someplace and realizing that you don’t quite have the fitness to enjoy the riding and that you can’t do all that you want. In the weeks and months leading up to your trip cycling abroad, make sure you’re riding enough and at the proper intensities to be ready.

Tips on Traveling Abroad to Ride

  • Bring any tools and spare parts you may need on your trip as finding what you need to fix something in a foreign country can be a hassle.
  • Buying travel insurance before you go is not a bad idea as most will cover baggage damage or loss, flight interruptions, along with the hospital bills should you have an accident, along with other unforeseen circumstances.
  • Hit up a local if you can on where the good rides are along with good places to eat and check out. Inside knowledge will go a long way.
  • Be kind, courtesy, and respectful whether in traffic or at the local restaurant. You are the foreigner and most likely don’t know the local customs and standards. It will go a long way in your experience as people will be much more receptive to reaching out and elevating your travel experience.

How to Fix Road Bike Brakes

January 11, 2016 by Lee Agur

how to fix road bike brakes

When you’re riding your road bike, and you pull the brake levers, what happens? Well, if you apply the rear brake, first, you should slow down, and applying the front brake should bring you to a full stop. However, if your brakes aren’t working properly, you’ll squeeze the levers all the way to the handlebar, and you’ll barely get any stopping power. Worse yet, while you do it, you might also hear a terrible, loud squealing noise. What can you do when you don’t know how to fix road bike brakes? Just follow these steps, and you’ll have your brakes fixed in no time.

How to Fix Road Bike Brakes – Locate the Pinch Bolt

The pinch bolt holds tension on the brake cable. It should be on the brake itself, not on the brake lever. Depending on how old your bike is and what kind of head the bolt has, you’ll most likely need either a five-millimeter hex wrench or a ten-millimeter box-end or open-end wrench to loosen the pinch bolt. Loosening this will take all tension off of the cable and allow the brake to open up to its widest point.

Roll Out the Barrel Adjuster

On road brakes, your barrel adjuster will be located at the cable stop on the brake. This takes up or lets out tension on the cable when the pinch bolt is tight. If it’s not already loosened, go ahead and loosen it until about half of its threads are showing.

Take Up Tension in the Cable and Tighten the Pinch Bolt

Now, with a cable puller or with your hands, pull the brake cable tight and pull the brake closed so that the pads lightly touch the rim. Then, while holding tension on everything, tighten the pinch bolt onto the brake cable with enough torque that it’s not going to slide through under heavy braking.

Once you’ve done that, you can just tighten the barrel adjuster back down. That will release some tension from the cable and let the brake out a little bit. Try squeezing the brake lever now. Feels better, right? If it’s not quite right, you can continue playing with the tension on the cable using the barrel adjuster and/or by adjusting where you clamp the pinch bolt down on the cable.

For Squeaky Brakes

Finally, if the brake pads are squeaking, you most likely have an alignment issue, but you may also have an issue with worn out pads. Take a look at your pads. If they’re still good and not excessively worn down, just roll the barrel adjuster out until the pads are lightly touching the rim. Then make sure that they are perfectly symmetrical and that the front end of the pad is toed in and touches the rim just a hair before the back of the pad. You can slip a business card in between the back of the pad and the rim while you tighten the bolt holding the brake pad in place. If your pads are worn out, just replace them and use the same technique to line them up.

That’s it! Now you should have everything you need to know to fix your brakes. Good luck!

Removing a Bike Chain

January 11, 2016 by Wade Shaddy

removing a bike chain

With some 800 million bicycles outnumbering cars by two to one, bicycles are one of the world’s most popular modes of transportation.  Bicycles are also the most energy-efficient machines —a cyclist burns about 35 calories per mile while an automobile burns 1,860 calories per mile. Bike chains, pound for pound, probably do more work than any single component on your bike. Removing a bike chain is going to be necessary at some point for cleaning or replacement.

Lots of Parts

The chain on your bike could possibly be the most important component on your bike, except for your heart and lungs of course. A standard chain is just about 56 inches in length. A typical chain has about 114 inner links and 114 external ones.

Why Remove It

The reasons to remove a chain include a bad link, broken link or simply to give the chain a bath. But in order to remove the chain, it’s nice to know a bit about how it’s made, and what to expect when you’re cleaning it, or replacing it.

How Chains are Made

Chains are made by a machine, or a bunch of different machines. The process starts with a punch press, cutting and pressing about 10,000 links steel inner links per hour, which look like a figure eight. Each of the links have been engineered accurately to interconnect, with smooth contours to travel easily across gears and through derailleurs.

Tested and Measured

Inner links are measured to confirm the space between the holes is precisely 12.7-mm. The test also gauges the diameter of the holes which must be accurate to within a fraction of a millimeter.

Baked and Hardened

Links are baked in an oven at more than 1500 degrees fahrenheit. They harden as they cool. Ceramic and silica powders are added with water to form an abrasive paste, and the links are shaken up to polish them smooth.

Bath Time

After a nickel-teflon bath, the inner links are ready to form into a chain, with the addition of outer links, which receive only a nickel finish, since they don’t travel over sprockets like the inner rings, and don’t require that smooth finish. The parts, including retainer rings and pins, spacers and bushings are then fed into an assembly machine.

Add Lube

The chain then takes a dip in hot oil to lubricate the links preventing squeakiness and wear down the road — that’s the tacky, somewhat oily feel on a new chain. Bearing all this in mind, it’s no wonder, with all these parts, assembled by a machine, that chains need removed and replaced from time to time.

Chain Maintenance

Chain maintenance is a controversial topic of bicycle mechanics. Is it really necessary to replace a chain every 1,000 or 2,000 miles? Chain durability is in direct proportion to riding style, gear, rain or snow, soil and sand, type of lubricant, lubrication method, and the condition of the gears it travels over. Everybody’s advice about chain maintenance and even cleaning is based on their own experience. Even professionals disagree when to remove or replace a chain. But when you’re ready, it’s a simple matter of the right tool for the job.

Removing a Bike Chain When it’s Wedged

If you’ve got a broken chain, just pull it from the derailleur — if it hasn’t already fallen off on the ground like a dead snake. It might be stuck, bunched up and wedged between gears or even the chainstay. If this is the case, don’t force it. Gently pull it loose, focusing on where it’s really stuck. Don’t resort to prying it out with tools unless you absolutely have to, and then be very careful not to bend anything. If you can’t pull it out, take the wheel off the bike which will relieve some of the pressure on the gears. If this still doesn’t work, you can remove the cassette with a cassette tool and then you should be able to remove the chain easily.

Use a Retainer

It’s a good idea to place a chain retainer on your chain before removing it from your bike. A chain retainer is nothing more than a small — about 2-inches long — piece of wire with two 90-degree bends on both ends — you can make one out of an old spoke. Slip the bent ends on the chain, over the link that you plan on removing. That way, when you break the chain, the retainer won’t allow the derailleur to snap back when the pressure is released. Use the retainer the same way when re-installing the chain. You also can just simply knock the chain off the front chain rings so it rests on the frame on the inside of the crankset. This will also take the tension off the chain.

Removing Chain Links

You’ll need a chain breaker tool to remove the chain for cleaning or replacement. It sounds complicated, but it’s really simple. The chain breaker tool is a small press. Look at it closely and you’ll see a small cradle, centered over a small hole. There’s a handle, or a bolt above the cradle that turns and pushes a pusher-pin against the pin on the chain to push out.

Employ the Chain Breaker

Fit the desired link into the small cradle, with the pin centered over the hole. It should fit snug, and the chain breaker is designed to help you get it centered. Twist the handle on the chain breaker to lower the drive cylinder directly onto the pin. Continue twisting — it typically takes five or six turns, to drive the pin out the bottom of the link. You should feel a slight bump when the pin releases from the link.

Re-use Versus Master Link

If you’re going to re-use the same pin when removing a bike chain and re-installing the same one, don’t push it completely out of the bottom link. Twist slowly until the link becomes loose and the chain is separated, but the pin is still stuck in the outer link at the bottom. It is not recommended to do this as that pin creates a week point in the chain. It is advised to use a new connector pin that easily installs into the link and breaks off on the other side to line up flush with the outer plate of the chain. If you plan on using a master link — recommended — then push the pin completely out of both outer links.

Remove the Chain

Finish removing a bike chain by unscrewing the drive pin and removing the chain tool from the chain. Hold both ends of the chain with your hands, and remove the retainer, releasing the tension from the derailleur. Snake the chain back through the derailleur and off the gears, it should come off easy from here.

Replace the Chain

If you’re re-installing the same chain, using the original pin or connector pin, it’s a bit tricky, but doable, just reverse the procedure with the chain tool pushing the pin back through the outer and inner link. If you’re using a master link, you’re done with the chain tool. Thread it back through the derailleur, use the retainer, or have someone hold both ends for you, and snap the master link back on to join the two ends.

Notes and Variations

Only some brands of chain can be serviced by pressing out a rivet partially, then re-pressing the same rivet to reinstall. Reusing any old pin can result in failure of the chain, because it shears the mushroom head off the rivet, and that’s what keeps the pin from coming out in the first place. Additionally, some chains include a master link that is removable by hand, without using a chain tool at all. Check with the manufacturer’s literature when in doubt, or consult with your local bike shop mechanics. Removing a bike chain is easy once you know the steps and what tool you need.

How to Fix a Broken Spoke

January 10, 2016 by Lee Agur

how to fix a broken spoke

You’re out ride and you just got out of the saddle to accelerate up a small hill and suddenly you hear a small “ping” followed by a clunk, clunk, clunk of a spoke bouncing off your frame with each turn of the wheel. If you don’t know what to do and how to fix a broken spoke, this can end your ride right there.

With just one broken spoke, your whole wheel can go out of true, making it impossible for the wheel to turn without hitting your brake pads and/or your fork or frame (depending on if you have a broken spoke in the front or rear wheel). Basically, this repair involves a two-step process: getting the wheel true enough to get home and then replacing the spoke and re-truing the wheel once you get home.

How to Fix a Broken Spoke Just to Get Home

First, you need to get the spoke out of the way so that it doesn’t interfere with your wheel turning. If you have a broken spoke on the front wheel, you should be able to just slide it out of the hub. If it’s on the rear wheel, bend the broken spoke around one of the spokes adjacent to it. Then you can adjust the tension on the rest of the spokes in your wheel.

To adjust the other spokes to accommodate for one missing spoke, you’ll need a spoke wrench, conveniently on many multi-tools, to tighten or loosen them by turning their nipples at the rim. Turn each spoke on either side of the one that just broke clockwise as if you’re looking from the hub of the wheel toward the rim. This will loosen those spokes. If this doesn’t move the rim back to center enough, ie. it’s still bouncing off the brake pads, go one more spoke in either direction and turn them counter-clockwise. This will tighten the spokes pulling the rim back toward the side of the broken spoke.  fIf the rim is moving too far to the right, you’ll want to either tighten the spokes that attach to the left side of the hub or loosen the spokes that attach to the right side of the hub. You’ll make this decision by testing the spokes and determining whether they feel too loose or too tight.

Never make drastic changes to the tension of a spoke at any one time. Just make half-turns with the spoke wrench each time and check and see how true the wheel is. It is easy to go too far. Once you get it roughly straight, you can ride the wheel. If the rim is still slightly touching the brake pads, open the brake quick-release to allow for more space.

Finishing the Repair at Home

After you’ve gotten home and you’ve gone to your local bike shop to buy a new spoke and nipple, you’ll install the spoke and thread it into place in the same pattern as the other spokes around it. Then use your spoke wrench to loosen the nipples on the spokes in the area around the broken spoke as you tightened and loosened them to get home. Then test the tension on all of the spokes around the whole wheel.

Go ahead and take tension off of any spokes that feel overly tight, and then work your way around the wheel truing out any wobbles by turning the nipples counter-clock wise to tighten and clockwise to loosen a spoke if looking from the hub at the nipple. This time, however, if you can, you’ll want to use a truing stand and get the wheel as straight as possible. Watch out for overly tight or overly loose spokes, as you could be looking at another broken one in the near future if the tension is off. As always, if you have trouble, take the wheel to your favorite local bike shop and get a little bit of professional attention.

There you have it; how to fix a broken spoke. When it first happens it’s always like “Danggg-it”, but it’s actually pretty straight forward to fix. There are far worse things that could break on your bike. Safe Riding!

The Best Ways to Boost Cycling Endurance

January 10, 2016 by Lee Agur

cycling endurance

Cycling can be either a liberating or a daunting experience, and the outcome of your ride rests largely on your endurance levels. If you go into cycling knowing that you can keep pace and enjoy the route you have planned, you can relax, but fearing your ability to keep up can cause you to feel disheartened and can even hinder your ability to take longer rides. The reality is that you should feel confident in your own cycling abilities when planning any journey, so here are the best ways to boost your cycling endurance – to get you to exactly where you want to go!

Fueling Up for Cycling Endurance

Many cyclists don’t realize that the key to boosting cycling endurance lies within your internal reserves. The body’s stores of glycogen, glucose, triglycerides (fats) and body fat are all essential to the length, functionality, and quality of a good cycling trip, so make sure to fuel up before you ride!

Carbohydrates, Glycogen, and Endurance

To really boost your cycling endurance, carbohydrates are the best friend that you can have! Turning carbohydrates into glycogen for energy within the muscles and liver will undoubtedly get you riding for longer, but simply upping your intake may not be enough if you are planning on a really hard ride. When you need to be sure of your stamina, set aside a day or two before your longer ride to consume carbohydrate-rich foods every three hours, and take the riding sessions in between easy.

Loading up on carbs for an extended time will help you to boost your body’s supply of muscle glycogen, which will help you to ride longer before you feel the burn. Remember not to take short, fast rides while you carb-load though, as this will expel the glycogen before the big event.

Eat an Early Pre-ride Breakfast

Loading up on carbs won’t just be enough to get you to your peak; protein and triglycerides (fats) are also essential to upping your cycling endurance. Simply planning to eat properly before you ride will give you the added boost that you need to ride for longer. Eating an early breakfast of carbs, protein and fat (around two to three hours before you set off) will put you in a good spot for the entirety of the ride, without bloating you or crashing your energy levels!

Top Up Nutrients and Keep Hydrated

To further boost your cycling endurance, aim to consume around 200-400 calories each hour during your ride. Whether you do this in liquid or solid form is up to you, but be sure to test products out well before you set out to ensure that they don’t upset your stomach. You should try to ingest around 60 grams of carbs per hour, to keep energy levels at their max.

As sweating is one of the leading causes of dehydration during longer, more arduous rides, you should aim to stay properly hydrated by replacing around 75 percent of the water that you lose through sweating. All cyclists should be aware that energy drinks alone are not enough to hydrate your body as you ride, so you should always carry plenty of water when you want to keep your endurance at an all-time high.

Train your Body

While following each of the above factors will make a huge difference to your overall cycling endurance, none of them will work particularly well if your body isn’t ready for the task at hand. The amount of cycling that your body can endure will rely heavily on the condition that your body is in to begin with, and not just on the effects of the nutrients and carbohydrates that you put into it.

This means that, to really get the best from your cycling endurance levels, you should make sure that you’re fit before you set off. Riding regularly in the months and weeks before your long ride will help your body to become stronger and more efficient at using fuel for energy.

One of the best ways to train your body for endurance is to follow a set routine of A,B,C. This is:

A is for Aerobic Riding: you should participate in aerobic riding for four to six hours a week.

B is for Breakfast-less Rides: you should cycle on an empty stomach for up to two hours once a week to teach your body to better utilize fats.

C is for Consistency: you should ride consistently getting more rides in per week than only a few even if they equal the same total distance.

If you follow these rules for up to one month before a longer, more strenuous ride, you will find that your body will work in better harmony with your bike and for a longer period of time to increase your cycling endurance.

6 Tips to Improve your Bike Skills

January 8, 2016 by Lee Agur

6 Tips to Improve your Bike Skills

Whether you are a novice or a pro, you might feel the need to improve upon your current bike skills and techniques. As with any form of exercise, how you do it determines how successful the endeavor will be. Luckily for cyclists everywhere, cycling is pretty straightforward and as a result, practically no skill is impossible to master! No matter what you are hoping to improve, from your pre-ride checklist to following the right interval routines, here are 6 tips to improve your bike skills today.

Bike Skills – Do the Pre-ride Checklist

One of the key factors to improving your bike skills is to get your pre-ride checklist in place. It may sound like an unnecessary factor when you want to improve the way that you ride, but if you consider the affect that overlooking a simple mechanical factor can have on your bike and body, you might think again! Simply forgetting to check a small detail on your bike, such as retightening the stem bolts, can lead to more than one complication after you set off, so it’s better to be safe than sorry.

Bike Skills – Improve Your Shifting

Learning how to shift properly will improve your bike skills by allowing you to maintain speed in the right gear. Anticipation really is the key. You might feel like you have a good grip on shifting correctly, but transitioning too soon can really affect your overall ride. Always attempt to change gears just before you need to. Try not to let your legs get bogged down by too big of a gear. Shift at the dead spot of your pedal stroke where your feet are at the 12 o’clock and 6 o’clock positions. The less pressure that you put on the pedals will allow your gears to shift quickly without any large “clunks”.

Bike Skills – Improve Your Comfort

Cycling isn’t just about getting on your bike and riding. For many of us, cycling is a way to get fit, let off steam, or even to compete. While doing it though you not only want to have a comfortable fit on the bike but should be comfortable riding on roads, trails, in traffic, through corners; basically in any situation on the bike. If you’re uncomfortable and tense, you’re not going to enjoy the ride as much as you otherwise would. The first thing to remember is to relax when you ride. Being tense will simply amplify all of the lumps and bumps of the ride along with your nervousness. You should practice and focus on riding more in the situations that make you uncomfortable. If you’re nervous on descents, practice your braking and cornering. If you’re not comfortable riding in traffic, make sure you’re doing the right things and being safe about it. Being comfortable on the bike will improve your enjoyment of riding.

Bike Skills – Intervals Made Easy

Many cyclists are using aerobic interval training when cycling, especially when trying to lose weight or to increase stamina. Cycling with intervals allows you to burn more calories in a shorter period of time and improves aerobic capability at a faster rate than any other form of cycling. To get to grips with intervals, try the following sets:

  • 2 minutes hard, 2 minutes easy
  • 1 minute hard, 1 minute easy
  • 30 seconds hard, 30 seconds easy
  • 15-second sprint, 5 minutes easy

These are perfect for beginners, and can be used in sets throughout a training session for more advanced riders, too. Just gradually add a set or two of each every week.

Bike Skills – Eat Properly

Food is a key element to the quality of your ride as having too little or too much to eat will affect your performance. Aim to eat around 90 minutes before you set out for a long ride to ensure that you digest the food before beginning and don’t run out of energy during the ride. Also, make sure you bring enough food for the ride to keep your energy levels up. It depends on how long you’re riding but rides over 30 minutes to an hour, you should be bringing something to snack on.

Bike Skills – Drink Responsibly

Always bring water or a sports drink with you when you ride no matter how long you plan to be out. When exercising, even in cold weather, your body is losing fluid. The more dehydrated you are, the hard your body is going to have to work to sustain the same pace. The trick is to drink before you’re thirsty as if you’re thirsty, it’s too late; you’re already playing catch-up.

You should also aim to drink in a responsible manner. Glance at your drinks bottle when you want a sip but don’t take your eyes off of the road to reach down for it. Always tilt the bottle to drink and if an obstacle appears while you have a bottle to hand,  hold it between your teeth while you grab back on to the bars. This may sound dangerous but having two hands on your bike to ride a bump will be much safer for you than only holding on with one. And make sure you don’t let go of the bottle before it’s securely in the bottle cage otherwise it’ll be on the road before you know it.

These are a few quick and easy bike skills to practice and get good at as they will up the quality of your rides. What other bike skills do you practice to improve your riding? Let us know in the comments below.

Road Bike Shifters

January 8, 2016 by Wade Shaddy

road bike shifters

Road bike shifters could be the most efficient mechanism on earth for transferring human energy to a machine. Shifters and derailleurs have been around for many years, and developed into relatively complex machines.

What Road Bike Shifters Do For You

Road bike shifters and gears make it possible to maintain motion and speed by being in the correct gear on your bike no matter the terrain, wind or weather. When used properly, shifters make it easier on the knees, lungs, heart and they prolong the life of your chain, cassette and body.

Gears and Efficiency

With a stack of gears on the front and back, shifting can seem intimidating but they serve to tame the confusion. Understanding the basics about road bike shifters goes a long way to keep you moving at a steady pace up hills and to find that comfortable gear to grind out long miles on flat ground.

Left Shifter, Front Gears

Road bike shifters have standard configurations. The shifter on the left side controls the front gears, also known as chainrings. It has either two or three positions which moves the the chain up or down accordingly. Bikes with two gears up front are known as a “standard or compact-double” Bikes with three gears up front are referred to as a “triple.”

Right Shifter, Back Gears

The road bike shifter on the right side controls the gears on your back wheel. Older road bikes may have only seven or eight gears in the back. Contemporary road bikes typically employ 9, 10 or 11 gears in back. The right-side drivetrain shifters are more complicated because they have more work to do, in a smaller space.

How Road Bike Shifters Work

Road bike shifters work by releasing or adding tension to a cable attached to a derailleur. When the rider operates the shifter, the tension is changed, and the derailleur moves the chain up or down, switching the chain to a different gear.

Positioned by Index

The vast majority of modern shifters are indexed. This means that each time you click the shifter with your fingers or thumb, the shifter allows the cable to move a precise amount equivalent to one gear shift.

Friction Shifters

Old-school shifters did not have indexing, the rider determined when the bike shifted by feel and how it sounded. Also known as friction shifters, they are still around today on some bikes, but are considered antiquated.

Three Competitors

Most modern road bikes employ one of three different brands of indexing shifters: Shimano, Campagnolo and SRAM, with Shimano being at the top of the market numbers wise for standard production bikes. High-end bikes often rely on Campy or SRAM, but Shimano also has that covered too. The three top brands look similar, and are positioned in the same place, but the actual functioning or mechanism of the shifting levers differ.

Shimano STi

Shimano designed the STi (Shimano Total Integration) system, which is a brake lever and shifter integrated into one unit. Cyclists shift to larger sprockets by pressing the brake lever sideways. Downshifting is done by pressing a small, separate lever behind the brake lever.

SRAM DoubleTap

SRAM uses a single lever to shift gears up and down. Tapping the lever inward a short distance on the right shifter shifts the rear derailleur down. Pushing that same lever further inward produces an up-shift on the rear derailleur. The front shifter is reversed as a small tap shifts down while a larger sweet shifts up to the big chain ring.

Campagnolo Ergopower

Rather than using the brake lever to shift up like Shimano, Campy uses a small lever behind the brake lever to shift up. A small button inside the hood is used to shift down. Because Campy is indexed on the right side only, it’s compatible with any chainring, unlike Shimano and SRAM, which must be specifically matched to the size and number of chainrings used.

Which One is Best

When choosing between road bike shifter brands, it depends on the existing groupset that you use. The shifter should correspond to the other components on your bike. For example: Shimano shifters are designed to work with Shimano components. The best way to choose your road bike shifter is to try them before purchasing to see which one you find more comfortable, and which lever system you prefer. It’s also a matter of how much you can afford.

Handlebar and Shifter Position

Shifter and handlebar position is a personal preference; there’s no wrong way to do it within reason if the position is comfortable for you. Old-school set-ups typically have the drops horizontal, but it’s common these days to see the drops pointed down somewhat. Find a happy medium for your handlebars, and then adjust the shifters/hoods from there.

Adjust the Position

It might be necessary, depending on how much you want to move the shifters, to remove or loosen the bar tape. You might be able to get by with minor adjustments without disturbing it. Begin by slipping a 5-mm hex wrench under the rubber brake hood to loosen the hoods via a small hex bolt. Sit on the bike, grasp the hoods, move them as needed, and then snug each clamp bolt just enough to hold the position.

Not Too Tight

Don’t over-tighten shifters on the bars. They should be tight enough so that they won’t slide when you put your full weight on them, but loose enough so that you can still twist them if you apply enough force. The idea is to allow them to move in a crash instead of breaking.

Clean and Degrease

Peel back the rubber shifter hoods so that you have access to the guts of the shifter. Use an evaporative degreaser to remove the grit and accumulated caked grease in the shifter mechanism. Don’t be afraid to get dirty. It may take quite a bit of the degreaser to get the shifters to loosen up. If you have access to pressurized air, use that lightly to blow out dirt and gunk. Run the shifter through the gears to work it in after spraying the degreaser. Repeat the process until the shifters are functioning normaly.

Lube and Ride

Lube the shifter with a light, bicycle-specific spray lube. Let the bike sit for an hour to allow the solvents to evaporate. Replace the road bike shifter hoods and go for a ride with well functioning shifting.

STP – Seattle To Portland – The World’s Best Group Ride?

January 6, 2016 by Wade Shaddy

STP

The STP – Seattle to Portland event has probably introduced more people to their first century ride than any single event. Experienced riders claim that the STP ride is the fastest they’ve ever completed a century. But it doesn’t stop there. After completing the first century you do another one, the next day. It might sound overwhelming but almost any cyclist with determination and a bit of preparation can do it. It’s easier than you think.

Biggest and Baddest

The 200-mile Seattle to Portland, or “STP,” bike ride is the largest bicycle event in the Northwest. The route takes you through the scenic valleys, forests, and farmlands of Washington and Oregon. Bicycling Magazine has listed the STP as one of the best cycling events in the nation. It’s not the toughest ride in the West or the most challenging, but it has plenty of rollers. It is missing the major climbs of similar rides — except for one big hill at the 45-mile mark. The lack of hills is what makes the STP so alluring to the average cyclist.

Bucket List

Even though it lacks the steep climbs of similar rides, it should be regarded as a physical and mental challenge for recreational riders and should be treated with respect, but it’s not a race. There’s no pressure to go fast. Put it on your bucket list if you haven’t already.

The Key to the STP

The key to the STP is that it’s implicit as a mostly flat route with temperate weather, aid stations, and a lot of camaraderie with other riders. Each and every rider has a blast that’s fueled by their abilities and drawing inspiration from those around them. The atmosphere of the STP is inspiring, and the miles drop behind you in a hurry.

Ten Thousand Riders

Cyclist participation in the STP is limited to 10,000 riders. Slots fill up fast. If you have any desire to participate, get online January 1st, the start date for open enrollment in the bicycle classic. Low license numbers are a badge of honor in the ride, if possible, get online when the ball drops on New Years Eve for the lowest of numbers. You’ll get recognized on the ride by fellow cyclists all along the route.

Sea Level

The elevation of the STP route is at, or just above sea-level, and the air is rich with oxygen. If your home town is higher than sea level, you’re accustomed to thinner air and you’ll be feeling super-charged, feeding on the oxygen-rich air along the STP Route. .

The Support

The STP is fully supported, with aid stations supplying food, water and sports drinks every 25 miles along the route. A typical line-up  handed out by volunteers might include more than 11,000 bananas, 4 tons of watermelon, 13,000 bagels and 18,000 sandwiches. There is some mechanical support at each rest stop, but if you have major mechanical issues, the halfway point supplies a mechanics who can deal with almost any bike issue that you might have, and it’s all included, free of charge.

Prepare Yourself

It’s not necessary to get a century under your belt before attempting the STP, but it’s advisable just to give yourself confidence. Prepare yourself mentally and physically. Realize it’s going to be somewhat tough. Your legs will get tired and your butt will get sore. If you come to grips with these vulnerabilities before they happen, you’ll be better prepared to overcome them. When you get tired, look at the riders around you, lots of them are in worse condition than you are. Look at the gray hair, middle-age bulge, or youthful exuberant riders on single-speeds, mountain bikes or cruisers. If that doesn’t give you the inspiration to keep pedaling, not much will.

The Launch

There’s a packet waiting for you after you register online. Find the location and pick it up the day before you launch. Bring your sleeping bag, and load it on a truck; they take it to your overnight stop for you. Start the ride as early as about 5 am if desired. Long distance riding is best accomplished with an early start, so get there, packet in hand, ready to launch. Starting before 5:30 am gives you the best chance to stay ahead of the masses, which is a bit safer, more enjoyable, and there’s smaller lines at the toilets and aid stations.  The launch site is at the Husky Stadium at the University of Washington. The launch consists of groups of 150-200 riders at a time, spaced a few minutes apart to keep everyone from bunching up.

Join a Paceline

It’s impossible to ride by yourself. There’s always going to be other cyclist around you. As the miles get longer, the pack thins out, and it’s a long, long line after that. If you’re invited into a paceline that’s fine, take it, but don’t assume it’s OK to suck the wheel of the rider in front of you. Get permission to join a paceline.  Meeting and riding with new people from around the world is one of the true joys of the STP.

Half Way Point

Centralia College is 99 miles into the ride and the most commonly used overnight spot for the ride. It’s a great scene with participant tents and vendor booths filling the college’s courtyard and it’s a perfect place to stop for a break. But if making this ride is a challenge for you, don’t overnight at Centralia. Continue on to Winlock or Longview. They have schools ready for you, and the gear that you have selected for the ride, sleeping bags primarily, will be there, waiting for you. The shower you get is a gift from heaven, followed by the traditional spaghetti dinner that’s the best one you’re ever going to have in your lifetime.

Not a Race

It’s not a race. Take your time and enjoy conversation with other riders, but don’t linger at aid stations. Too much time off the bike is counterproductive. Limit stops to no more than about 20 minutes or less if possible.

The Finish Line

The last few miles of the ride is punctuated with cheering spectators, all who want a piece of you. Picture yourself in the Tour de France. If you’ve ever wondered what it feels like to be a part of something this big, the STP is it. Cycling single-file down the last few blocks, through the colorful, narrow entry to the finish line with cheering people makes your heart race, and your adrenaline pound. You’ve done it. Expect to see tears of pure joy from other riders, and maybe even yourself, it’s infectious.

« Previous Page
Next Page »
  • Facebook
  • Tumblr
  • Twitter

Latest Articles

JOIN Cycling: A New Training Platform for Cyclists

May 27, 2024 By Eric Lister

cold exposure

The Benefits of Cold Exposure for Cycling & Life

June 13, 2023 By Eric Lister

hill climb

The Ultimate Hill Climb Training Guide

May 31, 2023 By Eric Lister

shoulder pain cycling

How to Treat & Avoid Shoulder Pain While Cycling

April 12, 2023 By Eric Lister

psoas stretch

The Importance of the Psoas Stretch for Cyclists

April 6, 2023 By Eric Lister

cycling neck pain

The Ultimate Guide to Cycling Neck Pain: Causes and Solutions

March 21, 2023 By Eric Lister

Useful Info

  • Contact
  • Finally, A Global Cycling Club That Is Focused On Community And Love Of Cycling!
  • Privacy Policy
  • Share Your Story!
  • Terms And Conditions Of Use
  • Welcome to I Love Bicycling
  • What Happened When I Stretched Every Day For a Month

Recent Posts

  • JOIN Cycling: A New Training Platform for Cyclists
  • How to Hang Bikes in Your Garage: 4 Inexpensive Options
  • Gravel Bike Vs. Road Bike: Which One Is Better For You?
  • The 6 Types of Mountain Bikes & How to Choose the Best One for You
  • What Is a Touring Bike Good For? 5 Benefits We Know You’ll Love

Search I Love Bicycling

Connect with Us

  • Facebook
  • RSS
  • Tumblr
  • Twitter

Copyright © 2026 · Magazine Pro Theme on Genesis Framework · WordPress · Log in