• Training
    • Injury Prevention
    • Training Tips
  • How To
    • Bike Fit
    • Gear
  • Nutrition
    • Nutrition Tips
    • Weight Loss
  • Repair
  • Reviews
  • Stories
    • Funny Stories
    • Jokes
    • Quotes
    • Videos
    • Funny Videos

I Love Bicycling

I Love Bicycling is a website that is geared towards cycling for beginners with road cycling tips, training articles, nutrition tips, weight loss, how to’s and bike repair articles.

Training

  • Injury Prevention
  • Training Tips
  • Training Camps

Time Trial Training – Workouts and Tips

May 4, 2016 by Josh Friedman

time trial training

Time trial training can be an experience in tremendous suffering but it’s not nearly as painful as showing up for a time trial under-prepared. Some tips on positioning on the bike and a few key interval workouts will put you on the right path to flying through the time checks at the top of the classification.

Ride Your Bike

The first and by far the most important step to going fast on your time trial bike is to ride it. A lot of riders have a time trial bike that they dust off a couple of times a year for a time trial in a stage race and then hang them back up. You should be riding the bike a couple of times A WEEK, not year, if you want to be efficient. Some of the days on your time trial bike can be easy and some should be quite hard to simulate the race effort. Time trial training starts with adapting to the equipment; skip that and you can throw your hope for good results out of the window.

Get A Proper Fit

An addendum to riding your time trial bike is that you should get a proper fit from a trained and trusted bike fitter. This is because the geometry of a time trial bike is different than a road bike so the setup will be different. The fit will allow you to use your body to its maximum potential.

A Few Basics If You Can’t Get a Fit

If you cannot get a fit, there are a few things to remember. Try to get your body as low and narrow as possible without having to strain while in that position. Position the saddle so your hips are open enough to allow you to pedal without your knees hitting your abdomen. Make sure you can pick your head up enough to see the road. Tinker with the position until you’re comfortable with it for longer than your longest time trial – this way you should have no trouble with comfort on race day.

Pushing a Big Gear versus a Small One

Some people mash and some people spin, but is there a proper pedal cadence? Yes, there is; and it applies to all sorts of riding, not only time trials.  It’s important not to burn your matches too quickly and to make sure that you don’t go too deep into the red at any one time. This allows you to maintain consistently high power throughout the race.

The Science

Power is force multiplied by velocity. A higher cadence requires less force. Less force results in a greater reliance on slow twitch muscle fibers, of which you have many more of and rely on oxygen for ATP production (the fuel for muscle cells). This aerobic production of ATP is by far the most efficient metabolic system for producing ATP. With a lower cadence, you are asking fast twitch muscle fibers to take on more of a load because you require more force per revolution. ATP production for fast twitch muscle fiber taps the glycolytic and creatine phosphate systems, both far less efficient than your aerobic system. In short, you will tire quicker. When you are time trial training, or any training really, focus on a higher cadence unless you are doing a specific strength workout.

Speaking of Workouts

Now that you are dialed in on your bike and know how to pedal it efficiently with a higher cadence, you have to put it into practice. The following workouts will work best after you have a bit of a base and are ready to suffer at high intensities.

Field Testing

It is helpful to do a field test to determine your maximal output to establish training zones. The training zones will zero in on the metabolic systems you are training in each workout session. Tests are also an opportunity to track fitness throughout the season.

Using Heart Rate

If you are using a heart rate monitor, warm up well and do a thirty minute all out effort. Take your heart rate from the last twenty minutes of the effort. That will be a very close approximation of your lactate threshold heart rate. Put that number in a heart zone calculator and you now have your proper zones to train in.

Using Power

To test with a power meter, warm up well and then do the following efforts in order at maximal effort, each separated with ten minutes rest:

  • 5 minutes
  • 5 seconds,
  • 20 minutes
  • 1 minute

Take the average power from each of those efforts and put it into a software program such as Golden Cheetah. It will give you your training zones plus a lot more data than you’ll know what to do with. It is a very powerful training tool.

Intervals for Time Trial Training

After riding more, the best way to improve your riding in general is through intervals. They can be hard and painful but are a necessary evil to getting stronger and faster. If you are going to be suffering, make sure you are suffering in the right way.

Lactate Threshold Intervals

Improving your lactate threshold is vital for improving your time trial. Warm up and then do:

  • 6 minutes at zone 4 power (or zone 5a heart rate)
  • Pedal easy for three minutes.
  • Repeat 2 more times.
  • Rest 10 to 15 minutes spinning easy.
  • Do another set; as you get stronger, extend your work interval until the cumulative working time reaches the time of your target time trial. This goes from a relatively easy workout to quite a hard one if you are looking to smash a forty kilometer time trial.

VO2 Max Intervals

Maximal oxygen uptake (VO2Max) is a critical component of being a good time trialist. The more oxygen you can deliver to your muscles, the faster you can go. It is very difficult to do VO2 Max intervals (zone 5 power) for more than seven minutes and it is even harder to repeat them for that long, even at peak fitness. This workout allows your cardiorespiratory system to function at VO2 Max while your power fluctuates. You are essentially tricking your lungs to keep working at their peak while your legs get a slight respite.

This workout is much easier to do with a power meter. You can try with heart rate only and approximate the effort out of your legs while keeping an eye on your heart rate. Start out with short blocks of four minutes and work your way up to twelve or even fifteen minutes if you can handle it. During the block, you do:

  • 30 seconds at zone 4
  • 30 seconds at zone 5
  • Repeat that for the duration of the block. (Start with 4 minutes.)
  • Pedal easy after the block for the duration of the previous block.
  • Do two or three sets.
  • Note: Remember that if you are not hitting the target power for your individual training zones, you are not getting the full benefit of the interval. Go harder and hit the numbers and if you are not capable, stop and ride home easy. You are fatigued and attempting the intervals will just make you more tired and not faster.

Ready to Go!

Like any other discipline, practice is key; time trial training is no different. It requires a bit of specialization even though it might appear that it is much like training on a road bike. It also requires a bit of a different mindset because it is really only you against yourself. There are less external factors pushing you to success. With this good foundational knowledge, you are ready to go test yourself in a time trial or two.

Hygiene For Cyclists – Why It’s Important

May 1, 2016 by Adam Farabaugh

hygiene for cyclists

Chamois time it’s called; the time spent in your cycling shorts. Many riders joke that chamois time is training time regardless of if they’re actually riding  their bike. This can be time spent at a coffee shop mid-ride, or at home after a ride while you get something to eat and are too lazy to take a shower yet. This time spent in shorts that have already been ridden in is the worst hygiene for cyclists as it can lead to saddle sores and other issues, not to mention smelling like something the cat dragged in.

What Makes You Dirty While Riding?

When you ride, whether it’s hot or cold, dry or wet, you perspire, particularly in areas such as the armpits and crotch area. This is your body’s way of keeping cool which is good. It becomes bad however when that moisture is left close to the skin, particularly in shorts.

What Manifests When Staying in an Un-Hygienic State?

After a ride, or mid-ride even, bacteria can find their way into those moisture rich areas where they thrive. Your skin in a normal state keeps them on the surface where they can’t enter the body and cause any harm. The issue however with cyclists is that they can enter the surface of the skin at an abrasion, such as the point that you’ve been sitting on on a ride especially if you don’t have the most comfortable saddle or chamois. Clogged pores and hair follicles can also become infected.

Stinking As Well…

In addition to laying the foundation for saddle sores to develop, you also stink and generally feel nasty particularly after a hot day of riding. This again is because of the moisture on your skin but also the salt that stays on your skin even after you’ve stopped sweating giving you this “everything feels sticky and nasty” feel.

Hygiene For Cyclists – Steps to Take to Get Clean

There are a number of hygiene for cyclists steps to take to make sure you don’t stink for one, but more importantly, develop any saddle sores which can be a pain to deal with and treat, quite literally.

Get Out of Your Kit

The first and most important step is to get out of your kit whether at home after a ride or at a race or event. Your chamois is like a sponge and will hold moisture against your skin where bacteria can develop.

Shower/Clean Yourself

If you’re at home, shower right away after getting out of your kit. Have a drink or a bite to eat but do it on the way to the shower. Don’t sit down and have a meal before showering. If you’re at an event, bring a towel and extra water to shower off and wipe yourself down. Antibacterial wipes are also a good option which should be used to wipe down the crotch area as well. You’ll feel much better and cleaner after even if it’s cold out. It’s worth the minute or two of suffering for longer term cleanliness and comfort.

Put on Clean Clothes

After you’ve cleaned up, make sure you put on clean clothes. Don’t put on a dirty pair of underwear or socks as they also can hold bacteria that can manifest. Also, you just made the effort to clean up, don’t negate it.

Never Wear Shorts Twice Without Washing

This is a big no, no. Never, ever wear a pair of shorts a second time without first washing. Bacteria can manifest in the chamois particularly if it didn’t dry out all the way. Also, the shorts themselves will just be plain nasty, leaving you with a “not clean” feeling before you even start riding. Even if you only have one pair of shorts, wash them and dry them completely before wearing them again.

What Are Oval Chainrings? Should You Use Them?

April 26, 2016 by Josh Friedman

oval chainrings

Oval chainrings have been around since nearly the advent of chain driven bicycles. The concept is simple; the chainring is at a larger radius when you are at a stronger portion of your pedal stroke and at a lower radius at a weaker portion. But does it actually make a rider faster or more efficient? Or is this another gadget designed to separate you from your money?

Myriad of Claims with Oval Chainrings

The claims are myriad with oval chainrings: it’s easier to turn over a higher cadence, your lactic acid production will be lower, you will access your stronger pedaling muscles while resting your weaker muscles, your overall power will increase (7-10% according to Osymetrics!). If it sounds too good to be true, it usually is.

Notable Results on Oval Chainrings

There have been a few notable results on oval chainrings in the last few years. The two biggest results to date are Bradley Wiggins winning the Tour de France in 2012 and Chris Froome winning in 2013 and 2015. Both rode for Team Sky, a team that is known for its search for marginal gains. Since that Tour victory, Wiggins has switched back to round chainrings. The truth is that people have won all sorts of races on all sorts of equipment with dubious benefits. There is a psychological edge if someone believes in the equipment they are on. If a rider believes that oval chainrings give a boost in performance, they may ride with a bit more confidence in their abilities. People have lucky socks. Why not have lucky chainrings too?

“These are people that are racing for their income. Teams would be clamoring for them because they need to get the best results possible for their programs to continue.”

An argument from some proponents of oval chainrings is that it is much easier to manufacture round chainrings and that is why we don’t see more oval chainrings on bikes. This isn’t the case anymore, though. Oval chainrings are readily available. If the benefits are what they claim to be, we would see many more professionals on oval chainrings. These are people that are racing for their income. Teams would be clamoring for them because they need to get the best results possible for their programs to continue. This is not the case; a few riders are riding oval chainrings because they feel that it’s what’s best for them. There is plenty of off-label equipment in the peloton but there are not a lot of oval chainrings out there.

Research on Oval Chainrings

There have been few peer reviewed research studies on oval chainrings. The Journal of Sports Science and Medicine published an article in May 2014 with the results of a test on twelve elite male cyclists. They tested for blood lactate, power output, and oxygen consumption with no discernible differences. The oval chainrings did not produce a scientifically significant enough difference over the round chainrings in a maximal sprint test to put the results outside the margin of error. Another claim is that oval chainrings allow for a lower metabolic cost than round chainrings which the study also found not to be true.

Another peer reviewed study from December 2010 tested cyclists in a 10 kilometer time trial. This study also found similar power output and rate of perceived exertion between round and oval chainrings. It also found that heart rate was statistically significantly higher with the oval chainring versus the round chainring which is contrary to the claimed benefits of oval chainrings.

Additional Research

This January 2004 test also did not find conclusive benefits to oval chainrings. They measured ventilation, oxygen uptake, carbon dioxide output, respiratory exchange ratio, and heart rate with no statistically significant differences between round and oval chainrings.

Installing Oval Chainrings On A Bike

The first hurdle to trying out oval chainrings is to get them working properly on a bike. Every front derailleur on the market is optimized to work with round chainrings. Some oval chainring manufacturers provide shims to move the front derailleur rearward to match the derailleur cage with the curve of the chainring. It will help with shifting but the chainrings themselves are optimized for their bio-mechanical claims, not shifting performance. Furthermore, there should also be a chain catcher on the front derailleur to keep the chain from dropping off the inside.

Shifting Performance Compromised

Thinking about your shifting performance in the heat of a critical moment is not ideal. Will the chain flawlessly go up to the big ring right at the crest of the hill? Will the chain fall off to the inside just as the big climb starts? Couple that with the cost of an oval chainring being on par with the best shifting round chainrings and the benefits become negligible. Nobody ever blamed losing a race on chainring shape but they certainly have on poor shifting performance.

Power Data Discrepancies

A lot of riders have a lot of data from their crank-based power meters. Oval chainrings change the angular velocity of the crankarms, thus changing the power transmitted to the strain gauges, yielding different power numbers than if the same person was pedaling round chainrings. All of that accumulated data (which is very useful for long-term training) is rendered useless. It’s almost as if the data is from two different people; one on round chainrings, one on oval chainrings.

The Take Away

Oval chainrings are a divisive subject. Supporters point to physics to support their claims of greater power through lower effort. Peer reviewed experiments show the opposite and that the benefits are negligible at best. There is no question that the mechanical operation of the bike will suffer. A finely tuned bicycle with round chainrings will always shift better than the same bicycle with oval chainrings. Switching round for oval chainrings will also make years of power data useless for comparison. But if it gives a rider a mental edge, it all may be worth it.

How To Fix Back Pain Cycling

April 18, 2016 by Wade Shaddy

 You’re 40 miles into a century — maybe less — when you begin to feel back pain cycling. Not exactly hell on wheels yet — more like a cramp. You’ve addressed it before. You try to ignore it but you know it could be the beginning of a long haul home. So what’s the problem? Why does it keep coming back?
back pain cycling

Upper Back

Part of the issue with an accurate back pain diagnosis is because there are different positions or locations in your back that can cause you back pain cycling; the lower back and the upper back, and both require different approaches. People with upper back conditions often feel more comfortable in the forward-leaning position and leaning lower on the handlebars. Lumbar spinal stenosis is the condition in which most people feel better in a forward leaning position.

Lower Back

Cyclists with a low back condition feel better in a reclining position. Lumbar degenerative disc disease is a condition in which less pressure is placed on the lower back such as in a position found on a recumbent bike.

Causes of Low Back Pain Cycling

Some common denominators can come into play that can cause back pain cycling.

  • Back posture on the bicycle can strain the lower back, a result of the lumbar spine flexing or pulling up.
  • Position on the bike, with an arching back, can strain the back, especially when the bicycle is equipped with aero bars.
  • Rough roads can increase jarring and compression to the spine which can lead to low back pain.
  • Tight hamstrings can pull on and rotate the hips which thus pulls on the lower back and can cause pain.
  • Tight hipflexors can also cause mis-hip alignment which can also pull abnormally on the back.

Upper Back Pain Cycling

Causes of upper back pain are often caused by the position of the handlebars along with other activities outside of cycling.

  • Handlebars that are too far forward can cause excessive reaching constantly placing pressure on the upper back into the neck.
  • An overly aggressive position will bring your upper body down forcing you to rotate your head up more in order to see where you’re going. This can then place undo stress on your upper back and neck.
  • Sitting at a desk all day, particularly with poor posture, can cause tightness in the upper back, neck, and shoulders which can translate into pain on the bike as well if not properly stretched and fixed.

Exams and Diagnosis

When assessing back pain cycling, a broad range of possible physiological culprits should be considered. The physician or even sports therapist assessing the cyclist with back pain cycling will likely perform an exam that correlates with a common diagnosis of:
  • Bursitis — due to repetitive pedaling
  • Degenerative arthritis — particularly in older cyclists
  •  Hyperextension of the neck — causes nerve irritation
  • Previous injury to the neck or spine
  • Tightness in other muscle groups which pull on the back.

Poor Bike Fit

Many cyclists suffer from one or more of the above issues but of all of the possible causes poor bike fit is at the top of the list. If it’s not the single biggest culprit, it could be exacerbating the underlying diagnosis.

Trained Experts

Though most cyclists can continue to train and compete through back pain cycling, the pain reduces power on the bike and overall enjoyment riding. A proper bike fit can help prevent and diagnos back pain cycling. A bike fit should be performed by nothing less than a trained expert particularly if you’re already having issues.

Bike Fit Checkup

A bike fit checkup will point out problems in the following categories:
  • Overall size of the bike frame and cockpit
  • Saddle height and position
  • Saddle width and pressure points
  • Width of handlebars
  • Head tube height

Cockpit Size

Some cyclists may resist losing aerodynamic advantage in favor of low back comfort…..but shortening the cockpit can alleviate many causes of back pain cycling and avoid excessive forward bend that can result in disc and spine issues.

Saddle Too High

A saddle that is too high will pull the pelvis backwards which puts tension across the lower back muscles as the hamstrings become tight and pull down on the back. The high saddle also rocks the hips at the bottom of the pedal stroke, increasing strain in the lower back muscles and ligaments.

Saddle Too Low

When your foot goes up over the top of the stroke, the knee comes up too high. The lower back is pushed backwards, first by one leg, then the other. If this is the case, look for a stiff angle on the knee which should have a relatively smoother transition from your torso to your leg at the top of your pedal stroke.

Core Strength

The muscles in your lower back back serve as a platform for powering the bicycle. If your core is weak, it creates a defective link in the chain from the shoulders to the pelvis. Overuse injuries often occur due to a lack of core strength.

What the Pros Say

Lower back pain causes the highest rate of impairment and medical attention for professional cyclists. Avoid or lessen back pain by doing what some of the pros recommend:

On The Bike Solutions

  • Stand up on the bike: Arch your back — it just feels good. Do it as often as you like to help alleviate a stiff, hurting back.
  • Stretch: Stretches keep your hamstrings and spine flexible. If you feel that you’re in trouble on the bike at any mileage, repeat the stretching exercises.
    • Stretch the hamstrings and along with the back by keeping your legs straight and even on the ground, and slowly reaching toward your toes. Arching your back slightly can help stretch it as well.
    • Stretch the quads and hip-flexors by gently pulling your ankle back toward your butt while balancing on your other leg. Try and keep the hips rotated back (try and push your tailbone toward the ground).
    • With your hands over your head, lean to the right and then left creating a sort of “C” with your body. Keep your feet shoulder width apart.
    • For the upper back, hugging your shoulders and arching your back forward can help stretch that area.
    • In addition, you can pull your head down gently forward which will stretch the neck into the upper back.
    • Also, alternate reaching each arm straight up over your head and arching to the opposite side stretching the side of your torso and back.
    • Performing the “Eagle Arms” stretch is also very beneficial for alleviating tension in the upper back and shoulders.
  • Get out of the drops: Ride with your hands on the hoods or even side by side with the stem. (If you’re not behind another cyclists’s wheel.) This helps to relive pressure on your spine. Move your hands around and find the sweet spot, cruise that way for awhile.
  • Ride with good posture:  Make a conscious effort to ensure your back is upright and in a neutral position at all times. Try to keep from swaying side to side. This typically indicates that your body is tired and you may end up with poor posture that strains your lower back.

Off Bike Help For Back Pain Cycling

  • Core strengthening exercises: Core muscles work together to stabilize and protect your spine. Core exercises help muscles in your pelvis, lower back and hips to work together to alleviate back pain cycling. They will also help you maintain good posture on and off the bike.
  • Strength training exercises: Target your major muscle groups such as squats, lunges, and pushups for all-around strength training. This helps you to avoid muscle fatigue, poor posture, and helps to increase your bone density
  • Warm-up and cool-down: Start slow and warm muscles up before your ride. Shoot for at least 10 minutes for both the warm-up and cool down. An extra ten minutes on either end helps to prevent strains or tears and helps to increase circulation.
  • Get a professional bike fit: Lots of cycle shops offer bike fittings. Make sure you’re working with a certified bike fitter that understands your experience level and that your bike fits your body and addresses any issues specific to you such as leg length discrepancies or other issues.

Why You’re A Better Climbing Cyclist — Or Not

April 14, 2016 by Wade Shaddy

 climbing cyclist
Climbing on a bicycle isn’t supposed to be easy. But why do some cyclists barely break a sweat while others puke their guts out? Why you’re a better climbing cyclist – or not, takes a look at some common issues with the typical climbing cyclist that can make a difference in your ascent.

Pacing is Everything

Pacing makes all the difference for the climbing cyclist. Attacking a hill doesn’t work. Sure you’re fresh at the bottom of the hill, your heart rate is down, and your legs are free of lactic acid. But when you push past a certain point and you still have gravity to overcome, you slow to a crawl, recovery is impossible and staying on the bike is your only objective. Other riders begin to pass you. Failure to pace yourself is probably the biggest reason why other cyclists of your caliber are better climbers than you are.

Genetics and Training

Don’t beat yourself up too much if you struggle on hills. Some of the prominent climbing cyclists — probably the majority of them — are gifted by genetics. Hill climbers tend to be shorter, lighter, and show the highest maximum load with the lowest oxygen consumption. But this doesn’t mean you can’t train yourself to climb hills better or just as efficiently as your shorter, smaller, lighter brothers and sisters.

Power to Weight Ratio

Power to weight ratio is the power required to overcome the gradient at your given weight — while still moving at a reasonable rate. If you weigh less, you have less mass to haul up the hill and therefore require less power to maintain your speed. It might not seem like there is much of a difference in weight between you and some of your fellow climbers. But if you have to push a few extra pounds uphill every time you climb, it can make a significant difference to your fatigue levels by the time you reach the final pull to the top. This is why the best climbers in the world are light and are able to maintain a consistently higher power output relative to their weight.

Frame Size

Smaller frames have a climbing advantage; they’re lighter for one thing. And shorter wheelbases provide better leverage when climbing hills. This is due in part to the ability to get your torso forward on the bike while keeping your body weight above the pedals. The compact design of shorter frames also has a mechanical advantage by keeping the drive-train shorter, and moving power to the back wheel more efficiently. You can gain something on hills — more so on mountain bikes — by using a smaller frame bike. Albeit smaller frames on road bikes can make you less efficient on flat ground.

Gearing Options

A wider range of gearing choices allows a good climbing cyclist to use lower gears to climb more efficiently. For road bikes, if you’re pushing a standard double chainring in front, you’re at a disadvantage to your friends riding a compact double, which has lower gears. Introduce the triple chainring into the equation and you have a road bike that can almost rival a mountain bike on hills. Is it worth it? If your rides are consistently hilly, the triple chainring can help you be the climber you want to be.

Mountain Bike Training

If you’re dead serious about becoming a better climber, take a few tips from mountain bikers. The contemporary mountain bike can climb almost anything. Riding one can help you gain skills that road bikes don’t offer. Add one to your stable, take it out on the trails regularly and the skills and abilities can transfer to your road bike climbing abilities. Additionally, descending on a mountain bike also gives you insight into descending on a road bike.

A Few Tips to Be a Better Climber

  • Anticipate: Keep an eye on the hill as you approach it. Pace yourself accordingly. Don’t attack the hill, at least from the bottom. Attacking over the top is the better solution if you must attack at some point.
  • Momentum: Carry momentum from your approach. Drop down through gears quickly and smoothly one at a time while maintaining momentum.
  • Don’t Stand Up: Staying in the saddle keeps your heart rate down. Standing up can cause you to blow up as it puts more load on your legs resulting in an increased need in oxygen to be delivered. The exception is if you’re a lighter rider and practice it. This article gets into the science of standing versus sitting while climbing.
  • Save Your Lowest Gear: Drop into your lowest gear only when you’ve slowed to about 5 mph.
  • Distraction: Keep mashing the pedals. Sometimes climbing a hill is as much a mental battle as a physical one. Try to distract yourself from the pain. Pat yourself on the back when you get to the top. You own this hill.

The Climbing Cyclist

All climbing cyclists get defeated by hills at some point, climbing hills is hard work. Sometimes it’s just too steep or too long. Sometimes you have a bad shift and lose your momentum. Don’t get defeated or demoralized. There’s always tomorrow.  The hill isn’t going anywhere.

Why do I Get Dizzy While Cycling — Something to Worry About?

April 11, 2016 by Wade Shaddy

 dizzy while cycling
An old cycling adage states to “keep riding until you see black spots — and then keep riding until they go away”. Were the early Tour de France riders tougher than today’s contemporary cyclist? Not really. But is lightheadeness something to be concerned about when cycling? The fact is, almost everyone gets dizzy while cycling at some point. You get dizzy when you stand up too fast or when an unexpected spin of the head happens. There are a few common denominators that make you dizzy while cycling.

Dizzy While Cycling

You probably don’t have a brain tumor if you get dizzy while cycling.  Just because you get dizzy doesn’t mean there is a major problem. But dizziness is not something to discredit either– especially if it’s chronic, debilitating, or that it feels like you can’t remain on the bike. If this is the case, get an appointment with a doctor as soon as possible. You might have a condition known as vertigo which is often triggered by a simple change in the position of your head.

Hard to Diagnose

If you choose to get a checkup be patient. The cause of dizziness while cycling is inherently hard to diagnose, even under a doctors care, because dizziness can be the result of a plethora of conditions requiring extensive, expensive testing. The doctors will likely look at the the most common causes of dizziness which includes dehydration, low blood sugar levels, overexertion, inner ear issues, or medications.

Dehydration is Common

Dizziness may just be a sign that you’re dehydrated so make sure you drink before and throughout your ride to replace any fluids you sweat out. The mechanics of why dehydration (or anything else for that matter) causes you to become dizzy while cycling are best left explained by a medical professional and some will simply diagnose it as heat exhaustion.

Over-Doing It

It could also be that you’ve taxed your system. Intense use of big muscles that are not accustomed to what you are making them do with a cardiovascular system that isn’t quite up to the task yet results in an increased stress not only on your muscles but also the brain as it too needs oxygen delivered and carbon dioxide cleared. It’s great to push yourself a little but it’s not wise to go so hard that your head spins. Try easing off a bit as you feel the dizziness begin to initiate to see if that solves the problem.

Asthma Under Exertion

One of the primary diagnosis of dizziness under a load is exercised-induced asthma. Exercised-induced asthma is a narrowing of the airways in the lungs triggered by strenuous exercise. This one can and should be diagnosed and dealt with by a doctor.

Low Blood Sugar (Hypoglycemia)

Another cause of that dizzy while cycling feeling might be hypoglycemia; a condition where blood glucose (sugar) levels are too low. Hypoglycemia occurs when your body’s blood sugar is used up too quickly, when glucose is released into the blood stream too slowly, or when too much insulin is released into the bloodstream. Hypoglycemia is a common occurrence in people who have diabetes; however, it can happen to non-diabetics as well if not enough fuel (food) is consumed prior to exertion or exercise.

Fuel Up

Prior to cycling, eat either a small meal or a hearty snack containing lean protein, a small amount of healthy fat, and complex carbohydrates to help prevent hypoglycemia. Avoid instant sugars. It is important to treat hypoglycemia immediately by consuming food high in carbohydrates/sugar such as orange juice or bread.

Out of the Saddle

If you are prone to light headedness or dizziness when you stand on the pedals, then take a few deep breaths before you get out of the saddle.

Ear and Medication Issues

You might be dizzy due to an inner ear infection or imbalance, prescribed medications like sedatives, tranquilizers, anti-seizure drugs, or blood pressure stabilizers. Check this one out with your doctor and make adjustments if needed.

Oxygen and Carbon Dioxide

Getting dizzy while cycling could be because your body’s demand for oxygen and the disposal of carbon dioxide has exceeded your capacity. Once you exceed peak capacity, oxygen levels drop and CO2 levels increase which results in light headedness. The lack of oxygen to the brain theory is questionable though because the brain is typically the last organ to get cut off from oxygen and in theory anyway, you typically notice other symptoms before dizziness begins to occur.

Anemia and Iron

If you feel that your dizziness is somehow related to oxygen it could be that you’re suffering from iron-deficient anemia. It’s a condition where your red blood cells have less hemoglobin than normal. Hemoglobin is an iron-rich protein in red blood cells that helps the cells carry oxygen from the lungs to the rest of the body.

Low Potassium

Dizziness can also be a sign of low potassium. If your potassium levels are too low, you need to see a doctor for a blood test — because the same dizzy symptoms can happen if your potassium levels are too high. This typically happens when or if you’re taking a potassium supplement. Additionally, you could be getting enough potassium but your body is depleting it faster than it can absorb it.

Don’t Take Anything For Granted

The reliability of online diagnoses for getting dizzy while cycling is right up there with the accuracy of astrological predictions. If you have any concerns about dizziness while cycling, get a checkup by a health professional. Simple blood tests can reveal or rule out dizziness problems in most cases.

Sun Protection Cycling – The Truth About Sunscreen

April 3, 2016 by Wade Shaddy

 skin protection cycling
Summer is coming fast. There’s nothing like the hot summer sun, baking your skin as you glide down a remote stretch of blacktop. But are you really ready for it? Sun protection cycling; the truth about sunscreen faces some cold, hard facts about skin damage. Forward-thinking cyclists should react appropriately.

Statistics Prove It

Current estimates are that one in five Americans will develop skin cancer in their lifetime. It’s estimated that more than 8,500 people in the U.S. are diagnosed with skin cancer every day. Skin cancer in Australia is nearly four times higher than the United States, Canada, and the United Kingdom. In Australia for example, 434,000 people are treated for non-melanoma skin cancers each year, of which 420 will die. The melanoma figures are worse, with 10,300 treated and 1,430 dying each year. To put it bluntly, skin cancer is far more dangerous to your health than cycling.

 Cold Hard Facts

  • Caucasians and men older than 50 have a higher risk of developing melanoma than the general population
  • Melanoma is the most common form of cancer for young adults 25-29 years old and the second most common form of cancer for adolescents and young adults 15-29 years old
  • Melanoma is increasing faster in females 15-29 years old than in males of the same age group
  • Invasive melanoma is projected to be the fifth most common cancer for men (46,870 cases) and the seventh most common cancer for women (29,510 cases) in 2016.
  • Basal cell and squamous cell carcinomas, the two most common forms of skin cancer, are highly curable if detected early and treated properly
  • Approximately 75 percent of skin cancer deaths are from melanoma. On average, one American dies from melanoma every hour.

Sun Protection Cycling – The Truth About Sunscreen

Now that you’re scared to death, you don’t have to succumb to it. Take protective measures. Fortunately, experienced cyclists can learn a host of methods to help avoid the threat of skin cancer. Scott B. Phillips, MD, in the Department of Dermatology at St. Elizabeth’s Hospital in Chicago, IL, has studied skin damage faced by endurance athletes. Dr. Phillips provides some key strategies for anyone who exercises in the sun.
“Train early and/or late in the day, even if it means breaking workouts into two sessions.” Says Dr. Phillips. “From 10:00 a.m. to 4:00 p.m., try to stay out of the sun. Do the bulk of your exercise before and after work, and sometimes during lunch hour”, says Dr. Phillips. “But if you’re out for hours on weekends, perhaps on a five- or six-hour bike ride, always use sun protection.”

The Basics

Dr. Phillips has these basic tips for avoiding skin damage and cancer.
  • During training, cover as much skin as possible, wearing sweatpants or at least long shorts, and a long-sleeved shirt or sweatshirt. Wear socks to soak up sweat and absorb impact as well as block the sun; wear them as high up on your leg as possible. And shield your eyes with UV-blocking sunglasses.  And always wear a helmet when biking, for both sun protection and crash protection.
  • Use an SPF 15 or higher sunscreen on all exposed skin, up to 6:30 p.m. or later on a summer’s day, even when it is cloudy. (The sun’s harmful ultraviolet rays go through clouds.) “I recommend alcohol-based sunscreens for the face, because they’re more resistant to sweating,” says Dr. Phillips. “I also like to apply stick sunscreens around the eyes, since they are almost impervious to sweating.”

What to Look For

Okay, so you’re older and may have already damaged your skin. The American Academy of Dermatology encourages everyone to perform skin self-exams to check for signs of skin cancer and to get a skin exam from a doctor. A dermatologist can make individual recommendations as to how often a person needs these exams based on risk factors including skin type, history of sun exposure, and family history. Here’s what to look for:

  • The most common warning sign of skin cancer is a change on the skin, especially a new growth or a sore that doesn’t heal. The cancer may start as a small, smooth, shiny, pale or waxy lump. It also may appear as a firm red lump. Sometimes, the lump bleeds or develops a crust.
  • Both basal and squamous cell cancers are found mainly on areas of the skin that are exposed to the sun — the head, face, neck, hands, and arms. But skin cancer can occur anywhere.
  • An early warning sign of skin cancer is the development of an actinic keratosis, a precancerous skin lesion caused by chronic sun exposure. These lesions are typically pink or red in color and rough or scaly to the touch. They occur on sun-exposed areas of the skin such as the face, scalp, ears, backs of hands, or forearms.
  • Actinic keratoses may start as small, red flat spots but grow larger and become scaly or thick if untreated. Sometimes they’re easier to feel than to see. There may be multiple lesions next to each other.

Ultraviolet Protection Factor

UPF or “ultraviolet protection factor” is the rating system used for apparel. It indicates how effectively fabrics shield skin from ultraviolet rays or UV. The higher the UPF number, the greater degree of UV protection a garment offers. UPF gauges a fabric’s effectiveness against ultraviolet radiation from the sun, or UV light. The UPF rating on clothing indicates what fraction of the sun’s ultraviolet rays can penetrate the fabric. A jersey with a UPF of 50, for example, allows just 1/50th of the sun’s UV radiation to reach the skin.

Sun Protection Factor

SPF or “sun protection factor”, is the rating system used for sunscreen. An SPF number pertains to a sunscreen’s effectiveness against the sunburn-causing segment of ultraviolet radiation or sunlight. Theoretically, the SPF number indicates how long you can stay in the sun before your skin reddens.

Do You Need UPF Rated Jerseys?

“You might get fine UV protection from a regular piece of clothing,” says Dr. Martin A. Weinstock, professor of Dermatology and Community Health at Brown University Medical School and the chairman of the Skin Cancer Advisory Group of the American Cancer Society. “But with UPF-rated clothing, you’re assuring that protection.”

Dr. Doug Grossman from Huntsman Cancer Institute puts it this way: ”  I tell patients that if they can hold the material up to the light in the room and still see through that, the pattern of the light bulbs for instance, then too much is getting through. Most clothing would be sufficient, but you want something appropriate for the activity you’re doing. So if you’re going to be biking, then a biking jersey.” His advice for adding sunscreen to your body as well as clothing is as follows: “The idea is to protect as much skin as you can with clothing and be comfortable and that minimizes the areas that you then need to apply sunscreen too.”

Don’t Let it Keep You From Riding

The benefits gained from cycling outweigh the chances that you’ll wind up with skin cancer. Don’t let it keep you off your bike. With sun protection cycling products it’s easy to get out there and enjoy yourself. It’s not a reason to avoid riding.

Sun Protection Cycling Products You Should Be Wearing Everyday You Ride

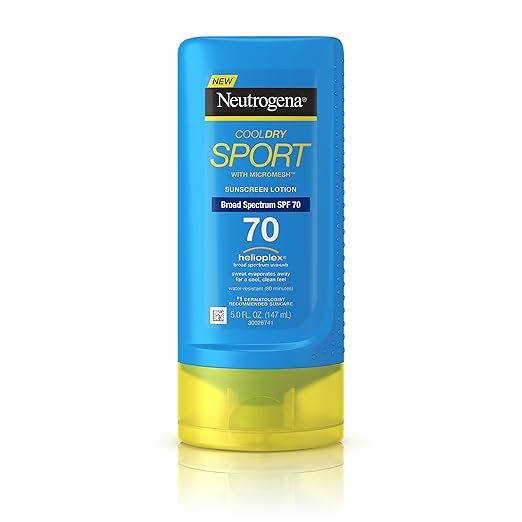
Neutrogena SPF 70 CoolDry Sport Sunscreen Lotion

Neutrogena SPF 70 CoolDry Sport Sunscreen Lotion, 5 Fluid Ounce
A high SPF and sweat specific sunscreen is your best sun protection cycling option. You can find sunscreens such as this at your local pharmacy and grocery stores even.

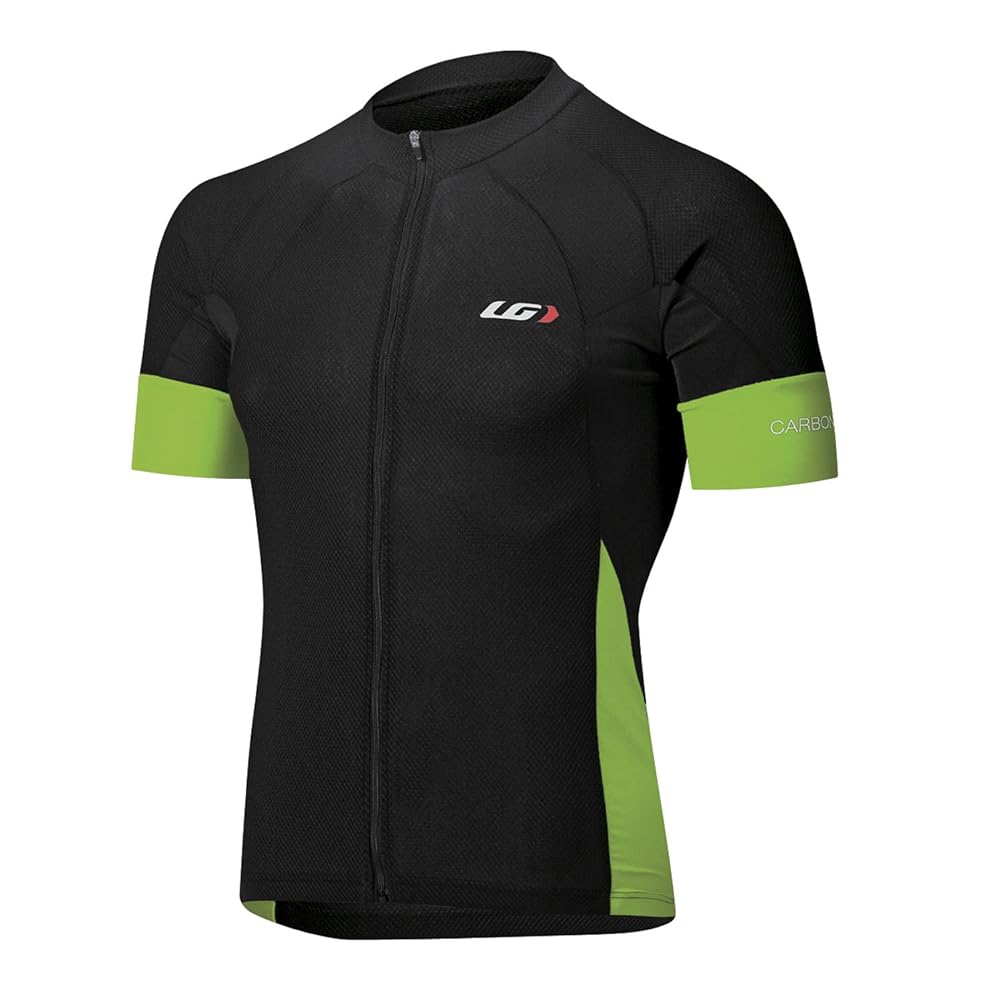
Louis Garneau Men’s Carbon Cycling Jersey

Louis Garneau Carbon Jersey - Men's Black / Green XL
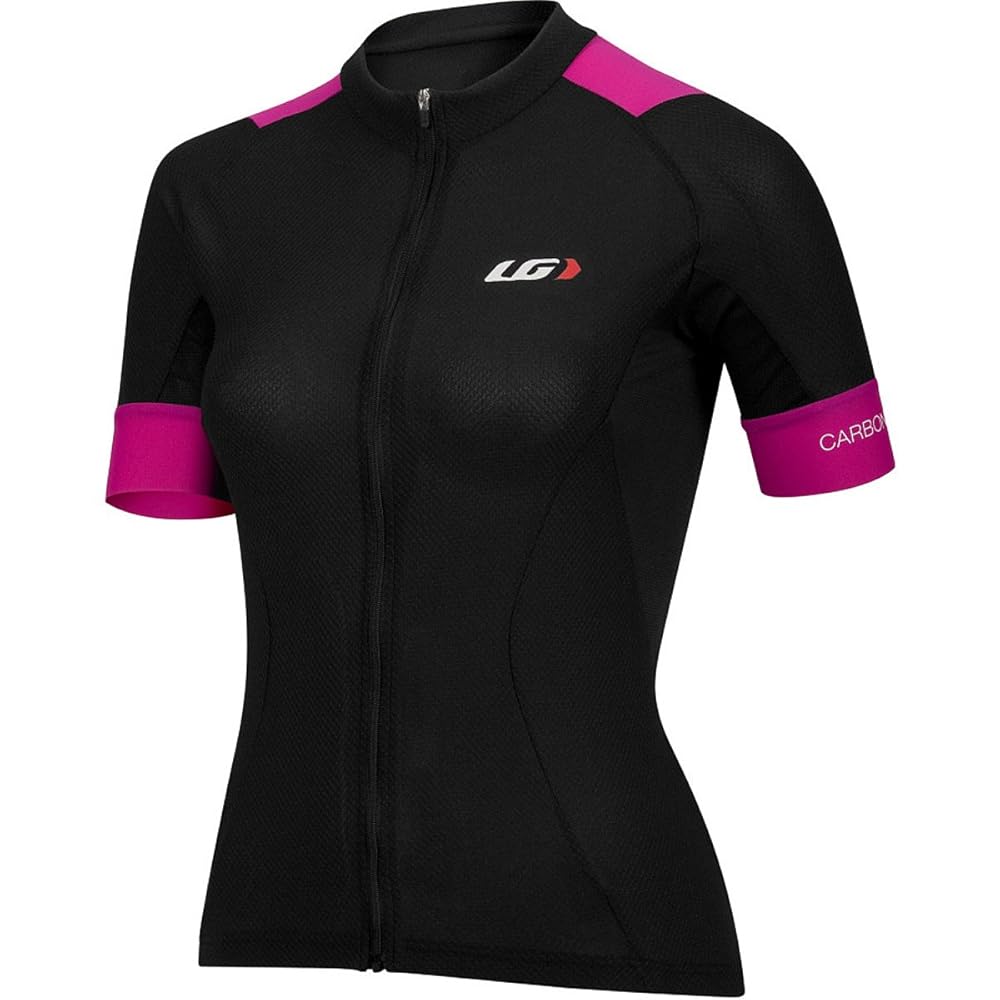
A cycling jersey that has a UPF/SPF rating is ideal for riding in the sun. You can find a variety of jersey that have it such as this one. This jersey also has a Coldblack Finish that makes darker colored material absorb as much heat as a white colored material. A good option to help keep cool.

Louis Garneau Carbon Jersey – Women’s

Louis Garneau Carbon Jersey - Women's Black / Purple Medium
The same jersey as above but women’s specific. All the same UPF/SPF features.

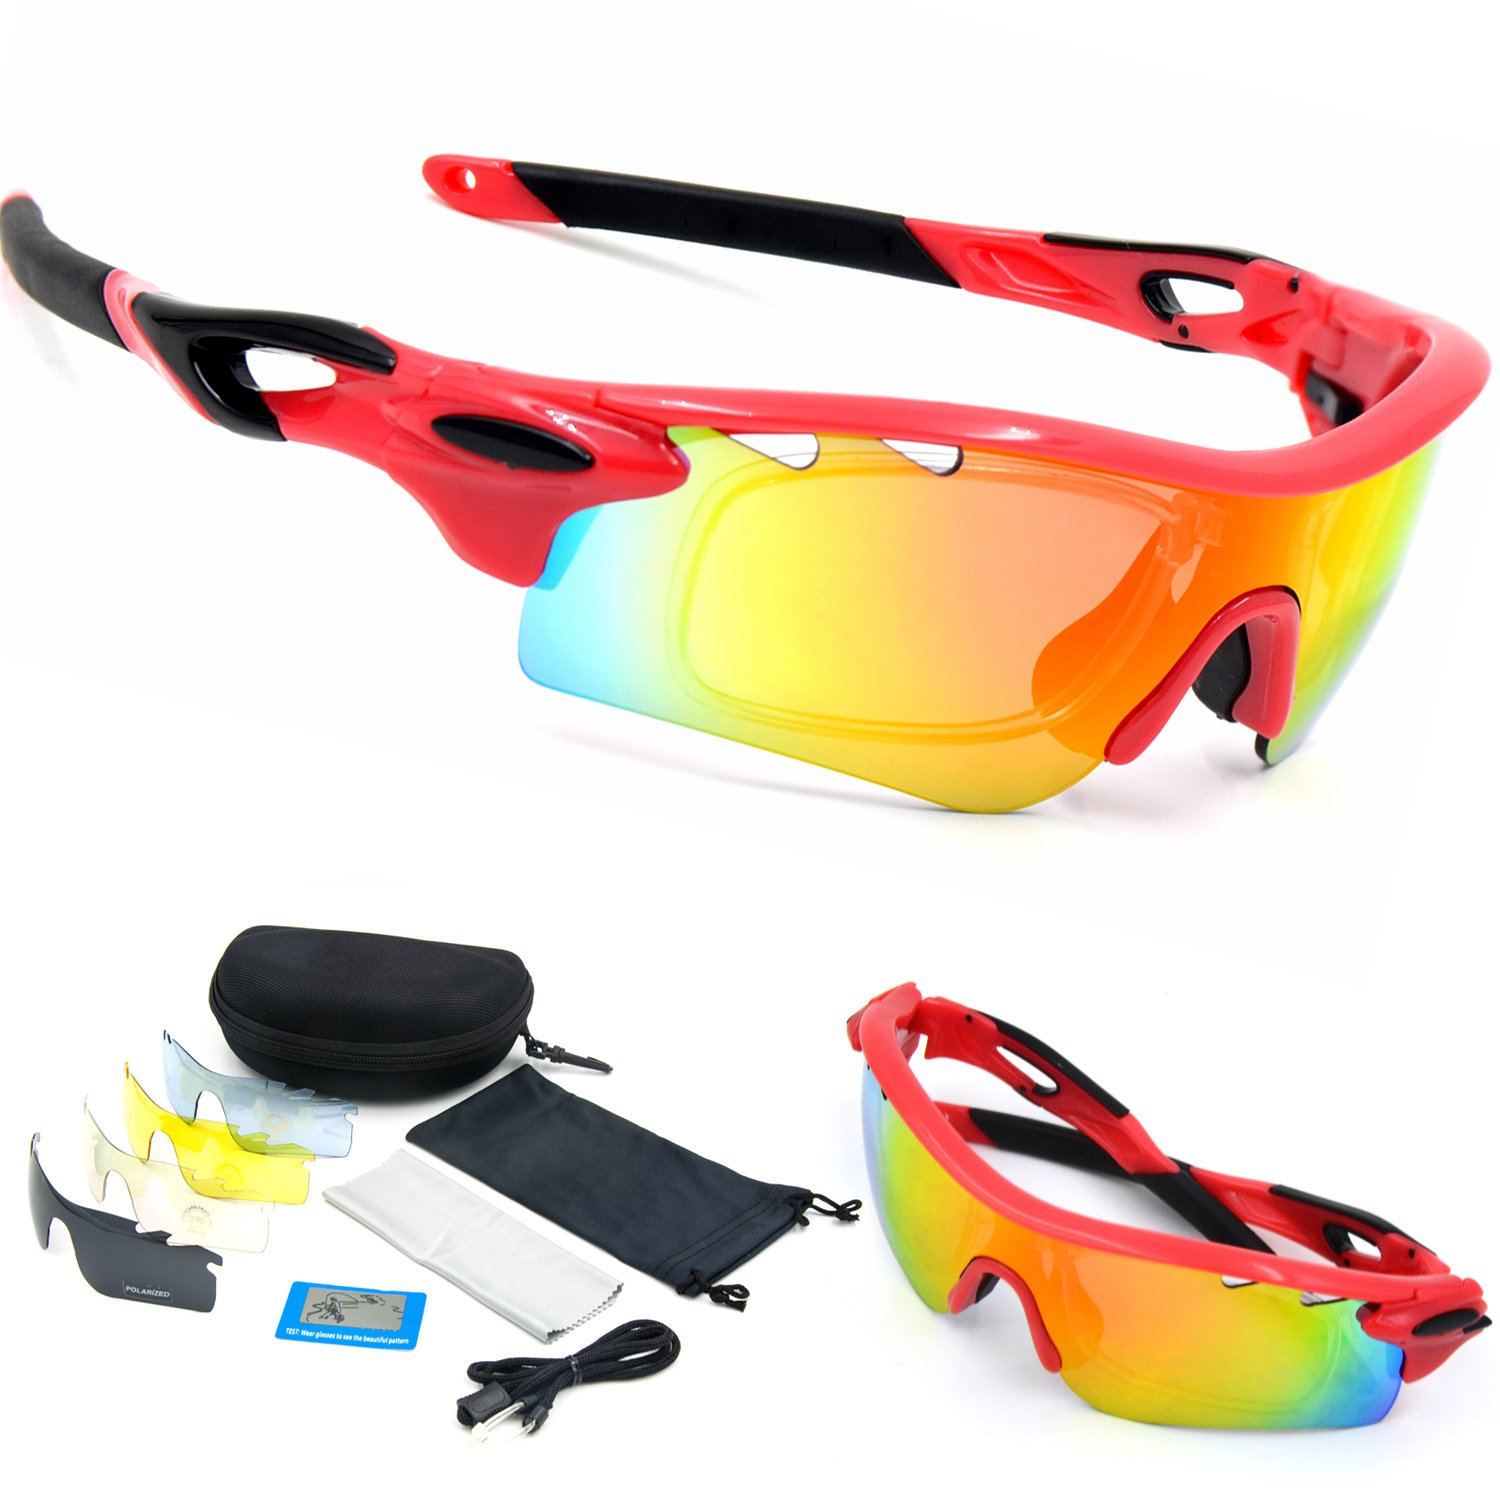
Aupek Polarized UV Protection Glasses

Of course the high-end sunglasses such as Oakley provide great sun protection but the same can be had with much cheaper versions. A shatter resistant pair is also a valuable option for cycling.

The Benefits Of Having A Cycling Training Plan

March 24, 2016 by Wade Shaddy

cycling training plan
Cycling training plans are not rocket science but if you have goals in mind, they are vital to the success of achieving them. Starting out without a defined program is like driving in a foreign country without a map — you’ll get somewhere but your location may not be anywhere you wanted to be. Without a defined cycling training plan, your fitness may not lead you to your end goal.

The Benefits of Having a Cycling Training Plan

The month of May is National Bike Month. By this time of the year you have probably seen or received various invitations to any number of gran fondo’s, benefit century rides, metric centuries, races or recreational group rides. Why not do one of them? You might not think that you’re ready for it but you are capable of much more than you think. All it requires is a plan. The benefits of having a cycling training plan are undeniable. It will make you fit and give you an incredible sense of self worth. Get involved. It could be a way to change your life.

Measure It to Improve It

Cycling training plans do one thing in particular — they allow you to measure your fitness. Once you sign up for a cycling training plan you will see your body, mind, and outlook improve over the next few days, weeks, and months. You will contentiously break your own personal records and the records of your friends, as you monitor your own fitness.

Mental to Physical

The benefits of a cycling training plan are almost as much psychological as they are physiological — and your mental outlook will change. Once you begin to see yourself gaining power, endurance, and confidence, you will want more as your cycling training plan progresses. Breath control becomes natural, finding the zone or “flow” becomes automatic, and you reap rewards benefiting every aspect of your life.

Knowledge is Power

Knowledge is power and a personal cycling training program will show you the way. You’ll learn about yourself and how your body is responding to your cycling training plan. You will advance your own capabilities allowing you to make better decisions regarding your health and you will continue evolving your level of fitness. Once you embark on a cycling training plan, a new way of life is in your future.

Make a Change in Your Life

Establishing a cycling training plan eliminates the danger of becoming complacent or falling into the destructive “I will do it tomorrow” thought pattern. It makes you accountable as you follow the plan. It motivates you to change your habits and manage your time more efficiently to finish your first century ride or sign your name to that first gran fondo event.

Fitness and Weight Loss

A good cycling training plan helps you to keep track of less-obvious issues of fitness such as sleep and recovery, nutrition and hydration. You’re more likely to meet your fitness and weight loss goals if you’re well rested, well hydrated, and properly nourished. A detailed cycling training plan helps you keep track of these small details and makes you more conscious of them on a day-to-day basis.

Not Just Any Program

Don’t accept any old workout plan you found in a book or magazine. Stick to a cycling training plan crafted by cyclists for cyclists. Once you start putting the plan into practice, you will understand how simple, achievable steps laid out in front of you helps motivate your success.

A Blueprint for Success

A good cycling training plan breaks down your established goals of fitness, century riding, or gran fondo participation into smaller, achievable short-term goals — it’s a blueprint for success. With every goal achieved, you pass a turning point on the way toward long term goals. Looking back at how much you’ve progressed through the stages of your plan, you will see a visual record of your progress and positive reinforcement in moments of doubt. More importantly, having a cycling training plan means that you never lose track of what you’re next step is. Staying on track is a simple implementation of the instructions in the plan.

Make it Happen

Lack of time is the most common excuse for skipping a detailed cycling training program. But do you have time later in life for multiple doctors appointments? Will you make the time and enough money for medication every day to treat high cholesterol, high blood pressure, or diabetes? In the light of advancing your health into the future, you will make the time when engaged in a cycling training plan — and there’s really plenty of time when you become accountable for it. Time management skills are one of the hidden benefits of having a cycling training plan.

Time Management

The best way to make time for cycling is to sign up for a cycling training plan. Go over the plan and figure out the best times for cycling in your schedule and enter it into your computer or phone calendar on a repeating schedule. It shows up daily and there’s less chance of scheduling something during that time. Check your schedule in the morning, form a mental picture of when and how you’ll be cycling that day, and it will quickly become routine and will help keep you motivated.

Schedule an Event

With tons of planned century rides, gran fondos, group rides, benefit and charity rides already out there, pick one, sign your name to it and pay the entry fee if applicable. Nothing motivates you like an upcoming ride. These types of rides are planned months or even years ahead of time and you’ll have plenty of opportunity to initiate your cycling training plan ahead of time. Just do it.

Life is a Challenge

A cycling training plan might not be the easiest thing you’ve ever done in your life and there will be challenges — but what is life if not a series of ongoing challenges. The benefits of having a cycling training plan far outweigh the challenges that you will face and once you beat them, you’ll realize they were nothing to be concerned about.

Be Safe Out There

Cycling strengthens your bones and muscles, helps you control your weight, and reduces the risk of heart disease and diabetes, among other things. It builds confidence and self-worth. The benefits of having a cycling training plan are good health and fitness. But if it’s been awhile since you’ve been on a bike and you’re over about 35 years in age or you have health concerns at any age, it’s a good idea to talk to your doctor before starting a cycling training plan.


Top 10 Biking Mistakes a New Cyclist Makes

March 19, 2016 by Wade Shaddy

biking mistakes1

All cyclists make mistakes, even the pros. It’s nothing to be embarrassed about and learning from the mistakes is part of cycling. Most of the top ten biking mistakes are simple and easy to remedy. Here’s a rundown of the most common.

Biking Mistakes

The good thing about common biking mistakes is that they can be addressed with little effort and require nothing more than a few tools and a bit of thought.

#1: Seat Too Low

You have probably seen this in action many times; riders with folded legs pumping up and down, furiously uncomfortable. It’s difficult to even watch it. Riding with folded, cramped legs is not only uncomfortable, you never develop power speed or anything that resembles efficiency.

Solution:

Raise your seat until you have only a slight bend in your knee while your foot is at the bottom of your peddle stroke. This article gives a detailed run-down of how to determine your proper seat height.

#2: Cross-Chaining

It’s one thing to use the wrong gear on the back; it’s not that big of a deal but drivetrains do have their limits. Cross-chaining is when your chain is diagonal from the biggest gear in front — to the smallest gear in back — or vice-versa. Cross-chaining will quickly wear out your chain and gears. It stresses the gears and chain sideways and can damage them if done too much.  Always strive to keep the gears in a position that allows for a nice, straight chain line from front to back.

Solution:

Briefly cross-chaining your bike won’t hurt it. If you notice that you’ve cross chained, immediately shift either one — front or back — of your gears to compensate to align the chain back into more of a straight line.

#3: Using The Wrong Seat

First timers are often drawn to the widest, squishiest saddles available.  These plush giants are not your friend. A hard, thin saddle gives your sit bones proper support, allows for enhanced movement, and prevents chafing.

Solution:

You don’t have to go rock-hard and skinny as a toothpick. There are plenty of medium-hardness saddles available. Bike shops have a wide range of proven test saddles. Try them out and read up on choosing the right saddle for you.

#4: Improper Tire Pressure

Riding with under-inflated tires has always been among the top ten biking mistakes. High pressure road bike tires are typically rated at 125-130- lbs or more. Testing them with your fingers by pinching them doesn’t work because unless they’re extremely low, they always feel stiff and hard. Riding with under-inflated tires is incredibly inefficient. You might not even notice that you’ve wasted a whole day, getting nowhere.

Solution:

Top off your tires before every ride. Use a tire pressure gauge to inflate them to the indicated psi printed on the side of the tire. And then adjust the psi for the conditions at hand.

#5: Wrong Clothing

The experienced – or the well-prepared, at least – pull out a lightweight jacket and protect themselves from the worst of the weather. Other issues with clothing might go the other direction; failure to wear adequate gear in hot weather, resulting in a red, blistering condition known as sunburn.

Solution:

Watch weather reports ahead of time and take precautions against bad conditions. Include a nylon shell that you can fold up and stash in your jersey pocket in case of rain or unexpected cold weather. If it’s hot, wear light-weight materials and sunscreen.

#6: Stationary Crashes

This first time biking mistake is not isolated to first timers. It catches most cyclists off-guard at some point but happens to first timers almost invariably. You forget to unclip until the last minute and fall over into a curb or beside the road at an intersection — it’s damn embarrassing. Another slow-speed or dead-stop crash is caused from dirty cleats that fail to release immediately and you topple over like a bag of potatoes.

Solution:

Be aware of it when rolling to a stop. Don’t allow distractions to get the best of you. Unclip your favorite foot a few moments before you stop. If you step in mud, sand, or any other kind of material that sticks in your cleats, it transfers to your pedals. Keep that in mind when you next try an unclip.

#7: Over-Confident

Over-confidence manifests itself in a number of ways. One of the most common is blowing up during a climb because of the failure to pace yourself.

Solution:

Never underestimate hills. They can be steeper than they appear, or much, much longer. Always reserve energy and pace yourself appropriately. Once you’re close to the top, and you are sure, you can then give it your all knowing you will make it. Finishing strong is better than starting strong and then faltering.

#8: Attacking for No Good Reason

Attacking for no good reason is a typical biking mistake of the new rider. Sure, it looks impressive, but why? Attacking or attempting to pass other riders at high speed increases your heart rate to the point of no return and just makes everyone else mad in your group.

Solution:

Stay with the flow of other riders. If you need to pass, make your intentions clear. When appropriate, slip by them courteously. The exception to this of course is if you’re in a competitive ride. Then attacking is encouraged but there is always a time and place.

#9: Pushing Big Gears

It’s one thing to push the big ring if you’re a pro, you have every right to do so. But first timers or beginners often push the big ring way too much. It leads to cramps, wears you down quickly, and it’s for the most part insufficient for cruising in wind, hills, or rough surfaces.

Solution:

Your bike has at least two gears up front, get to know them both. Use the smaller ring to spin more often. Find a cadence that you can maintain for the duration of your ride. A higher cadence places less stress on your muscles allowing them to last longer.

#10: Getting Lost

It’s not uncommon on organized group rides to stray down the wrong road for miles and miles when you suddenly realize that something’s wrong. It typically happens when you have your head down, following someone’s rear wheel, and you miss a designated turn. You might not think that this one is a top ten biking mistakes but if you’ve ever ridden with group of cyclists, it’s more common than you might think. It’s an accumulative error; like sheep leading each other.

Solution:

Never take for granted that the leader of the pack knows where he or she is going. If you begin to feel that you’ve taken a wrong turn, stop. Take a few minutes to evaluate your situation and take steps to get back on the right path again. Use maps if you have them. If all else fails, ask a local where you are.

Cycle Faster – 10 Things That Slow You Down

March 16, 2016 by Wade Shaddy

cycle faster

How to cycle faster is a topic that most cyclists can relate to. The best advice is just to train harder or longer or both. But there are other things that come into play. Some things you can do nothing about. Some require only a bit of attention and others can require a great deal. Here are 10 things that can slow you down which you can address to cycle faster.

The Big Thing That Slows You Down

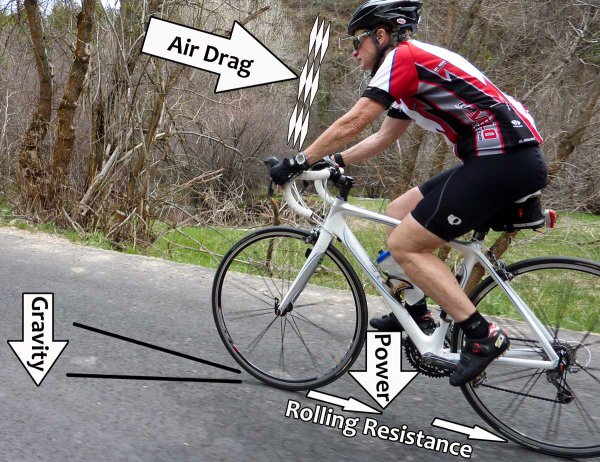
Drag is the single biggest thing keeping you and your bike from going infinitely fast on flat ground. Drag is the sciency term for a force that pushes backwards along your line of travel. Your bike is subject to different sources of drag.

Kind of a Drag

Mechanical drag is friction from your chain along with bearings in your wheels and bottom bracket. Mechanical drag is also the result of tire drag or rolling resistance caused by the constant squashing of the tires against the road.

No. 1 Mechanical Drag

Mechanical drag is pretty much a small, fixed number. It hardly varies from bike to bike but more so between cheaper bikes and high-end bikes. But even expensive ceramic bearings do very little to make a noticeable dent in mechanical drag. The chain is the biggest source of mechanical drag and there haven’t been any real advances in reducing chain drag recently because the contemporary roller chain is remarkably efficient. Basically, the main thing you can do to minimize drivetrain drag is to keep your bike properly maintained and your chain oiled.

No. 2 The Contact Patch

Tires are one of the single biggest things that can slow you down and here’s why. A pneumatic tire has a flat spot where it touches the ground, aka the contact patch. About half your weight is on each tire, making the contact patch a little smaller than 1-inch square in size. As the tire rolls forward, the leading edge of the contact patch moves around. Rubber is bent and flattened. As the tire rotates it bends over and over again. The constant bending involves friction that adds up and slows you down. Not much you can do about it except for keeping your tires topped off before every ride.

No. 3 Tire Osmosis

Tubes can leak up to 10 psi per day. The loss in pressure may not be obvious by just squeezing the tire with your fingers but it affects cornering, acceleration, and speed. Tires and tubes made with better quality rubber compounds tend to ward off osmosis and offer lower rolling resistance so an upgrade and tire replacement can help you to cycle faster.

No. 4 Hard Tires

To contradict rule No. 3 — too much pressure can actually slow you down too. It basically makes a light rider bounce around on the bike. Proper tire pressure is a feel thing. Just because the tire might have 160 printed on the side-wall doesn’t mean you should automatically do it. That is a maximum number printed for your protection and applies mostly to racing. Experiment with it to find your ideal tire pressure.

No. 5 Wide Tires

The most common size of road tire is 23mm. However, the trend to run wider 25mm tires is growing. If you’re an experienced road rider, you might notice that 25’s handle different, maybe a bit more stable, particularly through corners, but they can be slower on smooth surfaces although it might be unnoticeable. In general, the wider the tire, the more rubber that has to be flattened on each revolution of the wheel. 23’s are the preference of racers for a reason.

N0. 6 Clunky Shifting

Cables and derailleur springs stretch and wear. Pivots, chains, and teeth wear out. If it takes two or three pedal revolutions to complete a shift, it means less time hammering and more time messing with gears. It’s typically because you need a tune-up. It happens gradually and you begin to take it for granted and then it won’t shift at all. Keeping cables tight and derailleurs tuned keeps you at top speed with quick shifts to help you cycle faster.

No. 7 Added Weight

This one’s a no-brainer and has been drilled into cyclist’s heads for decades. Things you may have missed though are tools in your toolkit, added water bottles full of water, or extra gear in your jersey. One often overlooked heavy item is wet clothes. Even a light sprinkle can add weight to fabrics.

No. 8 Floppy Clothes

There’s a reason why cyclists wear tight clothes. It’s because unnecessary flappy clothes give you an aerodynamic disadvantage. This one can be fairly significant. If you can hear it or see it, it’s slowing you down. Tuck it in or discard it and get a skin tight jersey. It will help you cycle faster with the least amount of effort.

No. 9 Upright Position

Some road bikes have two torso positions; aggressive and passive. It’s typically controlled by the stem that angles up or down as needed. If you’re riding in the passive or upright position, your torso is catching the wind and slowing you down. Remedy it by removing the stem and flip it upside down for the aggressive position. If you have a flat stem and it won’t flip, consider swapping it for an angled one. (See “Handlebar Setup in How to Do a Proper Bike Fit)

No. 10 Air Temperature

Physiologically, depending on the distance of the ride and the temperature, your leg muscles may not be operating at full potential if it’s cold outside. A one-percent decline in local muscle temperature can reduce muscle force by up to 10 percent. On the opposite end of the scale, higher temperatures cause overheating and should also be avoided if you’re trying for a speed record. Additionally, air density is also affected by temperature, pressure, and also by humidity. Temperature has a more pronounced effect on air density than humidity — cold air contains more molecules per cubic meter. For example, on a cold day, you need to work harder to maintain the same speed because the air density is higher than on a warm summer day.

Cycle Faster Bonus Tip: Gluttony

The main fuel for exercise is carbohydrates. They are stored in the muscles and liver as glycogen. The body is only able to store a relatively small amount of glycogen which is why keeping it topped off is so important. However, overdoing it can slow you down especially if you eat a lot right before a ride. Everyone has different levels of comfort regarding eating before cycling. It’s important to test what works for you. In general, allow 2-4 hours after eating before cycling. But generally speaking, any kind of gluttony before riding can slow you down. It’s because the blood goes to your stomach to help digest the food instead of going to your muscles to deliver oxygen.
You can use this bike calculator if you’re serious about it. Input things like time, energy expenditure, and weight to get a rough idea of how much you’re slowing.
« Previous Page
Next Page »
  • Facebook
  • Tumblr
  • Twitter

Latest Articles

JOIN Cycling: A New Training Platform for Cyclists

May 27, 2024 By Eric Lister

cold exposure

The Benefits of Cold Exposure for Cycling & Life

June 13, 2023 By Eric Lister

hill climb

The Ultimate Hill Climb Training Guide

May 31, 2023 By Eric Lister

shoulder pain cycling

How to Treat & Avoid Shoulder Pain While Cycling

April 12, 2023 By Eric Lister

psoas stretch

The Importance of the Psoas Stretch for Cyclists

April 6, 2023 By Eric Lister

cycling neck pain

The Ultimate Guide to Cycling Neck Pain: Causes and Solutions

March 21, 2023 By Eric Lister

Useful Info

  • Contact
  • Finally, A Global Cycling Club That Is Focused On Community And Love Of Cycling!
  • Privacy Policy
  • Share Your Story!
  • Terms And Conditions Of Use
  • Welcome to I Love Bicycling
  • What Happened When I Stretched Every Day For a Month

Recent Posts

  • JOIN Cycling: A New Training Platform for Cyclists
  • How to Hang Bikes in Your Garage: 4 Inexpensive Options
  • Gravel Bike Vs. Road Bike: Which One Is Better For You?
  • The 6 Types of Mountain Bikes & How to Choose the Best One for You
  • What Is a Touring Bike Good For? 5 Benefits We Know You’ll Love

Search I Love Bicycling

Connect with Us

  • Facebook
  • RSS
  • Tumblr
  • Twitter

Copyright © 2026 · Magazine Pro Theme on Genesis Framework · WordPress · Log in