• Training
    • Injury Prevention
    • Training Tips
  • How To
    • Bike Fit
    • Gear
  • Nutrition
    • Nutrition Tips
    • Weight Loss
  • Repair
  • Reviews
  • Stories
    • Funny Stories
    • Jokes
    • Quotes
    • Videos
    • Funny Videos

I Love Bicycling

I Love Bicycling is a website that is geared towards cycling for beginners with road cycling tips, training articles, nutrition tips, weight loss, how to’s and bike repair articles.

Training

  • Injury Prevention
  • Training Tips
  • Training Camps

Cycling Versus Running – Which Should You Do?

July 9, 2016 by Josh Friedman

cycling versus running

Everyone knows exercise is important. How you exercise is up to you. There are many, many choices, some of which have proven benefits and some of which are dubious. This article will pit two tried and true exercises against each other: cycling versus running.

Overall Energy in Cycling versus Running

In the debate of cycling versus running, running comes out on top for energy expenditure for a given period of time and exertion level. This is because you support all of your weight when running. When cycling, the bicycle supports much of your weight via the saddle while your legs pedal and propel you forwards.

If you are looking for the quickest way to burn calories, running is it. Remember that calorie consumption is not an overall marker of fitness (or enjoyment).

Intervals

Recent research shows that interval training is the quickest way to overall fitness. It is a bit easier to do interval training on a bike because you can coast between efforts. That coasting or light effort will allow you to do higher quality efforts because you get better rest intervals.

Musculature

Running and cycling use muscles differently. Much of both exercise uses the same muscles but have different impacts on the muscles. That is why a runner that jumps on a bike and goes for a big ride will have sore legs, as will a cyclist that goes for a run and has sore legs. Which exercise is better for your musculature? It is hard to say. Enough of either will result in great muscle tone and strength as long as you are doing the exercise right. If you get the idea that you would like to venture into competitive cycling, you will want to cut out all running to focus on developing the best cycling fitness and musculature that you can.

Bone Density

Running is the winner here, unless the runner goes over the edge and gets stress fractures. Impact exercises are necessary for bones to maintain their density. Cycling is a low impact exercise; cyclists should keep this in mind and supplement their riding with some impact so their bones do not become brittle particularly in the off-season when your rides become few and far between.

Joints

Lots of runners resort to cycling after their joints have seen enough impact. Cycling is much more gentle on ankles, knees, hips, and backs. Runners often end up with problems at these high impact areas. You are more likely to see an old cyclist than an old runner for this reason.

Time

Again, running is the winner here. You can get a quicker workout in because of the higher energy expenditure along with the overall impact of the exercise. These are the factors that determine the upper limits of duration for either exercise. Runners usually top out at a marathon. Cyclists usually top out at a century, which is a much longer duration.

See the Sights

This one goes to cycling, by a long shot. On a bike you travel fast enough to cover great distances but slow enough that you can take almost all of it in. And you can stop to check out the scenery easily without a parking spot. You can stop running to see things up close, but you will not be that far from where you started; running covers far less ground. Cycling tourism is a popular mode of seeing new places. Running tourism is much less so.

Your Bank Account

Running is far cheaper. If you run a lot, you will go through a lot of shoes, but even then it probably will not stack up to an investment in cycling. If you are serious, both are more enjoyable with technical clothing, so that comes out even. Sometimes gear is the draw for an activity, so cycling has that covered – less money in your bank account, but more gear to play with.

Overall Fun

This is an important topic. If you are having fun exercising, you will keep coming back for more. Cycling covers more scenery, is more exhilarating with fast descents and challenging climbs and has many more skills to learn. Learning a new skill is one of the markers of an activity that keeps the mind fresh and staves off aging.

The Bottom Line

Getting exercise is critical to a healthy life. In the end it does not matter whether you choose cycling versus running; get out there and exercise. There is no requirement to chose one activity and stick to it. If you are a runner, you can mix in some cycling and vice versa.

What’s A Recovery Ride And How It Can Make You Faster

June 15, 2016 by Adam Farabaugh

recovery ride

It’s a beautiful day and your legs are spinning easily and effortless underneath you. You’re not out for a land speed record and can enjoy the sights. You don’t run out of energy or water because you’re not riding long enough to do so. Why not do a ride like this everyday? It sounds like bliss. For some, this is every ride but for others the draw to ride harder and farther is always there so day in and day out they dig themselves into a deeper hole. They may find that it takes a little bit for their legs to come around and feel good. If this is you, you’re in desperate need of a recovery ride. This can be a challenge if you’re always trying to go hard so knowing when to do one and how to do one right will help to ensure that you get the most out of your recovery ride, and not just in the recovery department but in enjoyment factor as well.

What Is a Recovery Ride?

A recovery ride is a ride dedicated to riding easy and just spinning the legs to get the blood flowing. The increased blood flow without the higher stress on the muscles from riding hard will help to enhance and speed recovery. If you’re particularly tired from a day or three of hard riding, you will probably feel like crap at the beginning and not want to do anything but by the end of the ride you will feel great. It is a boost for the muscles as well as the mind.

The Importance of a Recovery Ride

If you’re looking to recover, why not just stay planted on the couch? The couch is good, particularly if you’re horizontal on it, but it doesn’t get your blood flowing. Doing a recovery ride after lying on the couch will get your blood flowing along with loosening up your muscles. Muscles at rest will tighten if they’re not used or stretched properly. A recovery ride will also keep your legs from feeling stale the following day. Ever take a day off and get back on the bike a day later only to find that you feel tired and unmotivated to ride? This falls within the premise of a body in motion stays in motion while a body at rest stays at rest. When you try and go against what your body is used to, it resists. A recovery ride keeps you riding but at a level that is low enough to not cause increased strain.

When to do a Recovery Ride

You should do a recovery ride about two times a week depending upon how much you’re riding and/or training. It should follow two to three days of harder riding and a single day even if it is a much larger ride than you would normally do. Think century, race, a ride you would maybe only do two or three times a month. You should also do a recovery ride when you set out on a harder ride but simply are too tired to keep going at the same pace. Sometimes it’s good to push through this with “overreaching” training. Other times it just digs you a deeper hole and doesn’t make you any stronger or faster. Simply spin easy for a much shorter duration instead of flipping it and heading straight home.

How to do a Recovery Ride

A recovery ride sounds easy; just ride easy right? Well yes but there’s more to it than that. You should make a concerted effort to spin your legs more than you normally would. Also, when going up any climbs, go extra slow and again, spin as easy as you can up it. If you have to get out of the saddle, do it gingerly and keep your heart rate and/or power down if you’re measuring it. Your recovery ride should range in length from 30 minutes to one and a half hours if you ride more than fifteen hours per week. Also, since you need to go so easy on climbs, seek out the flattest route you can find. In conjunction with this, you want the roads or trails to be mellow with few cars or other riders to avoid. Going slow isn’t fun when it’s on a main road. Find the nice country road or scenic bike path and enjoy.

Also a great way to ensure that you ride slow and resist the urge to go a bit harder is to ride with someone else who is also doing a recovery ride. Include a stop at a coffee shop too. This will help the ride to be focused around conversation and enjoyment, not going hard. Another great option for a recovery ride is to ride with someone who doesn’t ride as much and couldn’t keep up with you otherwise. Someone such as your significant other or friend who you have been trying to get into cycling. Ride slow and next to them. This will keep you at a mellow pace until they try and drop you up a climb; then let them do it. You’re on a recovery ride.

Rollers vs. Trainer – Which Should You Choose?

June 9, 2016 by Josh Friedman

rollers vs. trainer

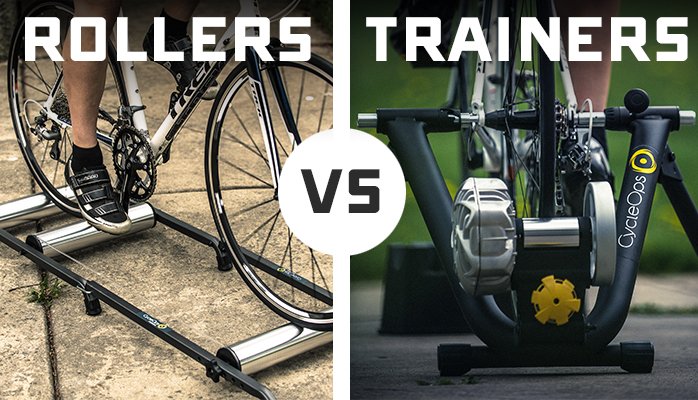
Sometimes conditions are not optimal for training outdoors whether it is the weather, time constraints, or suitable roads. There are ways to cheat what life and mother nature throw at you and train indoors. The two main devices for indoor training have devout supporters based on what each device provides. This is your introduction to the debate: rollers vs. trainer.

Why Ride Inside?

It is raining/snowing/freezing/scorching/hailing and you still need to ride. Maybe you had to work longer than you planned and your window to ride is small. Perhaps you had to spend the day with your family and it is dark out now. Or you have certain intervals and you cannot think of a road with a long enough of an uninterrupted section to do them.

All of these factors are possible and you still want to be in top form for an upcoming event and you feel that if you miss a day, you will fall behind. This is when you ride indoors. It lets you do a focused workout without interruption. Riding inside also allows you to keep your equipment cleaner and protects you from any weather related discomfort – both hypo- and hyperthermia mostly.

Keep Cool Inside!

When training inside, set up a powerful fan to blow on you. While riding outside, even on hot days, there is a lot air flow to cool your body down. The fan will mimic this airflow. Without the fan, you will get hot very, very quickly, to the point that you will compromise the benefit of your training. The only time it is OK to forego the fan is if you are getting ready for an event in a location that is far warmer than where you live. You are then training your body to cool itself. You MUST be prepared to drink two to three times the water you normally would for the duration of your ride.

Rollers

Rollers come first in the rollers vs. trainer debate because they have been around far longer. They are a simple device that allow you to ride inside; a cylinder, often referred to as drums, under the front wheel and two under the rear wheel inside of a frame. The front and middle drums connect with a belt. When you pedal, the rear wheel rotates the two rear drums. The belt moves the front drum, rotating the front wheel. The physics of keeping the bike upright are the same as on the road – spinning wheels and the centrifugal motion keeps you upright. It has a different feeling on the rollers because you are not going anywhere.

While riding rollers, you must maintain focus or you can come off. It is not very dramatic however like you would probably imagine. It is more of a flop over to the side or off the back. When starting out, try it in a door frame, next to a wall, or next to a sturdy table. It will allow you to get on the bike and get the wheels spinning with support. Once you have mastered that, you can jump on the rollers anywhere. On rollers, you are building your bike handling skills along with your fitness.

The differences in rollers comes in the diameter of the drums. The larger the drum, the less resistance for a given set of rollers. There is a limit of how hard you can go on rollers. You will not be able to do short, all-out efforts on rollers because they do not provide enough resistance.

The other factor, that mostly determines quality but can also affect noise while riding along with a small component of resistance, is the material of the drums. Higher quality rollers have alloy drums, while lower quality have plastic drums. Alloy drums will last far longer and should be quieter. And quality matters with rollers. These rollers have been the gold standard for years.

Trainer

A trainer holds the bike stationary by elevating the rear wheel off the ground and has a very stable base to keep you from tipping over. The front wheel is also stationary (and should be elevated to the same level as the rear wheel with a block, phone book, or some other stable object). The trainer has a resistance unit that the rear wheel spins when you pedal. A good trainer’s resistance unit will mimic the resistance you feel on the road – the harder you go, the harder the trainer resists your effort.

While riding a trainer, you do not need to keep focus on your handling; the bike is static, except for the pedals and rear wheel. For the majority of cyclists, resistance on a trainer is impossible to run out of. You can go as hard as you want and still have a challenge from the trainer. Your body is the limiting factor.

The main differences in trainers is the type of resistance unit:

  • Wind – The most primitive form of trainer resistance and also the noisiest. It does provide progressively harder resistance. This trainer provides a solid starting point.
  • Magnets – Quiet, although less progressive resistance than the road and other options. This trainer is a quality, economical option.
  • Fluid – The quietest and most engineered resistance. It is supposed to mimic road feel as closely as you can on a trainer. This trainer has been a very solid option for a long time.

The size of the flywheel on the trainer also helps dictate the feel of the trainer; the bigger the flywheel, the less it feels like you are pedaling through mud.

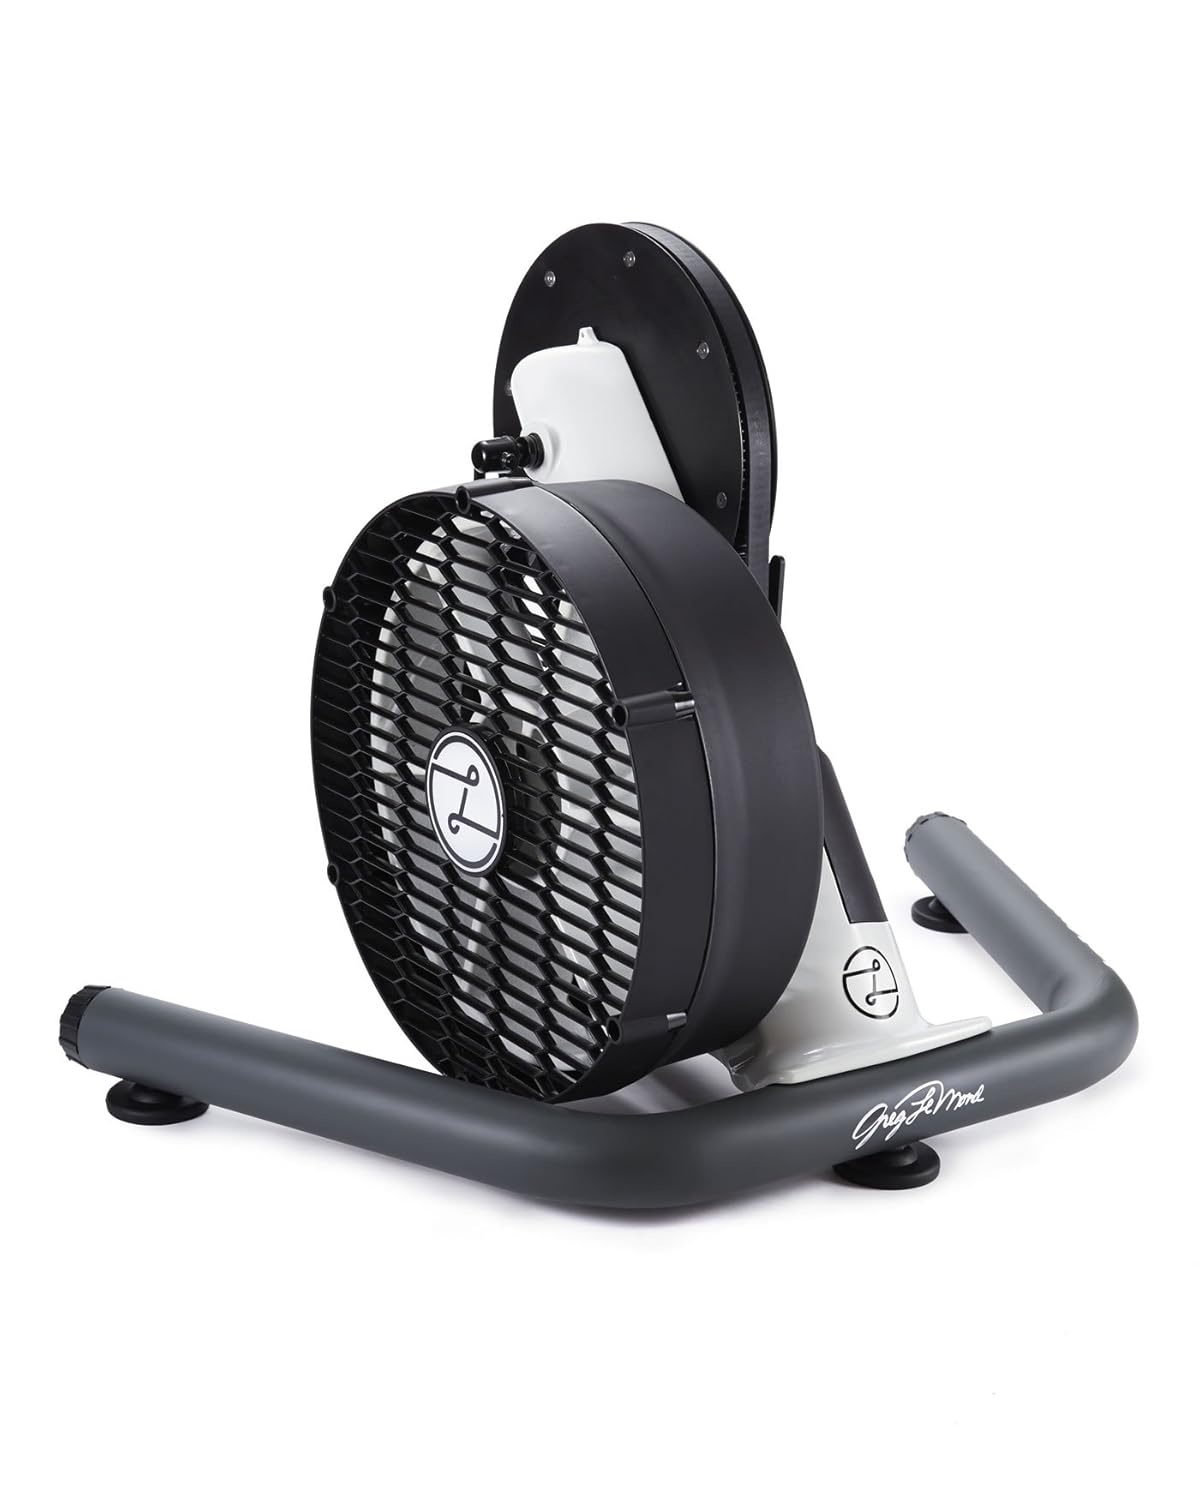
There is a new category of trainer – direct drive trainers. You remove the rear wheel and mount the rest of the bike on the trainer with the chain of your bike driving a cassette on the trainer. These are supposed to provide the closest feel to the road. They are also the most expensive.

Rollers vs. Trainer

Now that you know what goes into rollers and trainers, here is the showdown: rollers vs. trainer. If you need to put down serious power when training indoors, a trainer is for you. If you would like to work on your handling while getting your workout, use rollers. Rollers also give you the benefit of being slightly more interesting as you have to pay a little bit of attention to keep from falling over, but you are still riding inside. You might need some supplemental entertainment with either to keep you from boredom.

The best of both worlds would be to have both a trainer and rollers. If you are diligent in your search, you could find a used quality trainer and rollers. It gives you options and versatility in your training.

Will Cycling Make Your Legs Bigger?

May 30, 2016 by Lee Agur

Will Cycling Make Your Legs Bigger?

Will Cycling Make Your Legs Bigger?

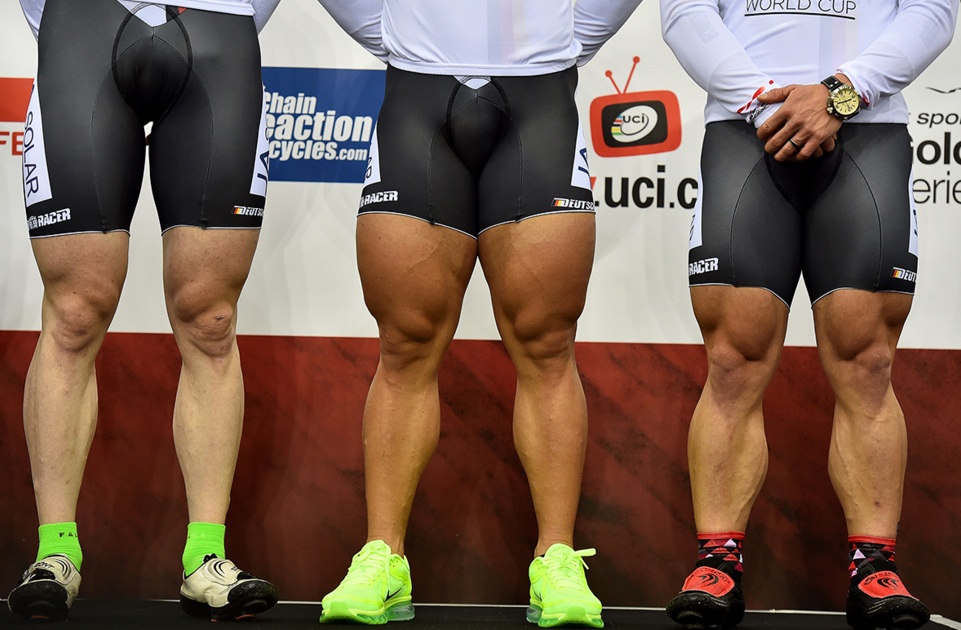
Despite this photo, it is unlikely that cycling will make your legs larger unless you really focus on it. For the women cyclists in the crowd that do not want to bulk up, don’t worry. Cyclists legs are directly correlated with the type of cycling each cyclist does. You are able to receive nice toned legs or you can build some monster quads.

You will not receive the monster quads that you see in this photo unless you start doing some serious weight training though!

How To Build Leg Muscle for Cycling

Cyclists thighs can be strengthened on and off the bike with a few simple exercises.

On the bike exercises:

  1. Low RPM “Grinding” – Get in the big gear and keep the cadence below 65rpm for 3 sets of 5 to 10 minute intervals.
  2. Stand Up Climbing – Find a hill that takes 5 to 10 minutes to summit and climb it out of the saddle 2 or 3 times.
  3. Single Leg Drills – Really focus on the upstroke as the hip flexor is likely your limitor. Do 3 sets of 1 minute per leg.

Off the bike exercise:

  1. Leg Press or Weighted Squat – If you do not have experience in weight lifting then do a leg press as it is much safer. Do 3 sets of 10 to build leg muscle.

How To Keep Toned Legs For Cycling

If you are looking for a more lean look then focus on endurance and sustained efforts. The average bikers legs are perfectly toned and it is a very sexy look. No real extra work required other than biking around as much as you are able to.

Male vs Female Cyclist Legs

Men have a unfair natural advantage over women and that is they produce more testosterone, in fact, male adults produce about 7 to 8 times as much testosterone as adult females.

It is no wonder that when you look at Victoria Pendleton (a serious female track sprinter) and compare her legs to someone like Chris Hoy (a serious male track sprinter) they look slender in comparison.

Cyclist Legs - Victoria PendletonCycling Legs - Chris Hoy

Muscle Burns More Calories Than Fat

Muscle burns nearly 3 times more calories than fat does, so you need to eat more calories (especially protein) if you are trying to bulk up. If you are trying to lose weight the benefit of building muscle is that it will work as a natural furnace burning off calories at an expedited rate.

Genetics

Genetics play a huge role in your body composition, some body types will be more suitable to building large amounts of muscle mass quickly while other body types will be more prone to keep on unwanted excess fat stores while another will stay lean and mean no matter how many weighted squats they do.

No matter what your goal is cycling is a great way to tone your body!

Average Bike Speed – How Do You Compare?

May 24, 2016 by Lee Agur

Aerobic vs AnaeAverage Bike Speedrobic

The average bike speed varies immensely depending upon total distance/duration, grade, and level of cyclist. The table below represents the average road bike speed taking each variable in to account. How do you compare to the pro cyclist? How about the average cyclist?

Average Cyclist Pro Cyclist
Average Bike Speed on Flat Terrain 18 mph 26 mph
Average Bike Speed up an 5% hill 9.5 mph 15 mph
Average Bike Speed up an 8% hill 7 mph 12 mph
Fastest Downhill Bike Speeds 47 – 57 mph 69 – 81 mph
Average sustainable watts for 1 hour (FTP) 200 watts 415 watts
5 second Sprint 33mph/700 watts 40mph/1250 watts
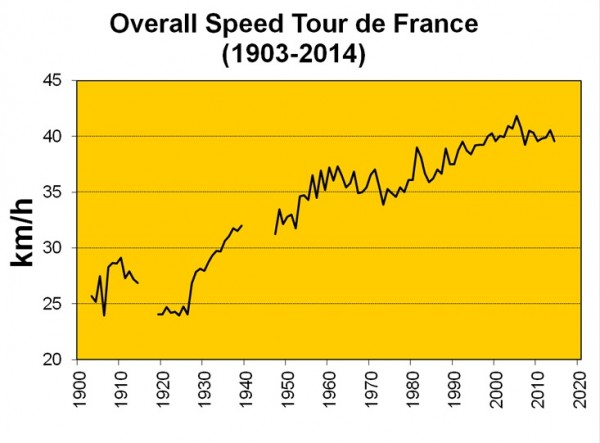
Tour De France Average Speed N/A 25mph (average of the 3 weeks)
Average Time of a Gran Fondo/Century (100 miles) 5.5 hours Under 4 hours

Average Bike Speed on Flat Terrain

The number one key to being fast on flat terrain is pure power. Generally larger riders will do quite well on the flats as their pure power will outweigh the larger frontal area they have to push through the air.

Average Bike Speed Uphill

This is where the smaller riders will have an unfair advantage as the secret to climbing uphill is the power to weight ratio. The less you weigh the less power you have to generate to get up the hill within the same amount of time.

Example:

A 150 pound rider pushing 200 watts will go 10 miles per hour up a 5% grade.

A 200 pound rider pushing 200 watts will go 8 miles per hour up a 5% grade.

In order for the 200 pound rider to go as fast as the 150 pound rider up a 5% grade the 200 pound rider will have to push 255 watts.

It is true that the larger riders generally have more muscle mass and can generate more power, but the advantage is the smaller riders. This is why pure climbers generally weigh less.

Road Bike Top Speed

Generally the top speed of a road bike is in direct correlation with how much risk the rider is comfortable taking on. On straight, slight downhill grades the heavier cyclist should outpace the lighter cyclist; however, on steep descents with sharp corners, it comes down to bike handling skills and comfort with risk.

Tour De France Average Speed

Since the year 2000 the Tour De France average speed for the winning time has been around 25 miles per hour (40 km/hr) over the 3 week stage race. The fastest was in 2005 by Lance Armstrong (if you count that) with an average bike speed of 25.88 miles per hour (41.65km/h).

Photo Credit: wikipedia.org

Average Speed of a Gran Fondo or Century (100 miles)

The average speed of a Gran Fondo or a Century is very dependant on how hilly the terrain is. Assuming there is a moderate amount of climbing (1500 meters) and drafting is an option then for an average amateur cyclist it will take 5.5 – 6.5 hours to complete the 100 mile long journey.

What is your average cycling speed? How long does it take you to complete these feats?

Preparing Yourself for a Century

May 18, 2016 by Lee Agur

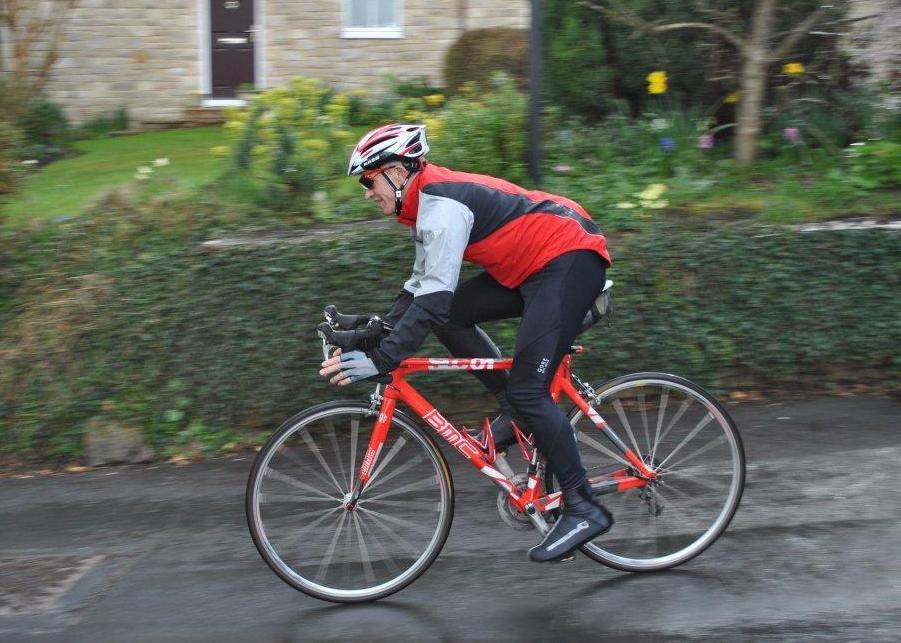
Glyn cycling in Sturminster Newton

Cyclists of all calibers aspire to take part in centuries and avid riders will understand just how intensive the events can be. Whether you’re taking part in a local century or if you’re traveling a little further afield, preparing yourself for a century can make a big to your performance at the event. There are a few specific techniques that even the most experienced veterans practice before their big event. Now there’s no guarantee that these techniques will reward you with a first place finish – but they will definitely help you to improve your performance on the day!

Preparing your Body

Centuries are often very physically-intense. It’s less about sprinting from the start to the finish line and more about pacing yourself and moderating your energy usage. The best way to prepare for a century is to practice it unofficially.

If you’re concerned about being able to ride in a safe environment, then consider driving to an area that is safer to ride. Many people opt to travel to remote locations to prepare for a century. Back country roads with low populations are a good alternative to the busycity streets – but this depends on how comfortable you are with traffic.

Grab a Stopwatch

Is there any better feeling than beating your personal best time? If you already know that you can complete the distance, set yourself the target of at least matching your personal best. If you beat it, then evaluate what you did differently so that you can replicate the results! A century is about pacing – making sure you start out slow enough to have enough in the tank to finish strong.

There’s no need to tackle all of your training in the same evening – in fact, if you prepare a training schedule that runs over the length of 4 to 6 weeks, you’ll be able to measure your progress as the weeks go by. As the century approaches, you should have beaten your personal best several times over and you can enter the race pretty confident of your pending performance!

Adjust Your Diet

It’s a little known fact that toxins stay in your body for weeks on end if they aren’t tackled head on. That fast food that you enjoyed last week could still be taking its toll on your metabolism right now and most professionals will undertake a detox period before an event. High energy foods are a better alternative than non-organic carbohydrates, and be sure to stock up on the former before a ride, to train your metabolism to make the most of the energy potential.

If you can spend a few weeks teaching your metabolism to utilize the energy that it has as its disposal, you will soon find that your body maintains its energy levels for extended periods of time. In terms of event-performance, this means that your body will be able to rely on your metabolism for a consistent influx of energy while you race.

Enhancing Your Endurance

There’s no shame in admitting that your endurance levels sometimes decrease during the off-season. Picking the pace back up again can take time and that’s where endurance training comes in handy. Casual bicycle rides that focus on duration over speed are ideal as is cardiovascular exercise to remind your heart what it feels like to pump at an increased rate again. A week before the event isn’t always enough and a better idea is to start your endurance training at least a month or two in advance.

Aim to surpass your performance each day, even minimally, and by the time four weeks have passed, you’ll be able to witness the improvements in your endurance for yourself. If you find yourself struggling at any point, avoid pushing your body to its breaking point. An injured you is an event no-show, so take it easy for an evening if you need it and pick the pace back up the next day.

The Tools of the Trade

Whilst training for a century, it’s easy to overlook the impact that your bicycle can have on the race itself! A week before the event, consider having your bicycle serviced by a professional, and make sure that the tire pressure, brakes, and shifters are all functioning as they should – after all, a cyclist is nothing without a bike!

A Detailed Training Plan To Walk You Through Your Preparation

A great option to ensure that you are fully prepared when preparing yourself for a century event is to start a training plan. For a particular even however you can’t just start any training plan but rather need a plan catered toward your ride goals. The I Love Bicycling’s 12 Week Training Plan For Your Gran Fondo or Century Ride not only prepares you physically but also gives you weekly skills practices, advice on nutrition, recovery, and good tips of things to know on the bike such as dressing properly for the weather. It also includes core workouts to strengthen your core so you don’t have any back pain or other issues during your long rides. Check it out by clicking the image below which will take you to a complete breakdown of the plan.

training plan for grand fondo or century1

Strength Training For Cyclists -The Best Approach

May 17, 2016 by Josh Friedman

strength training for cyclists

Almost everyone is in search of more power on a bicycle. Power is velocity times force at the pedals. Velocity is how quickly the pedals turns over while force is the amount of energy put into each pedal stroke. Developing a fluid and fast pedal stroke happens almost exclusively on the bike, but developing more force can be done both on and off the bike with the proper strength training for cyclists.

Strength Training For Cyclists – Why Get Stronger Off the Bike?

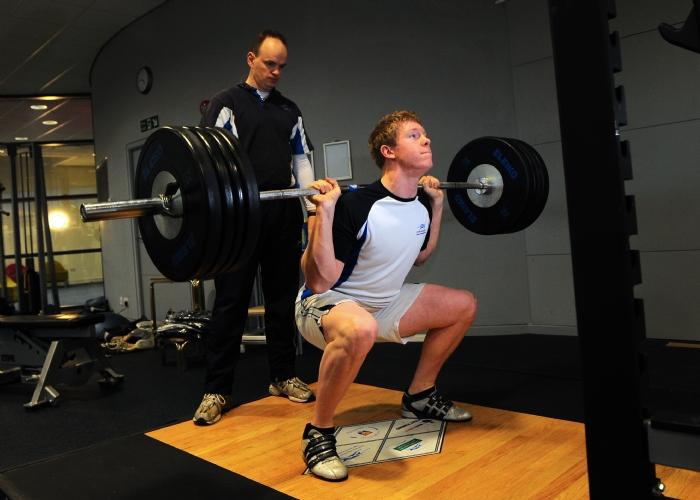
There is a limit of how much force you can generate on the bike. With strength training you can go beyond that force by moving weight, be it body mass or weights, which will translate into greater on-the-bike force. It is important to keep similar body positions and ranges of motion to your riding position when strength training so your new-found strength will adapt well to the bike. You must make sure during even your heaviest lifting phases that you are also riding so you can put that strength to good use.

Strength training for cyclists is also important because cycling is a low impact exercises. Cyclists’ bone density is lower if they do not engage in some sort of load bearing activity off the bike to complement their on-the-bike training; strength training can fill that need. This is especially important for women.

Hit the Gym

When most people think of getting stronger, they think of going to a gym with free weights and machines. It is a great place to start strength training for cyclists. If it is a good gym, all of the equipment that you could want is there. There are also people that can help you with proper form and progression in a gym training plan, but be aware that the needs of a cyclist are different than most people who are at a gym.

Free Weights versus Machines

There are a lot of options at the gym of what to lift. If you have the option, always choose the free weight option for a given exercise. On the bike, you are not guided by a machine and must stabilize your movement on your own. A weight machine takes away from the development of some of those stabilizing muscles that would otherwise benefit you while riding.

Additionally, choose exercises that use more than one joint. There are very few activities in life that require movement from one joint. You want your weight room experience to simulate life as much as possible.

Periodization

Just like a cycling training plan should be periodized, so should strength training for cyclists. The base periods should mirror the on-the-bike training; building good form towards increasingly high volume while working up to moderate intensities. The build periods will bring down the volume a bit but will also increase intensity. Think higher weights, towards maximal efforts. Remember to include rest weeks too otherwise the strength training will be for naught.

As big events approach, it is important to dial back lifting and focus on maintenance. It is like the recovery ride of strength training.

Keeping Perspective

The goal of strength training for cyclists is build strength to use on the bike. It is not to build mass or look great at the beach. It is especially important to remember if you are training in a setting with other people. It does not matter what they are doing or what they think about your regimen; stick to the plan and focus on your goals.

Body Weight Exercises

No access to the gym or there is not enough time in the day to get there? Body weight exercises are easy to do at home and you can get most of the benefits of a gym. You may not be able to push tremendous weight as you could at the gym at the end of the build period but you can get in a lot of repetitions quickly and cheaply. Important exercises are lunges and squats, especially one-legged squats, which really build up your stabilizing muscles.

On the Bike

For very specific strength training, you can do it on the bike. The motion is exactly what you need and you are already out riding. Again, you are limited by how much force you can produce, but you will be able to build more strength than you had before. These workouts involve putting the bike into a gear that lets you ride at 60 rpm or less. While you are doing it, it should feel like you are pushing incredibly hard. Again, not as hard as lifting weights, but far harder than your average ride. You will be able to get in a lot of repetitions very quickly. One thing to note on this is that you should ease into it week by week as it can put a lot of stress on your knees which can injure them if they’re not ready.

Masters

As people age, their ability to maintain strength decreases. It is especially important for masters to engage in some sort of strength training for cyclists to maximize their ability on the bike. It will provide a dramatic competitive edge over their counterparts that do not strength train and also stave off some of the negative results of aging.

Women

Female cyclists will benefit a great degree more than male cyclists from strength training because of the bone density issues cyclists face. Women are more likely to develop osteoporosis than men and a strength training will help fight off its onset.

Core

A popular current trend is core strengthening. It is very time efficient, can be done every day, and is very important to stabilize your body during riding, especially sprinting. Keeping a steady and calm upper body allows your legs to do all the work more efficiently. Core work is easy to do at home with little or no equipment.

A core muscle is anything that originates or inserts in the spine or pelvis. It covers a lot of muscles, but the important ones for cyclists are between the hips and armpits.

Try It Out

If you are looking for another way to boost your power, strength training for cyclists is it. You will be able to turn over a gear higher at a given cadence after dedicating to a program for a bit. Who doesn’t want that? Also, strength training for cyclists further develops tendons and supporting muscles which can help to avoid overuse injuries as they are strong enough to handle the stress in which you put them under.

When You Should Stop A Cycling Workout

May 12, 2016 by Josh Friedman

When You Should Stop A Cycling Workout

Bicycle racing is not only hard, it puts a premium on suffering. Whoever suffers the most at the right time often wins. Sometimes that suffering to win is an acute ten seconds, sometimes it is two hours. And there is suffering even when you don’t win. To get to a point where you have the fitness and ability to deal with the pain, you have to put a lot of time towards training and suffering through intervals and long rides. But when is the suffering too much? Knowing when you should stop a cycling workout will help keep you from digging yourself into a deeper hole and come back stronger for next time.

The Love of Riding

If you did not love riding your bike, you would not put in all the work. You ride because you love it. Even on days you do not feel at your best, you feel it is necessary to ride. You do it because you want the freedom of the road; it’s an escape and you don’t want to miss out on training. But sometimes riding when you are not quite one hundred percent can set you back more than you can gain.

Hitting Your Mark

Every workout should have a structure and a goal. If you’ve done a cycling field test, you know your training zones. Your intervals should be a combination of a target zone, a challenging duration that is achievable, and an adequate rest interval. When one or more of these variables is not quite right, you cannot hold the zone. If the duration is too long or there is not enough rest in between intervals, it is time to assess the workout. Is your fitness not quite up to one of the factors? Are you too fatigued? Are you getting sick? Is your mind not up to the suffering of the day? Know when you should stop a cycling workout is hard to gauge but important to identify. This is a time to be completely honest with yourself. Nobody else is watching. You will not improve if you cannot answer these questions truthfully, unless it is a question of mental suffering and your head just isn’t in it.

When Is It Suffering & When Is It Time To Quit?

Again, workouts should be a challenge. Some should be such a serious challenge that you question your life choices and want to leave your bike in the rain to rust into a useless pile of scrap. Those are breakthrough workouts; you make such large physical and mental gains that you remember them months and years later. It’s the second most rewarding suffering you will find, the first after success in races from suffering.

But when you do not find that dark place to be inviting, when it is hard to turn the pedals over, when you do not feel right, it might be a good idea to know when you should stop a cycling workout. Not hitting the marks early in the workout could be an indicator. Late in a workout, on your eighth one-minute full gas effort, your power is not quite as high; that is normal. But if your second effort is way below your first, that workout may be too much. Again, honesty is the key. Do you want to abandon a workout because you are really cracked/getting sick/under-slept/et cetera or because you do not feel like putting in the work? If you’re training with heart rate, not being able to hit your normal numbers can indicate that you are fatigued. Even if after warming up and doing the first or second interval you still can’t get your heart rate close to your objective, it’s time to spin home easy.

Factors To Gauge When Assessing When You Should Stop A Cycling Workout

Properly assessing the reasons why your body feels the way it does can help you make an honest decision whether you should keep riding or not. Things like have you slept enough and have you eaten the right foods to feel good.

Fuel Up

Make sure you have enough of the right food in your system before starting a workout along with plenty of water. Abandoning a workout because you haven’t fueled up properly is no reason to quit a workout, especially when you are in good condition otherwise to have good workout.

The Common Cold 

The rule many use for colds is if it is from the neck up, you can ride. If it has moved down into the respiratory system, do not ride. But if you feel like you will get over the head cold quicker and get back to full training sooner, go ahead and rest. It’s better to error on the side of rest than trying to push through and making your sickness worse.

Beyond The Common Cold

There are more maladies in the world than the common cold. What about gastrointestinal distress? What about some sort of fever? Road rash? Headache? Not enough sleep (do not discount the importance of sleep!), muscle soreness? Back to the addendum to the last rule, if you feel that you will heal faster by taking time off and get back to quality training sooner, take that time off. Again, being honest with yourself is key. Most of the time taking an opportunity to heal will be more important than a poor quality workout.

Honesty is the Best Policy

It is clear; honesty is your guide. Some intervals should make you want to abandon a workout and maybe the sport entirely. There is a rest interval at the end of that dark place where you can evaluate if you should continue. Most of the time, you should. But if you are feeling off, if it is really hard to hit your objectives, if you are sick, have not slept enough, out of calories, it will be good to know when you should stop a cycling workout and just ride home easy. Make sure when you abandon a workout you do it for the right reasons – so that you can come back stronger and suffer even more next time.

Cycling Field Test – Why and How

May 11, 2016 by Josh Friedman

cycling field test

Cycling field tests are a great way to track progress. Power numbers are great in a race but there are a lot of external factors that can influence how much the rider puts into the pedals. A cycling field test removes those factors; it is only the rider versus the road. The data that results is easily comparable with later tests with similar conditions.

Replicate the Situation

The most important component of a field test is that it is the same situation each time – the same road, the same terrain, the same time of day and weather (if you can control it), the same bike, and the same warm up. This way the only data points that change from the cycling field test are time, power, and heart rate. What you will use depends on the equipment available to you.

Setting Your Zones

Besides tracking the progress of your fitness, cycling field tests will give you data to adjust your training zones. If your zones are too low, training is too easy and you will not get stronger. If they are too hard, you will not achieve your training goals and have the potential for discouragement and burnout from pushing too hard. Appropriate zones will challenge you enough that it is hard but achievable.

Where to Test

The most important part of the location you choose is that you have at least twenty minutes of uninterrupted riding at high speed. It would be easy to do it indoors on the trainer, but then you may end up with zones that may not be a true reflection of what you are doing outdoors. Keep this in mind if you do decide to use a trainer.

The second most important factor of location is that you can keep up a consistent effort. A big descent in the middle of an effort does not make for consistent power numbers. If you are lucky enough to live near a long climb, use it. It’s the best way to control external factors such as wind and it’s easier to maintain a maximal effort.

Warm Up!

Get in a good warm up. Starting a test on cold muscles and an un-primed cardiovascular system will only lead to misery and poor data from your cycling field test. Find a good warm up routine and stick to it before each test. It should be hard enough that you feel like you are working during the warm up but have plenty of energy left to tackle the test.

The Simple Test

The first of three cycling field tests is the easiest. All you need is that stretch of road, your warmed-up body, your bi,e and a stopwatch. Pick a favorite stretch of road and attack it, timing yourself each effort. Track your progress over time and see if your training is paying off.

The Heart Rate Test

If you have a heart rate monitor, this is the cycling field test for you. The only caveat is that you will need thirty minutes of open road, not twenty. Warm up well. At the start of the test, go into time trial mode. Do not go full gas from the start, but ease into the effort. After the first ten minutes, you should have reached your target pace and effort, which should be blindingly hard, but not so hard that you cannot finish off the twenty minutes.

The data collection comes from the last twenty minutes; you want your average heart rate only for that section of the test. That number is a very, very close approximation of your lactate threshold heart rate without getting blood drawn. Put it into a calculator and you will get your training zones.

The Power Test

The cycling field test with power is the most involved but it gives very interesting and comprehensive data. You must do each of the following efforts at full gas, with ten minutes rest in between: five minutes, 5 seconds, twenty minutes and one minute. The test will give you a normalized power that you can expect from a race effort. It will also show you where your strengths and weakness lie, especially when you track the data on this chart.

Keep in mind that the one minute power might be a bit lower than if you went out fresh and cracked off a huge one minute effort. In this order it simulates the finish of the race – you put in your time in the breakaway, now it is time to attack for the win. You will not set any power records in that situation, but you do need to do the best that you can.

To really get into the data, use a program like Golden Cheetah for analysis. It will also give you your zones, anaerobic capacity and whole host of other useful data. If you manage to track every ride with a power meter, Golden Cheetah or another similar program will be indispensable.

Putting the Cycling Field Test to Use

Try to test every six weeks or so during the training season. Your training zones will stay up to date and you will get the most out of your time on the bike. Track your progress and watch as you make big gains with more precise training!

Race Day Strategy To Have The Perfect Time Trial

May 5, 2016 by Josh Friedman

time trial

A key time trial is approaching. You want to have a great race but have the jitters. Get over them with a good plan starting with the day before the race up until you cross the finish line. Make the most of the many hours of training with a detailed approach to the race.

Two Nights Out

Make sure you get great sleep two nights out. Sometimes it is difficult to do it the night before a race, but two nights out is much easier. If you get a chance the day before the time trial, take a nap.

The Night Before

Pack everything you think you might need, even if it is a small possibility. Check the weather and bring appropriate kit (do not forget your shoes and helmet!). Bring all of your nutrition and hydration essentials. A small tool kit may come in handy if something needs a quick adjustment. All of your inflation tools – pump, right angle adapter for a disc wheel, spare tubes – are mandatory. Bring your trainer or rollers to have an effective warm up. Pack everything the night before and have it ready to go so you have piece of mind when you go to bed.

Morning Preparation

How much to eat for breakfast before a time trial depends on how much time there is before the race. If you have three hours, a full breakfast may suit you. If there is less time, trim down how much food you eat. This will take some experimentation. Make sure it agrees with you.

Arrive Early

Get to the venue early enough so that there is time to pre-ride the course. It will allow you to see the best lines on the road and give you an idea of where you need to put the power down and where you can recover some. If you do not have time to pre-ride but the road is still open, drive the course; it is better than going into it blind.

Pair Your Clock

Check your start time for the time trial. Compare your own reliable clock with the official race clock. Make sure they are close enough that you will know exactly when you need to start based on your own clock.

Warm Up

The longer the time trial, the shorter the warm up. First, you want to save your effort for out on the course and second, you have a little time at the beginning to ease into your pace. You want to ease into your pace so you do not blow up and have more left for later in the time trial. For a shorter time trial, you should do a longer warm up because there is not as much time to differentiate yourself from the rest of the riders. You set a pace that is nearly full gas from the start.

Start your warm up easy and work your way up to harder efforts. Do some time in each zone up to zone 4; the duration of the time trial will determine how long you will spend in each zone. Include some high cadence around 120rpm for short bursts to loosen up your legs. Do not overdo it zone 4 – you only need to activate your metabolic systems, not win the warm up.

Time Trial Start

Get to the start line for the time trial with about five minutes to go. That means you have to be done with your warm up, have gone to the bathroom, made final adjustments to your kit, and taken care of anything else that needs to be done.

You are all ready to go. All of the preparation lead you hear. Do not blow it by going way too hard off the line. On go, do a few decently hard pedal strokes to get the bike going, but then get into the aerobars on your time trial bike or low aerodynamic position on your road bike as quickly as possible. You will gain more by being aerodynamic than by sprinting and it will keep you from blowing up. If the time trial is longer than fifteen minutes or so, ease into your pace over the first two or so minutes. You should not be going easy but at a sustainable pace below your target. Shorter than fifteen minutes and you need to be ready at the line to go straight to your target pace.

The Middle

The coefficient of drag versus velocity is a cubed relationship, while the gravity versus velocity is linear. This dictates that you get more bang for your buck with extra effort on climbs rather than descents. This should also inform your time trial pacing. Think of your ideal pace on the flats to be a 100% effort. On a climb, do 110% of the flat effort, and a descent, do 90% of the flat effort. These numbers are relative to illustrate pacing ideas and only applies to flatter or rolling time trials. If the time trial has longer climbs, or is a hill climb time trial you will want to stick to your target pace so you do not blow up.

Standing On Climbs

Sometimes you will see riders come out of their aerobars for a hill. This is only worthwhile if your speed drops below twenty kilometers per hour or so. Otherwise aerodynamics are more beneficial than the additional force of standing on the pedals.

Staying Aero

Through the middle and end of the time trial it is important to maintain a good aerodynamic profile. It pays to think about it because as you tire it will become more difficult to keep low, narrow, and stable. It is worthwhile to expend a little energy to ensure that you keep the good form that you worked on leading to the time trial. The less the air sees of you, the more the effort from your legs will count.

The End

Your lungs are burning and your legs ache en route to a great time. Do not give up now. Really empty the tank for this last section. If you can stand up and sprint at the end of a time trial you did not leave enough of yourself on the course. Relief will come soon enough when you cross the finish line. In the meantime, stay in a very aerodynamic position and meter out your final effort to carry you across the line on empty.

After you cross the line, catch your breath, clean the salt and snot off of your face, get some water and recovery food and get yourself to the podium.

« Previous Page
Next Page »
  • Facebook
  • Tumblr
  • Twitter

Latest Articles

JOIN Cycling: A New Training Platform for Cyclists

May 27, 2024 By Eric Lister

cold exposure

The Benefits of Cold Exposure for Cycling & Life

June 13, 2023 By Eric Lister

hill climb

The Ultimate Hill Climb Training Guide

May 31, 2023 By Eric Lister

shoulder pain cycling

How to Treat & Avoid Shoulder Pain While Cycling

April 12, 2023 By Eric Lister

psoas stretch

The Importance of the Psoas Stretch for Cyclists

April 6, 2023 By Eric Lister

cycling neck pain

The Ultimate Guide to Cycling Neck Pain: Causes and Solutions

March 21, 2023 By Eric Lister

Useful Info

  • Contact
  • Finally, A Global Cycling Club That Is Focused On Community And Love Of Cycling!
  • Privacy Policy
  • Share Your Story!
  • Terms And Conditions Of Use
  • Welcome to I Love Bicycling
  • What Happened When I Stretched Every Day For a Month

Recent Posts

  • JOIN Cycling: A New Training Platform for Cyclists
  • How to Hang Bikes in Your Garage: 4 Inexpensive Options
  • Gravel Bike Vs. Road Bike: Which One Is Better For You?
  • The 6 Types of Mountain Bikes & How to Choose the Best One for You
  • What Is a Touring Bike Good For? 5 Benefits We Know You’ll Love

Search I Love Bicycling

Connect with Us

  • Facebook
  • RSS
  • Tumblr
  • Twitter

Copyright © 2026 · Magazine Pro Theme on Genesis Framework · WordPress · Log in