As cyclists, we love the sport. Apart from providing freedom, the simple two-wheel bicycle offers physical and mental health benefits such as relieving stress and maintaining a healthy weight.
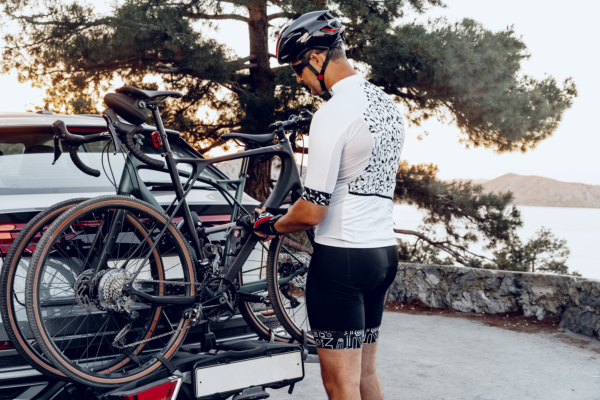
Cycling can be an expensive sport, and with bikes costing thousands of dollars, cyclists need to ensure their bikes are secure. Enter the SUV bike rack. Fortunately, these bike racks won’t break the bank like many other cycling accessories. Moreover, choosing the best bike rack for an SUV is critical not only to the safety of your bike but also to the size of the hole in your wallet.
So how exactly do you choose an SUV bike rack? And are there different types of bike racks for SUVs? You bet there are. When choosing the best SUV bike rack, you need to consider a few factors.
So without further adieu, let’s take a look at the different types of bike racks and some of the important factors to consider.
Important Factors To Consider When Purchasing A SUV Bike Rack
Generally speaking, the two most frequently asked questions that pop up are how often and how far do you intend to travel with your bikes? Next up, you need to tackle the question of the type of bikes you have and how many bikes your SUV bike rack will have to carry.
Are these questions really necessary to answer? YES. Taking the time to answer these fundamental questions will not only save you money but a big headache later on.
Other factors to consider:
- Does your bike have thru-axles?
- Do you own heavy mountain bikes?
- Do you own light road bikes?
- Are they expensive bikes made from carbon?
As you’ll see, there are several types of bike racks for SUVs, so it’s essential to consider how you want to carry your valuable bikes. Do you prefer to carry them on an SUV bike roof rack or a no hitch bike rack for an SUV?
One additional factor that many cyclists don’t consider is the simple fact that most bikes are entirely different in terms of weight, style, dimensions and price. Because of this, you need to do plenty of thorough research on the many SUV bike rack brands on the market.
Simply put, you’ll probably want to invest in a quality SUV bike rack that doesn’t cost a third of one of your Pirelli P-Zeros.
Types Of SUV Bike Racks
Before we look at the best bike racks for SUVs, let’s look at the types of racks available. Each rack serves a different purpose, so it’s important to know which rack serves what purpose.
Roof Bike Racks
SUV roof racks are remarkably adaptable and offer some of the best safety for your pricey bikes. That being said, they tend to be a bit more costly than other SUV bike racks.
Hitch Bike Racks
As the name suggests, the hitch mount bike rack fits directly into your trailer hitch. These bike racks are pretty common among bike enthusiasts as they are generally cheaper and still provide a decent amount of safety compared to a no hitch bike rack for SUV’s.
Trunk Bike Racks
Trunk bike racks attach to the trunk of your car via a series of unsightly straps and hooks. These SUV bike racks are cheap but tend to move around during travel, damaging your bikes.
Truck-Bed Bike Racks
These types of bike racks are perfect for SUVs and are incredibly versatile. They are easy to install and can also carry boats, mini-bikes and ride-on mowers.
The Top Five Bikes Racks For SUVs
Saris Bike Rack
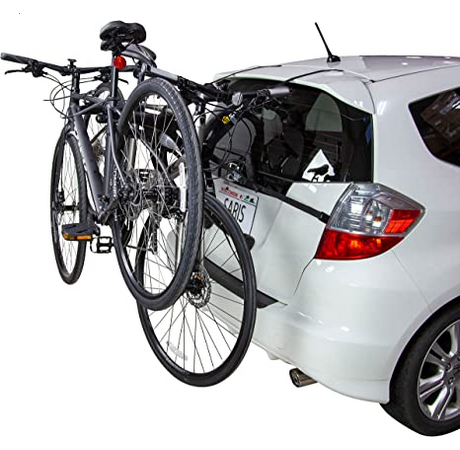
Price: $215.93
Boasting one of the lightest yet strongest frames, the Saris Bike rack utilizes an “arc design,” enabling bikes to be transported without hitting each other. Made in the USA, this bike rack is perfect for your SUV and can carry two bicycles. Amazingly this SUV bike rack suits 90% of the most popular cars on the market.
Things We Liked
- Sleek and stylish design
- Rust resistant
- Lightweight
- Robust and durable
Things To Consider
- Only comes in black
Young 2-Bike Rack Hitch Mount Platform Style
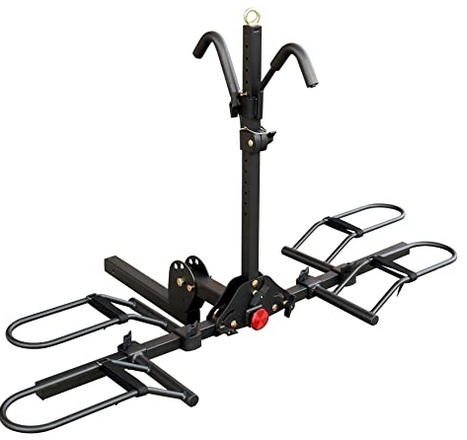
Price: $249.99
The Young 2 bike rack is safe and secure, comes with a 1-year warranty and can hold up to 200lbs. Not only does the Young 2 SUV bike rack use a tilt-back design, but it also folds away easily, saving you plenty of space. The padded hooks are an excellent feature that secures your bike without scratching it.
Things We Liked
- One-year warranty
- 200lbs carrying capacity
- Tilt-back design
- Folds away
Things To Consider
- Not the best-looking SUV bike rack; that said, it does a great job
KAC K2 2” Hitch Mounted Rack 2-Bike Platform Style Carrier
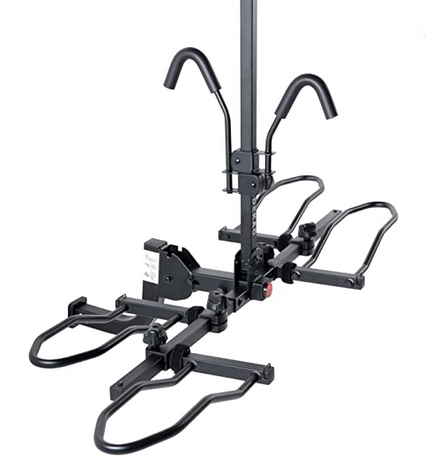
Price: $359.99
The KAC K2 is a platform-type, hitch-mounted SUV bike rack that allows you to transport 2 bikes. The KAC K2 simply attaches to your 2-inch trailer hitch for a secure ride. With a total carrying capacity of 120 lbs, it provides more than enough durability to give you peace of mind on the highway.
Things We Liked
- Limited lifetime warranty
- Tilt-action to access your trunk easily
- Easy-to-follow assembly instructions
- Supports even the widest E-Bikes
Things To Consider
- Slightly on the pricey side but well worth the money
Thule EasyFold XT 2 Hitch Bike Rack
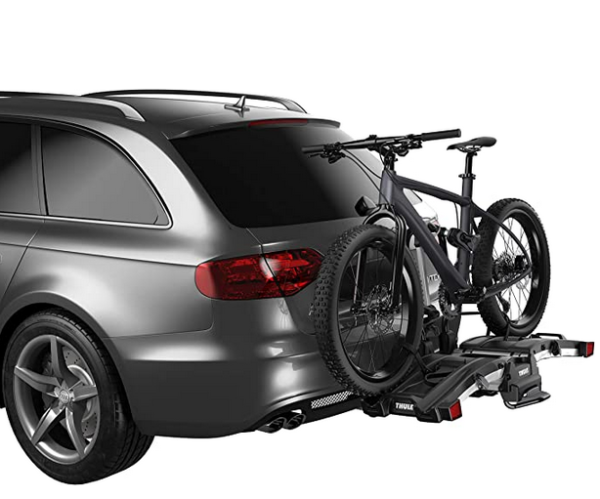
Price: $999.95
Undoubtedly the cream of the crop in the SUV bike rack category, the Thule EasyFold is the premium option for cyclists who want a safe and secure rack with all the bells and whistles. Thule is one of the industry’s most reputable brands and has built quality bike racks since 1962.
With easy trunk access via a smart foot pedal and a fully foldable design, the Thule bike rack screams style while remaining functional. Best of all, it requires no tools to assemble.
Things We Liked
- Reputable brand
- Quality build materials
- Rust resistant
- Sleek design
- Functional
- No tools needed to assemble
Things To Consider
- Price; but as they say, if you want the best, sometimes you’ve got to pay
ROCKBROS Suction Cup Bike Rack
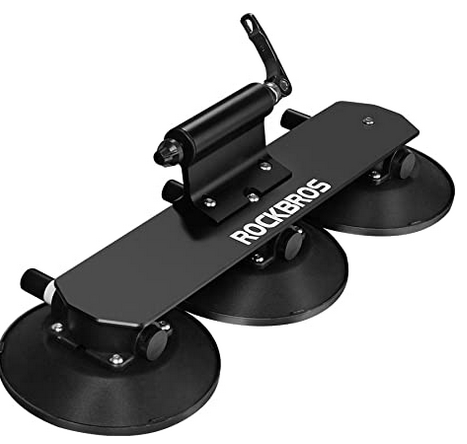
Price: $238.18
The ROCKBROS Suction rack takes a unique approach when it comes to securing your bikes. As the name suggests, the rack uses suction cups and attaches easily to your roof. The cups are made of soft yet highly-durable rubber, so they won’t damage your car paint.
The ROCKBROS suction rack comes with an easy-to-install video that guides users through an easy 5-step installation process. All ROCKBROS bike racks come with a one-year guarantee.
Things We Liked
- Easy-to-install
- Super lightweight
- Sleek design
- Affordable
- Fits all types of vehicles
Things To Consider
- Can be a bit fiddly
That’s A Wrap
So there you have it, everything you need to know before purchasing an SUV bike rack. Remember, several factors should be considered before you pull the trigger and spend your hard-earned cash.
Factors such as:
- How often you’ll be using the bike rack?
- What type of bikes do you own?
- How many bikes do you have?
- Do your bikes have thru-axels? And, of course,
- Your budget
Take your time, explore all the bike rack options, and I’m sure you’ll find the right SUV bike rack for you and your beloved bikes.
Happy biking!!


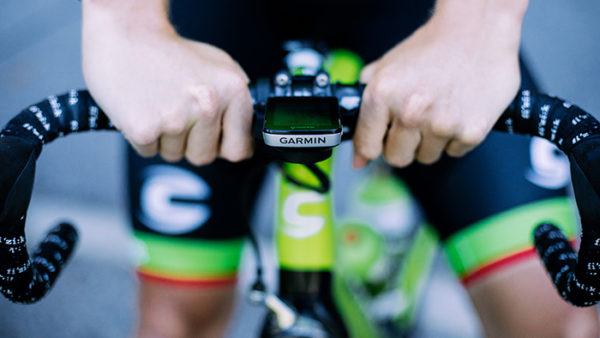

 After you have your new power meter ready to go on your bike, the next step is to do some baseline tests to determine your power profile. Ideally, you will want to determine the maximum power you can produce for 5 seconds, 1 minute, 5 minutes and 30+ minutes (this last one is referred to a
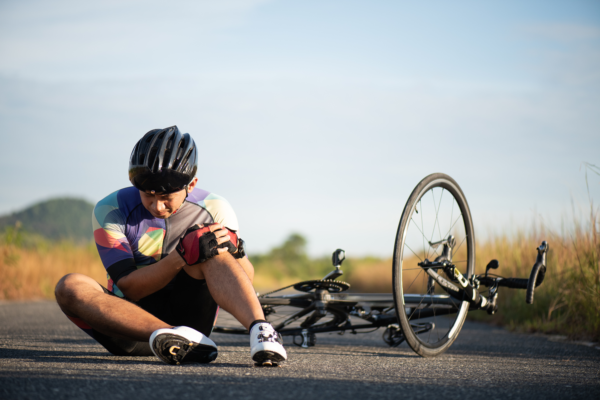
  So it finally happened. After years of close calls and near misses, you finally hit the deck. Maybe it was a errant patch of gravel, or someone’s back wheel that was the culprit, but the end result is always the same – you leave a significant portion of your skin behind on the road. Recovering from a crash can be a tricky process, and you will only ever do it the wrong way once (it hurts that much!). To spare you some learning pains, here are some tips on dealing with the dreaded road rash.