• Training
    • Injury Prevention
    • Training Tips
  • How To
    • Bike Fit
    • Gear
  • Nutrition
    • Nutrition Tips
    • Weight Loss
  • Repair
  • Reviews
  • Stories
    • Funny Stories
    • Jokes
    • Quotes
    • Videos
    • Funny Videos

I Love Bicycling

I Love Bicycling is a website that is geared towards cycling for beginners with road cycling tips, training articles, nutrition tips, weight loss, how to’s and bike repair articles.

How To

  • Bike Fit
  • Gear

Leg Workouts For Cyclists

October 25, 2015 by Dyani Herrera

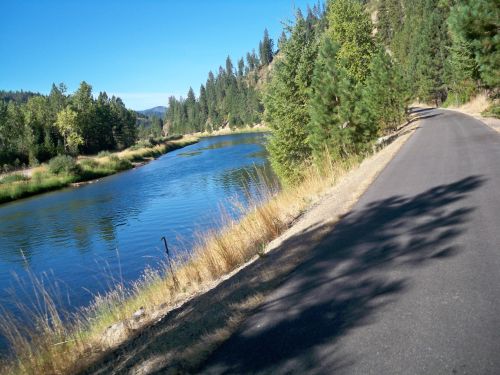
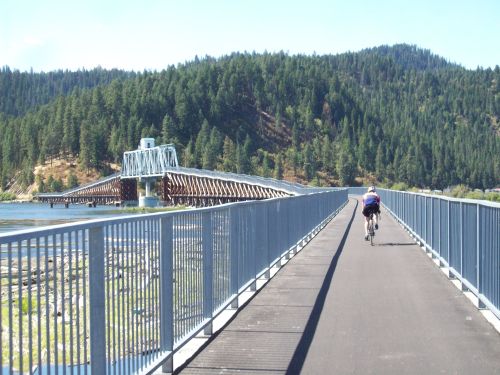
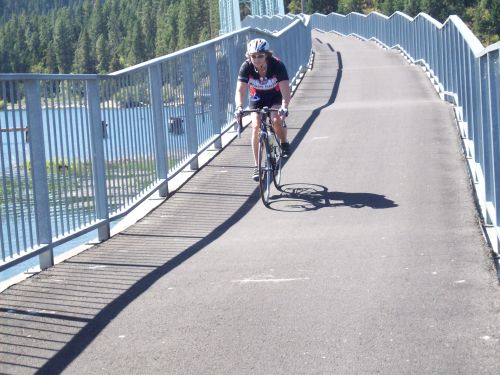
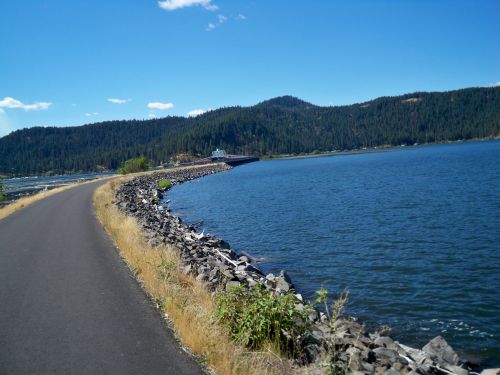
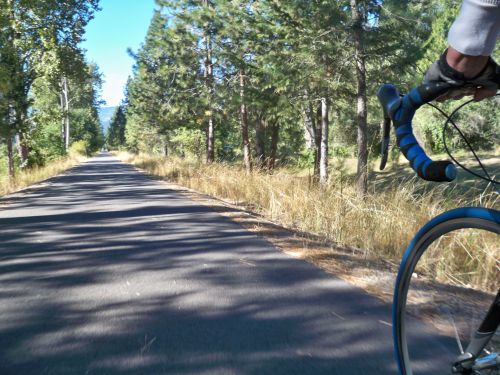
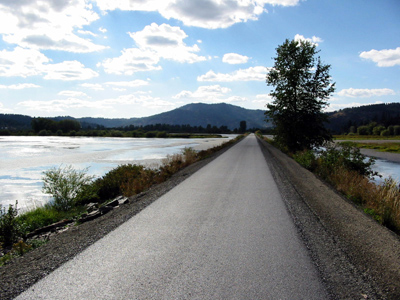
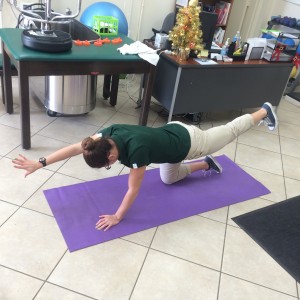
At times as endurance athletes we tend to neglect strength training because we make the mistake of thinking we workout our legs enough when cycling. However, this misconception could lead to a wide array of issues such as injury and decreased performance.

As a rookie cyclist I used to think doing interval training or bridge repeats was enough resistance to incur strength gains, I was also noticing a visible difference in my leg musculature. Yet, as the years went on I noticed I had hit a plateau in my cycling performance and couldn’t figure out why.

I had changed my cycling workouts, increased the volume, and trained harder than ever before, but wasn’t noticing a significant improvement in my speed. Then, the injuries began to occur and I started to suffer from IT band syndrome. Additionally, I noticed I had a low lactate threshold and my muscles would fatigue quickly during difficult workouts.

After two years of this, I decided I needed to make a big change in my training, although I hated the weight room it was a necessary evil if I wanted to improve performance. For several months I’d complete two weight lifting sessions a week for my legs. Each session had a difference purpose, one required lighter weight, but more explosive movements which would lead to increased muscle recruitment. Conversely, the second session was higher weight to build more lean body mass. As time passed I noticed that workouts which were difficult before became easier, my lactate threshold had increased significantly, and I was able to train at a higher intensity.

There are many physiological benefits to strength training that endurance athletes can benefit from. Strength training increases muscle recruitment, in other words more fibers within the muscle are utilized during specific movements. By having more muscle fibers completing a task, it becomes easier to complete. It also leads to decreased lactic acid buildup since muscles are used to training at a higher load. The body becomes more efficient in using its energy supplies and releasing lactic acid as a byproduct. This allows the lactate threshold to increase and in return allows a cyclist to ride longer with less fatigue. Additionally, it aids in building more mitochondria since more muscle fibers are being utilized and thus, cells are divided quicker to supply these fibers with the needed energy, glucose. In turn, this leads to a higher basal metabolic rate, in essence, faster metabolism. In completing the exercises below on a consistent basis, these benefits can be acquired, and performance improved.
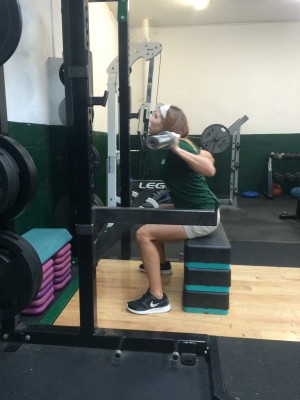
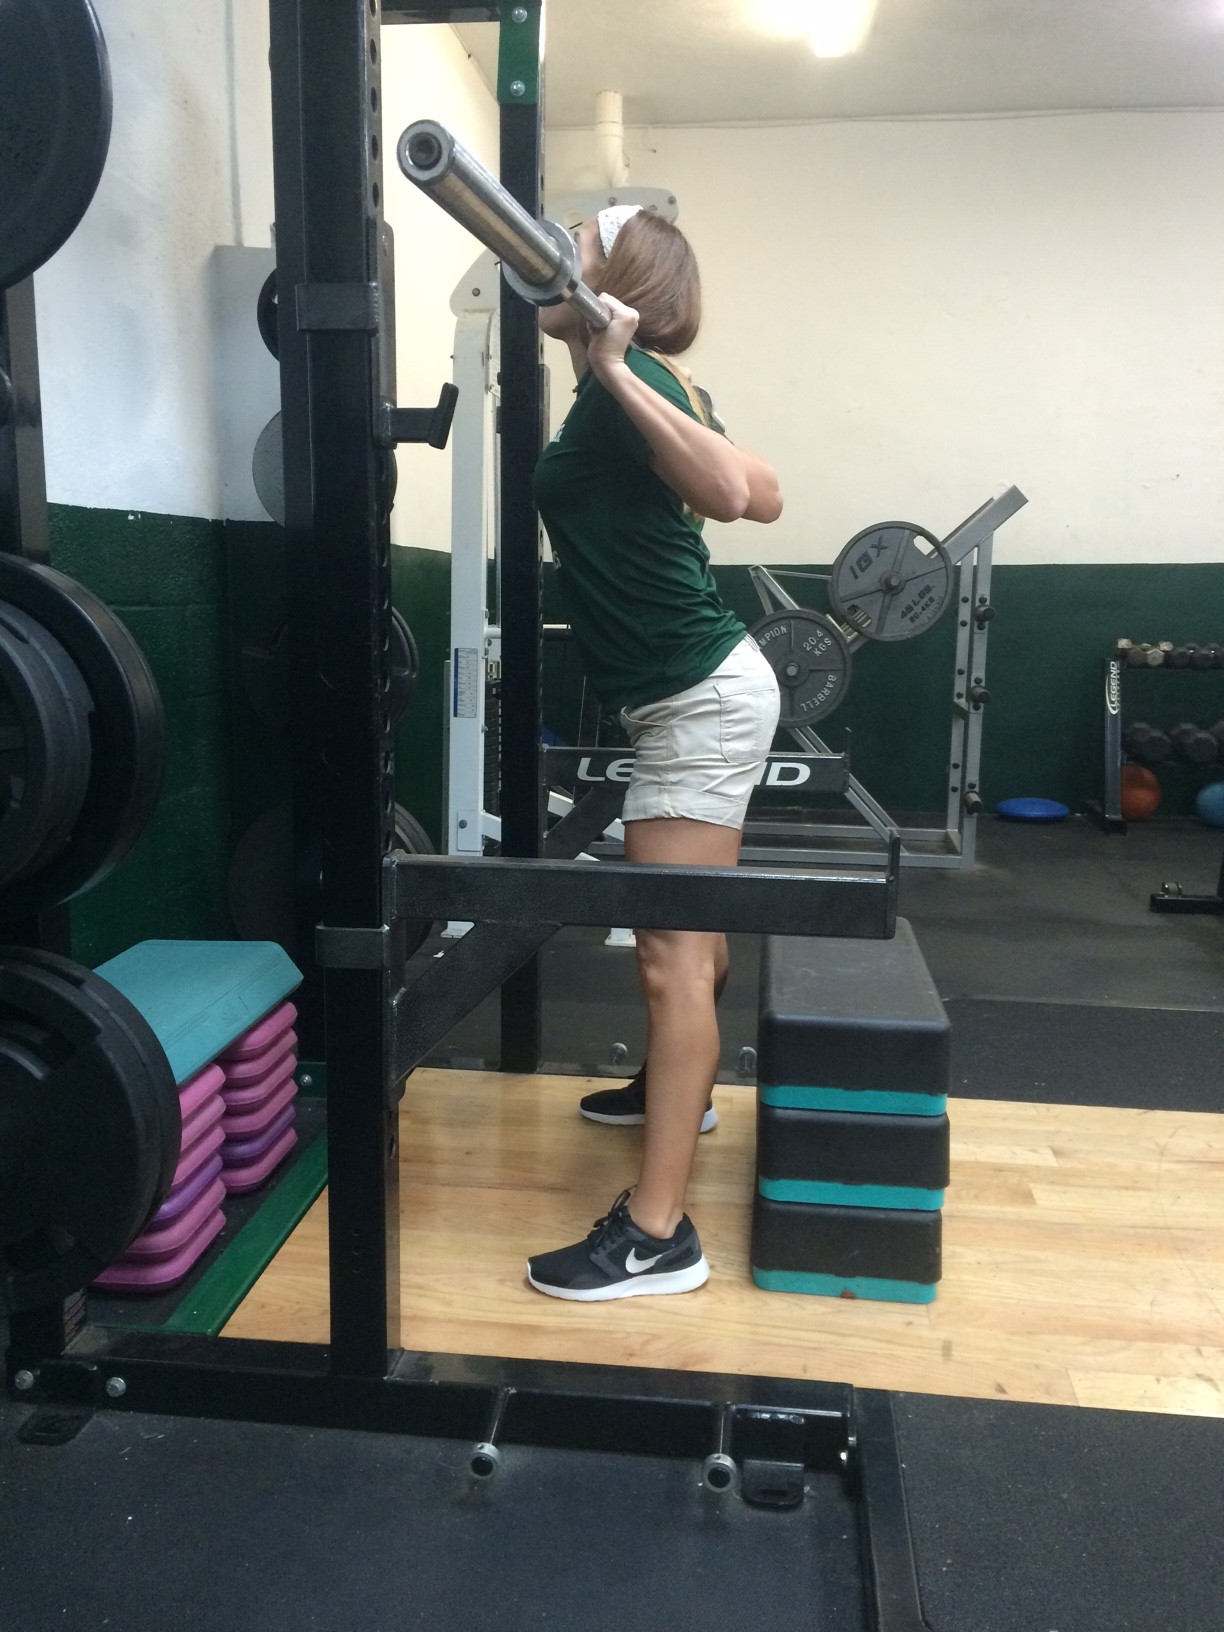
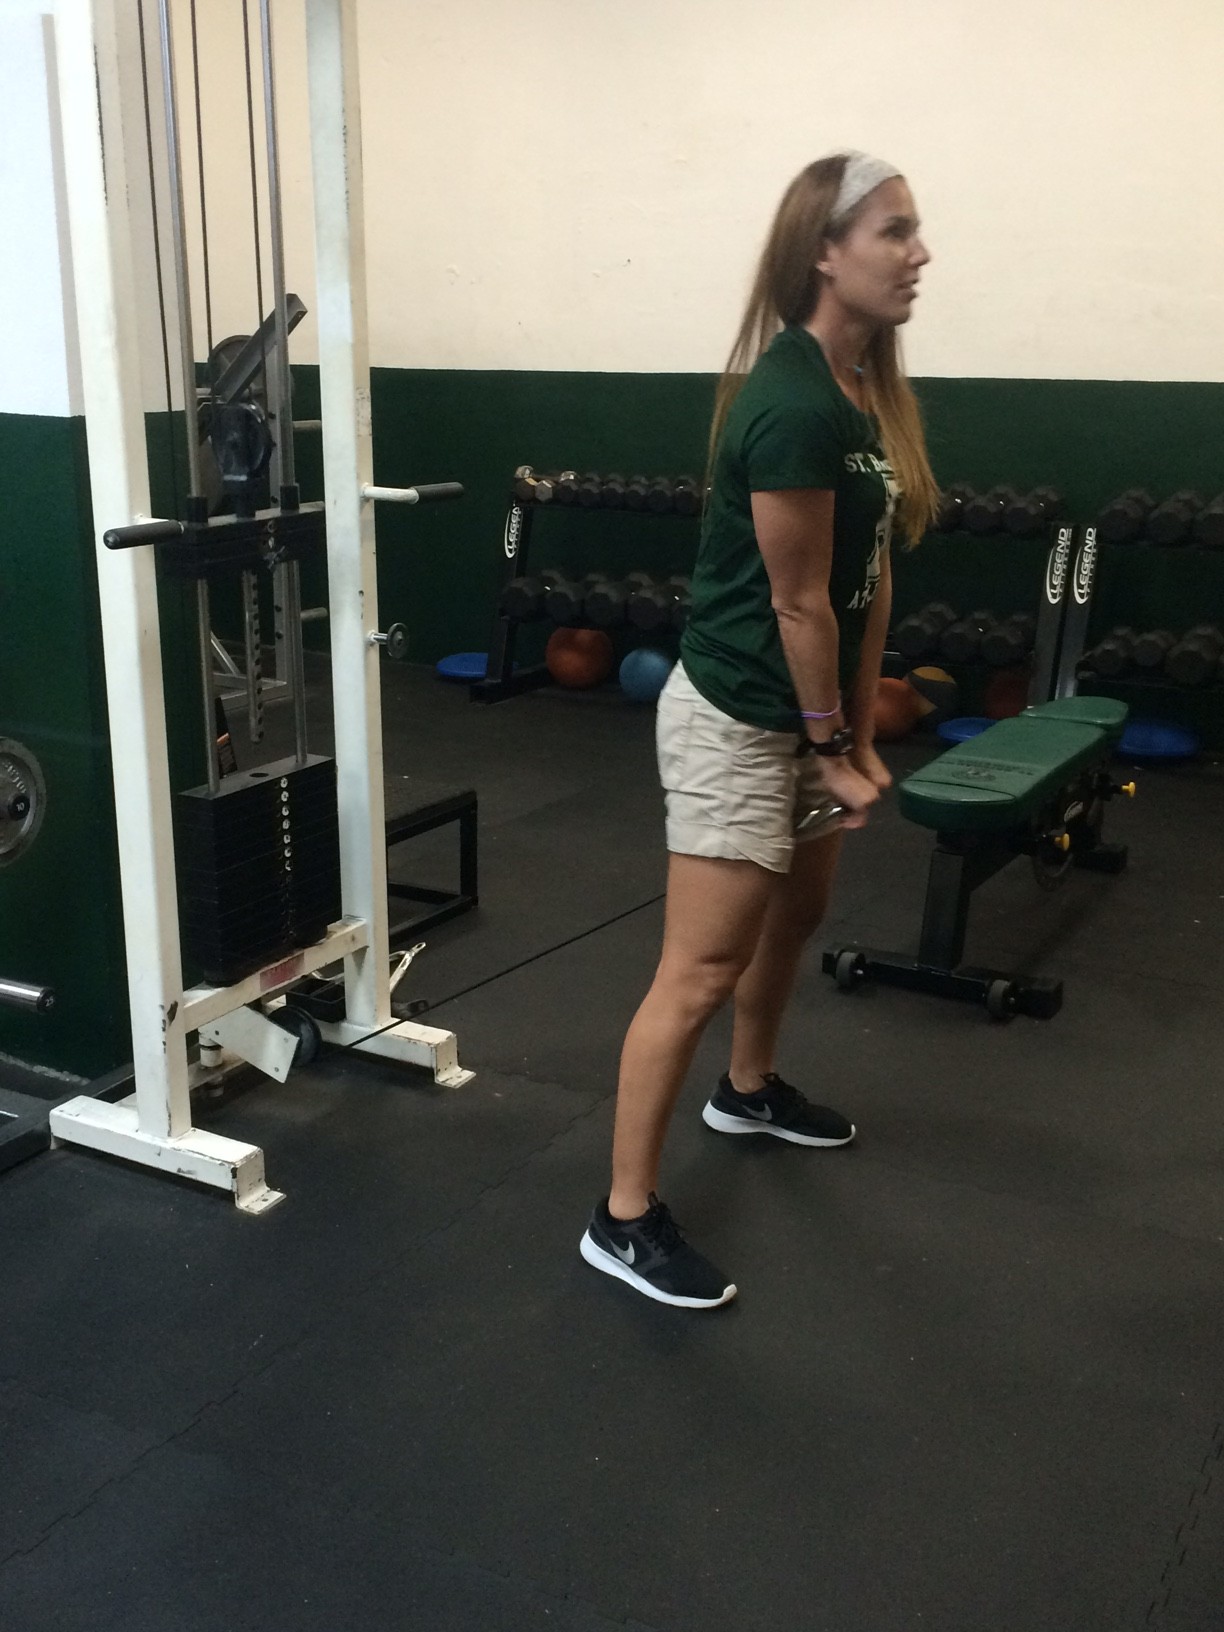
Box Squats

This type of squat requires more activation of the gluteus maximus and hamstrings. These muscles are usually “asleep” in cyclists since we tend to use more of our quadriceps during the pedal stroke. However, in strengthening these muscles we can engage them in the upwards portion of the pedal stroke and allow our quadriceps to rest for a brief moment.

Also, by strengthening these muscles we decrease the risk of poor compensation patterns where the body begins to recruit the hip abductor muscles such as gluteus medius and tensor fascia lattae, which could lead to IT band syndrome.

Make sure to have a wide stance, with the feet pointed slightly outward, keep your core tight, and look upwards during the motion. Make sure to not “slam” on the box and to squeeze your glutes together when coming off the box. If you feel yourself slamming/falling on the box decrease the weight you’re lifting until you’ve perfected the technique. On speed days you can complete 6 sets of 8-10 reps with lighter weight, and exploding off the box. On days where you’re maxing out then complete 5-6 sets with 3-5 repetitions ensuring you never sacrifice form for heavier weight.
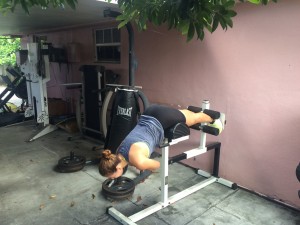
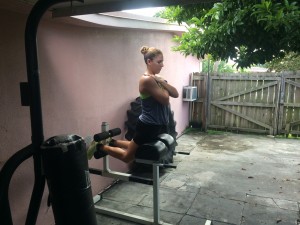
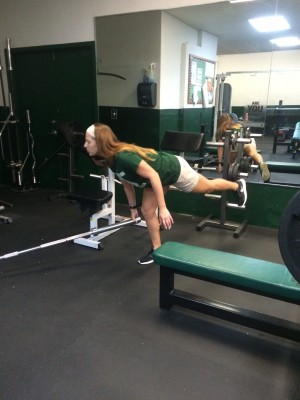
box squats 1 - Leg Workouts For Cyclists

Box squats 2 - Leg Workouts For Cyclists

GHD’s

With this exercise you need a GHD machine. Make sure to adjust the height and width to your size to maximize the movement. It’s important to squeeze your glutes throughout and keep your core tight to prevent any low back pain. If you do not squeeze the glutes on the way up, you will begin to engage more of the erector spinae muscles and turn the exercise into a trunk extension instead. Complete 3 sets of 8-10 repetitions.

GHD 1 - Leg Workouts For Cyclists

GHD 2 - Leg Workouts For Cyclists

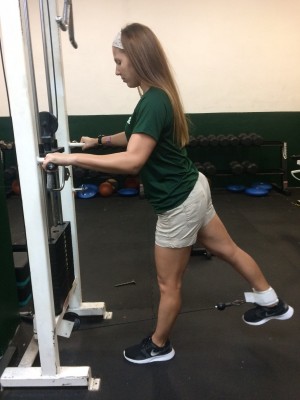
Single-Leg Deadlift with Barbell in Landmine

If your gym does not contain a landmine (metal plate with socket for barbell) then you can place the end of the barbell into a corner of a wall. Since the exercise is unilateral, it requires a higher degree of balance, therefore completing this exercise with flat shoes such as converse or even barefoot would be beneficial. Ensure to keep your back flat at all times as to not engage those erectors and reduce risk of injury to the low back. Squeeze those glutes and hamstrings as well as tighten the core during the motion. Complete 2 sets of 12 repetitions.

single leg deadliest - Leg Workouts For Cyclists

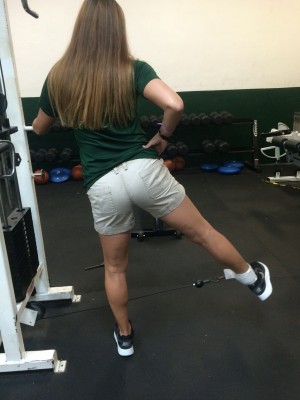
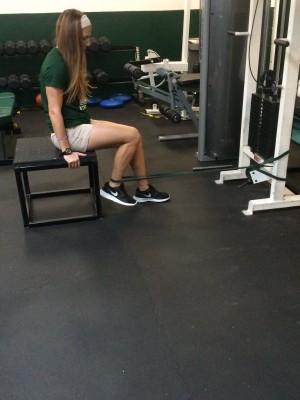
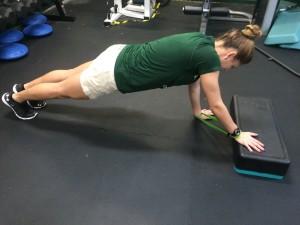
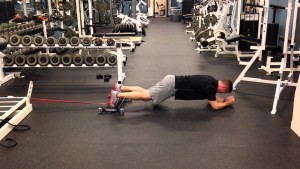
Step-Downs with Resistance Band

This exercise requires a long resistance band of higher resistance, these can be purchased via amazon here. Loop the band around the top pole of a squat rack, pull down on the band, and place one foot in the loop as seen in the picture below. Make sure to maintain control throughout, step down explosively, and quickly rebound. Keep your back erect at all times. Complete 3 sets of 15 repetitions, bilaterally.

step downs 1 - Leg Workouts For Cyclists

step downs 2 - Leg Workouts For Cyclists

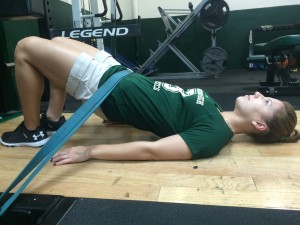
Hip Extension and Hip Abduction Superset

These exercises allow the gluteus maximus to be isolated as well as the gluteus medius and TFL, respectively. Strengthening these muscles decreases the risk of IT band syndrome. It is vital to have ankle cuffs to perform these exercises. When completing hip extensions, make sure to keep the back erect, and foot pointing forward at all times to avoid recruitment of hip abduction muscles. Conversely, with hip abduction, ensure to have toes pointing forward and be explosive when completing the motion. Complete 3 sets of 10 repetitions.

Hip extension 1 - Leg Workouts For Cyclists

Hip abduction - Leg Workouts For Cyclists

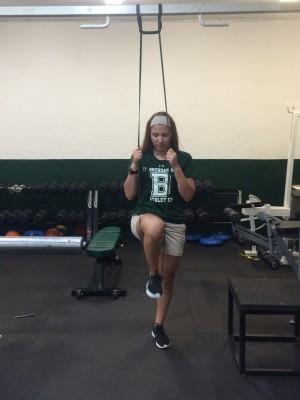
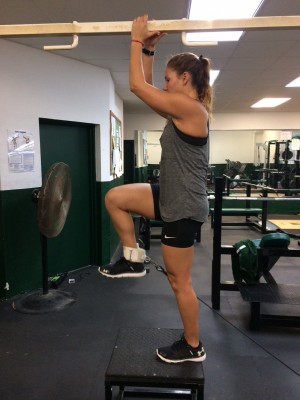
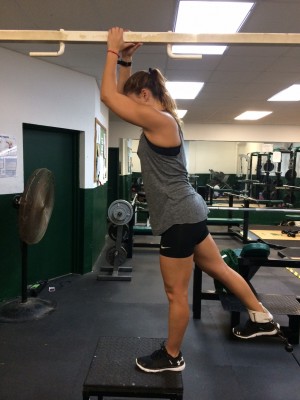
Hip Flexion/Extension

This exercise also requires ankle cuffs, cable cross over machine, and 18 inch plyo box. Hook one leg to the bottom cable, step onto the plyo box, and hold yourself steady with the above beam. Bring your hip upwards in an explosive fashion, and control it as you extend it backwards. This is a great workout for the hip flexors which are used a lot when climbing on the bike. Also, it strengthens the gluteus maximus. Complete 3 sets of 12-15 repetitions.
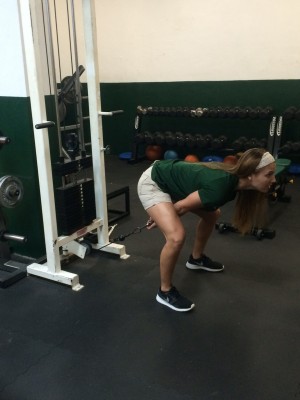
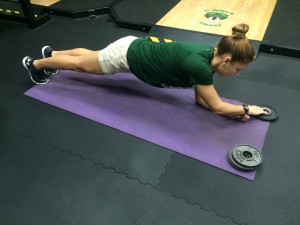
Hip flexion 1 - Leg Workouts For Cyclists

hip flexion 2 - Leg Workouts For Cyclists

Pull Throughs

This motion requires a single-handle and cable cross over machine. Hook the handle bar to the bottom cable, place it between your feet, and “pull it through” until your glutes are fully extended as seen in the picture below. It’s important to maintain a flat back when reaching down to ensure you do not hurt your low back during this exercise. Complete 3 sets of 12 repetitions.

pull throughs 1 - Leg Workouts For Cyclists

pull throughs 2 - Leg Workouts For Cyclists

Hamstring Curls with Resistance Band

Using the same type of resistance band as in the step-downs, except with lower resistance (thinner band), you will complete hamstring curls. This exercise is a great alternative if you suffer from any low back pain or pathology. Loop the band around a pole, sit on an 18 inch plyo box, and place heel in loop, then bring the band towards you. Complete 3 sets of 15 repetitions bilaterally.

seated hamstring curls - Leg Workouts For Cyclists

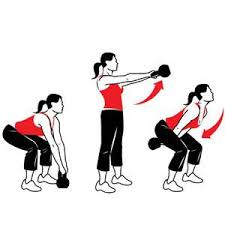
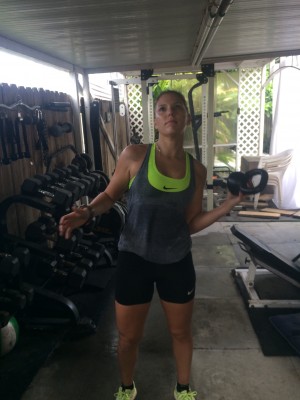
Kettle Bell Swings with Plyometric Box Jump

With this exercise you must maintain a tight core, get momentum in the kettle bell swing, and allow the swinging motion to propel you forward as you frog leap. Complete this motion 5 times, drop the kettle bell, and jump onto a plyobox. This is a fantastic plyometric maneuver involving several leg muscles. Do 3 sets of 5 repetitions as explained above.

KB swings - Leg Workouts For Cyclists

In completing these leg workouts for cyclists twice a week for several months in the off and pre-season, you can minimize risk of injury and improve cycling performance.

Coeur D’Alene Bike Trail

October 18, 2015 by Wade Shaddy

Can a bike trail make you faster, with more endurance? Can you imagine riding 140 miles or more — in a single day?  A trail exists that can help you do that.

Coeur D'Alene Bike Trail

The 72-mile Coeur D’Alene bike trail in the rugged panhandle of Idaho is such a path. Designed with the hardest, smoothest blacktop you can imagine, it’s purpose is to cap-off heavy metals leftover from the Silver Valley Rail line. Paid for by the United States Government, the State of Idaho, and the Coeur d’ Alene Tribe, the 10-foot-wide, well-maintained path provides cyclists with a once-in-a-lifetime experience.

Coeur D'Alene Bike Trail

Gliding along with almost no effort, the Trail of the Coeur d’ Alene is like glass. You can’t even feel your bike on this trail, and it’s easy to cruise at 20 mph all day. The miles drop away as you pass through chain lakes, pastoral settings, over high-bridges, and through deep, forested tunnels….and most of the people you’ll see are cyclists just like you, and maybe a few deer, bear, raccoon, moose, elk, herons, etc.

scenic river - Coeur D'Alene Bike Trail
The trail follows the Coeur d’ Alene river.

The trail starts at Plummer Idaho, and ends at Mullan Idaho, but there’s options to enter it at regular intervals. One of the best options is to leave your rig at Heyburn State park, and start your journey by climbing the Chatcolet bridge over lake Coeur d’ Alene.

Once a draw bridge for big ships, it's now a lookout for cyclists. Coeur D'Alene Bike Trail
Once a draw bridge for big ships, it’s now a high point for cyclists.

Designed with bikes in mind, the draw bridge is refurbished with a series of built-in rollers. It’s the fastest part of the trail. Because it’s so smooth, intrepid cyclists can hit 40 mph — if life insurance is paid up.

Coeur D'Alene Bike Trail

Your next stop, only about 10 miles from the bridge is the lake-front town of Harrison. It’s a bike-friendly town where you can grab an icy caramel frappacino, stop at the bike shop for advice, and visit with other like-minded cyclists.

The last refreshment stop before heading toward Cataldo, about 30 miles. Coeur D'Alene Bike Trail
The last refreshment stop before heading toward the tiny Cataldo Inn, about 30 miles.

The remainder of the trail is relatively flat — because trains can’t climb. If the path climbs at all, it’s unnoticeable.

Coeur D'Alene Bike Trail

Going the distance from Plummer to Mullan and back is about 140 miles. It’s easier than you think. But if that’s a bit intimidating, plan an overnight stay at the historic Ryan Hotel in Wallace — the center of the universe — it’s an experience you won’t soon forget. It’s right across the street from the Oasis Bordello Museum where you could get a, “straight, no frills” for $15, until about 1988 when it closed its doors.

handlebars - Coeur D'Alene Bike Trail

If Wallace seems like too many miles, the scenic town of Kellogg is only about 40 miles from Chatcolet, where you can ride one of the longest gondolas in the world to the top of Silver Mountain. Rent a downhill bike and practice your downhill skills.

gondola - Coeur D'Alene Bike Trail
Silver Mountain downhill has trails for all skill levels.

The ride from Harrison to Kellogg is remote. There’s bathroom facilities at regular intervals on the trail, but make sure your water bottles are filled, you’ve got a few snacks, a tool kit and a spare tube. Forget your cell phone, it’s probably not going to work out there anyway.

Sunlight reflects off the glassy trail. - Coeur D'Alene Bike Trail
Sunlight reflects off the glassy trail.

The trail ends 6 miles from Wallace at the small town of Mullan, an old mining town. But the biking adventure doesn’t end there. The Trail of the Hiawatha is another 10 miles via interstate 90 where you can rent at mountain bike in Montana, enter a two-mile long tunnel, and emerge in Idaho. Locals in Wallace will often give you a lift to Lookout Pass where they have bikes with the necessary headlights to navigate inside the tunnels. Some people ride their bikes from Wallace to Lookout pass on the interstate, but it’s best to ask around at the hotel for a lift, they’re used to it.

final - Coeur D'Alene Bike Trail

The Coeur D’Alene bike trail is what cycling is all about. Do it fast on a high-speed carbon bike for a training ride. Do it slow on a cruiser to escape the rat-race. Take a side-trip on a cushy downhill bike for an adrenaline rush, or combine them all for a trip you’ll never forget. The Coeur D’Alene bike trail is waiting.

How to Buy a Bike

October 16, 2015 by Adam Farabaugh

How to Buy a Bike, buying a bikeBuying a bike is an important investment in your health, wellbeing, and overall enjoyment. Getting the right one that is perfect for you will help ensure that you get the most out of your purchase and are thoroughly happy with it. Whether you have ridden a little bit before or you are a first time buyer, knowing a little bit about what you’re looking for will go a long way and will make the buying process easier.

Following this guide starting from before you even go to your local bike shop to your first ride on your new bike will help you get the most out of your buying and riding experience.

Homework Ahead of Time

Before you go to a bike shop to take a look around, you should do a little bit of homework first so you know what you’re looking for.

First, determine what type of riding you are going to do and where your fitness level is at. Are you going to be riding primarily on trails, the road, cinder bike paths? Is your riding just going to be a short commute to work or are you looking to build to 100 mile century’s on the road. Knowing what type of riding you are going to be doing will allow you to narrow your focus on bikes specific for your type of riding.

Buy a Road Bike

Buy a road bike if you are looking to stay on the road, stay away from any sort of rough terrain and are looking to go fast.

Buy a Mountain Bike

Buy a mountain bike if you are looking to do a little off road exploring or mountain biking. The suspension system will absorb the shock of the rocks, bumps and roots out on the trail.

Buy a Hybrid

Buy a hybrid or a commuter if you are looking to cruise around at a medium pace, want a relaxed upright position, want to carry items, or plan to be on a mix of pavement and gentle off road riding.

Research and Price Range

Once you have determined what type of bike you want to buy, ask your cyclist friends what specific bike they might recommend. If you don’t have cyclist friends (and even if you do) go on the internet and look at the varying options and prices of a number of different brands with the style of bike you are looking for.

Call or go on the websites of your local shops and see what they carry and use that as a starting point.

Each company breaks down their bikes by category and you can get a better look at the kind of bikes you’re looking to get. Look at the frame and component specifics with their corresponding prices. This will give you a better idea when you get into the bike shop of how to compare bikes. As you’re doing this, it doesn’t hurt to write down a few questions to take with you to the local shop.

At the Shop

Before you go into a shop, call or go on their website and see what their focus is. If you’re looking for a mountain bike, you want a shop that has a good selection and isn’t focused mainly on road bikes and vice versa.

If you’re looking for a bike for commuting and around town, make sure they have those too. After you have a bit of a background on what you’re looking for, go into your local shop. Also ask around to see which shops are good or better known in the area. When you get there, browse around and get a feel for what they have.

Then talk to a knowledgeable employee and explain what you’re looking for and why. They will be able to help guide you toward the bike that is perfect for you and your price range. Ask questions about the bike and ask to see a bike one level up as well as down from what they recommend to get a feel for what you’re getting and for what price.

Test Ride

Once you find a bike you like, take it for a test ride. You’re not going to get the full feel of what it’s like on a normal ride but just a ride around the parking lot will give you a feel for its fit and how it handles. Shift through the gears, test the brakes, get out of the saddle, do some turns.

You should get a good feel for the bike. After riding this one, ask to ride the next level up bike as well as down so you have a good comparison for what you’re getting. You may find that the cheaper bike feels just fine for you or that the more expensive one is well worth the upgrade.

If you are reading this guide on how to buy a bike it is likely you are a beginner cyclist, in saying that, you should be focused on one thing above all else, comfort. If you are not comfortable on your bike, no matter the price, you are not going to enjoy it.

Make sure to test ride a minimum of 3 to 5 bikes before making any decisions at all. Discuss with the sales person what you liked about one bike, but perhaps not the other, especially regarding comfort or bike fit. Sometimes a small adjustment of the saddle, or stem length will make all the difference.

Buying a New or Used Bike in Person

Once you’ve gotten a good feel for the bike and have compared it to others along with its price, ask about what comes with the bike. Does the shop offer free tune ups for the first year that you own it? How about a discount on other products like helmets or a jersey?

Most shops will have some sort of extra incentive to buy from their shop. If they don’t, ask for something like it. They may not give a discount on the bike but they may throw in some extra free tune ups if you buy a bike and up to 50% of any accessories you buy.

Once you’re comfortable with the bike and everything you’re getting with it, make the purchase. You can sweat all the little details but in the end it’s how much you like the bike and want to ride it. Also, if you can’t afford the full price of the bike up front, a lot of shops will offer financing, so ask ahead of time if that’s something they can do.

Buying a New or Used Bike Online

Honestly, if this is your first bike purchase I highly recommend against buying online unless you are able to test ride elsewhere first. You have to be very confident that it is the right bike for you.

The amount of money you save from buying a bike online will be outweighed by the service, knowledge and fit that you would receive from your local bike shop. If you are purchasing a bike for under $1000 then your savings are generally negligible by purchasing online. Save yourself the headache of purchasing additional parts to make your bike fit properly or other such disasters that occur online.

First Ride

After you’ve bought the bike, you’re going to want to take it for a ride straight away. Be sure that you have a good fit on the bike such as the saddle height and the reach to the handle bars. The shop can help you with this as well.

Also make sure you know how to make all the necessary adjustments so if you have to raise or lower the seat mid-ride you can. Make sure you have a multi-tool to do this as well. Once you’re riding, don’t go to crazy straight away. Any bike is going to take some getting used to so ease into your riding and get comfortable with it. You’ll be glad you did once you get everything dialed.

Buying a bike is an exciting time and knowing a few things going into your purchase will make the experience that much better. It will also help to make sure that you are getting the best bike for you. There’s nothing worse than making a purchase and realizing it wasn’t the one you wanted. Doing a little homework, asking the right questions at the shop, and taking multiple test rides will help ensure that you’re getting the best bike for you as well as your price range.

10 Core Exercises For Cyclists

October 15, 2015 by Dyani Herrera

As avid cyclists we tend to neglect our core and instead focus on increasing strength in the legs, thinking this should be the only muscular focus for increasing speed. However, having a weak core could become an injury risk once we start increasing the volume in our cycling regimen. A weak core could lead to instability in bike handling, negative compensation patterns, and low back pain. By incorporating core exercises in our strengthening program we can improve riding efficiency. Additionally, it aids in avoiding over compensation by the hip and leg muscles that could eventually lead to injuries. All factors when combined with a proper training regimen could allow for improvements in overall speed and smoother pedal stroke. By completing 3-4 of the following core maneuvers, 3-4 times a week; we can reap the benefits of this strengthening program.

1.Planks

This is a great exercise that incorporates all the abdominal muscles from your obliques, to rectus abdominis, and intercostal muscles, as well as erector spinaes (back muscles). When completing this exercise, make sure to maintain a flat back and not raise your butt in the air to compensate for weakness. A good tip is placing a straight pole/stick on your back and not allowing it to fall. Also, look straight ahead instead of looking down. You can initially start with 3 sets of 20 seconds and continuously add 15 seconds as you become stronger.

Planks - Core Exercises For Cyclists

2. Planks with Plate Movement

This variation of the plank is more advanced and engages the obliques more than the standard plank. Females can begin with 4-2.5lb plates and males can begin with 4-5lb plates. In this exercise you stack the plates on the left hand side and while in plank position stack them to the right. Completing one repetition involves moving the plates from the left to the right and back. Make sure to complete 3 sets of 5 repetitions, maintaining proper plank form throughout.

planks with plate 1 - Core Exercises For Cyclists     

3. Planks with Small Resistance Band Loop

This is a different variation of the plank that also includes strengthening the chest muscles. This plank requires a theraband or resistance band loop that goes around both wrists. Make sure to always maintain tension on the band and not allow it to relax. As indicated in the photos this movement must be completed off a small ledge or stacked foam mats to create a difference in floor height. Start with both hands on the floor, then move them up on top of the stacked foam mats one by one then back down. That is one rep. Complete 3 sets of 10 repetitions.

plank pushup 1 - Core Exercises For Cyclists


4. Side Planks

This exercise isolates the obliques and minimally engages the hip abductors muscles to keep the hips up during the movement. These should be completed 3 times on each side for 20 seconds and continuously adding 15 seconds as it becomes easier.

side planks - Core Exercises For Cyclists


5. Glute Bridges with Stability Ball

Most people don’t assimilate glute strength to be related with overall core strength. However, if the glutes are weak it requires more effort from the back muscles causing them to spasm thus, leading to pain. Lift your glutes off the ground by raising one leg in the air and using the opposite leg to lift you in to the bridge. Switch legs and do the same. That is one rep. Complete 3 sets of 12-15 repetitions.

Glute bridge - Core Exercises For Cyclists


6.Glute Bridges with Resistance Bands

When completing this exercise make sure to acquire two thick/heavy resistance bands and place them across the bottom of a squat rack. Then, slide under the bands and complete the glute bridge making sure to squeeze your glute muscles and abdominal muscles as your rise up. Complete 3 sets of 15 repetitions and increase repetitions as strength improves.

glut bridge 1 - Core Exercises For Cyclists  

7. Opposite Arm/Opposite Leg

Maintain a similar position to the plank in this exercise and extend  upwards with the left arm and right leg, then the right arm and left leg. Ensure that the back is flat and leg and arm are fully extended. A helpful feedback tool for form is to maintain a stick on the low back, making sure it doesn’t fall. Complete 3 sets of 12 repetitions.

opp arm opp leg end position - Core Exercises For Cyclists 

8. Kettle Bell Toss

Using a light kettle bell (5-10lbs) depending on your core strength, stand with your legs shoulder width apart, and a tightened core. Then, toss the kettle bell from one hand to the other engaging your obliques. You can initially complete this for 1 minute straight and increase by 30 seconds as you become stronger for a total of 3 sets.

kb toss 1 - Core Exercises For Cyclistskb toss 3 - Core Exercises For Cyclists


9. Ab Slides

This exercise is extremely challenging and requires a Sorinex Roller and long resistance band. Loop the resistance band around the roller and tie the opposite end to a pole. Place your feet in the ridges of the roller and maintain a push-up position, stretch out until there is tension on the band, then bring the roller towards your arms, making sure to not let the roller move sideways, rather straight up and down. This exercise incorporates all core muscles (abdominals, erector spinaes, and glutes). Complete 3 sets of 10 repetitions.

sorinex ab exercise - Core Exercises For Cyclists

10. Abs using Cable Cross Over Machine

This core maneuver requires more equipment involving a cable cross over machine and two ankle cuffs. First you want to lower the arms on the cable cross over machine to the lowest insert and then hook each leg to the respective hook on the machine. Place yourself in a push up position and bring your right foot towards your left wrist and vice versa. Complete 3 sets of 12 repetitions.

These core exercises for cyclists involve beginner to more advanced maneuvers. It is helpful to complete these in front of a mirror or with a partner to correct technique throughout. In addition, it is important to remember to keep the glutes down during all plank exercises and ensure you maintain a flat back. Also, maintain a tight core by squeezing the abs and glutes during the exercises. This will help reduce injury and yield the full benefits of the exercises.

Bike Skills: Cornering – Techniques to Know and Get Good At

October 11, 2015 by Adam Farabaugh

Bike Skills- Cornering - Techniques to Know and Get Good At
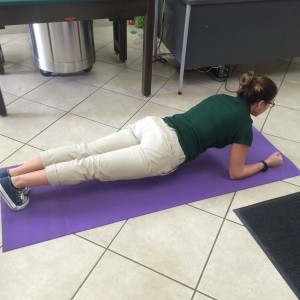
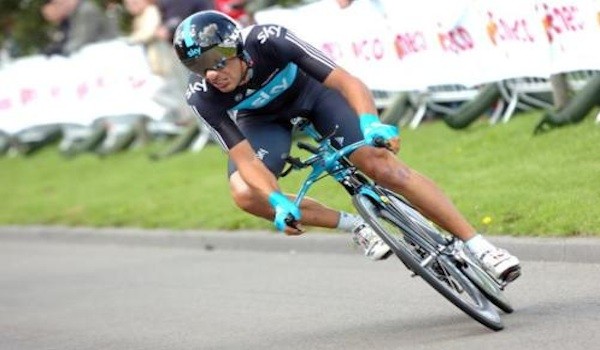
Riding a bike comes with the amazing potential to be able to do more than just go down the street or trail at a quicker pace than walking or running. With riding you can go fast enough and maneuver enough to give you a feeling unlike that of any other. Your heart pumps, the adrenaline flows, you can feel the excitement of what you just rode. You could have crashed but you didn’t. You had the skills to not only get through it but to get through it with style. These few tips will help you ride through corners better and with more confidence.

Cornering

Whether on the road or trail, cornering is the best skill you can learn to be a really good bike handler. If you can do all the other cool stuff but can’t corner, you’re riding is going to suffer. The biggest thing with cornering is having confidence in yourself and your tires. Like anything, practice is what is going to make you good. You will fall and if you don’t, you won’t find your limits. Practice, but practice smart so if you do fall, the damage is minimal.

Technique

On the road, cornering well is imperative because if you’re at your limit, you are probably going pretty fast and if you mess up it’s not going to feel good. To start, the first thing is to gauge your speed. Every corner you go through is going to have a rough maximum speed that you can get through it. As you improve, this speed will go up but there is always a limit. If you come into a corner faster than what you can handle, you are going to overshoot it. Brake and slow before the corner, not in it.

Position

Typically when going fast and through technical turns, you want your hands positioned in the drops of your road bike. This lowers your center of gravity and gives you a solid base of which to corner from. As you enter the turn, make sure your outside legs is at the bottom of the pedal stroke thus making sure your inside pedal doesn’t clip the pavement. As you do this, put a bit more weight on your inside hand while putting extra pressure on that outside leg as well. This is going to weight the tires and bike in a way to get the maximum grip out of the tires in contact with the road.

Control

Some riders swing their inside knee out while some keep it close to the top tube. Swinging it out gives a bit more stability but try it and see what feels best. As you start the turn and continue through it, look at where you want to go and keep your eyes moving toward that point. Avoid any rocks or other debris mid-turn with small adjustments as any real objects that you ride over during the turn has the real potential to cause your tire to slide out thus causing a crash.

Braking Mid-Turn

If you need to brake mid-turn, you are not going to be able to do it well while leaned over. You are going to have to straighten the bike back up, going straighter for a bit, and then applying the brakes. If there is still more corner to navigate, hopefully you slowed enough and can then re-enter the turn to make it through, otherwise start to look for exit options.

Exit Options for the Worst Case

If you do come into a turn too hot, or for whatever reason can’t make the turn, you are going to have to find exit options. This is going to just be reaction but the key is to stay cool and don’t over react. One of the first things less experienced riders do is to grab a handful of brakes. If still leaned over and cornering, this is going to send you right to the pavement. Instead, like above, straighten the bike back up, and then slow as much as you can.

If there’s a soft exit off the side of the road, take it and continue to slow and hope you don’t hit anything hard. If that’s not an option, say there is a guard-rail, you are going to have to try and make as much of the turn as you can. You may make it, but if you don’t you’ll have at least slowed some and created less of an angle into the object so it is less of a direct impact making your landing softer. You don’t need to be thinking about this as you enter every turn but when you do encounter it, you need to know what to do. It’s going to just be reaction but the fact that your brain has thought of it once before and has some inclination on what to tell your body to do will go a long way.

Practice

The more you go through corners, the better and more comfortable you are going to get at going through them. The best way to practice cornering is to find an empty parking lot where there is good pavement and no traffic. Practicing on the open road is dangerous and lends itself to traffic and having to focus on them instead of cornering.

First make a corner out of the parking lines or something of the like. Make sure however that at the outside of your turn there isn’t a curb or anything that you may hit if you do overshoot the corner. The first time you go through the corner, do so at a slower speed, exaggerating your actions such as the weight on your inside hand and outside pedal. Get a feel for it and then go through again from the other direction. You want to get equally good at turning in both directions, not just one. As you get more comfortable, go faster and faster but don’t overshoot your ability. Feel how the tires are contacting the pavement and try leaning the bike over more and less along with playing around with other things until you get extremely comfortable. Practice this once a week until you’re an expert at cornering and extremely comfortable with it.

Becoming good at cornering is going to allow you to be more comfortable on the bike because you are always going to feel in control. If you go too fast for what you’re comfortable with your body will tell you and you’ve found your limit. The key is to raise that limit and always be comfortable. Don’t test your limits where you shouldn’t such as on busy streets or descents where if you overshoot a corner you’re crashing. Do it safely and with that you’ll still have fun with it. Always be in control.

Goal Setting for Cyclists

October 10, 2015 by Alison Jackson

Goal Setting for CyclistsWhether you are aiming for a podium at National Championship or just want to be a little healthier, all bike riders can benefit from setting appropriate SMART goals.  SMART is an acronym used to set Specific, Measurable, Action-Oriented, Realistic, and Time-bound goals.

S – Specific

The first step to making a SMART goal is to be very specific.  You can set a broad big picture goal but from there it is important to articulate the smaller process goals that will help you achieve the big goal.  An example of a broad goal is ‘to do better than last year’ or ‘get fit’.  Ambiguous big-picture goals need to be funnelled down into attainable process goals to be check-marked along the way to the big goal.  Specific goals look at what is needed to get to the big-picture goal.  A more specific goal might be to place higher at your next National Championships.  Even more specific would be to notice that the championship course has a lot of climbing in it and choose a specific goal of becoming a faster climber.  Also, to get fit, what does that look like or mean to you?  Perhaps it means riding more kilometers, a goal weight or size, or the ability to achieve a fitness task.

M – Measureable

Another way to help select a specific goal is to determine if there is a good way of measuring success.  A SMART goal will have an end result that can be measured.  A measureable goal produces accountability and keeps you on track to know if you are getting closer to reaching your goal.  Becoming a better climber can be measured by a hill climbing workout done every week or every other week, whether it is increasing the number of hill repeats in a workout, or reaching the top in a single effort with the KOM or QOM Strava record.  If the goal is to ride more kilometers to get fit, start keeping a log of kilometers each week and increase the weekly count by 5 or 10km.  If the goal is to lose 10lbs use the scale regularly to keep you on track.

A – Action-orientated

In order to achieve your goal you must do something.  You will not reach your goal just by wishing for it to happen.  Make a plan and choose a couple of steps that will lead you to reaching your goal.  To be the best climber you need to commit to doing hill repeats regularly.  If you want to get fit, ride more kilometers this year than ever before, or lose that weight, you need to oil that chain and lay down some rubber on the road.

R – Realistic

A successful goal needs to be realistic.  A good assessment of your present situation will help you determine what a realistic goal might be.  Consider your work schedule, your family needs, current commitments and present fitness while setting your goals.

T – Time-bound

Finally, your goal needs to be written on a calendar with an end-date.  An open-ended goal becomes a never ending fight where preoccupation with previous habits distract you from really digging in and reaching your goal.  If you want to climb faster and have decided to include hill repeats in your weekly training plan, set up monthly markers such as ‘x’ number of hill repeats by the 30th of each month.  In addition to setting a year-end kilometer goal, set monthly kilometer goals to keep you on track.  If you want to lose weight before the next big race or before your best friend’s wedding make sure you circle that date on the calendar.  A deadline will help keep you motivated to work hard because you know that it has a foreseeable end.

How To Use Bike Gears Properly

October 4, 2015 by Lee Agur

Bike Gears – How They Work

How To Use Bike Gears Properly
This bike is in the easiest gear possible. It is in the small chainring upfront, and it is in the largest gear in the back.

Bikes have anywhere from one front chainring to three chainrings these days, accompanied by seven to eleven gears in the back. The different combinations of these gears will determine how easy or difficult it is to pedal and will dictate your speed. If you are looking to make small adjustments in the speed/difficulty then you will want to change your back gears (also known as cogs).

If you are looking to make a big change in your effort or speed then you will likely want to change the front chainring. A great example would be when you are heading from a downhill in the big ring and then switching to the small chainring as you climb up the other side of the hill.

Shifting Bike Gears

Left Shifter – Changes the front chainring and makes the biggest shift change.

Right Shifter – Changes the rear cogs and makes the smallest incremental shift changes.

What Is the Proper Gear To Be In?

The appropriate gear to be in is a gear that allows you to have a good steady cadence without feeling like you are pedaling too hard or too gently.

If you select a gear that is too high for the conditions, it will force you into a slower cadence. Pedaling slower than your ideal cadence is wasteful of energy. You also run a higher risk of muscle strains and joint damage, particularly to the knees and hips. Pedaling faster than your ideal cadence can allow you to generate an extra burst of speed, but you will tire yourself out too soon if you try to maintain an excessively fast cadence.

Aim for a constant cadence of 75 – 95rpm.

What To Avoid When Changing Bike Gears

Cross chaining occurs when the chain is on a big slant. The chain should not go on the big ring up front and the big ring on the back simultaneously, nor should it go on the small ring upfront and the small ring in the back. Cross chaining wrecks your chain, decreases efficiency and it also gives you less options when trying to find a new gear.

Using Bike Gears

  1. To begin with, start in your small chainring up front.
  2. Get on your bike and become familiar with changing your back gears with your right shifter.
  3. Get comfortable shifting through the gears (while avoiding cross chaining) before you start shifting with the front gears as well.
  4. Attempt to maintain a smooth steady cadence of about 75 – 95 rpm while maintaining a moderate effort when pushing on the pedals. Change the gears appropriately to maintain this steady cadence and effort.

How To Use Bike Gears On a Hill

Use the small or middle chainring upfront and the bigger gears in the back. You will want to switch in to these gears early as you approach the climb allowing you to climb the hill slowly and with less effort.

How To Use Bike Gears On a Flat

Use the middle front chainring and the middle or small gears in the back. Focus on small adjustments with your back gear.

How To Use Bike Gears Descending

Use the large front chainring and the middle or small gears in the back.

Essential Cycling Gear

October 2, 2015 by Adam Farabaugh

Essential Cycling Gear, Must have bike gear
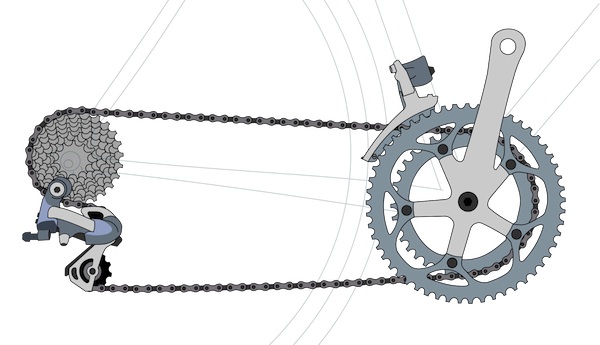
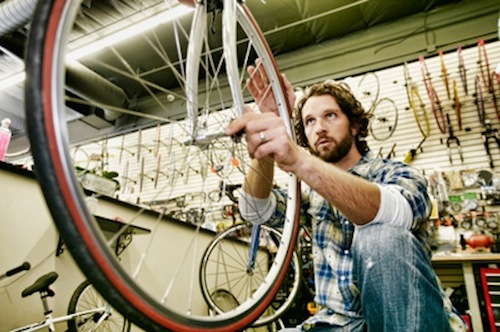
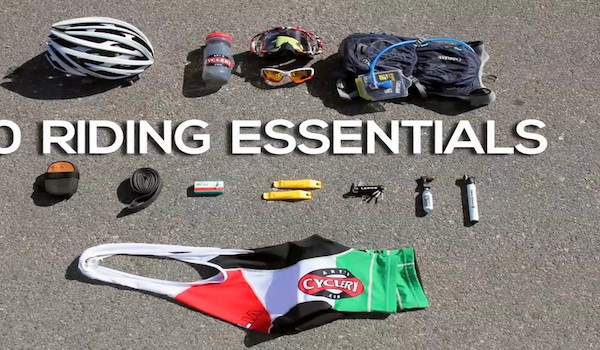
For any sport there is a bare minimum of what you need. Of course you can go above and beyond but just starting out you don’t need all the extra’s. Just the basics will do just fine. With road cycling, these basics can be a bit more pricey than a soccer ball but they don’t have to be expensive, and they’ll last you quite a bit longer than you think.

Must Have Bike Gear

Bike

Seems pretty obvious, but you are not going to get too far cycling without a bike!

Helmet

After you have a bike the first thing you need is a helmet. This trumps all other gear as this is what is going to save your life if you have an accident. Choose a helmet based on what is right for you. All helmets are going to meet the required safety standard but will come with different price points and features. A road bike helmet specifically is going to be relatively light with ventilation and without a visor.

Shorts

After safety comes comfort. Cycling shorts are form fitting, meaning that they are snug to your skin, and have padding for a more comfortable contact point with the seat. Being form fitting, road cycling shorts are more aerodynamic than other clothing and won’t flap in the wind nor hinder your knees as they bend with the pedal stroke.

Jersey

A jersey, like shorts will also add comfort to your ride as well as functionality. Jerseys are made from thin sweat-wicking material to keep you cool along with a front zipper to allow for more air to pass over your chest. Also, jerseys come with pockets in the back. These are clutch as you can easily carry anything from your phone, to wallet, to food, to extra clothing easily and are very accessible, even while riding.

Shoes/Pedals

Cycling shoes and pedals are going to be much more comfortable as well as more efficient. They have a stiff, lightweight sole that doesn’t flex as you pedal putting more of your effort into the pedals themselves instead of being lost in the shoe. Clipless pedals will allow your shoe to clip in and be attached to the pedal keeping your foot from moving on the pedal as well as giving you the ability to pull up through the pedal stroke. This, along with the added comfort, will allow you to pedal longer and faster than wearing any old shoe.

Water Bottles

Bikes are great to ride because they come with a place to carry your water bottles. Not many, if any, other sport has the functionality of always having a bottle at arm’s reach. A cycling specific water bottle is made to fit snuggly in the water bottle cage and not fall out going over bumps and any other rough terrain. Also they have a nozzle that can be opened and closed with your mouth so you only need one hand to take a drink.

Essential Bike Tools

Flat Pack

As a bike rider it’s not a matter of if but when you are going to have a flat tire. Tires are lightweight and thin and although durable, flats will happen. You will need the following items as well as the knowhow to change a tire.

-Saddle Bag: A saddle bag attaches behind your saddle to carry everything you need to change a flat.

-Hand Pump: A small hand pump will inflate your tire after you get a new tube in it.

-Tire Levers: Some tires will be tight to the rim and hard to get off with just your hands. Tire levers can be used to safely remove and install the tire without damaging the rim or tube inside.

-Tube: A spare tube to replace the one with a hole in it. A patch-kit is also a good idea as if you get another flat in your only spare tube you’re in trouble. Carry two tubes during every ride.

–Multi-Tool: Although not needed to change a flat, a multi-tool is a great addition to any saddle bag as you never know when you might need an allen key to tighten a loose bolt.

Sunglasses

Although not always needed and largely based on personal preference, sunglasses are a very good thing to have. First, they will protect your eyes on a sunny day from UV rays. Second, they can keep wind and road debris out of your eyes particularly if you’re riding on a dusty or dirty road. Finally, if it rains, they can be worn so you can still actually see something through the rain that otherwise would be pelting your eyes.

With these road cycling gear must have’s, you’ll be ready to ride with comfort, style and speed. Any of these can be purchased on the cheaper side but upgrading them as your riding progresses is pretty much a guarantee. You have to start somewhere and with these you’ll be starting out on the right foot.

Switching to Clipless Pedals

September 30, 2015 by Adam Farabaugh

When to Switch to Clipless Pedals
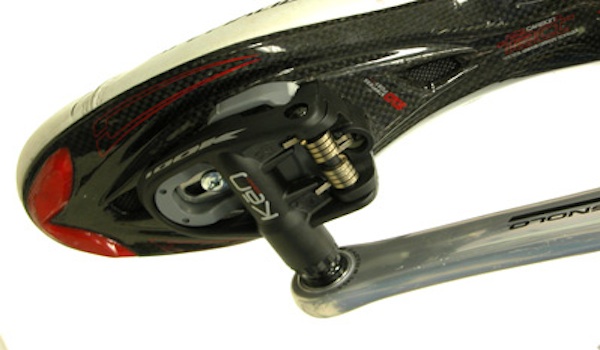
Riding clipless pedals allows you to ride further, faster, and over more technical terrain while giving you a smoother, more comfortable pedal stroke.  The only real downside is falling over when you come to a stop because you forgot to unclip before stopping; more of a hit to your morale than your body.  Switching to clipless pedals at the proper time along with taking the time to learn how to use them properly will take your riding up a level whether it is on the road or mountain bike.

Timing the Switch

When you start out riding a bike you want to be focused on the riding itself, making sure you know how to shift, brake, and keep it upright and going in the direction you want without having to think about it.  Adding in clipless pedals at this time just throws in another hurdle at the same time.  Riders should start riding their road or mountain bike with standard flat pedals for their first ten to twenty rides.  This time allows you to not only become proficient at riding but to the point that you can ride, negotiate turns, hills, and descents without having to think about it.  It is already second nature to you.  You need to get to this point before adding in clipless pedals otherwise they will be more challenging to learn how to use than needed.

Once you have completed ten to twenty rides on flat pedals and are extremely comfortable riding, it is time to switch to clipless pedals.  You may have noticed limitations with flat pedals both on the road and mountain bike.  Clipless pedals keep your foot secure in one location on the pedal as well as allowing you to pull up through the backside of the pedal stroke.  This allows you to ride much more efficiently as well as with more power, specifically on climbs where your cadence slows and you’re trying to get any help you can get pushing the pedals.  Also, on bumpy trails and technical climbs on the mountain bike, clipless pedals will keep your feet on the pedals, lessening the risk of them coming off and hitting your shin on the pedals, or worse, crash.

One fear that riders have in switching to clipless pedals is having their feet still engaged in the pedal in the event of a crash.  One of the big benefits to clipless pedals is that they are spring loaded, like ski bindings, and when there is enough force they will disengage.  The release point on most pedals can be adjusted giving you the comfort of knowing that if you do crash your feet won’t be stuck in the pedals.

Tips on Starting Out

Now that you’re comfortable on the bike and have your first set of clipless pedals and shoes, it’s time to practice to ensure that you know how they work and that you don’t fall over in front of everyone at that first red-light.  The first step is to sit on your seat and lean against something so you can stay in one place while spinning the pedals backwards.  The pedals work by first engaging the front part of the cleat (the piece that is attached to your shoe), on most pedal systems, and then pressing the back part of the cleat down into the pedal.  A good way is to point your toes a little bit and then drop your heel.  The biggest thing is lining up the cleat to the pedal itself.  With practice, you will feel where your foot should fall relative to the pedal.

To clip out, simply twist the heal of your foot out and that will disengage the pedal from your cleat.  Practice this with both feet multiple times until you can do it comfortably.

Now that you can comfortably clip in and out in place, it’s time to do it while riding.  Starting out, find a flat to slightly downhill stretch to get rolling on.  With one foot still on the ground, clip the other into the pedal and bring it to the top of the pedal stroke.  Then push off with the foot that is on the ground and give a big push of the pedal with the foot that’s already clipped in.  Now you will have some momentum and can now clip in your other foot.  Make sure this is on a safe stretch of road or area as you won’t be paying attention to traffic but rather your feet.

Now that you have both feet clipped in and have taken a couple of pedal strokes, it’s time to unclip.  While coasting put one foot down to the bottom of the pedal stroke and unclip (twisting your heel out).  Now you can come to a stop and put your foot on the ground.

Now do the above again, and again, and again.  You want to be comfortable finding your pedals and getting clipped in quickly as well as unclipping.  Once you can do this comfortably, off you ride.  During your first few rides you will have to focus on clipping in and out but once you do it enough it will become a habit and a breeze.  You can now take advantage of all the benefits of having clipless pedals without any of the downsides since you practiced and are now a pro at clipping in and out.

How To Teach a Child To Ride a Bike

September 29, 2015 by Lee Agur

How To Teach a Child To Ride a Bike, How to teach a kid to ride a bikeThe step by step guide outlined in this article can teach a child to ride a bike as quickly as an hour or two. The important thing to remember is that everyone learns at their own pace, so be patient have fun and use the techniques and steps outlined in this article and you will be riding bikes together in no time.

The traditional way of teaching a kid to ride a bike was to strain your back holding them while running along side them until they got the hang of the balance, pedaling and steering. This method of teaching a child to ride a bike is no longer suggested. There is a faster and safer way!

First of all you want to teach your child to do one thing at a time. There are 4 main skills to acquire: balancing, steering, pedaling and stopping. Below we will focus on each of these skills 1 by 1 and step by step.

How To Teach a Child To Ride a Bike

Generally, you are able to teach your child to ride a bike as early as 3 years old. Riding bikes can be a great family activity and can be enjoyed by all.

Items needed: A bike and helmet are absolute essentials, but if you are looking for more safety gear then short of wrapping your child in bubble wrap you are able to get gloves, elbow pads and shinguards. Items not suggested: loose fitting pants.

How To Teach a Child To Balance on a Bike

  1. Take the pedals off your child’s bike or use a balance bike.
  2. Adjust the seat height so that your child is able to touch the ground flat footed with both feet.
  3. Find a gentle grassy slope, 3 degrees is sufficient. It only needs to be approximately 25 yards long with a flat spot afterward or even an uphill. Then instruct him or her to go downhill by pushing with their feet. As they get more comfortable encourage them to use their feet less and less.
  4. Make sure they are relaxed (not gripping too tight on the handlebars) and looking straight ahead and not down right in front of them. Also, keep legs and arms tucked in and close to the bike for better balance.
  5. Do not hold on to the bike, let your child feel the balance on their own. If they really want you to come with them then make sure you run behind them and not beside them so you do not distract them.
  6. Once they have improved balancing, challenge them to games of how long they are able keep their feet off the ground. Ie. count to 10, sing the abc’s or sing a song. Keep it as fun as possible.
  7. Remember to always praise improvement.
  8. Continue to coast downhill until your child is comfortable balancing on their own down the entire slope. No need to rush this step, it is the single most important one.

How To Teach a Child To Steer a Bike While Coasting

  1. Your kid may have already started to learn this while coasting down the gentle slope; however, have them make gentle turns while going down the slope so they are able to get a feel for steering.
  2. Make another game of turning, put two cones out and have them go on the left side of one and the right side of the other, gradually move them wider apart.
  3. Continue to build their confidence by constant encouragement.

How To Teach a Kid To Pedal a Bike

  1. First, put the pedals back on the bike if you removed them.
  2. Stay on that very same hill, start from the top and ask your kid to only pedal once down the entire slope. Then pedal twice.
  3. When they feel comfortable have them pedal on the flats or slight uphill after the gentle downhill slope.
  4. Once they get the hang of pedaling, teach them how to stop the bike. Once they are comfortable stopping, raise the child’s seat an inch, have them practice more, then raise it another inch. Raise the seat until it reaches it’s ideal saddle height. Rough guide to ideal saddle height for children, is that there should be a slight bend in the knee when at the bottom of the pedal stroke. The leg should be about 80% – 90% straight.

How To Teach a Child To Stop

  1. Now it is time to teach your child to stop without using the feet on the ground as brakes.
  2. While costing downhill have your child press on the coaster brake to stop. Once your kid has done this a few times without wobbling too much then it is time to break out the games: Use your cones to get them to stop a specific points or play red light green light.
  3. Remember to tell them what a good job they are doing.

How To Teach a Kid To Ride In a Straight Line

Congratulations, your child has the basics of riding a bike down. Now we can start to combine the skills they have learned. Find a flat parking lot, cul de sac, or even a wide long driveway.

  1. Teach your kid to ride a bike from a stand still. If they are right hand dominant, teach them to put the right pedal at the 2 o’clock position to get started. If your child is left hand dominant, then teach them to put the left pedal at the 2 o’clock position to get started. By doing this it will ensure as they get on the bike it will start to move forward, making the balancing act a little bit easier.
  2. Teach your child to look straight ahead, as looking to any side will make them turn or possibly lose balance.

Tips on How To Teach a Child To Steer, Pedal and Brake

Once your child gets the hang of riding their bike, challenge them to a right hand turn, then a left hand turn, then graduate them to circles and finally ask them to do figure eights. Once they have this mastered this then it is time to go for a ride with them!

Mistakes to Avoid When Teaching Your Child To Ride a Bike

  1. Buying too large of a bike – many parents do this so the child is able to “grow into the bike” however, this makes it significantly more difficult while learning. Ensure that your child is able to to stand over the top tube, with both feet flat on the ground and can comfortably reach the handlebars. You can purchase inexpensive child’s bikes here.
  2. Not making bike riding fun – make games out of the separate skills, you and your child will have more fun.
  3. Rushing the lessons – breaks are necessary, if they are not feeling up to the next skill test don’t force them. Also make sure they are comfortable with the skill before moving on.
  4. Not giving enough positive reinforcement – focus on the positive things your child is doing as opposed to pointing out all of the mistakes.
  5. The steps outlined below is the safest way to teach a child to ride a bike; however, don’t expect that it will be crash free. You may need to comfort and bandage your child, then tell them how tough they are and encourage them to get back on the bike.
  6. If decide to hold on to your child or their bike at anytime, make sure that you do exactly what you tell your child you are going to do. For example do not lie to them saying that you are holding on to their bike when you are not. It will diminish trust and their confidence will decrease.

Teaching anyone to ride a bike can be a fun and rewarding experience. Just make sure to keep it fun and provide lots of positive energy and encouragement.

Don’t forget to share this with anyone you know that has a child.

« Previous Page
Next Page »
  • Facebook
  • Tumblr
  • Twitter

Latest Articles

JOIN Cycling: A New Training Platform for Cyclists

May 27, 2024 By Eric Lister

cold exposure

The Benefits of Cold Exposure for Cycling & Life

June 13, 2023 By Eric Lister

hill climb

The Ultimate Hill Climb Training Guide

May 31, 2023 By Eric Lister

shoulder pain cycling

How to Treat & Avoid Shoulder Pain While Cycling

April 12, 2023 By Eric Lister

psoas stretch

The Importance of the Psoas Stretch for Cyclists

April 6, 2023 By Eric Lister

cycling neck pain

The Ultimate Guide to Cycling Neck Pain: Causes and Solutions

March 21, 2023 By Eric Lister

Useful Info

  • Contact
  • Finally, A Global Cycling Club That Is Focused On Community And Love Of Cycling!
  • Privacy Policy
  • Share Your Story!
  • Terms And Conditions Of Use
  • Welcome to I Love Bicycling
  • What Happened When I Stretched Every Day For a Month

Recent Posts

  • JOIN Cycling: A New Training Platform for Cyclists
  • How to Hang Bikes in Your Garage: 4 Inexpensive Options
  • Gravel Bike Vs. Road Bike: Which One Is Better For You?
  • The 6 Types of Mountain Bikes & How to Choose the Best One for You
  • What Is a Touring Bike Good For? 5 Benefits We Know You’ll Love

Search I Love Bicycling

Connect with Us

  • Facebook
  • RSS
  • Tumblr
  • Twitter

Copyright © 2026 · Magazine Pro Theme on Genesis Framework · WordPress · Log in