• Training
    • Injury Prevention
    • Training Tips
  • How To
    • Bike Fit
    • Gear
  • Nutrition
    • Nutrition Tips
    • Weight Loss
  • Repair
  • Reviews
  • Stories
    • Funny Stories
    • Jokes
    • Quotes
    • Videos
    • Funny Videos

I Love Bicycling

I Love Bicycling is a website that is geared towards cycling for beginners with road cycling tips, training articles, nutrition tips, weight loss, how to’s and bike repair articles.

How To

  • Bike Fit
  • Gear

How to Breakaway in Cycling

December 19, 2015 by Adam Farabaugh

How to Breakaway

After winning, how to breakaway in cycling is one of the hardest things that many riders never learn to excel at. Getting in a break requires strength and endurance but also the skills and mental intuition to read the race and know when the precise moments to attack and follow are. Many new to racing find breaking away and tactics frustrating but if you know a little bit on how to read a race and when best to play your cards, you will not only enjoy it but also excel at it.

Variables to Consider for Breakaways

There are a number of variables to account for on how to breakaway in a bike race. The first is race length. The longer the race, the more likely a break will be allowed to get away as there is more time for the riders in the lead to tire and the peloton to catch them. Often times in shorter races it’s difficult for a break to get away and if it does, everyone is motivated to keep it on a short leash.

The next variable to consider is terrain. If the race is mostly flat and not excessively windy the peloton will often allow a break to form and gain a bit more time as the speed of the peloton toward the end of a race will simply eat up the break before the finish line. If it is a bit more hilly or mountainous even, it is difficult for a field to effectively chase so if there is a break the time gap won’t be allowed to go up very much.

When to Breakaway in Cycling

Considering the above variables, breakaways are most likely to form in the beginning of a race while later in a race no one wants to let anyone get away in fear that they won’t catch them before the finish. The difficulty in getting into a breakaway at the beginning of a race is that everyone is fresh and can follow attacks.

How to Breakaway

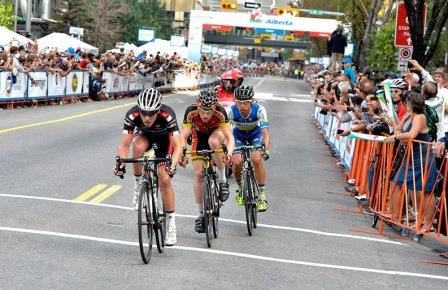
Often times the break that does get away isn’t the one that goes really fast but is the one that just slips up the road and no one really feels like closing the wheels or chasing. Because of this, to get in a breakaway, you not only need to follow the moves that go when it’s hard but also the ones that just seem to slip away.

To do this you first need to be a strong enough rider to follow attack after attack and wise enough to know which attacks to follow. Whether strong or weaker you should never hit your maximum when trying to get in a break. Always leave some in reserve as the likelihood of your break succeeding is small and when you do get brought back you are going to have to go again without much recovery.

Depending on your tactics and team’s tactics if you have one, you should never be the one attacking but always the one following. The best way to do this is to be near the front and sides of the peloton so you can get out. Once one or two riders have a ten or so second gap, either bridge across solo or follow the next rider who goes to bridge across. This is the best scenario as a lot of the time you will get a free ride to the break without expending too much energy. By watching the riders around you and looking for telltale signs such as moving to get an opening out or shifting down to accelerate, you can have a heads up when someone is about to attack.

The best attack whether it is the original move or a chase to bridge is the one that is started from ten or more riders back as it gives you time to accelerate and pass the lead riders with speed. When this happens the other riders can’t immediately get on your wheel because they’re going 5mph slower and when they hesitate as well it can give you just enough of a gap for them to realize that it is going to take a hard effort to close it and so they just stay where they are.

Also the best time to do this is immediately after a breakaway is brought back as often times there will be a bit of a lull in the field and a bit of a delay to anyone wanting to chase right away again. Also, never be the one to attack on a downhill unless you’re just trying to roll off the front as it’s easy for everyone to follow. By learning how to breakaway you’ll learn that the best time to attack is an uphill or flat section out of a turn after everyone rides hard to close any gaps.

Gauging your Effort in a Breakaway

Now that you know how to breakaway and make it into the break, hopefully with a few other riders to trade in the workload, you need to gauge how hard you are going to go. This depends on a few factors such as if you’re just riding to be in the breakaway and it doesn’t matter where you finish or if you need to conserve your energy so you can get a result in the race whether the break is caught or not. Typically when the break first has a descent gap of 100 to 300 meters, everyone is going to want to ride hard to establish the break and take away any hopes from behind of bridging up to you which will often bring the rest of the peloton.

Again you don’t want to go full tilt but you may have to go harder to establish the break. After the break has been established, you generally want to be the rider doing the least amount of work. If the other riders are motivated to stay away they will ride hard and as the finish approaches, they will tire while you are hopefully still fresh. In no circumstances do you ever want to be dropped from the break because you rode too hard. If you are going to get dropped, sit on the back even though the other riders will probably yell at you. If you can contribute, do, if not, sit.

Managing the Time Gap

Knowing what the gap is to the field behind largely depends upon the race and how organized it is with officials and time boards. Sometimes you will have no idea how far back the field is and other times you will be given a constant time gap. In the pro peloton, typically it takes 10km to bring back a 1 minute time gap. In amateur racing this will range up from there as there is typically less organization in the chase. If it is hilly or mountainous it will take even longer.

In the break you should ride hard enough to get the gap to a certain amount depending on how far you are from the finish. If you have 50km to go you will want about a 4 to 5 minute gap to have a chance at staying away from a larger, well organized field with teams. If it is a smaller field you can have less of a gap as they won’t be able to pull back the time.

Going for the Win out of a Breakaway

As the finish approaches and you’re becoming more and more certain that your break is going to survive until the finish, you should ride easier and easier to save your energy to be able to go for the win when the time is right. The problem here is that the other riders will probably be trying to do the same so your break could slow substantially which will then leave your gap in question. If this happens you may need to start riding harder again and if the other riders don’t want to contribute, then attack. This will force them to chase and hopefully you will get one or two other riders with you who are willing to ride.

You used your strengths and smarts to navigate into a breakaway and conserved your energy by riding the least hard out of your breakaway companions and effectively managed your time gap. Now use your strength to win the race. If you’re a strong sprinter find the right wheel to start your sprint off of in the final 200 meters of the race. If you’re not as strong of a sprinter try and get away solo and hold on until the finish. If you execute these breakaway tactics well you have a much better shot at making it to the finish out of the breakaway but it is still a breakaway and the majority of the time they don’t succeed. Just keep trying and half the fun anyway is getting in them and riding the front of the race.

Bar Tape Basics – That’s a Wrap

December 19, 2015 by Wade Shaddy

Bar Tape

It’s cold outside, and your bike is just waiting for some attention. Changing your bar tape can be the perfect way to spend a cold afternoon with your bike. Bring it in the house, settle in with a warm cup of hot chocolate and get busy. Your bike will thank you with a comfortable, new appearance.

Bar Tape – Cosmetic Designs

The harlequin, or double-diamond are just a few of the cosmetic, yet functional designs to consider. But bar tape is about more than looks. It takes into account how your hands fit and feel on the handlebars. Good planning and design adds the longevity needed for long days and many miles in the saddle, while offering cushion in the drops and a slip-proof grip.

Bar Tape Life

Bar tape can last for years, and it typically comes already installed on a new bike. It might seem easy enough; wrapping tape around bars. But it’s not that simple. Not all cyclists know how to wrap a bar and make it last. In fact, it’s one of the most common things done wrong on bicycles.

How Often Should you put on New Bar Tape

Cyclists know that certain items, tires, chains and gears should be replaced at regular intervals, but how often should you replace your bar tape? If you measure it in years, professionals consider it way too long, some cyclists consider it gross. Bar tape is similar to  running shoes and socks, most get changed way more often than once a year.

Nasty Stuff

The sweat, water, dirt, gunk and nasty stuff on your hands is on your bars. So once a year is considered a bare minimum if you’re an active rider. Of course, it also depends on how many bikes you own and how much you ride each of them. If you ride one bike all the time and pile up the miles, it probably deserves fresh bar tape every few months.

Choose Your Bar Tape

Inferior tape can be hard, slippery when wet and doesn’t last very long. Good tape is durable, comfortable, and makes gripping the bars for miles on end a little nicer. Good quality tape also tends to have some stretch, making it easy to achieve a nice, tight wrap; a wrap that that doesn’t move when you’re shifting your hands around on the bars.

Thick or Thin Bar Tape

There’s also a wide variation in feel between various types of tape. Padding and thickness varies, the depth of which depends on what you expect from a grip, and what type of riding you do. Choose thicker tape for rough riding conditions, thinner tape for a more streamlined approach.

Types of Bar Tape

Bar tape is prone to wear and tear, and most bar tape is relatively inexpensive. There are plenty of options to explore too, and new tape will always rejuvenate a tired-looking bike. It’s worth experiencing the subtle differences in comfort, feel and performance offered by different brands and materials.

Cotton Bar Tape

Cotton is old-school. Any bike built before about 1985 probably has cotton bar tape. Cotton tape is very cheap but it’s not widely available, and your best bet may be to go shopping online for it. Cotton tape comes in a roll with an adhesive backing that is easy to apply to a clean set of bars. Cycling purists like to give cotton tape several coats of shellac to protect the material and prevent it from unwrapping. That’s why some older bikes seem to have shiny handlebars.

Cork/Synthetic Bar Tape

By 1987, cork tape had for the most part replaced cotton as the tape of choice. Contemporary cork tape is actually a synthetic blend of cork and ethylene vinyl acetate. Cork/synthetic tape is more expensive than cotton, but typically also comes with a with a small strip of adhesive backing. Cork/synthetic tape needs to be stretched carefully when wrapping the bars, otherwise it looks untidy and is prone to unravelling. Take care with cork blends, stretch them too tight and they will break. Cork tape is typically too thick for designs such as the harlequin or other pattern making. The main advantage of cork is that it absorbs shock and sweat like nothing else.

High-Tech Bar Tape

Most contemporary bar tapes are made from a lightweight and durable synthetics, in combination with a foam or gel core for cushioning. Materials such as polyurethane, synthetic nylon or silicone are strong, lightweight and durable and often have a tacky  texture that aids grip and contributes to a positive feel to your hands. Some have a perforated surface, others a ‘microfiber’ smooth feel, while others have a textured surface. Some look like faux leather or faux carbon. These newer formulas add good vibration dampening, without the bulkiness that can come from old-school tapes like cork.

Leather Bar Tape

If you’ve ever heard of the Brooks saddle you won’t be surprised that leather bar tape is at the top of the heap. Leather tape just feels good in your hands. Expect to pay around $100 for leather handlebar tape. You can also expect it to last forever. Some cyclists claim that it improves with age, just like a Brooks saddle. If you’re into changing the tape every year as suggested, leather probably isn’t the best choice. The downside to leather is that it doesn’t provide a vibration dampening effect like cork or gel.

Off With The Old

Do whatever it takes to remove the old bar tape. It might just unravel when you remove the plugs, or you can use tweezers or pliers to grip it an pull it off delicately.

Clean The Bars

Clean the bars thoroughly. Use a bike specific cleaner or anything that will remove tacky substances. Make sure it’s dry and without any residue to ensure a good bond with your handlebars.

Position the Hoods

If you’re replace existing tape, the hoods should already be in the right position, but this is your chance to move them if you desire. Make the adjustments, and tighten the hoods to the handlebars. It’s typically done with a 5mm hex wrench. The bolt is usually on the outside of the lever under the hood. Its a good idea to ride the bike before applying the tape, to ensure the hoods are where you want them, because after wrapping the bars, they’re difficult to move without disturbing the tape.

Secure Cables

Use black electrical tape to secure the brake cables to the bars if applicable. Some bars have holes in them for this purpose, and you can skip the electrical tape while others bikes require the use of black tape. It typically takes 3 or 4 strips of electrical tape to secure the brake line to drop bars.

Wrap It

The jury is still out on the direction, and whether to wind clockwise or counterclockwise is up to you. Some prefer to start in the center, on either side of the handlebars. Some prefer to anchor the tape with the plugs, and work toward the handlebars. Because the procedure varies wildly due to your choice of designs, the procedure can vary wildly. In general the most used way is to start at the end of the bars leaving about a half-inch overhanging the end of the bars. This is so you stuff it inside the bars when you insert the bar-end plug to secure it. Then start wrapping the bar tape leaving about 1/4 of an inch to a half overlapping the previous. Make sure you keep it snug as you go. When you get to the hoods there are a few ways to do it but in general, you want to make sure that no metal on the bars is showing. Then continue toward the stem stopping two to three inches from the stem. Cut the tape so it forms a straight edge and wrap a few layers of electrical tape around the end to secure it. Then the nice tape that generally comes with new bar tape can be wrapped over the electrical tape giving it a sleek look.

That a wrap. New bar tape will not only make your bike look better but will also give you added comfort to your riding. Make sure you pick a good bar tape color!

Women’s Specific Bikes Explained

December 15, 2015 by Adam Farabaugh

Womens specific bikes

Women’s specific bikes have recently become more and more popular with the majority of bike manufacturer’s now offering bikes specifically made for women. In the past, bikes were just bikes, and to accommodate women’s shorter torso length and generally smaller body size, parts were changed and adjusted to try and get a bike as close as possible to a good fit. Some bikes had better geometry than others that made this possible but it was still a challenge and no one wants to change half the stuff on their bike before they can ride it. There are a number of modifications that can be done but the biggest and most desirable is the women’s specific frame which now comes in road, mountain bike, and even a few time trial/triathlon bikes.

Differences in Frame Design

The biggest difference between men’s body geometries and women’s is torso length. Regular men’s frames generally leave women too stretched out on the bike reaching for the handlebars. A smaller frame could be chosen but that leaves the seat tube at too short of a length as their legs make up the majority of their height particularly with longer femurs.

Women’s specific bike frames are made to have a shorter top tube length which brings the bars closer to the body. This however can create a few problems. The first is toe overlap with the front wheel. The second is that with a shorter top tube handling can be compromised. To accommodate for these issues, the head tube angle is relaxed which pushes the front wheel further out to the front. The length of the head tube is also generally lengthened which more easily brings the handlebars up which if left too low can be harder to reach which can put a lot of strain on the back. Also, a slightly steeper seat tube angle is used to more easily reduce top tube length.

These combinations lead to a bike that is sized well for the average women and handles as a bike should. Also on mountain bikes, in addition to the above, a lower top tube is generally used to allow more clearance when standing over the bike with both feet on the ground.

Modifications to Parts

Before women’s specific bikes, changes to parts were made to better accommodate them. With a women’s specific bike these changes are already made making the bike ready to roll as soon as you get it.

Stem

On standard men’s bikes, shorter stems were used to bring the bars in closer to the body. A shorter stem will probably still be used a bit to allow for a good fit specific to you as well as stable steering. Also, a stem with a higher tilt to it could be used to bring the bars up further if needed.

Handlebars

Women’s shoulders are generally narrower and so normal men’s road bars are too wide. A bar width of 38cm to 40cm is common and allows the hands to be positioned squarely in front of the shoulders which not only is more comfortable but also aids in handling.

Saddle

Women generally have wider sit bones so a wider saddle generally comes stock on a women’s specific bike. In addition to a wider saddle, a lot of women find that a cut out in the center of the saddle along with a bit more padding is preferred so that also generally comes stock. Finding more details on how to fit a saddle for you can be found in “Bike Saddle Fitting“.

Crank Arm Length

The length of the crank arms are generally proportional to height and with the average height of women being smaller, crank arms of around 170mm to 168.5 are generally used. The shorter crank arms aren’t necessary for all women however because despite a shorter overall height, the legs are still of sufficient length for a standard 172.5 crank arm length. This is also dependent upon rider preference as a shorter crank arm length allows more spinning while a longer crank arm is generally used with lower cadences, particularly in mountain biking.

Compact Crankset – Sometimes

A compact crankset has gears of 50×34 as opposed to the normal 53×39. This allows for the use of smaller gears and an increased ease of spinning over climbs, particularly steeper ones. Crankset is largely proportional to a rider’s strength, both male and female, as well as terrain. If you happen to find yourself struggling up climbs or have a cadence below 70 up a climb it is likely that a compact crankset or a triple crankset is beneficial.

Other Differences in Women’s Specific Bikes

One other site-ly difference, colors. This largely depends on manufacturer, but a lot of women’s specific bikes will be colored with pink, light blue, and purple tones, while some women gravitate to it, it seems there are nearly an equal number that dislike the colors. Also the bar tape as well as saddle color may be different to highlight that it’s a women’s bike. This can sometimes be hard to get around but a number of bike manufacturers do make neutral colored women’s bikes.

If you’re a woman, buying a women’s specific bike is largely the way to go. The only real exception is if your body geometry is more suited to a men’s frame; namely your torso isn’t as short. If you do go that route, still make sure the rest of the parts are geared toward a woman as you don’t want to be stuck changing everything mentioned above on your own. The differences in frame design are where a lot of the advantages occur. Ride one and talk to someone who knows specifically about fitting a bike for a woman and you’ll be riding comfortably on a bike before you know it.

25 of the Best Gifts for Cyclists

December 11, 2015 by Lee Agur

So you are looking for the the perfect gifts for cyclists that have everything. Here is a list of gift ideas they may not have.

Cyclists love gadgets, do they need them? Probably not. But adding new gear to your cycling regimen can aid your performance, motivation, safety and comfort, and besides that, gadgets are just cool. Designers, inventors and technology has given cycling some of it’s coolest toys. Can cyclists get by without them, probably, but they are sure fun to use.

For those looking for something that goes beyond gloves, helmets, shoes or jackets for cycling enthusiasts, there are also many useful, unique and sometimes unusual gifts for Christmas, Birthdays or just because, that can make cycling more interesting.

Cool Gifts For Cyclists

Magnetic Lights

gifts for cyclists

Price: $25 – $50

Stand out and stay safe on your next ride down the block or through the trails with powerful, palm-sized bike lights. LED powered, typically white for the front, and red for the back–shine in three different settings. Choose a steady beam, slow or quick flash. Strong magnets ensure that the lights stay put even on the roughest roads, but remember, magnets only work on selected frames, if you’re on carbon they won’t work. When you reach your destination, the brilliant little light snaps off and can be popped in your pocket or backpack until the next time you need to hit the road. There are lots of magnetic lights out there, but those from Lucetta run for 40 hours.

Glowing Bikes

gifts for cyclistsgifts for cyclists

Price: $300 – $400

If you like riding in the dark, a fixed gear nut, maybe even a bicycle messenger, or you just like green, glowing things, the Zulu is a fixed-gear bike that might be just the thing to use for night riding. The white-frame bike glows neon green after being in the sun for a half-hour during the day. The manufacturer says it will glow in the dark for an hour.

Laser Beams

gifts for cyclists

Price: $10

This is one cool laser beam, actually two laser beams. It’s called the Cyclist’s Virtual Safety Lane. It’s a device that mounts on your seat and emits two red laser “virtual lanes,” one on either side of the bicycle, increasing your safety when cycling on dark highways, paths or anywhere else.. The six-foot long lanes are said to be visible from a mile away.

Giant Sock

gifts for cyclists

Price: $60

The Velo Sock fits over a bike to keep sand and other dirt off the floor. The bike sock, which comes in a choice of colors and patterns, is machine washable.

Battery Charger

gifts for cyclists

Price: $130

Transform energy from your next ride into reserve power by downloading your energy into a removable battery pack. Use the fully loaded pack to charge your USB-powered devices anywhere your ride takes you. The little powerhouse pack takes less than two minutes to install on your back wheel and lets you use the momentum you create while biking to fill the removable battery. This weather-proof charger/battery comes to your aid when you’re biking to an outdoor destination, such as a campsite or park, and will revive your phone, GPS, camera, or any of your other go-to devices.

Folding Helmet

gifts for cyclists

Price: $99 – $200

Not sure why you would need a folding helmet, but they’re out there. Utilizing an elastic system, the helmet from Carrera folds up when it’s not in use, making it easy to store in your bag while you’re shopping, eating or otherwise off your bike. While it does collapse when you’re not using it, the brand ensures that top level safety is their priority when the helmet is strapped on your head.

Ass Savers

gifts for cyclists

Price: $2 – $15

This one is a no-brainer if you cycle in wet weather, maybe commute or just don’t want to show up at work with the tell-tale stripe up your butt. Constructed from recycled materials, the lightweight mudguards fit on your seat rails in minutes to help prevent embarrassing stains from showing up on your backside.

Bike Pizza Cutter

Gifts For Cyclists

Price: $10 – $20

What a cosmopolitan way to slice a pie! Durable stainless steel, double-wheel pizza cutter will take you on a gastronomic tour from crust to crust.

Phone Controlled Lock

gifts for cyclists

Price: $139 – Not available yet… coming soon.

This gift is for all those cyclists who do everything with their phone. The phone technology is infused into the old-school, mechanical bike lock. Built from cut-resistant stainless steel, the BitLock employs a proximity sensor that automatically locks/unlocks your bike when your mobile phone — equipped with the app — is within a 3 feet radius. It also lets you grant access to other users, track calories burned, map your ride, and has GPS.

Barr Mitts

gifts for cyclists

Price: $50 – $75

Cold weather riding is doable with gloves, but when your gloves aren’t enough, maybe adding bar mitts can do it for you. The neoprene cover slides right over your handlebars acting as a shield against the harsh weather conditions, protecting your fingers from freezing. They might appear bulkish, but they work, to keep direct wind off your hands. For just under $50, they’re cheaper than some gloves.

Boom Bottle

gifts for cyclists

Price: $75 – $150

The boombottle is a wireless Bluetooth speaker, geared toward listening to music while you ride. It fits in your water bottle cage, with a built in microphone that works as a speaker phone. The rechargeable lithium battery lasts about 10-hours. The speaker feature comes in handy with group rides, or organized cycling events.

Crash Sensor

best gifts for cyclistscool gifts for cyclists

Price: $100 – $135

This gift could literally save your life. The ICEdot Crash Sensor, attaches  to your helmet, and sends alerts to your contacts, with a GPS coordinates, when you’re in an accident. A countdown on the sensor app is triggered during the accident. If you’re not injured, you can shut it down.

50 Bikes That Changed The World

Unique gifts for cyclists

Price: $10 – $15

A gift for the knowledgeable cycling historian – From the Penny-Farthing, the Dandy-Horse and the Velocipede the design of the bicycle has evolved over the decades both in terms of style and technology. From high-performance cycles to practical run-arounds, conceptual bikes to commercial models, here are the 50 most important, pivotal bicylces from around the world.

Balaclava

Cycling gifts for the cycling enthusiast

Price: $20 – $40

A gift for the hardcore cycling enthusiast, this balaclava will keep them warm in all weather. The Chinook Multi-Tasker Pro can be worn as balaclava, a balaclava with face mask or as a neck gaiter.

Bike Chain Bottle Opener

Best gifts for cyclists

Price: $10 – $20

Know a cyclist that likes a beer once in a while? I know I do. Get them the gift that keeps on giving, the handy bike chain bottle opener.

Bike Wine Holder

gifts for cyclists

Price: $25 – $30

What if your cyclist isn’t a beer lover… it is ok, we will forgive them. Grab them a bike wine holder and put a little gift of wine to go with it.

Bike Chain Frame

gifts for cyclists

Price: $30 – $40

Want to keep some memorable moments, grab this picture frame from recycled bike chain.

Bike Clock

gifts for cyclists

Price: $25 – $30

Simplistic yet elegant vintage-style wrought iron bicycle frame is handsomely detailed with seat, springs, pedals, fenders, chain, brake cables, and more.

Bike Earrings

gifts for cyclists

Price: $24

Women love any type of gift, but when you get them jewellery you know you are winning.

Bike Chain Bowl

gifts for cyclists - bike chain bowl

Price: $50 – $89

This unique and gorgeous bowl is made from the most unlikely medium a recycled bike chain. With a great weight and classic shape it is perfect on an entry table for your keys a coffee table in the living room or even your desk at work. A great gift for the cycling enthusiast in your life.

Cycling Socks

gifts for cyclists - cycling socks

Price: $10

Socks and underwear, that is all I generally need for Christmas… or my birthday. Keep it simple, or use them as stocking stuffers.

Road ID

gifts for cyclists - Road id

Price: $25

Safety first with this gift in mind. Road ID can literally be a life saver.

Handcrafted Personalized Name Bike

gifts for cyclists - handcrafted personalized name bike

Price: $30 – $35

Want a handcrafted bike with your name on it? Perfect for coffee tables, cakes and home decor, there is a choice between mountain bikes or road bikes. Select a maximum of 6 characters for the name and let them make it. You also have the option of adding a heart after the name.

Cycling Calendar

gifts for cyclists - cycling calendar

Price: $8 – $17

Can’t think of a gift to give the cyclist who has everything. Grab them a cycling calendar! Everyone can use another calendar.

Shut Up Legs Cycling Shirt

gifts for cyclists - cycling shirt

Price: $15 – $30

Who doesn’t love Jens Voigt? This “Shut Up Legs” shirt is going to kill as a present. You can’t go wrong here.

Best Gifts For Cylists

What have you found to be the best gifts for cyclists? Did any of our ideas make the list?

Best Places to Buy a Bike

December 8, 2015 by Adam Farabaugh

Best Places to Buy a Bike

There are bikes everywhere from the lamp post next to the bus stop to your local Wednesday night Worlds. The path that these bikes and every bike in-between took from manufacturing plant in Asia to the local bike shop to the passing of hands via Craigslist or Ebay after a season or two makes up the marketplace that is bikes. Navigating this marketplace to buy the best bike for you at the right price point can be extremely tricky as there are always options to weigh.

You may think you have a good deal at one location but if that place isn’t the ideal medium to buy the bike you are looking for, you are likely leaving money or bike on the table. Matching your needs to the place that sells the bike you’re looking for starts with knowing what all those different places offer. Each has their positives and negatives and each comes with an associated cost. In general, you get what you pay for.

Know What You’re Trying to Buy

Knowing what you are looking to buy before you actually go out and try to buy a bike is pretty important. You can go to your local bike shop and browse which can give you more of an idea of what you actually are looking for. Also talking with other cycling friends can give you good insight. The way you approach buying a bike is going to change whether you’re looking to upgrade with a brand new bike or are trying to save money yet still want something high end.

Bike Shop

There are thousands of bike shops across the country for a reason; because they offer good value in what they sell and in what they know. Most bike shops only sell new bikes which can range from lower end entry level bikes to your $10,000 top of the line bike. If you are looking for something brand new whether it’s at the entry level or for an upgrade, this is the place to do it. Unless you are a sponsored rider or have some other hookup, it is difficult to get a brand new bike through any other methods as most of the higher end retailers, Trek, Specialized, Cannondale, etc., will only sell through licensed distributors. Some smaller companies do offer direct shipping but you need to know exactly what you are looking for as there’s no test ride before it comes out of the box.

Used Bike Stores

Many cities and popular cycling areas will have used bike stores or consignment shops where you can get a used bike. At these places the bikes are looked over and generally made sure that they are in good working order otherwise they won’t accept them which is great for peace of mind when buying something used. If you are upgrading, they may even take your old bike and you can just pay the difference on the new one.

Friends

Now we’re solidly into the mediums used to buy a used bike. One of the best ways to get a used bike is through a friend or acquaintance who is trying to sell their bike. Bikes aren’t always something frequently bought and sold so it does take some luck in timing to have a friend that’s selling one when you’re looking for one. The big benefit in having a bike previously owned by a friend is that you probably know how the bike was ridden and taken care of as well as if it experienced any major crashes. Also, it’s probably rare that a friend or someone you know would try to take advantage so you know you’re getting a good price for what you’re getting.

Buying a Bike Online

Craigslist

We are now into the online realm which can be tricky to navigate as well but if you know where and how to look, it can be a great resource. Seeing a bike in person before you actually buy it is a huge plus so even though Craigslist is online, you can still see what you’re buying before you complete the purchase. Sellers know this so they don’t try any goofy stuff as it obviously won’t get by you when you see the bike in person. The big thing here is just to be safe about meeting a stranger and making sure the money exchange goes smoothly. Cash is generally best on the spot.

Online Forums

There are a number of online forums that take away a bit of the “random person selling a bike” factor in that there are general requirements to post as well as many people have reputations within the online community because they actively sell bikes and bike parts on a regular basis. If you are looking for something in particular this can be a great resource as you can ask if anyone is selling … And if they’re not, maybe they know someone who does.

Facebook Group – Online Swap Meet

With anything online it can be difficult to establish credibility but Facebook does a good job of it due to the Friend’s Lists basically establishing that the person and their name is real along with if anything does go awry, you can generally contact someone that they know personally. Online Swap Meet is a page where members can post their cycling related gear for other members to view. It’s simple to join to not only buy but to sell also.

Classifieds

Classifieds are a more removed way of buying or selling anything with the advent of the internet but online classifieds do exist. A lot of bikes are sold this way as it is much cheaper and easier to deal with than Ebay, discussed below. There are generally standards which must be met in order to sell and some require fees which generally weed out anyone who isn’t looking to honestly pass along their old bike.

Ebay

Ebay is one of, if not the largest online exchanges. Simply everything is sold here including bikes. You can find high end bikes as well as the lower end town bike that someone is trying to get rid of and make a buck or two. There are buyer and seller protection policies in place to help ensure the accurate depiction of what is being sold. Even with this however you can’t actually see in person how good the bike is and if it actually works. The policies can protect you from this but it is still a pain if you have to go through the process. Ebay also takes a relatively steep fee so sellers tend to try selling their bikes via the means above and use Ebay as a last resort. That said, you can still find some fantastic deals on good quality bikes. Just make sure you do your homework and know what you’re getting.

Online Gear Exchanges

In every sports industry, used gear is everywhere and getting rid of it and getting cash for its value can be a pain. Online exchanges attempt to ease this process as well as to take away some of the drawbacks to selling used gear online in that they get the product and inspect it to make sure it’s of quality before they actually sell it.

The Pros Closet

A good example of an online gear exchange for cycling is The Pros Closet. They take in your old cycling gear, namely bikes, ensure that it’s of quality, and then post it on their site and Ebay page. They take a cut of the sale but as a buyer you can be sure that the bike is legit and that you are getting what you’re paying for. And for whatever reason if something isn’t right, it’s much easier to deal with a company who specializes in used gear than with an individual who’s just trying to make a buck.

The best place to buy a bike depends on the bike you’re looking for. There is no one “best place” but there is a best place for you. Know the ins and outs of the above retailers and match the one to the bike you’re looking for whether high end used bike or entry level. The cycling industry is pretty large and dynamic and to navigate it efficiently takes some know how. Study up and you’ll have your next bike before you know it.

Bike Fitting Cost

December 7, 2015 by Adam Farabaugh

Bike Fitting Cost

Getting a bike fit is an investment in yourself and your riding. It allows you to be in the optimal position on the bike for your anatomy as well as physique. How you value it though can depend, as raising the saddle a little and adjusting your bars ever so slightly might not seem like it should cost much. When you can’t ride because of an overuse injury and have to spend even more money on rehabilitation, that fit suddenly becomes much more worth it.

Valuing something is always dependent on how much you need it and what your opportunity costs are. Bike fits get placed in a category of “yeah it would be nice but is it really worth all that money?” Their value is always increased retrospectively when riders realize that they should have gotten a fit after all. They can vary in cost but getting it right is always worth it.

Levels of Bike Fits

There are varying levels of bike fits that depend upon the fitters experience and expertise level. Each level will go up in cost but also will have increasing value. Finding the right level of fit for your riding needs is key.

MyVeloFit: At Home Bike Fit

MyVeloFit is a revolutionary new app that combines the powers of computer vision and artificial intelligence to help you do your very own bike fitting at home in a matter of minutes. Whether you’re an individual or a business that specializes in bike fitting, they have a subscription model that works for you. Everything from free to a fraction of the cost of an in-person fitting!

Local Shop

Your local bike shop is going to be your biggest fitting resource as they are likely to have the personnel who have been around bikes enough to know how to position someone on a bike. They can adjust, with a bit of margin for error in the general sense, the height of your saddle, how far back it should be, and the height and reach of your handlebars. Most shops will include this general fit with the purchase of a new bike. On its own they will charge around $50 for this service as it does take a bit of time and know how. This is your best option if you are looking to ride for fun and aren’t doing long rides or racing as this puts higher demands on, well everything.

General Coach/Fit Enthusiast

The next level of bike fitters are going to be the ones who can more accurately assess what a local shop can tell you as well as other areas of specificities such as knee and hip angles as well as where your foot should be positioned on the pedal. Typically they have been around cycling long enough and are in a position of trying to achieve optimal performance so they know the ideal positions to produce the most power as well as endurance.

Depending on experience level, they may be able to do some of the stuff a fit specialist can do so if you can find a good coach who knows what they’re doing they can be a great valued option. Typically when working with a coach or other similar individual they will give you a discount on their fitting services since you are already paying for coaching. If not they will typically charge $100 to $200 because they have enough experience to know the ins and outs but may be lacking some of the higher end tools.

Fitting Specialist

At this level of fitting on a bike the fitter either has decades of experience or has taken classes to know the ins and outs of body anatomy and how to find the correct position for each cyclist they fit. They are going to be able to do what a local shop and coach or fit enthusiast can do but to an even higher degree of accuracy. Furthermore, they are going to be able to asses you for flexibility and other potential discrepancies that can affect your pedal stroke. This includes correcting things like leg length discrepancies, knee tracking issues which can be corrected with shims under the cleat, and other specific issues that aren’t going to be properly corrected for with anyone without the proper know-how. A fitting specialist is going to cost roughly from $150 to $300 because of their expertise and larger tool kit that can get your position pretty well dialed on the bike. The range in price is going to depend largely on the fitters experience level.

Fit Guru

A bike fit guru is someone who not only has taken classes on becoming an expert bike fitter but also has years of experience dealing with all sorts of fit related issues. A solid fit guru can assess a rider and know where they are potentially having problems and how they will be placed on the bike before a pedal is turned. Once the rider is on the bike they can see intricate details to how and why something is doing what it’s doing, say a knee diving in toward the top tube. Fit gurus also will have one of the latest fit tools such as the Retul Fit System or Guru Dynamic Fit Unit which are high tech tools using computer software and exact measuring devices to measure your position on the bike as well as your bikes exact measurements. Furthermore, they will most likely have lasers that can project a straight line that can determine knee tracking as well as foot, knee, and hip alignment. This level of expertise does come at a price however typically starting at around $300 and ranging up toward $500.

Personal Value

The cost of a bike fit can seem expensive at any level but when you compare it to what you’re getting out of it as well as what you’re saving, you’re actually getting a lot.

Value of Comfort

It’s hard to put a monetary value on being comfortable on a bike but riding and being uncomfortable is only going to lead to riding less to not at all because it’s not enjoyable. A good fit will have you as comfortable as if you were walking down the street.

Correcting Injuries

This is where the real value in getting a proper fit comes in to play as if you can’t ride due to an overuse injury it is likely going to take a while to bounce back from. On top of not being able to ride, you could potentially need treatment such as physical therapy to revamp a bad tendon or other strained body part. Depending upon the injury, this can easily cost as much as a fit and on top of it you still need a fit to correct the misalignment in the first place. If you just get back on the bike after you have recovered  you are just going to re-injure it.

Monetary Gains from Performance

This is an area that is more reserved for the racing cyclist who is at a high enough level to make prize money. Simply, a good fit is not only going to put you in the ideal position to pedal but also to be the fastest on the bike. This added power and efficiency can contribute to increased performance and thus results, which can have bigger payouts.

Additional Bike Fitting Costs

One additional note to costs in a bike fit to be aware of is the added costs on top of the original fit fee to make any changes on your bike. Things like a different length stem or cleat shims or wedges are going to cost more as the bike fit covers exactly that, the fit on the bike, not the additions needed for your bike. Typically a fitter has access to well-priced equipment that you can purchase to get your position dialed.

A bike fit is a costly investment whether using a local bike shop or a fit guru, but its benefits are going to be well worth it in the long run. Just make sure that when you get a fit you write down all of the exact measurements of your bike and that you keep them in a safe place so you can refer back to them in the future when needed. Bike fits are something you should do early in your riding days at the lower end of the scale and as your riding improves or if you have specific anatomic differences you should seek out a higher end bike fitter. They all will help improve your position on the bike to make your riding more comfortable and enjoyable.

Bike Saddle Fitting

December 5, 2015 by Adam Farabaugh

Bike Saddle Fitting

When you ride the majority of your weight is placed on the saddle. Having a good saddle fit will help to ensure that you’re comfortable on the bike as well as not doing long term damage to sensitive areas. There are many different variables when it comes to bike saddles and accounting for each one of them is key.

Saddles for Road Riding and Mountain Biking

The way you fit a saddle is different depending on your riding discipline. Fitting for a time trial or triathlon saddle is different than road and mountain but the latter two are similar. Mountain bike saddles typically have a bit more padding to help absorb the bumps as well as have a thicker, more durable cover to help prevent the more frequent crashes from ruining the saddle. These guidelines are road and mountain bike specific.

Width for Bike Saddles

The first thing to consider when fitting a bike saddle is sit bone width. This is where the majority of your weight should be placed on the saddle as this area is surrounded by muscles and tendons that can handle and adapt to the stress. The area in-between your sit bones are sensitive and if sat on for too long with too much pressure can not only be uncomfortable but can also cause longer term damage.

Measuring Your Sit bones

There are a number of ways to determine sit bone width. The easiest is to use an Assometer which can be found at many bike shops. This contraption is malleable and holds the shape that is pressed into it. With this, simply sit on it and measure the distance from the exact center of the two deepest points where the sit bones lie. If you don’t have access to one of these you can sit on a piece of paper or cardboard and feel with your hand where your sit bones lie. Then with a pen, mark on the paper the exact center of each. Then simply measure the distance between the two marks in centimeters.

Choosing Saddle Width

Now that you have the exact width of your sit bones, you can determine what size saddle you need. Take the distance you just measured and add two centimeters. This is approximately what size saddle you need as you want at least one centimeter past the sit bone on each side. Don’t go any smaller but you can get away with a little larger. The limiter here is as saddles get wider, which are normally classified as narrow, medium-width, and wide, the nose of the saddle also widens which can start to rub on the inside of your quads causing discomfort.

If the saddle you have doesn’t have its width marked on it you can simply measure the width of the saddle at its widest point in centemeters.

Shape of Bike Saddles

There are two general shapes of regular saddles when viewed from above. They are T-shaped and pear-shaped. T-shaped saddles can be better if you have problems with chaffing and your quads rubbing on the nose of the saddle. A pear-shaped saddle can be good if you find you move around a lot from forward to back as when you slide forward, there will be more evenly dispersed support to aid in comfort.

Flat-ness of Bike Saddles

A second shape to the saddle to consider is how flat or not flat its surface is. When viewed from the back, how much curvature does the saddle have? The more curvature equals more pressure on the central areas between your sit bones which can be uncomfortable and should be avoided. You also don’t want the saddle too flat as with it slightly curved it keeps you centered on the saddle instead of sliding left to right.

Center Cut-out of Bike Saddles

The center cut-out on bike saddles is designed to take even more pressure off sensitive center areas. This is largely personal preference as some people find the cut-out to be the only way they can comfortably sit on a saddle while others find that it can cause increased pressure as well as pinch certain parts.

A test to see if you might benefit from a center cut-out is to sit on a hard wooden chair or bench and lean forward without arching your back to where you can rest your elbows on your knees. Sit like this for a few minutes and if you find that there is adverse pressure and discomfort on the soft tissue being pressured then you will most likely benefit from a cut-out in your saddle. This is particularly true for women but men can also benefit.

Firmness of Bike Saddles

The final indicator of saddle preference is how hard or soft it is. A lot of people think that a softer saddle with more padding will be more comfortable but in fact it puts more pressure on sensitive areas and not enough weight on areas that can handle it. It makes the pressure on your rump more even across the saddle and different areas can handle different amounts of pressure.

The general ideal firmness is in the medium to lower end range as this places enough weight on your sit bone areas while still being padded enough to give some comfort. Some people find that going all the way to no padding is the most comfortable as this puts the pressure exactly where you want it. For some, this is a bit too much so you need to find your personal preference.

Getting Comfortable with Your Bike Saddle Fitting

After you’ve chosen your perfect saddle you are going to need to test it. The best way is to do an hour or two of riding on it but nothing major as if it’s uncomfortable you don’t want to be half-way through a long ride and be stuck riding home out of the saddle as much as you can. Your rump may be a bit sore at first and for the first ride so you may need to give it some time. This is particularly true if you haven’t been riding much recently. As you ride, the muscles and tendons adapt to the pressure that is placed on them so when these pressure locations change, it will take some time to get used to.

It is extremely important to find a saddle that not only fits your contour but is also comfortable. Your saddle is the most important comfort piece on the bike as it holds the majority of your weight. Even with the right size saddle, flat-ness, firmness, and cut-out preference, you may have to try a few different saddles before you find one that’s comfortable. The little attentions to detail will save you a lot over the life-time of the saddle. And when you find one that works, stick with it. No need to change what works.

Why You Should Get a Professional Bike Fit

December 4, 2015 by Adam Farabaugh

Why You Should Get a Professional Bike Fit

You should get a professional bike fit because you are already making the financial and time investments into cycling and riding without an accurate fit on the bike can negate those investments. Having an accurate fit on the bike ensures that you are not only comfortable but are also going to minimize the chances of having an overuse injury.

The last thing you want with something that you do for fun, or career even, is to not be able to ride because you didn’t take care of a minor adjustment that needed to be done on the bike. A professional bike fitter knows the ins and outs of everything related to fits whether it’s an anatomical irregularity or just a sore back or knee while riding. They can get you rolling faster and help prevent any overuse injuries.

Reasons for a Professional Bike Fit

The reasons are many for why you should get a professional bike fit and how you value each of them will depend on where you’re coming from. Find the reasons why you need a fit and then find an expert bike fitter.

Comfort on the Bike

The number one thing with riding a bike is that it has to be comfortable. Whether you’re just riding around town or racing full tilt, no one wants to be in a position on the bike that is uncomfortable. Even a small discomfort, such as a sore butt from the seat, is something that should be corrected because if it isn’t it can lead to other problems as your body will naturally try to correct for the irregularity. Even if it’s performance you’re after, being comfortable comes first as your performance is going to suffer if you can’t get into a comfortable position to achieve your maximum output on the bike.

Personal Anatomy Irregularities

If you have anatomical differences such as a leg length discrepancy (one leg is shorter than the other which is more common than you might think), inflexibility, or other not so normal things going on, getting a professional bike fit is about the only way that you can properly correct for those irregularities. There are a number of approaches and tools that can be used to assess these problems as well as correct them. If you don’t correct these issues or attempt to correct them without the proper knowhow, it can easily result in injury which can be harder to fix than a simple overuse injury.

Prior Injuries

Another big reason to get a professional bike fit is to accommodate past injuries. These injuries can range from knee pain to lower back issues. An expert bike fitter is going to be able to position you as to make sure that there is not any added stress on the problem area. You will be amazed by how much a professional bike fitter knows and how they can change things around to accommodate your specific issues. Also, just having a proper bike fit will help to insure that these injuries don’t come back and to give you piece of mind about it as well.

Maximizing Performance

Everyone rides for different reasons but the majority of us do like to go fast and see just what we can get out of our bodies whether racing for the town line with buddies or for a finish line in front of thousands. Having an optimal fit will ensure that you are generating the most power along with endurance. If your position is even just a little bit off in one area it can significantly impact your power output which can also result in injury because the tendons and muscles are placed under added stress.

Value of a Professional Bike Fit

The value of a professional bike fit is never the actual cost that you pay for it. It is what you get out of it; the comfort of the ride, the injuries avoided, the performance gains. These all are extremely important measures and in addition to these a fit will also save you time and money directly.

Saving Time and Money

If you don’t have a good fit on the bike sooner or later you are going to suffer an overuse injury. This is going to not only take away from time riding but will also take time to heal. Whether it be on your own with icing, stretching, and other remedies or with a visit to the doctor. If it is a particularly bad injury you could need further analysis and treatment including MRI’s and physical therapy which are far more expensive than a professional bike fit. Accounting for problems and issues before they occur is always the best way to approach any situation. Of course issues do arise but with a professional bike fit they are far less likely.

Getting a professional bike fit is well worth the investment. It will pay dividends in the short and long run as you will be comfortable on the bike as well as have a higher degree of power and endurance. You will also then have much less of a risk of developing any injuries which will keep you on the bike where you belong. Find a good professional bike fitter and make the most of their knowledge and expertise. When you do, you’ll wonder why you waited so long to get one.

At Home Bike Fit

MyVeloFit is a revolutionary new app that combines the powers of computer vision and artificial intelligence to help you do your very own bike fitting at home in a matter of minutes. Whether you’re an individual or a business that specializes in bike fitting, they have a subscription model that works for you. Everything from free to a fraction of the cost of an in-person fitting! Check them out today to start feeling better on your rides!

How To Fit a Bike Helmet

December 3, 2015 by Adam Farabaugh

How To Fit a Bike Helmet
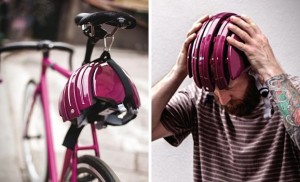
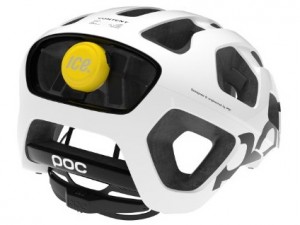
Getting the right helmet fit is imperative to your safety. Wearing a poorly fitted helmet is almost just as bad as not wearing one at all. A good fitting helmet worn properly will not only help to protect you in the event of a crash but also looks good. There are a few things to know when buying a helmet as well as when wearing it.

Find Your Size

There are two ways to find the right size helmet for your head. The first is measuring the circumference of your head just above your ears. This number, ranging from about 50 to 60 centimeters for the average adult, correlates with different sized helmets. Try the one on where your circumference falls in the range of the helmet size, typically labelled on a sticker on the inside of the helmet.

The second way to find the right size, provided you have an assortment of sizes to choose from, is to just try them on and see how much space is between your head and the helmet. With both methods you don’t want any more than one to two fingers to be able to fit in-between the helmet and your head.

If there’s too much room your head will actually be knocked against the inside of the helmet in the event of impact which can also cause injury. If there’s not enough room, the helmet simply won’t be comfortable and will likely sit too high on your head not protecting you as well as it should.

How to Wear Your Helmet

Now that you have the right sized helmet you need to make sure that you are wearing it properly. Most of today’s helmets are going to have an adjustable mechanism in the rear of the helmet to cinch down the inner retention system to your head. This is going to keep the helmet from moving around.It shouldn’t be overly tight but also shouldn’t be too loose. You should be able to grab a firm hold on the helmet and not have it slide around your head.

The helmet should also be worn in a level position with the front falling no more than one to two finger lengths above your eyebrows. If it’s too far up and more on the back of your head, it won’t protect the front of your head in the event of a fall. If it’s too far forward, you won’t be able to see for one as it will be in your eyes, but it also won’t protect the back of your head.

Adjusting the Buckles

The final but just as important step to making sure your helmet fits properly is to have the straps and buckle positioned correctly. With a new helmet this can often be a challenge as there are four straps that need to be aligned and positioned well to be comfortable as well as safe.

The first step is to release the adjusting plastic pieces on the sides of the helmet. These slide up and down the straps and can be locked in place to hold the strap where it’s supposed to be. Put the helmet on your head and slide the piece up so it falls just below your ear making a Y with one strap going in front of your ear and the other behind. Lock the plastic piece down in place. Then do the same on the other side so it’s even.

Now you need to make sure the buckle is centered under your chain. If the receiving piece of the buckle is too far one way or the other you are going to have to loosen or tighten it by pulling the strap up through the rest of the helmet. This will also move the plastic adjusters on the sides so you may have to readjust them. Once this is centered under your chin, you can then pull the straps tight so they’re snug but not overly tight when the buckle is clipped.

Depending on how much extra strap is left over you can tuck it into the rubber piece that is on most helmets to prevent the strap from dangling. If you do need to shorten the strap, use a pair of scissors and cut accordingly. The real trick comes in taking a lighter and singing the end of the cut piece so it doesn’t fray.

Wearing a helmet is imperative when riding a bike and almost just as imperative is wearing a helmet that fits properly. Getting the right sized helmet for your head along with properly adjusting it will help to ensure that the helmet does its job when the time is less than ideal, i.e. when you have a fall. Your head is much safer and you have the piece of mind that your head is taken care of while wearing a helmet.

What is Pedal Float?

December 2, 2015 by Adam Farabaugh

What is Pedal Float?

With cycling cleats and pedals, pedal float is how much your foot can move and rotate while clipped in to the pedal. The degree of how much your foot can move while attached to the pedal depends largely on pedal type as well as cleat choice. There are varying degrees of float that have an ideal scenario for when they should be used. Having the wrong pedal float can cause injury so it’s important to choose the right one for you depending upon your bike fit as well as personal anatomy.

Why You Should Have Pedal Float

Pedal float is built in functionality with the objective of allowing your foot to rotate to its natural position to keep your ankle, knee, and hip in a natural position. Everyone’s natural foot angle, the angle at which your foot naturally falls when you walk or pedal, is extremely difficult to line up perfectly on the bike. Because of this, the little bit of float in the pedal allows you to rotate your foot ever so slightly which in turn changes the rotation of your shin and thus knee ever so slightly. If you can’t rotate to achieve this natural position, added stress is placed on the knee joint which over time and at high stress, can cause knee pain.

What the Ideal Pedal Float Is

The perfect amount of pedal float depends on how dialed in your position is on the bike. A bike fit in general wants to position you so your body is able to function in its natural ranges of motion. This means that with cleat position, they are placed at the correct location on your foot as well as at the correct angle to account for your natural foot angle. If your cleat is positioned perfectly so your foot is in its natural position and your knee is lined up how it should be, you don’t need any pedal float. Getting this perfect position often takes a fair bit of trial and error in moving and rotating the cleats to where they feel perfect, which is why most people should and do ride with some amount of pedal float.

Pedals and cleats often range from 5 to 15 degrees of float. If you don’t have the best fit it is better to error on the higher end to not constrict your foot to an adverse angle. The one risk with higher degrees of float angle is that your foot is not as stable on the pedal which allows your knee to constantly change its tracking which can be bad. The solution to this is getting a better fit on the bike from an expert bike fitter or by doing it yourself (“How to Do a Proper Bike Fit”)

The mid to lower degree of float angle is ideal as it allows a little bit of movement to position your foot in the correct angle while keeping your knee tracking in relatively the same path. Aim for less than 8 degrees of float as this will give you enough float to allow for any alignment discrepancies, but not so much that you knee may track poorly.

Does Pedal Float Hurt your Knees

The improper amount of pedal float can hurt your knees. Too little float with your cleats not placed in the exact correct position will result in high stress to your knees which can result in injury especially over time. Too much float can cause your knee to not track properly in the same line. Your feet will be sliding around on the pedals on an unstable platform.

If you already have knee issues, make sure to change the angle of your cleats so it promotes natural foot alignment along with adjusting your float. An expert bike fitter can give you more detail and make sure you are in the best position to resolve your knee pain.

Variety of Cleat Types

Each pedal brand has its own qualities and most have a number of different cleat options depending on how much pedal float you want. These often come in different colors to differentiate from no float to a mid-range degree of float to a high degree of float. A little bit of research on your pedal type will show you what cleat options are available to get your ideal pedal float.

Pedal Release Tightness

On some pedals the degree to which the clip engages the cleat can be adjusted. Pedal float is in the cleat itself and not the pedal so adjusting this to help with pedal float won’t help. If it is loose however, your foot could flex the spring-loaded mechanism which will feel loose particularly on the upstroke of the pedal stroke. You can tighten this slightly to make sure it’s firm and not moving with each pedal stroke. Over tightening will cause it to be difficult to unclip as well as take more force to disengage your cleat in the event of a crash.

Pedal float is a great solution and avoidance to knee and other issues resulting from improper foot angle on the pedal. Even with a professional bike fit, everything may not be perfect so having a margin of error built in to your pedals can pay dividends in the long run to avoid injury. The right amount of pedal float for you depends on your position so make sure that’s correct first and then analyze your natural foot angle to position your cleat correctly so you don’t need a large degree of pedal float. With this and a low to mid-range of pedal float, you should be in a good position to avoid injury.

« Previous Page
Next Page »
  • Facebook
  • Tumblr
  • Twitter

Latest Articles

JOIN Cycling: A New Training Platform for Cyclists

May 27, 2024 By Eric Lister

cold exposure

The Benefits of Cold Exposure for Cycling & Life

June 13, 2023 By Eric Lister

hill climb

The Ultimate Hill Climb Training Guide

May 31, 2023 By Eric Lister

shoulder pain cycling

How to Treat & Avoid Shoulder Pain While Cycling

April 12, 2023 By Eric Lister

psoas stretch

The Importance of the Psoas Stretch for Cyclists

April 6, 2023 By Eric Lister

cycling neck pain

The Ultimate Guide to Cycling Neck Pain: Causes and Solutions

March 21, 2023 By Eric Lister

Useful Info

  • Contact
  • Finally, A Global Cycling Club That Is Focused On Community And Love Of Cycling!
  • Privacy Policy
  • Share Your Story!
  • Terms And Conditions Of Use
  • Welcome to I Love Bicycling
  • What Happened When I Stretched Every Day For a Month

Recent Posts

  • JOIN Cycling: A New Training Platform for Cyclists
  • How to Hang Bikes in Your Garage: 4 Inexpensive Options
  • Gravel Bike Vs. Road Bike: Which One Is Better For You?
  • The 6 Types of Mountain Bikes & How to Choose the Best One for You
  • What Is a Touring Bike Good For? 5 Benefits We Know You’ll Love

Search I Love Bicycling

Connect with Us

  • Facebook
  • RSS
  • Tumblr
  • Twitter

Copyright © 2026 · Magazine Pro Theme on Genesis Framework · WordPress · Log in