• Training
    • Injury Prevention
    • Training Tips
  • How To
    • Bike Fit
    • Gear
  • Nutrition
    • Nutrition Tips
    • Weight Loss
  • Repair
  • Reviews
  • Stories
    • Funny Stories
    • Jokes
    • Quotes
    • Videos
    • Funny Videos

I Love Bicycling

I Love Bicycling is a website that is geared towards cycling for beginners with road cycling tips, training articles, nutrition tips, weight loss, how to’s and bike repair articles.

Is Bike Sharing A Safer Bet For People New To Cycling?

June 30, 2016 by Adam Farabaugh

bike sharing
Getting on the road with a bicycle can be a scary prospect to new cyclists. For a start, they have to get to grips with the controls of their bikes. Plus, there is the added pressure of avoiding collisions with other road users like cars and trucks.

Still, more of us are ditching our cars and riding to work on bicycles to be healthier. Plus, it’s a cheaper form of transport that boasts zero carbon emissions.

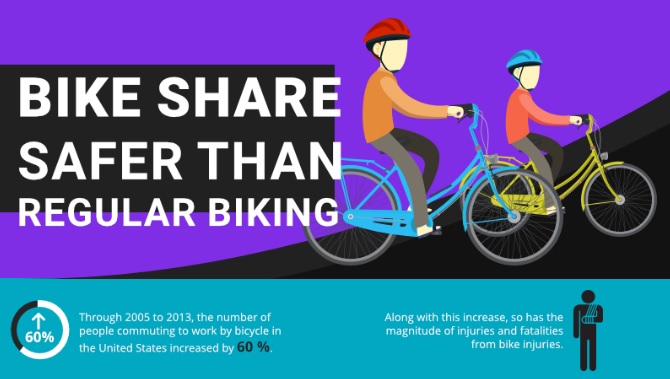
Did you know that there was a 60% increase in people cycling to work from 2005-2013? It’s a figure that has shown a constant rise each year. The rising price of oil has meant that many of us can’t afford to fill up our tanks with gas.

Of course, the safety issue is still there for new or experienced cyclists. One real alternative is to take part in bike sharing. But, how does that make cycling safer?

For a start, the bikes used are heavier and have wider tires. Those characteristics alone make them safer to ride on bumpy roads.

They also only have seven gears to contend with, making them easier to maneuver. Last but not least, there is also the cost aspect. It’s cheaper to use a bike from a bike sharing scheme than to buy one outright.

The following info-graphic shows other reasons why bike sharing is safer than using regular bikes:


By Cogan and Power, PC.

You’re An Asshole If… A Lesson For Drivers

June 26, 2016 by Adam Farabaugh

you're an asshole if

Riding a bike on public roadways can mean placing your life in someone else’s hands. Not always the most comforting of feelings. Drivers don’t have the same degree of fear or vulnerability when passing a cyclist so they often don’t even realize the danger that they are placing another human being under because of their actions. Because of this, drivers have a tendency to be an asshole to cyclists. They may not realize it because to them, there is no real threat or degree of aggressiveness that they feel they are placing on anyone. This of course is some drivers as others will blatantly try to place cyclists in danger whether it’s buzzing them or slamming on the brakes in front of them. Regardless of if you’re intending on placing a cyclist in danger or if you don’t think you are, you’re an asshole if you do any of the following. This website is obviously catered toward cyclists so please share with all of your non-cycling friends as well to keep all of us cyclists safer on the roads.

You’re An Asshole If…

  • you pass a cyclist with less than 3 feet between any part of you’re vehicle and the cyclist. 4 feet if you’re in Pennsylvania.
  • you don’t slow down to pass a cyclist.
  • you don’t adequately check for traffic in the opposing direction before passing a cyclist.
  • you pass a cyclist going into a blind corner.
  • you are towing something and don’t give extra space to a cyclist when passing.
  • you think cyclists should not be on the roadway.
  • you pass a cyclist with adequate space but merge back into the lane before the rear of your vehicle has safely passed the cyclist.
  • you ever swerve in front of a cyclist.
  • you ever brake directly in front of a cyclist.
  • you don’t wait for opposing traffic to subside before passing a cyclist.
  • you try and squeeze past a cyclist regardless of circumstance.
  • you accelerate excessively as you pass a cyclist with your diesel truck spewing fumes into their face.
  • you turn right in front of a cyclist just after passing them.
  • you ever run a red-light.
  • you ever drive drunk.
  • you don’t look for cyclists when turning out from a side road or driveway.
  • you turn left across traffic without looking to see if there’s a cyclist on the other side of the road.
  • you ever throw anything at a cyclist.
  • you don’t stop at cross-walk for a bike path.
  • you honk at a cyclist aside from a friendly one AFTER you have passed them. A friendly wave is nice with this as well.
  • you’re a trucker and don’t realize the danger you’re placing a cyclist under when passing in an unsafe manner.
  • you text and drive.
  • you get out of your car parked on the street and don’t first look for cyclists before opening your door.
  • you ever yell at or heckle a cyclist.
  • you threaten a cyclist in anyway.
  • you think your life or time is any more valuable than that of someone else’s.
  • in general, you don’t watch out for cyclists.

Drive in a respectful, safe manner looking out for yourself as well as that of others. You are not the only one out on the road. Imagine if you hit a cyclist as this sad, tragic story recounts. You would have a very difficult time living with yourself knowing you took the life of someone with so much left to live. Drive safe. Everyone will thank you.

Risks Of Crowd Control Barriers At Cycling Events – An Issue Of Safety

June 19, 2016 by Adam Farabaugh

barriers

If you have been to a cycling event you have probably seen crowd control barriers being used. Events from local charity rides all the way up to the Tour de France keep both riders and spectators safe from each other with them. They however can present an added danger to riders that event promoters don’t often consider or weigh heavily enough. Your next event may have barriers that can not only cause a crash but potentially cause serious injury. Don’t just accept the risks and hope for the best but rather contact the promoter with your concern and share this article with them as well. If they don’t at least listen, do they have your best interest in mind?

What Causes Barriers To Be Unsafe

Bike riding is a dangerous sport and crashes resulting in injury will happen especially when there are large groups involved. That said, when an unnecessary element of danger is added to an event, it is a risk that only has negative outcomes with no upside. For example, if you risk going over a jump on your bike, there is the negative side of crashing. On the flip side, if you land the jump, it’s awesome and you feel ecstatic and want to do it again. Having an improper barrier has no upside aside from saving time and money in course set-up. The three main issues with barriers being unsafe are as follows.

Improper Bases

The base of crowd control barriers, specifically the metal ones, are generally either flat bottoms with a center post for the barrier to set in or an upside-down Y shaped stand with the feet protruding to either side. The flat bottom barriers are the kind that should be used for cycling events particularly when placed right up to where a rider can ride. The protruding base of the Y stand type can catch the wheels of riders causing them to crash instantly.

barrier feet 3
Barrier feet protruding into the roadway which can cause a crash.
flat bases
Flat bases being used properly except with no protective bannering.

Unsecured Gaps and Sharp Edges

With metal barriers there is a lot of space between bars where arms and other body parts can enter and become entangled in the event of a crash. With plastic barriers they can give and break but with metal barriers, body parts break before metal bars ever will. In addition to dangerous gaps with metal barriers, the edges of them at the corners and ends can be very sharp and dangerous if left uncovered. Bannering, as seen in the photo below, should be durable and secured with zip-ties and in a way to cover the tops and sharp edges. Doing this will prevent body parts from entering between the bars.

proper barriers
These barriers at the Red Hook Criterium in Brooklyn are the right kind with flat feet and are properly secured with adequate bannering. In addition, they set the crowd back from the riders as riders will ride exceptionally close to the barriers during events.

Improper Placement

Even if the proper type of barriers are used and they are properly secured with bannering, improper placement can still cause a crash and serious injury. Placement largely depends upon the specific roadway and objective but two general steps can be taken to avoid incident.

The Problem:

The first is having barriers that begin abruptly in the roadway. Riders can run straight into the end of them if placed improperly.

The Fix:  

Have the barriers gradually enter the roadway to force the riders to slide over with the barrier further into the road. If they do still run into the barrier, they will only hit it at the sloping angle.

The Problem:

Abrupt curves or protruding barriers can cause riders to clip the barriers while riding in a straight line.

The Fix:

Make sure the barriers are perfectly straight or if going through a curve, they curve naturally. No barriers should ever be further out into the roadway than the ones around it. If a separation is needed in the barriers, at a cross-walk for example, make sure the barrier further forward in the direction of travel is set back to ensure that no riders swerve into the gap and hit it head on.

The Best Barrier for Cycling Events

The barrier for cycling cycling events that are the best are the ones that slope away from the center of the roadway. These allow the riders to ride right up against them (as they will in many events) and still allow room for their handle bars not to clip the fencing. In addition, this places the spectators at a greater distance from the roadway keeping both parties more safe. With these type of barriers then properly covered with banners, they are the safest option for cycling events.

best type of barrier
The best type and use of barriers for a cycling event. It also places spectators at a greater distance from the roadway helping to keep arms and heads from being hit by riders.

Why The Lack of Focus On Safety

Common sense would say that if you saw an unsafe barrier, you would fix it or not use it in an event. However this does not happen in many events from gran fondos with thousands of riders to professional races where riders are testing the limits of speed on a closed course. The reason is three-fold; time, money, and a mis-understanding of the associated risk. Depending upon available resources, the safe type of barriers may not be cost effective. Events often run on tight margins and spending additional money on something that seems like the same thing often doesn’t happen. In addition, it takes time and people to properly setup barriers and secure bannering on all of them. Also, event promoters often have a lot on their plate and don’t always fully understand how easily a crash can happen with a barrier and also how easily a rider’s body can get caught up, or cut on one.

Shifting of Costs

The time, effort, and money saved by event promoters who do not provide adequate barriers is paid for by the riders in the form of broken bikes and bodies. Bikes are expensive but that doesn’t compare to what medical bills can add up to be not to mention the pain and suffering a rider would go through. Cost shifting such as this never creates a positive outcome and spending a little bit more time and money in the beginning will save time and money as whole in the long run. Participants are the life-blood of events. If they are not taken care of and watched out for will they come back to an event? Some will, some won’t but the question should never have to be asked.

What You Can Do If You’re A:

Rider:

Before an event, ask the promoter about what sort of barriers they will be using and how they are securing and placing them. They should be following guidelines such as these above. If they just say they’re providing normal, standard barriers they probably don’t know about the potential risks they are placing riders under. Press them to do more to create a safe event with no added unnecessary risks. If you arrive at an event and you see potentially dangerous barriers, notify the promoter and organizers and insist that they do something about it to make it safe. This may take getting a few other riders behind you.

Promoter:

Read and follow the guidelines in this article and do additional research into barriers and what other events are doing and cater it to suit your event. If you are unsure of something, ask someone who knows. When it comes down to costs and making an event viable, tell your participants of the possible added cost of safety barriers and why they’re paying more (if it is a paying event) and that it is for their safety. If keeping costs down is ahead of keeping riders safe should you really be running an event in a sport that involves such a high degree of risk such as cycling?

This crash was not caused by the barriers (the rider simply entered the corner way too fast) but the risk for a high degree of injury is quite significant with no protective bannering being placed. The riders can hit the metal bars directly which focuses the impact to one area and arms, legs, and heads can get caught between the bars while the rider is still in motion.

Cyclists Killed In Michigan – What We Can Learn

June 11, 2016 by Adam Farabaugh

cyclists killed in michigan

Whether it’s gun violence or irate drivers, hearing of a tragedy such as the cyclists killed in Michigan a few days ago is never easy, especially when its innocent victims who were simply in the wrong place at the wrong time. Even though you probably don’t have any direct connection to an event, it hits you deeper than you would have thought. You place yourself in a similar situation and imagine how it would feel if you were one of the victims parents, children, significant others, or simply friend. In this particular situation, it’s easy to point fingers and say what caused it. This is not always the case but regardless, there is always something we can learn from events.

Danger in Any Activity

Because we live in a world where actions have consequences, there is always some amount of danger in anything that we do. A meteor could plummet out of the sky, hit you, and you wouldn’t even know what happened. This of course has a ridiculously low probability of occurring (1 in 20,000,000,000,000 chance) but it’s still a chance. The level of fear we have in a situation is largely dependent upon how much control we have with the less control resulting in greater fear. This lack of control can be attributed to someone else or our own lack of ability in a certain situation.

Danger Riding A Bike

Taking the lack of control in a situation toward riding a bike; we have control over the majority of situations meaning that we dictate how fast we go through a corner, which roads we ride on, things of that nature. The things we can’t control, which is where the majority of fear resides in riding a bike, are the things like irate drivers, mountain bikers coming around a corner on a trail that neither one can see through, or drivers that simply don’t care and will run you off the road. These are the things that scare us the most riding a bike.

Being Okay With Not Being In Control

When we’re not in control of a situation it’s very hard to be comfortable; this is human nature and what helps to keep us alive. As cyclists, particularly road cyclists, we become used to the constant buzz of traffic and what was once a large fear, and is for the vast majority of humans, no longer scares us as much. This is you becoming more okay with not being in complete control; you can’t control what that driver does behind you but you have some amount of trust in them not to hit you. Nine times out of ten, or probably more accurately, 9,999 times out of 10,000, or more even, that driver is not going to hit you and values life regardless of whose life it is.

What Can We Learn From The Cyclists Killed In Michigan

If something like this were ever to happen to you, the one thing you would probably want is for it to never happen to anyone else ever again; that people should have learned from the event, whether drivers, riders, law enforcement, or law makers. The bad things in history should never repeat themselves because in theory, we are smart beings who can learn from our mistakes. Unfortunately this doesn’t always happen but what we can do is to help make a situation like this as least likely to happen again as possible. We of course aren’t all but are definitely one of the above; drivers, riders, law enforcement, or law makers and can help to have an impact on the likelihood of a repeat occurrence.  If you are one of the following you should:

Driver: be aware of your surroundings including cyclists. They will be where you least expect them and where you are not looking. If you are unaware how to drive around cyclists, read this. And of course you should never, ever drive impaired (the likely cause of the tragedy in Michigan).

Cyclist: never trust anyone other than yourself or someone that you have reason to trust. This means that you should not trust that the driver behind you is going to see you and not hit you. The more aware that you are and the less busy roads you choose will help in lowering the likelihood of an incident like the one in Michigan from happening to you. Of course it is always still a possibility as in this world we can’t take the probability to zero of something bad happening. It’s something we have to live with and we know that freak accidents like the one in Michigan can happen.

Law Enforcement: do what you’re trained to do. Protect citizens and enforce laws to protect citizens. Relating to cyclists; this includes watching out for irate drivers and should a driver create a dangerous situation, correct it by educating them in an effective manner to help ensure they never do it again and that they are not just aware of cyclists but are looking out for them.

Law Maker: do everything you can to ensure that laws are passed that help to protect cyclists and create safe roadways. This includes things like creating 3+ foot passing laws and should an accident occur, whether injury or death results, appropriate punishments be carried out to not only serve justice but to show others that should you hit a cyclist with a vehicle, you will be punished to the fullest extent of the law; much like hitting a construction worker is punished.

Other: regardless of who you are, should you see an irate driver, as a number of citizens called in the driver prior to the incident, do everything in your power to stop them. This is largely dependent upon the situation and in most cases it is notifying the appropriate authorities.

In Closing

The tragedy of the cyclists killed in Michigan is something you never want to hear of. Innocent people just out enjoying the day and never making it home. It’s easy to be angry, sad, scared but one thing you can take from this is learning that there are things we have control over and things that we do not. In those situations that we do not, make sure that you do everything you can to have the most control possible. Stay safe, stay in control, and do whatever you are capable of to help prevent a tragedy like this from ever happening again.

Bicycle Insurance – What You Need To Know

June 10, 2016 by Josh Friedman

bicycle insurance

Cycling equipment can be expensive and mishaps occur – crashes, theft, driving into your garage with your bike on the roof of your car… Bicycle insurance can help cover the cost of replacement of your damaged equipment and the equipment of others. This article is meant to get you thinking about insurance possibilities and is not meant to be insurance, financial, or legal advice.

What Most Cyclists Do

Most cyclists do not have any specific insurance to cover any sort of loss. They will cover whatever loss they incur out of pocket with no insurance; this is called self insurance. And most of the time it works – a dented rim here, a broken handlebar there is not a big deal. But what happens when the damage is more significant?

Start With Your Homeowner’s Insurance

Check what your homeowners insurance will cover. Chances are it will only cover your bike if it is stolen from your home. And even then, homeowner’s insurance may only cover the bike if it has its own rider and it is below a certain value, while possibly increasing your premium. If you find that the homeowner’s insurance is not enough and you would like coverage, specific bicycle insurance may be right for you.

Renters Insurance

If you’re not a home owner, renters insurance can offer similar coverage to that of a homeowners policy including theft of your bike. You need to read the details of the specific policy to ensure the coverage meets your expectations.

Bicycle Insurance Companies

Two main companies that offer bicycle insurance in the US are Velosurance and Markel Bicycle Insurance. Both offer comprehensive insurance on your material cycling goods – bicycle and clothing – and additional medical coverage if you choose it. There are many a la carte options; if you do opt for bicycle insurance, think ahead about what you would like to cover. The basic policy will cover your bicycle in the US. If you are traveling abroad, you may want additional coverage. You may have additional bikes or equipment to cover as well. The insurance can cover most things cycling related as long as you are willing to pay the premium. Read the details of whichever policy you are considering so you are certain that it meets your needs and expectations.

Other Options That Can Include The Bike

There are also other options that can include forms of bicycle insurance. Depending upon your local cycling association, they could offer a policy or could be associated with a company that does so. If you are traveling, abroad specifically, finding a travel insurance policy could meet your needs from airline damage to if an accident happens. Some motor vehicle policies may also offer coverage for your bicycle but potentially only if a bike was stolen from the vehicle itself. Read your policy to find out if you would be covered. In addition to covering your bike, you may want coverage for if something happens such as damage or injury to another persons property or self. Personal liability insurance can be an option in addition to an umbrella policy which covers past what your general insurance would cover. Again read your specific policies details to see if it meets your needs.

Read the Fine Print

Like any policy, read the fine print to ensure that you have the coverage you need for bicycle insurance. If necessary, enlist a professional with experience in bicycle insurance to help guide you. Choose the right policy with the right additions and it could save you a lot of money in an unfortunate event. The opposite is also true; you could end up wasting money if you chose the wrong policy.

Cycling In Fog – How To Make It Safe

June 2, 2016 by Adam Farabaugh

cycling in fog

Depending upon where you live, morning fog and fog in general can be a regular occurrence that you have to deal with whether commuting or getting a training ride in. Driving in the fog can be hazardous but cycling in fog can be even more so. The best approach is to avoid it if you can; ride later in the day, choose a different route, etc.,  but those aren’t always options. If you do have to ride in fog, make sure you know how to and know what to wear. It can save your life.

Avoiding Fast, Busy Roads While Cycling In Fog

Obviously in heavy fog, visibility is drastically reduced. Under normal conditions, drivers may not see you but in foggy conditions, the chance is even greater. The best way to make sure that a driver doesn’t come up behind you suddenly is to simply avoid roads where they can do so. Choose a route with little to no traffic such as a bike path, back roads, or neighborhood roads even. Removing one of the variables will make your ride extraordinarily safer.

Riding Defensively

If you do have to cycle on a road that receives more traffic, you must ride like you are invisible because, well, you pretty much are. As a car approaches, you will be able to hear it, slide to the side of the road completely out of the cars path. This way if they don’t see you, they miss hitting you. When approaching intersections you must be very aware of traffic coming from every direction. Never assume that they see you, particularly vehicles that are turning or pulling out. If you must, slow and stop to avoid crossing the intended path of a car.

Be As Visible As Possible While Biking In Fog

While riding, you should always wear things that are visible but must do so even more when riding in fog. This includes things such as the following:

  • Bright colored jersey/jacket.
  • Rear flashing red light. The brighter the better.
  • Front flashing head light. Again the brighter the better.
  • Reflectors on your feet/ankles. The movement of your feet will catch an eye more easily. Some cycling shoe covers also have reflectors on the rear of them giving you more visibility as well as toasty toes.

Staying Warm

With fog comes moisture. With moisture comes a chilling effect due to the heat transfer properties of water. If you are riding with bare skin on your legs and/or arms, moisture will develop on the surface causing you to become cold very quickly. In addition, fog often forms at lower temperatures so the combined cooling effects of moisture on the surface of your skin and the outside ambient air temperature create the conditions for a bone chilling ride. Treat cycling in fog like riding in the rain; meaning wear a rain jacket or at the very least, arm warmers and leg warmers.

Glasses Fogging Up

With the added moisture in the air, your glasses will likely fog up much easier or at the very least, get water droplets on them. Keeping them clear will be a huge help as not being able to see through the fog itself is bad enough. You don’t need to add another barrier to seeing well. If you take your glasses off, riding with a cycling cap can be a good option as it keeps some of the wind and any rain out of your eyes.

How To Cross Railroad Tracks On A Bike

May 28, 2016 by Adam Farabaugh


cross railroad tracks on a bike 2

Railroad tracks can be one of the most difficult things to learn to maneuver on a bike. If you occasionally cross railroad tracks on a bike, chances are that you’ve crashed on a set before. It is very easy to do especially if they’re wet. Even experienced riders crash on them but you don’t have to if you know what to do.

The Dangers of Crossing Railroad Tracks

Railroad tracks are dangerous to cross on a bike for a few reasons. The largest one is that when they are wet, they are as slick as ice. If they’re even at a slight angle, your bike is not straight up and down while crossing, or you try to accelerate or brake, you are very likely to have your wheels slide out from under you. The thing with all of these scenarios as well is that it happens very fast and the next thing you know you’re sitting on the ground. Another danger is getting your tires sucked into the crack which can cause a nasty fall. This occurs more often when the tracks are running with you such as with a trolley line.

When Tracks Are Perpendicular

perpendicular railroad tracks

The easiest type of railroad tracks to cross on a bike are ones that are perpendicular to you as you cross them. (like the image above) When crossing any set of tracks, do not turn your front wheel. Keep it straight with a firm grasp so your handlebars don’t turn on you when you hit the bumps. When crossing perpendicular tracks, slow a bit and lift your butt slightly off the saddle to absorb the bumps. Also, stop pedaling and coast over keeping your bike straight up and down. A lot of these railroad track crossings can be old and can easily cause a flat tire from the rail or supporting wood, metal, or concrete structure. Taking your butt off the saddle and absorbing any bumps with your legs and arms will help avoid flatting. Another alternative to crossing railroad tracks on a bike is to bunny hop over them. With this you won’t need very much height but you will need speed as the distance to stay in the air is quite large. Also if you don’t make it all the way and your rear wheel comes down on the track, it can very easily puncture.

When Tracks Are at an Angle

angled railroad tracks1

This type of crossing is likely the type that may have brought you down on a bike. If you were to try and ride across them at an angle, particularly while wet, the wheel will be in contact with the track for longer which combined with the track going in your direction of travel, will cause your wheels to easily slide out. There are three ways to cross these types of crossings with the first one being your standard go-to.

Cross Perpendicular

The first, and safest way, to cross angled railroad tracks is to not cross them at an angle. Simply ride further to the right or left so you can approach them at a 90 degree angle. Then cross them as you would a normal set of tracks perpendicular to you. The one thing to watch for here is that there is no traffic coming up behind you as depending upon the road, you could be in the center of the lane. Most drivers typically recognize the danger you are in and what you are trying to do so will give you space. Don’t count on it though so ride defensively.

The Double Hop

If you are a much more experienced bike rider and you can’t ride wide to cross the tracks at a 90 degree angle and don’t want to slow down, you can employ the double hop. You need to slow down a little bit to give enough time in-between the tracks. What you do is as your front wheel approaches the first track, lift it off the ground slightly so it doesn’t touch the track. As it’s coming back down, lift your rear wheel over the first track but while doing so you will have to lift your front wheel over the second track. And then again, as your front wheel is coming down, lift your back wheel over the second track. You have to be very quick to do this and the slight angle of the track gives you a bit more space in-between the tracks to employ it. If the tracks are running even more parallel with you, it will be slightly easier although not hitting any of the tracks becomes even more important. As the tracks come closer to perpendicular, it can be very difficult to not hit one of the rails.

The Full Bunny Hop

If you have the speed and skill, the best way to avoid crashing on railroad tracks is to simply not even touch them. Just air it out. This can be somewhat easier on perpendicular tracks but as the tracks turn at an angle, the distance you need to go increases so it can be hard to make it all the way. In particular, if you try to bunny hop over angled tracks, especially if they’re wet, and you have your rear wheel come down on the last track, you are very likely to crash.

When Tracks Run with you – Ie. Trolley Tracks

parallel tracks

In some cities, particularly in Europe, you will encounter trolley tracks that run parallel with you down the street. These can be a nightmare if you don’t know how to handle them as not only do you have navigate the parallel tracks, you have to navigate the above scenarios as well when you come to intersections. The best rule to avoid crashing is to simply only ever cross tracks at a 90 degree angle. If you find yourself trapped, simply stop and put a foot down to get over them safely. It can be quite embarrassing to crash on these because there are often a lot of people around in a city where these are located. If you are a more experienced rider and are riding clip-less pedals, you can employ two different techniques to move laterally over parallel tracks.

The Improvised Double Hop

The first one is to be used when you are riding a bit slower. First, lift your front wheel off the ground and move it laterally over the track. Make sure you get it high enough as if you don’t and it catches on the track, it can bring you down. As soon as the front wheel comes back to the ground, do the same with the rear wheel. A good way to practice this is to go to an empty parking lot and practice it over the parking lines that way you don’t have to risk crashing if you don’t get it the first time.

The Lateral Bunny Hop

The second way to move laterally over tracks is to bunny hop them laterally. This is for when you’re going a bit faster. It’s fairly close to the improvised double hop but while your front wheel is still in the air you bring your back wheel up. Again, a good way to practice this is in an empty parking lot over the parking lines.

Slowing Down To Cross Railroad Tracks on a Bike

The simplest, most effective way to stay safe while you cross railroad tracks on a bike is to cross them slowly. This gives you time to approach them at a 90 degree angle, unless you’re an expert and employing one of the other above techniques, and if you do happen to fall, you are not going very quickly. If you are still not comfortable crossing railroad tracks, even at a 90 degree angle, it’s okay to stop and get off your bike and cross them on foot. It’s always better than crashing. Happy crossing.

Where To Ride A Bike On The Road

May 15, 2016 by Adam Farabaugh

where to ride a bike on the road

Riding a bike in the middle of the lane on one road could get you killed while riding in the same spot on a different type of road could keep you alive. Knowing where to ride a bike on the road with differing road and traffic situations is a must know for bike riders of any level.

Which Side Of The  Road Should You Ride On?

You should always, always, always ride with traffic, never against it. This means on the right-hand side of the road in the majority of countries in the world. Riding against traffic puts you and the vehicle in greater danger as there is a much greater difference in speed as two object approaching each other will meet much quicker than two objects traveling in the same direction at the general speed of bicycles and vehicles. This reduces the time a driver has to react as well as a cyclist. Also, if a collision were to occur, it would be much worse head-on than if both objects were traveling in the same direction. Also, navigating intersections is much easier and safer when taking the same path as a vehicle.

Where On The Shoulder and When?

Now that you know roughly where to ride a bike on the road, how far to the right should you ride? This depends upon the road and the traffic. Being in one place on a certain road will keep you safe while that same place on another can be very dangerous.

Right Of The White Line

If a road has a lot of traffic, more than ten or so cars passing in a minute, you should ride on the right side of the white line. This is because when vehicles are behind one another they often can’t see past the vehicle ahead of them. If a rider were to ride further into the lane to force the vehicle to move over into the other lane to pass, it could create a more dangerous situation with the potential for a head-on collision. Additionally, as the vehicle moves over, the vehicle behind may not have time/be paying close enough attention to slide over around you resulting in being rear-ended. Staying to the right of the white line avoids this. While being out of the travel lane, you still want to glance over your shoulder to make sure no drivers are texting and drifting over to hit you.

Left Of The White Line

When there is less traffic than described above, you will want to ride just to the left of the white line by one to six inches. This places you in the field of vision of the driver as they may not be looking down the side of the road to see if a cyclist is there. This then forces them to slide over and around you while also making sure there is no traffic coming in the opposing direction. As the vehicle begins to pass you, you should then slide to the right of the white line to give even more space for them to pass.

If There Is No Line

On many roads there is no white line. In this situation you should ride roughly on the right side of the right most tire track when there is little traffic. With more traffic you should ride further to the right where traffic can pass you safely without hitting you while you are still on the road.

Where To Ride A Bike On The Road When There Is No Shoulder?

In many places there isn’t a shoulder wide enough to safely accommodate cyclists while vehicles pass. These roads are often built just wide enough for two vehicles to pass and that’s it. To the right of this is a ditch, grass, woods, you name it. Whether there is little or a lot of traffic you need to ride on the right side of the right most tire track. This will force the vehicles behind you to slow and move into the other lane to pass when there is no opposing traffic. If there is opposing traffic or a corner that they can’t see through, they have to wait behind you as the lane is not big enough accommodate the both of you. In some areas (particularly rural, low cyclist populated areas) drivers will get mad at you but this is the safest option for both you and the vehicle. In this situation you must keep an eye on vehicles approaching from behind and if they don’t see you or attempt to squeeze by anyway, you need to hightail it off the road regardless of what’s there. Crashing on your own will always turn out better than being hit by a car.

When Turning Where Do You Go?

As stressful as knowing where to ride a bike on the road can be, intersections can be just as stressful if you don’t where to go and when. The key is to approach them exactly as you would as a vehicle. This means that when you approach a traffic light and want to turn left, begin to slide left into the lane before the intersection and then into the turning lane if there is one. If you’re turning right, you can just stay to the right and proceed when clear of traffic from the other directions.

What’s A Speed Wobble and What Do You Do When You Get One

April 29, 2016 by Adam Farabaugh

speed wobble

You’re going down a fast descent and all of a sudden your bike starts to speed wobble and shimmy beneath you. What do you do? What’s happening? How do you avoid crashing?

What is a Speed Wobble?

A speed wobble, or speed shimmy, or death wobble, is when the front of the bike starts to shake violently back in forth originating from the front fork and wheel. This oscillation of the handlebars and the front of the bike violently back and forth is due to an occurrence called Hopf-Bifurication. This is a high end physics term used to describe the point at which a system’s stability changes to that of a periodic solution. This means that the bike maintains stability through a deflection in one direction followed by a deflection in the other to maintain equilibrium. This is much like that of a top that is spinning, slowing, and beginning to wobble back and forth yet still staying upright.

What a Speed Wobble Isn’t

A speed wobble is often mis-described as a resonance phenomenon where the bicycle hits a resonance frequency and begins to shimmy. According to Eric M. Bolt, W. Jon Harrington Professor of Mathematics Clarkson University, this is not the case as there is no periodic forcing nor is there a building of amplitude in a speed wobble on a bike, both required for a resonance phenomenon. In laymen’s terms, this describes that a force such as a bumpy road, which places differing forces upon the wheels and frame, can induce the effects of a speed wobble where in fact it can just as easily occur on a smooth surface. Secondly, when a speed wobble occurs, it doesn’t begin as a slight shimmy and build to a larger and larger amplitude but rather begins at a point known as critical speed, or the point at which the bike crosses the Hopf bifurcation value, and shakes violently back and forth at a more set amplitude.

What Causes a Speed Wobble?

On a bike, a speed wobble can be caused by a number of things. The first is rider placement upon the bike. Distribution of weight centered more toward the rear of the bike causes the front end of the bike to loose stability at speed. It would be like if someone were to shake a swimming pool noodle back and forth holding onto one end while you held onto the other end in a fixed position; the noodle would form s-bends but if you were grab the other end of the noodle by the person’s hands as well, it would stabilize it thus removing the s-bends. On the bike, the person shaking their hands back and forth is the occurrence of Hopf-Bifurication and controlled instability as the critical speed of the bike is reached.

Fixing and Avoiding a Speed Wobble With Weight Distribution

Holding the handle bars and placing more weight on the front end of the bike will stop the speed wobble and if you keep enough weight toward the front of the bike, it will help avoid a speed wobble in the first place.

Insufficient Frame Rigidity As A Cause

The second cause of a speed wobble is insufficient rigidity of a bicycle frame itself, particularly the top tube. This often occurred in older bikes but newer models are now stiffer and more rigid thus reducing the occurrence of a speed wobble. The rigidity of the frame simply increases the critical speed so you have to be going faster to induce the speed wobble.

What To Do When You Get A Speed Wobble

In addition to keeping your weight more evenly distributed, a quick, simple way to control the bike and stop the speed wobble is to squeeze your knees together onto the top tube with the pedals at 3 and 9 o’clock (where they most likely already are as this is how you should descend unless going through a corner). This will immediately stop the speed wobble and allow you to brake to a more manageable speed for the bike you’re on.

The Take Away

Getting a speed wobble will scare the crap out of you no matter how many times you’ve experienced it. Not knowing what to do can be even scarier. Remember just squeeze your knees onto the top tube whenever it happens, then brake to slowdown. To help avoid it from happening, keep your weight more evenly distributed between the front and rear wheels and always make sure you have a grip on the bars but not a death-grip.

How To Tuck On A Road Bike Effectively

April 27, 2016 by Josh Friedman

The greatest force to overcome on a bicycle is wind resistance. The greatest source of wind resistance is your body (despite what the equipment companies would lead you to believe). What do you do when you have spun out of all your gears but you are still frantically trying to catch the pack? The answer is knowing how to tuck on a road bike effectively. There are all sorts of ways to do it wrong. Here you will learn how to do it correctly.

how to tuck on a road bike

Taking In The Scenery – Or Not

You see pros on TV do it all the time; the aero tuck. It is a sacrifice of a bit of agility and control to go as fast as possible. It also provides a dramatic and exciting visual; riders pushing themselves to the physical limits of speed with a backdrop of beautiful vistas. But those riders have no time to take in the scenery and you don’t either if you try this. It requires the utmost focus on the road unfurling itself before you at ever increasing speeds. Your focus will have to move further and further up the road as speeds increase. It will allow you to have ample reaction time to changes in the road as you go hurtling towards them.

Safety and Starting Out

The most important aspect of the aero tuck on a road bike is SAFETY. Do not try to do anything you are uncomfortable with or puts you in unnecessary risk. There are a few steps to ensure that you get comfortable along the way. The first few times, practice on a straight road that is not too steep to get a feel for it. As you become more experienced, you can graduate to more challenging situations.

Staying Loose

Because of reduced reaction time and agility while you are tucked on a road bike, you have to be able to handle imperfections in the road. Keep your grip loose on the handlebars yet tight enough that your hands won’t slide off and absorb any impacts in your already flexed joints. It will keep your bike tracking straight and safely over any holes or bumps.

Reducing Drag

Think about reducing your frontal area, which is also known as the surfaces that the wind will hit, when you go into the aero tuck. Bring your head down as low as it will go and still allow you to see the road. Never look down to get more aero; always look at where you’re going. Bring your arms and legs in as close to your frame and torso as they will go. To start, put your hands in the drops and bring your elbows in. As you get more comfortable, you can move your hands to the tops of the bars right next to the stem. This is a move that sacrifices a little control because it’s harder to maintain stability if you hit a bump and you’re also away from your brake levers but when your goal is maximum speed, you are not thinking of slowing down at all. It is also a bit harder to steer with your hands so close to the stem, although at the speeds you are hoping for, most of the steering comes from your body.

Where to Sit on the Seat

While learning how to tuck on a road bike, you should make sure that you are sitting on the nose of your saddle, much like a time trial position. It will allow your body to rotate forward easier than if you’re positioned on the back of the saddle. This is because it opens your hip angle and moves your thighs down out of the way.

Additional Stability

For additional stability, grab the top tube with your knees. This is also a great tactic to counter any speed wobbles you may get at any time at high speed. It gives you another point of contact and control while you are descending at blinding speed.

How To Tuck on a Road Bike With The Super Tuck

The final addition to knowing how to tuck on a road bike is the super tuck. For the fastest version of the aero tuck, you move from sitting on the saddle to sitting on the top tube in front of the saddle. This is a last ditch attempt at additional speed. It further reduces your frontal area but it also reduces your control of the bike dramatically if you need to brake, turn, accelerate, or absorb a bump or pothole. Some riders are able to pedal while sitting on the top tube but it’s doubtful that it will add any speed. If you are going fast enough to require any form of aero tuck, you are likely going to spin out the biggest gear you have. It has to be a very high stakes situation for you to go into a super tuck. Think staying away to win a race. Otherwise it is not worth the risk in most situations.

Recovery While Tucked

An additional benefit of aero tucking is that it you gives you a chance for complete recovery while achieving maximum velocity. Opportunities like this are rare in a competitive environment. When you reach the bottom of the descent you will be ready to start smashing again, whether it is to bridge back to a group up the road or to keep building a gap to the riders behind you.

The Take Away

Like any skill that you would like to master, the key is practice. It is especially important with learning how to tuck on a road bike because it is a high-stakes activity; one small error can lead to catastrophic results. But once you master the aero tuck you will be hooked. Every descent will become a challenge to break your all-time speed record. Go and try it. You will have some exhilarating results but always make sure to stay safe. 

« Previous Page
Next Page »
  • Facebook
  • Tumblr
  • Twitter

Latest Articles

JOIN Cycling: A New Training Platform for Cyclists

May 27, 2024 By Eric Lister

cold exposure

The Benefits of Cold Exposure for Cycling & Life

June 13, 2023 By Eric Lister

hill climb

The Ultimate Hill Climb Training Guide

May 31, 2023 By Eric Lister

shoulder pain cycling

How to Treat & Avoid Shoulder Pain While Cycling

April 12, 2023 By Eric Lister

psoas stretch

The Importance of the Psoas Stretch for Cyclists

April 6, 2023 By Eric Lister

cycling neck pain

The Ultimate Guide to Cycling Neck Pain: Causes and Solutions

March 21, 2023 By Eric Lister

Useful Info

  • Contact
  • Finally, A Global Cycling Club That Is Focused On Community And Love Of Cycling!
  • Privacy Policy
  • Share Your Story!
  • Terms And Conditions Of Use
  • Welcome to I Love Bicycling
  • What Happened When I Stretched Every Day For a Month

Recent Posts

  • JOIN Cycling: A New Training Platform for Cyclists
  • How to Hang Bikes in Your Garage: 4 Inexpensive Options
  • Gravel Bike Vs. Road Bike: Which One Is Better For You?
  • The 6 Types of Mountain Bikes & How to Choose the Best One for You
  • What Is a Touring Bike Good For? 5 Benefits We Know You’ll Love

Search I Love Bicycling

Connect with Us

  • Facebook
  • RSS
  • Tumblr
  • Twitter

Copyright © 2025 · Magazine Pro Theme on Genesis Framework · WordPress · Log in