• Training
    • Injury Prevention
    • Training Tips
  • How To
    • Bike Fit
    • Gear
  • Nutrition
    • Nutrition Tips
    • Weight Loss
  • Repair
  • Reviews
  • Stories
    • Funny Stories
    • Jokes
    • Quotes
    • Videos
    • Funny Videos

I Love Bicycling

I Love Bicycling is a website that is geared towards cycling for beginners with road cycling tips, training articles, nutrition tips, weight loss, how to’s and bike repair articles.

Training Tips

  • Injury Prevention
  • Training Camps

Tips for Biking in the Heat

June 24, 2020 by Adam Farabaugh

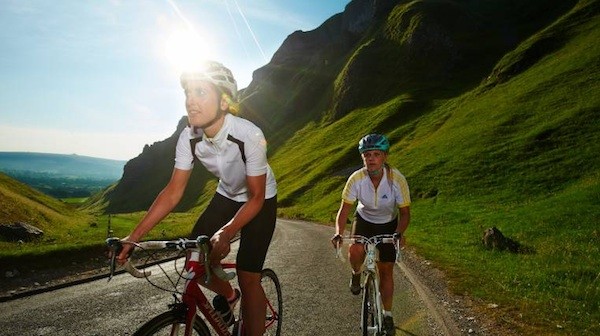
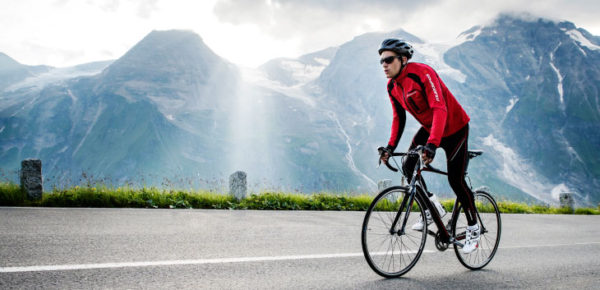
Summer can bring great riding weather, but sometimes it goes overboard and brings excessive heat as well as humidity which can bring your riding to a grinding halt.

The biggest thing to heat is how used to it you are, or acclimated.  Remember in the early spring when 60 degrees Fahrenheit (15.6°C) used to feel like balmy shorts and jersey weather? And now, during summer, you practically want a jacket and gloves for the same temperature. Your body becomes adapted to heat over time but if you try and ride in excessive heat before your body is ready for it you can pay dearly.

Whether you are adapted to it or not, you need to take the necessary steps to stay hydrated and cool before, during, and after your ride.  Doing so will not only keep you out of the hospital but also make your rides in the heat more enjoyable.

Biking in the Heat

Biking in the Heat

Acclimating

Getting used to riding in the heat is the first step to being able to ride comfortably and efficiently when the mercury goes up. Hopefully the temperature eases its way up but if it doesn’t, try avoiding the heat of the day and ride in the early morning before it warms up too much. If you are traveling someplace where it is considerably warmer or if you see in the weather forecast that the temperature is going to be hot, overdress on your rides now.  Wear an extra jacket or vest to add a few degrees to your body. Don’t go overboard but if you do, you can simply take it off and cool down. This is an easy way to prepare for riding in the heat without yet having the heat around to ride in.

Hydrating

Whether it is cold or warm you should always hydrate properly. When it’s cold your body won’t feel as inclined to drink as it is to eat but you should make sure to drink enough. When it gets warm those tendencies switch. You need to drink more than just water as your body needs electrolytes to continue functioning at the same level. Salt, or sodium, along with potassium, magnesium, and calcium will help your body to continue muscle function as well as other life essentials. Electrolytes allow your cells to absorb the nutrients they need (in short). Depending upon how hot it is and how hard you are riding, you should roughly be aiming to drink one 24oz. bottle each hour.  This should be primarily sports drink mix but can be supplemented with water.

Prior to riding in the heat you need to make sure you are hydrated going into the hot ride. Focus on drinking enough water and carry around a water bottle throughout your day and make a mental note to drink to thirst. This combined with having enough salt in your meals will help your body to be fully hydrated going into your ride. Half an hour or so before your ride you can start drinking small amounts of your sports drink mix. Drinking it before this is not necessary unless it is an electrolyte only drink that only contains electrolytes and no sugar or carbohydrates. Save them for the ride as your body will need and burn them then.

Following a ride you still need to make sure you hydrate. Having a super sugary drink such as soda or a strong sports drink can make your stomach upset so focus on water with electrolytes and some sugar and carbohydrates. A post workout recovery drink can be a good option which combines protein and other building blocks to help you recover from your ride.

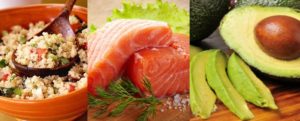
Some good food options to eat during the heat are those that are simple and easy to digest. You will want to go lighter on the protein as well as fat as they are harder to digest. Some foods like homemade rice cakes give a good balance of water in the food itself so your stomach doesn’t need to pull water from elsewhere in your body to digest. At rest stops, foods like watermelon and cantaloupe give a big punch of water so stock up on these if they’re available.

Staying Cool

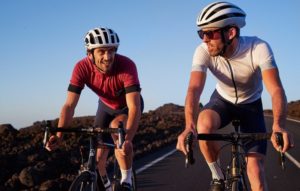
Along with drinking enough during your ride you will want to make sure you stay cool as well. This starts with wearing a jersey that is made of a light material that is also light in color. Having a lighter jersey will allow air to more easily pass through as well as to more quickly absorb and evaporate sweat from your skin which is how your body keeps cool. Having a lighter color jersey will keep you much cooler as it will absorb less of the sun’s rays by reflecting much more of its energy. Some riders find that unzipping their jersey all the way helps to get more air across their chest thus keeping them cooler. This can be true if you have a hot jersey but a lot of warm weather jerseys are designed to stay zipped up to wick sweat and keep you cool.

Some riders, particularly racers, in the heat will put ice socks on the back of their neck in their jersey. This may feel good but it actually does more harm than good as the extreme cold on the skin sends a shock to your body causing it to send blood to the core instead of to the skin where it can dissipate heat. The best way to stay cool is to continually squirt water on your head, the back of your neck, and shoulders as this will help to dissipate heat more effectively.

Riding in extreme heat can be dangerous so if it’s too hot, simply don’t ride. But if it’s not crazy hot and you are ready for it, biking in the heat can give you more days of good weather riding. Prepare ahead of time and make sure you bring enough water as well as know where your stopping points are mid-ride as well as what your options are if you need to bail out half-way through. Riding in the heat can also help to raise your VO2 max as well as help you shed some extra weight. Stay safe and stay smart and you can come to enjoy riding in the heat!

Improve Your Cycling With These Cross Training Sports

June 22, 2020 by Sarah Lauzé

We may be of the opinion that cycling is the single best sport out there, but sometimes widening our horizons can make us appreciate time in the saddle even more. While it remains true that the only way to get better at cycling is to ride more, cross training can help you get there. It can help fill in the gaps by building bone density and strengthening muscle groups that may be underused on the bike.

Whether your taking a break due to an injury or just trying to work some variety into your training plan, here are some of the best cross training sports to improve your cycling.

Hiking

Hiking is a great way to enjoy your surroundings at a relaxed pace. While you may be chasing segments on your bike, hiking makes you stop and take in the view. This can have a great stress-relieving impact on the brain.

Why it’s great for cyclists: Taking a stroll in the woods, especially if you tackle a mountain, is a great workout for your glutes, quads, hamstrings, core and hips. Those muscles sound familiar? They are also your mission-critical muscles used cycling, so hiking is a great way to build strength and endurance. It also helps build bone density as a weight bearing activity, but without the high impact of running.

Swimming

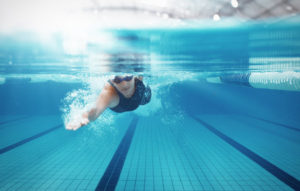
Who doesn’t want to go hit up the beach in the summertime? Whether it be in your nearest body of water or the local pool, swimming is one of the best ways to exercise while injured. It is also one of the more efficient strength and cardio workouts.

Why it’s great for cyclists: A weak core can lead to a whole lot of issues for cyclists, largely sharing up as lower back pain. As cycling naturally leads to underdeveloped core muscles, it is important to find another way to strengthen that area. If this is a challenge for you, swimming needs to be your new favourite thing. It is also a great way to recover after a hard ride.

Strength Training

Hitting the gym may not be everyone’s particular cup of tea, but even doing some strength exercises at home can be a great way to balance muscles. When done right, strength training can make you feel stronger, faster, and fitter both on and off the bike.

Why it’s great for cyclists: Cycling is a low impact activity, which means it’s great for your joints, but not so great for supporting your bone density. Strength training can help fill the gaps and build stronger bones and complementary muscles to have you feeling stronger than ever on your bike.

Running

Running is a great option if you’re travelling without your bike, or have limited time for a workout. It is effective in maintaining the condition of your cardiovascular system and gives you some variety in your training.

Why it’s great for cyclists: Running strengthens your bone density in a way that cycling doesn’t, and will keep you top climbing shape when you can’t put the time in on your bike.

Yoga

There are a lot of misconceptions around yoga, and you may scoff at the idea of it improving how you feel on your bike. However, more and more pros are using yoga as their secret weapon to get faster and prevent injury.

Why it’s great for cyclists: Yoga helps strengthen your core, which in turn can prevent lower back pain. It maintains a healthy range of motion in your muscles and joints, and will improve your flexibility and posture over time. Regular stretching and yoga will reduce your risk of suffering from the typical overuse injuries that plague cyclists. These include IT band syndrome, tight hamstrings, back pain, and knee problems.

3 Hidden Cycling Injuries and How to Fix Them

June 20, 2020 by Sarah Lauzé

We all know the wonderful feeling of cycling, but unfortunately it’s not always sun on the face and wind in the hair. Pedaling is a low-impact motion, making cycling one of the best ways to stay fit without putting stress on your joints. However, it’s also a highly repetitive action through a limited range of motion, which has consequences over time. Injury is a part of almost every sport, and cycling is no exception, but that doesn’t mean you need to hang up your jersey and sell your bike. Here’s what you need to know about hidden cycling injury and what you can do to fix them.

The Issue: Adaptive Muscle Shortening

Muscles do not naturally maintain their healthy or ideal range of motion on their own. In fact, it’s just the opposite, especially with the increase of 9-5 desk jobs. Muscles will change their functional resting length to adapt to the length at which they are habitually used or positioned. The process by which muscle fibres physically shorten is called “adaptive shortening.”

Cycling is one of the few activities in which muscles contract concentrically (while shortening), rather than eccentrically (while lengthening). The repetitive motion causes muscle fibres to shorten 
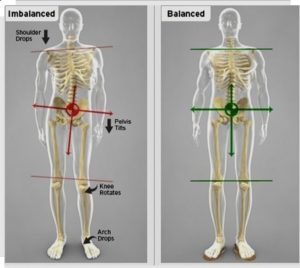
if action is not taken. Not only will shortened muscles impact your efficiency, comfort, and aerodynamics on the bike, but they will eventually lead to injury.

The cycling position is, unfortunately, more time spent in a hunched over posture that can compound already tight hip flexors, weak glutes and rounded shoulders. If you’re a weekend warrior, then it really is a case of when you will suffer an injury rather than ‘if.’ When you’ve spent most the week in a relatively sedentary position, and then hit the weekend with high levels of activity, you are taking chronically shortened muscles and forcing them to fire so quickly that it can lead to joint injury.

The Symptoms: Weak and shortened hamstrings are caused by the combination of the upper section becoming loose and weak while the lower section behind the knee becomes tight and never fully extends. This can show up as either knee or hip pain.

The Fix: The problem is a little more complex than just lengthening the muscles back to their natural state. It is a combination of stretching and strengthening that can reverse the effects of adaptive shortening, as it takes both range of motion and strength to bring muscle balance.

The Issue: Lower Crossed Syndrome

Lower Crossed Syndrome (LCS) is a neuromuscular condition in which there are both tight and weak muscles. Specifically, it refers to weak abdominal and gluteal muscles combined with tight iliopsoas and erector spinae muscles (see diagram). This is the most common underlying cause of anterior pelvic tilt, which is common among even professional cyclists.

The seat of power on a bicycle is the pelvis. When the pelvis is properly aligned the rest of the body can pedal efficiently. When the pelvis is misaligned and unstable, it is a recipe for not only lower back problems but hamstring problems too. An unstable pelvis leads to rocking. With each rock, the pelvis engages lower back muscles and hamstrings in ways that should not be involved in pedaling, overworking and straining the muscles unnecessarily.

The Symptoms:  LCS can become obvious in posture, as it leads to forward head posture, flat glutes, and a protruding abdomen as the pelvis tilts anteriorly (forward). The inhibited muscles, 
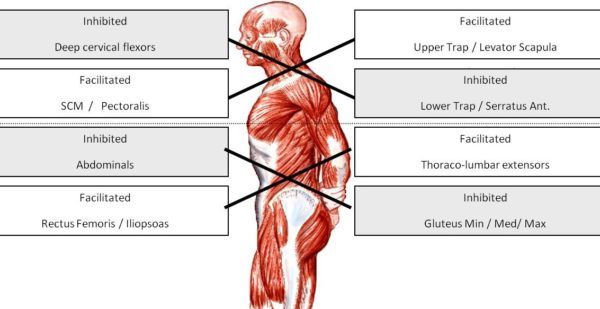
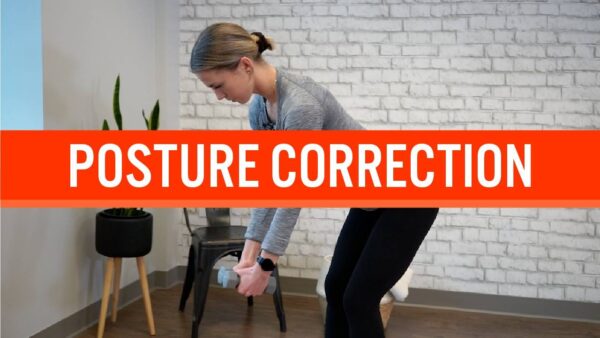
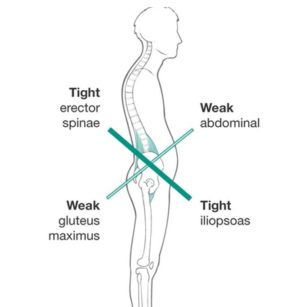
abdominals and gluteals, are never fully engaged in cycling, while the facilitated muscles, rectus femoris (quadraceps), iliopsoas and thoraco-lumbar extensors  are always engaged and often overworked. Constantly engaging those lower back muscles without proper support from a stable core often results in lower back pain for cyclists.

The Fix: The first step is to loosen the tight cross, which will quickly alleviate pain and discomfort caused by LCS. This is done this through targeting stretching, mobility movements, and foam rolling. The second step is targeted and deep stabilization exercises that will help build up the glutes and abdomen.

The Issue: Knee Pain

This one may not be so hidden, as knee pain is one of the most common injuries among athletes. In fact, a 2010 study of professional cyclists found that knee pain was the cause for over half of the time spent off the bike. As one of the most complex joints in the body, and in combination with muscle imbalance as discussed, it makes sense that it’s often one of the first places we experience pain.

To understand knee pain it is helpful to have a basic idea of what lies beneath the skin. In simplistic terms, think of the knee joint as a hinge where the quadriceps muscles pull the knee straight and the hamstring muscles bend the knee. The quadriceps run from the front of the femur (thigh bone) to the patella (knee cap). The patella acts as a pulley to increase the force generated by quadriceps which creates a greater torque on the tibia (shin bone).

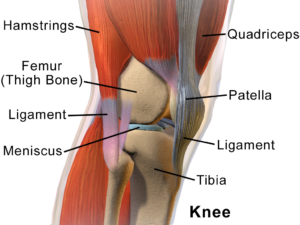
To make matters more complicated,  the ITB runs down the outside of the thigh and blends into the outside of the knee. ITB stands for iliotibial band and is a well known potential source of trouble for cyclists, runners and active people in general. The ITB is also attached to your glutes (buttock muscles) and hip flexors. Often when looking for the source of knee pain we have to pay close attention to hip flexibility and control.
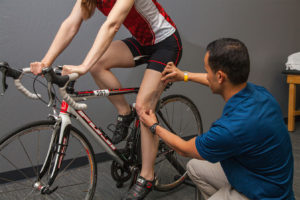
The Fix: Some types of knee pain require rest, but most are caused by muscular imbalance. Again, it takes a combination of stretching and mobility exercises to loosen tight muscles and build up the proper supporting muscles.

The Mistake Most Cyclists Make Stretching: Not Having a Plan

Most of us were taught that stretching for a couple minutes before exercise would help loosen the muscles and prevent injury, but this is not the case. Holding a static stretch for 10 seconds will do nothing to lengthen the muscle, and barely scratches the surface of what needs to happen in the structure of the muscle.

The only way to achieve muscle balance is to practice a variety of stretches over a prolonged period of time (at least 2 weeks), hold each for the appropriate amount of time, and complete in combination with some strength training.

It can be tough to accomplish all that on you own. Even with the best of intentions and a plan laid out by a physiotherapist, it’s easy to never do it at all, or stop as soon as the pain is gone. Stretching should be thought of as basic body maintenance, especially for cyclists.

As cyclists, we know how hard it is to stick to a stretching routine. We all want to spend more time on our bike, but maintaining a healthy range of motion and flexibility will, in the long run, keep you on the bike without injury. That’s why we’ve partnered with Dynamic Cyclist to bring you a stretching and strength program that is easy to follow, and is geared towards cyclists. They’re offering our readers a free 7 day trial, just click the link below to get started.


How to Maintain Proper Cycling Posture

June 17, 2020 by Sarah Lauzé

There are some cyclists that make riding look effortless and smooth. Although it may come naturally to some, it takes time and practice to achieve that gliding look, but it’s not just for professionals! If you understand the basics of how your muscles are working, both for and against you, then you can ensure you stay balanced and relaxed in the saddle. Maintaining proper cycling posture is important to not only your efficiency, but to prevent injury.

There is no “correct cycling posture” that is right for everyone. We are all built differently, so what will work for some won’t for others, but there are some general rules to go by. After ensuring your bike is fit to you and your riding style properly, then it’s time to start thinking about what proper cycling posture looks like for you.

Cycling Posture

Why is cycling posture important?

Being as efficient as possible is the easiest way to go faster while spending less energy, sound good? The first thing you want to focus on is staying as relaxed and stress-free as possible, tension is the enemy! Many cyclists will slowly tense up over the course of a ride, not only compromising efficiency, but demanding more than is necessary from their bodies. Letting go of that tension and relaxing into a natural position will work to:

  1. Increase efficiency
  2. Keep you comfortable
  3. Improve bike handling
  4. Easier breathing
  5. Prevent injury

What does proper cycling posture look like?

As stated above, this will look different for everyone, but here are some things to keep in mind:

Keep your shoulders relaxed 

Many cyclists will find their shoulders slowly creeping up to their ears while riding, which puts unnecessary stress on your shoulders, neck, and back. This can also get in they way when you need to shoulder check or move your head around. You will actually stay more alert by keeping you shoulders down and relaxed.

Bend your elbows

Riding with locked out elbows will make for a rough ride, so adding a slight bend will act as suspension and keep any bumps on the road from tossing you overboard. Keep your elbows tucked into your sides rather that out like wings. This will reduce the stress on your shoulders, and also result in less pressure on your hands and wrists (your wrists should NOT be bent).

Maintain a neutral spine

Left: Too straight, putting tension in the lower back, Center: Correct posture with core engaged and back relaxed, Right: Core unengaged and rounded spine.


You want your back to be relatively straight, but not locked or tensed into a line. The most common mistake is letting the back round outward, which can cause all sorts of issues over time. The best way to ensure you are keeping your back straight enough is to keep your core engaged. If your abs are just taking a free ride, your back will inevitable round out, putting pressure on your hands, shoulders, and crotch (which can be super painful).

Keep your knees in line with your foot

You do not want your knees to bow outward at any point during the pedal stroke. Not only is this incredible inefficient, but it will cause some painful knee issues. So, focus on keeping your knee in line with and over the ball of your foot as you ride.

How to improve your cycling position

If you think you are struggling with any of these aspects, it is worth taking the time to correct what you can to ensure you are comfortable and efficient on the bike.

Proper bike fit

First things first, everything has to be in the right spot to even make it possible for you to maintain proper posture cycling. If you’re not sure your bike is the right fit, or isn’t adjusted to you, then it’s worth looking into having a professional bike fit.

Think about it

Pay attention to your body when you’re on the bike. Where do you feel tension? In what ways is your body out of alignment or its natural range of motion? Focus on relaxing your muscles and breathing, and think about each aspect of your posture piece by piece.

Stay flexible

Flexibility, or rather inflexibility, can lead to unbalance in the body and even cause the body’s structure to move out of alignment. If you are not flexible enough to hold proper posture over the course of a ride, then you need to work on increasing your flexibility through stretching and strength training exercises.

Stretch

It is important to have a healthy range of motion and flexibility to move freely and efficiently. Stretching can aid in aligning the thick and thin muscles back into their ordered state after movement, as well as remove the lactic acid buildup that causes soreness. Regular stretching will also increase your flexibility, making that aerodynamic position more attainable.

Strength Training

The facilitated (overworked) muscles, like the quadraceps and lower back, do not need strengthening but stretching. Instead, it is the inhibited muscles that benefit most from strength training – the abdominals and gluteals. Because the core needs to be engaged to stabilize your spine and the movement of your legs, strengthening it off the bike is important.

Posture Correction Program for Cyclists

Looking for a program that will help you improve your posture and restore muscle balance? Dynamic Cyclist is an online training platform designed to help cyclists become stronger and faster while riding pain free for years to come. Complete your regimen with an all-inclusive program that addresses mobility, flexibility, strength and injury prevention, all for a fraction of the cost of one physiotherapy appointment. Try out their 2 Week Posture Correction Program and experience the results for yourself. Click here to try 7 days free!

Bike Handling Tips for Spring Conditions

June 12, 2020 by Sarah Lauzé

Early season riding conditions can be challenging. During the winter, a ton of grit and salt gets dumped on roads to keep them grippy and snow-free, and, come spring time, all of that stuff ends up in one place – the shoulder where you want to ride. Spring is also pothole season, as water seeps into cracks in the road and freezes overnight, opening up holes the size of the Grand Canyon on your favorite roads. There are a few simple bike handling tips to keep your skin off the road and your bike in one piece.

Take It Slow

This seems obvious, but it is easy to forget in the middle of one of your favorite descents. Slower speeds mean more time to react to what is in front of you. Slow down well in advance of corners so you aren’t braking hard while turning – doing so increases the chance of losing traction.

Move Into the Lane

Most of the road grit accumulates on the shoulder of the road, and you can avoid this by moving out into the travel lanes. Be VERY careful when doing this – think ahead, and don’t try to move out in front of a line of cars just before your corner. Wait for a large gap in traffic, and move out well into the lane, so cars aren’t tempted to try and squeeze by you. On long, switchbacking descents, I will usually just stay in the travel lanes to avoid having to move back and forth.

Relax

Hitting a small patch of gravel or wet spot won’t necessarily cause you to crash. Overcorrecting for a small skid of your back tire will. Staying relaxed and confident will help you ride through small skids instead of tensing up and turning the small skid into a huge wipe-out. You can build this confidence through other types of cycling – mountain and cyclocross riding will both give you the experience of feeling your bike sliding through turns, which will help you become a more confident road rider.

Avoid Obstacles

Be it potholes, glass, or ice, there is a lot of stuff on the roads that you and your bike would rather avoid. Your first key to avoiding this nasty stuff is to look ahead – the earlier you see something, the easier it will be to avoid. When you know what you want to avoid, doing so requires a bit of practice. Anyone who has managed to hit the only pothole on a clear stretch of road knows what I am talking about – your bike will tend to go where you are looking. If you are looking at that one pothole, there is a good chance you are going to hit it. Instead, work on keeping your eyes focused on the clear path you want to take, and your bike will follow.

Master the Bunny-hop

Sometimes, despite your proactive road reading and all of your best obstacle avoidance techniques, you just can’t ride around something. Often this has something to do with the 2 ton hunks of metal passing by on your left. This is when the bunny-hop comes in handy. Bunny-hopping is like jumping on your bike – both wheels lift off the ground for a split second. If you have never done this before, practice at slow speeds first. Clipless pedals make it much much easier and safer as well. When you do encounter something you can’t ride around, don’t try to jump too high – for potholes, your wheels barely need to leave the ground.

Keep these tips in mind when you head out on your next ride, and you will be well equipped to deal with whatever the spring roads will throw at you!

5 Cycling Tips to Master Hill Climbing

June 1, 2020 by Sarah Lauzé

Love them or hate them, hill climbing is an inevitable part of cycling (unless you somehow map out perfectly flat routes). So, when you’re sitting at the bottom of a daunting climb what is your go-to game plan? When you’re pushing your muscles to the edge of their ability, you can only tell them to “shut up” so many times – no matter how tough you are they are going to win that conversation.

The best thing you can do mentally is to learn to love climbing. If that’s a little too drastic, then at least go in with the tools needed to feel your best as you grind up the hills. There’s nothing more satisfying than conquering a tough climb–and we want to get you there!

Tips to Master Hill Climbing

Pace Yourself (and use your gears)

Attacking the hill may work if it is small climb with the crest in view from the bottom. However, if you go in too aggressively, sure you’ll feel strong at the bottom, but once you hit a certain point it’s easy to hit a wall. You overexert your muscles and skyrocket your heart rate rather than pacing yourself for the long game. If you find yourself often slowing to a crawl halfway through a climb, think about gearing down earlier and keep those legs spinning. You will then have the energy to “attack the hill” when you reach the final push over the top.

Stand Up Strategically

Should you sit or stand while climbing? It might seem like you’re more power standing by using your upper body weight, but it also requires 10 to 12 percent more energy. The net effect is more energy used and an increase in your oxygen uptake. However, it is good to get out of the saddle to stretch it out a bit and to incorporate different muscles, just save it for the steeper parts– and even then use it sparingly.

Focus

It may seem counterintuitive to try and find your inner peace while your lungs and legs are screaming at you, but the mental game is most of the battle. As you approach the hill, be your own cheerleader, and convince yourself that you love the climb. Focus on your steady cadence. Relax your body from the top down, starting with your eyes, face, neck, and moving all the way down to your toes. If you have a mantra, now is the time to start visualizing it!

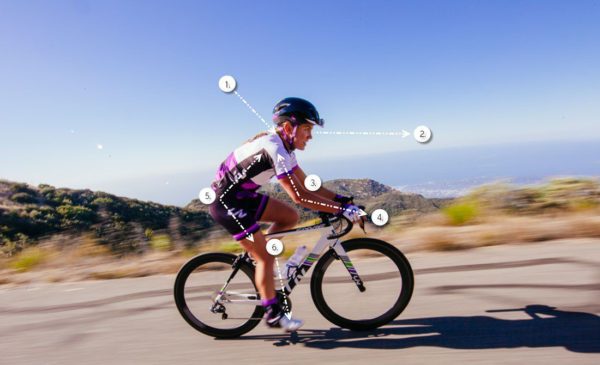
Find Your Power Position

If you’re tackling hills with a tense upper body, you’re going to burn out a lot faster. The natural tendency as we get tired is to round the back and slump the shoulders forward, but to allow for efficient breathing, keep your back straight and your chest open. Position your hands on the brake hoods and relax your arms so your elbows sit slightly wider than your hips. Try keep your body free of tension, all the while tightening your core to stabilize your movements.

Practice Hill Repeats

Practice makes perfect. You’re not going to get better at anything by wishing it into reality. Climbing is tough, and it’s never going to get easier, but the more you challenge yourself the stronger you’ll get. Find a hill and spend some time going up and down. Half the battle is finding your rhythm with climbing. Once you do, you may find yourself even looking forward to the hills!

From Pavement to Trails: Mountain Biking for Beginners

May 14, 2020 by Sarah Lauzé

Mountain biking is one of the greatest ways to get some exercise, spend time outside, and hang out with friends. For road bikers, it can be a great way to switch things up, get out on some new terrain, or stay in shape while the weather may not accommodate hitting the pavement. However, there are some major differences between the two, so here is a guide to mountain biking for beginners.

If you have only ridden a road bike, there will be some key differences you’ll notice right off the bat. Mountain bikes have much wider tires with rugged tread for optimal traction and durability on off road terrain. With road biking you want to minimize the contact point between the bike and the road, but on trails you want as much traction as possible. There will also be some sort of suspension system to make riding over rough terrain bearable.

The Bike

First things first, you need a mountain bike. Before deciding what kind you want, you need to think about what type of riding you’re going to be doing. Generally speaking, this will break down into two main features: suspension type and wheel diameter.  There are three main types of mountain bikes when it comes to suspension: rigid, hardtail, and full suspension. Wheel diameter is a choice between 26, 27.5, and 29ers.

Rigid mountain bikes are a bit more rare, but some people do choose to use them. With no suspension, they are less expensive and easy to maintain, but can make for a pretty rough ride when tackling technical trails.

Mountain Biking for Beginners

Hardtail mountain bikes have a suspension fork in the front, but not the rear of the bike. They are typically less expensive because there are less moving parts, and can have the option to lock out the front suspension for more efficient climbing. Many cross country riders will choose a hardtail as they allow for more direct power transfer between the pedal stroke and the rear tire.

Mountain Biking for Beginners

Full suspension bikes are a bit more complicated, so there are more variations when it comes down to the specifics. Generally, there is front fork suspension as well as a rear shock to absorb as much of the trail as possible. If you’ve been riding a hardtail and get on a full suspension for the first time, it will almost feel like you’re floating. It makes for a much more forgiving and smooth ride. Most downhill bikes will be full suspension, but more and more cross country bikes also feature full suspension.

Mountain Biking for Beginners

The Gear

A Helmet

Mountain biking is a ton of fun, but it can also be really dangerous. So, you should always wear a helmet anytime you hop on your mountain bike. It should fit your head snugly, and be level on your head so it doesn’t obscure your vision.

Gloves

Gloves are not a necessity, but they are definitely nice to have when you’re starting out. Not only will they protect your hands if you crash, but they can reduce soreness that comes from the vibrations of the bike on rough terrain. For summer riding you can get fingerless gloves so your hands don’t overheat, but you’ll want a pair with fingers for the coolers months.

A pump, puncture repair kit, and multi-tool

Punctures and their resulting flats are almost inevitable, so you should have the proper equipment and know-how to do a quick fix to at least get you home or to the bike shop. You should always carry a pump, repair kit, and multi-tool with you on your rides, whether in a saddle bag or in a backpack.

Clothing

The most important thing is to be comfortable in what you’re wearing. You may think a plain t-shirt would be the easiest thing, but as soon as it gets wet from rain or sweat, it’s going to become cold and clammy (not to mention the chaffing). You’ll want at least an athletic-specific top designed from a moisture wicking material. You should also always carry a windproof or rain jacket in case the weather takes turn!

As for shorts or pants, its a good idea to invest in a pair of bike shorts with padding. You could use your road cycling shorts, or there are mountain biking specific shorts with a more casual, baggy look.

The Technique

Perhaps the more drastic difference between mountain biking and road biking is in the technique. The key for mountain biking is to stay relaxed and flexible on your bike, as it’s going to jump around a lot more than you may be used to. If you are used to just sitting and spinning, this can be a bit of an adjustment.

You want to always be looking ahead on the trail towards what is coming up. Staring at your front wheel may work to get over some roots, but it’s also a good way to clip a tree.

Riding Downhill

Tip: Don’t do this.

When you hit a downhill, stand up on your pedals (keeping them level) and try get your weight to the back of the bike, pushing your hips backwards behind the seat if possible. Keep your legs and elbows bent with your body low to the bike. This will keep you from flying over the handlebars if you need to stop suddenly.

Climbing

If you see a climb coming up on the trail, you want to ensure you gear down well in advance. You want to try stay seated and spin in an easy gear when possible, as standing and pedaling hard can cause you to spin out and lose traction.

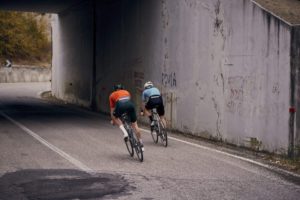
Riding through corners
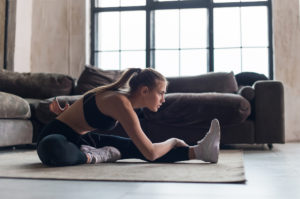
Cornering can also be a bit of a challenge in the beginning, but they are a ton of fun once you get your technique down! You want to take control of your speed BEFORE you hit the corner so you can roll through it without touching your breaks. As with descending, you may want to stand on your pedals with your knees flexed as you lean into the corner.

Obstacles

Obstacles like rocks and roots are the reason for both the width and tread of mountain bike tires. They are built to roll over these things. So, it is more likely you’ll have to conquer the mental aspect of it rather than the physical. When you see an obstacle coming up on the trail, pick your route and exit point then commit to it mentally. Control your speed and try ride through without breaking. Make sure you are not resting all your weight on your handlebars, but instead keep your arms and legs flexed and your butt off the saddle, pulling your front wheel up to pop over the obstacle. Once you’ve done it a few times, it will become second nature.

Mountain biking for beginners can be a little overwhelming, but the learning curve is well worth it! Start off with some easy, rolling terrain, and you’ll be tackling those technical rides in no time.

Steps to Master Clipping In On Your Bike

May 8, 2020 by Sarah Lauzé

The fear of clipping in on your bike is a real thing when you’re just starting out. However, it’s not just a right of passage as you move from beginner to intermediate, but it also has some clear advantages. Riding clipless pedals allows you to ride further, faster, and over more technical terrain while giving you a smoother, more comfortable pedal stroke.  The fear is well worth working through, and with these tips you can be clipping in and out like a pro in no time.

The Clipless System

First things first, what are clipless pedals? The name may seem counter intuitive, but it stems from the time when toe-clips (with a cage and strap that secured your toe to the pedal) were popular, so the term clipless was born as a way of differentiating the system.

The three part system that makes up a clipless pedal starts with the pedal itself. This has a spindle just like a normal platform pedal, but the plastic or metal platform is shaped in a way to allow the second part of the system, a matching cleat, to snap into it. A spring-loaded mechanism then secures the cleat in place so it doesn’t slide around or pull out. The cleat is then attached to the final part of a clipless pedal system, the shoe. Shoes are made specifically for these cleats to be attached to the bottom of them via bolts. This three part system works in sync to keep your foot where it should be on the pedal as well as allowing you to pull up during the pedal stroke. In this three part system, the cleats always come with the pedal as they are made to fit exclusively with each other.

Why should you clip in?

You may have heard stories of the classic slow motion tip over that happens when cyclists are getting used to being clipped in. It’s fair to say that most have experienced this somewhat embarrassing turn of events, but don’t let it deter you from taking the leap. Some of the advantages are:

  • Clipping in allows you to recruit more muscles to increase pedaling efficiency. It’s not necessarily about being able to pull up as well as push down, but about creating forward momentum as you pull through the bottom of the pedal stroke.
  • When you have your pedals and cleats set up properly for you, being clipped in will keep you in the optimum riding position.
  • Your feet won’t slide around like they do on flat pedals.

Pedal Systems

As mentioned above, there are three variable in the clipless pedal system: the pedals, the shoes, and the cleats. There are two main types within this definition.

  • Mountain/Touring System

A mountain setup, also referred to as a touring setup, consists of a pedal that can be clipped in easily on both sides. The cleat, which is attached with two bolts, is a smaller metal piece that is recessed into the shoe which is for mountain and touring only. The shoe has a walkable sole with a bit of tread on it to allow for easy and functional walking. This type of pedal is the only choice for mountain biking but also is a great choice if you are riding on the road, but have frequent stops where you are walking around.

  • Road System

A road pedal set-up is made for road riding where walking is mostly avoided and efficiency is a high priority. Road pedals consist of a lightweight pedal that accepts a lightweight, typically plastic, cleat. The cleat is then attached to a “road” shoe with three bolts in a triangle pattern. This system creates a lighter and more aerodynamic pedal and shoe combo that is optimized for road riding.

Clipless pedals are a great way to improve your cycling and as you start to ride longer and farther it becomes a logical choice. A simple, non-high end, pedal and shoe system can actually be quite cheap and as your cycling progresses you can always upgrade. Cycling is full of technological advances and clipless pedals, although simple, provide an incredible advantage to both racers and recreational riders alike.

Getting Started Clipping In

At Home

Once you’re comfortable on your bike and have been set up with your first set of clipless pedals and shoes, it’s time start practicing. Before hitting the road (and those inevitable red lights), you’ll want practice clipping in and out. Sit on your seat and lean against something like a countertop or a wall so you can stay in place while spinning the pedals backwards.

To clip in, most systems work by first engaging the front part of the cleat, then pressing the back part down into the pedal. Once clipping in, try spinning your legs backwards and getting a feel for being clipped in. Next you’ll want to practice getting out the pedals. Try twisting your heel out, disengaging the pedal from the cleat. This should be fairly easy, so if you find you are really having to put in all your effort to unclip, then you will need to find the tension adjustment and back it off a little.

On the Road

Starting out, find a flat to slightly downhill stretch to get rolling on.  With one foot still on the ground, clip the other into the pedal and bring it to the top of the pedal stroke.  Then push off with the foot that is on the ground and give a big push of the pedal with the foot that’s already clipped in.  Now you will have some momentum and can now clip in your other foot. Make sure this is on a safe stretch of road or area as you won’t be paying attention to traffic, but can focus on your feet.

Now that you have both feet clipped in and have taken a couple of pedal strokes, it’s time to unclip.  While coasting put one foot down to the bottom of the pedal stroke and unclip (twisting your heel out).  Now you can come to a stop and put your foot on the ground.

Now do the above again, and again, and again.  You want to be comfortable finding your pedals and getting clipped in quickly as well as unclipping. During your first few rides you will have to focus on clipping in and out, but once you do it enough it will become a habit and you’ll find you will think about it less and less.

6 Tips To Speed Up Post Ride Recovery

May 2, 2020 by Sarah Lauzé

We get it, when you get home after a long ride all you want to do is collapse on the couch with a beer. There may not be anything wrong with that, but what you do after your ride can be just as important as the ride itself. If you miss the opportunity to give your body what it needs to recover, it can have negative effects in the long run. So here’s what you need to know about post ride recovery to bounce back from a hard ride feeling even stronger and faster.

6 Tips To Speed Up Post Ride Recovery

Cool Down

You may want to do a final sprint on your final segment home, but it’s important to take some time for a cool down. Stopping abruptly can cause blood to actually pool in your legs, so you’ll want to gently spin your legs and lower your heart rate for at least 5 minutes at the end of each ride.

Stretch & Roll

You may not have access to a massage therapist after every ride, but massaging your legs after a ride encourages blood flow to the muscle, pushing out waste products of muscle breakdown and aiding muscle recovery. Using a roam roller is like having your own personal massage therapist, as painful as it can be. Stretching your muscles in a way that returns them to their natural state of balance is also important to recovery. If you want to learn more about the best stretches for cyclists, check out Dynamic Cyclist for more information.

Hydrate 

Dehydration can slow the recovery process, so be sure to drink up after a ride. Whether it be water or an electrolyte drink, be sure to replenish your body before reaching for that beer.

Have a Nap

A long ride is the perfect excuse to go for that afternoon nap. Sleep is one of the most important parts of recovery, as your body enters full relaxation mode. Whether it be having a 30 minute nap, or going to bed a little earlier that night, getting plenty of sleep will help boost your recovery.

Have a Meal 

Hard rides can eat through your carbohydrate stores pretty quick, so it’s important to replenish within an hour after your ride. A meal that is both carb-rich and high in protein is ideal to restock glycogen and speed up muscle recovery.

Hot/Cold Shower

Contrast water therapy (a fancy name for alternating between hot and cold) can help reduce inflammation and increase blood circulation to the areas that need it. Although the science hasn’t fully backed the method, there’s a reason why many professional athletes and coaches still swear by it.

Routine Bike Maintenance: Make your bike last longer

April 29, 2020 by Sarah Lauzé

We all want our bikes to last us a lifetime, but we do have to give them a little love and attention to prolong their lifespan. Staring at your bike lovingly or tucking it into your bed at night may be tempting, but it won’t do much in making it last longer. Routine bike maintenance is the easiest way to ensure the financial and emotional investment you’ve put into your bike doesn’t go to waste.

Routine bike maintenance isn’t complicated, but it can take some dedication. When you’ve finished a long ride, you may want to just lean up your bike and go have a nap, but it’s better if you establish a post-ride routine that includes a little bit of TLC.

Routine Bike Maintenance

1. Keep it clean

It’s simple, but so important. Keeping your bike clean ensures your bike not only looks great, but also keeps all it’s part working flawlessly. Obviously you aren’t going to clean your bike meticulously after every ride, make sure you do whenever you ride in the rain or mud.

In addition to that, but put your bike on a regular cleaning schedule. At the very least clean it once per month. It obviously depends on how often you ride, but if you want to keep your bike in smooth working condition, once a month is a bare minimum. For some tips on how to clean your bike, check out “How To Clean Your Bike in 5 Minutes or Less.”

2. Lubrication and Grease

Make sure your bike is lubricated properly as it protects moving parts from excessive wear and tear (choose an appropriate lube for the riding conditions you’re in). On the other hand, make sure not to go nuts as too much lubrication will attract dirt and cause just as much damage. Allow the lube to soak in and then wipe any excess off with a clean rag.

Most importantly you want to lube the chain, but also all the other moving parts including brake and derailleur levers, and cables. You’ll also want to grease any threaded bolts such as the stem, derailleurs, and pedals. If you have any bearings apart, make they are all well greased.

3. Regularly Replace the Chain

Chains travel countless times over sharp gears, often under a heavy load. They wear out and stretch over time because of dirt, gunk and attrition. A little bit of chain stretch over time is ok and will always occur. The problem becomes when it stretches too far and the teeth on the cassette begin to wear out as well. Before long you will not only have to replace the chain but the cassette as well.

You’ll want to replace your chain every 1,000 – 2,000 miles, once a year, or whenever the chain is starting to show signs of wear. It’s a simple task that any cyclist can accomplish on their own with the right tools and know-how.

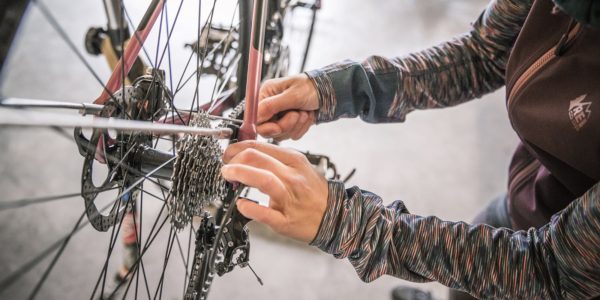
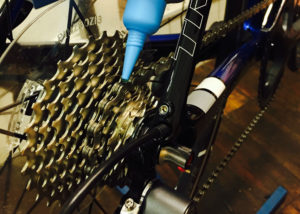
4. Inspect Your Bike

Inspect the frame for cracks or serious dents that are more than just cosmetic. Specific areas to look at are the joints particularly around the head tube and bottom bracket. If there are any cracks, even if it looks like it’s just paint, take the bike to your local bike shop to be looked at by an expert. For this reason (and a lot of others) it’s a good idea to take you bike in for a yearly tune up and checkover at your LBS.

5. Ride Clean Roads

Okay, that may not be possible, but riding in the rain and mud is going to wear out your bike and components more quickly. If you can be strategic with your route to avoid areas with a lot of mud and gravel it can go a long way. That being said, this is why many cyclists have a more budget friendly bike to ride in such conditions, and keep their more expensive bike out of the elements.

6. Cover it up or keep it inside.

Leaving your bike open to the elements will speed up the aging process. The sun, water and dirt will end up causing damage to your bike and cost you in repairs. If you’re in a humid climate, rust on certain metal components can also develop quicker. If possible, keep your bike inside. However, if you live in an apartment building or do not have adequate space, you will want to at least keep it covered.

« Previous Page
Next Page »
  • Facebook
  • Tumblr
  • Twitter

Latest Articles

JOIN Cycling: A New Training Platform for Cyclists

May 27, 2024 By Eric Lister

cold exposure

The Benefits of Cold Exposure for Cycling & Life

June 13, 2023 By Eric Lister

hill climb

The Ultimate Hill Climb Training Guide

May 31, 2023 By Eric Lister

shoulder pain cycling

How to Treat & Avoid Shoulder Pain While Cycling

April 12, 2023 By Eric Lister

psoas stretch

The Importance of the Psoas Stretch for Cyclists

April 6, 2023 By Eric Lister

cycling neck pain

The Ultimate Guide to Cycling Neck Pain: Causes and Solutions

March 21, 2023 By Eric Lister

Useful Info

  • Contact
  • Finally, A Global Cycling Club That Is Focused On Community And Love Of Cycling!
  • Privacy Policy
  • Share Your Story!
  • Terms And Conditions Of Use
  • Welcome to I Love Bicycling
  • What Happened When I Stretched Every Day For a Month

Recent Posts

  • JOIN Cycling: A New Training Platform for Cyclists
  • How to Hang Bikes in Your Garage: 4 Inexpensive Options
  • Gravel Bike Vs. Road Bike: Which One Is Better For You?
  • The 6 Types of Mountain Bikes & How to Choose the Best One for You
  • What Is a Touring Bike Good For? 5 Benefits We Know You’ll Love

Search I Love Bicycling

Connect with Us

  • Facebook
  • RSS
  • Tumblr
  • Twitter

Copyright © 2025 · Magazine Pro Theme on Genesis Framework · WordPress · Log in