• Training
    • Injury Prevention
    • Training Tips
  • How To
    • Bike Fit
    • Gear
  • Nutrition
    • Nutrition Tips
    • Weight Loss
  • Repair
  • Reviews
  • Stories
    • Funny Stories
    • Jokes
    • Quotes
    • Videos
    • Funny Videos

I Love Bicycling

I Love Bicycling is a website that is geared towards cycling for beginners with road cycling tips, training articles, nutrition tips, weight loss, how to’s and bike repair articles.

Training

  • Injury Prevention
  • Training Tips
  • Training Camps

10 Common Mistakes Cyclists Make on Long Rides

July 28, 2015 by U.M.

cycling-659806_640So you’ve really started to get into this whole cycling thing and you have decided it’s time to tackle something a bit more challenging than the short rides you have had so far. Now, it’s time to go long distance!

Don’t jump on your bike and go just yet though, as long distance riding requires a little bit of preparation before to ensure you stay comfortable and avoid injury. Check out these common mistakes that cyclists make on longer rides to make sure you enjoy yourself.

Not Enough Water

Hydration is key if you want to have enough energy to go the distance, you should make sure that you are stocked up with a few drinks so that you never find yourself in a situation where you’re reaching for a bottle and coming up with nothing but air. Aim to be drinking approximately one bottle every hour, with a couple of bites of food every 15-20 minutes to keep yourself at a constant level.

Three Minute Drills

If you’re aiming to improve your overall endurance during the race, try doing three minute drills a couple of times every hour. This is when you ride as hard and fast as you can for three minutes before recovering over the next fifteen by riding normally. Repeat this one or two times every hour and you will build up strength in your legs in no time.

Overpowering Hills

Conservation of energy is key for a long bike ride, but when it comes time to go uphill you are going to be spending a little more energy. Try to keep to a steady rhythm and don’t go outside of your own comfort zone while going uphill. Just make sure you maintain your pace and don’t try to go as fast as possible to get it out of the way.

The Wrong Clothing

Cycling clothing isn’t essential for short rides, but the longer you stay on the bike, the more you are going to need it. Make sure that you have a good pair of gloves so that your hands stay protected, and that you are wearing clothes made of breathable fabrics that offer you a good fit and enough flexibility to do what you need to do.

The Wrong Bike

Your bike is just as important as the preparations you are making, so you need to ensure that it is a good fit for you. Too much time spent in a poor posture as a result of a badly fitted bike can cause all sorts of aches and pains. It can even lead to you getting injured if you’re really unlucky.

No Emergency Kit

Bike punctures happen and there are few things worse than being miles from home only to have a tire blow out on you. Make sure you pack a puncture repair kit, pump and any other essentials, especially if you are going over any difficult terrain. Hopefully you won’t need it, but you will be glad it’s there if you do.

Not Training

Physical fitness is very important if you are going to cycle over large distances, so you need to make sure that you are up to the task beforehand. Build up your rides beforehand and try to simulate what you will be doing as closely as possible and try to keep your cardio at a reasonable level.

Not Working Out

It can be tempting to think that your riding is all that you need to stay healthy, but if you really want to excel over long distances you need to get off the bike every so often and build up your strength. Pilates will help you to improve you core, which will in turn improve your posture and lead to fewer injuries and muscle aches. Mix that in with some yoga, strength and general cardio training and you should see improvements.

Poor Planning

No long ride should be started without a clear end and beginning point, with a set route between the two, planned well in advance. This will ensure that you don’t waste any time or energy getting yourself lost. If you’re a little concerned about the distance you will be covering, try breaking your route down into sections to make them a little less intimidating.

The Wrong Gear

Understanding your gears is extremely important, using the wrong one can lead to you overexerting yourself. On flats you want to be going at about 95rpm, so if you’re finding that too much of a struggle, you’re in too high a gear and will eventually wear out. Conversely, if the gear is too low then your legs are having to do too much work to keep to the correct speed.
Cycling Training Zones

July 27, 2015 by Lee Agur

Do you know what your cycling training zones are? Would you like to determine your training zones cycling? This 25 minute heart rate training zones cycling test will do it for you!

Setting Your Cycling Heart Rate Zone

heart rate training zones cycling, cycling training zones, training zones cyclingFirst, you have to determine your lactate threshold heart rate with a short 25 minute test.

The best way to determine your lactate threshold heart rate should be done when you are properly rested and performed on a slight and continuous uphill. Ensure there are no traffic lights or stop signs that may interrupt your test. Also ensure that you get a proper warm up in before starting.

The 25 minute Heart Rate Training Zones Cycling Test

To find your lactate threshold heart rate start a 25 minute time trial and maintain the highest average possible effort, if you have a power meter then it is to maintain the highest average watts. It is easy to start out too fast in a 25 minute test, so ensure you get up to speed quickly, but do not push it too hard as you will tire too quickly and it would result in an inaccurate result.

Once you have completed the 25 minutes look back and see what your average heart rate was for the last 20 minutes. (Ignore the first 5 minutes of the test as it takes time to settle in to your pace and the heart rate to normalize) The average of the last 20 minutes is your lactate threshold heart rate and we will use that number to determine your cycling training zones.

The more times you do this test the more accurate the results will be.

Cycling Training Zones

Cycling Training Zone 1 – Less than 80% of Lactate Threshold Heart Rate

Cycling Training Zone 2 – 81% to 89% of Lactate Threshold Heart Rate

Cycling Training Zone 3 – 90% to 93% of Lactate Threshold Heart Rate

Cycling Training Zone 4 – 94% to 99% of Lactate Threshold Heart Rate

Cycling Training Zone 5a – 100% to 104% of Lactate Threshold Heart Rate

Cycling Training Zone 5b – More than 105% of Lactate Threshold Heart Rate

We emphasize cycling training zone here so much as it is not the same as your running training zones! Your running zones are actually higher than your cycling zones.

Finding Your Cycling Power Zones

Really what you are trying to determine here is your Functional Threshold Power for Cycling. The link to the article provides a similar test, but to summarize you can do the test listed above with a power meter and take the average watts held for the last 20 minutes of the test and reduce it by 5%. So if your average watts were 262.5 then your functional threshold power would be 250 watts.

Cycling Power Zones

These power training zones came from Training and Racing With a Power Meter By Hunter Allen and Andrew Coggan. Which is a must have book if you have a power meter!

Zone 1 – Less than 55% of Functional Threshold Power Watts (FTPW)

Zone 2 – 55%  to 74% of FTPW

Zone 3 – 75%  to 89% of FTPW

Zone 4 – 90%  to 104% of FTPW

Zone 5 – 105%  to 120% of FTPW

Zone 6 – More than 120% of FTPW

There you have it! You have determined your cycling training zones. Now you just have to implement them in to your cycling training plans. Good luck!

A Complete Guide to Cycling for Beginners

July 27, 2015 by Lee Agur

cycling for beginners, cycling tips for beginners, beginner cycling, beginner cycling training, cycling beginner, beginner cycling tips, cycling training for beginnersCycling for beginners can be a scary thing. This guide will give you beginner cycling tips on everything you will need to know to get started. We will cover pedaling, stopping, position, corners, climbing, changing a flat tire, road bikes for beginners, cycling tips for beginners, training, nutrition, injury prevention, bike fit and training plans for beginners!
Pedaling Your Bike

Cycling for beginners, road bikes for beginners, beginner road bike, cycling tips for beginners, beginner cycling, beginner cycling training, beginner cycling training plan, beginners road bike, cycling training for beginners, cycling beginner, beginner cycling tips, cycling training for beginners, cycling training program for beginners

The first thing you are going to need to learn his how to pedal your bike! Pedaling the bicycle is what cycling is all about! Why would you not want to be the most efficient at this one thing?

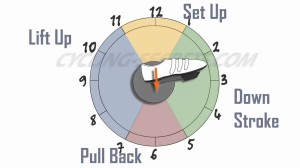
Most novices “mash” the pedals, meaning that they apply all the force on the down stroke. It sounds ridiculous, but you really need to focus on pedaling in a circle and applying pressure through the entire stroke. You can accomplish this by pushing down, pulling back, lifting up and then pushing forward. That is one entire stroke.

If you find your quads are really sore after a ride it may be due to the fact that you are mashing the pedals.

If you find you are struggling with your pedal stroke visit: The Perfect Pedaling Technique for more detail.

Stopping Your Bike

Cycling for beginners, road bikes for beginners, beginner road bike, cycling tips for beginners, beginner cycling, beginner cycling training, beginner cycling training plan, beginners road bike, cycling training for beginners, cycling beginner, beginner cycling tips, cycling training for beginners, cycling training program for beginnersStopping your bike is likely the most important thing you can learn. Clearly, if you squeeze the brakes you are going to slow down and eventually stop, but there are different techniques involved.
Need to slow down or stop slowly. Sitting upright with you hands on the hoods and gently squeezing the brakes will be all that you need to do.

Need to stop more safely and quicker. Put your hands in the drops where you have more leverage and are able to squeeze the brakes harder but you also lower your centre of gravity allowing you to stop more quickly.

Need to stop immediately. Emergency stopping should be practiced. Have your hands in the drops squeeze hard but at the same time drop your bum off the back of the seat and lower your bum as low as you can to your back tire. This is the fastest way you can stop on a bike.

For more details on how to stop your bike go to All you need to know about stopping your bike.

Position On the Bike

There are three different riding positions on a bike: Neutral, drops and standing.

Neutral

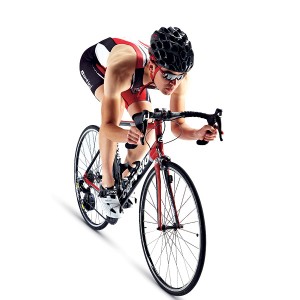
The neutral position is the most common position and it involves sitting on the seat with your hands on the hoods “covering” the brakes (this means your hands are over the brakes ready to stop). If your bike fits properly then your arms should be at a 90 degree angle in relation to your torso. At first this may seem like you are leaning too far forward, but as you adapt from a beginner cyclist to a seasoned pro it will feel as natural as sitting in a chair.

Drops

Being in the drops is when your hands are in the C-shaped bottom portion of your handlebars. You are commonly in this position if you are trying to get more aero and go faster or when you are descending. It is safer to be in the drops while you are descending as it gives you more leverage on the brakes allowing you to brake harder, in addition to lowering your centre of gravity allowing you to stop faster.

Standing

Primarily used for climbing, standing is a position that uses a little more energy as you have to support more of your body weight with your arms and legs. In order to stand, start in the neutral position and then slide your weight forward as you begin to stand. Remember to keep pedaling! As you continue to pedal, slowly rock the bike side to side with your arms in unison with your pedal stroke essentially making it easier to pedal.

Taking Corners on a Bike

Cycling for beginners, road bikes for beginners, beginner road bike, cycling tips for beginners, beginner cycling, beginner cycling training, beginner cycling training plan, beginners road bike, cycling training for beginners, cycling beginner, beginner cycling tips, cycling training for beginners, cycling training program for beginnersMost beginner cyclists assume they need to turn the handlebars in order to take a corner; while this is the case at very slow speeds it is usually not practiced while taking most corners at speed. Rather you will lean the bike frame the direction you want to turn and adjust your weight accordingly.
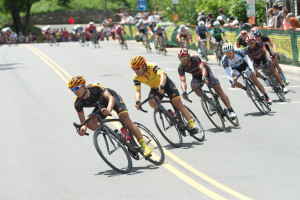
When riding you should always stay relaxed, but it is even more important around a corner as it will allow you to adjust your body weight properly.

Look Where You Want to Go

Your body likes to follow your eyes, so look where you want to go, not where you don’t. A common mistake is continuing to look at what you are trying to avoid; this generally results in a collision with that same object. Let your peripheral vision do the work, it can see that object and you will not hit it.

Look far in to the corner, not right in front of you. Your hips turn the same direction you are looking and your hips determine where the bike is going to steer. Beginners are guilty of looking directly in front of themselves quite frequently, especially when the turns come hard and fast. Depending on your speed and the angle of the corner determines how far in to the corner you look. In sharp corners look as far ahead as possible. Play with it and you will notice significant improvements immediately.

Brake Before the Corner

Cycling for beginners, road bikes for beginners, beginner road bike, cycling tips for beginners, beginner cycling, beginner cycling training, beginner cycling training plan, beginners road bike, cycling training for beginners, cycling beginner, beginner cycling tips, cycling training for beginners, cycling training program for beginnersYou should be going the speed you want to go around the corner at the beginning of the turn. Braking in the turn actually makes the bike want to stand up on itself and straighten out, two things you are trying not to do. You end up fighting the bike and shedding more speed than necessary to make the turn safely.
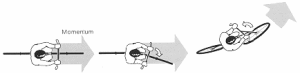

Generally, you only want to be doing one of the following things at any given time: braking, cornering, or pedaling. Combining these things can lead to disaster.

Find the Line

Approach the corner as wide as possible, cut through the apex and finish wide. This is the straightest line through the turn, allowing you to carry more speed and reducing the angle of the turn making it less scary. Many people cut to the apex too early which results in excessive braking near the end of the turn and exiting slowly.

Don’t Pedal in a Corner Pedal out of a Corner

Pedaling in a corner can cause you to strike your inside pedal on the ground and send you flying. If this happens try not to panic and over correct. Over correcting will certainly cause a crash.

Once you have completed the turn and the bike is in a more upright position it is safe to hammer on the pedals again. Hopefully you remembered to shift down to an easier gear before you entered the turn so it is not too difficult to pedal out of it.

How to Steer Your Bike

There are three different ways to steer the bike: Upright steering, leaning and countersteering.

Upright Steering

Upright steering is when you turn your handle bars and keep your body and the bike as upright as possible. This is best reserved for slow speeds and dangerous conditions i.e. wet and slippery conditions. If your tried this at a high speed you would fly off your bike. Been there, done that… don’t recommend it.

Leaning

This is the most common method of steering and involves leaning your bike and body over to make the turn. Lean over more to turn sharper and make sure that you have your outside pedal at the 6 o’clock position pushing your weight through that pedal to keep traction with your tires and not causing a pedal strike.

Countersteering

The next level of steering. In order to test it out, go down a straight road, pick up some speed then push your right hand down… what happens? Initially your front wheel turns right, but as the bike starts to lean over you turn left. The sharper the turn and less consistent the turn (more bends) the more important countersteering becomes.

Cycling for beginners, road bikes for beginners, beginner road bike, cycling tips for beginners, beginner cycling, beginner cycling training, beginner cycling training plan, beginners road bike, cycling training for beginners, cycling beginner, beginner cycling tips, cycling training for beginners, cycling training program for beginners

Position While Countersteering

Initially, you press with your opposite hand, but as you being to turn you want your inside arm straight and applying a bit of pressure to continue to turn the direction you want to go.

Lean your body over, but then lean your bike over even harder. This is not like the leaning technique where the angle of your bike and the angle of your body are the same in relation to the ground. In countersteering you lean the bike over more and your body is more upright in order to keep traction.

Try to keep your weight back and low and remember to push hard on your outside pedal that is located at the 6 o’clock position.

If you learn how to countersteer you will not regret it, it is safer and faster as it allows you to make adjustments through out the turn much quicker.


Ok! Now that we are done with the essential cycling tips for beginners we can move on to more exciting bike skills like climbing hills!

Climbing Hills

Cycling for beginners, road bikes for beginners, beginner road bike, cycling tips for beginners, beginner cycling, beginner cycling training, beginner cycling training plan, beginners road bike, cycling training for beginners, cycling beginner, beginner cycling tips, cycling training for beginners, cycling training program for beginnersThe most important aspect of hill climbing is maintaining a steady effort from the bottom all the way to the top. This is a difficult thing to achieve. If you have a heart rate monitor there is a lag of approximately thirty seconds to one minute – keep this in mind. If you are going off of perceived effort – the beginning of the hill is perceptively easy and top seems incredibly difficult at the same effort. Power meters are the only way of receiving instantaneous feedback of your actual effort.


Not everyone wants a power meter, so the best advice is:

  • Start out slower than you think at the bottom of the hill
  • Be familiar with the course or ride so you know how long the hill is and what type of effort is required
  • Practice the hill and see what pace works for you

Cadence

You can mash or you can spin. Everyone is different, but for most people it is more efficient to spin up a hill (maintaining a cadence of 80 to 105). Maintaining this high of a cadence may be difficult in the beginning but as your fitness improves it will become more natural.

What happens if you are in the easiest gear and you are unable to maintain a cadence of at least 80? It is likely that you need to get a compact or triple crankset. Beginners road bikes can come with a triple crankset up front and it is likely you should take that option. Mashing just burns you out faster.

Position

While climbing you should:

  • Sit upright in order to open your lungs for more oxygen intake to engage larger muscle groups.
  • Have a relaxed grip so you do not waste energy with a death grip and cause tension to limit your oxygen intake.
  • Have a quiet upper body (don’t bob your head back and forth – it wastes energy and is usually caused by mashing on the pedals instead of spinning)
  • Mostly remain seated:

Standing vs. Sitting.

It is more efficient to stay seated during a hill climb than to stand; however, you can produce more power while standing.

When you stand your core does more work because your pelvis is not anchored to the saddle so your core and back muscles have to pull up on an unweighted pedal resulting in a higher energy expenditure. You also engage your arms to pull down on the bars and support yourself.

When is it beneficial to stand?

  • On long climbs it is beneficial to stand to engage different muscles groups and let the other ones have a rest. Try to save this for the steep sections of the climb.
  • When your cadence slows down and it is difficult to continue “spinning”.
  • When cresting over top a summit to transition into a flat or descent. It can give your muscles a feeling of relief.
  • When you need to go as fast as possible as it engages more muscle groups, but be careful as it expends more energy.

Mental Attitude

Mental attitude towards hills makes a big difference on how you perform. You have to stay in a positive space no matter how much you are hurting and believe you can do it. Use little mind tricks as simple as envisioning rockets on your bike and then literally say, “rockets engage!” embarrassing, but effective. Never be mentally defeated and always finish a climb no matter how slow you have to go… even if you have to walk!

Shifting Gears Properly

Gear shifting comes with experience. Shift to an easy gear too soon and lose your momentum, shift too late and you run the risk of not being able to shift at all.

When you shift down to an easier gear there is more strain on the chain and sometimes it will not shift if there is too much pressure, ease up on the pedal stroke for a brief moment to allow the shift to happen. Shifting gears becomes a “feel” thing, over time you will instinctively know how much pressure your chain can take and how brief of a moment you have to stop pedaling for.

Additionally, when you change from a seated position to a standing position you should shift up at least one, if not two gears when your foot is at the two o’clock position because when you stand your cadence slows down. You do not want to lose momentum or have the person behind you run into you.

Changing a Flat Tire

A flat tire is the most common bike repair that you are going to have to perform. Find out how to change a flat bike tire by watching this short video:

What are Good Road Bikes for Beginners?

Cycling for beginners, road bikes for beginners, beginner road bike, cycling tips for beginners, beginner cycling, beginner cycling training, beginner cycling training plan, beginners road bike, cycling training for beginners, cycling beginner, beginner cycling tips, cycling training for beginners, cycling training program for beginners

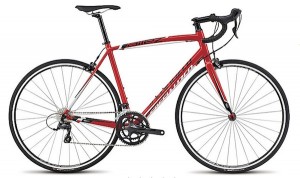
The best beginner road bike is the one you are most comfortable on! For a great list of entry level road bikes click on the link. My top pick: The specialized allez.

The specialized allez sports comfortable yet fast geometry combined with its great handling makes it the best bike under $1000. To get the most bang for your buck you want something comfortable enough to ride on but stiff enough to go fast. The specialized allez sport is the best combination of these two qualities.

Cycling Tips For Beginners

One article is far too little to scratch the surface of all the cycling tips for beginners. Below is a list of additional articles that I highly recommend you read when you have time! There is a lot to learn as a beginner!

cycling for beginners, cycling tips for beginners, beginner cycling, beginner cycling training, cycling beginner, beginner cycling tips, cycling training for beginners

How To Breathe While Cycling – I bet you don’t do it properly.

Finding Your Ideal Cadence – The proper cadence can make you more efficient.

Perfect Pedaling Technique – This is difficult to master but it is worth your attention.

Cycling Aerodynamics – How much does it really help?

Should I Buy a Bike Online? – If you are getting a beginner road bike and have not bought a bike before, buy one from your local bike shop! If you know exactly what you want and have tried it before maybe there is some savings online.

How to Bike Safely on Wet Roads – As a newbie this can be particularly scary, make sure you give yourself ample time to slow down as it takes much longer.

How to Stay Cool While Cycling – Overheating while you are out road biking?

The Perfect Sprinting Technique – Want to start beating people to the line?

Climbing Steep Hills – So you have nailed climbing hills, but need a few extra tips to get you up the steep ones!

Top 10 Best Cycling Books – This list of books provides cycling tips for beginners, cycling training programs for beginners, amusing reads and more.

Descending on a Bike – Trying to descend on a bike safely and quickly is an art.

Road Bike Tire Pressure – Find the correct road bike tire pressure for you.

Beginner Cycling Training

When you start out as a newbie, cycling training can seem difficult. Firstly you need to learn the Basic Goals of Training, once you know what you are attempting to accomplish then you will have a better idea of how to get there!

cycling for beginners, cycling tips for beginners, beginner cycling, beginner cycling training, cycling beginner, beginner cycling tips, cycling training for beginnersInterval Training – What it is and how it works.

2×20 Interval Training Workout – This is the best workout for aerobic fitness there is. If you are training for a race longer than 10 minutes this should be your go to workout.

Beat Indoor Cycling Boredom – Find you are getting bored with training on an indoor trainer? Spice it up with these ideas.

The Benefits of a Proper Warm Up – You should always warm up before you add any sort of intensity in to your ride.

Aerobic Energy vs Anaerobic Energy – It is surprising how much more energy you use anaerobically rather than aerobically.

Cycling 100 Miles or a Century – Looking to complete your first 100 mile race?

Bonking – It is almost guaranteed that you are going to “bonk” (run out of energy and feel terrible) if you are a beginner cyclist because you will not have your nutrition needs figured out yet, nor will you have the efficiency to properly utilize that energy. Check out how to avoid bonking.

Nutrition for the Beginner Cyclist

When you start cycling, taking in the proper nutrition before, during and after a ride is likely your most important and difficult task.

cycling for beginners, cycling tips for beginners, beginner cycling, beginner cycling training, cycling beginner, beginner cycling tips, cycling training for beginnersWhat to Eat on a Long Ride – Here is a general guideline of how much you should be eating per hour of cycling.

Ten Foods to Eat After a Long Ride – Recovery is every bit as important as the actual ride for training. Make sure you allow your body to recover properly by feeding it the appropriate foods!

Nutrition and Fueling for Cycling – An overall look at nutrition and fueling for cycling written by Canadian National Road Race Champion Scott Price.

Best Way to Lose Weight Cycling – Most of the studies and suggestions are wrong. This common sense approach to losing more weight while cycling just makes sense.

How Many Calories do You Burn When Cycling – Do you know approximately how many calories you burn while you are cycling? Here is a rough guideline to follow.

ABC’s to Fats, Proteins and Carbs – Understand what your body needs and when it needs it.

Hydration Tips – Hydrating properly is such a variable, depending on the weather conditions, effort and individual. Get a rough guideline on how to determine how much water you need during your ride.

Is the Paleo Diet for Cyclists – Want to know if the paleo diet is beneficial or harmful to you becoming the best cyclist you can be?

What you need on a long bike ride – Don’t forget the essentials!

Cycling to Lose Weight Tips – A few quick tips that will help you achieve your goals that much easier.

Cycling for Beginners – Injury Prevention

There is nothing worse than finding a new passion and then immediately being sidelined by an injury, especially if it could have been prevented!

cycling for beginners, cycling tips for beginners, beginner cycling, beginner cycling training, cycling beginner, beginner cycling tips, cycling training for beginners

Knee Pain – This is one of the most common injuries as biking is a repetitive motion. If you are having knee pain and/or want to prevent it read this article.

Lower Back Pain – What causes lower back pain and how to solve the problems.

Stretching Exercises for Cyclists – Almost all cyclists are guilty of not enough stretching, it doesn’t matter if you are a seasoned pro or a new cyclist stretching is a great injury prevention measure that is not utilized enough.

Foot Pain – Are you getting foot pain?

Exercises to Strengthen Core – You need a strong core to be a great cyclist. Try these exercises to improve your core strength.

Post Ride Massage – The benefits of a post ride massage and how to do it yourself.

Cycling For Beginners- Bike fit

How to do a Basic Bike Fit – Learn how to do a basic bike fit so you can ride comfortably.

How to Find the Proper Saddle Height – A few centimetres too low and you will use a lot of extra energy and bring on knee pain, too high and you will sway back and forth reaching for your pedals.

Proper Cleat Position – Proper cleat position can help with alignment and endurance. Make sure to get it right.

Fore and Aft Saddle Position – Where your saddle is positioned in terms of how far forward or back it is in relation to your cranks is important for proper position and comfort.

Saddle Tilt – Important parts going numb? It could have something to do with the tilt of the saddle.

Beginner Cycling Training Plan

Cycling for beginners, road bikes for beginners, beginner road bike, cycling tips for beginners, beginner cycling, beginner cycling training, beginner cycling training plan, beginners road bike, cycling training for beginners, cycling beginner, beginner cycling tips, cycling training for beginners, cycling training program for beginners

You know what the best cycling training for a beginner is? Just getting out there and doing it! Whatever makes it more fun! Find groups to ride with, track your rides on strava. Whatever it takes to get you out riding!

I Love Bicycling will be coming out with some beginner cycling training plans soon. Subscribe to our newsletter below to stay in the loop.

Does Cycling Work Abs?

July 20, 2015 by U.M.

Does Cycling Work Abs?Bicycling utilizes more than just the leg and gluteal muscles. Being a strong cyclist means engaging your core muscles, particularly your abs. The abdominal muscles are responsible for stabilizing you while you ride and providing you with a strong platform to push from. They also play a large part in helping you maintain your balance.
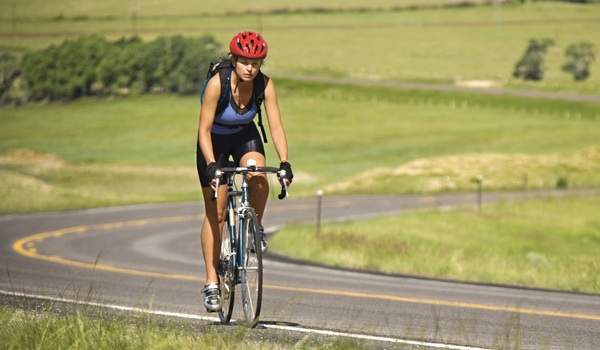
Your abdominal muscles contract to provide stability and the constant contractions help tone your abdominal muscles as well as increase strength and endurance.

Exercises such as crunches are great for building up your abs. Even better are poses such as the plank, which force you to hold a contraction for an extended period of time. Perhaps best of all, in terms of convenience and relevance, are the exercises you can do to strengthen your abdominals while you ride. Whenever you find yourself on a long, straight stretch of road, you can make the most of your workout by doing a quick ab routine.

How To Develop Your Abs During a Ride

Sustained Contraction

The simplest exercise you can do on your bike is a sustained contraction of your muscles. Take a deep breath and focus on tightening your abs. Hold the contraction for a period of 10 to 15 seconds, then release. This exercise can be repeated a few times and can be done at any point during a ride that doesn’t require your full attention.

Stand Up

When you’re standing, your muscles have to work harder to support you and keep you upright. Lift up off your seat from time to time and lean over the handle bars so that your stomach is almost parallel to the ground. Hold this position while continuing to pedal.

Bike Crunches

Contract your ab muscles while bringing one elbow in toward you. Keep your hands on the handlebars and don’t stop pedaling. Continue alternating sides until you’re tired, or until you have to return your full attention to your ride.

Repeating Lift Off

While continuing to pedal, lift yourself off the saddle. Come back down, touch the saddle lightly, and then come back up. Continue this up and down movement while keeping your abs contracted. This is a tough one, but it’s a great workout for your abs and core.

You don’t have to do these ab exercises every time you go out on a ride, and you certainly don’t have to incorporate all of them. Taking the time to focus on your abs, however, is a great way to strengthen your core. A stronger core will provide you with better support and stability, increasing your efficiency and making a noticeable difference in your overall performance.

What is Functional Threshold Power (FTP)?

July 5, 2015 by Lee Agur

What is Functional Threshold Power (FTP)?

What is Functional Threshold Power (FTP)?Functional threshold power is the maximum power that you are able to sustain over a one hour period.
How To Determine FTP

Firstly, functional threshold power is a moving target and will constantly be changing. FTP will increase with the proper stresses of training, but decrease when overly fatigued, sick or due to a lack of training. In order to determine FTP you require a power meter.

What is My Functional Threshold Power?

There are 2 ways to determine your functional threshold power. Both should be done when you are properly rested and performed on a slight and continuous uphill. Ensure there are no traffic lights or stop signs that may interrupt your test. Also ensure that you get a proper warm up in before either test.

The 1 Hour FTP Test

The obvious and least practical way to determine functional threshold power is to do a one hour ride as steady and as fast as you possibly can. The reason why I say least practical, is because it is unlikely that you will have the will to go as fast as you are able. You probably will not be as rested as you should be, you will not be racing anyone, and no one will be judging you if you go slow or congratulating you if you go quickly. If you choose to ride for an hour and it is not during a race you should take the average power output and add 5% – 8%. So if your average watts were 250 then your functional threshold power would be between 262.5 and 270 watts.

The 20 minute FTP Test

The easier and more practical test can be done in 20 minutes. Again your goal here is to maintain the highest average wattage possible. It is easier to start out too fast in a 20 minute test, so ensure you get up to speed quickly, but do not push it too hard as you will tire too quickly and it would result in an inaccurate result. Once you have completed the 20 minutes reduce the average wattage by 5% – 8%. So if your average watts were 250 then your functional threshold power would be between 230 and 237.5 watts.

How To Improve FTP

Everyone’s goal on a bike is to become faster! Some focus on becoming a better sprinter, while others focus on endurance or hill climbing. I focus on functional threshold power.

Why do I focus on FTP? It is simple, a higher FTP will allow me to ride away from the other cyclists not leaving it to chance on a sprint. There are two basic ways that I increase FTP:

Riding at FTP

The best workout to do for any cyclist is a 2×20 interval:

The workout is fairly self-explanatory – you are going to ride two 20 minute efforts. In between is a 5 minute slow recovery pedal. You will want to pace your effort such that you maintain a steady pace throughout the first effort that leaves you feeling pretty tired, but knowing you held back a bit. For the second effort, you still want it to remain relatively even paced, but you should be about as close to falling over as you can push yourself. If you’ve done things right, your efforts should be about the same power output (or pace if you don’t have a power meter)

Increasing Your Stress

By increasing volume, duration and intensity by 10% – 20% you will form positive adaptions that will increase your FTP. If you are so fatigued that you start cramping then you have gone too far; however, if you are just quivering then you have likely pushed the perfect amount.

Getting to the next level is no easy task and takes commitment. Are you ready for it?

Triathlon Vs Road Shoes

June 25, 2015 by Dyani Herrera

Triathlon Vs Road Shoes

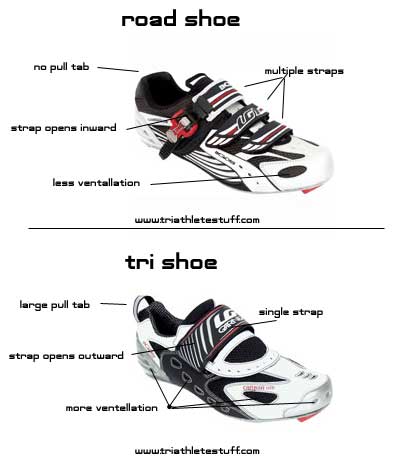
road vs tri shoeWhen beginning in the cycling community there is much debate as to whether one should purchase triathlon or road shoes. Each of these shoes has their advantages as well as disadvantages. Depending on what needs you have, you may use the following factors to help you determine which cycling shoe is the most appropriate for training or racing.

Transition

If you participate in triathlons regularly then there are a few advantages of having triathlon shoes versus road shoes. Due to the ease of having one or two Velcro straps, triathlon shoes are a lot easier to slide on and off; with these, you don’t have to worry about any buckles or adjustments. This can come in handy during your swim to bike transition, in which you can clip the shoes on your bike, run barefoot through transition, and slide into your shoes once you’re on the bike. However, if you don’t feel comfortable with doing a flying dismount during your next triathlon, and prefer putting on your shoes before mounting your bike, triathlon shoes are easier to put on. Although, the seconds lost putting on triathlon shoes versus road shoes is minimal. Moreover, triathlon shoes also carry the advantage that they’re seamless and don’t require socks therefore minimizing blisters.

Pedal Stroke

Of all the factors distinguishing these two shoes, the advantage of an improved pedal stroke is my personal favorite. Prior to switching to road shoes, I would ride in Shimano WT-52 shoes, which were great for comfort and learning ease in transition. However, I was beginning to get a lot of stress on my IT band as well as toe numbness on longer rides. After a year of making minor adjustments with no resolve I decided to make the switch to road shoes. What a difference it made!

Road shoes have less lateral gliding motion on the clips, which prevents stress on your hip abductor muscles such as the TFL which tapers into the IT band. I no longer felt that nagging pain during my longer rides or numbness in my toes. Also, road shoes tend to be narrower than triathlon shoes and this fit aids with a more efficient pedal stroke. Due to the fit and minimal glide movement, it allows for increased efficiency which translates to more power on the bike. I’ve definitely noticed an improvement in riding comfort and power with my road shoes, especially on rides greater than 35 miles. Therefore, losing a few seconds in transition doesn’t compare to the overall effects experienced during the bike leg of a triathlon.

Cost

The cost between these two types of shoes depends on the brand, model year, and size (if purchasing online). However, most of the time triathlon shoes tend to more expensive than road shoes. A way to deter these costs is by purchasing an older model that the shop is trying to get rid of to make room for the newer models. In addition, amazon.com has great deals on both triathlon and road shoes (i.e. louis garneu, pearl izumi).

When trying to determine which shoe is the most appropriate option I’d suggest thinking of the following questions: Do you have a wide or narrow foot? Do you train often and have frequent long rides? Are you experiencing pain or discomfort in your foot, patella, or lateral knee? Are you a triathlete who is comfortable with transitioning or still learning? These are the questions you should be asking yourself when purchasing cycling shoes rather than using cost as a determining factor. It is better to have a comfortable fit that is conducive to your cycling regime, than have cheaper shoes which create more problems for you in the long run.

Neck Pain Cycling

May 10, 2015 by Dyani Herrera

Neck Pain Cycling

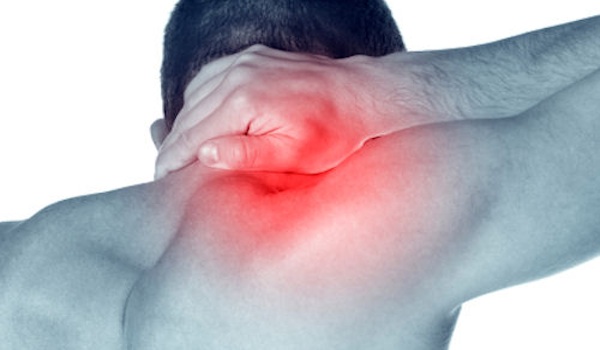
neck pain cycling One of things that takes getting used to when you first start cycling is the neck and shoulder discomfort. Even an experienced rider who has taken a short hiatus, and is returning to a regular regime can suffer from these aches. Typically, the discomfort is localized in your anterior deltoids, upper trap muscles and neck extensors. This can be attributed to a few causes such as bike fit, head positioning when riding and tightness of aforementioned muscles.
Bike Fit

If you’ve read our previous articles you will understand how many issues can be initiated due to an improper bike fit. As a beginner cyclist it’s important to work with a bike fitting specialist and tweak one thing at a time, ride for about a week, and assess the changes. This allows you and the fitter to pinpoint the exact solution or cause in order to improve riding conditions. Often neck and shoulder pain is linked to having a high seat post in relation to your bars. When the seat post is too high it can place you in an aggressive position, which as a beginner cyclist you are not ready for. It’s a better tactic to gradually increase the aero position as you get used to cycling. Additionally, if your road or aero bars are too far away causing you to overreach you can place unecessary strain on these muscles. The solution would be to place the bars closer in relation to your body so you’re in a “tucked” position when riding.

Head Position

When I first started riding solo I remember how afraid I was of either riding off the road, or going over debris that would make me fall, that I looked up for the entire duration of my ride. Although I would finish my rides in one piece I had a soreness in my neck and shoulders that would last for days. I remember, constantly moving it side to side while riding to try to minimize the discomfort. I mentioned this to the bike fitter and he told me to keep my head down and only use my eyes to look up. What a difference this made! I practiced this on my rides as I was in the aero position and I no longer felt the pain in my neck. I would only look up with my head if I knew I was coming up on an intersection or bump in the road. During long rides it’s best to look up with your eyes and only tilt your head up when necessary or intermittently. Not only will this decrease your neck discomfort, but it will also make you slightly more aero.

Tight Muscles

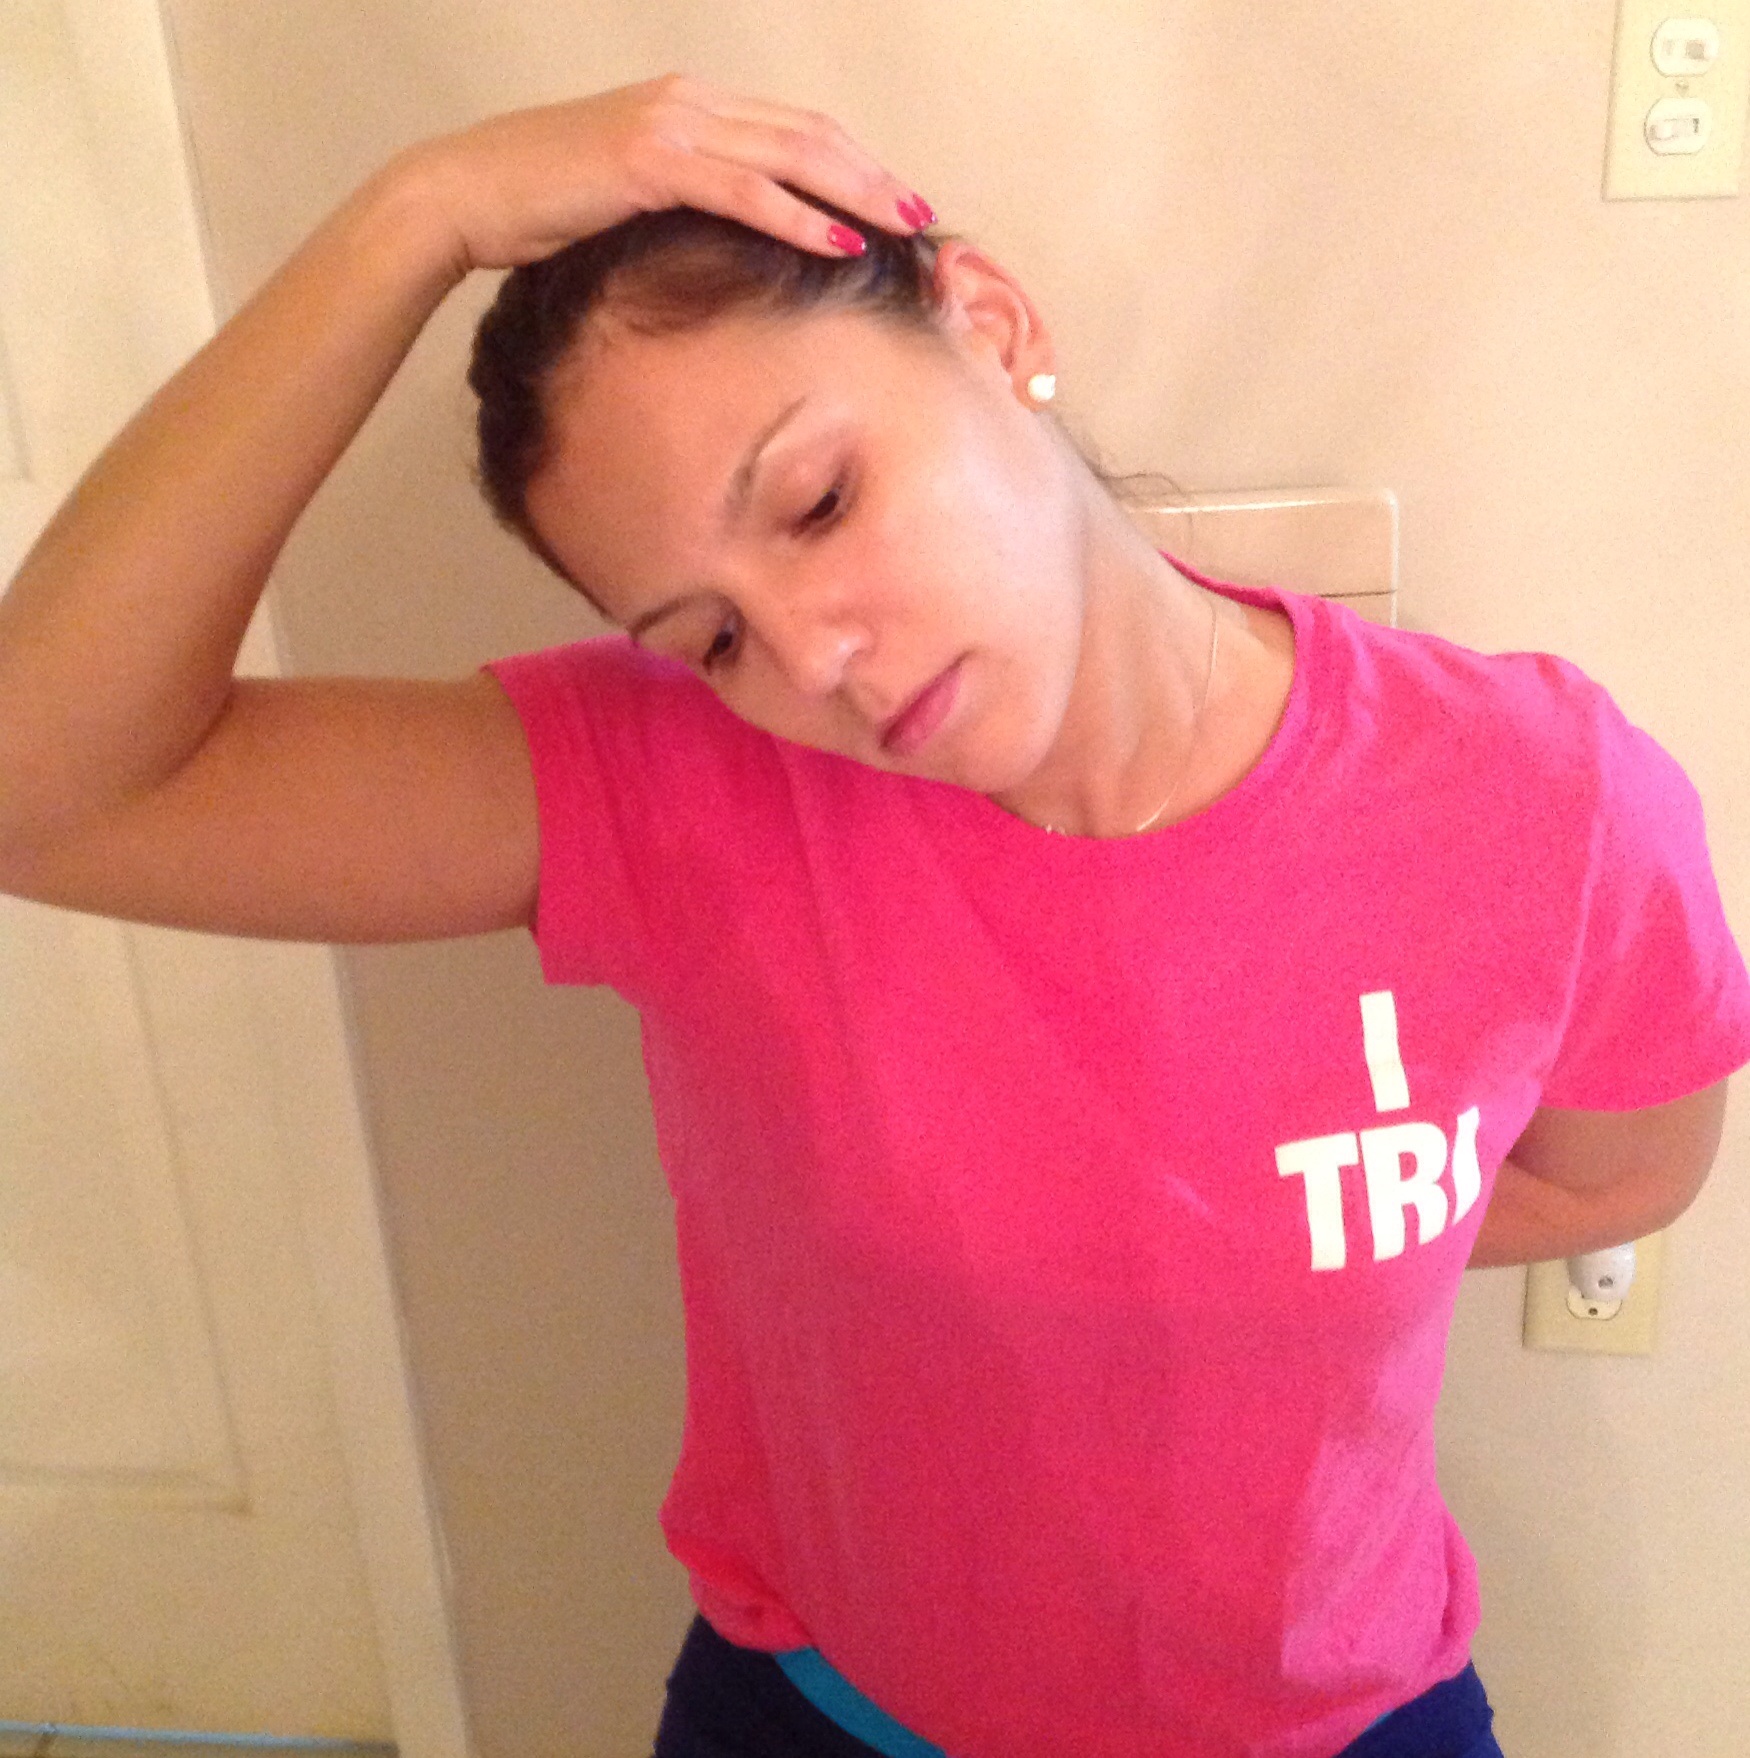
As a beginner cyclist you are now forcing your body to use muscles either it hasn’t in other activities or in a different way. This leads to tightness, muscles spasms, and pain. However, there are a few stretching exercises that can be completed which will lead to disruption of the pain-spasm cycle. One exercise involves a lacrosse ball as demonstrated in “Massage Tips for Tight Muscles.” You place the lacrosse ball between you shoulder blades and roll side to side as well as up and down on the floor. Another variation is to do the same thing, but against a wall instead. Make sure to put your body weight over the knot and roll over it a few times for 20-30 seconds. This will typically release the restriction and cause the trap muscles to relax. There are two stretches that can be done to release the upper traps and neck extensors. Complete each stretch for 20-30 seconds a total of 3 times, several times a day. The first stretch requires you to put your arm behind your back of the side you are stretching. Then, use the other hand to tilt your head to the opposite shoulder.

1st stretch
1st stretch

Stretch two, requires you to look down at a 45 degree angle, and place the arm of the side you’re stretching behind your back. After, use the opposite hand to push the back of your head down further in that 45 degree angle. You may refer to the pictures for further demonstration.

2nd Stretch
2nd Stretch

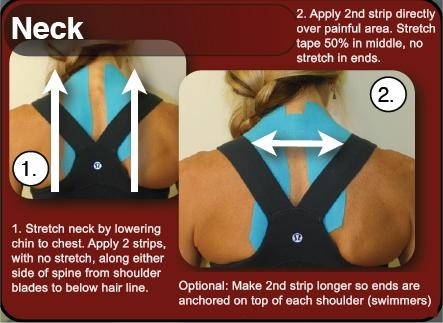
Another helpful tool is to have a partner help you in placing rock tape/kinesio tape along your posterior neck muscles and upper traps. Rock taping offers several advantages such as added support, increased blood supply, and propioceptive feedback. The latter works on nerves which alert your brain to where a particular body part is, and offers feedback to either adapt a movement pattern, or execute it properly. Usually when purchasing rock tape it comes with a pamphlet that teaches you how to apply the tape for different injuries. Nevertheless, YouTube offers plenty of videos teaching how to apply it correctly. It is important to initially wipe the area with rubbing alcohol to remove any oil on the skin, then wipe off the alcohol. Next, make sure to cut the tape with rounded edges, not straight across. Then, break the tape in the middle and slowly apply it with no extra tension. Last, rub the tape to activate the adhesive with the heat generated. In following these steps you’re ensuring the tape lasts for several days and even through showers. You may refer to the photo for further demonstration.

image

If after following all these steps you’re still experiencing discomfort remember that there’s an adaptation process involved as a beginner cyclist. Just like in any other sport it takes time for the muscles to adapt to these new demands and with time they become accustomed. Once your body becomes used to your cycling position, your rides will be neck and shoulder pain free.

Tips to Increase Cycling Speed

May 9, 2015 by Dyani Herrera

Tips to Increase Cycling Speed

tips to increase speed cyclingWhether you’re a road cyclist or a triathlete all of us have one common goal…RIDE FASTER! Perhaps you’re putting in the time, yet aren’t seeing the desired results. It’s possible you’re not doing the right training that will translate to increased mph. However, by following the five tips below you’ll increase your speed and work towards that PR you’ve been chasing.

Interval Training

There are different interval training workouts that really improve your efficiency and speed on the bike. Although challenging, it is a great workout to complete once you’re in the build phase of your training during racing season. Depending on the distance of your next race, you can determine how long your interval workout will be.

It is prudent to not start intervals without a proper warmup, as this could lead to muscle strains. Hence, a warmup of 15-30 minutes depending on your fitness level is indicated. Ensure that during your warmup phase you’re simply spinning, in a small-medium gear, with a few off-seat pedal strokes. Upon completion of your warmup, you may begin your intervals using the following sequence: work interval (WI): x amount of time, with a rest interval (RI) that is ½ of your work-interval. For instance, if you had a work interval that lasted 10 minutes at a high intensity, then your rest interval should be no more than 5 minutes. This pattern should be repeated and becomes the bulk of your workout. The length of time for interval training depends on your fitness level and duration of your next race.

In addition, there are different types of work intervals that can be completed to increase speed. You can complete work intervals that have you riding at goal race pace. Another effective interval, is riding in a smaller gear with a high cadence, and maintaining that cadence throughout the WI. If you’re a beginner cyclist, then these WI can include drill work such as single-leg pedal strokes. In this drill, you spin with one leg doing the work, while the opposite leg glides along. You complete this until fatigue sets in, then switch legs, completing this pattern until the WI time has elapsed.

Trainer Work

An effective method to increase speed work and cadence involves trainer workouts. Although they can be incredibly dull to the senses, trainer workouts is great for cycling training. On a trainer, you can manage the amount of resistance by adjusting the back knob to your rear wheel. There are no gaps when riding on a trainer, forcing your muscles to constantly work.

Tempo Rides

Tempo rides involve a proper warmup as listed above followed by a specific duration where you’re riding at a sub-maximal level or goal race pace. Once again the duration of your tempo ride depends on your fitness level and distance of next race. Typically, these are very challenging rides that push you to new limits and help your body adapt to a higher average speed.

It is recommended to do these as a group ride with riders that are at a similar or higher fitness level than yourself. By riding with more experienced riders you push yourself beyond what you’ve grown accustomed to thus, improving. These can be completed 1-2 a week during your build and peak phases of training. These group rides are sometimes conducted by your local bike shops or through memberships to cycling teams/groups.

Riding More

By reading this headline “riding more” it seems like an obvious concept however, as a beginner cyclist you may just try to ride the duration of your next race and think you’re set. However, in order to become fast it’s important to ride at least double the distance of your next race. If your next race is 24 miles, then have some long rides where you’re riding 50-60 miles. In using this method, once you ride those 24 miles they’ll feel like a breeze and you’ll be able to push yourself more during the shorter distance. Additionally, if you’ve only been riding 2-3 times a week then it would be advisable to increase your riding sessions to 4-5 times a week.  However, ensure you do not make this jump from one week to the next in order to avoid injury. This increase in riding has to be completed gradually over time in order to adapt the body to the higher volume.

It is imperative you do not ride just for the sake of riding; each workout has to have a goal and execution plan. For example, if you’ve been noticing that you acquire lactic acid buildup quickly and need to increase your threshold, then insert some workouts that involve anaerobic work. If the issue is endurance, then include long rides at a more moderate pace.

Weight Lifting

Integrating weight-lifting sessions with your cycling regime is beneficial for numerous reasons. For one, if you’re increasing your volume or speed, strengthening your legs can help address muscle imbalances and prevent injuries. If you’re new to the world of cycling then weight-lifting that is centered around high-weight/low repetitions would be helpful in building muscle mass and preparing your legs for the cycling sessions to come. By building muscle mass, you increase the amount of cells within those muscles which house mitochondria. Having more mitochondria, helps increase your aerobic capacity and energy production, because you have more cells working towards the same goal. As an experienced cyclist, it is indicated to weight-lift with low weight and high repetitions. In doing 15-20 repetitions with low weight you increase the endurance of your muscles thus, increasing the time they reach lactic threshold when riding.

Many times cyclists think that by buying a more aerodynamic bike and corresponding equipment it will help them go faster. Although a carbon frame is lighter than aluminum and can make riding easier it is not the ultimate solution to increasing speed. It’s been shown that aerodynamic equipment makes the biggest difference when long course racing, but not much in short course races. The vital component is working on the “engine” and having the equipment become a secondary help. In following these 5 tips your cycling “engine” will improve significantly.

5 Tips To Increase Cycling Motivation

May 6, 2015 by Dyani Herrera

5 Tips To Increase Cycling Motivation

tips to increase cycling motivationAs much as we may love cycling, there may come a time when we lose motivation. We may struggle to reacquaint ourselves with that burning desire to ride at the crack of dawn. When we’ve hit this plateau in our training, there are a few ways to change the monotony of our routine. Here are five tips that will reignite the passion for cycling again!
Time of Day

Perhaps we’re losing motivation to ride because we’re too tired to wake up early in the morning due to overtraining or life’s general responsibilities. Although riding early in the morning does have its benefits, it doesn’t mean we are bound to riding as the sun rises. At times our bodies demand more sleep than usual and we need to listen. It’s helpful to change your ride times to late afternoons instead. By riding in the afternoon we have time to sleep in and get all our work done, rather than rushing to arrive to work on time post ride in the mornings. There’s also the added bonus of finishing your ride and watching the beautiful sunsets. The other advantage of a late afternoon ride is being able to de-stress after a long day’s work. Having something to look forward to at the end of the day, functions as a motivation to finish your responsibilities, and see cycling as your oasis rather than, “something you HAVE to do.”

Riding Partner/Group

If you’re someone who’s accustomed to riding alone and are beginning to find your sessions rather repetitive or lonely, it’s helpful to find a new riding partner. Riding with a partner who is highly motivated can be contagious as well as fun. Also, having someone who you can compete with when riding can not only push you to improve, but make you motivated to ride more. The same can happen when riding with a cycling group. In riding with a group you can take turns being the leader or drafting, both of which have benefits in increasing self-confidence when riding. Riding with a group is also a way to build camaraderie with others who are just as passionate about the sport as you are. Another advantage of group rides, is they usually have set times and days when they ride, forcing you to be held accountable!

New Route

Depending on where you live cycling routes may be limited, forcing you to use the same path constantly. However, in cities where cycling is highly supported there are several bike paths for cyclists throughout the city. Regardless of the circumstances, if you’ve been using the same route continuously it may kill your drive to go out and ride. At times it’s beneficial to stimulate the senses and choose an alternate route. It’s highly motivational when you’re seeing new sights, smelling different air (ocean side vs farm land), and feeling diverse wind patterns.

Fresh Gear

There’s nothing that can increase motivation more than buying a new bike! You count the days, hours even, until you can give your new baby a test ride. Immediately you want to investigate how responsive the bike is, its comfort level, or how smooth the gear shifting can be. Even if you’ve only bought new clothing gear, there’s always an itch to go and show it off. This can also relate to buying new cycling shoes, where you can assess the difference between triathlon shoes versus road shoes. Having new cycling equipment by any means is exciting, it’s a cyclist’s version of Christmas; hence, an effective motivator to go out and train as soon as possible.

New Workout

As a rookie cyclist, every workout seems new, exciting, and challenging, but if you’ve been riding for quite some time now, these workouts can become repetitive. Although there are certain workouts, which act as staples and deliver results, it doesn’t hurt to try out a new regimen occasionally. “I Love Bicycling” has some great articles on different workouts that address specific weaknesses. Also, Joe Friel’s book “The Triathlete’s Training Bible” and “The Cyclist’s Training Bible” both have great workout routines. Friel does a great job on breaking down different types of workouts, providing drills to address weaknesses, differentiating speed work vs endurance work and when to do either one. By completing a new workout, it helps us feel as though we’re progressing towards our goal, and provides us with some confidence when we complete them successfully.

In trying any one of these 5 motivators we will certainly see a surge in our eagerness to ride and consequently in our efforts.

Avoiding Sciatica While Riding

May 5, 2015 by Guest Post

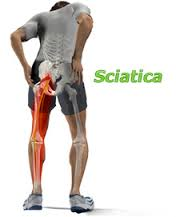
SCIATICAWhen I first entered the cycling community my main drive was the fact that I couldn’t run without feeling sciatica down my right leg. I had completed all the Orthopedic tests and MRIs and found out it was not disc related. Yet, the weakness and numbness would not subside, so I was extremely bummed that I wasn’t leading an active lifestyle. I was assessed by a physical therapist and told all my issues were being caused due to muscle tightness and muscle imbalances. Alas! An answer to my problem.

Cycling is non weight bearing exercise and really helps strengthen my muscles (hip flexor, glute maximus, and hamstrings). Slowly, I began to feel better and was able to do other activities besides cycling; such as: swimming, weight lifting and running. It is important to note that sciatica is not an actual injury rather, a catch all term for an underlying pathology. Sciatica is what alerts us to muscle tightness, muscle imbalances in our hips, disc herniation or impingement, leg length discrepancy, or piriformis syndrome. There is also about 22% of the population which have the sciatic nerve going straight through the piriformis instead of behind it. This makes one more susceptible for sciatica symptoms. If you’re experiencing sciatica and have ruled out a disc injury, then the following tips can be beneficial for resolving symptoms and causes.

SADDLE POSITION

Having the appropriate saddle position is vital for a variety of reasons. If your saddle is too low in relation to your pedals it can cause the hip muscles to be in a constant shortened position. This does not allow the piriformis, hip flexor, glute max, or glute medius to stretch out at any phase of the pedal stroke. When this happens it can lead to compression of the sciatic nerve causing numbness, tingling, and a feeling of general posterior leg tightness when riding. However, this can be fixed by visiting a certified, bike fitting specialist at your local bike shop. There are some companies like Specialized that offer courses to certify bike employees in proper fitting techniques. They use specific body landmarks, plumb lines, and goniometric measurements to ensure the bike is fitted to your needs. Once you’ve adjusted your saddle position you will see a rapid improvement in your symptoms.

It is also important during long rides to pedal off the seat once in a while to allow some blood flow into your legs. When sitting on the saddle for a long period of time, the sciatic nerve is compressed as well as surrounding blood vessels. By pedaling off the seat we relieve the nerve compression and allow an increase in circulation. This can also be accomplished by unclipping one leg at a time and shaking it out to increase blood flow.

MUSCLE TIGHTNESS

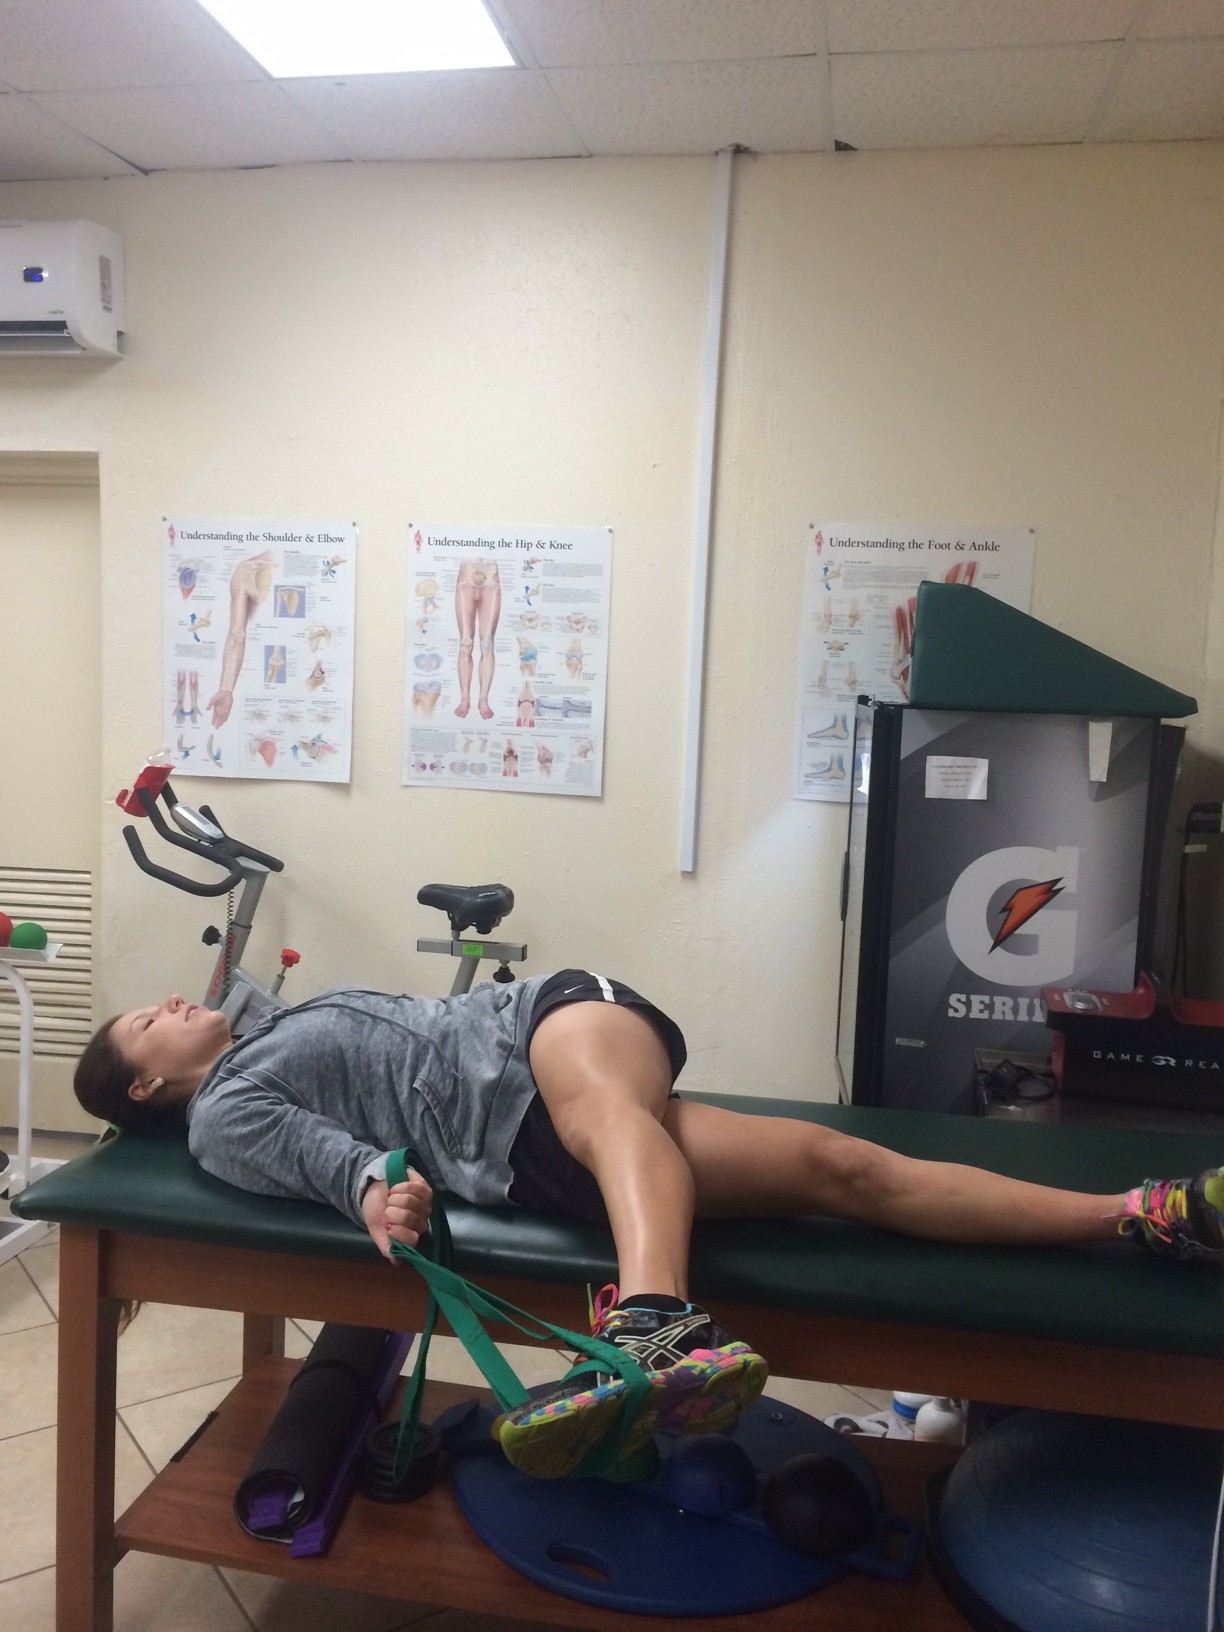
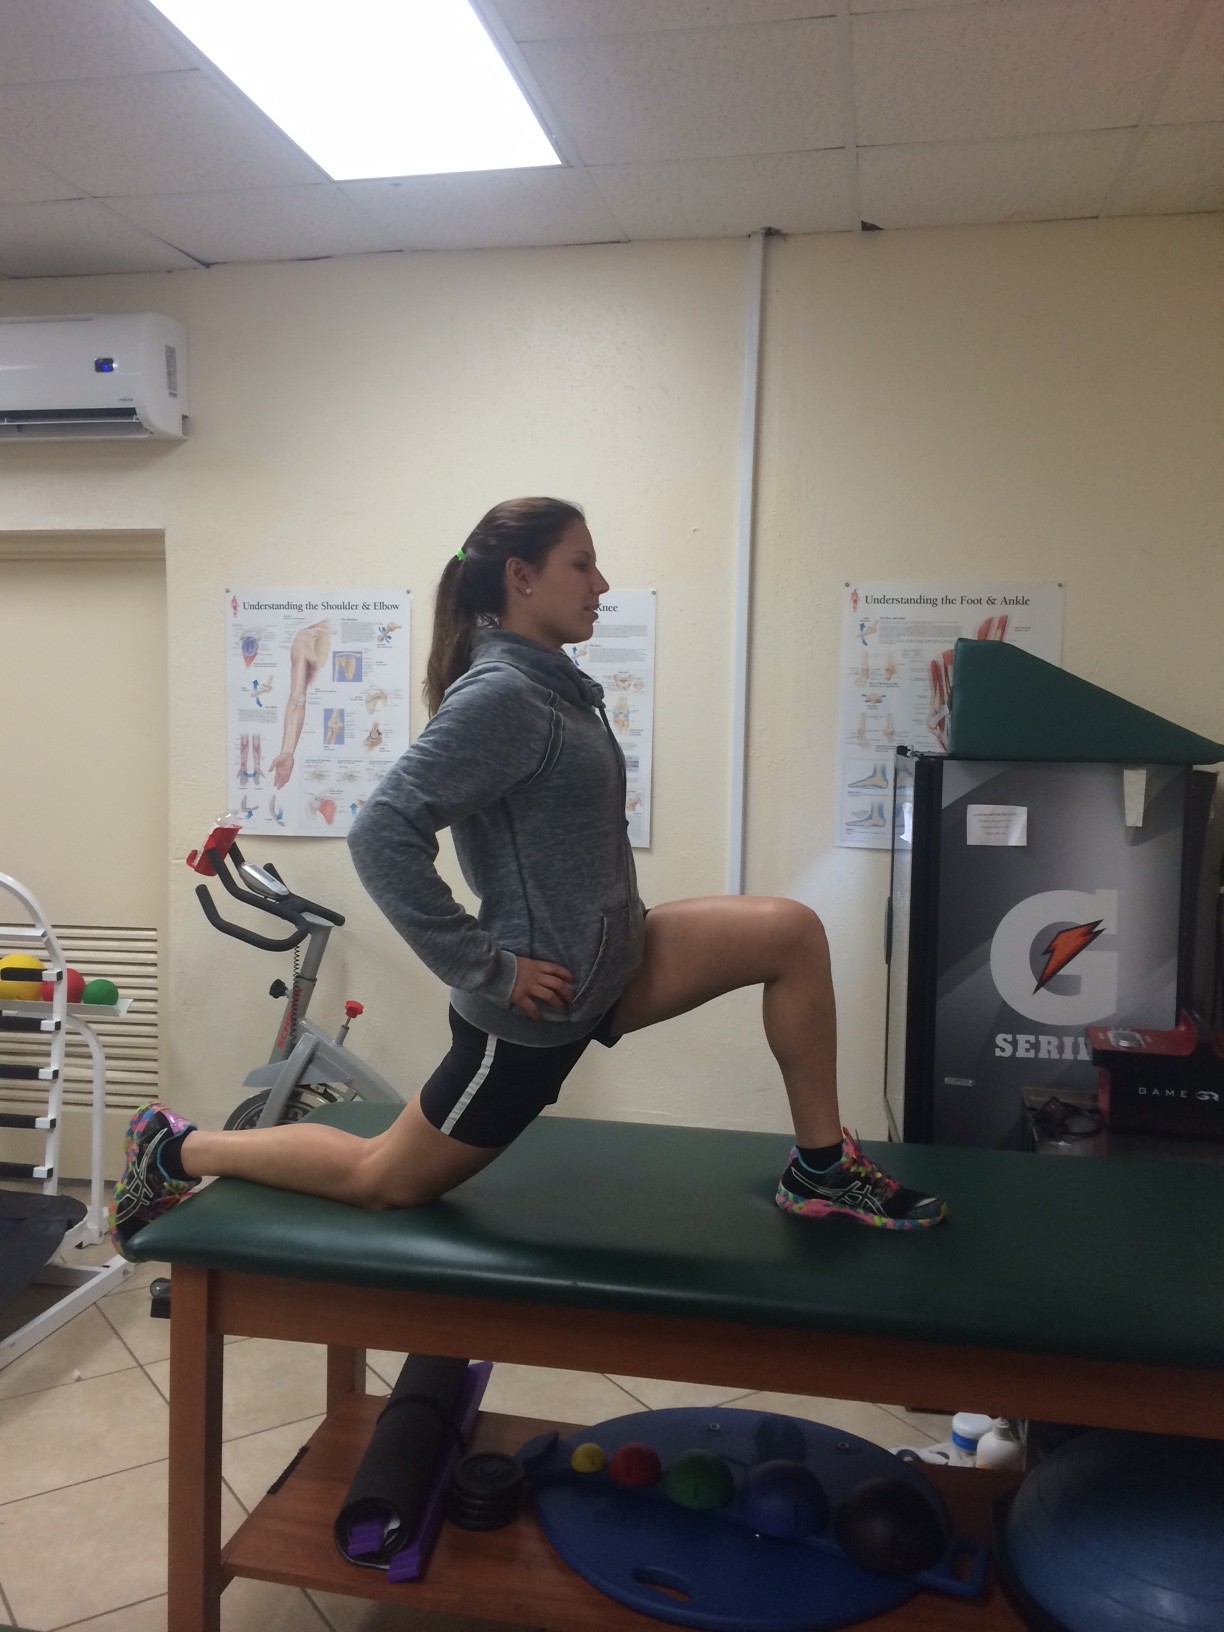
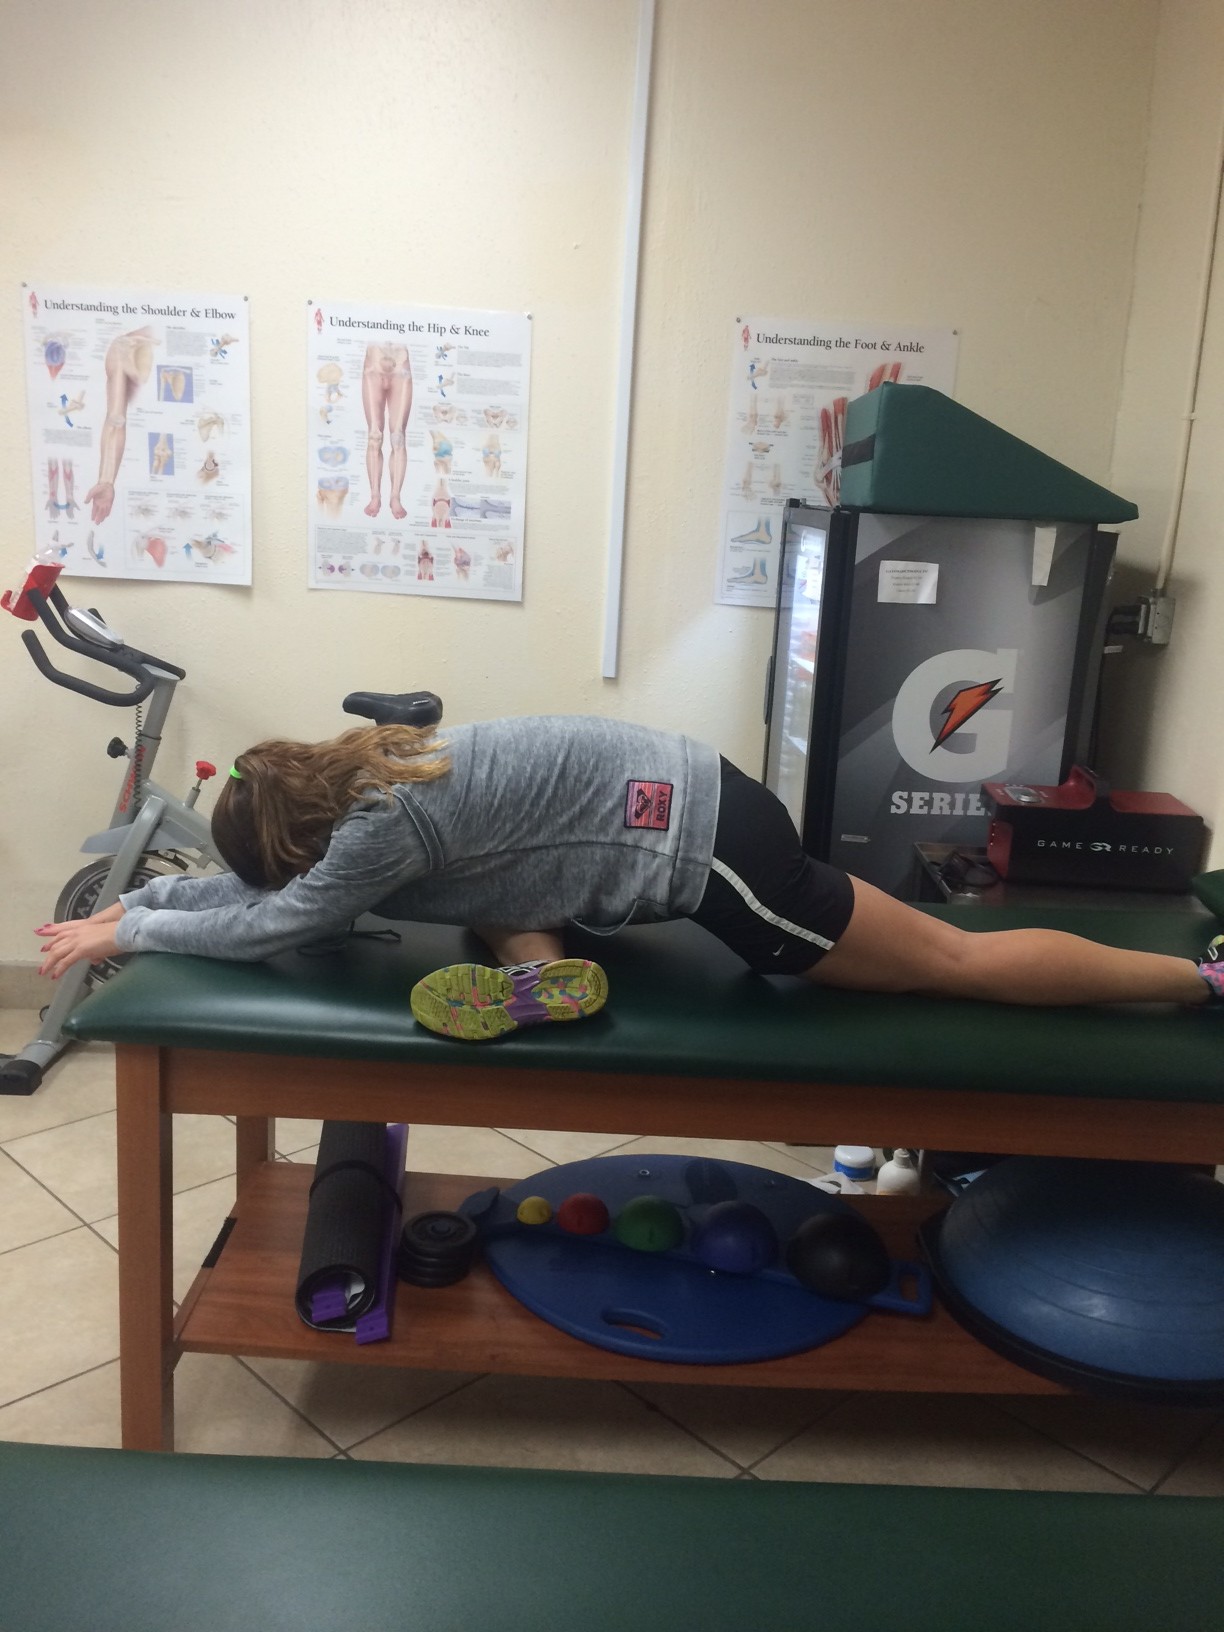
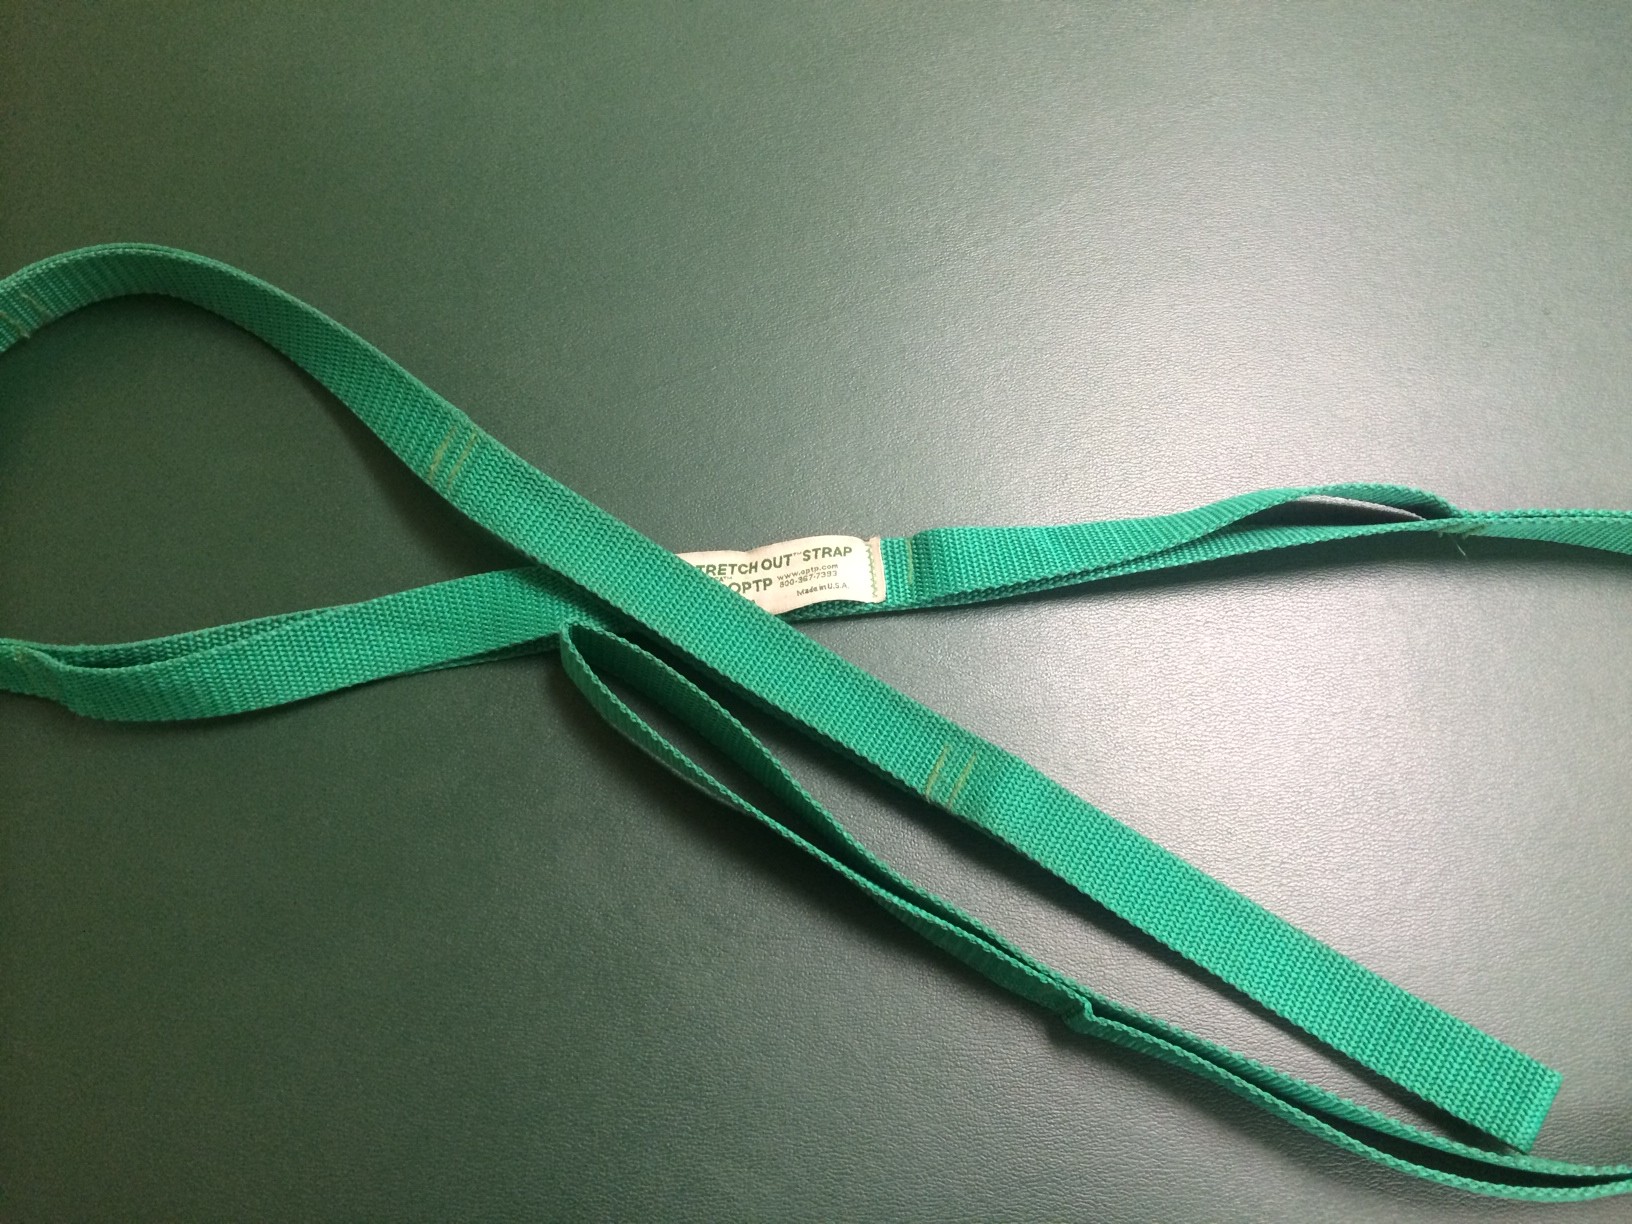
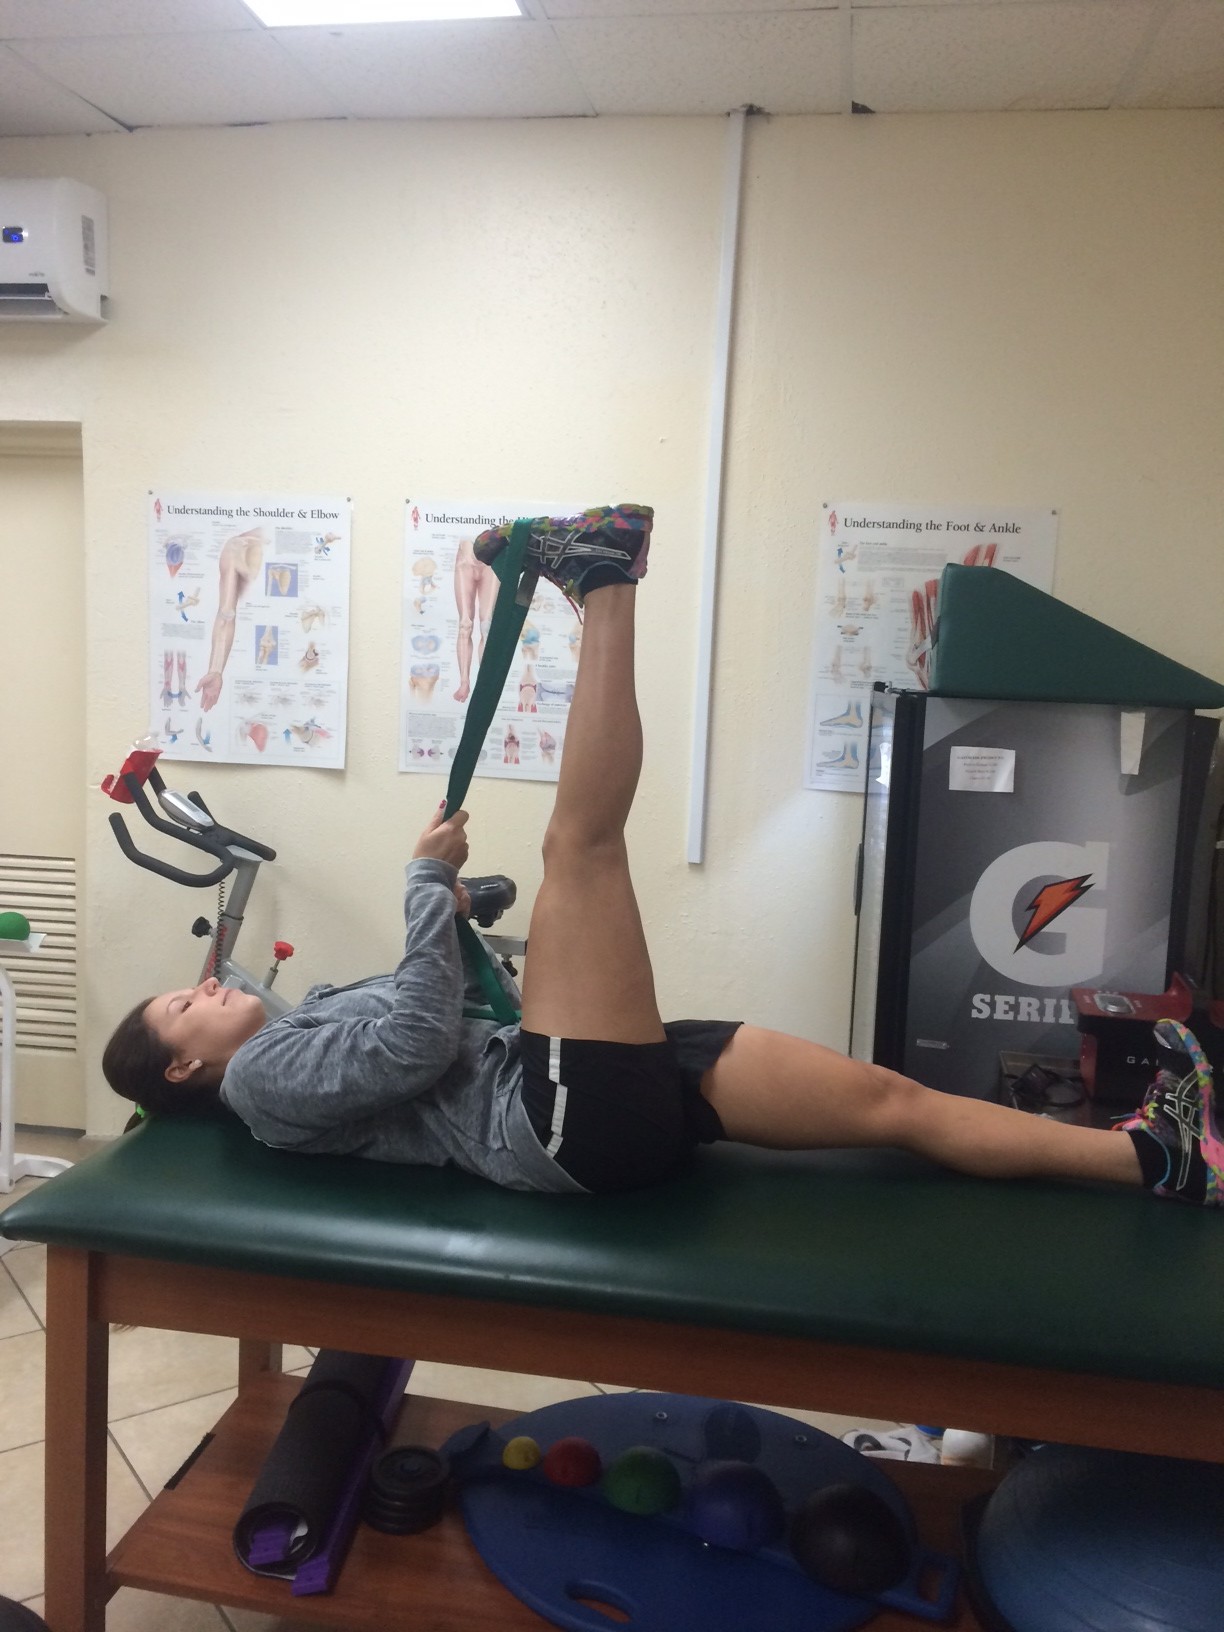
If the hamstrings, glute maximus, hip flexor, or specifically the piriformis is tight it can choke the sciatic nerve and cause this nagging pain. It can also cause improper rotation of the hips, which aggravate the sciatic nerve. It is imperative we stretch these muscles before and after riding. These muscles should be stretched ideally 3 times for 20-30 seconds multiple times a day. Using a stretch out strap (pictured below) is beneficial in getting a good hamstring stretch. Below I’ve demonstrated some great stretches for the glute maximus, hip flexor, and piriformis.

stretch out strap

hamstring stretch
hamstring stretch

Low back and Glute Max Stretch

Hip Flexor Stretch
Hip Flexor Stretch

Piriformis and Glute Max Stretch. Can also be done on floor.

If after stretching these muscles the symptoms are not resolved, there may be some scar tissue forming in the area and ART massage would be indicated. Although painful, ART will help in breaking up any adhesions in the piriformis which are restricting the normal function of the sciatic nerve. There can also be a leg length discrepancy caused by tight hip muscles which can be released with manual therapy. If the leg length discrepancy is congenital, then a heel lift with the necessary measurements can be inserted into your cleat.

MUSCLE IMBALANCES

Sciatica can also be caused due to muscle imbalances in the hip area which cause the piriformis and hamstrings to work harder in an effort to compensate for areas of weaknesses. This can be corrected by completing the exercises listed in 7 exercises to treat and cure IT band syndrome. It can also be addressed by adding squats, walking lunges, reverse lunges, single leg dead lift, and hip abduction to your workout regime, twice a week. By strengthening these hip muscles it will correct compensation patterns and release the tension in the hamstring and piriformis caused by overworking them. In turn, the sciatic nerve is relieved from compression.

In following these tips the causes for sciatica can be resolved and you can return to riding pain free.

Written by: Dyani Herrera

Hip Rehab Program for Cyclists

Looking for a program that will help you address the muscle imbalance that is likely causing your sciatica? Look no further than Dynamic Cyclist. This comprehensive resource addresses the most common muscle imbalances and adaptive muscle shortening that lead to pain and reduced performance on the bike. With just 15 minutes a day, you can follow along with the video programs to alleviate tension and improve posture, so you can ride pain free and reach your full potential on the bike. Try out their 6 Week Functional Rehab Program and experience the results for yourself. Click here to try 7 days free! 

« Previous Page
Next Page »
  • Facebook
  • Tumblr
  • Twitter

Latest Articles

JOIN Cycling: A New Training Platform for Cyclists

May 27, 2024 By Eric Lister

cold exposure

The Benefits of Cold Exposure for Cycling & Life

June 13, 2023 By Eric Lister

hill climb

The Ultimate Hill Climb Training Guide

May 31, 2023 By Eric Lister

shoulder pain cycling

How to Treat & Avoid Shoulder Pain While Cycling

April 12, 2023 By Eric Lister

psoas stretch

The Importance of the Psoas Stretch for Cyclists

April 6, 2023 By Eric Lister

cycling neck pain

The Ultimate Guide to Cycling Neck Pain: Causes and Solutions

March 21, 2023 By Eric Lister

Useful Info

  • Contact
  • Finally, A Global Cycling Club That Is Focused On Community And Love Of Cycling!
  • Privacy Policy
  • Share Your Story!
  • Terms And Conditions Of Use
  • Welcome to I Love Bicycling
  • What Happened When I Stretched Every Day For a Month

Recent Posts

  • JOIN Cycling: A New Training Platform for Cyclists
  • How to Hang Bikes in Your Garage: 4 Inexpensive Options
  • Gravel Bike Vs. Road Bike: Which One Is Better For You?
  • The 6 Types of Mountain Bikes & How to Choose the Best One for You
  • What Is a Touring Bike Good For? 5 Benefits We Know You’ll Love

Search I Love Bicycling

Connect with Us

  • Facebook
  • RSS
  • Tumblr
  • Twitter

Copyright © 2026 · Magazine Pro Theme on Genesis Framework · WordPress · Log in