• Training
    • Injury Prevention
    • Training Tips
  • How To
    • Bike Fit
    • Gear
  • Nutrition
    • Nutrition Tips
    • Weight Loss
  • Repair
  • Reviews
  • Stories
    • Funny Stories
    • Jokes
    • Quotes
    • Videos
    • Funny Videos

I Love Bicycling

I Love Bicycling is a website that is geared towards cycling for beginners with road cycling tips, training articles, nutrition tips, weight loss, how to’s and bike repair articles.

Training

  • Injury Prevention
  • Training Tips
  • Training Camps

Numb Privates – A Delicate Matter

November 28, 2015 by Wade Shaddy

Numb Privates - A Delicate Matter

It’s one of the most perplexing of all cycling issues: You’ve been in the saddle for a while, nature calls and you stop to pee. Everything works just fine, but you can’t feel it. Your penis is swaying around out there in the breeze like a deflated flag.

Not Comfortably Numb

Numb genitalia is nothing new to cycling. If you’ve done any serious miles on any bike, you’ve probably had numb hands or fingers — it’s the same thing, only between your legs.

Women Too

Embarrassing as it is to discuss openly around other cyclists, numb genitals is not something that women are immune to. If you’ve ever done any long distance cycling with your spouse, you probably already know that. Yale researchers in 2006 found that female cyclists often had less genital sensation after spending time on the bike, and it’s believed that female cyclists are at just as much risk for genital numbness as male riders.

Getting Personal

It’s caused primarily when nerves — more exclusively the pudendal nerve — and blood vessels become compressed in one of the most vulnerable areas of your body; the perineum. In men, the penis is affected. In women, the labia and clitoris. You can opt for staying off your bike to avoid it, but that’s not an option any real cyclist would even consider.

Cause and Effect

It’s not always obvious what’s causing you to go numb down there. A cause and effect, or trial and error is the best approach to numb genitals, starting from easy to more drastic measures. Most of the typical causes are simple; your riding position, bad saddle angle, bad saddle, seat or handlebars too high, and the most often overlooked but probably the least likely — a seam in your shorts.

Riding Position

Your riding position can make all the difference. Too much torso forward is an obvious giveaway to numb genitals. If you’re zoned out for miles and miles, it could be that you just need to keep shifting your ass back and forth. You’ll feel the difference when blood rushes back into your privates, kind of a tingling. Pay attention, shift around on the bike and stand up occasionally.

You’re Reaching

If you’re reaching too far for your handlebars, it means you’re leaning forward, putting more pressure on the perineum. A shorter stem makes your reach more comfortable, allowing your torso to lift slightly up off the front of the seat. Bike shops have all kinds of stems, try them out, they’re easy to change, and it only takes a few minutes.

Bad Saddle Angle

Tilt the nose of the saddle downward. Ride the bike for a few hours or days. It might feel like you’re sliding forward. It’s common and you’ll get used to it, and likely stop sliding eventually. If you don’t, look at other solutions. Your butt should be touching the saddle, supporting your weight only by the two bones in your rear — nowhere else.

Seat Down

If your hips rock back and forth while pedaling, it’s a safe bet your saddle is too high. Ideally, the top of the seat should be level, or angled down no more than 2-to-3-degrees. It’s OK to move it more than that to test it. Check it by riding, and see if your numbness goes away. Even if you don’t rock and roll, excessive height may still be involved. Lower the saddle about a 1/2-inch or less at a time, just enough to promote a slight bend of the knee at the bottom of the pedal stroke. This should reduce compression on the nerves in your perineum. A lower saddle height also improves your ability to support your weight throughout the pedal stroke.

Seams in Shorts

If your wearing cheap or poorly designed shorts, you can get skin abrasion, also sometimes referred to as saddle sore, along a seam. It feels like fire. But that same seam can pinch nerves or blood vessels in your crotch. It’s not a given solution, but wear high-dollar shorts to help alleviate numbness. Shorts are rated by panels, the more panels the better. Riding shorts typically don’t have seams in the crotch area.

Seat

If everything checks out, and you still suffer from genital numbness, the most likely suspect is the seat. Saddle choice is a personal thing, what works for one cyclist may cause agony for others. Riding with different saddles is the only real solution, but there are certain saddles that have proven to relieve genital numbness better than others.

Split the Difference

Don’t be too interested in running out for a gender specific saddle, most of them do the same thing. If you’re a woman, a man’s saddle might be what you’re looking for.  They come in two varieties, one type has a split in the back, the other has a split in the front. Both types have proven to relieve pressure on nerves and blood vessels, but neither has been crowned the king or queen of comfort, and numbness reducing, it’s that personal thing. The only real way to figure it out is by trying them.

Mountain Bike Saddle

If you don’t want to spend $100 a piece trying out saddles, you might want to opt for a cheap mountain bike saddle. They have the blunt, short nose at a fraction of the cost of road bike saddles. If you don’t like it, you’re not out that much.

The No-Nose

No-nose saddles have been around for a while. It might be that they just look goofy, but the thing is, most cyclists shy away from them, even though they’ve been proven to work at reducing numbness. Another issue deals with control. Some cyclists use the nose of the saddle to help steer. But others don’t miss the long, extended nose on a road bike saddle.

The Study

“Cutting off the nose to save the penis,” is an article published in the Journal of Sexual Health. Before the study, nearly three-quarters of the participating cyclists complained of numbness while riding with standard saddles. After six months of using the no-nose, fewer than one-fifth complained. So it’s a sure bet that a no-nose saddle can reduce numb genitals.
Average Speed — The Three Mile Test

October 28, 2015 by Wade Shaddy

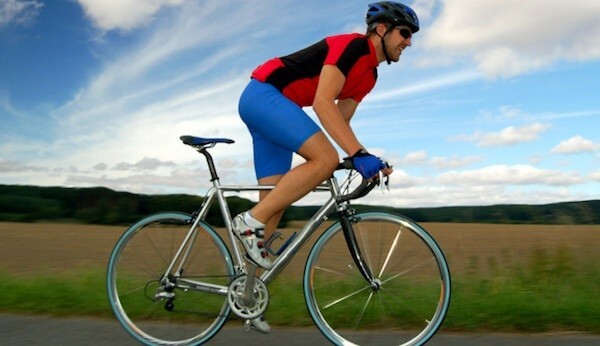
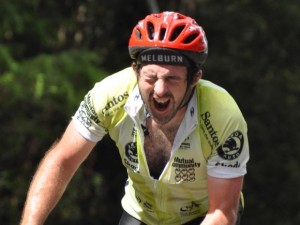
Average Speed -- The Three Mile TestEveryone is different. It’s never a good idea to compare yourself to other cyclists. Genetics, gender, bike, personal health, lifestyle — most of us have to work for a living and can’t take the time to train everyday —  are all good reasons to compete only with yourself. But if you’re curious, a simple unofficial time trial allows you to access your fitness across the demographic. The 3-mile test will do it for you.
Variables and Distance

Anything under 3 miles can be sprinted relatively easy, with no real assessment of fitness. Anything over three miles, and variables such as gradient, wind, traffic, and route come into play.

Where You Stack Up

To find out where you stack up, ride three miles and compare your time to a simple scale: Anything over 12-minutes is below average, 8-12 minutes is moderate —  and where most cyclist fit in. If you finish in under 8 minutes, consider yourself extremely fit. You can see where your average speed stacks up in this article.

The Average

Shoot for 9-minutes. Nine minutes over three miles breaks down to about 20 mph, and that seems easy enough, but holding it for 3 miles is probably harder than you think.

The Route

Find a flat, straight, 3-mile stretch of country road if possible, and remember, you can’t stop at a stop sign, so it should be a clear shot to the end of the route. It’s a plus if your chosen route is a few miles from home, it gives you the chance to warm up just getting there.  If you have a water bottle, keep it full so that the weight is the same for future references.

Ride in the drops if you're accustomed to using them. Average Speed -- The Three Mile Test
Ride in the drops if you’re accustomed to using them.

Prepare Yourself

Gear can make a difference, but you don’t need the futuristic time-trial helmet, composite wheels or aero-bars. A good quality road bike is fine to accomplish the nine-minute average. If the wind is blowing either direction, tail or head, forfeit the test and try again on a different day.

fancy helmet Average Speed -- The Three Mile Test

Nutrition and Water

Don’t eat for 2 hours before doing the test. Don’t chug water, but go into the test hydrated. And it’s always a good idea to pee before the test. Warm up and stretch for at least 10-15 minutes or longer, depending on your own body’s needs. Warm ups are personal, you should know by now how much you might need. If you feel that you didn’t warm up enough, or maybe too much, take note and try the test again after readjusting your routine.

Ways to Improve

You can strap on heart monitors, add power taps, or an endless supply of electronic gadgets designed to gauge fitness and help you improve, but seriously, leave them at home. Keep it simple. Set a base time, and when you have the opportunity to run the test again, you’ve got someone to beat — yourself.

Fun and Fitness

Don’t go out and torture yourself trying to chase higher averages if you’re cycling for fun and fitness. You’ll burn out and lose interest.

Average Speed -- The Three Mile Test

The best ways to improve your average is to increase power and lose weight. By now, you’re probably sick and tired of hearing all about the power-to-weight ratio, but it’s viable. Almost nothing has a more dramatic effect to make you faster. Have fun.

Common Cycling Injuries and How to Avoid Them

October 15, 2015 by Adam Farabaugh

Common Cycling Injuries and How to Avoid ThemThe more that you ride, the more likely common cycling injuries are going to happen to you. It’s not really an if, but rather a when. With proper preventative maintenance, such as stretching and strengthening as well as the knowledge of what to do after you have an injury, you’ll be out of commission for a shorter period of time.
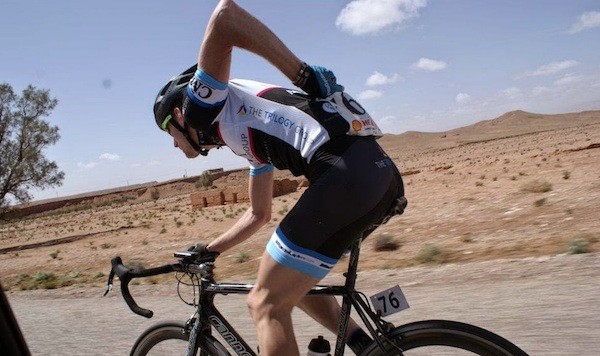
As with anything, your specific injury could require further treatment but having an idea of preventative measures and some simple fixes will give you a good idea on how to take care of yourself. Seek expert care if you are unsure about anything. Problems are much easier to deal with the sooner they are confronted so don’t wait to get something even minor looked into.

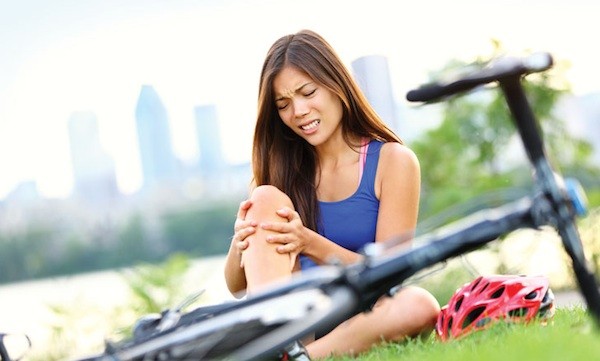
Knee Pain

Riding a bike includes a lot of repetitive motion so anything that is a little bit off can have a big impact on your body after a few thousand revolutions. Your knees in particular take more of a beating than anything else on the body because of the large range of motion combined with a lot of force being placed through the joint. Knee pain can develop in any number of areas around the knee for a variety of reasons.

Causes

The first big cause of knee pain is a poor position on the bike. A saddle that is too high or too low will place an uneven load through the knee joint and the muscles and tendons surrounding it. Knee pain on the front or top of the knee often is the result of a saddle that is too low and/or too far forward. Pain in the back of the knee is often the result of a saddle to high and/or too far back. Cleat position can also have an impact on how your knees track also contributing to knee issues.

A second cause of knee pain is riding to long and too hard before your tendons and muscles are ready for it. This typically occurs early in the season after a long period off the bike. Your heart and lungs may be able to push it already but the supporting muscles and tendons around your knee need time to get used to riding longer again. A lot of climbing and specifically pushing large gears can magnify this problem.

Solutions

The best way to deal with knee pain is to prevent it in the first place and if you do experience some sort of knee pain, it will hopefully be less severe. Make sure your fit on the bike is dialed. If you don’t have the know-how of where you should be positioned on the bike, seek out someone who does. Even a ball-park estimate is better than nothing and if you’re super diligent, finding a fit specialist who uses things like lasers and other exact measuring devices can give you a fit that you know is right.

To combat issues that you may have from riding too much too quick, increase your mileage gradually, no more than a 10% increase per week. And if you’re climbing, make sure you spin instead of pushing large gears. Stretching in the early season as well as throughout can also help prevent injuries.

If and when you do have a knee injury, stop riding and get it taken care of straight away. Small injuries can quickly become a major issue that can stop you from riding far longer than you want. Icing the problem area as well as taking anti-inflammatory medication along with eating anti-inflammatory foods can help reduce inflammation. Never take medication to be able to ride. If your knee is sore you want to feel it so you know to stop riding or to take it easy. If you can’t feel it, you’re just going to continue riding hard doing even more damage.

Rest is going to be the biggest thing that heals your knee quickly. While you rest, figure out the root of what caused the problem in the first place because if you just get straight back on the bike the problem is probably going to come back. Everything happens for a reason so make sure you deal with it before it becomes an ongoing issue.

Back Pain

Common Cycling Injuries and How to Avoid Them - Back Pain

Another common injury in cycling is back pain due to the bent-over nature of the cycling position. Back pain can range from mild discomfort on a longer ride to ride stopping pain that needs to be dealt with immediately. Back pain can be muscular but it can also be a larger issue with the spine itself, such as a pinched nerve, which can require more than just self-treatment.

Causes

Back pain usually results from one of two issues. The first is poor core-strength. This includes the muscles around the spine and up the back as well as your abdominal muscles. The second, lesser known cause of back pain is hamstring tightness. Both of these can be exaggerated also by your handlebars being positioned to low and/or too far forward.

Solutions

To prevent back problems, first make sure you have a good fit on the bike. Then focus on strengthening your core with back and abdominal exercises. An exercise ball can be a great tool that helps hit the right muscles. With strengthening, stretching is also very important. Cyclists notoriously have tight hamstrings. Everything is connected so tight muscles in the back of your legs pull all the way up through your back. Your back may be sore but the cause of it may be difficult to pinpoint. To take care of back pain once you have it, do some gentle stretches, specifically of your hamstrings. A hot shower or hot tub can also help relax your back muscles giving you relief.

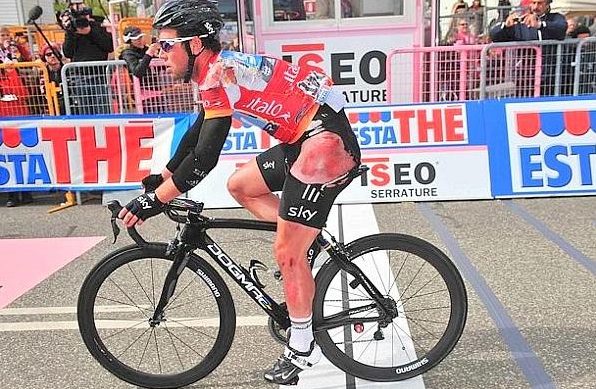
Road Rash

Common Cycling Injuries and How to Avoid Them - Road Rash

Road rash is an unfortunate side-effect of crashing. Fortunately, standard road rash isn’t deep into the muscle and can still be ridden with provided you take care of it. If you don’t know what you’re doing or if your road rash is more than just minor, seek expert help. Mishandling road rash can result in infection as well as delayed healing time.

Cleaning

The first thing to do with road rash is to clean it as soon as you can. The longer you wait to clean it, the more it is going to hurt. After a crash, adrenaline pumps through your body resulting in you feeling less pain. You want to try and clean the wound before that wears off.

As long as the wounds aren’t too deep, clean the area starting with water and a clean cloth or sponge. You’re going to have to be a bit harsh on it to make sure all the dirt gets out. Showering will hurt a lot, and when I say a lot, I mean a lot, but using a light soap with a clean cloth can help get a lot of potential debris out. If you don’t shower, still scrub to get everything out.

Sterilizing

After getting the bigger stuff out, using an antiseptic such as hydrogen peroxide will ensure that the wound is clean. The use of this is a bit debated as hydrogen peroxide not only kills all the bad stuff in there but also your cells as well potentially delaying the healing process. Regardless of your approach, make sure the wound is thoroughly cleaned.

Healing

After you’re sure that everything is cleaned, applying an anti-biotic healing cream can help prevent infection along with help healing. Once a thin layer is applied, a non-stick (this is important as you don’t want the bandages healing in the wound as when you take the bandage off it will take the skin with it) or a thin film such as Tegaderm will help keep the wound protected and cleaned.

Cycling is a sport that comes with an increased likelihood of getting injured. Just because of this risk doesn’t mean we’re just going to give it up. Knowing how to prevent injuries as well as dealing with them once you have them is critical. Also, as much as you need to take care of yourself physically, you also need to take care of yourself mentally.

The first part is that you’ll be back riding before you know it and some time off can be good. Use this time to do the other things you tend to neglect when you’re riding a lot. Secondly, if you’ve suffered an injury from a crash, you are probably going to be a bit timid getting back on the bike. There’s no problem taking it easy when you first start back. You’ll regain your comfort and before you know it you’ll be back to your riding self. Take the preventive measures to avoid injuries and when they do occur, approach them with a calculated deliberate approach and you’ll be back riding before you know it.

10 Core Exercises For Cyclists

October 15, 2015 by Dyani Herrera

As avid cyclists we tend to neglect our core and instead focus on increasing strength in the legs, thinking this should be the only muscular focus for increasing speed. However, having a weak core could become an injury risk once we start increasing the volume in our cycling regimen. A weak core could lead to instability in bike handling, negative compensation patterns, and low back pain. By incorporating core exercises in our strengthening program we can improve riding efficiency. Additionally, it aids in avoiding over compensation by the hip and leg muscles that could eventually lead to injuries. All factors when combined with a proper training regimen could allow for improvements in overall speed and smoother pedal stroke. By completing 3-4 of the following core maneuvers, 3-4 times a week; we can reap the benefits of this strengthening program.

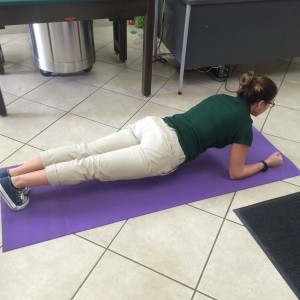
1.Planks

This is a great exercise that incorporates all the abdominal muscles from your obliques, to rectus abdominis, and intercostal muscles, as well as erector spinaes (back muscles). When completing this exercise, make sure to maintain a flat back and not raise your butt in the air to compensate for weakness. A good tip is placing a straight pole/stick on your back and not allowing it to fall. Also, look straight ahead instead of looking down. You can initially start with 3 sets of 20 seconds and continuously add 15 seconds as you become stronger.

Planks - Core Exercises For Cyclists

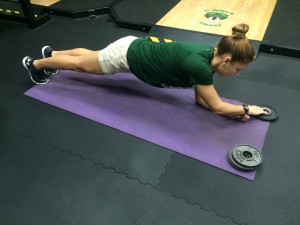
2. Planks with Plate Movement

This variation of the plank is more advanced and engages the obliques more than the standard plank. Females can begin with 4-2.5lb plates and males can begin with 4-5lb plates. In this exercise you stack the plates on the left hand side and while in plank position stack them to the right. Completing one repetition involves moving the plates from the left to the right and back. Make sure to complete 3 sets of 5 repetitions, maintaining proper plank form throughout.

planks with plate 1 - Core Exercises For Cyclists     

3. Planks with Small Resistance Band Loop

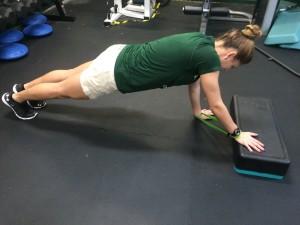
This is a different variation of the plank that also includes strengthening the chest muscles. This plank requires a theraband or resistance band loop that goes around both wrists. Make sure to always maintain tension on the band and not allow it to relax. As indicated in the photos this movement must be completed off a small ledge or stacked foam mats to create a difference in floor height. Start with both hands on the floor, then move them up on top of the stacked foam mats one by one then back down. That is one rep. Complete 3 sets of 10 repetitions.

plank pushup 1 - Core Exercises For Cyclists


4. Side Planks

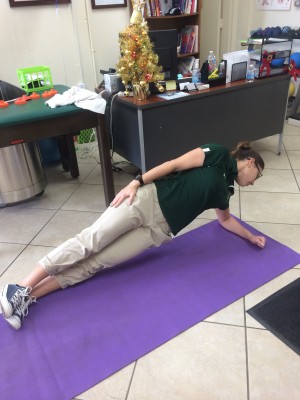
This exercise isolates the obliques and minimally engages the hip abductors muscles to keep the hips up during the movement. These should be completed 3 times on each side for 20 seconds and continuously adding 15 seconds as it becomes easier.

side planks - Core Exercises For Cyclists


5. Glute Bridges with Stability Ball

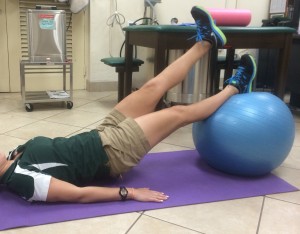
Most people don’t assimilate glute strength to be related with overall core strength. However, if the glutes are weak it requires more effort from the back muscles causing them to spasm thus, leading to pain. Lift your glutes off the ground by raising one leg in the air and using the opposite leg to lift you in to the bridge. Switch legs and do the same. That is one rep. Complete 3 sets of 12-15 repetitions.

Glute bridge - Core Exercises For Cyclists


6.Glute Bridges with Resistance Bands

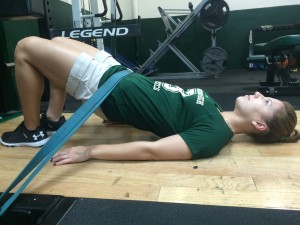
When completing this exercise make sure to acquire two thick/heavy resistance bands and place them across the bottom of a squat rack. Then, slide under the bands and complete the glute bridge making sure to squeeze your glute muscles and abdominal muscles as your rise up. Complete 3 sets of 15 repetitions and increase repetitions as strength improves.

glut bridge 1 - Core Exercises For Cyclists  

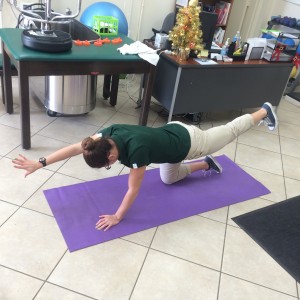
7. Opposite Arm/Opposite Leg

Maintain a similar position to the plank in this exercise and extend  upwards with the left arm and right leg, then the right arm and left leg. Ensure that the back is flat and leg and arm are fully extended. A helpful feedback tool for form is to maintain a stick on the low back, making sure it doesn’t fall. Complete 3 sets of 12 repetitions.

opp arm opp leg end position - Core Exercises For Cyclists 

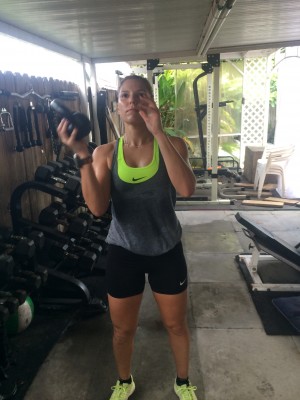
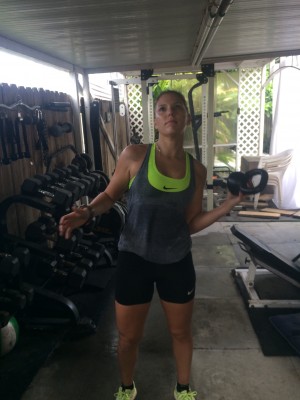
8. Kettle Bell Toss

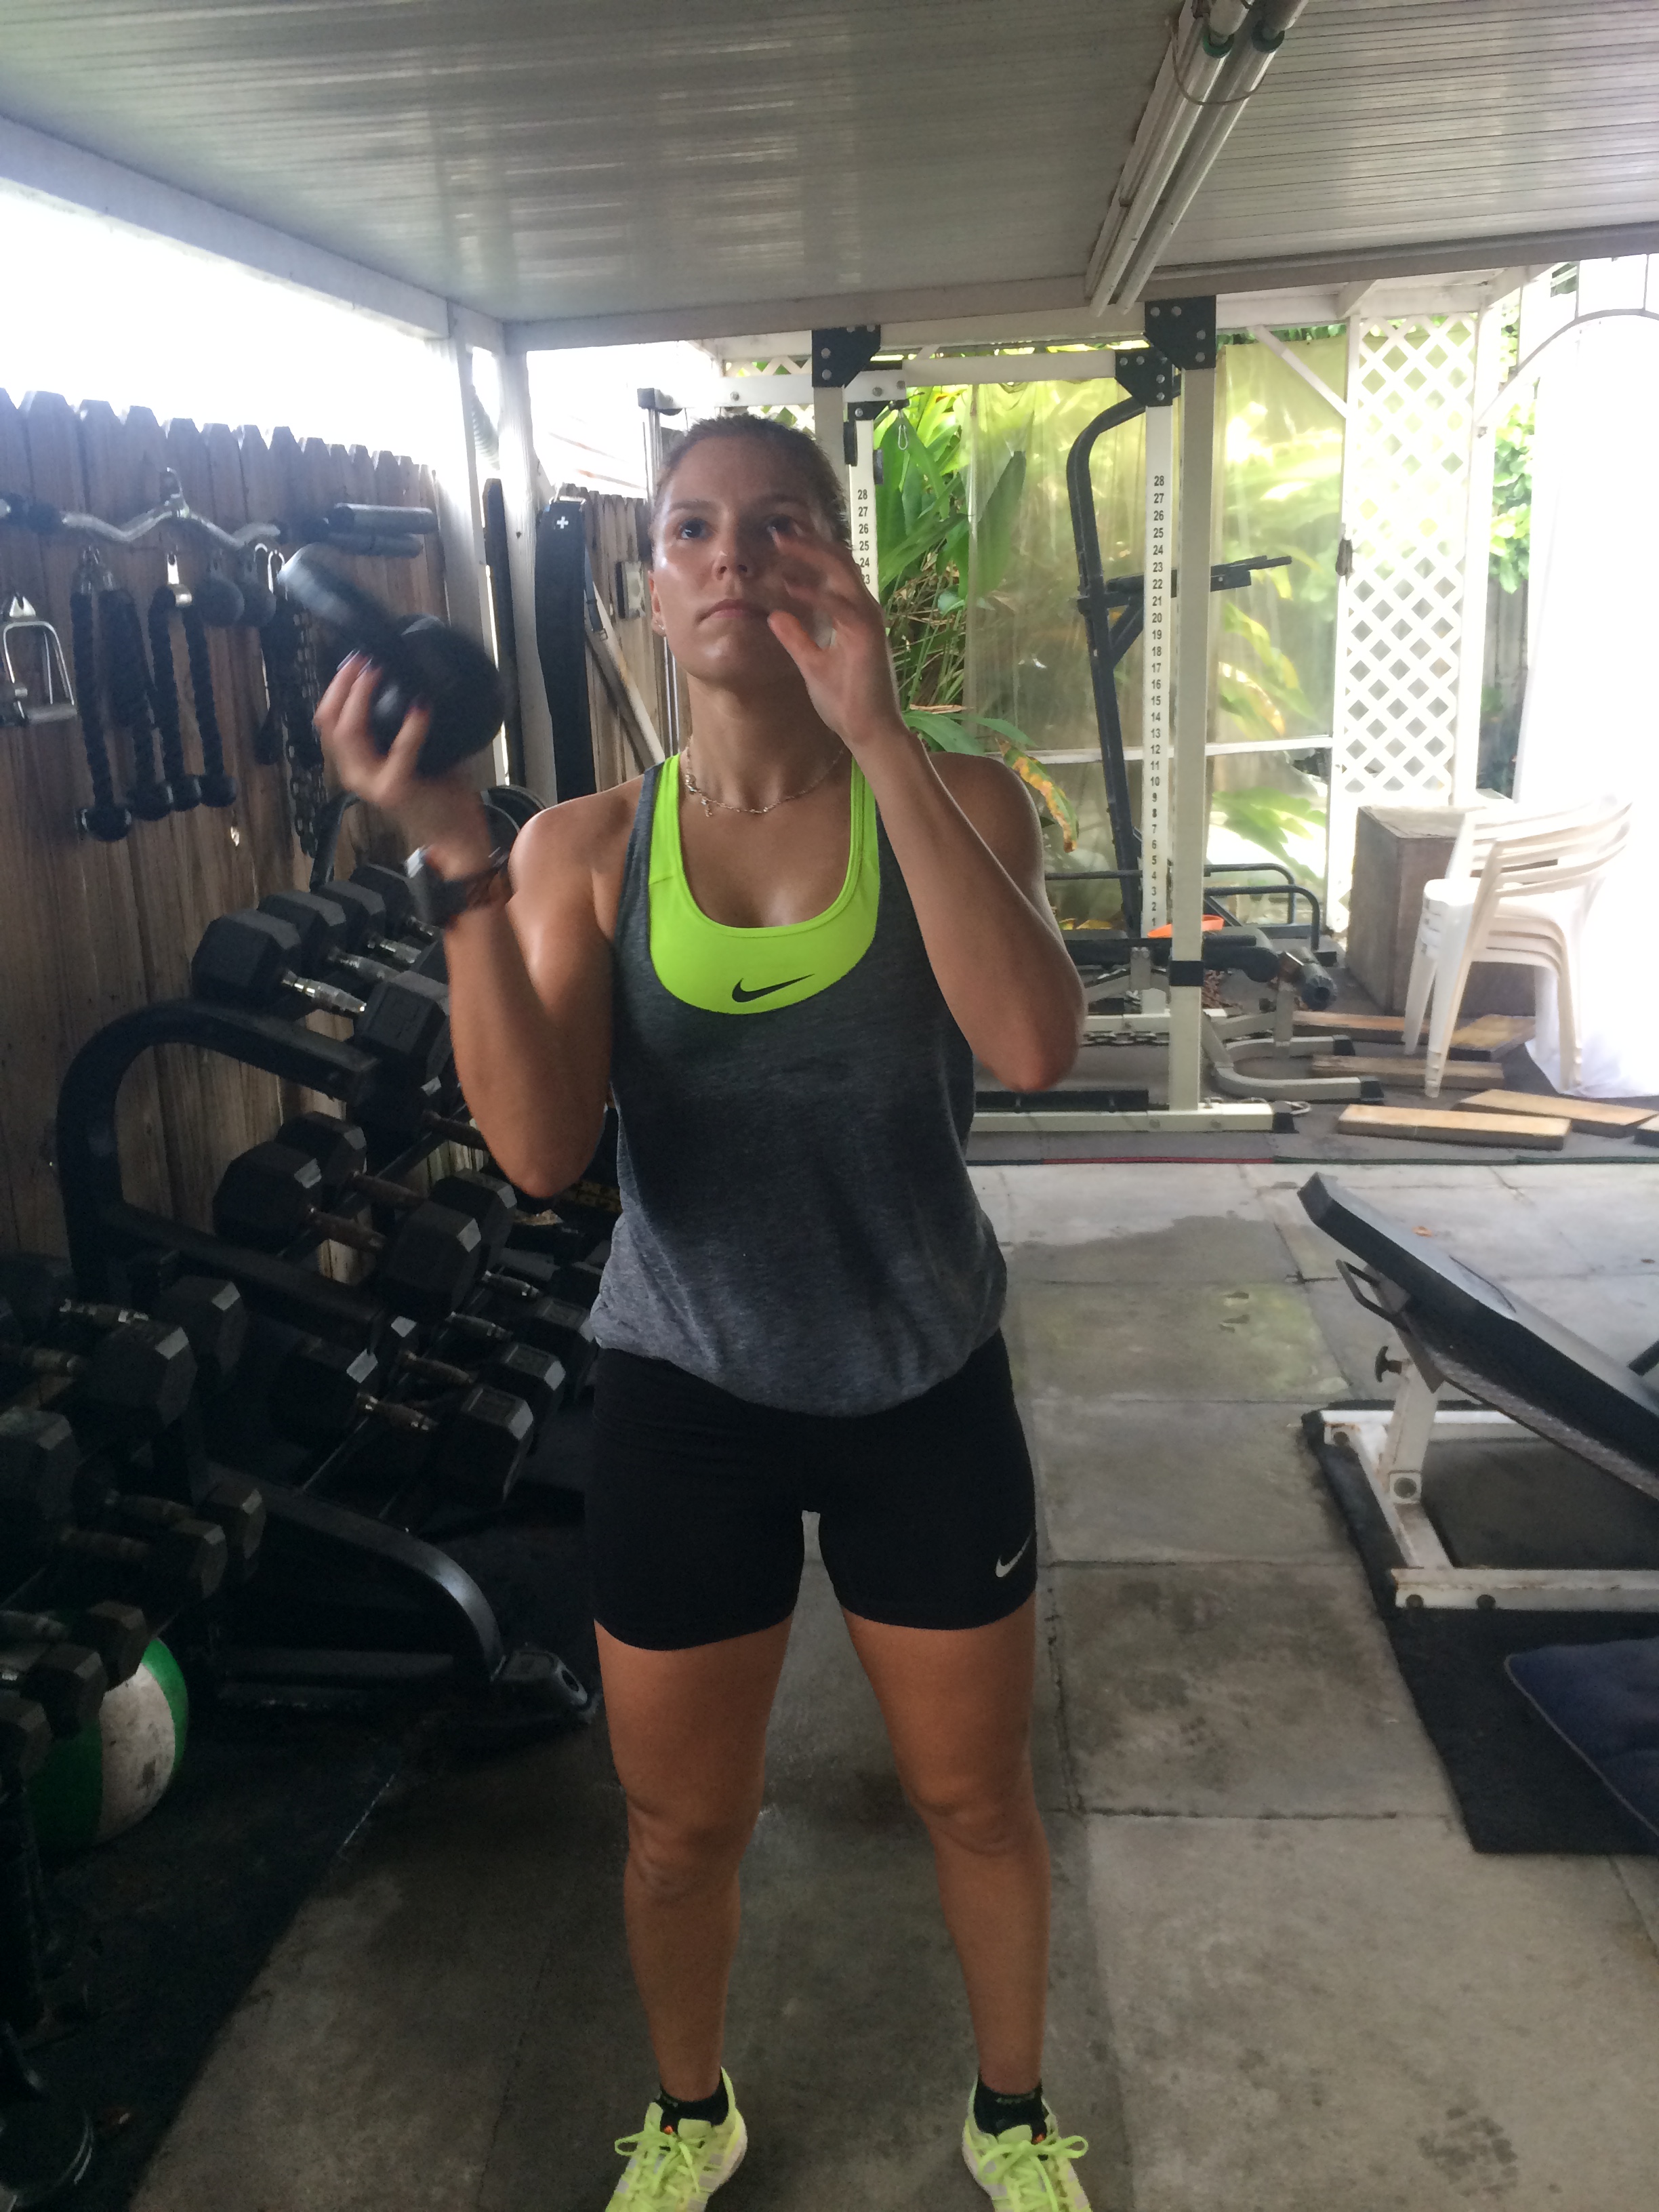
Using a light kettle bell (5-10lbs) depending on your core strength, stand with your legs shoulder width apart, and a tightened core. Then, toss the kettle bell from one hand to the other engaging your obliques. You can initially complete this for 1 minute straight and increase by 30 seconds as you become stronger for a total of 3 sets.

kb toss 1 - Core Exercises For Cyclistskb toss 3 - Core Exercises For Cyclists


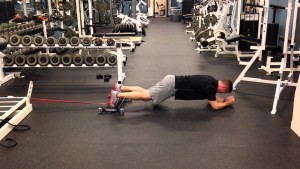
9. Ab Slides

This exercise is extremely challenging and requires a Sorinex Roller and long resistance band. Loop the resistance band around the roller and tie the opposite end to a pole. Place your feet in the ridges of the roller and maintain a push-up position, stretch out until there is tension on the band, then bring the roller towards your arms, making sure to not let the roller move sideways, rather straight up and down. This exercise incorporates all core muscles (abdominals, erector spinaes, and glutes). Complete 3 sets of 10 repetitions.

sorinex ab exercise - Core Exercises For Cyclists

10. Abs using Cable Cross Over Machine

This core maneuver requires more equipment involving a cable cross over machine and two ankle cuffs. First you want to lower the arms on the cable cross over machine to the lowest insert and then hook each leg to the respective hook on the machine. Place yourself in a push up position and bring your right foot towards your left wrist and vice versa. Complete 3 sets of 12 repetitions.

These core exercises for cyclists involve beginner to more advanced maneuvers. It is helpful to complete these in front of a mirror or with a partner to correct technique throughout. In addition, it is important to remember to keep the glutes down during all plank exercises and ensure you maintain a flat back. Also, maintain a tight core by squeezing the abs and glutes during the exercises. This will help reduce injury and yield the full benefits of the exercises.

Using Time as a Guide for Training

October 10, 2015 by Alison Jackson

Using Time as a Guide for TrainingTraining by time is a popular and easy method to use when outlining your cycling training program.  The only tool you need is a device that will record your ride time, whether that is a bike computer, a phone app, or a wrist watch.  It is an easy and inexpensive way to track your training and is helpful when planning training around all the other activities in your life.
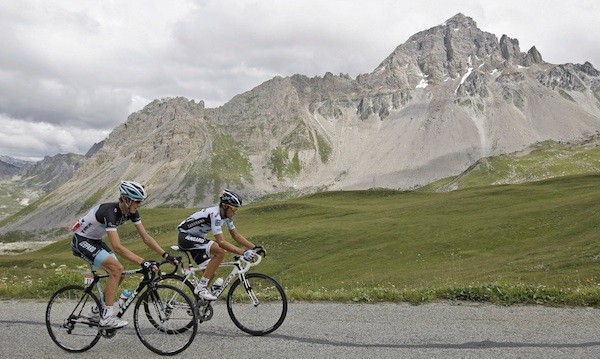
If you have an hour available for training after work you can plan for an intensity that is appropriate for that time block or arrange your day to allow for a 4hr long ride with the confidence that you will complete your training goal before you need to get home for dinner.

Although races are based on a set distance, a rider must plan for the time that it would take to complete the course.  An 80 kilometer race might mean a 2hr effort if it is flat and fast, however if the course is a circuit with an 8km climb at 15% every lap the race might take 3hrs or longer depending on how many laps you are expected to do over the climb.  The intensity and pace required for a 2hr race is very different from what is required for a 3hr race; therefore understanding what your training effort should feel like for these different scenarios will increase your odds of success.

Using Time Based Training

When using time-based training, you will get a feel for the amount of intensity you can lay down on the pedals for various training efforts no matter the level of fitness you are at.  When training by time, it is important to keep in mind what your ultimate goal is.

Here is a guide and a few workout examples on how to manage training intensity based on time:

Time Intensity Workout
6-10 sec Maximal effort; Sprints Use in warm-up: Ride 10-30min or until warm, 3 x 6sec max sprint
10-30 sec Sprint practice: Start with 2 sets of 3 x 30sec sprint with 30sec recovery and build to 5 sets, 3min between sets
1-8 min High; Intervals Improve VO2max: 4 x 4min on a hill, riding steady-hard in between, work to increase number of repeats
10-30min Moderate; TT effort or Tempo TT Tempo effort: 2 x 10min TT effort with full recovery in between increase workout by 2min each week (2 x 12min, 2 x 14min)
30min+ Low; Endurance ride Long ride 2-5+ hrs

Maximal Effort – Sprints

The highest anaerobic effort will last 6-10 seconds and can translate into a varied range of distances from person to person depending on individual fitness.  A 30 second anaerobic sprint might equate to 250m for a male pro but only 100m for a beginner cyclist with their 30lbs. commuter bike.

Sprints are useful for road cyclists who want to beat their competitors to the line.

Moderate and High Intensity – Intervals

Moderate and high intensity intervals will help all cyclists, whether it is powering up a climb, breaking away from the group or just improving overall speed.

Low Intensity – Endurance

If you are planning a century ride or long distance races over 40km then you will want to add a lot of endurance rides in to your training.

Exercise Techniques to Maximize your Cycling Performance

October 8, 2015 by Guest Post

Exercise Techniques to Maximize your Cycling PerformanceIt’s no secret that cycling is an incredibly potent method of exercise, and it’s actually considered one of the most effective forms of cardio on the planet. Training your body to perform to its fullest potential is something that most competitive cyclists strive for, and just a few extra seconds of energy can spell the difference between a confident win, and losing out as your heart rate struggles to keep up with your pace!
What the Professionals Say

If you ask any experienced cyclist about maintaining energy, they’ll say that it’s all about pacing yourself. The human body is capable of extraordinary things, and with particular exercise techniques, it’s entirely possible to improve the way that your heart, lungs and blood pressure work. In standard terms, these techniques are referred to as cardio, but what you might not know is that other forms of exercise can be even more effective.

Training your Body with Tension Exercises

If you haven’t come across ‘tension exercises’ before, then you’ll be pleasantly surprised to read about their potential. Your arms and legs play a huge role in your balance, and although your thighs will often undergo extreme pressure before tiring, there is a technique that can help to promote their endurance and keep you pedaling for much longer.

If you flex your biceps, you’ll notice that the muscle stands out far more prominently. The same could be said for your thighs. As we flex, our muscles are triggered in to action, and it’s this action that stimulates growth. It’s less about lifting heavy weights with your legs, and more about training them to cope with high amounts of pressure for extended periods of time (endurance). Here’s a great exercise that you can try from home:

  1. Sit down comfortably, and place your legs slightly apart, with your feet flat against the floor
  2. Keep your back straight, and use a cushion if needed
  3. Tense/ flex your thigh muscles, so that your heels lift off of the ground and your feet enter a ‘tip-toe’ stance
  4. Keep your thighs flexed, and hold for 15 seconds – or for as long as you can manage
  5. Relax your thigh muscles for 5 seconds, and then repeat 3 more times

If performed correctly, your legs will ache almost immediately after exercising, and undertaking this routine just once per day for a week can provide endurance results. The same could be said of your arm muscles, and promoting their endurance will assist with a greater level of control and strength when riding your bicycle.

Enhancing your Cardiovascular Health

It may not be possible to strap a dumbbell to your lungs and build their muscle mass, but it is entirely plausible to encourage them to function at an enhanced rate. If you cycle, then your lungs may already be benefitting, but there’s nothing to say that you couldn’t further train your lungs. The best way to do this is to force the capacity of your lungs to expand over time.

Typical cardio exercises are recommended (running, swimming and cycling), but it’s been proven that deep-breathing techniques can further assist when it comes to expanding the volume of your lungs. So what sort of deep breathing techniques can you try at home? Well there’s always yoga, and this technique helps to expand your lungs, promote muscle growth, and improve your blood flow. There’s also Tai Chi which assists with physical balance, as well as general deep breathing exercises that involve holding your breath for just under a second, before exhaling.

The Benefits

Improved lung capacity results in a greater supply of oxygen. The more freely oxygen can flow around your body, the better your blood pressure will be – and this means an improved performance as far as physical activities go.

When practiced daily, each of these techniques can help to promote an increased rate of functionality, and in terms of cycling, which means an extra few minutes of performance – which can make or break a race result! Before a race, or even preceding a bit of local cycling – it’s always a good idea to prepare your body.

Performing a few simple stretches will help to elongate your muscles, and loosen them ready for the activities ahead. You can also try inhaling deeply 10 times, to encourage your lungs to stretch to their full capacity, and there’s nothing to say that you can’t continue this breathing while you cycle to keep your heart rate steady.


Hip Flexor / Iliopsoas Stretches

October 7, 2015 by Dyani Herrera

As cyclists we use every muscle in our legs during a specific stage in the pedal stroke. Typically we focus on the larger muscle groups such as the quadriceps and hamstrings, and tend to neglect the hip muscles. Hip muscles, specifically the hip flexors are used significantly during cycling especially when climbing. It is the muscle responsible for bringing the hip into flexion or plainly stated, upwards. Therefore, if we don’t consistently stretch this muscle we can put ourselves at risk for several injuries. Tight hip flexors can make us susceptible to a muscle strain, avulsion fracture where the tendon rips off the bone, anterior rotation of the hip causing a shortened leg, or limited range of motion during cycling which causes decreases in speed. There are several stretches that can be completed solo or with the assistance of a partner.

Hip Flexor – Iliopsoas Stretches

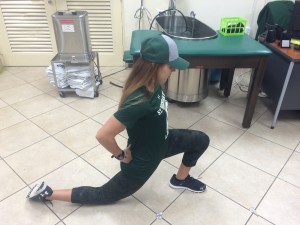
Lunge Stretch

This stretch should be completed approximately 3 times for 30 seconds each. To feel more of a stretch you can push on your glutes to push the hip slightly forward. Make sure to maintain an upright posture when completing this stretch.

Hip flexor stretch
Hip flexor stretch
hip flexor stretch with added push
Hip flexor stretch with added push

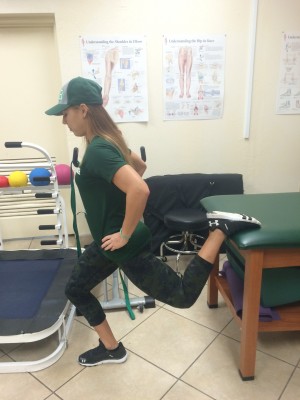
Lunge Stretch with Variation

This is a more advanced stretch of the former and will target more muscle fibers in the hip flexor. By placing the stance leg increasingly forward it will enhance the stretch. It can be completed using the edge of a table, chair, or bleacher at a park. Complete the stretch 3 times for 30 seconds.

hip flexor stretch with variation
Hip flexor stretch with variation

Stretch-Out Strap Hip Flexor Stretch

This stretch can be completed on a flat surface 3 times for 30 seconds each.

stretch out strap hip flexor stretch
Stretch out strap hip flexor stretch

Partner Hip Flexor Stretch

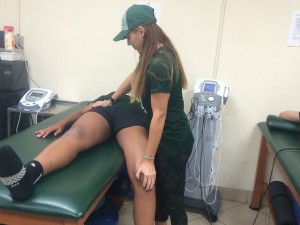
Your partner should push slowly downward on the hip flexor being stretched and stabilize the opposite hip with their other hand. This can be completed 3 times for 30 seconds each.

partner hip flexor stretch
Partner hip flexor stretch

By incorporating these stretches into your normal flexibility routine it will lower your risk of injury as well as maintain normal mobility of the hips. By having good hip mobility it will assist in having a more efficient pedal stroke. If you want targeted stretching routines built for cyclists, check out Dynamic Cyclist for more information.

Anterior Knee Pain Cycling – Causes and Solutions

October 3, 2015 by Lee Agur

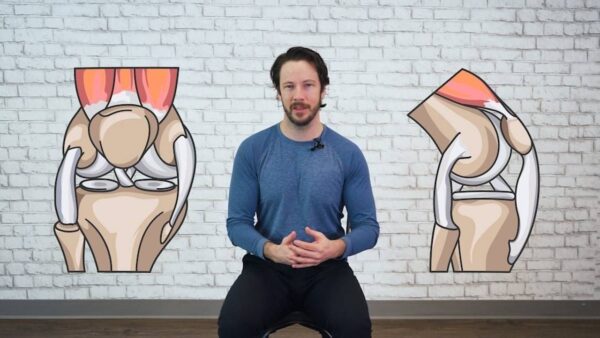
Anterior Knee Pain Cycling - Causes and SolutionsAnterior knee pain cycling is pain on the front part of the knee and can be caused by improper saddle height, fore aft saddle position, crank arm length, cleat positioning and gear selection. The ultimate reason you feel pain on the front part of the knee is due to injuries called Patellar Tendonitis or Patellofemoral Syndrome. We will help you solve the anterior knee pain cycling by discussing how to isolate each cause to find out what your individual problem really is and then we will tell you how fix it.
Reasons

Patellar Tendonitis

Patellar tendinitis is an injury to the tendon connecting your kneecap (patella) to your shinbone. The patellar tendon works with the muscles at the front of your thigh to extend your knee so you can kick, run, jump and bike.

Pain is the first symptom of patellar tendinitis, usually between your kneecap and where the tendon attaches to your shinbone (tibia).

The pain in your knee may:

  • At first be present only as you begin physical activity or just after an intense workout
  • Worsen until it interferes with playing your sport
  • Eventually interfere with daily movements such as climbing stairs or rising from a chair

Patellofemoral Syndrome

The cartilage under your kneecap is a natural shock absorber. Overuse, injury or other factors may lead to a condition known as patellofemoral pain syndrome.

Patellofemoral pain syndrome usually causes a dull, aching pain in the front of your knee. This pain can be aggravated when you:

  • Walk up or down stairs
  • Kneel or squat
  • Sit with a bent knee for long periods of time

Causes & Solutions

Saddle Height

Cause: The saddle height is too low putting unnecessary pressure on the front of your knee.
Solution: Raise your saddle to a proper saddle height.

Saddle Fore Aft Position

Cause: The saddle is too far forward.
Solution: Move your saddle back to its ideal aft position.

Crank Length

Cause: The crank arms are too long.
Solution: Replace your current cranks with ones that are 2.5mm shorter.

Leg Length Discrepancy

Cause: Your seat is set for your shorter leg
Solution: Either raise the saddle height to set your saddle height for your longer leg or purchase orthotics or shims to put on your shoes.

Cleat Positioning

Cause: Your foot is too far forward on the pedal.
Solution: Move your cleat position so that your foot is set further back on the pedal.

Gear Selection

Cause: You are pushing too big of a gear, straining your knee.
Solution: Stop thinking you are Jan Ullrich and increase your cadence.

Overuse

Cause: Increasing intensity, duration and/or volume by too much.
Solution: Take a rest for at least 3 days. While taking a rest, make sure to speed up the recovery process by icing and heating your knee to stimulate blood flow to the area and potentially taking anti-inflammatories. Stretching can also help accelerate recovery. Start by doing 25% of your regular cycling routine and build back up to 50% over a period of 1 week. Assess the pain each ride and determine whether you should continue to build back up or take a longer break.

Assessing Anterior Knee Pain

Self assessing the root of the knee pain is extremely important to a speed recovery. Start by treating it as an overuse injury and taking a rest for 3 days, while icing and heating the area and perhaps even take an ibuprofen. Then make sure to test only one variable at a time. Perhaps you think it is due to a low saddle height, raise your saddle height a small amount and then get back on your bike and test out your theory. Make sure to not increase your training load to more than 50% of what it previously was until you have isolated the root cause of the knee pain and fixed it.

Do You Have Knee Pain In Another Area? Check these links below for the causes and solutions:

General Knee Pain Cycling

Medial Knee Pain – Pain on the inner side of the knee

Knee Rehab Program for Cyclists

Looking for a program that will help you address the muscle imbalance that is likely causing your knee pain? Dynamic Cyclist is an online training platform designed to help cyclists become stronger and faster while riding pain free for years to come. Complete your regimen with an all-inclusive program that addresses mobility, flexibility, strength and injury prevention, all for a fraction of the cost of one physiotherapy appointment. Try out their 6 Week Functional Rehab Program and experience the results for yourself. Click here to try 7 days free!

What are Clipless Pedals?

October 2, 2015 by Adam Farabaugh

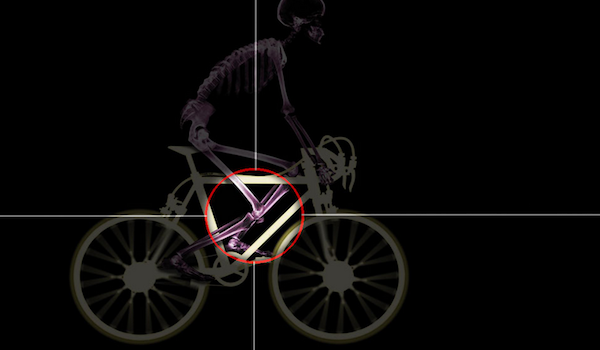
What are Clipless Pedals?Clipless pedals are a pedal system that keeps your foot attached to the pedal of your bicycle with a spring-loaded system similar to that of a ski binding. Traditional pedals, those with flat sides that are ridden with everyday shoes, can allow your feet to slide around and even off the pedal resulting in a sore shin or potentially a crash. Clipless pedals are a three part system that not only keeps your foot from sliding off the pedal but also provides greater pedaling efficiency. The two types of clipless pedals can help improve your riding and make it more efficient and enjoyable.
What are Clipless Pedals

The three part system that makes up a clipless pedal starts with the pedal itself. This has a spindle just like a normal platform pedal but the plastic or metal platform is shaped in a way to allow the second part of the system, a matching cleat, to snap into it. A spring-loaded mechanism then secures the cleat in place so it doesn’t slide around nor pull out. The cleat is then attached to the final part of a clipless pedal system, the shoe. Shoes are made specifically for these cleats to be attached to the bottom of them via bolts. This three part system works in sync to keep your foot where it should be on the pedal as well as allowing you to pull up during the pedal stroke.

In this three part system, the cleats always come with the pedal as they are made to fit exclusively with each other. The shoes come in two styles, mentioned below, and can be used with their particular system, road or mountain.

How it Works

On the pedal there is a spring mechanism that holds the cleat to the pedal. To clip in, line the cleat up with the pedal and then push down, just like a ski binding. To release the shoe from the pedal, a simple twist of the heal outward releases the cleat. In the event of a fall, the pedal will release the cleat allowing your foot to come free from the bike.

Mountain/Touring System

A mountain setup, also referred to as a touring setup, consists of a pedal that can be clipped in easily on both sides. The cleat, which is attached with two bolts, is a smaller metal piece that is recessed into the shoe which is for mountain and touring only. The shoe has a walkable sole with a bit of tread on it to allow for easy and functional walking. This type of pedal is the only choice for mountain biking but also is a great choice if you are riding on the road but have frequent stops where you are walking around.

Road System

A road pedal set-up is made for road riding where walking is mostly avoided and efficiency is a high priority. Road pedals consist of a lightweight pedal that accepts a lightweight, typically plastic, cleat. The cleat is then attached to a “road” shoe with three bolts in a triangle pattern. This system creates a lighter and more aerodynamic pedal and shoe combo that is optimized for road riding.

Clipless pedals are a great way to improve your cycling and as you start to ride longer and farther it becomes a logical choice. A simple, non-high end, pedal and shoe system can actually be quite cheap and as your cycling progresses you can always upgrade. Cycling is full of technological advances and clipless pedals, although simple, provide an incredible advantage to both racers and recreational riders alike.

Medial Knee Pain Cycling – Causes and Solutions

October 1, 2015 by Lee Agur

Medial Knee Pain Cycling - Causes and SolutionsMedial knee pain cycling is pain on the inner side of the knee and can be caused by improper cleat position or individual anatomical problems such as different leg lengths or even poor technique.
Reasons For Medial Knee Pain Cycling

Pes Anserinus

The pes anserinus is an area on the front and inside of the shin bone where three tendons join the tibia. The tendons can get inflamed and sore from overuse or misuse, and pain and swelling may follow.

Treat Pes Anserinus by addressing the causes listed below coupled with icing, resting and stretching. In extreme cases treatment options can include surgery.

  • Ice the inflamed or sore area.
  • Stretch – specifically focus on your hamstrings, calves and quads.
  • Put a pillow between your legs when sleeping on your side

Medial collateral ligament (MCL)

The MCL is a ligament that goes from the inside surface of the upper shin bone and attaches to the inner surface of the bottom thigh bone and is responsible for keeping the inside of the knee joint stable.

Treat the MCL just as you would treat the Pes Anserinus.

Causes for Medial Knee Pain Cycling

Cleat positioning

Cause: Cleats that are positioned too wide can cause the foot to be externally rotated (toes point out).

Solution: Narrow foot position by moving cleat inwards.

Cleat Float

Cause: Little, to no float in the cleat.

Solution: Increase pedal float to a minimum of 6 degrees. Different cleat styles allow for more or less float in addition to the settings on the pedals themselves. First try and loosen the float on the pedals, but it may require a new set of cleats.

How do you know if it is a cleat problem?

Self assessment can be done by taking a rest for 3 days. While taking a rest, make sure to speed up the recovery process by icing and heating your knee to stimulate blood flow to the area and potentially taking anti-inflammatories. After the three days is up, get back on the bike but stay in the small ring, also wear normal running shoes, and cut your training down to 25% of what it previously was.

Over a week, build back up to 50% of previous training load. If you notice improvements or the pain is no longer as severe, then it may be your cleat position. If the pain did not improve then it is likely an overuse injury and you will need to take a longer rest. It could be 4 to 6 weeks, but it may be time to include a medical professional for a second opinion.

Leg Length Discrepancy

Cause: Excessive impact (running), muscle tightness or imbalance or perhaps just a shorter leg.

Solution: Sometimes you are able to correct the leg length discrepancy through physio, stretching and strengthening. If this is possible then this is the best approach; however, some people have one leg shorter than the other and the only fix is to purchase an orthotic or put a wedge in the cleat.

How do you know if it is leg length discrepancy?

A quick test is it to lie on floor and make a 90 degree angle with your knees while your feet are flat against the wall. If one knee sticks out more (away from the wall) then that tibia is longer. If one knee is higher up the wall (further from the ground) then the femur of the respective leg is longer. This is a quick test and is a starting point to investigate further. X-rays would be more reliable.

Poor Technique, Tightness, Muscle Imbalance, Injury

Poor technique such as riding with your knees too far apart can cause medial knee pain. Tightness, muscle imbalance or an old injury can throw alignment off and cause your knee to track poorly and instead of moving in a perfect linear circle it can move laterally as well, opening you up to potential inner knee pain.

If your knee is moving side to side while pedaling, it will likely just be a matter of time before you start to feel a twinge. Try spinning rather than mashing. Really focus on your pedaling technique, and making sure that you are stretching properly (more specifically your IT band).

Medial Knee Pain Is Not Caused By…

Medial knee pain cycling is generally not caused by saddle height or an improper fore-aft saddle position as that will affect the posterior knee (back of knee) or anterior knee (front of knee). You are looking for a lateral issue and not a linear one.

Assessment

Assessing what is the root cause of the medial knee pain can be quite difficult, but will be one of the most important tasks. Make sure to change one variable at a time. Resting and cutting your training volume down by 50% will address overtraining, then look at leg length discrepancy and cleat position independently of each other. If you change more than one variable at a time how are you going to figure out what the issue is?

Last Words of Advice

Take extra care to warm up and cool down the ligaments that are now inflamed and sore, as ligaments do not receive as much blood flow as muscles and therefore take longer to warm up. Take particular care to dress properly in the cold to protect from further injury.

Take the recovery and assessment seriously. Most cyclists will tend to want to rush the recovery process further setting them back. Don’t be that person.

Knee Rehab Program for Cyclists

Looking for a program that will help you address the muscle imbalance that is likely causing your knee pain? Dynamic Cyclist is an online training platform designed to help cyclists become stronger and faster while riding pain free for years to come. Complete your regimen with an all-inclusive program that addresses mobility, flexibility, strength and injury prevention, all for a fraction of the cost of one physiotherapy appointment. Try out their 6 Week Functional Rehab Program and experience the results for yourself. Click here to try 7 days free!

« Previous Page
Next Page »
  • Facebook
  • Tumblr
  • Twitter

Latest Articles

JOIN Cycling: A New Training Platform for Cyclists

May 27, 2024 By Eric Lister

cold exposure

The Benefits of Cold Exposure for Cycling & Life

June 13, 2023 By Eric Lister

hill climb

The Ultimate Hill Climb Training Guide

May 31, 2023 By Eric Lister

shoulder pain cycling

How to Treat & Avoid Shoulder Pain While Cycling

April 12, 2023 By Eric Lister

psoas stretch

The Importance of the Psoas Stretch for Cyclists

April 6, 2023 By Eric Lister

cycling neck pain

The Ultimate Guide to Cycling Neck Pain: Causes and Solutions

March 21, 2023 By Eric Lister

Useful Info

  • Contact
  • Finally, A Global Cycling Club That Is Focused On Community And Love Of Cycling!
  • Privacy Policy
  • Share Your Story!
  • Terms And Conditions Of Use
  • Welcome to I Love Bicycling
  • What Happened When I Stretched Every Day For a Month

Recent Posts

  • JOIN Cycling: A New Training Platform for Cyclists
  • How to Hang Bikes in Your Garage: 4 Inexpensive Options
  • Gravel Bike Vs. Road Bike: Which One Is Better For You?
  • The 6 Types of Mountain Bikes & How to Choose the Best One for You
  • What Is a Touring Bike Good For? 5 Benefits We Know You’ll Love

Search I Love Bicycling

Connect with Us

  • Facebook
  • RSS
  • Tumblr
  • Twitter

Copyright © 2026 · Magazine Pro Theme on Genesis Framework · WordPress · Log in