• Training
    • Injury Prevention
    • Training Tips
  • How To
    • Bike Fit
    • Gear
  • Nutrition
    • Nutrition Tips
    • Weight Loss
  • Repair
  • Reviews
  • Stories
    • Funny Stories
    • Jokes
    • Quotes
    • Videos
    • Funny Videos

I Love Bicycling

I Love Bicycling is a website that is geared towards cycling for beginners with road cycling tips, training articles, nutrition tips, weight loss, how to’s and bike repair articles.

Training

  • Injury Prevention
  • Training Tips
  • Training Camps

What is the Best FTP Test?

December 23, 2017 by Sarah Lauzé

Functional threshold power (FTP) is the maximum power that you are able to sustain over a one hour period, or at least, that is what it represents. It has since become more of a benchmark, as FTP can now be measured using a much shorter test. So, what is the best FTP test, and how can you use the results to structure your training plan?

Why does FTP matter?

Training with FTP isn’t for everyone, but by understanding which power zones you are training in you can become a lot more efficient and learn to listen to your body. If you want to try racing, or even tackle some time trials, knowing your FTP will help you pace your efforts and avoid burnout.

What you’ll need

Functional threshold power is measured in watts, so you will need a power meter. They can be expensive, so you can try a virtual power meter such as TrainerRoad or Zwift first. It will provide virtual numbers using the power curve on you indoor turbo trainer to calculate your watts. This can be a great option to see if crunching the numbers is for you before investing a lot of time and money into it.

Best FTP Tests

There are 2 ways to determine your functional threshold power. Both should be done when you are properly rested and performed on a slight and continuous uphill. Ensure there are no traffic lights or stop signs that may interrupt your test. Also ensure that you get a proper warm up in before either test.

The 1 Hour FTP Test

The most obvious way to determine functional threshold power is to do a one hour ride as steady and as fast as you possibly can. From there you would take your average power reading and that would be your FTP. However, it can be tough to push yourself for the length of an hour to get an accurate reading of just how fast you can go. When you’re not in a race environment, keeping your mind as focused as it needs to be will be a huge challenge.

You probably will not be as rested as you should be, you will not be racing anyone, and no one will be judging you if you go slow or congratulating you if you go quickly. If you choose to ride for an hour and it is not during a race you should take the average power output and add 5% – 8%. So if your average watts were 250 then your functional threshold power would be between 262.5 and 270 watts.

The 20 minute FTP Test

The easier and more practical test can be done in 20 minutes. It may not be a “true” FTP test, as what you can maintain over 20 minutes will be different from what you could over an hour of pain, but it as much a mental test as it is physical.

For the first 5 minutes you may wonder what all the fuss about, but believe me, the pain will come. Again your goal here is to maintain the highest average wattage possible. It is easier to start out too fast in a 20 minute test, so ensure you get up to speed quickly, but do not push it too hard as you will tire too quickly and it would result in an inaccurate result. Once you have completed the 20 minutes reduce the average wattage by 5% – 8%. So if your average watts were 250, then your functional threshold power would be between 230 and 237.5 watts.

The 8 Minute FTP Test

You will complete this test twice, so it’s actually more like 16 minutes. The benefit: you have two efforts so you can learn from the first. This test is geared more towards experienced riders as it provides more information by demonstrating power at VO2max (the body’s ability to consume oxygen during intense exercise, in other words respiratory endurance).

Okay, get ready for the longest 8 minutes of your life. You will take your average power for the two 8-minutes intervals (pushing yourself to your limitand taking a break in between) and multiply by .90 to get your FTP. So, your FTP will be 90% of your average power over the two intervals.

Now what?

Once you have your FTP, what do you do with it? This is not a static number, but your FTP is a snapshot of your fitness level at any given time, so it can be used to measure your progress as well as a training tool. If you want to improve your FTP, your training should include workouts that combine riding just below your FTP at 90-98% with VO2max intervals, which are above your FTP from 105 – 120%. This will ensure you are pushing yourself in a way that can be missed by just using heart rate as a training measure, and will make you a stronger rider over time.

How To Treat Muscle Aches and Pains

December 20, 2017 by U.M.

Muscle pain plagues cyclists for many reasons. Beginners have the challenge of building muscles in areas they’ve never used so heavily before, and those training for a race or long ride must push their bodies even farther than usual to prepare. Forgetting to stretch can lead to a muscle injury, and pushing your body too hard can lead to some awful leg pain. Here are a few great ways to treat muscle aches and pains due to exercise.

Methods of Prevention

  • Foam rollers: Shown in the image, foam rollers are a great way to loosen up tight muscles and relieve muscle aches. They are an especially good investment for a muscle aches and pains
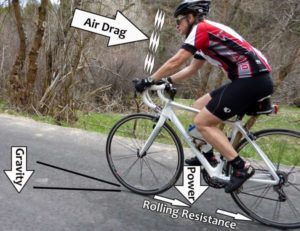
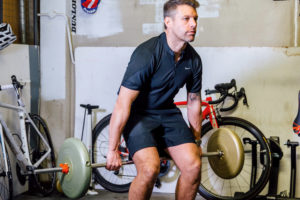
cyclist because of how
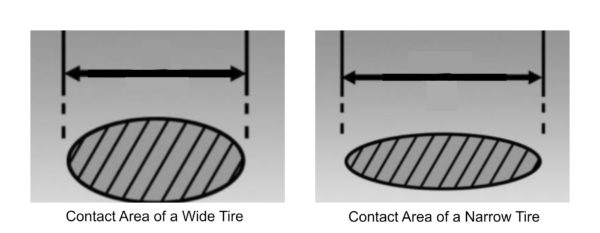
 tight cyclists IT bands can be. Using them on a regular basis helps keep your muscles healthy long term by loosening them up and increasing blood flow. They are also useful for treating pain, thanks to the increase in blood flow. More blood flow means more oxygen, which is needed for recovery, and less waste products that prolong soreness. Foam rollers can be a bit uncomfortable to use, but it’s worth it in the long run!
  • Supplements: While everyone experiences post-workout pain, preventing the problem is always better than treating it once it occurs. Antioxidants, vitamins, and amino acids have been shown to help reduce pain due to exercise. These are available in supplemental forms, but are also readily available in food. Fruit contains vitamins and antioxidants, tea contains lots of antioxidants, and red meat contains all of the essential amino acids. However, some people prefer specially formulated workout supplements, because there is an increased concentration of the specific amino acids and vitamins that prevent muscle soreness.
  • Stretching: The importance of stretching cannot be emphasized enough. Before a bike ride, you should always warm up the muscles by walking and doing dynamic stretches. Dynamic stretching means that you are actively moving the muscles as you stretch them—examples include lunges and squats. Static stretching (being still and holding a stretch) is better left for after your ride.

Methods of Treatment

  • Analgesic ointments: Icy Hot and Tiger Balm fall into the category of analgesic, or pain relieving, ointments. They function in similar ways, but do have some differences. Both use Menthol and Methyl Salicylate, which function to relieve pain in the area of application. Tiger Balm is commonly found in the form of ointments and patches, and Icy Hot is commonly found in the form of ointments and roll-on applicators. In addition to mild pain relief, these products dilate the blood vessels in the affected area to increase blood flow and speed up recovery. Lastly, they both interact with the temperature receptors in the area, creating a perception of warmth and/or cold. This helps distract the brain from the pain signals that it is receiving.
  • Temperature therapy: Switching off between applying an ice pack for 20 minutes, and then a heating pad for 20 minutes, is a common and effective way to relieve muscle aches. Everybody does it a bit differently, but the rule here is to not leave either item on for more than 20 minutes. This method is often combined with rest, which is, of course, the best way to recover! Hot baths and ice baths are also useful alternatives, depending on the severity of the pain. Icy Hot mimics this in a way, since it creates the perception of cold and then hot in the affected area.
  • Handheld massager: This method works best for mild to moderate pain. It can be used for treating muscle aches the same way that a foam roller works. It stimulates the tissue, which increases blood flow to the area; increased oxygen translates to faster recovery, and decreased waste and chemical irritants translates to decreased swelling and pain. It should be used on the aching area as needed, but should not cause discomfort. Too much pressure may contribute to the swelling rather than help relieve it. A heating pad and a handheld massager make a fantastic team- the heating pad increases blood flow and loosens up the muscle, and then the handheld massager does the rest of the work.
  • Daily stretching: The most important thing for cyclists, and human beings in general, is to have a healthy range of motion and flexibility to move freely and efficiently. Stretching can aid in aligning the thick and thin muscles back into their ordered state after movement, as well as remove the lactic acid buildup that causes soreness.

If you’re looking to take the guesswork out of stretching, you can check out Dynamic Cyclist. This comprehensive resource addresses the most common muscle imbalances and adaptive muscle shortening that lead to pain and reduced performance on the bike. With just 15 minutes a day, you can follow along with the video programs to alleviate tension and improve posture, so you can ride pain free and reach your full potential on the bike. Don’t let muscle imbalances hold you back – click here to try 7 days free!

Avoid the Pain in the Butt: Find a Comfortable Bike Saddle

December 19, 2017 by Sarah Lauzé

An uncomfortable bike saddle can quickly turn your bike from an instrument of joy to one of torture. Not only can it be extremely painful, but it can also lead to long term injuries or saddle sores as you contort your position on the bike trying to lessen the discomfort. There are a number of factors that contribute to how  comfortable bike saddle is, but the most important one is you.

We are all built differently, so there is no “one size fits all” when it comes to a perch for your unique bottom. What feels comfortable to one person, will feel like torture to another. So, we will outline some things to look into before starting the search for you dream saddle, but keep in mind that it will likely come down to trial and error.

Saddle Features

Width

You may think that the wider the saddle, the more comfortable it would be, but this is not the case. Neither are narrow saddles the be all end all when it comes to finding the best fit. The first step towards finding the most comfortable bike saddle is to measure the distance between your sit bones. This can be done with an “Assometer” at your local bike shop, or at home with a piece of paper and a pencil. Once you know the distance between your sit bones you will want to add 2 cm, 1 cm past the sit bones on each side.

If a saddle is too wide, the nose of it can start to rub on the inside of your quads. If it is too narrow then you sit bones will not be your main point of support for your weight. The pressure will then come down onto soft tissue, which can be extremely painful over any amount of time or distance.

Cut outs

The popularity of cut outs largely came from a 1997 study. It claimed that reduced blood flow caused by saddle pressure could potentially lead to erectile dysfunction and permanent reproductive failure in men. Although this has since been disproved, the concern is still there. It comes down to personal preference and what feels most comfortable to you.

A test to see if you might benefit from a center cut-out is to sit on a hard wooden chair or bench and lean forward without arching your back to where you can rest your elbows on your knees. Sit like this for a few minutes and if you find that there is adverse pressure and discomfort on the soft tissue being pressured then you will most likely benefit from a cut-out in your saddle.

Softness / Firmness

It’s easy to think that the more padding a saddle has the more comfortable it will be, but it actually puts more pressure on sensitive areas. It can pinch and chafe rather than support your sit bones. The ideal firmness will put enough weight on your sit bones, while still providing enough padding to be comfortable. Some riders prefer no padding at all as it puts the pressure exactly where they want it, but that isn’t the case for everyone.

Shape

There are two general shapes for saddles when viewed from above: T-shaped and pear-shaped. If you have issue with chafing or your quads rubbing together, then T-shaped will be the better option for you. A pear-shaped saddle can be good fit if you shift your position a lot while riding, as there will be more evenly dispersed support.

The second aspect of saddle shape if how flat or rounded the surface it. When viewed from the back, how much curvature does the saddle have? You want it to be slightly curved to keep you centered on the saddle, but not so curved that there is pressure on the central areas between your sit bones.

Gender Specific

Looking at saddles designed specifically for men or women may be a good place to start, but don’t let it dictate your decision. Women typically have wider set sit bones, and therefore require slightly wider saddles. That being said, many women find mens saddles that work perfect for them, just as many men ride on womens saddles.

Comfortable Bike Saddles

Touring Saddles

Brooks B17

$120

The B17 design was first introduce in 1910, so it may seem odd to be highlighting it here. However, the fact that this saddle has changed very little over the past century speaks to “if it’s not broke, don’t fix it.” It was made for those long distance tours, with a wider shape and a slim, short nose making it ideal for a more upright position on the bike. Handmade in Birmingham, this leather saddle molds to your bottom over time, giving you the ultimate personalized support.

Selle Anatomica X Series

$150

Unlike the Brook saddle, the X series has no break in period, and is quite comfortable for most riders right from the start. The leather top is supported by a stiffer laminate layer glues to the underside, striking the balance between comfort and durability. The slot shape is meant to eliminate perineal pressure, sit bone pain, and saddle sores.

All-Rounder Saddles

Bontrager Montrose Elite Saddle

$130

Intended to be one of the more all-purpose saddles on the market, the Bontrager Montrose Saddle has been perfected year after year. It uses something called inForm BioDynamics to optimize your natural movement on the bike. This helps eliminate any restrictions on your legs or power output, whether racing or heading out for a group ride.

Fabric Scoop Pro Saddle

$170

It may not look like much, but this simple design is one of the more popular in recent years. Available in three shapes to suit your position on the bike, you can find a specific fit to your riding style. It brings together the perfect combination of comfort, performance, and unique construction. Plus, with the waterproof microfiber, the Fabric Scoop is durable and will stand up to years of use.

Racing Saddles

Selle San Marco Mantra

$214

Weighing in at just 122.1g, this saddle is for racers who are worried about adding any weight to their bike. The stiff design allows for an efficient transfer of power, and is made for those who ride in an aggressive position.

Ritchey WCS Carbon Streem

$144

This light (155g), low-profile design and narrow carbon fibre injected shell is built for the faster riders who prize long-term support. The comfort comes from the shock-absorbing ‘Vector Wing’ rather than padding, so the flat profile will suit hardened racers, but can seem harsh for casual riders.

It is extremely important to find a saddle that not only fits your contour, but is also comfortable. Your saddle is the most important comfort piece on the bike as it holds the majority of your weight, so don’t rush into it. Even with the right size saddle, flat-ness, firmness, and cut-out preference, you may have to adjust your saddle further through minor tilt adjustments.

Road Bike Tires and Rolling Resistance

December 18, 2017 by Sarah Lauzé

The ideal road bike tire would weigh nothing, have zero rolling resistance, never malfunction, and maybe even help you out near the top of a tough climb. Unfortunately, tire technology is not quite there yet. (Fingers crossed for future hover bikes).

What we can look at is what makes up a road bike tire. What makes a tire faster than others? What makes it more stable? And what role does air pressure play in all of this? Because, at the end of the day, it all comes down to where the rubber meets the road.

Rolling Resistance

Types of Tires

There are three types of tires available: clincher, tubular, and tubeless.

Clinchers are the most common, and you’re most likely familiar with how they work. They have a wire bead around the edge that both holds their shape and fits into a hook on the rim, with an entirely separate inner tube that you can repair or replace. Tubular tires have typically been the number one choice for racers, but are both tough and expensive to fix. They have an inner tube that is actually stitched inside, then the tire is glued to the rim. Tubeless tires have become increasingly popular for mountain bikers, but have crossed into road cycling as well. Like a car tire, the open rubber tie sits firmly on the wheel’s rim, with the air sitting in the cavity between the rim and inside of the tire. In addition, a liquid sealant is used inside the tire to preemptively plug any small cuts in the tire without losing pressure at all.

Rolling Resistance

Everyone knows about wind resistance as a force that works against cyclists. Headwinds can be brutal and unrelenting, and also make for a handy excuse when your times are a little slower. Although not nearly to the same effect, rolling resistance is the much less obvious factor at play here.

Rolling resistance is a principle of physics, and isn’t specific to cycling. It refers to the energy that is lost where a tire makes contact with the road. As a tire rolls along, the rubber and casing flex and unflex. The energy needed for the constant deformation is then absorbed and turned into heat. It’s much more obvious on your car, and is the reason your tires get warm as you drive.

There are a number of factors that contribute to rolling resistance:

Tire Width

For many years, narrow 23mm tires have been the standard width for road bike tires. Racers would go even narrower to 21mm, with the general thought that the narrower the surface area, the less rolling resistance. However, this has proved to be untrue. At the same pressure, narrow and wide tires will have the same contact area. Narrow tires will flatten onto a narrower but longer section of the tire where it contacts the road, whereas wider tires will flatten over its width. The narrower tire loses more of its shape, and so does not roll as well. Wider tires have less deformation from its round shape, and therefore roll faster.

Tread Pattern

Any tread actually increases rolling resistance as the shapes or patterns can squirm as they come in contact with the road. Therefore, a smooth, slick surface is the best option, but most companies seem to want some kind of tread on their tires, if only for marketing purposes.

Casing 

Tire casings are specified in TPI (threads per inch), and have multiple layers of threads holding things together. The higher the TPI, the thinner the threads, as they can be more crowded together. In most cases, a higher TPI delivers less rolling resistance and therefore a faster tire.

Tube Choice

Clincher tires will be slightly slower than their tubeless counterparts as the inner tube and the casing create friction and raise the rolling resistance. However, the difference is not enough to make the switch for most riders. Your tube choice will have more of an impact, as running a thinner, lighter, and more flexible tube will create less rolling resistance.

Tire Pressure

Overinflated tires will deform less, and so technically will reduce the rolling resistance, but it also forces movement. Your momentum is forced up instead of forward as you bounce over every little bump and rock in the road. In recent tests the rolling resistance between a tire inflated to 85 psi as opposed to a tire inflated to 110psi is negligible. Additionally, safety is significantly reduced with high tire pressures. If you try to take a sharp turn at speed around a moderately slippery corner with overinflated tires, it’s not going to be pretty.

Your choice of tire depends on what your specific needs are and the type of riding you do. It is often a toss up between speed, longevity, puncture resistance, ease of use, and your budget. Click here to read more about how to choose the right tires for racing, or the the right tire by type.

Back Stretches for Cyclists

December 14, 2017 by Sarah Lauzé

Cycling is known for being a low impact sport, generally having a lower injury rate than running. The overall benefits for both your physical and mental well-being are as endless as the roads you can explore on your bike. However, that doesn’t mean cycling is without its own set of strains on the body. Back stretches for cyclists are really important to reduce the risk of pain and injury.

The position of the body on a bike can cause imbalanced work. The abdominal muscles are relaxed and relatively compressed, while the back muscles are stretched and tensed as you hold yourself up. This is especially true for road and track cyclists who are in a lower, more aerodynamic position.

To ensure that this sustained stretching and tension in the spinal muscles doesn’t lead to injury, it’s important the muscles are strong enough to bear the work load. A combination of strength, flexibility, stretches for cyclists and proper posture on and off the bike is necessary to both treat and prevent back pain.

Back Stretches for Cyclists

The Muscles Involved

Everything in the body is connected. When you’re looking to target a certain sore muscle, you also want to focus on the muscles surrounding it. Strain is often caused by a lack of support from weaker surrounding muscles.

The Lower BackBack Stretches for Cyclists

Lower back pain is common among cyclists, especially when combined with sitting at a computer for extended periods of time. The first thing to look into is bike fit, as it can arise from riding a bike that is too big for you. Next you’ll want to work on strengthening your core to counteract and support your lower back when you’re on the bike.

Finally, a lack of flexibility could be the cause of your lower back pain. If you have tightness in your hamstrings, hip flexors, or quads it can pull your pelvis out of alignment with each pedal stroke. The work that should be happening in your legs is then transferred to your lower back causing unnecessary strain.

The Upper Back

Upper back pain usually shows up as a burning in your shoulder blades and a tightness running into the neck. This can even lead to numbness travelling down your arm into your hands and fingers. This could be caused by an overly aggressive position on the bike, but most commonly it stems from your posture off the bike.

Sitting at a desk all day, particularly with poor posture, can cause tightness in the upper back, neck, and shoulders which can translate into pain on the bike. Stretching is the most effective way to ensure this doesn’t happen.

The Best Back Stretches for Cyclists

Hold each stretch for 25-30 seconds, repeating each one three times.

Hug Stretch

Back Stretches for Cyclists

(Either sitting or standing) Straighten your back and neck while looking straight ahead. Cross your arms in front of your chest and place each hand on the opposite shoulder. Try to reach the center of your back between your shoulder blades with each hand, so your chest is compressed and the upper part of your back is slightly curved outward. You should feel the stretch in your shoulder blades. Be sure to alternate your arms, one over the other, as your hold this stretch.

Cat Position

Back Stretches for Cyclists

Get down on all fours on your hands and knees (put a mat or cushion under your knees). Start with a straight back, then slowly lower your head and arch your back up towards the ceiling, like a cat. Try to to get the greatest amount of curvature as possible for you. This can be a hard stretch to feel your spinal muscles, but that doesn’t mean it’s not there.

Seated Upper Body Bend

Back Stretches for Cyclists

Start on the ground in a seated position, with your back straight, legs out, and hands resting beside you. Slowly slide both hands forward toward your feet, while bending your upper body as necessary. If you feel discomfort, just back the stretch up a little. If you need assistance holding the stretch, use a band to hook around the bottoms of your feet to anchor your arms.

*This is great for cyclists with poor flexibility in the glutes who spend a lot of time in a dropped position on the bike.

Downward Facing Dog

Back Stretches for Cyclists

Start on your hands and knees, aligning your wrists directly under your shoulders and your knees under your hips. Stretch your elbows and relax your upper back. Spread your fingers wide and distribute your weight evenly across your hands, pressing firmly onto your palms. Press your pelvis up and gently bein to straighten your legs. If you hamstrings are tight, step your feet wider apart. You should feel the stretch through the entire spinal column, opening the hips, and stretching the hamstrings.

Supine Upper Body Rotation

Back Stretches for Cyclists

Lie down on your back and place your hands on the back of your neck, looking upward. Bend your hips and knees to a 90 degree angle, as if you were sitting on a chair. Slowly rotate your legs to the side so the top of your back remains on the floor. Your legs should remain together as your lower them to the floor. Bring them back up to center before slowing lowering them down to the other side.

Sleep and Cycling: How much and why it matters

December 13, 2017 by Wade Shaddy

You may not think sleep and cycling have much to do with each other, but that could not be further from the truth. Not only is sleep how your body recovers and prepares for the next day’s ride, but cycling can actually help you sleep better at night. Not getting enough sleep is one of the most common mistakes cyclists make. Experienced cyclists know that sacrificing sleep defeats the purpose of training, that a body won’t recover sufficiently, or adapt to strenuous exercise without adequate sleep.

Sleep has become such a hot-button for professional cyclists, that cycling’s governing body, the International Cycling Union, decreed that a comfortable bed’s positive impact on sleep would grant competitive advantages to cyclists who had adequate sleeping accommodations.

Professor Peter Hespel of Belgium’s Louvain University checked in with a simple statement. “Sleep is key to athletic success.” he said. “In sport we use all manner of measures to relax such as massages, etc. But sleep is the most important of all. Only through sleep can the body recover from the stress and strain of the day. If a competitor can sleep every night under perfect conditions, ideal mattress, temperature, humidity, he or she is much more fit the next day than the rest of the field.”

Recovery Science

Felicia Stoler, RD, an exercise physiologist and registered dietitian in New Jersey, says that, “Sleep is the time when your body repairs itself,” she says. “If we don’t get enough sleep, we don’t perform well.” Training actually makes you slower while it’s sleep that makes you a faster cyclist.

A report from the American College of Sports Medicine revealed that sleep deprivation wasn’t good for cycling performance; the rate of perceived exertion during cycling was significantly higher and the time to exhaustion was less. In the study, cyclists managed an average of 20.6 minutes to exhaustion after a normal night’s sleep, but only 18.9 minutes when they were sleep deprived.

Dr. Allen Lim is a sports physiologist and cycling coach. His advise is as follows:

“Ditch the complicated formulas you’ve established for yourself and let sleep dictate your training schedule if you’re feeling tired or stayed up too late. It’s more beneficial to cut down on volume and intensity, and do your intervals when you’re feeling fresh and rested.”

How to Know You’re Not Rested

Signs that you don’t have enough sleep are fairly obvious and if you think about them, you’ll probably recognize them in our own routine:

  • Lethargic in attitude and body
  • Insomnia and or restlessness
  • Run down or depressed
  • More than average anxiety
  • Indecisive, irritable
  • Lack of concentration on simple tasks
  • Loss of appetite, weight loss
  • Getting sick, colds, flu etc.

How Much Sleep Do You Need?

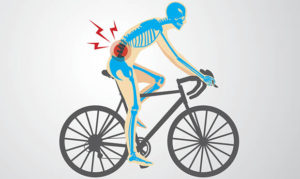
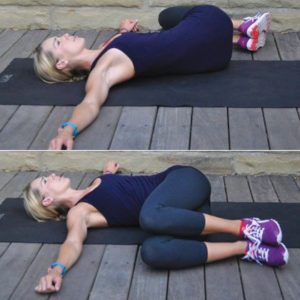
The minimum people need is about 7 to 9 hours of sleep a night, according to David Geier, MD, an orthopedic surgeon and sports
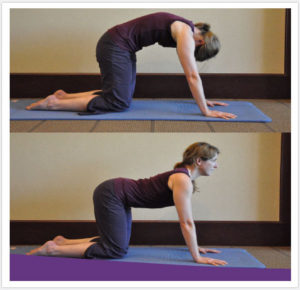
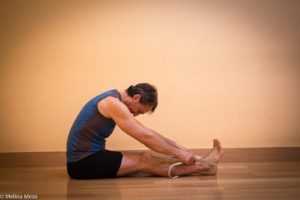
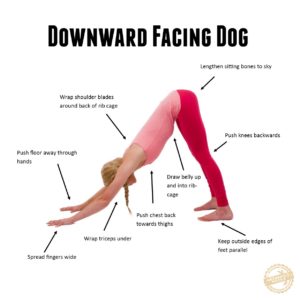
 medicine specialist. ” If you’re an athlete in training, you may need more. Just as athletes need more calories than most people when they’re in training, they need more sleep too,” Geier says. You’re pushing your body in practice, so you need more time to recover.
Rob Hayles is a three-time Olympic medalist and one of the most experienced and well respected riders in British cycling. Hayles is a perfect example of using adequate sleep to aid recovery. “Sleep is definitely the main thing in recovery,” he says. Hayles admits to often sleeping well over 12 hours a night. Getting enough sleep requires a basic element of time management which, as Hayles reports, “is the key to effective training and recovery”.

For many cyclists who lead busy lives, it’s important to think less about fitting training around work, and more about fitting life around recovery. If you have a busy life, do less training if you have to to get more sleep. Form a training plan that fits in with your life, rather than one that fits with dates on the calendar.

Dr. Stewart Armstrong is a cycling health adviser. He say’s that the vast majority of cyclists require 7-to-8 hours of sleep. Some can survive on less, some require more. “The thing that is though,” Armstrong says, “is that you need to be in bed for 8-to-9 hours, because falling asleep, and staying asleep requires extra time in the sack.”

Jim Thornton, president of the National Athletic Trainers Association agrees with Geier. “Athletes in training should sleep about an hour extra than average. You can go to sleep earlier, or take an afternoon nap,” Geir says.

Sleep Deprivation

If you are sleep deprived for a week, averaging less than 4-to-5 hours, sleeping in on a Saturday, 9-to-10 hours can go a long way to getting your baseline of 8-to-9 hours back on track. But to return to normal, you really need two good nights of sleep.” Armstrong adds. There are numerous studies that indicate that a lack of sleep negatively impacts athletic performance. According to the American Academy of Sleep Science   the lack of sleep increases levels of the stress hormone cortisol, and decreases the level of the recovery as well as the amount of growth hormone in your body.

Tips to Sleep

  • Get on a regular schedule. Arrive early at your ride or race destination. Get up and go to bed at the same time you always do.
  • Don’t do sleep drugs, unless prescribed by a doctor. Over the counter sleep medications disturb the quality of your sleep and can make you feel lethargic the next day.
  • Reduce alcohol and caffeine consumption — not likely for cyclists but advisable.
  • Employ natural relaxation techniques before bed to help you fall asleep. Deep breathing is one way to relax along with yoga.

Cycling calms anxiety, and anxiety is a symptom that you may not be sleeping enough in the first place. The relationship to cycling and anxiety is the positive effect that cycling has on serotonin, which occurs naturally with cycling, and promotes healthy sleep. So it’s a no-brainer. Get on your bike, keep riding and sleep better. See you in the morning.

Training With Power

December 10, 2017 by Aaron Robson

One of the biggest revolutions in cycling training has been the introduction of the power meter as a training tool. It has rapidly thrown cycling into the highly technical world of sports science, and the benefits can be enormous – Chris Froome’s win in the 2013 Tour de France was aided greatly by Team Sky’s extensive use of power meters in both their training and racing plans. So what is power training, and more importantly, can it benefit you?

Training With Power

What is Power?

Everyone has heard of power, but unless you have a particularly good memory of high school physics, you may not be familiar with what it means in a technical sense. Power is defined as the rate of work; how much ‘work’ is done in a certain interval of time. Work is defined as a force applied over a distance. So power is essentially a measure of how hard you can push on the pedals (the force) and for how long (time). The harder you can push, and the longer you can maintain a certain level of ‘push’, the faster you go! And going faster is what bike racing is all about.

Why Should I Use it?Training With Power

Now, you might be saying to yourself ‘OK, that’s nice. So what?’ Well, the ‘so what’ is that cyclists can use power to train and race much more effectively. Power is ultimately a measure of how hard you are working, and by using a power meter on your bike, you can more precisely monitor your effort. Other ways of monitoring effort do exist – rate of perceived exertion (a subjective assessment of how hard you feel you are working) and heart rate are the two most common methods, but neither comes close to the precision you get from a power meter.

This precision can be extremely beneficial to cyclists. By using a power meter on a climb, for example, you can ride the entire climb at precisely your optimal power output – never going too hard and pushing yourself into the ‘red zone’, but also not being too conservative and leaving too much in the tank at the end. You can also train more effectively, doing intervals at an exact percentage of your maximum output, or riding a tempo ride right at your lactate threshold to name a few possible applications.

How to Integrate Power into your Training

Hopefully you’re convinced that using a power meter can make you a better cyclist. The obvious question is how? First things first, you need a power meter. Debating the merits of the many options available on the market will be the subject of another article, but in short – invest in a good one. You might be tempted by the low cost of some models, but these are no where near as accurate as the better ones, and accuracy is the whole point of using a power meter. The cheapest worthwhile option I know of is the Stages Power meter, which retails for $700.

Training With PowerAfter you have your new power meter ready to go on your bike, the next step is to do some baseline tests to determine your power profile. Ideally, you will want to determine the maximum power you can produce for 5 seconds, 1 minute, 5 minutes and 30+ minutes (this last one is referred to a Functional Threshold Power). All-out 5 second effort is easy enough, and even a 1 minute maximum effort isn’t too daunting. The 5 minute and 30 minute efforts take a bit more planning to execute properly, but when you know all these numbers you will have a much better idea of your strengths and weaknesses as a rider. There are tables available online that provide approximate equivalent levels of power for each duration. If your values for 5 second and 1 minute power rate higher than your 5 minute and 30 min values, then you know you are relatively weaker aerobically, and can emphasize aerobic training.

Power meters also help you to gauge efforts better. If, for example, you know that your FTP is 300 Watts (watts are the standard unit of power), then you know that in a time trial that will take you about 45 minutes to complete, you shouldn’t be riding above 300 Watts at any time. Riding with the most even power output over the course of your effort will give you the best results.

It is impossible to cover every aspect of power training in a single article – there are entire books written about it. If you are an aspiring racer, or even just someone who loves to track progress, a power meter will be your best friend. Now that you are familiar with the basics, you can start your journey into training with power!

Top 5 Cycling Blogs To Follow

December 9, 2017 by Sarah Lauzé

It’s easy to get caught up in the day-to-day grind of life, which may be why many of us choose to get out on our bikes every chance we get. Cycling is a way of breaking free, simplifying life, and clearing our minds. Although many of us may not have the chance to drop everything and set out on a ride around the world, there’s adventure in every ride if you know where to look for it.

If you’re looking for a source of inspiration as a cyclist, or for life in general, look no further. These are some of the most inspiring cycling blogs out there, documenting incredible bike journeys, including the good, bad, and painful. Who knows, maybe you’ll be the next great adventure cyclist!

Cycling the 6 

“Like most decisions of great consequence my plan to cycle the length of six of the earth’s continents was made in a pub, beer in one hand, mini-atlas in the other.” – Stephen Fabes, Cycling the 6

Stephen Fabes is candid and honest about his six year, 860,203 km ride around the world. Working as a doctor in London for years, he decided to leave his family, friends, and job almost on a whim, which is relatable to most of us. We have these crazy ideas or dreams, but few of us follow through with them because we don’t think it’s possible. As Stephen cycled away from his home, he immediately wondered what the heck he was doing and headed straight to a pub just kilometers out of town. You’ll have to check out his blog to find out what happened next.

Push Bike Girl

Heike Pirngruber first set out from her front door in Southern Germany in 2013. Almost five years later she has made her way across countries and entire continents solo – just her and her bike.

She made her way across Europe and Asia to Japan. From there she hopped on a flight to Los Angeles, and is currently pedaling her way down through Central America. Her blog is full of beautiful photos of the people she meets and the cultures she experiences. Heike isn’t one to sugarcoat things, so as amazing as her experiences have been so far, she is also raw and honest about the tough times and loneliness that you experience as a solo cyclist out on the road.

Tasting Travels

Tasting Travels is a three-languaged blog about people, places, culture and nature. Annika and Roberto started out on a journey to cultivate empathy through bike travel in 2011, and have an impressive map that shows their route around the world. Their goal is to inspire people around the world to consider cycling as a means of travel, whether around the globe or around your home.

“So for those who dream of traveling the world by bicycle and cannot do it at the moment. I invite you to take your bicycle and discover your surroundings. We assure you, you will be impressed by what you can discover. Excitement is just around the corner.”

Family On Bikes

Just because you have kids doesn’t mean you can’t head out on an adventure of a lifetime (it may actually be a reason that you SHOULD).

The Vogel family of four cycled 17,300 km from Alaska to Argentina over the course of three years. They now run their blog and have a series of books to inspire families around the world to “grab life by the horns and enjoy the ride.”

While Out Riding

Cass Gilbert is a freelance cycling journalist, based out of the UK, who has bikepacked through some amazing adventures. First chronicling his journey through the Alaskan backcountry, he has since rode through Mongolia and the Republic of Georgia.

More than an adventure blog, Cass writes about his car-free existence, and about cycling as a way to declutter your life and clear your mind.

Cross Training For Cyclists

November 12, 2017 by Josh Friedman

With the weather turning cooler, spending less time on the bike might be appealing. There is more adverse weather to deal with, along with waning daylight. Riding indoors on a trainer or rollers is a good way to maintain cycling form despite being a bit on the boring side. Cross training for cyclists on the other hand can keep up some of your fitness while being fun, exciting, and simply different.

cross-training-for-cycling

There are additional benefits to cross training for cycling besides maintaining hard-fought fitness gains you made when the weather was nice and the days were long:

  • Workouts in cross training disciplines can be shorter, while making similar fitness impacts.
  • Cycling is a low impact sport; you need to do other work to boost bone density. Cycling alone can lead to bone mass loss. Many cross training activities have some impact, increasing bone density as your body responds to the training. (this is particularly important for woman)
  • Cross training can be a great mental break. After all of the hours you spend on the bike, sometimes a change is nice, especially if it is going back to an activity you love.
  • Hiding from the bad weather is not always a bad thing. Too many wet and cold rides can take away some love for cycling.

Cross Training for Cycling

There are lots of ways you can spend your time cross training. If you are excited about it and it will keep you fit and moving, go for it. Below are five activities that are common and will have a few of the benefits mentioned above.

Running

The benefits of running when it is cold and the days are short are easy, it takes less time to get a workout in and because you are going slower, there is less wind, thus it’s easier to stay warm. With the impact of each stride, you make your bones stronger. You may see less of the world on the bike, but you can see it in greater detail – it will give you a different perspective of your local training grounds.

Weight TrainingTips For Cross Training For Cycling

Weight training can give you great benefits on the bike by developing both muscular endurance through high repetitions and low weight exercises and neuromuscular explosiveness with high weight maximal exercises. It is very easy to stay warm when you are working out indoors, while benefiting your bone density greatly by putting strain on your skeleton. It might not be the most mentally uplifting activity, but staying focused on the benefits can get you through a winter’s worth of workouts and stronger on the bike.

Other Sports

Was there a sport that you enjoyed before cycling? Now is the time to do it. Lots of sports that are traditionally outdoor sports have some indoor version – soccer, rock climbing, basketball, etc. It can be an enjoyable mental break that will keep you fit and healthy through the cooler days of the year.

Tips For Cross Training For CyclingYoga

Core strength is quite trendy right now. Yoga is an activity that can boost core strength, along with all-around strength and flexibility. It can also be a time to get your mind focused and settle your thoughts unlike many other competitive disciplines.

Skating

The first few times you run after exclusively riding, you will be sore (but your lungs will work great). But there is an activity that does use roughly the same muscles and movement as cycling – skating. If you know how to skate, you can jump right in and show off your fitness immediately. If not, go learn and you will be skating well relatively quickly. There are even skating clubs that offer competition and the group environment that cycling offers during the fair weather. (And if you were wondering which type of skating was being referred to… well all three: skate skiing (traditional cross country skiing in skating form), ice skating, and roller skating which can be a great activity when it’s cold out but not cold enough for snow and ice.)

Do not let the word training fool you; cross training for cycling should be a fun and beneficial distraction through the fall and winter. Find and activity that suits you and enjoy yourself while keeping up your fitness.

How To Reduce Back Pain By Strengthening Your Core

November 10, 2017 by Josh Friedman


Before trying to find a remedy for back pain, it is necessary to know the reasons that back pain happens to cyclists. They body of a cyclist is one complete system; if one element of the body is not doing what it is supposed to, the entire body suffers. This is the root of most back pain in cyclists. Strengthening your core may be the solution to eliminating that weak link.

strengthening your core

Understanding Core Strength

Traditionally core muscles were defined as from the diaphragm to the pelvic floor. More recently, core muscles are defined muscles that insert or originate at the spine or pelvis. It is a broad definition that includes major arm and leg muscles. For the purpose of this article and cycling, strengthening your core will refer to muscles between the base of the skull and the abdominal floor. Those are the muscles that stabilize the body on the bike, resulting in a very smooth looking pedaling style. A silent upper body results in a very stable platform for the muscles that provide power on the bike to push against.

Making the core muscles function as a unit with proper motor control is the goal of strengthening the core; not developing brute strength or a tone beach body. You may see some physical changes, you may not, but you will feel better while riding.

Lower Crossed Syndrome

Understanding Lower Crossed Syndrome will help you understand one of the most common causes of back pain in cyclists. The image below illustrates improper muscle loading that results in pain and discomfort. The inhibited muscles, abdominals and gluteals, are never fully engaged in cycling, while the facilitated muscles, rectus femoris (quadraceps), iliopsoas and thoraco-lumbar extensors  are always engaged and often overworked. Constantly engaging those lower back muscles without proper support from a stable core often results in lower back pain.

strengthening your core 1

While pedaling, quadraceps pull the pelvis forward. To keep your body on the bike, your lower back resists that pull. It is an action that is not inherent to the design of your lower back muscles. The result is overworked lower back muscles that may cross into pain.

Stable Pelvis – Healthy Body

The seat of power on a bicycle is the pelvis. When the pelvis is properly aligned the rest of the body can pedal efficiently. When the pelvis is misaligned and unstable, it is a recipe for not only lower back problems but hamstring problems too. An unstable pelvis leads to rocking. With each rock, the pelvis engages lower back muscles and hamstrings in ways that should not be involved in pedaling, overworking and straining the muscles unnecessarily.

A stable pelvis gives a platform for the quads to push against in the most powerful part of the pedal stroke, easing strain on the lower back. Strengthening your core will lead to a stable pelvis, a lower likelihood of injury, and more efficient riding.

Basics of Core Exercise

Strengthening your core should be based on the principle of proximal stability and distal mobility, according to Craig Abrams who is a Doctor of Chiropractics with a special interest in cyclists. Proximal stability is keeping the core still, providing a platform to work against, while distal mobility is moving the extremities against the stable core. This will replicate how your body should work when it is in action and will build towards proper motor control.

Stretch the Facilitated & Strengthen the Inhibited

Be mindful of which muscle groups need what kind of work. The facilitated (overworked) muscles, like quadraceps and lower back, do not need strengthening but stretching. They are always engaged in cycling. The inhibited muscles benefit most from strengthening your core – the abdominals and gluteals. Keeping this in mind will restore balance through your core.

Exercises

Dr. Abrams provided a few exercises to get you started on the road to strengthening your core. As you advance, you should seek out more advanced and strenuous movements.

Foam Roller Exercises

This should be the first thing you do after you get off the bike every ride. It’s one of the most effective ways to
develop your daily postural work.

#1

  • Start by lying with your spine running down the length of the foam roller with your knees bent so your feet are flat on the ground.
  • Once stable, begin by placing your hands together above your chest with your arms straight up into the air.
  • Now press your finger tips towards the ceiling.
  • Movement should come from your shoulders. You will be arching your shoulders forward toward the ceiling.
  • Repeat ten times.
strengthening your core
Start like this and then place your hands together above your chest, straighten your arms, and reach straight up toward the sky with the movement coming from your shoulders.

#2

  • While keeping your hands above your chest, carefully lift one foot at time off the ground, as if you’re are marching in place.
  • The goal is to lift each foot ten times.

#3

  • Finally, place both arms on the ground next to you and raise both legs as if you are sitting in a chair.
  • If you find it exceptionally hard to stay balanced on the roller, slide it down so it’s more under your lower back.
  • While keeping one leg still, reach the other leg forward towards the opposite wall.
  • Do ten reps on each leg.

Remember to maintain a comfortable natural breathing rhythm throughout the entire routine.

Movement and Static Exercises for the Core

Side Bridge on Knees

  • Start by lying on your side with your hips in-line with your legs and torso while having your knees bent at 90 degrees or a bit less. You should have your elbow under shoulder with your wight positioned on your forearm and the side of your knee. Your hips will be off the ground in the air. One note is that you will want something soft under your fore-arm and knee such as a soft carpet or yoga mat.
  • Next make sure that you feel like the shoulder is in a strong position. The ideal position is a place that you could hold for about one minute. Make sure you stick your chest out.
  • While maintaining the above position, drive your hips forward. The common mistake is to raise the hips up. To avoid this, think forward/backwards with your hips, NOT up/down.
  • Do this ten times and repeat on the opposite side and increase the number as you progress.
  • This works the muscles on the side of your abdomen and hips so it is about movement and not a static hold.
strengthening your core
Make sure you keep you body in line then move your hips forward and back. In this case, toward the camera, away from the wall.

Side Plank

  • Once you are able to perform twenty reps of the side bridge on your knees with ease, move on to the side plank.
  • The set up is the same except that the legs are straight and your weight is placed on the side of your foot/ankle.
  • Make sure you keep you back, hips, and legs all in a straight line while you hold the pose.
  • Once you are up, engage your glutes, abs, quads, and hold for ten seconds.
  • This should be difficult. Repeat on both sides.
strengthening your core
Remember to keep everything in line.

Bear

  • Start on all fours in a quadruped position.
  • If you can, place your palms FLAT on the ground and have your knees directly below your hips and hands directly below your shoulders. If you need to place a yoga mat or towel under the knees, do that.
  • Perform 2-3 light cat/cows to relax your back.

cat cow pose

  • Once you are ready, set your back. The ideal position is an exaggerated lumbar lordosis (cow pose). The easiest way to do this is by dropping your belly to the ground and pressing your chin back as if you are trying to make a double chin. Do not look forward, aim your head/eyes at a spot about 2 feet in front of you.
  • Now tuck your toes and lift your knees about one inch off the ground. Take two deep breaths.
  • Drop your knees back to the ground.
  • Repeat two to three times.
  • To add an additional challenge work on lifting each hand off the ground just like you did with the legs in the previous exercise.

Remember to try to keep the body stable (limit the twisting/bending).

Plank / Plank roll

  • Start with a side plank position with your top foot in front of the bottom. Make sure you activate the side of your body by pulling your shoulder towards your feet.
  • Hold this for ten seconds.
  • Now keeping shoulders and hips “locked” together, roll to a front plank. (Try to avoid any twisting during this phase.)
  • Once in the front plank, hold for five seconds.
  • Again keeping shoulders and hips “locked”, roll to the opposite side. The key here is to really pull that shoulder underneath your body to help lock the plank as you roll.
plank roll
Start with B, go to A, and then C. Remember to keep everything inline.

Goblet Squat

  • Hold either a kettle bell by the horns or a dumbbell by one end (or whatever else you have that is heavy.)
  • Start in an upright posture with feet just wider than shoulder width apart with the elbows in tight.
  • Your target is to have your elbows touch the inside of your knees as you squat down.
  • Keep your back straight in the same position as you squat down. Don’t allow it to bend forward.
  • Once “in the hole” rock side to side. Then come back to the center and stand.
strengthening your core
Keep your back straight as you squat down.

Hip Hinge with Dowel

  • Start by standing and holding a long dowel against the back of your head, mid-back, and your sacrum.
  • Keep your knees soft and drive your hips backward as you back tilts forward.
  • Maintain the three points of contact at all times.
  • If you need, reset to maintain a neutral spine (ie. three points of contact)
  • Do this ten times.

If you are unable to do this while standing. You can try while kneeling. It is the exact same hip/back movement but we remove the added strain of the legs.

hip hinge with dowel

Bike Fit

While it is not part of strengthening your core, a proper bike fit is key to allowing your muscles to function in their appropriate ranges. A bike fit from a professional involves more than just adjusting your saddle to the correct height. The bike fitter will test your range of motion off of the bike. That range will then transfer over to the bike to ensure that your muscles will not extend past their limits, ensuring that you will not overwork or strain muscles.

Bike fits are something that changes with time. Your fitness improves, strengthening your core changes how you ride, maybe you had an injury. Lots of factors affect your fit on the bike; be aware of any changes and get a new fit.

The Importance of Strengthening Your Core

Strengthening your core is the single most important movement you can do off the bike for injury prevention. The great news is that it is usually easy and quick. If you have back problems or want to prevent them, you should be strengthening your core.

« Previous Page
Next Page »
  • Facebook
  • Tumblr
  • Twitter

Latest Articles

JOIN Cycling: A New Training Platform for Cyclists

May 27, 2024 By Eric Lister

cold exposure

The Benefits of Cold Exposure for Cycling & Life

June 13, 2023 By Eric Lister

hill climb

The Ultimate Hill Climb Training Guide

May 31, 2023 By Eric Lister

shoulder pain cycling

How to Treat & Avoid Shoulder Pain While Cycling

April 12, 2023 By Eric Lister

psoas stretch

The Importance of the Psoas Stretch for Cyclists

April 6, 2023 By Eric Lister

cycling neck pain

The Ultimate Guide to Cycling Neck Pain: Causes and Solutions

March 21, 2023 By Eric Lister

Useful Info

  • Contact
  • Finally, A Global Cycling Club That Is Focused On Community And Love Of Cycling!
  • Privacy Policy
  • Share Your Story!
  • Terms And Conditions Of Use
  • Welcome to I Love Bicycling
  • What Happened When I Stretched Every Day For a Month

Recent Posts

  • JOIN Cycling: A New Training Platform for Cyclists
  • How to Hang Bikes in Your Garage: 4 Inexpensive Options
  • Gravel Bike Vs. Road Bike: Which One Is Better For You?
  • The 6 Types of Mountain Bikes & How to Choose the Best One for You
  • What Is a Touring Bike Good For? 5 Benefits We Know You’ll Love

Search I Love Bicycling

Connect with Us

  • Facebook
  • RSS
  • Tumblr
  • Twitter

Copyright © 2026 · Magazine Pro Theme on Genesis Framework · WordPress · Log in