• Training
    • Injury Prevention
    • Training Tips
  • How To
    • Bike Fit
    • Gear
  • Nutrition
    • Nutrition Tips
    • Weight Loss
  • Repair
  • Reviews
  • Stories
    • Funny Stories
    • Jokes
    • Quotes
    • Videos
    • Funny Videos

I Love Bicycling

I Love Bicycling is a website that is geared towards cycling for beginners with road cycling tips, training articles, nutrition tips, weight loss, how to’s and bike repair articles.

Training

  • Injury Prevention
  • Training Tips
  • Training Camps

Hip Stretches for Cyclists: Relieve Tight Hip Flexors

October 20, 2019 by Sarah Lauzé

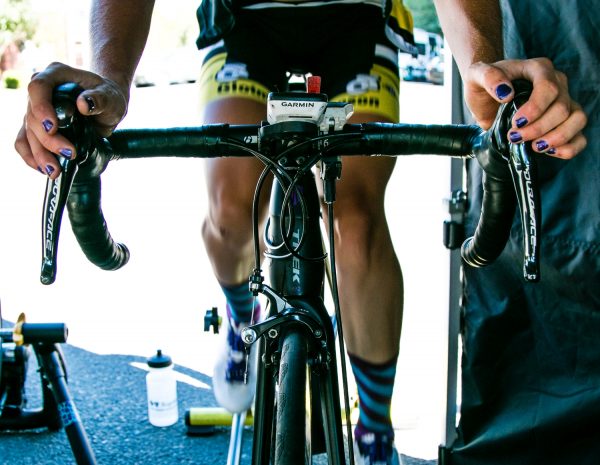
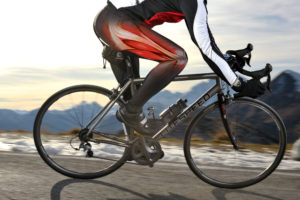
Tight hips and cycling unfortunately go hand in hand. Why? Well, think about your position on the bike, with your upper body tucked forward and your legs hammering down. Your hips are contracting, but the hip flexors are never full extended. Over time, this flexed position can shorten the hip muscles, and cause all sorts of issues down the road. Hip stretches for cyclists can help prevent this shortening of the muscle, as well as counteract how much of our days we spend sitting.

Hip Stretches for Cyclists

What are the hip flexors?

hip stretches for cyclists

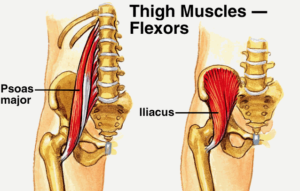
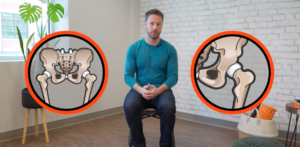
The hip flexors are a group of muscles made up of the iliacus, psoas major, and the rectus femoris. These muscles work together to produce the hip flexation, moving the knee up towards the abdomen and down again.

The iliacus starts at the top of the pelvis and runs down to the top of the thigh bone (femur). The psoas major originates on the lumbar vertebrae and attaches to the femur. The rectus femoris is actually one of four muscles that make up the quadriceps, playing a part in both knee extension and hip flexion.

What causes tight hip flexors?

As mentioned previously, the action of cycling involves repeated hip flexion with the hip never full extending, which can cause tightness or even a shortening of the muscle over time. Prolonged periods of time sitting also contribute to tight hip flexors, such as time spent at a desk or driving.

Not only can tight hip flexors cause discomfort in your everyday life, they can also reduce your cycling performance. It can lead to lower back pain and a weakening of the glutes.

Best Hip Stretches for Cyclists

The best plan of attack to both treat and prevent tight hip flexors is regular stretching. Here are some of the best hip stretches for cyclists that you should include as part of your stretching routine. Try holding them for at least 30 seconds to start, and working up in time from there.

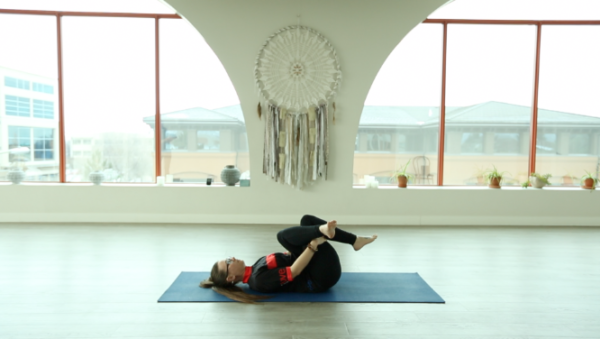
Beginner: Figure Four Stretch

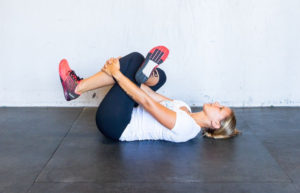
Start on your back with your knees bent and your thighs parallel and hip-distance apart. Cross you left ankle over your right thigh, ensuring the ankle clears the thigh. Actively flex your front foot by pulling your toes back. Slowly pull your right knee in toward your chest, threading your left arm through the triangle between your legs. Try avoid creating tension in the neck and shoulders as you open the hips and glutes, so try keep a hold of the front of your shin without rounding your upper back or lifting your shoulders off the ground. If you can’t, then keep your hands clasped around your hamstring instead, or use a strap.

Advanced: Pigeon

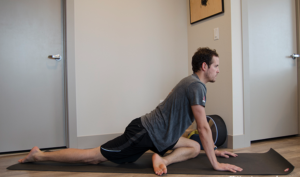
Once you are comfortable with the Figure Four Pose, then you can give pigeon a try. Start on your hands and knees, bringing your right knee forward. Place your ankle somewhere in front of your left hip. The more your lower leg is parallel with the front of the mat, the more intense the hip opener. Slide your left leg back, straighten the knee and point the toes. Make sure your leg is behind your body and not drawing outwards and your heel is pointing up to the ceiling. Slowly lower yourself down and use some support under your right buttock if needed, to keep your hips level.

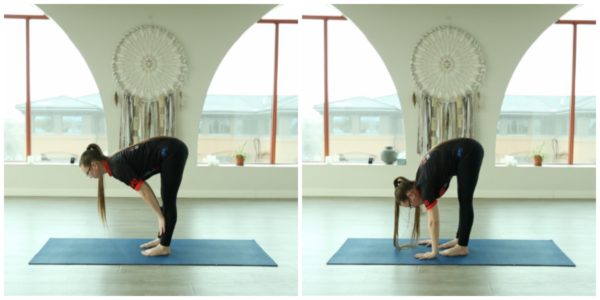
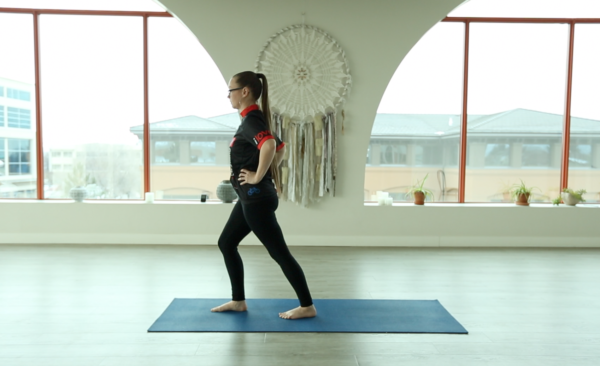
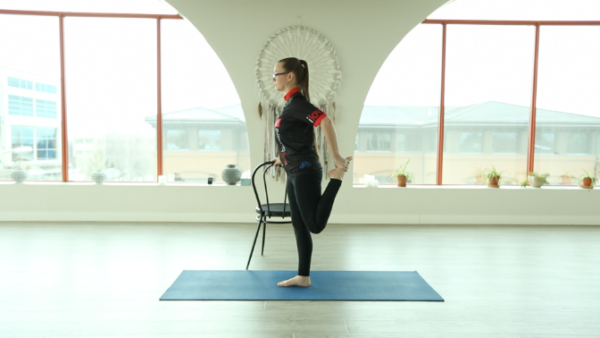
Kneeling Hip Flexor Stretch

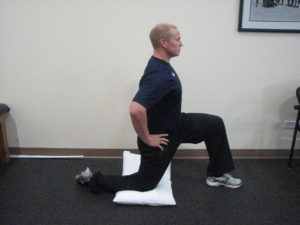
Kneel on a mat, putting a cushion or blanket under your right knee. Bring your left knee up so the bottom of your foot is on the floor. Extend your right leg out behind you so the top of your foot is on the floor. Shift your weight forward until you feel a stretch in your hip.

Hip Rehab Program for Cyclists

As cyclists, we know how hard it is to stick to a stretching routine. We all want to spend more time on our bike, but maintaining a healthy range of motion and flexibility will, in the long run, keep you on the bike without injury. That’s why we’ve partnered with Dynamic Cyclist to bring you a stretching and strength program, that is easy to follow, and is geared towards cyclists. If you are suffering from hip pain or discomfort on or off the bike try out their 6 Week Hip Function & Rehab Program and experience the results for yourself. They’re offering our readers a free 7 day trial, click here to get started.

Get Your Bike Ready For Winter

October 3, 2019 by Adam Farabaugh

With the days getting shorter and the temperature dropping, winter is fast approaching. Riding in the winter not only requires a little bit of extra prep in the clothing department, but also for your bike to keep running smooth and minimize breakdowns.

Having a mechanical issue in the warmer months of the year can be inconvenient, but during the winter months it can spell disaster. Avoiding situations before they arise is the best solution, but mechanicals do happen, so being prepared to fix them quickly will ensure you’re not in a bad situation for long. Other measures for the bike can also be taken to keep you warmer as well as safer with the waning light.

Getting Your Bike Winter Ready

Winter Maintenance – Fix it Before it Breaks!

The biggest reason things break on a bike are due to over wear. Newer, well-functioning parts are very rarely going to fail unless due to a crash or some other catastrophic event. Cold temperatures, snow, ice, and grit can quickly deteriorate parts, but starting winter with a few fresh additions will help ensure that they last until spring and beyond.

Chain

With the possibility of snow as well as water spraying up and freezing in your chain along with added road grit, the chain takes a lot more stress in winter months. Start the season with a new one to minimize the risk of it breaking.

Brake Pads

In a lot of areas winter brings with it wet roads which wear down your brake pads much more quickly. This combined with the possibility of roads being slippery due to snow as well as loose sand, cinders, and grit means that you have to brake harder to slow your speed to safely navigate corners, thus further wearing down your brake pads. Start winter with a set that is dedicated to moist conditions.

Cables/Housing

With the grit of salt, cinders, sand, and who knows what else in winter, anything that moves is going to start to experience more drag and friction. Derailleur and brake cables in particular are going to take a lot of abuse and will snap if not properly looked after. Don’t only get new cables on your bike before winter starts, but also new housing if they look worn.

Tires

The dirt and grit on the roads is the biggest factor in what can cause breakdowns. Flats will be much more frequent with this unless you get a more durable tire as well as bigger. A good tire is going to be the biggest deterrent to flats along with keeping enough air in your tires to help prevent pinch flats. Two potential additions to new tires to further help prevent flats are tubeless tires with sealant and thorn proof tubes which are tubes with thicker rubber.

Winter Additions For You Bike

During the summer months the bike is generally stripped down to be the lightest and fastest possible. During the winter, however, it’s highly unnecessary as well as much less functional. Having a few add-ons to the bike will keep you more comfortable, safer, as well as get you out of a situation you would otherwise be stuck on the side of the road with.

Fenders

Even on warmer days as the snow melts, if that’s a thing in your area, the roads are probably still going to be wet. Having fenders will not only keep you dry but will also keep your bike cleaner. In many areas around the country you not only need fenders on group rides, but also a “buddy flap” which is essentially a mud flap that hangs off your rear fender preventing wheel spray into the rider behind you.

Lights

With the shorter amount of daylight, having lights permanently mounted on your bike for when it does in fact get dark or even if it’s just starting to, is more than a good idea and could potentially be a lifesaving decision. In winter in a lot of areas, drivers aren’t always looking for cyclists so even if it’s just starting to get dark, it’s a good idea to turn them on.

Chain Tool

Even with a new chain, they can still break, particularly if you get snow packed into your cassette. Many multi-tools come with a chain-tool that can be used to take out the broken link and shorten the chain to make it home.

Pump

Another valuable addition to your winter setup is a pump instead of CO2 cartridges. With CO2 you only get one try with each and ifit doesn’t work, that’s it. During winter especially, the valve can become frozen while open, letting out all the air you just put into the tire.

Extra Tube

With all the grit on the roads, flatting is an increased possibility and thus having one extra tube might not be enough. Bringing a second or third one can give you piece of mind to keep riding longer on your original route instead of just looking to make it home.

Insulated Bottles

Although separate from your bike, having insulated water bottles will keep you warmer on the road by keeping your liquids from freezing solid as quickly. Put warm water in them when you start and make sure you close the top to push any liquid out that can get trapped in the opening to keep it from freezing shut.

Riding in winter does require more dedication and planning, but if you take the necessary steps to make sure you’re prepared along with your bike, it will keep it fun and enjoyable like every ride should be. Stay ahead of the curve on winter and your rides will stay pleasant and enjoyable all the way until spring.

Ride All Year Round (Yes, even in the rain)

September 25, 2019 by Alison Jackson

The group ride starts at 8:00am but when you open your eyes in the morning it’s dark, cold and raining outside.  The snooze button is a few feet from your head but that’s how far away you were from first place at last season’s key race.  That’s why you pull yourself out of bed, make your coffee extra hot and get out in the rain to ride.  Riding in the rain doesn’t have to be miserable, some of the best cycling is during the winter on the West Coast, also known as the Wet Coast for all the rain, and you don’t want to miss any training days this year.  Here are a few tips for making riding in the rain a little more ‘fun’ so that you can ride all year round.

Safety First

The most important thing is to check your brakes.  Rain will exaggerate the negative wear of brake pads, meaning if the pads are worn down and too far away from the rim of the tires, the braking reaction will be slower and less powerful.

Stopping control should not be compromised due to poor bike maintenance.

If you are going to be riding in the rain often you will need to replace your brake pads more often.  Make sure that as your brake pads wear down you use your micro adjust on your cable to bring the pads in closer to the rim for optimal stopping action.  Your rear brake pads should wear faster than the front so keep an eye on what is behind.  Another thing to check is that there is an equal distance between right and left brake pad for simultaneous contact on the rim while braking.

Front and Rear Fenders

A lot of people when they start riding use only a rear fender for the rain (and to keep their friends riding behind them), but totally miss out on the benefits of a front fender.  A rear fender is obvious to keep your back from getting the rooster tail spray and also helps the rain and mud the group that you’re pulling behind you (remember you’re training so you want to be in the front).  However, what works for you might not work for the rider behind you.  How long should your rear fender be?

Your rear fender should be as close to the ground as possible, try 4 inches from the pavement.

When buying fenders make sure they will fit your tire size.  A skinny road tire fender will not suit a wider cyclocross or recreation road bike tire.  Buy your fenders as long as possible, even then you might have to do your own modification to be suitable for your next rainy day group ride.  Sometimes you can buy fender compatible extenders that you easily attach to reach the 4 inch rule.  Other times, you can take an old water bottle, cut it in half, punch out two holes and zap strap it to the end of your fender.  You can make this attachment as wide and sweeping as you want either to make more friends or add more resistance to your ride.

The same principles apply to your front fender.  The front fender does miracles for delaying the wet penetration of road spray into your booties. The day after I got a front fender I came home after my rainy day ride and was surprised that I could actually feel my feet touch the floor when I took them out of my shoes!

Protect Your Head, Hands and Feet

You lose the most heat through your head so a rain hat with a brim not only keeps the water off your glasses, but also traps in some heat – unless it is made out of cotton, which soaks up the rain and stays cool.  Choose a synthetic, quick-dry hat or better yet, a brimmed fleece cycling beanie that fits under your helmet and cuddles your ears to protect them from the cut of the wind.

The point to keeping your hands and feet warm is solely purposed for your riding comfort and greatly increases your happiness factor.  If your hands or feet go numb it doesn’t matter how many times you stop for coffee, you will hate riding in the rain.  Choose wool socks, maybe even two pairs!  Even if they get wet they will stay warm.  Buy a good pair of shoe covers, wind-proof is NOT rain-proof.  A silicone or rubber pair will protect against the rain but have no additional thermal properties.  A pair that is fleece lined and wind-proof will delay the wetness but can have enough of a barrier effect for your wool socks to maintain a warm enough temperature (and, if you’ve made it this far your front fender will help too!).

Wind-proof is NOT rainproof.

Use the double glove technique: a thin inner wool layer with a bulky winter snow glove on top. The lobster claw gloves came from the idea to have multiple fingers together in order to share body heat, but they don’t work for everyone because they feel different when shifting and braking.  The outer glove layer needs to be a water-proof layer while the inner glove, as the insulated layer, than can be thicker or thinner depending on what weather you are expecting.

Layer-Up!

Your base layer should not be a base layer cycling shirt but a thick layer of embrocation cream.  This stuff is incredibly popular for Belgian cyclocross races and during the wet Spring Classics.  At the moment of application the lotion doesn’t seem to do anything but once rain or wind reach the cream it gives off a delightful glow of warmth on your skin.  If on a rainy day ride you get stopped by a train crossing, the emobrocation layer keeps you from shivering, instead you wait at the railway crossing feeling tingly and warm!  Just remember to put your chamois cream on first, then embrocation, and wash your hands after so you don’t burn your eyes from touching your face.

Apply chamois cream BEFORE applying embrocation lotion.

The next layer is a merino long-sleeve undershirt, short-sleeved jersey and water repellent rain jacket.  If you get too warm on the ride and take off the rain jacket the merino wool can get wet while staying warm.  Finish layering with a jersey and a waterproof-breathable jacket and get out riding in the rain!

Best Waterproof Cycling Pants

September 24, 2019 by Sarah Lauzé

Sometimes when it rains, it pours. There’s nothing worse than getting caught in the rain on your ride or your morning commute to work, and arriving with sopping wet clothes. Regular wind breaking pants may hold up in a light shower, but when it really starts coming down you need a little something more. First of all, keeping your torso warm and dry with a waterproof cycling jacket or rain cape is your first line of defence, but your legs are also important. Waterproof cycling pants will keep all the water running off your jacket from soaking into the tops of your legs.

Features to look for

Material / Waterproofing – The word “waterproof” is thrown around a lot, but the truly waterproof gear will most likely come with a higher price tag. The top of the line will be products made from Gore-Tex, but other materials such as polyester or nylon can also be used with a waterproofing top layer.

Comfort – It should be said right now that waterproof pants are never going to look cool, so you might as well focus on comfort and functionality right off the bat. They are not fitted like regular cycling pants, as you need to be able to pull them overtop of whatever you’r wearing at the time. They will most likely have an elastic waist, with wide enough legs that you can pull them over your shoes, but with some sort of system to clip in the right pant leg so it doesn’t get caught in your gears.

The Best Waterproof Cycling Pants

Showers Pass Storm Pant 

Price: $52 

The Showers Pass Storm Pant is waterproof and rugged, made with a 3-layer waterproof breathable Artex material. Ankle zippers help these rain pants slide on and off over shoes easily. They also include a mesh stuff sack for pants storage during bike commute hours. This style runs small, so size up if you are layering over other clothes.

Helly Hansen Voss Rain Pant

Price: $26 – $64

With the lowest price point, these pants are super light and flexible, but the cost of their waterproofing is a lack of breathability. So, these are a great option for the commuter who needs something to throw on overtop of their work pants, but for the more avid cyclist they leave something to be desired.


Pearl iZUMi Select Barrier Wxb Pant

Price: $86 – $130

This waterproof and breathable full-length pant is engineered to provide optimal freedom of movement on the bike, while keeping you warm and dry. What makes them unique is their matte finish and unique feel. None of that shiny look that comes with most waterproof clothing, and they are noiseless when you walk around.

Craft Men’s X-Over Waterproof Bike Pants

Price: $127

With the higher price point comes a very bike-specific design. These pants are probably overkill for the commuter, but for cyclists who train outside no matter the weather, they are worth it. They are highly functional, combining elastic fabrics with advanced body mapping and ergonomic design ensuring body-temperature management, body control, aerodynamics, and a comfortable riding position fit.

GORE BIKE WEAR Element -Tex Active Pants

Price: $106- $255

Gore-Tex technology is proven to be top of the line when it comes to being waterproof, windproof, and breathable. The Element Series was specially developed for the recreational cyclist to account for unaccountable weather on and off the road. The pants combines high versatility, contemporary design geared to road cycling or mountain biking, and a close and comfortable fit.


How To Use Strava for Cycling

September 16, 2019 by Sarah Lauzé

If you’re new to the cycling world, then you may not have heard of Strava. The website and mobile app is based around using satellite navigation to track an athlete’s activity. Known as the social network for runners and cyclists, it is a great way to stay motivated, track your improvement, and get connected with the athletic community.

Like a lot of things with cycling, getting started can be intimidating. The app itself has a ton of features that many users don’t know about, or use to their fullest advantage, so here’s a breakdown for you.

Why you should use StravaHow To Use Strava for Cycling

  1. Everyone is doing it – Okay, so maybe peer pressure isn’t the best reason to use Strava, but it’s true. Most cyclists are using Strava, so don’t miss out on the party. You can keep tabs on your friends (and competition) as well as see where you stack up against the pros. It’s the perfect source of motivation with a side of humble pie.
  2. It’s free – There is a Premium version, but the free version includes some great features that are enough for a lot of cyclists. With zero commitment, you have nothing to lose.
  3. That community feeling – One of the most amazing things about cycling is the community that comes with it. Community is what helps you improve as a cyclist by learning from others and pushing yourself harder than you would by yourself. On Strava, you can create private groups for you and your crew. So, even if you’re not out riding together, you can stay in touch and even try to beat their time on a route. Through the comments, you can encourage each other and give kudos on a great ride.
  4. Track your progress – There’s nothing better than feeling stronger and faster than when you started. With Strava you can track your progress over time through a variety of features. If you want to get technical, there is a training calendar for comparing your milage month to month to your heart rate and power data. You can also simply look at your heart rate over a ride that will show up as a “suffer score.” This score is based on your heart rate throughout the ride in comparison to your max heart rate. Using heart rate zones, this is great indication to how hard you were working (only available with Premium).
  5. Motivation – Every month there are great challenges to join to motivate yourself to get out, no matter what the weather or how you’re feeling. You can compare yourself to the leaderboards, and even make it a goal to get on the board yourself.
  6. Safety – Strava isn’t just a great app for cyclists, but for their friends and family as well. If you’re heading out on a long ride, you can use the beacon to share your location with someone. They can then track your progress and know exactly where you are if anything were to happen.

How to speak Strava

Segment

Probably the most popular feature of Strava, a segment is a section of trail or road that users create and name. Other users can then “race” for the best time for that particular segment. Climb segments are rated from easiest to hardest as 4,3,2,1 or HC.

KOM / QOM

The “King of the Mountain” or “Queen of the Mountain” is the fastest rider on a particular segment. It doesn’t have to be a climb, but could also be a flat or a descent. The rider with the fastest time will remain the KOM or QOM until someone gets a faster time and dethrones them. As fun as it is to ride for these titles, just remember that it’s not worth risking injury.

AchievementHow To Use Strava for Cycling

Achievements are presented in the form of trophies, medals or KOMs/QOMs. When you upload your ride to Strava, it will be compared to other users. Tropies are for top ten placements on a segment, and medals are your best three times for a specific segment.

Flyby

The Flyby feature allows users to see if they crossed paths or road close to other Strava users. Depending on security settings, you may only be able to see athletes you follow. It can help you connect with cyclists riding similar distances in your area, and see where you stack up.

Suffer Score

Your “suffer score” is based on your heart rate throughout the ride in comparison to your max heart rate. Using heart rate zones, this is great indication to how hard you were working (only available with Premium).

Stravasshole

You know who they are. This refers to anyone who puts a segment goal or KOM/QOM before the fun and safety of those around them. Don’t get us wrong, Strava is fun to use and challenge yourself with, but it’s not the be all end all.

How to make the most of Strava

Try a new route

Using the heatmap feature, you can plot where you typically ride and how many times you’ve ridden it. Take a look at all the areas you’re not riding and start taking in some new scenery. You can also check out other user’s heatmaps in your area. Using the Route Builder, you can piece together a new route from some popular roads and segments mapped by cyclists in your area.

How To Use Strava for CyclingGet creative

With the ability to add photos, you can really document your ride and make it as personal and inspiring as you want. There is also the infamous “Strava Art” that is a ton of fun. There is a thin red line that shows your route, so think of yourself as the tip of the pencil and get drawing on the canvas of your city. Check out some of the best strava art here.

Join a community

As mentioned previously, joining a community of cyclists (whether physically or virtually) is one of the fastest ways to improve–and it’s also a lot more fun!

Adjust your privacy settings

When you’re uploading your routes anywhere online, you will want to adjust your privacy settings so other users can’t see exactly where you live. If you don’t, this could make you a target for bike theft. In your Strava privacy settings you can create a 1 mile radius privacy zone around your house so users can’t see exactly where you start and finish.

Track your commute

Keep your commuter miles separate from your regular rides to track your overall distance without affecting your other stats. When you’re heading to the office, you probably won’t be pushing for that KOM. The commute feature also helps build a database of where people are riding and even where more infrastructure may be needed.

Stay Visible: The Best Use of Bike Reflectors

August 27, 2019 by Sarah Lauzé

Riding at night can be a ton of fun, and it’s unavoidable if you commute on your bike early in the morning or later at night. Ensuring that drivers can see you in tough lighting conditions is the first step in staying safe on your rides. This includes bike lights, reflective gear, and making use of bike reflectors.

Bike Reflectors

Bike Reflectors as a Supplement to Lights

First things first, you’ll want to have a front-facing white light and a rear facing red light (one solid and one blinking is best). These are legally required in many places, and are a very good idea. Reflectors can be used to supplement bike lights, not replace them.

Fortunately, new LED lights are both affordable and long-lasting for those longer rides. Drivers have to be able to see you to have enough time to react, so better to have too many lights than not enough.
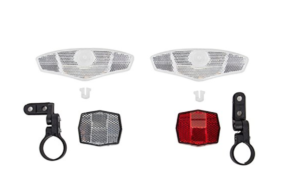
If you’re planning on heading down any low light or country roads, you’ll want to ensure your front light is bright enough to light your path. Be sure that all your lights are fully charged before heading out with more than enough battery life for the duration of your ride, and it’s a good idea to have an extra backup light as well.

The Best Use of Bike Reflectors

Bike reflectors work to bounce light back in the direction of it’s source, in this case a car’s headlights. Depending on your bike, it may already have some reflectors. Most new bikes come with a set of reflectors, but are rarely installed by the bike shop before sale. The most common places will be on the back of the pedals, the fork, handlebars, seat post, and rear rack if you have one.

Front and Back Reflectors

Front and back reflectors usually have a bracket that fits around the stem or handlebar. These will either snap shut, or have small screws that hold it in place. Back reflectors will go on the stem below the seat, but make sure it isn’t so high that the seat or your jacket will block it. Front reflectors will go right on the handlebars, or the front stem. If you don’t want to attach reflectors on your bike, strips of reflective tape can be used instead.

Pedal Strips

It’s been proven that drivers will notice the up and down movement of pedaling before the smoother movement of the whole bike, so it’s important to get something reflective on your pedals or feet. For pedals that don’t have built-in reflectors, you can get a reflector attachment that will bolt into your pedals. Or you can use strips of reflective tape on your pedals and wear reflective ankle bands to ensure you are visible.

Tire Spoke Reflectors

You may not want to have tire spoke reflectors on your favourite road bike or mountain bike, but they are a great idea. The rotation of the wheel will make sure you are seen from the sides as well as the front and rear. Basic plastic tire reflectors will snap on and off easily, so you could just put them on for those rides at dust or in the dark.

Cycling at night doesn’t have to be dangerous and can open up a whole new world of riding, not to mention the additional time available to actually do it. Be prepared and stay smart and you’ll reap the benefits of cycling at night be it commuting or getting some extra training in.

The Perfect Yoga Sequence for Cyclists

August 25, 2019 by Sarah Lauzé

After putting miles in on your bike, it’s important to give your body some relief. Not only does this mean adequate rest days to give yourself time to recover, but a specific yoga sequence for cyclists can help those muscles out a little. Luckily, yoga has your back (and hamstrings and hips).

The key to yoga is to give yourself the adequate amount of time to relax into each pose. Whether you’re a yogi or not, taking time to reach those deep stretch targets and work on your breathing can help you become a more efficient cyclist. Anything less than 30 seconds won’t make a significant difference in lengthening the muscle fibers and tissue, but holding too long too soon can put you at risk of injury.

The Benefits of Yoga for Cyclists

Core Strength

A strong core is vital for cycling power, posture, and injury prevention, especially in your lower back region. As a result of the bent over position on your bike, many cyclists have highly developed back muscles, with comparatively weaker abdominal muscles.

This muscular imbalance is normal, but can cause issues in the long run. If you’re tired at the end of a long ride and have poor core strength, you will be more likely to slump in the saddle. This will place undue pressure on your shoulders and wrists, as well as cause lower back pain once off your bike.

Flexibility & Posture

Much in line with your core strength, maintaining proper posture on your bike will prevent injury. The natural inclination is to round your back as you crane your head to look forward. Not only does this create drag, but it will eventually cause pain in your lower and upper back and neck.

Everything in your body is connected. So, to maintain proper bike posture you have to have adequate flexibility in your lower back, hips, glutes, and hamstrings. The flatter your back can be, the less issues you’ll come up against in your training. Yoga can help you not only build the strength and flexibility to hold your posture, but also help you become constantly aware of how your body is feeling.

Breathing

You may not put much thought into your breathing when you’re attacking a hill. The pressing thought for most is to simply keep breathing, even if it looks more like panting. However, when transformed from an automatic function, it can be great training tool.

Yoga can help you learn how to monitor your breathing, making the most of each breath. It can train your body to take slower and deeper breaths to maximize your oxygen intake.

Injury Prevention

Yoga is ideally injury prevention rather than treatment, but it can help on both ends of the spectrum. Regular stretchingand yoga will reduce your risk of suffering from the typical overuse injuries that plague cyclists. These include IT band syndrome, tight hamstrings, back pain, and knee problems.

Because your legs never fully extend on the bike, your muscles get little chance to fully lengthy. There is also an imbalance of strength, with so much power coming from certain muscles, while others remain underdeveloped. Ensuring you are working and stretching these muscles off the bike will go a long way to keep things balanced.

What a Yoga Sequence for Cyclists Should Look Like

Although we’d all rather be out on our bikes than cross training, given everything listed above taking 20 minutes our of your day to practice yoga can keep you feeling your best while you are out on the road. If you’re not ready to go to an hour long yoga class, whether it be the time or financial commitment, you can piece together your own routines to do at home. Here’s what you should know before getting started.

Same time, same place.

Starting around the same time every time is the best way to turn good intention into a habit. Starting you day off with yoga can be one of the best ways to wake up y our body and mind and get you ready for the day.

From the ground up.

A great rule is to start on your mat, with poses that have your body on the ground, and work your way up. This gives your body time to work up to the more active standing poses.

Be focused.

Remove all distractions if you can. Leave your cellphone in a different room and set aside the time to just stretch. Be patient with yourself in the beginning, as it may take time to quiet your mind.

Keep it simple.

Practicing at home is a wonderful thing, but you’ll want to keep it simple. Start out by following along with the video routine below, or just begin with just these 4 poses. If you want more routines like this one, check out Dynamic Cyclist for more stretching routines for cyclists.

A Guide to Mastering Pre-Race Nerves

August 22, 2019 by Morgan Cabot

Whether you’re training for a fondo, multisport or road racing, there is something undeniably motivating and thrilling about training for an event. There is added passion and dedication that comes with the pressure of registering for a race. However come race day, your body is going to do all sorts of crazy things despite your best efforts to control it. Welcome to the world of pre-race nerves!

As someone who is typically more anxious than most, I found my race jitters overwhelming at first, and struggled to control my emotions near the startline. It certainly gets better with time, but the nerves will never go away entirely. Fortunately, there are a few tips that can help you cope with pre-race anxiety:

Pre-Race Routine Photo by David Gillam

A Guide to Mastering Pre-Race Nerves

Pre-Race Nerve Symptoms

Everyone’s fight or flight response is a little different. In some cases, your pre-race anxiety might manifest itself as feeling shaky and super hyped, or you might yawn uncontrollably while feeling like you need to fall asleep. In many cases, it can be an alternating roller coaster.

Don’t Drink Too Much Coffee

If you start to feel the nerves, do not drink 4 times the amount of coffee you’re used to in an effort to feel “alert” or “awake”. You won’t be any more focused, and it will more than likely result in having more shakes and feeling more anxious. Trust that if one cup of coffee is good, 4 is not necessarily 4 times as good.

It’s Not Superstition: Embrace Routine and Pre-Race Traditions

If you chat with experienced racers and ask them about “pre-race routine”, everyone will know exactly what you’re talking about. In fact, the way they discuss their routine will almost sound like superstition. Whether it’s a need to always put your left shoe on before your right shoe or wanting to lay out all your kit perfectly the night before a race, pre-race routines can help calm the pre-race nerves.

Skipping your pre-race habits can leave you feeling frantic and unprepared, despite the fact that we all know shaved legs don’t actually make you any faster. If you forget your lucky socks, don’t panic!

Why Do Routines Calm Pre-Race Nerves

At a very high level, these rituals are all something that is within your control, and help you feel calm in a stressful situation. Yes, you’re fully aware that your lucky socks aren’t really lucky, but being able to choose to wear them on race day helps you feel more in control and prepared for the task ahead. No, you didn’t suddenly become superstitious overnight! Embrace the little tasks that help calm your pre-race nerves, and make sure you plan time (or book that manicure and pack those socks) to accommodate them around big events.

Your Body is Ready

Porta Jon Line Photo by David Gillam

The number one reaction your body is going to have is the need to go to the bathroom – a lot more than you think is normal. You may be a little horrified, but trying to control this will be counterproductive. Porta potties at professional races aren’t any nicer than grassroots races. The urge may lessen slightly over time, but it will never go away. Try to perceive this as a sign that your body is ready, not that there is something wrong with you! When you line up for the bathroom for the 17th time, turn: “Wow something is wrong with my stomach,” into: “My body is telling me it’s hyped and ready to race.”

Stay Focused on What is in Your Control

You’ve made it to the start line, now is not the time to second guess your training. You’ve done the best you can to prepare yourself for your event, and staring in awe at the next racer’s bulging arm veins wondering if they even have any body fat is doing nothing to help. There is absolutely nothing you can do in this moment to modify your fitness, body composition or any other aspect of your physical preparedness. Divert your energy away from elements that are out of your control, and focus on what you can.

  • Is your number pinned properly?
  • Do you need to go to the bathroom (see point above)?
  • Do you need to apply sunscreen?
  • Did you eat all the pre-race food you had planned?

There are little things you can do to ensure your race goes as smoothly. Keep yourself focused on these elements and do not let yourself get distracted by second guessing your fitness or comparing yourself to others.

Don’t Worry About Results

Your peers’ ability is not something you can control. You should have a plan for your race. Your plan should not be “finish top 3!” but rather race tactics you can execute. A few examples of race plans for your annual Grand Fondo:

  • Attack your favourite climb
  • Drink one water bottle by the 50km mark
  • Smile and wave at every camera

Having mid-race goals is a good way to focus on the process instead of your result. Execute your race plan to the best of your abilities. For both racing and fondos, you should have created a race plan ahead of the race, and on the day of the event the only thing you can do is have full trust in your plan and/or your team, and commit 100% to them.

Warm Up

Warm up – photo by David Gillam

Warming up will help prepare your body for the effort ahead. There is also a calming element to it: Instead of fidgeting and pacing back and forth, go for a short spin or hop on the trainer. Listen to your favourite music, and focus on the warm up process and reminding your body that it can in fact do this.

Sometimes You Just Need Space

Your new best friend might just be some giant noise cancelling headphones. In Vancouver there is a crit race called the Gastown Grand Prix, with thousands of dollars of prize money, professional competition, right downtown, and EVERYONE will come watch and cheer you on. Sponsors, coworkers, friends, teammates and family will all come wish you luck when you can barely even open your mouth because you might just throw up from nerves. The greetings are well meaning of course, but I’ve learned that I’m better off promising to catch up with everyone after I survive the race and drowning out my friends with warm up music. If you know that you are too nervous to be good company, there’s nothing wrong with politely acknowledging this, isolating yourself, and then treating all your friends to your post race extra giddy self after it’s over.

For as nervous and anxious as you might feel before the race, you will also be a euphoric ball of joy after the finish line! So go ahead and sign up for that big event, trust that the nervous pit in your stomach is a good thing, and have a great time building lifelong memories on two wheels.

Should You Sit or Stand While Climbing

August 12, 2019 by Josh Friedman

Your bike has a supportive saddle to rest your body weight on your sit bones. Why would you ever want to rise up from the saddle to go uphill? You just have to put more weight on your legs… It turns out there are some compelling reasons why you would want to either sit or stand while climbing.

Sit or Stand While Climbing?

Everyone has a different riding style. Even when choosing between whether to sit or stand while climbing, riding style comes into play. It may be how you grew up riding, maybe there was an influential coach that pushed you one way or the other, or maybe there was a pro rider you tried to emulate. Regardless of which it is, there’s likely a way  you inherently prefer to climb. But science can also help to determine whether you should sit or stand while climbing.

Higher Heart Rate and Oxygen Consumption While Standing

Standing while climbing is much more similar to running than turning over the pedals while sitting. A more vertical position on the bike results in higher heart rate and higher oxygen consumption, but not greater energy expenditure according to this detailed study. Running uses more energy and is less efficient than riding, but the energy expenditure is different in cycling; standing versus sitting uses the same energy.

Lower Body Mass = More Time Standing

Larger riders will use more energy proportionally while standing. There is more weight to support along with more weight to bring up the hill. The loose formula to figure out climbing style is to divide weight in pounds by height in inches.

A 2 to 1 ratio or lower is usually a pure climber who can ride out of the saddle for long periods of time. A 2.1-2.5 to 1 ratio can benefit from switching between styles. A ratio of 2.5 to 1 or greater should probably stay seated to benefit from the bike supporting the rider’s weight.

Perceived Exertion

According to this study on whether to sit or stand while climbing, the subjects experienced a significantly lower perceived exertion on a ten percent grade while standing versus sitting. This is despite a much higher heart rate and oxygen uptake. Good sensations in the legs do not always tell the whole story. In fact, they may even lead you astray of the most efficient method of cresting a climb.

A Definitive Study

Ernst Hansen’s 2008 Study of ten well-trained male cyclists is likely the most definitive study on whether to sit or stand while climbing. The subjects were tested on a ten percent climb at four levels of power. There was no difference between standing and sitting at the lowest level; eighty-six percent of VO2 Max power. It is still an intense effort, but it allows for a rider to make a choice whether to sit or stand while climbing. The study found that ninety-four percent of VO2 Max power is the tipping point where climbing while standing versus sitting becomes more efficient. At the two upper levels tested, up to a maximum of 165 percent of VO2 Max power, standing was far more efficient.

You must remember that this efficiency holds true only if it is a skill that you have honed and allowed your muscles to adapt to. It will be highly inefficient to climb out of the saddle if you have not trained this skill.

Consider the Gradient

Some hills do not give you a choice of whether you can sit or stand while climbing. Some hills are so steep (or perhaps your bike is wildly over-geared for steep hills) that to get over them you must climb out of the saddle. This is a consideration of your threshold and how low you will let your cadence go. You may be able to grind out a twenty percent climb in a 39/25 at 38rpm, but it probably is not the most efficient way to make it to the top. Engaging your arm muscles to rock the bike is the order of the day when the climbs get really steep.

A corrollary to being over-geared or under-cadenced is whenever cadence becomes uncomfortably low, stand up and climb, even if it is not necessarily based on the gradient.

Comfort

Research likely does not consider comfort regardless of the efficiency that it may find. Riding out of the saddle opens your hips to recruit your calves and glutes, which likely remain fresher than your tired quads. Sometimes you want to give a muscle group or your sit bones a rest. Shifting from standing to sitting or vice versa can help keep your body fresher for longer, especially on a really long climb.

Traction

When roads or trails get wet, traction changes. A climb that may be perfectly fine to ride out of the saddle in the dry may now spin your rear wheel out when wet. An additional consideration is whether the road surface changes. Perhaps it is asphalt but has a lot of tar patches covering cracks. Maybe there is a lot of paint on the road. Both tar and paint become very slippery when wet, forcing you to stay in the saddle to maintain traction. It is also very important to remember tar and paint’s additional slickness when cornering. Another traction consideration is loose dirt roads. You will be forced to sit  just to make it over a climb that has a lot of dirt and gravel.

Making Sense of All the Data

All of the data can make for some confusing choices. Here are some good rules of thumb to help you decide whether to sit or stand while climbing:

  • If the grade is too steep, likely over 10%, stand.
  • If you can maintain a cadence while climbing near what you maintain on flats, sit.
  • If your muscles or sit bones need a break, stand.

In the end, climbing while standing is not less efficient if you have trained it. Get out there and practice. At the very least it will give your muscles a break on longer climbs.

Stretches for Cyclists: Treat and Prevent Knee Pain

August 9, 2019 by Sarah Lauzé

Stretches for Cyclists

The knee is one of the most complex joints in the body, so it makes sense that it is often one of the first places we experience pain. Although it’s not a muscle, stretching is key to ensuring everything connected to the knee remains flexible and in place. Doing regular stretches for cyclists can help prevent and treat knee pain.

Pedaling requires work from the the quads to straighten the knee and push the pedal forward and downward with enough power to propel the bike forward. In addition, the IT band contributes to that same movement, although less intensively. These efforts, although low-impact, can lead to problems with knee pain. Tendinitis of the kneecap can be a painful condition, and can keep you off your bike. Stretching these muscles can both prevent and treat these issues, resulting in a more comfortable and flexible range of motion.

Many cyclists think knee pain means taking time away from the bike and resting up, but that’s not necessarily true. It could be caused by something as simple as a saddle adjustment or new cleats. So, if you’re experiencing knee pain, figure out what it may be stemming from and adjust your training accordingly. To help in recovery, and to prevent further knee pain, try stretching the muscles surrounding the knee on a regular basis.

4 Best Stretches for Cyclists to Treat Knee Pain

Bilateral Hamstring Stretch

This stretch is effective for all cyclists because of the involvement of the knee flexor muscles in the repetitive pedaling motion. It is also great for those who experience discomfort in the inner or outer face of the knee, which likely originates at the insertion of the ischiotibials.

Stretches for Cyclists

Stand with you feet shoulder width apart and slow bend at your hips towards the floor. Rest your hands on your shins, or step your hands down to the floor if you can. Your knees should be straight, but not overextended or locked backwards. You should feel the stretch in the backs of your thighs and knees.

Lunge with Ankle Flex

If you feel tension or strain in your calves, Achilles tendon, or the back of the knee then this is an important stretch.

Stretches for Cyclists

Stand with your hands on your waist, one leg slightly in front of the other, with your knees straight looking ahead. Slowly lunge forward with the front foot, keeping your rear foot in its original position. Both feet should be making full contact with the floor, including the heel. As your center of gravity moves forward and downward, the rear ankle will act as an anchor and increase the stretch.

Flamingo Position

Because of the involvement of the knee extensor muscles in the pedaling motion, the flamingo position is a great stretch to relieve discomfort in the quads and patellar tendons.

Stretches for Cyclists

Use a chair or wall the steady yourself, and raise one foot by bending your knee. As you hold the front of your ankle, slowly pull it upwards and gently push your hips forward. As the hip extension increases, you will feel the stretch in the front of the thigh.

Supine Pull to Chest

Stretching the muscles that rotate the hips, specifically the glutes and piriformis, can have a positive effect on the knees. As mentioned previously, each segment of the leg is connected, and each area can have a domino effect, especially through the knee.

Stretches for Cyclists

Lie on your back with your neck relaxed and head resting on the floor. Cross your right ankle over the other and place your hands on your left thigh, pulling your legs towards you in a figure four position. Slowly pull on your thigh to increase the stretch, feeling it in your glute. Repeat with the left side.

Knee pain can be disheartening, but most cases are not cause to give up on your training. However, if pain persists despite proper rest, stretching, and bike adjustments, then it may be a good idea to see a physiotherapist to see if there is an underlying issue that needs to be addressed. You can also try targeted, daily stretching with Dynamic Cyclist to treat and prevent your knee pain.

« Previous Page
Next Page »
  • Facebook
  • Tumblr
  • Twitter

Latest Articles

JOIN Cycling: A New Training Platform for Cyclists

May 27, 2024 By Eric Lister

cold exposure

The Benefits of Cold Exposure for Cycling & Life

June 13, 2023 By Eric Lister

hill climb

The Ultimate Hill Climb Training Guide

May 31, 2023 By Eric Lister

shoulder pain cycling

How to Treat & Avoid Shoulder Pain While Cycling

April 12, 2023 By Eric Lister

psoas stretch

The Importance of the Psoas Stretch for Cyclists

April 6, 2023 By Eric Lister

cycling neck pain

The Ultimate Guide to Cycling Neck Pain: Causes and Solutions

March 21, 2023 By Eric Lister

Useful Info

  • Contact
  • Finally, A Global Cycling Club That Is Focused On Community And Love Of Cycling!
  • Privacy Policy
  • Share Your Story!
  • Terms And Conditions Of Use
  • Welcome to I Love Bicycling
  • What Happened When I Stretched Every Day For a Month

Recent Posts

  • JOIN Cycling: A New Training Platform for Cyclists
  • How to Hang Bikes in Your Garage: 4 Inexpensive Options
  • Gravel Bike Vs. Road Bike: Which One Is Better For You?
  • The 6 Types of Mountain Bikes & How to Choose the Best One for You
  • What Is a Touring Bike Good For? 5 Benefits We Know You’ll Love

Search I Love Bicycling

Connect with Us

  • Facebook
  • RSS
  • Tumblr
  • Twitter

Copyright © 2026 · Magazine Pro Theme on Genesis Framework · WordPress · Log in