• Training
    • Injury Prevention
    • Training Tips
  • How To
    • Bike Fit
    • Gear
  • Nutrition
    • Nutrition Tips
    • Weight Loss
  • Repair
  • Reviews
  • Stories
    • Funny Stories
    • Jokes
    • Quotes
    • Videos
    • Funny Videos

I Love Bicycling

I Love Bicycling is a website that is geared towards cycling for beginners with road cycling tips, training articles, nutrition tips, weight loss, how to’s and bike repair articles.

Injury Prevention

  • Training Tips
  • Training Camps

Cure Muscle Cramps While Cycling

July 29, 2015 by U.M.

Cure Muscle Cramps While Cycling

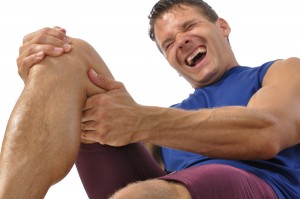
Muscle cramps are a fairly common occurrence for cyclists and we would be willing to wager that many of the people who are reading this article will have experienced them either during or after they have enjoyed a good cycling session.

They are an unpleasant experience at the best of times, so understanding why they occur and what you can do about them may help to make your cycling experience all the more enjoyable.

Why Do Muscle Cramps Occur?

There is a lot of speculation as to why Exercise Associated Muscle Cramps (EAMC) occur, but no definitive answer. However, there are a few common issues that are often pointed towards.

Proper Bike Fit 

Many bicycle manufacturers and cycling technicians will tell you that one of the reasons such cramps could occur is that your saddle is a little too high for the bike. This leads to the rider overextending their legs when they are riding, which in turn puts undue strain on the muscles they are using and causes them to cramp up. Happily, assuming you visit a professional fitter, this is a fairly simple issue to remedy and one that you can look into without too much undue cost.

Nutrition

There are also a number of nutritional experts who will claim that, all other things being perfect, that a lack of magnesium and other electrolytes in your diet could be to blame if you are still experiencing cramps. A lot of sports drinks make a big deal about including electrolytes, so there is something of an industry built around the research, but it does seem to have some merit to it. As such, it is probably a good idea to keep a decent sports drink handy whenever you go out on a ride and to adjust your diet a little to make sure you are getting enough magnesium.

Many people have had great success with taking salt tablets in order to solve this problem, myself included. If you are continuously cramping it is well worth the shot.

Exhaustion

Lastly, the muscles are just purely exhausted. They are cramping in protest of doing any more work, a way of protecting the body. Perhaps you increased volume, intensity or duration more than usual and muscles are starting to cramp.

What Can I Do To Fix Muscle Cramping?

Based on the above, altering your seat height and your diet a little should help along with being adequately prepared for the ride ahead. There are a few other tips that you should follow that will also help:

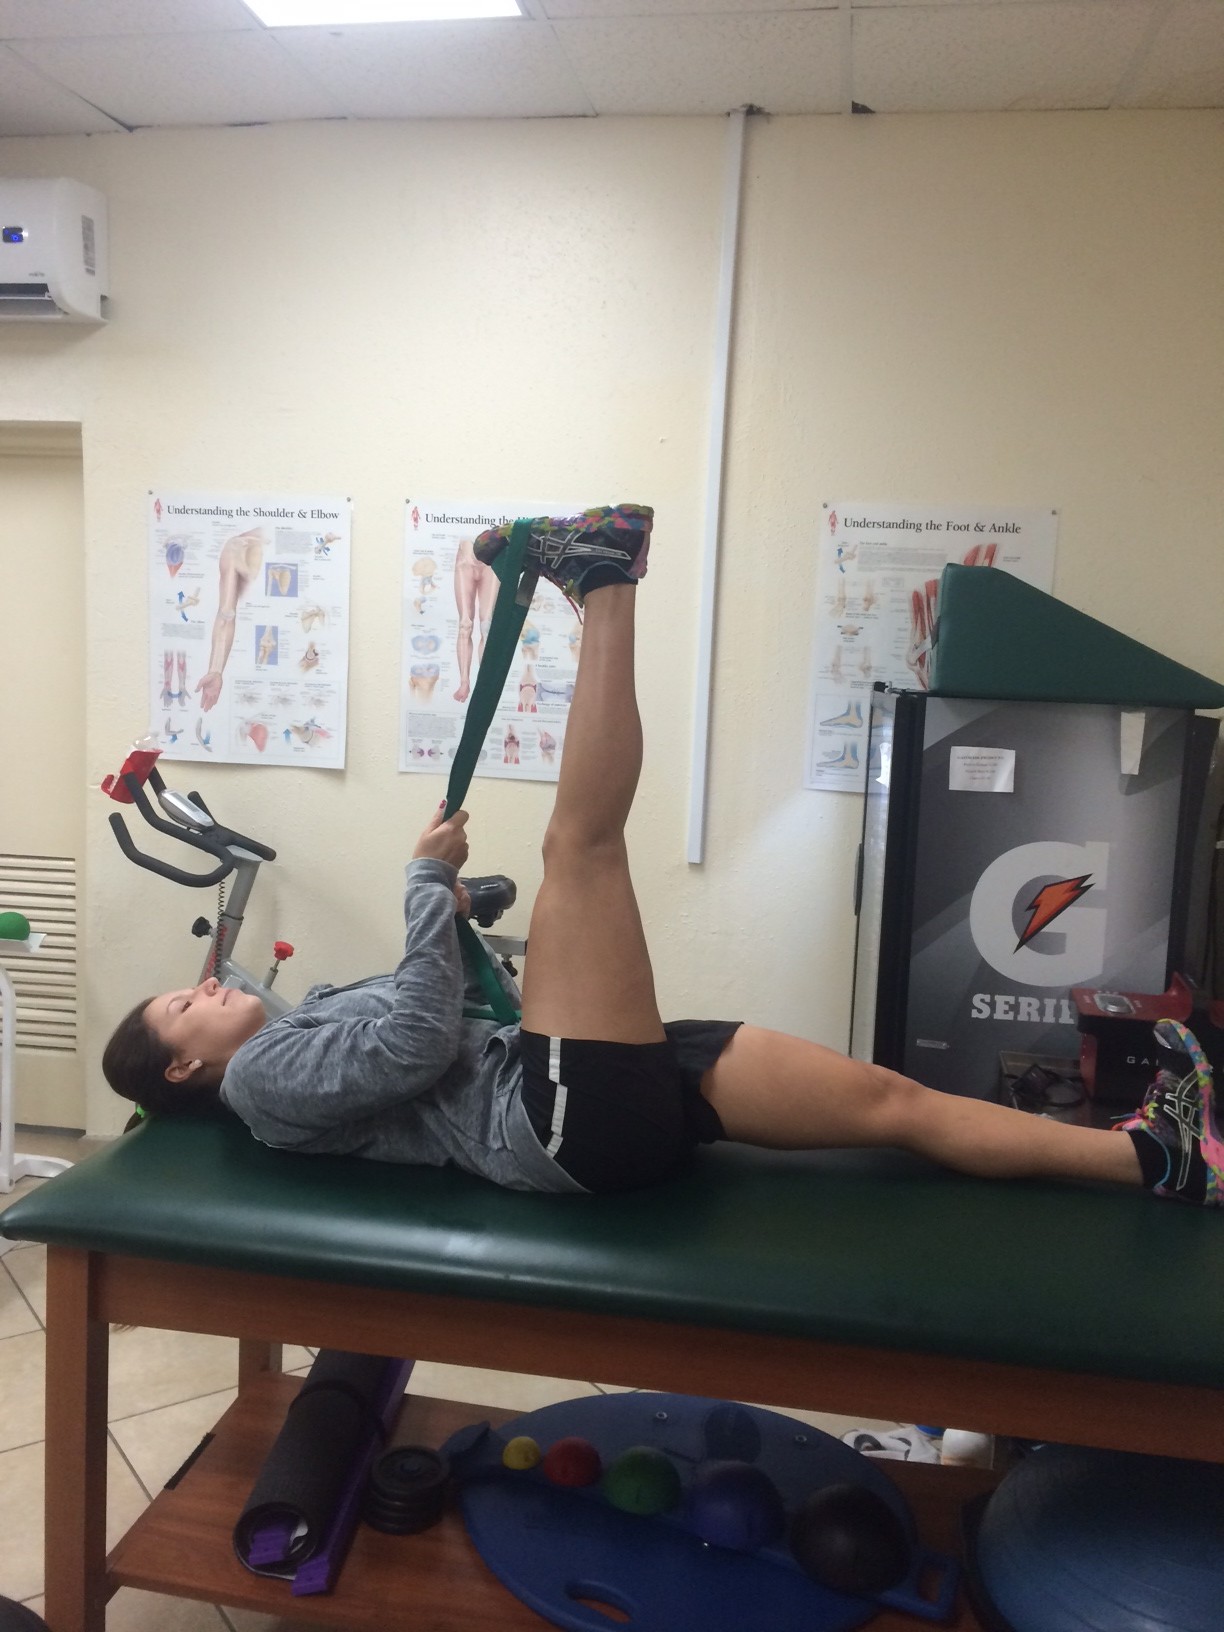
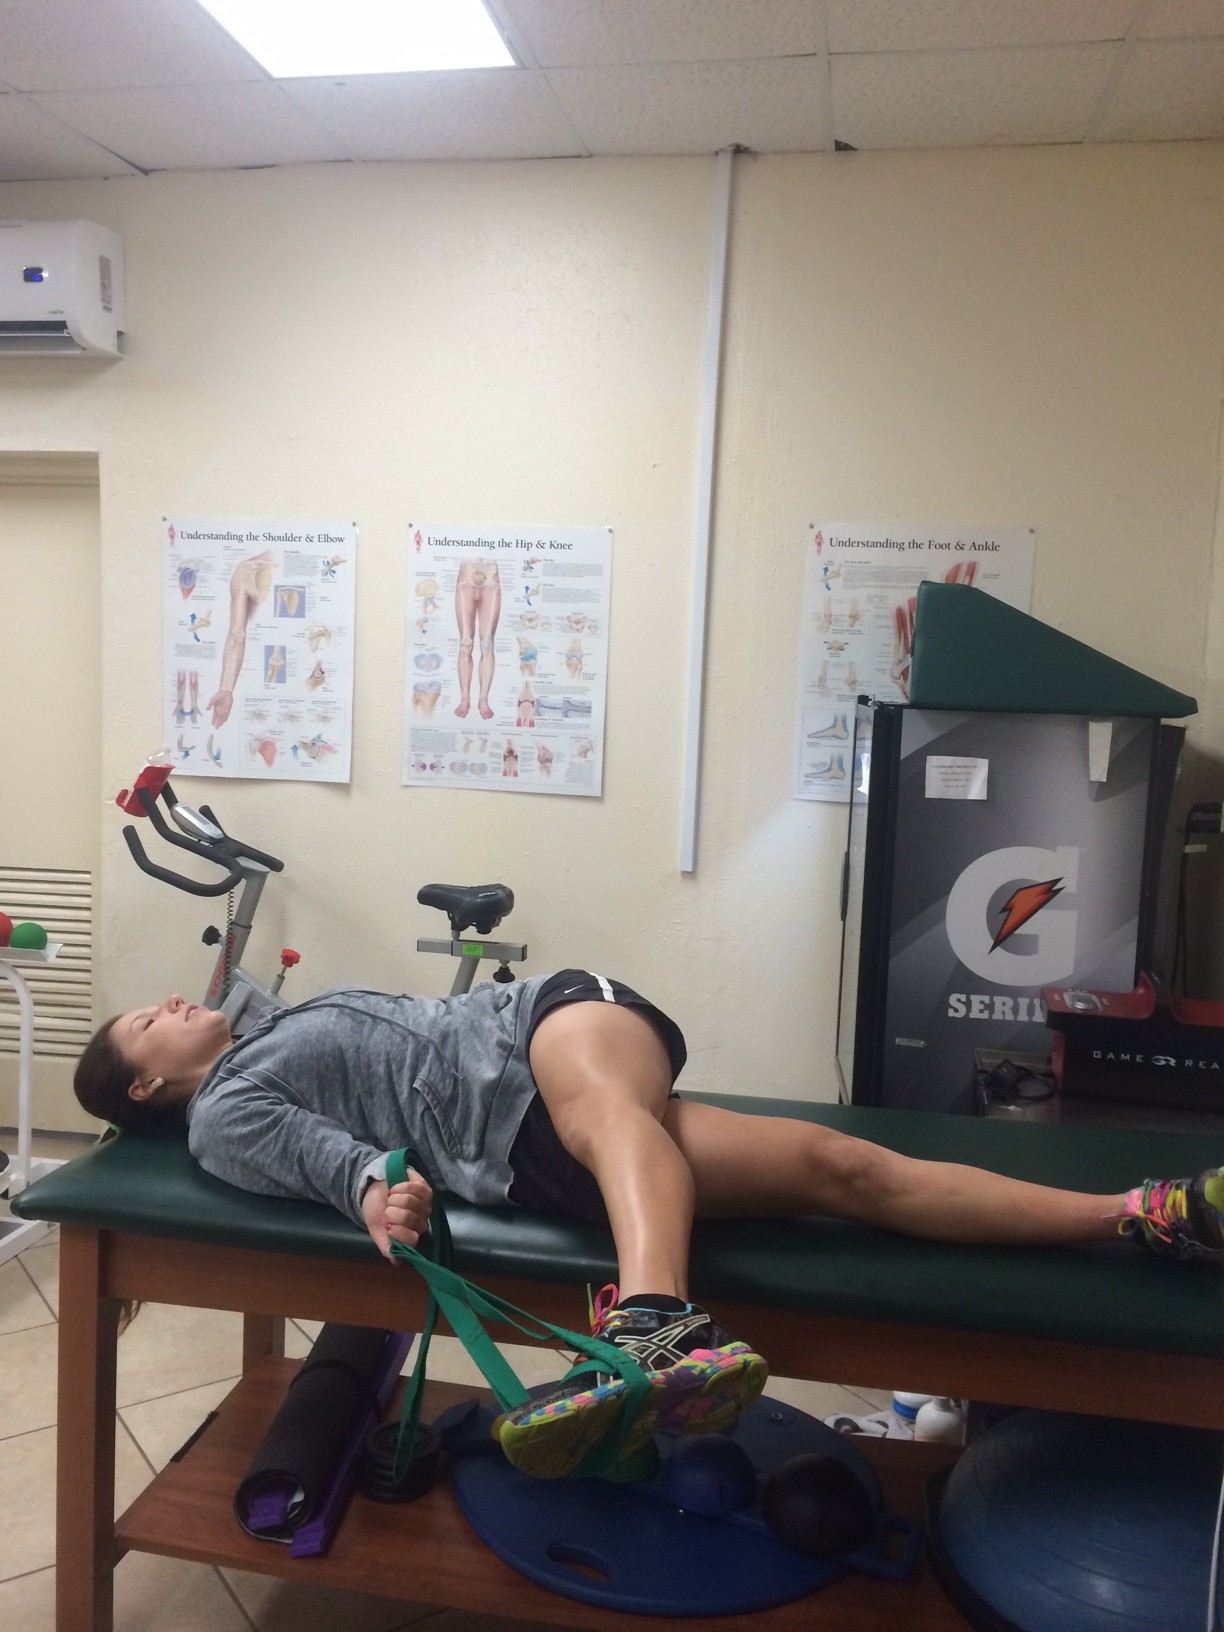
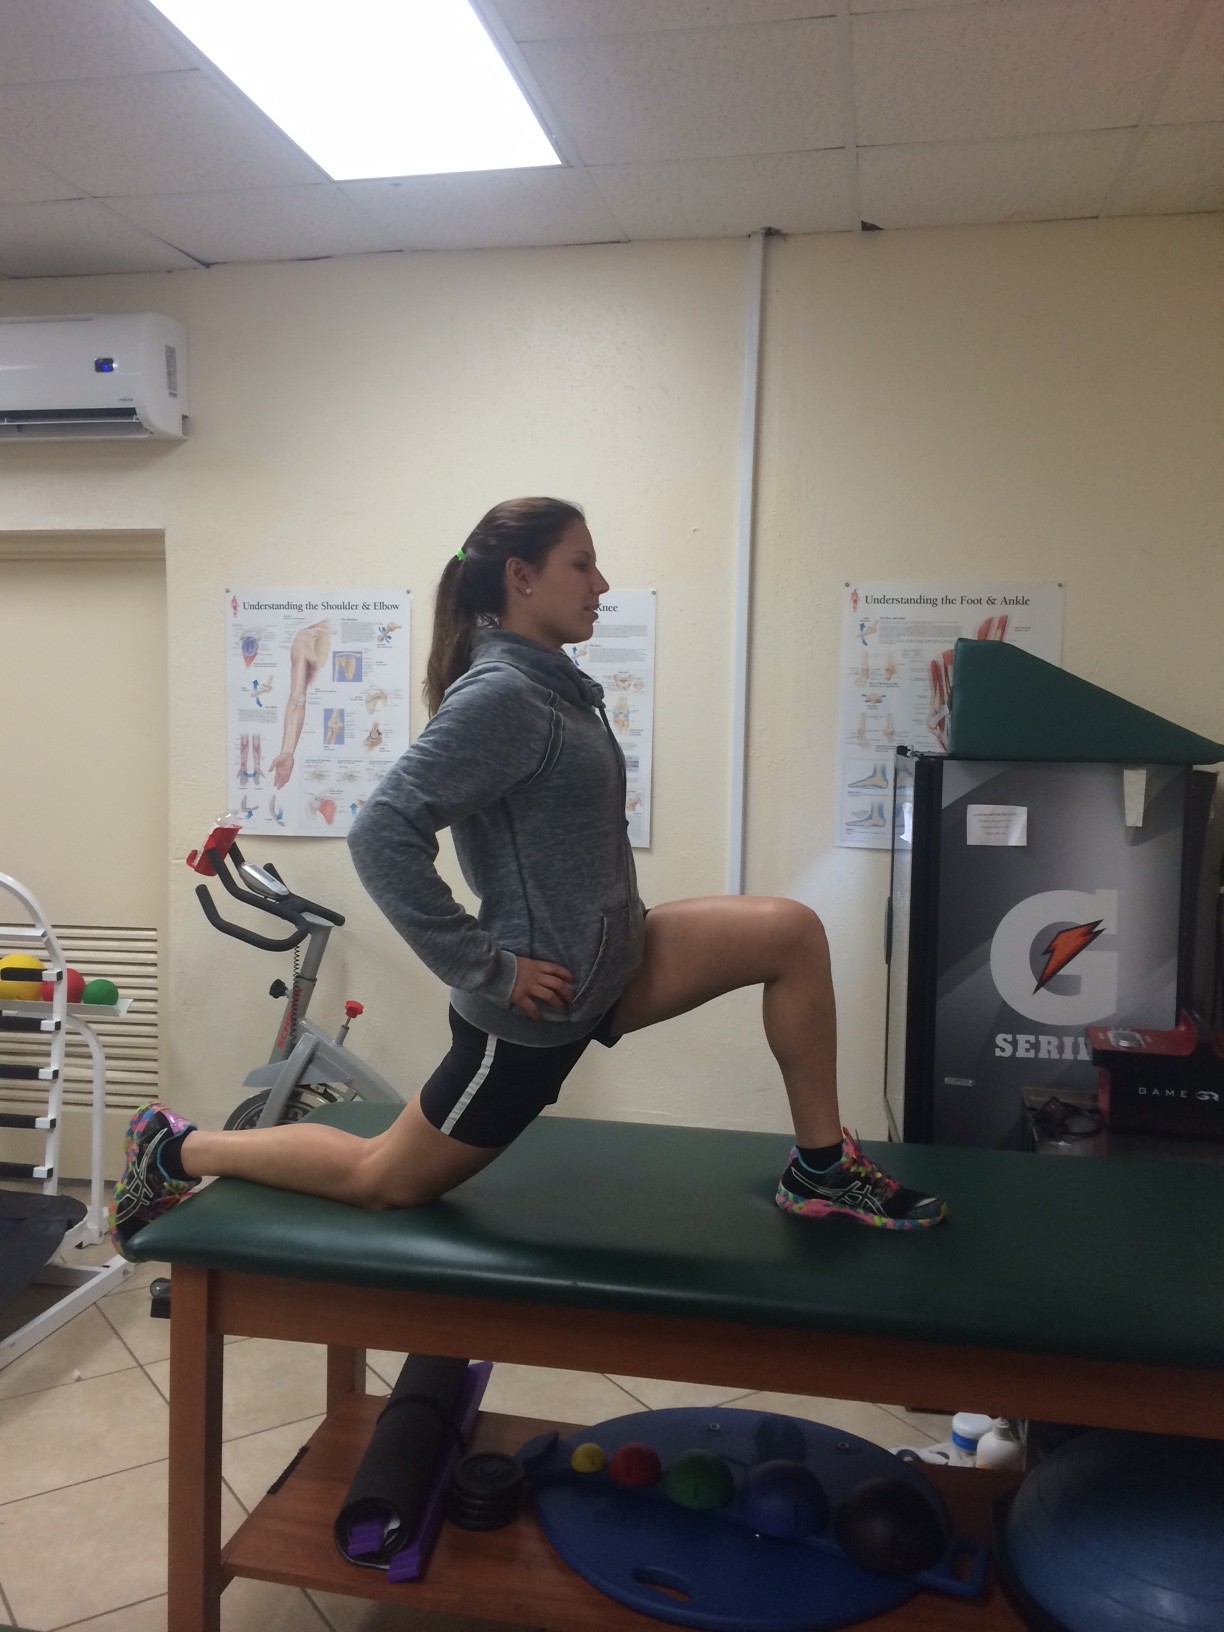
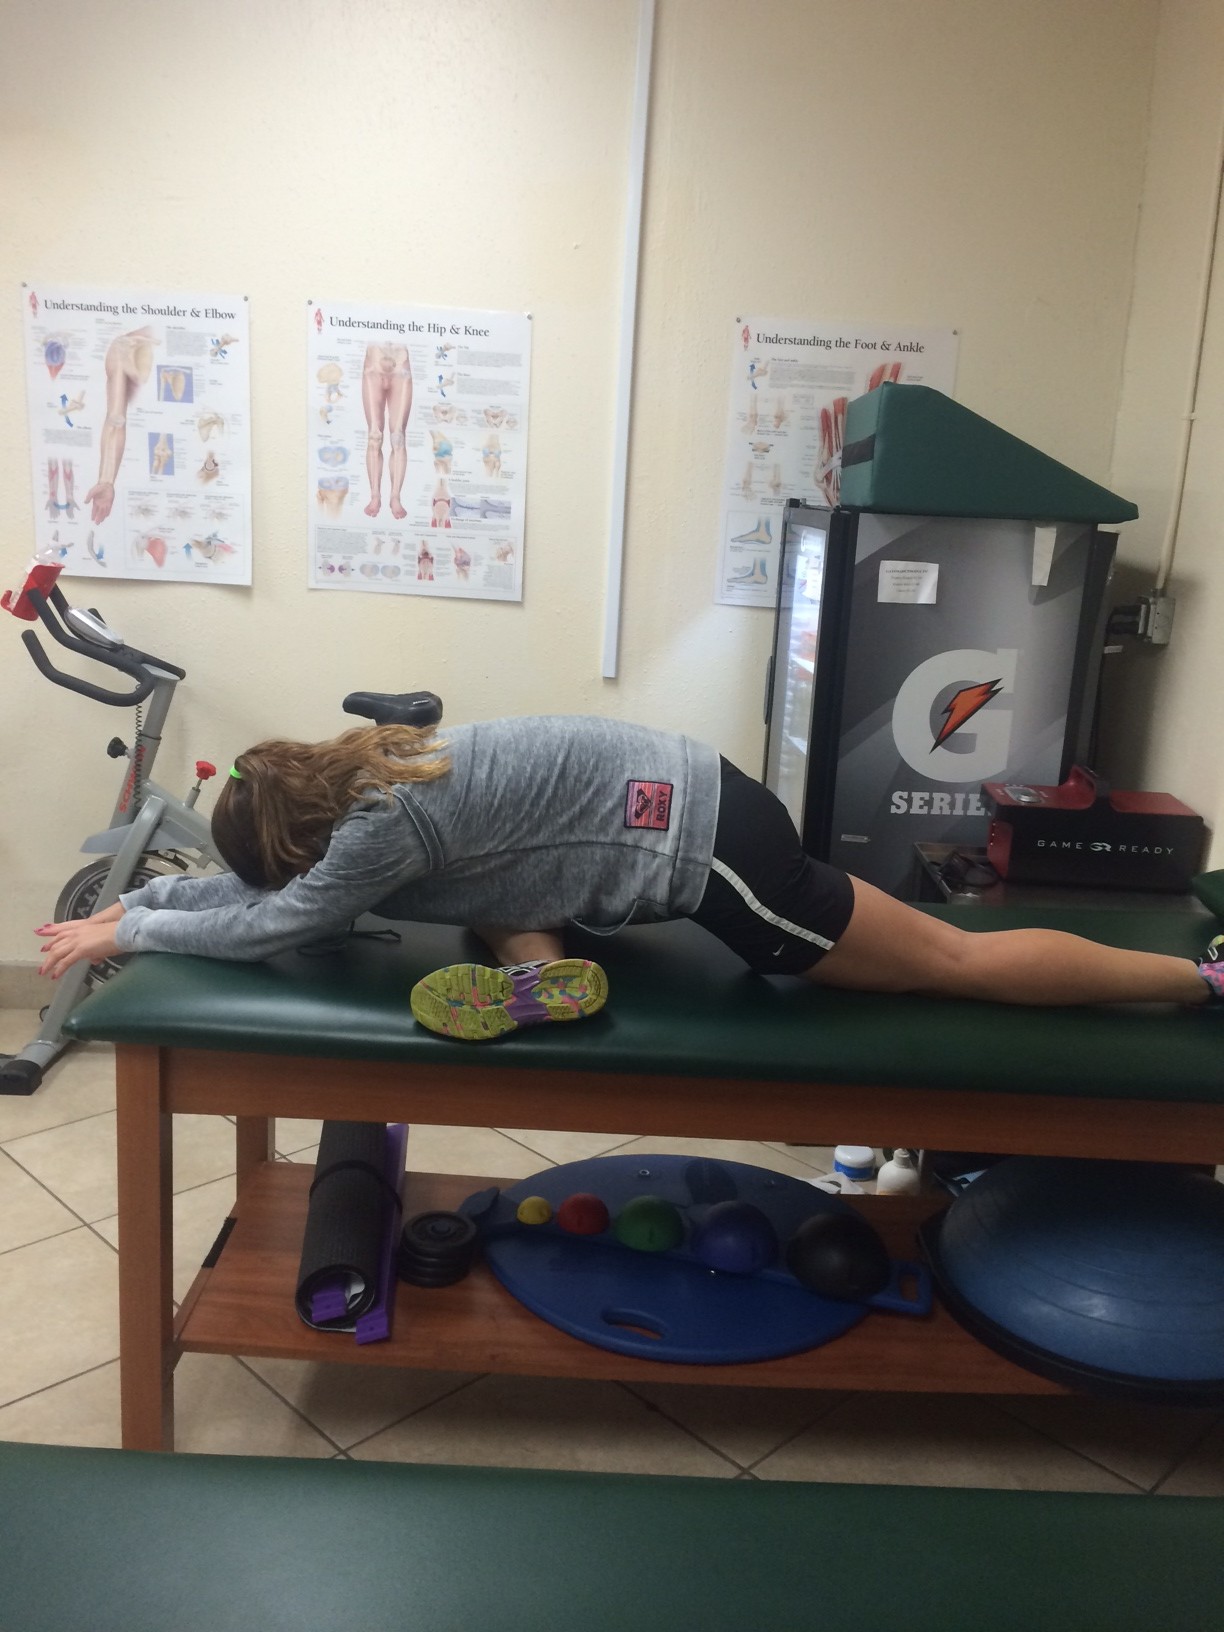
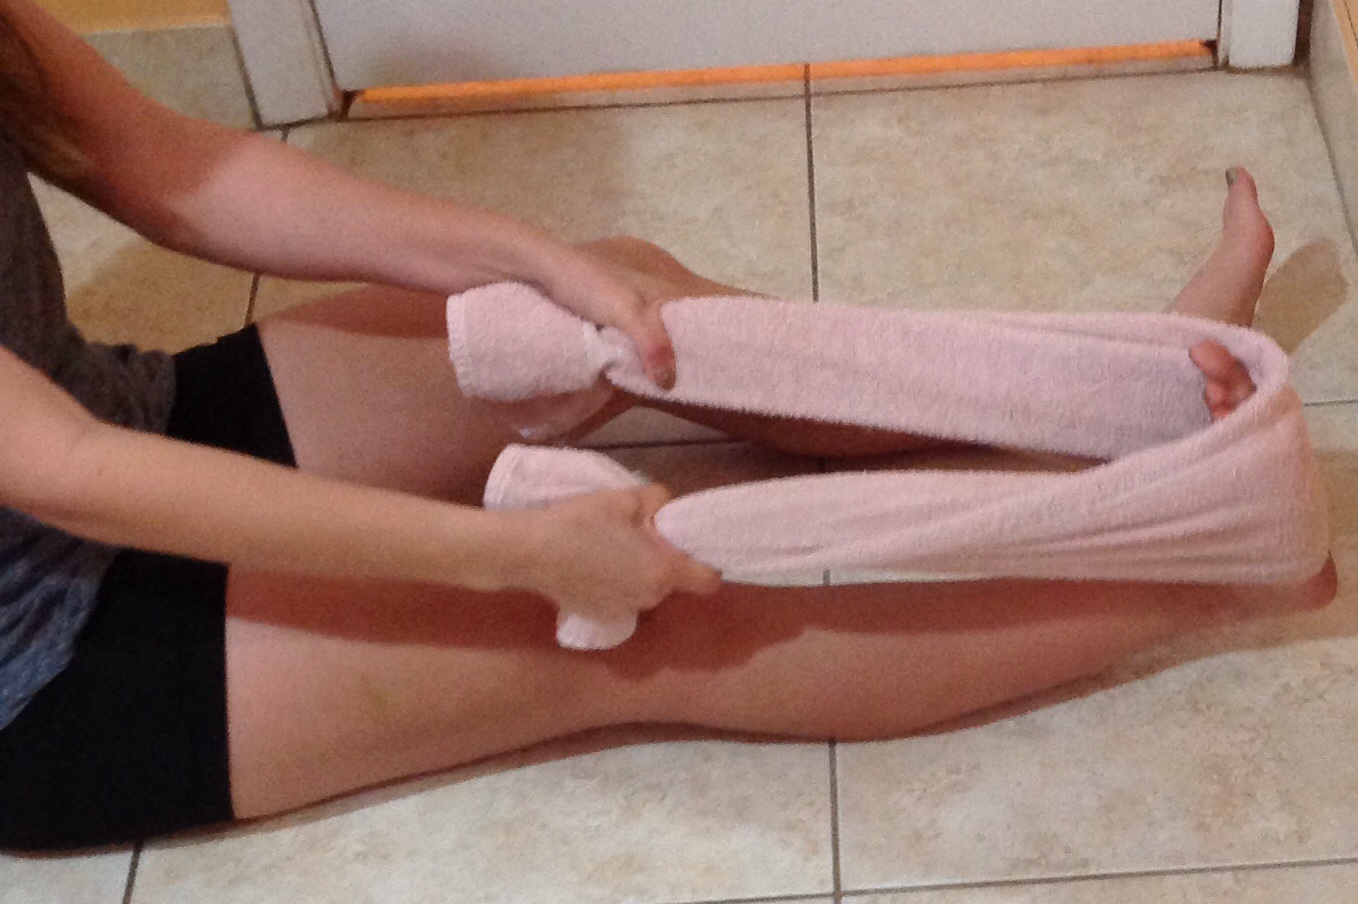
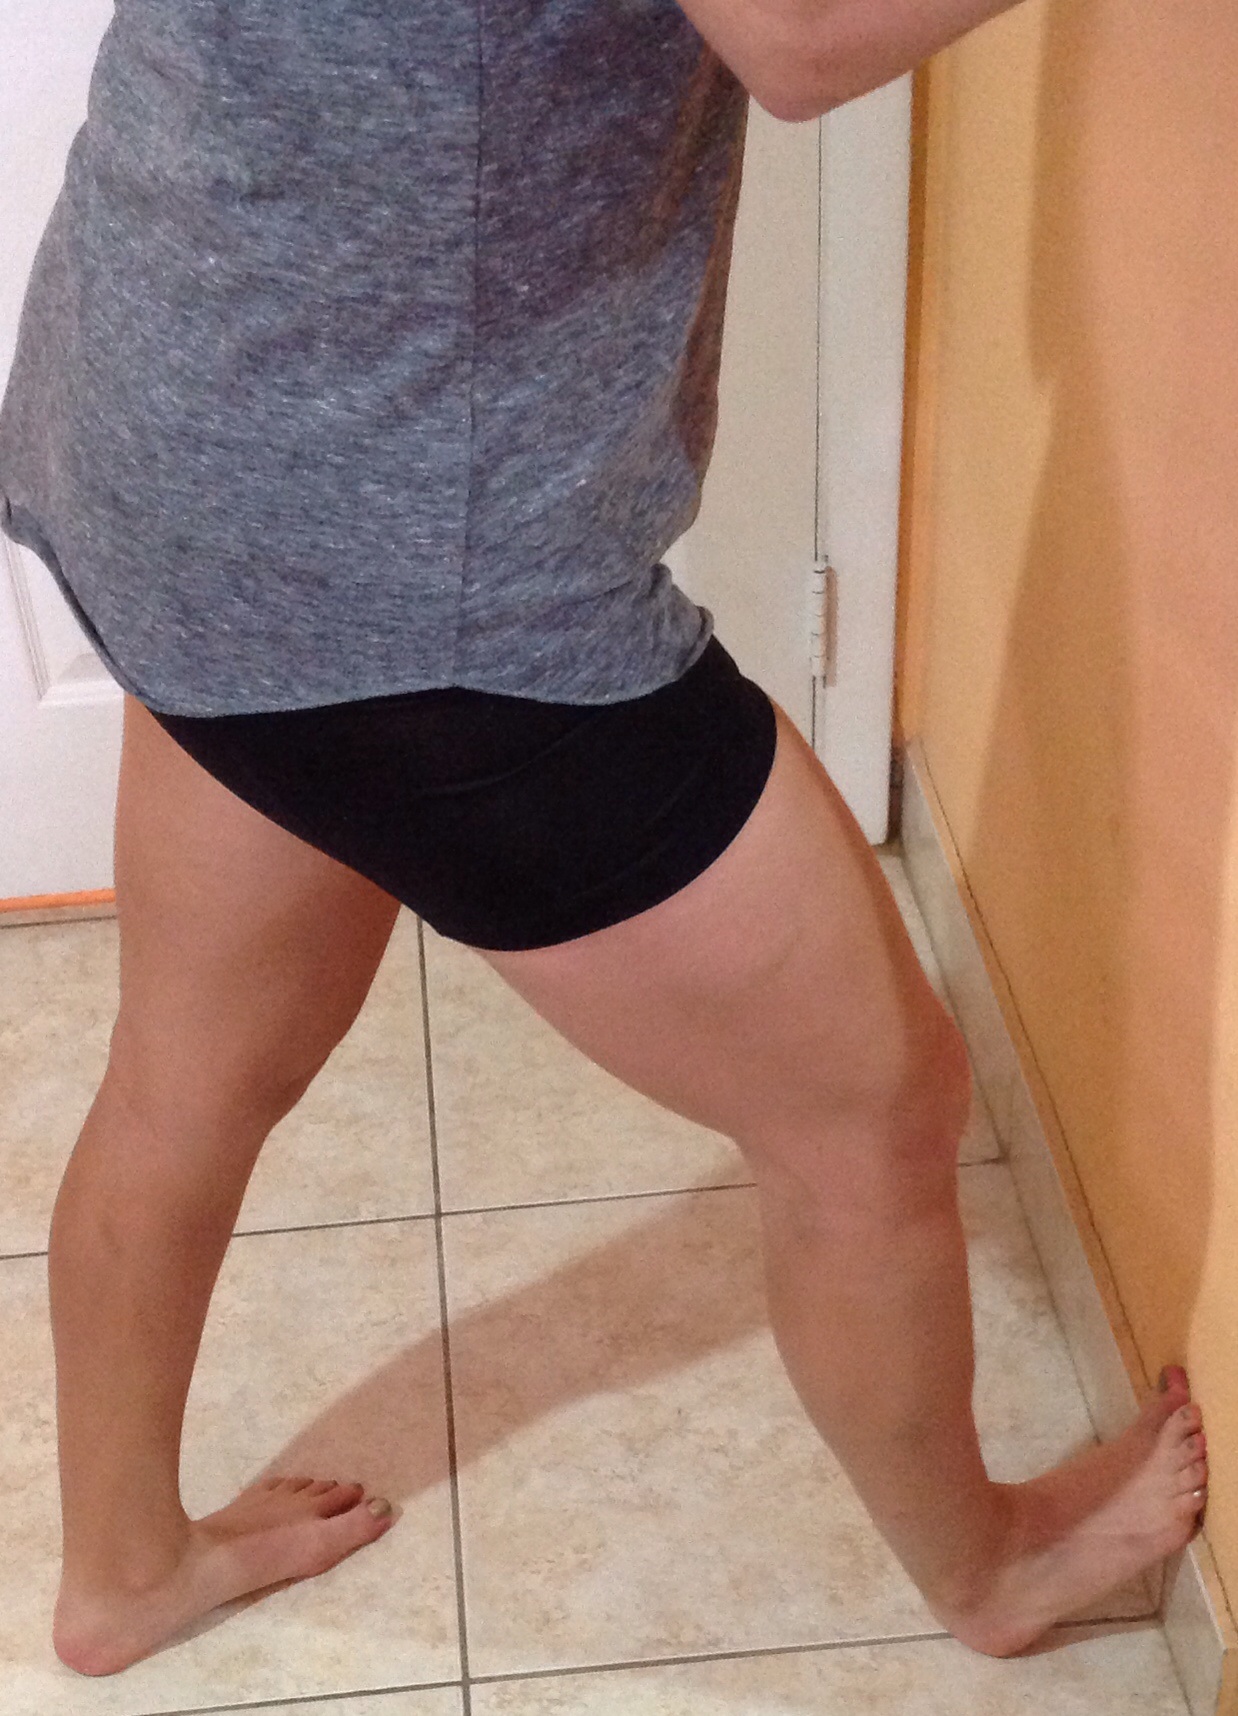
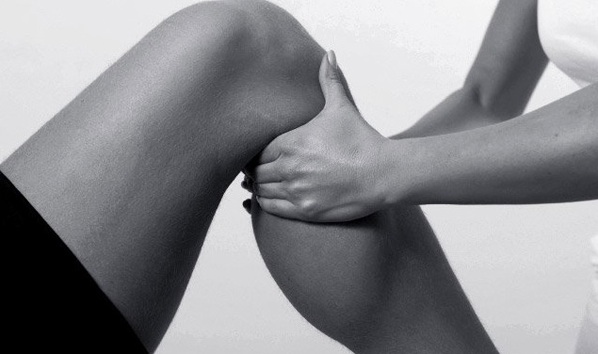
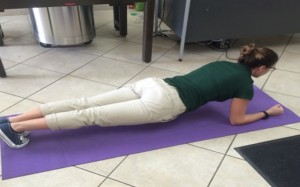
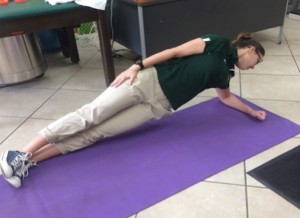
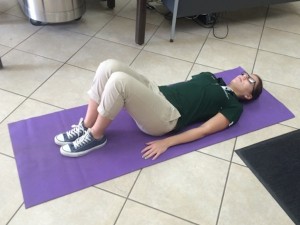
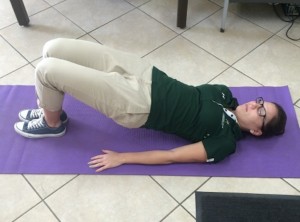
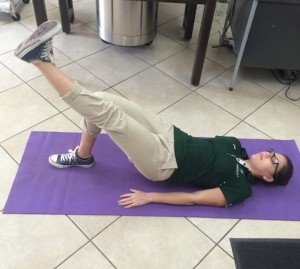
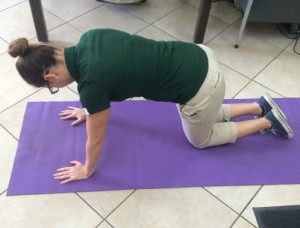
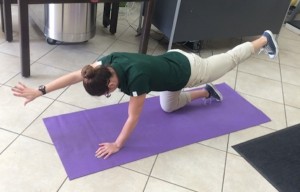
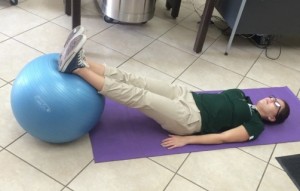
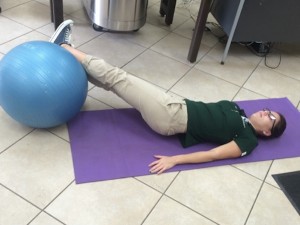
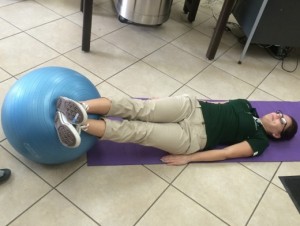
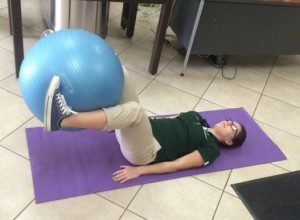
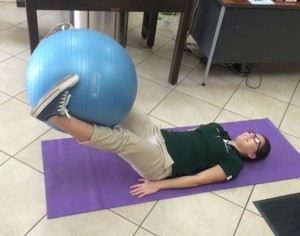
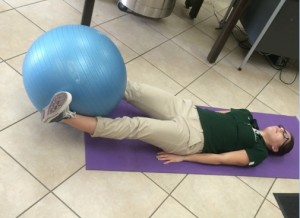
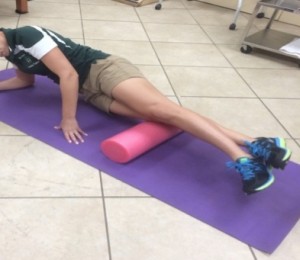
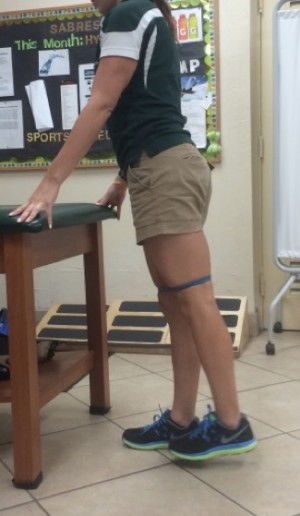
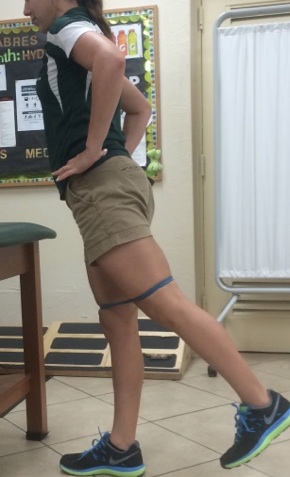
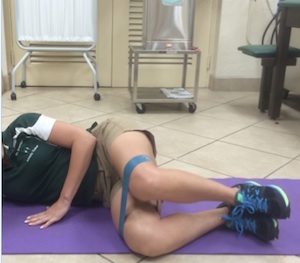
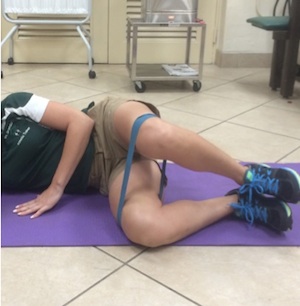
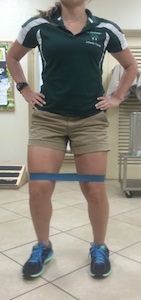
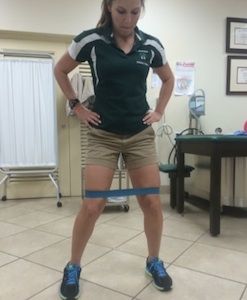
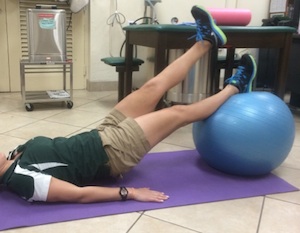
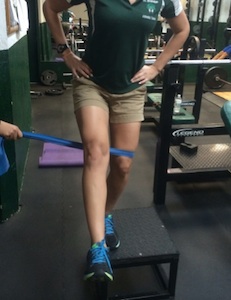
Tip #1 – Stretch to Improve Muscle Cramping

Stretching is one of the most important, yet under-utilized, aspects of any exercise regimen. Not stretching can cause damage to your muscles if you try to push too hard without loosening up. Your muscles continue to contract and contract with no relief. You eventually become a tight ball of muscle waiting to cramp up.

Take the time to do a warm down as it is just as important as the warm up, take a little time to do a few leg stretches when you finish your ride.

Tip #2 – Keeping Hydrated Improves Muscle Cramping

Having a sports drink that is rich in electrolytes is usually a good start, but there is nothing wrong with just taking a bottle of water along as well. Dehydration can lead to muscle cramps, so be sure to keep a bottle of water handy so that you can take a few swigs whenever you start to feel a little thirsty.

Tip #3 – Build up Volume, Intensity and Duration Slowly


Want to avoid cramping? Don’t push it in to the red all the time. Make sure that you slowly build up to your cycling goals. Do not increase volume, intensity or duration more than 10% per week.

There is a lot of speculation out there, ultimately you know your body best. Find out which one of these works for you or perhaps it is a combination of all. Either way get out there and enjoy some cycling cramp free.

Do I need Chamois Cream?

July 28, 2015 by U.M.

Do I need Chamois Cream? What is Chamois Cream? Should I Use Chamois Cream? So I Should Use Chamois Cream!
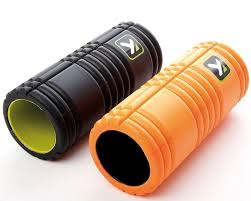
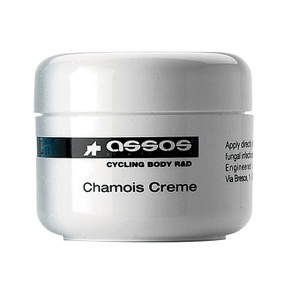
Chamois cream is one of those sorts of items that is slightly difficult to bring up in polite conversation, but can often still offer quite a valuable service to riders, particularly if they favour long distance riding and want to avoid issues with chafing.

For those who aren’t aware, chamois is essentially another name for cycling shorts and often refers to the padding that they contain that is intended to protect the rider from sores and other issues that can be caused by spending a lot of time in the saddle.

Unfortunately, in the past many people found that the material used in chammy’s reduced in quality after every wash, necessitating the need for something that could extend their shelf life while also adding to the required protection for the riders nether regions.

However, newer apparel is designed with the potential discomforts of a cyclist in mind, yet the cream is still in use. Here we take a look at what it is and whether or not it is something you should consider using.

What is Chamois Cream?

Chamois cream was created with the intention of reducing friction in a cyclist’s more delicate areas, particularly those that chafe against material on a regular basis. It essentially moisturizes these areas, thus increasing rider comfort.

Chamois cream is also anti-bacterial, which is useful should sores or blisters develop as a result of chafing. However, as mentioned, a lot of current cycling apparel accounts for these issues through the use of better designs and new materials.

Should I Use Chamois Cream?

At the end of the day, your decision really needs to be based around just how comfortable you feel in the saddle area when you are riding.

If you tend to just take your bike out for a short ride every so often, the likelihood is that you won’t see any benefit from chamois cream. After all, you won’t be experiencing high levels of friction due to the fact that you don’t spend much time on the bike, and you shouldn’t feel any discomfort from the saddle as long as the bike has been properly fitted to your body type.

Those who favour longer rides may have a good reason to consider the cream, though. Even the best of clothing materials and a properly fitted bike don’t always completely eliminate the issue of chafing, so if you find that you still feel sore in such areas after a longer ride, it may well be worth investing in a little cream just to help mitigate it a little.

This is particularly the case for road racers and others who not only ride over large distances, but also do it at speed. After all, increased speed simply creates more friction and, in many cases, the material in your cycling shorts isn’t going to be enough to completely prevent chafing.

Every individual cyclist is different, some riders are more susceptible to chaffing. There is also one final point to consider – the anti-bacterial properties of the cream. Saddle sores are extremely painful at the best of times, and the cream does offer some level of soothing for them in addition to ensuring you can keep riding a little until they heal. However, without any sort of treatment you may find your sores turn into abscesses, which will not only take you off the bike for a while but can also be rather dangerous to your health.

So I Should Use Chamois Cream! Definitely, Maybe

Simply put, any cyclist who wants to ride on a daily basis should definitely consider chamois cream. After all, anything that can help increase your comfort levels when on the bike is always a good thing, plus the cream can contribute to keeping you healthy as well. However, occasional cyclists will probably find that they have no use for it and should consider buying better clothing before opting for the cream.

Neck Pain Cycling

May 10, 2015 by Dyani Herrera

Neck Pain Cycling

neck pain cycling 
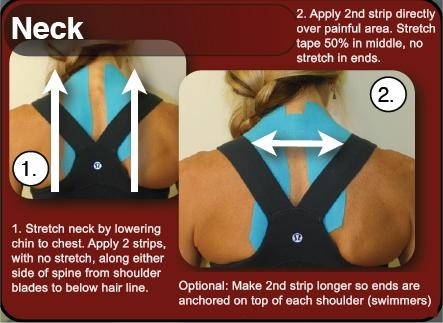
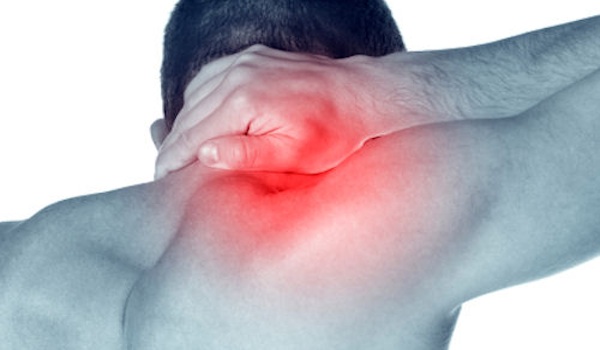
One of things that takes getting used to when you first start cycling is the neck and shoulder discomfort. Even an experienced rider who has taken a short hiatus, and is returning to a regular regime can suffer from these aches. Typically, the discomfort is localized in your anterior deltoids, upper trap muscles and neck extensors. This can be attributed to a few causes such as bike fit, head positioning when riding and tightness of aforementioned muscles.

Bike Fit

If you’ve read our previous articles you will understand how many issues can be initiated due to an improper bike fit. As a beginner cyclist it’s important to work with a bike fitting specialist and tweak one thing at a time, ride for about a week, and assess the changes. This allows you and the fitter to pinpoint the exact solution or cause in order to improve riding conditions. Often neck and shoulder pain is linked to having a high seat post in relation to your bars. When the seat post is too high it can place you in an aggressive position, which as a beginner cyclist you are not ready for. It’s a better tactic to gradually increase the aero position as you get used to cycling. Additionally, if your road or aero bars are too far away causing you to overreach you can place unecessary strain on these muscles. The solution would be to place the bars closer in relation to your body so you’re in a “tucked” position when riding.

Head Position

When I first started riding solo I remember how afraid I was of either riding off the road, or going over debris that would make me fall, that I looked up for the entire duration of my ride. Although I would finish my rides in one piece I had a soreness in my neck and shoulders that would last for days. I remember, constantly moving it side to side while riding to try to minimize the discomfort. I mentioned this to the bike fitter and he told me to keep my head down and only use my eyes to look up. What a difference this made! I practiced this on my rides as I was in the aero position and I no longer felt the pain in my neck. I would only look up with my head if I knew I was coming up on an intersection or bump in the road. During long rides it’s best to look up with your eyes and only tilt your head up when necessary or intermittently. Not only will this decrease your neck discomfort, but it will also make you slightly more aero.

Tight Muscles

As a beginner cyclist you are now forcing your body to use muscles either it hasn’t in other activities or in a different way. This leads to tightness, muscles spasms, and pain. However, there are a few stretching exercises that can be completed which will lead to disruption of the pain-spasm cycle. One exercise involves a lacrosse ball as demonstrated in “Massage Tips for Tight Muscles.” You place the lacrosse ball between you shoulder blades and roll side to side as well as up and down on the floor. Another variation is to do the same thing, but against a wall instead. Make sure to put your body weight over the knot and roll over it a few times for 20-30 seconds. This will typically release the restriction and cause the trap muscles to relax. There are two stretches that can be done to release the upper traps and neck extensors. Complete each stretch for 20-30 seconds a total of 3 times, several times a day. The first stretch requires you to put your arm behind your back of the side you are stretching. Then, use the other hand to tilt your head to the opposite shoulder.

1st stretch
1st stretch

Stretch two, requires you to look down at a 45 degree angle, and place the arm of the side you’re stretching behind your back. After, use the opposite hand to push the back of your head down further in that 45 degree angle. You may refer to the pictures for further demonstration.

2nd Stretch
2nd Stretch

Another helpful tool is to have a partner help you in placing rock tape/kinesio tape along your posterior neck muscles and upper traps. Rock taping offers several advantages such as added support, increased blood supply, and propioceptive feedback. The latter works on nerves which alert your brain to where a particular body part is, and offers feedback to either adapt a movement pattern, or execute it properly. Usually when purchasing rock tape it comes with a pamphlet that teaches you how to apply the tape for different injuries. Nevertheless, YouTube offers plenty of videos teaching how to apply it correctly. It is important to initially wipe the area with rubbing alcohol to remove any oil on the skin, then wipe off the alcohol. Next, make sure to cut the tape with rounded edges, not straight across. Then, break the tape in the middle and slowly apply it with no extra tension. Last, rub the tape to activate the adhesive with the heat generated. In following these steps you’re ensuring the tape lasts for several days and even through showers. You may refer to the photo for further demonstration.

image

If after following all these steps you’re still experiencing discomfort remember that there’s an adaptation process involved as a beginner cyclist. Just like in any other sport it takes time for the muscles to adapt to these new demands and with time they become accustomed. Once your body becomes used to your cycling position, your rides will be neck and shoulder pain free.

Avoiding Sciatica While Riding

May 5, 2015 by Guest Post

SCIATICAWhen I first entered the cycling community my main drive was the fact that I couldn’t run without feeling sciatica down my right leg. I had completed all the Orthopedic tests and MRIs and found out it was not disc related. Yet, the weakness and numbness would not subside, so I was extremely bummed that I wasn’t leading an active lifestyle. I was assessed by a physical therapist and told all my issues were being caused due to muscle tightness and muscle imbalances. Alas! An answer to my problem.

Cycling is non weight bearing exercise and really helps strengthen my muscles (hip flexor, glute maximus, and hamstrings). Slowly, I began to feel better and was able to do other activities besides cycling; such as: swimming, weight lifting and running. It is important to note that sciatica is not an actual injury rather, a catch all term for an underlying pathology. Sciatica is what alerts us to muscle tightness, muscle imbalances in our hips, disc herniation or impingement, leg length discrepancy, or piriformis syndrome. There is also about 22% of the population which have the sciatic nerve going straight through the piriformis instead of behind it. This makes one more susceptible for sciatica symptoms. If you’re experiencing sciatica and have ruled out a disc injury, then the following tips can be beneficial for resolving symptoms and causes.

SADDLE POSITION

Having the appropriate saddle position is vital for a variety of reasons. If your saddle is too low in relation to your pedals it can cause the hip muscles to be in a constant shortened position. This does not allow the piriformis, hip flexor, glute max, or glute medius to stretch out at any phase of the pedal stroke. When this happens it can lead to compression of the sciatic nerve causing numbness, tingling, and a feeling of general posterior leg tightness when riding. However, this can be fixed by visiting a certified, bike fitting specialist at your local bike shop. There are some companies like Specialized that offer courses to certify bike employees in proper fitting techniques. They use specific body landmarks, plumb lines, and goniometric measurements to ensure the bike is fitted to your needs. Once you’ve adjusted your saddle position you will see a rapid improvement in your symptoms.

It is also important during long rides to pedal off the seat once in a while to allow some blood flow into your legs. When sitting on the saddle for a long period of time, the sciatic nerve is compressed as well as surrounding blood vessels. By pedaling off the seat we relieve the nerve compression and allow an increase in circulation. This can also be accomplished by unclipping one leg at a time and shaking it out to increase blood flow.

MUSCLE TIGHTNESS

If the hamstrings, glute maximus, hip flexor, or specifically the piriformis is tight it can choke the sciatic nerve and cause this nagging pain. It can also cause improper rotation of the hips, which aggravate the sciatic nerve. It is imperative we stretch these muscles before and after riding. These muscles should be stretched ideally 3 times for 20-30 seconds multiple times a day. Using a stretch out strap (pictured below) is beneficial in getting a good hamstring stretch. Below I’ve demonstrated some great stretches for the glute maximus, hip flexor, and piriformis.

stretch out strap

hamstring stretch
hamstring stretch

Low back and Glute Max Stretch

Hip Flexor Stretch
Hip Flexor Stretch

Piriformis and Glute Max Stretch. Can also be done on floor.

If after stretching these muscles the symptoms are not resolved, there may be some scar tissue forming in the area and ART massage would be indicated. Although painful, ART will help in breaking up any adhesions in the piriformis which are restricting the normal function of the sciatic nerve. There can also be a leg length discrepancy caused by tight hip muscles which can be released with manual therapy. If the leg length discrepancy is congenital, then a heel lift with the necessary measurements can be inserted into your cleat.

MUSCLE IMBALANCES

Sciatica can also be caused due to muscle imbalances in the hip area which cause the piriformis and hamstrings to work harder in an effort to compensate for areas of weaknesses. This can be corrected by completing the exercises listed in 7 exercises to treat and cure IT band syndrome. It can also be addressed by adding squats, walking lunges, reverse lunges, single leg dead lift, and hip abduction to your workout regime, twice a week. By strengthening these hip muscles it will correct compensation patterns and release the tension in the hamstring and piriformis caused by overworking them. In turn, the sciatic nerve is relieved from compression.

In following these tips the causes for sciatica can be resolved and you can return to riding pain free.

Written by: Dyani Herrera

Hip Rehab Program for Cyclists

Looking for a program that will help you address the muscle imbalance that is likely causing your sciatica? Look no further than Dynamic Cyclist. This comprehensive resource addresses the most common muscle imbalances and adaptive muscle shortening that lead to pain and reduced performance on the bike. With just 15 minutes a day, you can follow along with the video programs to alleviate tension and improve posture, so you can ride pain free and reach your full potential on the bike. Try out their 6 Week Functional Rehab Program and experience the results for yourself. Click here to try 7 days free! 

Tips to Avoid and Treat Plantar Fasciitis

January 20, 2015 by Dyani Herrera

Tips to Avoid and Treat Plantar Fasciitis

tips to avoid and treat plantar fasciitis
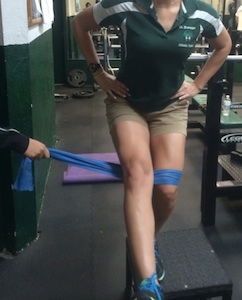
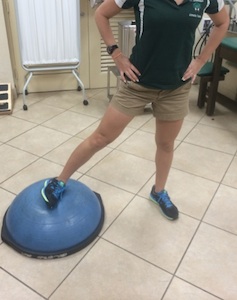
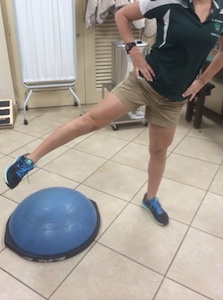
You’ve been waking up in the morning with this intense pain on your heel and the arch of your foot, which goes away once you’ve walked around a bit. It also seems to come back whenever you’re on the downstroke while cycling. After researching your symptoms you come to the conclusion that you’re suffering from Plantar Fasciitis, but aren’t sure how to treat the condition, or prevent it from intensifying. Also, you may be wondering “what is a plantar fascia?”

Anatomy:

The plantar fascia is a series of fibrous structures found on the bottom of your feet. It begins at the heel and finishes at the ball of your foot. The main purpose is to help provide stability to your foot and maintain the integrity of your arch. It is neither categorized as a muscle or tendon.

tips to avoid and treat plantar fasciitis

CAUSES:

There are several causes for this nagging pain impeding your rides. One main cause is tight calf muscles. When your calf muscles are tight, it places extra tension on your Achilles’ tendon and plantar fascia. All of these structures are the continuum of the kinetic chain in your lower leg and foot. Another main cause is having high arches or flat feet. A probable cause can also be the type of shoes you wear when you’re not riding. Some include, converse (in particular if you’re flat footed), flip flops, sandals, or ballet flats. In essence, any shoes which don’t offer arch support.

STRETCHES:

To increase flexibility there are a few stretches you can complete three times a day. These will help prevent and treat plantar fasciitis. When completing any of these stretches ensure you hold each of them for 20 seconds. One easy stretch requires you to fold a small bath towel, place it over the bottom of your foot, and then pull the ends towards you. Another stretch involves placing your heel against the edge of a pole or wall and leaning forward. If on my bike and feeling my calves tighten, I’ve found that standing off the saddle, rotating the affected leg slightly back, and leaning forward gives me a quick calf stretch when riding.

image     image

TREATMENT:

If you enjoy drinking Gatorade, don’t throw away the bottles they’ll come in handy for this treatment! Get an empty bottle, freeze water, and then roll the bottom of your foot several times. You can do this multiple times a day or on a as needed basis. With this treatment you’re getting the massage effect and breaking up any knots in the fascia. Additionally, you’re icing it to decrease pain and inflammation. You can also purchase a mini, dense foam roller with ridges to do a self myofascial release, which will decrease pain and increase flexibility. Lastly, you can have a friend who is nice enough to massage this area for you with some bio freeze or ALO analgesic lotion. This method really helps you pinpoint what area has the most restriction so you can focus on it more with the previous two methods.
It is helpful to take some Ibuprofen or naproxen sodium as directed on the bottle for a week. This will further aid in decreasing internal inflammation of the fascia, and in turn reduce pain.

ways to treat and prevent plantar fasciitis theraband

ORTHOTICS:

If you’re flat footed it would be beneficial to visit your local bike shop and have someone help you choose some orthotics that would fit your cycling shoes. I remember when I was having some issues due to my flat arches, the bike fitting specialist suggested these for me and made some adjustments to my clip positioning. These minor changes made a world of difference when I rode and minimized the pressure on my arches during my downstroke. However, if you’re having pain during normal activities of daily living it would be good to purchase some semi-rigid orthotics for your regular shoes as well. By removing the inner sole of the shoe, and replacing it with these orthotics it can aid you throughout the day.

In following these steps you can help prevent plantar fasciitis from worsening. If ignored, this injury can lead to several weeks in a walking boot, unable to ride. It can create a heel spur, which isn’t as easy to treat. Therefore, it’s imperative we listen to our bodies when it’s trying to alert us something is wrong. By catching plantar fasciitis early we can prevent an unwanted visit to our podiatrist.

Massage Tips For Tight Muscles

January 15, 2015 by Dyani Herrera

Frequent rides may do wonders for our fitness level both physically and mentally, but they do take a toll on our muscles if we don’t stretch sufficiently. Not properly caring for these muscles could lead to restrictions in our fascia. Fascia is a type of tissue in our body which envelops and divides the muscles. It has the ability to contract and relax with our muscles as well as withstand any load we may place.

However, at times if it is a higher load than our muscles can withstand, the fascia can become “deformed” and create restrictions, which lead to pain. They also cause decreased range of motion. These restrictions can become chronic issues if not treated adequately such as IT band syndrome, leg length discrepancies, or piriformis syndrome to name a few. Nevertheless, there are a few massage techniques which are great to address these “knots” in our soft tissue.

MASSAGE TIPS FOR TIGHT MUSCLES

Active-Release Technique (ART):

This technique is best completed by a clinician (physical therapist, chiropractor, athletic trainer, or occupational therapist) that is certified in this manual therapy, but I’ll help you out with a brief video so you may do these at home with a partner if a clinician is not available to you. The idea behind ART is that it releases the knots in your fascia by moving the muscle in the direction it performs (refer to the chart for assistance). For instance, to release your quadriceps the therapist would massage upwards as you extend your knee/leg.

At first, this technique can be painful, but take it from someone who does this consistently; it feels SO much better afterwards. Once your legs have been released with ART you feel like you could ride for hours. Typically, ART is done on the area that is causing you pain, but it helps to release the most active muscles in the lower extremity (hip flexor, piriformis, hamstrings, quadriceps, calves, and peroneals). This is additionally helpful, since fascia is found all over our body, and a restriction in a surrounding muscle can affect the one below or above it.

Therefore, if you’re having pain in the hamstring, part of the problem can be a restriction or lack of flexibility in the calf, causing the hamstring to work harder than it should. One good tip before performing ART is to heat the muscle being treated for about 15 minutes, to enhance the effects of the massage. A lotion that has an oily base with some analgesic would be best to help the fingers glide and offer some pain relief. Some of my favorites include “Alo” and “Biofreeze” which can usually be found at your local CVS.

ART Hip flexor & Quads  ART Quads & Peroneals  ART Peroneals & Piriformis

Muscle Action it Performs/Direction
Quadriceps Knee extension
Hamstrings Knee flexion
Hip Flexor Flexes hip/brings hip up
Peroneals Moves foot outwards, away from you
Calves Moves foot/ankle towards floor
Piriformis Hip rotation away from you

The next question you may be asking yourself is how often should you do this? This answer depends on several factors: How often do you ride? How many miles a week? Are you currently experiencing pain on one of these locations? If you’re an avid rider, it would be advantageous to do this at least once a week to address any restrictions and decrease your risk of soft tissue injury.

Deep Tissue Massage:

This massage is indicated for a person who would like a full body release after enduring a tough ride or race. It is important to note, this is not a relaxation massage, it can be painful over your pressure points, but you will feel more flexible afterwards. This type of massage should only be performed by someone who is a certified massage therapist. If an uncertified person performs this massage, they could do more harm than good. In addition, make sure to let you therapist know you are a cyclist and which areas you would like them to focus on. These can be completed once a month unless you’re in a heavy training bulk, then twice is more beneficial.

Graston Technique:

Graston massage is performed by clinicians who have been certified in this manual therapy and know how to properly use the tools. This is another technique which focuses largely on releasing restrictions in the fascia except it uses the tools in an almost “scraping” motion. Each tool is stainless steel and specifically shaped to treat certain areas of the body.

In addition to releasing fascia it also aids with removing accumulated lactic acid in muscles. It can be painful if the muscle and fascia are very tight, but will help increase flexibility and reduce risk of injury. When I’ve been in a high volume period of my training this has been a lifesaver, especially in helping me remove lactic acid. It has also helped with making my legs feel fresh for my next riding session. YouTube has several videos demonstrating the technique for different injuries and issues.

grastonSelf-Myofascial Release:

This technique is the most economical of the four and can be done consistently on your own with the help of a few tools. The most effective tools to help you include a high density foam roller, foam roller with ridges, the stick roller, and lacrosse ball. These can be completed a few times a week by rolling over the affected muscle for about 20-30 seconds, 2-3 times. Make sure to not continue rolling over the same muscle or tendon because, then you can irritate the area instead of release it. The lacrosse ball is great to release the rhomboids (between the shoulder blades) or the IT band.

high density foam rollerfoam roller with ridgesthe sticklacrosse ball

It is vital that after completing any of these massages you drink plenty of water to help your body get rid of the byproducts from the massage. Although these massages can be painful they are beneficial. The same force and tension you applied on these muscles to get them this tight in the first place is the same amount needed to release them.

Core Exercises to Eliminate Back Pain

December 21, 2014 by Dyani Herrera

Core Exercises to Eliminate Back Pain

If you’ve ever experienced back pain you know how insufferable it may seem especially when you’re trying to stay fit through a non-weight bearing exercise like cycling. First, make sure you visit your local bike shop and rule out an improper bike fit. In addition, if you’re feeling any numbness/tingling radiating down your leg, visit an Orthopedist to ensure you do not have a herniated or bulging disk. Once these causes have been eliminated, then the problem could be due to a weak core. Perhaps you’re asking yourself what exactly is considered the core? The core is a group of muscles that includes the erector spinae, paraspinals, rectus abdominus, internal and external obliques, and the gluteus maximus acts as an accessory muscle. When the core is weak and required to perform exercise which it is not prepared for, it can react by creating muscle spasms. If the erector spinae muscles or paraspinals begin to spasm, the pain can become a nightmare. However, here are some beginner exercises you can perform to strengthen your core and prepare yourself for pain-free cycling. It is ideal to perform these three times a week, with a day of rest in between.

Planks:

Planks are great to strengthen not only your back muscles, but also your abdominals. Make sure when performing planks you aren’t lifting your butt in the air in order to compensate for weakness. The whole body should be in a straight line, with your head looking up. You will need a timer for this exercise. You can start with 20 seconds and as you become stronger, increase in increments of 10 seconds. Before you know it, you will be able to hold this position for a 1 minute or more! Perform 3 sets of planks.

Core Exercises to Reduce Back Pain

Side Planks:

Side planks should be performed bilaterally and if possible with a partner. Your partner can assist you with verbal cues to ensure you are executing the proper form. However, if you cannot complete these with a partner, start out doing these in front of a mirror so you can fix your position throughout. It is important to keep your whole body in a straight line. Some common mistakes include sticking out the butt or leaning forward with the shoulders to compensate for weakness, and make the exercise easier. You can start with 20 seconds and increase in increments of 10 seconds as you become stronger. It is not uncommon for one side to be stronger than another. Typically, we have a dominant side in our body. This exercise helps with working on each side individually, without compensation from the stronger side. Perform 3 sets, bilaterally.

Core Exercises to Reduce Back Pain while riding

Basic Glute Bridges:

Since the Gluteus Maximus is an accessory muscle to the core it is important we strengthen it as well, to avoid any compensation patterns along our kinetic chain, which could lead to injury. In this exercise you will lie on your back, have your hands at your side, dig your heels into the ground , and squeeze your Glute muscles (butt) as you pop up; hold the position for about 5 seconds before you come down and perform the next repetition. Make sure your hips do not touch the floor as you come down. Complete 3 sets of 15 repetitions.

As this method becomes easier you can maintain this same position, but now instead of having both heels on the ground, raise one leg up, fully extended. The most advanced form of this exercise can be found in 7 Exercises to Cure and Treat IT Band Syndrome.

Core Exercises to Reduce Back Pain When Riding

Core Exercises for back pain

Core Exercises to Decrease Back Pain When Riding

Quadruped Arm and Leg Raise:

This exercise helps you improve balance (aka stabilization) as you strengthen your spinal muscles simultaneously. Make sure you tighten your Glute and Abdominal muscles as you perform this to maintain balance. This is another exercise that would be helpful if performed with a partner. However, if this isn’t possible then one tip I’ve found to be helpful is to place a small stick on my lower back, to serve as feedback. I know I’m in a parallel position if the stick does not fall off; but, when it does it may mean my hips are rotating, or my back is not in a straight line.

You will be in a facedown position on the floor, on all fours. Then, lift the left arm, fully extended out in front of you and extend the right leg at the same time. Hold this position for about 5 seconds before doing the next repetition. Repeat the same motion by lifting the right arm and left leg. Repeat 3 sets of 10, bilaterally.

Core Exercises to Decrease Back Pain When Riding

Core Exercises for back pain

Hip Rotation:

When performing hip rotation, it aids with strengthening your oblique muscles. You will need a large, medicine ball for this exercise. Lie face up on the floor with your legs on the medicine ball and arms at your side. Then, roll side to side as far as you can without falling off. Make sure as you complete this exercise your shoulders are on the floor and you aren’t arching your back. It also helps if you tighten your abdominals as you rotate side to side. Perform 3 sets of 10 repetitions.

Core Exercises for back pain

Core Exercises to Eliminate Back Pain

Core Exercises to Eliminate Back Pain

Ball Lift:

The ball lift helps with strengthening your lower abdominal muscles. You must lie on the floor, face up, place the large medicine ball between your lower legs, and place the legs in a 90 degree position. Then, at this height, extend and flex the legs. Make sure your shoulders and back remain flat on the floor in order to maintain proper technique. Once this becomes too easy you can progress, by maintaining the ball between your legs, fully extended, raising your legs, and lowering them all the way down before touching the floor. Perform 3 sets of 10 repetitions.  

Core Exercises to Eliminate Back Pain 

Core Exercises to Eliminate Back Pain

Core Exercises to Eliminate Back Pain

Although these exercises may prove to be difficult initially, they will help you obtain a strong core, which in turn will decrease your pain and risk of injury. These six exercises should be an integral part of your cycling regime.

What core exercises do you do to eliminate back pain?

7 Exercises to Cure IT Band Syndrome

December 15, 2014 by Dyani Herrera

It’s 5am and off goes your motivational, cycling alarm. My personal favorite is MACCA’s “Embrace the Suck” slogan. Sluggishly you get up from bed and gear up for your morning spin. Then, the moment you get on your saddle you question why you were so reluctant getting out of bed in the first place. After a nice warmup, you really start to crank it, and climb at speed when suddenly you feel that nagging pain on the outside of your knee again. It’s been creeping up for a few weeks now, and although you stretch your legs, you can’t seem to pinpoint the cause.

This, my cycling community, is known as the annoying “IT band syndrome” a common injury plaguing cyclists. If not recognized in time and treated appropriately it could really put a damper on those rides and even force you to stop altogether.

Here are 7 exercises you can do to prevent issues with your IT band, which usually occur due to lack of proper stretching and gluteus maximus (aka butt) weakness. One essential tool for any cyclist, besides flashy cycling kits is a foam roller, preferably one with ridges, which can be found at any local sporting goods store or amazon.com here.

Exercise 1: IT Band Foam Rolls  

It’s vital that cyclists roll out their IT bands immediately after their rides to release them. Hip abductor muscles such as the tensor fascia latae which tapers into the IT band, and glute medius are used frequently during cycling causing them to tighten. Proper execution of this exercise requires you to lie on your side and foam roll past your knee and hip, bilaterally. As I always tell my athletes, “if you’re not in pain, you’re not rolling it out correctly.” It hurts, but I promise you’ll feel a decrease in pain and looser afterwards.

it band hip exerciseIT band syndrome cure

Exercise 2: Glute Max Extensions

Strengthening your Glute max is vital in order to avoid compensation patterns, which can lead to IT band syndrome. The Glute Max can be strengthened with the standing hip extension exercise, making sure you don’t throw your hips back as you complete the motion. Complete 3 sets of 12-15 repetitions on both legs.

IT band syndrome symptomsIT Band Syndrome Surgery

Exercise 3: Clamshells

‘Clamshells’ require you to wrap a theraband loop around the top of your knees, and move your legs apart as your heels are kept together. As this exercise becomes easier, you can increase resistance with a thicker theraband loop. They typically range from least resistance to most resistance in a colour coded progressive system of yellow, green, red, blue, black, and grey in that respective order. Complete 3 sets of 10 repetitions.

IT Band Syndrome CyclingExercises to Treat and Prevent IT Band Syndrome

Exercise 4: Side-walks

Keeping the theraband loop in the same position (looped around both legs, above the knee), you can stand up, and complete side-walks with a slight bend in the knee in order to eliminate any assistance from your calves. You’ll want to complete these along a long stretch, which includes 20 or more steps, going left and right. You should feel the soreness on the outside hip over your glute medius and tensor fascia latae. Remember to make sure your toes are always pointing forward and not rotated in order to prevent assistance from other muscles.  Complete 3 sets, moving a minimum of 20 steps to the right and then 20 to the left.

Exercises to treat and prevent IT band Syndrome? These exercises will help cure IT band symptoms and causes. Rolling the hip and...Exercises to treat and prevent IT band Syndrome? These exercises will help cure IT band symptoms and causes. IT band syndrome hip pain is bad.

Exercise 5: 1 Leg Glute Max Bridges

Using a large medicine ball, lie on the floor with both legs fully extended, 1 leg with the heel of your foot on the ball, and the other leg in the air. Tighten your core, and glute max muscles, dig your heel into the medicine ball, and come up off the floor. Complete 3 sets of 12-15 repetitions with each leg.

Exercises to treat and prevent IT band Syndrome? These exercises will help cure IT band symptoms and causes. IT band syndrome hip pain is bad.

Exercise 6: 1 legged Squats

This exercise requires an elevated step box placed near a pole or anchor of somesort; you can also complete this exercise with the help of a partner. You must use a larger theraband loop, which has some extension, and place it around the knee of the leg you are strengthening. Once in place you can tie the band to the pole, or have your partner hold the other end. In this position you will perform 1-legged squats on the step box as you keep your hips back, keep your back straight, and make sure your knee does not go past your toes. The non-weight bearing leg should be extended out in front of you in the air. You should feel the soreness in your glute max, if you don’t, push your hips back a bit more. Complete 3 sets of 10-12 repetitions on each leg.

IT Band causes and solutionsIT band pain and cure

Exercise 7: Hip Abduction

Using a bosu ball/half medicine ball, place the side of the foot of your moving leg on the top of the bosu ball. Keep your stationary leg slightly bent on the floor. Then, keeping your foot in the same position, extend it sideways, as seen in the photo, making sure you don’t jerk your body to the side to compensate for weakness. A good way to prevent this is by keeping your hands on your hips, and this will serve as a guide for you. Complete 3 sets of 10 repetitions on each leg.

IT band exercisesIT band exercises hip abduction

As we get more dedicated to cycling, and start logging in those miles, it’s essential to be proactive with your injury prevention tactics and listen to your body. By completing these 7 exercises, 3 times a week with a day of rest in between, you can avoid one of the most nagging injuries experienced by many cyclists. In following this program, you’ll be one step closer to becoming a stronger cyclist.

IT Band Program for Cyclists

Looking for a program that will help you address the muscle imbalance that is likely causing your knee pain? Dynamic Cyclist is an online training platform designed to help cyclists become stronger and faster while riding pain free for years to come. Complete your regimen with an all-inclusive program that addresses mobility, flexibility, strength and injury prevention, all for a fraction of the cost of one physiotherapy appointment. Try out their 7-Day IT Band Program and experience the results for yourself. Click here to try 7 days free!

Dealing with Spring Road Conditions

December 12, 2014 by Aaron Robson

Dealing with Spring Road Conditions

spring road conditions
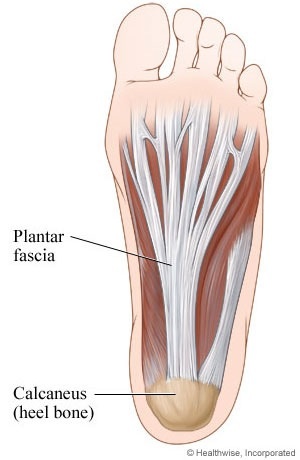
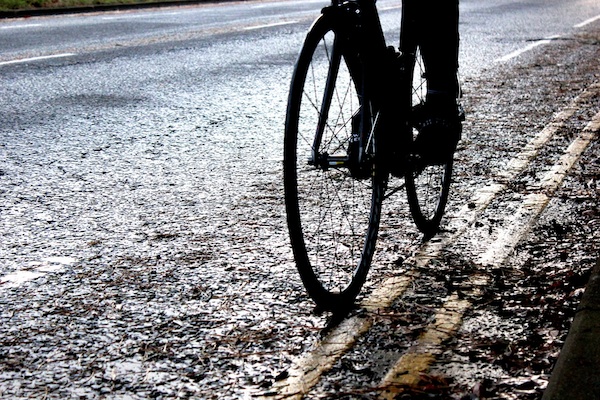
Road conditions are a huge problem with spring riding. During the winter, a ton of grit and salt gets dumped on roads to keep them grippy and snow-free, and, come spring time, all of that stuff ends up in one place – the shoulder where you want to ride. Spring is also pothole season, as water seeps into cracks in the road and freezes overnight, threatening to open up holes the size of the Grand Canyon in your favorite roads. There are a few easy things you can do to beat these obstacles and have a safe and enjoyable spring riding season.

Staying Flat-Free

Nobody likes to change a flat tire, and the side of a road in a spring downpour is about the worst time to have to do it. But this time of year seems to produce an abnormal number of frustrating flats. The culprit? Road grit. As it builds up on the side of the road, it collects all the little bits of stuff that would normally get blown off into the ditch – pieces of glass, metal shards, nails, etc. Normal, lightweight road tires get torn up in these conditions.

To keep you riding, a durable, puncture-resistant tire is essential. These tires have Kevlar fabric, or something like it integrated into the casing of the tire to strengthen it. Most major tire manufacturers offer at least one model like this. They won’t be the lightest, or the smoothest rolling tires, but they will take a beating. I have the Continental Gatorskins on my bike right now that are a nice balance of performance and protection. The same company also makes even more durable (and heavier) tires – the GatorHardShell and the Grand Prix 4-Season. Other options include the Specialized Armadillo and Schwalbe Marathon Plus.

Pothole Avoidance

Weaving your way through the obstacle course that some spring roads tend to turn into can be a daunting task, but there are a couple of tricks that will help you out. The simplest is to look where you want to go, rather than looking at all the things you want to avoid. If you have ever managed to hit the only rock/hole/whatever on a nice smooth stretch of road because you were staring straight at it, you will know how well this works. Look ahead, pick your path through the debris, and then follow that path with your eyes. Your body will guide your bike there without you having to think about it.

As skillful a bike slalomer as you might be, occasionally there will be times that you can’t go around something – maybe you are on a shoulder with cars to your right, or you might be in a group with other riders. Whatever the situation, you need to take alternative action. Enter the bunny hop. If you haven’t heard the term before, the general idea is to ‘jump’ your bike – both wheels leave the ground for an instant. This isn’t something that you want to try out for the first time at 25 mph on pavement – find a grass field to practice on. With clipless pedals, the task is considerably easier. There are countless YouTube tutorials out there, but in short, you are going to ‘hop off’ your pedals (not literally, since your feet are clipped in), and then bring the bike up along with you. Don’t think about pulling the bike up first – your body has be be airborne before your bike can follow. When you’ve got the hang of the maneuver on grass, try it out at slow speeds on the road before working your way up to full speed.

Embrace the Fender

Grit and water aren’t much fun to ride through, and they are even less fun when you end up covered in them during a ride. Fenders are your friend for spring riding. They keep you (relatively) dry, grit-free, and they also keep all that same stuff from getting into your drivetrain, reducing maintenance and keeping your bike running smoothly. The type of bike you have will determine what your fender options are. For full-fledged race bikes choices are limited since attachment points and tire clearance are minimal. The SKS Race Blade fender is just about the only good option.

With lower-end road bikes, and touring/cyclocross bikes, you have more possibilities. Some people like clip-on fenders, since you can take them off at the end of the season to keep your bike looking slick. The downside to these are they won’t offer the same coverage and performance as a dedicated bolt-on fender set. If I just had one bike, I’d probably use clip-ons, but with my current set-up – one touring/commuting/spring riding bike, and another race/summer riding bike – I like bolt-on fenders that I leave on my commuting bike year-round. Whatever you choose, it will be light-years better than going without!

Foot Pain Cycling – Causes and Solutions

December 9, 2014 by Lee Agur

Foot Pain Cycling – Causes and Solutions

foot pain cycling - causes and solutionsFoot pain cycling is one of the most commonly reported problems among cyclists. This can be partially accredited to the pressure placed on your feet from the bike’s pedals, but more likely it has to do with your choice of cycling shoe and foot positioning on the bike.

Injuries and Treatment

Hot Foot

Choosing The Perfect Shoe

Shoe selection should be just as important to you as the bike that you choose to ride. The foot itself is equivalent to the engine that powers your car, and requires proper care and maintenance to operate.

When you pedal, you are creating friction within the shoe which generates heat. This heat and constant rubbing will result in blisters and swelling of the feat. As your feet swell they’ll be pushing up against the walls of the shoes, resulting in pressure on the nerves, restricting blood flow, and causing a burning sensation in the foot. This feeling is often referred to as “hot foot.”

The longer that you ride at high intensity, the greater your risk for experiencing foot pain and aches. Alleviate these common compression injuries by selecting a looser fitting shoe with ample ventilation to release the pent up heat while you ride.

Pay close attention to the width of the front of your shoe when you are shopping around as this will be the part of the foot that experiences the most pressure. Purchase a shoe that holds your feet snug, but leaves room on the sides and front for expansion.

Test: Take the insole out of the shoe, place it on the ground and put your foot on top of the insole. If any part of your foot is outside of the insole you need a wider shoe.

Fasten the straps and lean forward slightly to position the foot like you would if you were pedaling the bicycle. Make sure that the tongue of the shoe doesn’t fold over or bend significantly as this could cause additional pressure. How does this feel?

Choosing The Perfect Sock

Choosing the proper sock for cycling goes a long way to keeping your feet cool. If you get foot pain cycling then make sure to purchase high-tech cycling socks that wick away sweat. Also try the socks on with your cycling shoes to make sure they feel good before you buy them.

Altering the Pedals

Small pedals installed on road bikes concentrate pressure on a single location, increasing your risk for hot foot and foot problems. You might also try moving the cleats backwards to disperse pressure throughout the foot, or even lowering the seat can help.

Numbness

Numbness in the foot is usually caused by an impingement in the nerves in your foot which causes the numbness, sharp shooting pain, tingling or burning. Mostly, this is caused by too tight of shoes, try loosening the straps or laces. If that does not work it is likely time to buy new shoes.

Achilles Pain

Though uncommon in weekend warriors, achilles tendinitis does occur and is generally caused by improper pedaling, saddle height, overtraining or no warm up. If you have achilles tendinitis then you should rest it, ice it and consider anti-inflammatory medication.

Sesemoiditis

Pain in the ball of your foot? You may benefit from orthotics or purchasing a shoe that fits properly.

Improper Foot Positioning

Faulty foot positioning can cause be the source of many other cycling related pains such as knee pain, lower back pain, shin splints, achilles pain and more.

If none of the recommendations help and you can’t find shoes that can alleviate your foot pain, you might consider investing in custom orthotics and a professional bike fit to help alleviate pain and make your ride a more enjoyable experience.

« Previous Page
Next Page »
  • Facebook
  • Tumblr
  • Twitter

Latest Articles

JOIN Cycling: A New Training Platform for Cyclists

May 27, 2024 By Eric Lister

cold exposure

The Benefits of Cold Exposure for Cycling & Life

June 13, 2023 By Eric Lister

hill climb

The Ultimate Hill Climb Training Guide

May 31, 2023 By Eric Lister

shoulder pain cycling

How to Treat & Avoid Shoulder Pain While Cycling

April 12, 2023 By Eric Lister

psoas stretch

The Importance of the Psoas Stretch for Cyclists

April 6, 2023 By Eric Lister

cycling neck pain

The Ultimate Guide to Cycling Neck Pain: Causes and Solutions

March 21, 2023 By Eric Lister

Useful Info

  • Contact
  • Finally, A Global Cycling Club That Is Focused On Community And Love Of Cycling!
  • Privacy Policy
  • Share Your Story!
  • Terms And Conditions Of Use
  • Welcome to I Love Bicycling
  • What Happened When I Stretched Every Day For a Month

Recent Posts

  • JOIN Cycling: A New Training Platform for Cyclists
  • How to Hang Bikes in Your Garage: 4 Inexpensive Options
  • Gravel Bike Vs. Road Bike: Which One Is Better For You?
  • The 6 Types of Mountain Bikes & How to Choose the Best One for You
  • What Is a Touring Bike Good For? 5 Benefits We Know You’ll Love

Search I Love Bicycling

Connect with Us

  • Facebook
  • RSS
  • Tumblr
  • Twitter

Copyright © 2025 · Magazine Pro Theme on Genesis Framework · WordPress · Log in