• Training
    • Injury Prevention
    • Training Tips
  • How To
    • Bike Fit
    • Gear
  • Nutrition
    • Nutrition Tips
    • Weight Loss
  • Repair
  • Reviews
  • Stories
    • Funny Stories
    • Jokes
    • Quotes
    • Videos
    • Funny Videos

I Love Bicycling

I Love Bicycling is a website that is geared towards cycling for beginners with road cycling tips, training articles, nutrition tips, weight loss, how to’s and bike repair articles.

How To

  • Bike Fit
  • Gear

How To Choose The Right Bike Tires For Road Racing

July 21, 2015 by U.M.

When you’re a road racer one of the most important weapons in your arsenal will be the tires you have on your bike. There are several things you’ll want to consider when you go to buy the tires.

Tire Sizebike tires for road racing

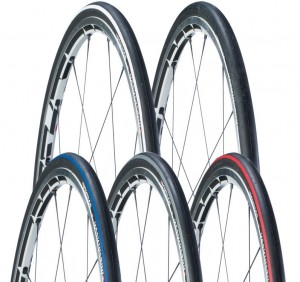
A good size for bike tires for road racing are 700, sometimes referred to as 700C. An exception to this rule is tire size 650s which is typically for small cyclists to decrease their stand over clearance. The rim of your wheels should have the size printed on it but if it does not you need to take the bike to a bike shop for correct sizing. Bike shops have special tools that can find the circumference (size) of the wheel much more accurately.

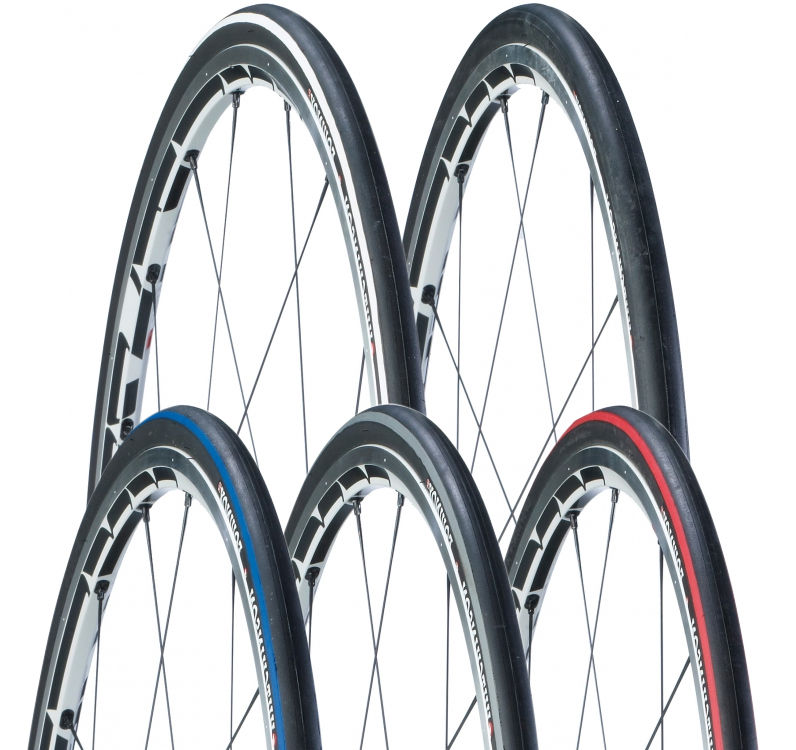
The width of bike tires for road racing usually vary from 18 to 25 mm. However, these are the narrowest options available and some cyclists like tires ranging from 25 to 28 mm. Typically the thicker tire gives more stability and comfort and has most recently been linked to fastest times due to smoother rolling and increased shock absorption.

The Tread

You need to be very specific about the tread on road racing tires. Tires with a slick style tread will work the best. Slick tires will appear smooth with a minimal tread pattern. This kind of tire tread was designed specifically for riding on the road and works wonders during a race. On dry roads, slick tires provide the most traction because they have the greater percentage of contact with the ground. Be careful if you are riding in wet conditions though, as slicks will be particularly slippery.

Furthermore, the reduced tread on slick bike tires keeps the tire from deforming under load. This means that the tire can be made of lighter materials without running the risk of damaging the tire during a race. All of this means that slick tires are the most lightweight option that provides the greatest traction on dry roads.

Soft Rubber

Because the tread is terrible for any road condition other than dry you have to make up for traction and grip somewhere else. That somewhere else is the soft rubber of the tire. Soft rubber is sticky and grips the road much better than hard rubber does. However, these tires wear out easily and have to be replaced more often. So if you’re mostly training as opposed to racing then a hard rubber tire will be the more economical choice.

Another economical choice is the dual-compound bike tire that uses soft rubber where the wheel meets the ground and hard rubber everywhere else. These last a little longer and are a common choice for high-performance cyclists who can’t afford to go through tires unnecessarily.

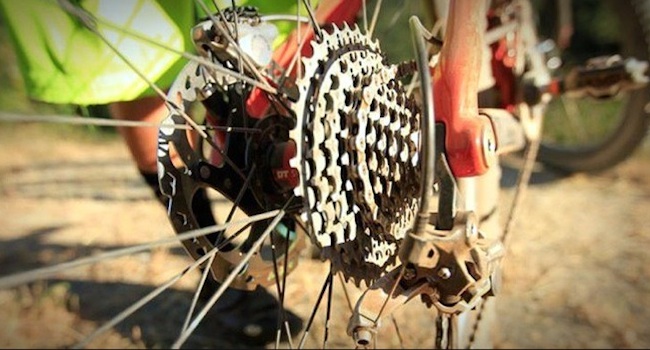
 Thread Count Casing (TPI)

The TPI is important for road racing tires because the road is where the tire experiences the highest pressure. A good TPI to aim for is anywhere from 60 TPI to 320 TPI. A higher thread count tire is by far the best performance tire. A high thread count will make the tire more supple which in turn makes the tire more resistant to punctures. A higher TPI can also make the tire more lightweight.

Tubular Tires vs. Clinchers

Tubular tires used to be more prevalent, but it seems as if convenience has won and most riders now use clinchers. Tubular tires are more lightweight but a huge pain in the ass to change in the unfortunate event of a flat tire. Unless you have a follow car close behind we recommend that you purchase clinchers. Clinchers are commonplace and nearly as lightweight as tubular these days. If you are a true weight weenie then go for the tubulars… just don’t expect for someone to wait for you on a group ride.

Durability

It is awesome to have a really lightweight tire for accelerations and climbs; however, replacing the tires every few weeks can make the piggy bank squeal.

These are likely the most pressing concerns about your racing tires. When you go to the bike shop make sure to take your bike with you so that the shop’s tire expert will be able to help you find the right bike tires for road racing.

Our personal favourite tires are ones that are fast enough to race yet durable enough to stand training such as the Michelin Pro 4 Service Course and the Schwalbe Ultremo ZX HD.

What are some of your favourite bike tires for road racing?

Specific Situations For Gear Changes

June 3, 2015 by Dyani Herrera

Specific Situations For Gear Changes

change bike gears in specific situationsAs a new cyclist the first step is learning how to clip in properly without toppling over. Once this skill is mastered the next step is knowing how to properly change gears. You could’ve purchased the most aerodynamic bike with amazing components, but if you don’t know how to properly utilize the shifters, you’re shortchanging yourself on speed as well as energy efficiency. Initially, it’s important to understand the anatomy of your bike gears in order to use them effectively. There are several, situations which require a change in gears for optimal performance.

Hills/Bridges

While cycling if you are approaching a steep hill or bridge it is wise to gear down, in other words create the least resistance possible while still maintaining stability on the bike. In approaching this situation you will already feel resistance going up the hill/bridge, therefore why add more resistance by riding in a big gear? However, if your goal in that particular ride session is to build strength in the hip flexors and gluteal muscles then gearing up (riding in a big gear) allows you to pedal off the saddle and strengthen these muscles. Conversely, while you’re going downhill momentum will create very little resistance and allow you to ride faster. In this instance, gearing up is suggested in order to maintain stability on the bike, steady pedal stroke, and regain speed lost going uphill.

Tailwind/Headwind

When going into a headwind you will automatically feel a drop in speed because of the resistance going against the wind. Unless you’re an experienced cyclist this situation can be challenging for most riders. In fighting a headwind it is effective to gear down (switch into a small gear) and increase your rpms. By riding in a smaller gear with high RPMS you’ll be able to battle the headwind at a good MPH average. Also, it won’t fatigue your quadriceps as much, and it’ll reduce lactic acid buildup that would occur if you were riding in a big gear into the headwind. However, once this battle has been fought we reap the benefits of the tailwind. In a tailwind, you are receiving an extra push and thus, our speed increases. In this instance, you must take full advantage and gear up in order to gain a bit of resistance needed for stability, and increasing your average MPH significantly.

Flats & Intervals

Depending on your particular workout, riding on flats offers the opportunity to gear up unless you’re fighting a headwind. The more you ride; you will discover which gear selection is ideal for you. Usually this gear selection allows you to have some resistance to maintain stability and increase speed, but not so much that it quickly fatigues you causing you to drop in speed over time. In contrast, if you are completing interval work, gear changing is vital in order to render the results offered by this type of training. If your goal is to increase overall cadence then gearing down is best in order to allow minimal resistance and a rapid pedal stroke. However, if your goal is to build strength and muscle endurance then gearing up during your work intervals is best. By riding in a big gear your legs will increase in strength and become accustomed to a higher gear. Lastly, if you are inserting some pickups pedaling off the saddle, then gearing up is important for stability. If you do not place your bike in a big gear, the bike will be hard to control pedaling off the saddle. Also, it will inhibit you from a proper pedal stroke. In this instance, you want to create enough resistance that you feel in control of the bike and are simulating a sort of “dancing” motion with your bike.

As a new cyclist, it takes some time to really understand your gears and when to switch them for your particular needs. This can be safely accomplished when riding on an unbroken bike path. Riding on a continuous bike path allows you to play with the gear shifting and find that ideal selection for you. It’s important to note that when you are shifting gears you should continue a slow and steady pedal stroke in order for the chain to catch fluidly on the ring. Lastly, never change a gear without pedaling because this could cause you to fall, the chain to become stuck, or have the chain fall completely.

Out the Door in 15 Minutes

May 7, 2015 by Monica Rosa

Out the door in 15 minutes

Most of us, if not all, live extremely busy lives.  It is a constant balance between family, work, different responsibilities, and some quality time on the bicycle. Every minute counts, especially on weekdays.  Many try to squeeze some time on the bike before work and we want to get out on the road as soon as possible while others value a few extra minutes of sleep before they train.  Here are a few tips to get you out there door in 15 minutes.

Pumping Your Tires

Save some time by pumping your tires the night before.  There’s no real need to pump it right before you ride.  This is one less thing to have to worry about in the morning.  Also, it avoids waking up anyone that may live with you. In the morning just make sure to check your tire pressure with your thumb to ensure there was not a slow leak overnight.

Bike Computer

Along with pumping your tires, do a quick check and make sure your bike computer is charged.  If not, take a few minutes to charge it while you finish up your nightly routine so that it’s ready to go in the morning.

Check the Forecast

Also, take a look at the forecast to make sure you know what you have to wear.  If it’s chilly and windy, you’ll pull out the wind jacket.  If there are chances of rain, you already know and prepare accordingly.

Prepare Nutrition

Nutrition depends on the length and intensity of your ride.  Some days we need to leave with pockets full of bars, other mornings a bottle of water will suffice.  Determine what you will be using and also prepare it the night before.  Not only will it save time but you won’t leave the house without forgetting that all important gel or Bonk Breaker.  Prepare all your hydration as well.  Even if it’s just water, filling up the bottle the night before will save you a minute or two.  Don’t forget breakfast! Don’t scramble looking for your meal in the morning; leave it all visible in the fridge.

Cycling Kit

Before you settle in for bed, pick what kit you’re going to wear, your socks, and leave it set up in a visible place.  For the ladies, make sure to grab a sports bra.  Put anything that goes in the pockets, whether it is nutrition or a little extra cash.  Don’t forget any weather related extras (ie base layers, wind jackets).  Keep your chamois cream or sunblock nearby so that it’s in arms reach when you’re getting dressed.

All the Extras

Whether you pack up your car or leave right from home, gather any additional gear in one place.  If you are driving to a location we recommend having a cycling bag and packing it the night before.  If you’re leaving from home for your ride, you can place it all in the most convenient area.  Be sure to run through the list so you don’t forget anything.  All cyclists need at least their helmets, cycling shoes, gloves and sunglasses. Don’t forget your extra tubes, patch kit, tire levers and pump.

Preparing the night before will allow you to wake up, put on your kit, grab your bike and get out the door in minimum time.  Not to mention, it’ll be less likely you’ll forget anything in the early morning haze. It’ll take a little practice to master but after a few times you’ll be getting a few extra Z’s.

Happy riding!

The Art of Sweet Talking Your Local Bike Shop Employees

December 16, 2014 by David N. Stiles

Bike ShopIf you’ve ever been to a bike shop you’re sure to have encountered an employee that seems to think you are the dumbest person on the planet. I don’t really know why but before I taught myself the art of sweet talking the elitist bike snob I would walk out of a shop muttering “What a jerk.”

The silly part is, I used to work in a shop, I know the pet peeves of shop employees. Sometimes you can’t help it, everybody has a bad day here and there, and it takes a special kind of person to keep their cool while working in customer service every day, but some of these guys seem to have bad days way too often. Either way, to enhance your bike shop experience you need to learn to sweet talk the employees.

#1: Stupid Is As Stupid Does.

Either play dumb and keep your speculation to yourself or do you homework. Nothing seems to set off a hail storm of condescension than incorrectly calling a “wheel” a “tire” or mistakenly referring to the “cassette” as “cogs” or “the sprocket”.

#2: No discount for you!

Don’t ask for a discount. Even if you fancy yourself a bit of a racer. Everyone asks for a discount. Sure bikes and bike parts are marked up nearly 100% from wholesale but even with that mark up most shops barely make any money.  Asking for a discount is a sure fire way to get a shitty tune.

#3: The eBay Trap!

Never bring in a part you bought from ebay. In fact it’s better to not even mention eBay within 100 feet of a bike shop. Trust me when I say this is a can of worms you don’t want to open. It would be like bringing up politics with your grandfather at Thanksgiving. Oh, and if someone at the shop brings up eBay, ignore it because it’s a trap!

#4: Be A “Norm”.

If your shop puts on a bike tuning class or other educational events, go to them. You don’t have to go to all of them but if you get to know the owners and employees you’ll be surprised at how your relationship will change with them. You may even get a discount on labor or parts. But remember, don’t ask for it, if they offer, just say thank you. Then load up your cart with a ton of crap you may need someday because lord knows you might never get a chance like this again.

#5: The Caffeine Catalyst.

When it’s crazy busy in a shop don’t get frustrated or impatient. Either wait your turn or leave and come back later.

Option A) If you wait, when it’s your turn make a joke about how busy it is and how well they are handling it. NEVER, I repeat, NEVER, under any circumstances say something about the shop being short staffed or that they need to hire some more help. You might as well kiss your Schwinn goodbye.

Option B) Likewise, if you leave then come back later the same day you can ask the employees if you can run and grab them coffee or a sandwich. Chances are they haven’t eaten anything with the rush, just be prepared to deliver if you ask, shop employees are not modest, they will whip out a $10 bill and take you up on your offer before you know it.

#6: Buy Something Or Drool By Yourself

If you are looking at bikes but you are not really ready to pull the trigger and buy don’t take up too much of an employees time asking silly questions. You know the difference between the shifters on this bike or the brakes on that bike. General questions are ok as long as they are prefaced with “I’m really just looking but I plan to get a bike in the next few…(days, weeks, months or whatever).”

It may seem quiet in the shop but more likely than not, out back, there are 30 bikes needing tune ups and 15 new bikes needing to be built. One never stops working in a shop, so buy something or quietly look and drool by yourself.

Finally, if some sickly looking, shaved legged guy comes in to the shop and the employees start being all nice to him and joking about something in bike lingo that you can’t really follow, don’t get jealous. They like him more than you because he has put in the time sweet talking the shop employees and with a little work you can be a skinny, shaved leg shop rat too.

How To Curb Tired Legs

December 15, 2014 by Dyani Herrera

tired-cyclistHow To Curb Tired Legs

We’ve all been on those group rides, where we became overzealous and thought we were speed bikers at the Kona World Championships. Then, spent the next few days paying the price, feeling like you were lugging around cement blocks; thinking, how can you rid yourself of these tired legs so you can hop back on for your next ride? Here are a few tips to speed up recovery after a tough ride.

Post-Ride Recovery Shake

It’s crucial to have a protein shake with some carbohydrates within 45 minutes of finishing your ride. Research has demonstrated that when combining carbohydrates with protein immediately after exercise it increases muscle synthesis. As we ride we break down muscle, and the body builds more muscle after activity as a process of adaptation to exercise. Forty-five minutes is the time frame when your muscles are most hungry for nutrition, and absorb readily to aid with muscle repair. In addition, it is a crucial period in restoring the glycogen (energy) stores we’ve depleted during our ride. It’s also been shown that endurance athletes rely on protein during long rides as a last fuel source once we’ve depleted our glycogen and fat stores. Recommended daily allowances of protein for males include 84-112 grams and 66-88 grams for females. Furthermore, some of my favourite mixes include soy milk with a scoop of vanilla, whey protein, mixed with some strawberries, and blueberries for the antioxidant effect. If I’m craving something sweeter, then I add a scoop of peanut butter along with protein powder, and some banana slices.

Stretch Before and Post Ride

Make sure you stretch your leg muscles in order to minimize the decreased range of motion due to sore muscles, which could lead to strains. Vital muscles to be stretched include quadriceps, hamstrings, calves, IT bands, hip flexors, and glute maximus. There are several stretching techniques one can use to achieve elasticity. The most commonly known is “static stretching”, which requires you to stay in a stationary position, and place the muscle in a stretch, typically in the opposite direction the muscle performs.

There is also “proprioceptive neuromuscular facilitation (PNF) stretching”, which involves stretching the muscles with alternating sets of static stretching versus muscle contraction; with this style you would need a partner to assist you. A PNF stretching example includes a static stretch of the hamstring for 10 seconds, and 10 seconds of contracting the hamstring by pushing against the person’s hands/body, with a stretch-contract-stretch sequence. The advantage of this stretching is you see immediate gains in flexibility, more so than in static stretching.

Another form is “dynamic stretching”, which involves a person performing low intensity exercises involving that muscle action; for instance, walking lunges to stretch the hip flexors. These are best completed before a ride in order to get the muscles firing and geared up for cycling. Each stretch should be completed 2-3 times, for no more than 30 seconds each. It’s more effective to stretch these muscles once you’ve completed a 10-15 minute warm up, as well as immediately post ride. Research has shown minimal elasticity gains when performing these stretches prior to a warm up. “I Love Bicycling” has an article on some great stretches for cyclists with photos included.

Hydration Post-Ride

After a ride, drink plenty of water mixed with a cap of Pedialyte, per 8 ounces. Pedialyte contains condensed electrolytes, and aids in speeding up muscle recovery by hydrating muscles, and flushing out lactic acid. By drinking plenty of fluids with electrolytes, it helps your body eliminate the lactic acid through urine. In addition, it helps in hydrating your body in preparation for your next ride. There are formulas online, which can be used to figure out how much water is needed for your particular body weight and activity level. One way to check if you’ve hydrated adequately is by observing the colour of your urine. If your urine is yellow you’re still in need of hydration, but once it comes out clear or a pale yellow you are hydrated.

Ice Bath

A great way athletes minimize soreness and achy joints is by making themselves an ice bath. The advantage of an ice bath is allowing several muscles and joints to be treated at the same time. It is also the one ice treatment that has the deepest penetration effect of tissues. This treatment can be done in the bathtub of your home. Fill up the tub until it passes your thighs and dump in 1.5-2 bags of ice. In order for it to be therapeutic the temperature should be between 50-60 degrees. Granted, you’ll be freezing for the first 5 minutes, but afterwards you’ll be numb. If you don’t have a bathtub this can also be done by purchasing a 10 gallon garbage tub, and completing the same process. The ice bath can be completed for a minimum of 20 minutes, but no longer than 30, because then it has the adverse effect. If done for more than 30 minutes the body begins to think it’s entering a hypothermic state, and starts to dilate the blood vessels in order to increase body temperature. This is the opposite effect of the ice, which is intended to constrict blood vessels in order to decrease swelling and eliminate pain.

In following these four tips, it’ll help you avoid delayed onset muscle soreness (DOMS), which happens when you’ve pushed your body a bit too far. By speeding up recovery, we can gear ourselves up for our next ride, where this time we can imagine ourselves to be as fearless as Sebastian Kienle going into a headwind.


Road Bike Tire Pressure – Get It Right!

December 8, 2014 by Lee Agur

Road Bike Tire Pressure – Get It Right!

bike tire pressureMaintaining the proper air pressure in your tires is important because it allows you to experience a smooth ride and helps you to ward off things like pinch flats and punctures. Ideally, you should check your tire pressure every time you plan to go for a ride. Modifying the pressure to match the type of terrain you’re planning to encounter is a good way to get the most out of your bike ride.

Road Bike Tire Pressure

Most amateurs make the common mistake of thinking that the higher the tire pressure is, the faster you are going to go! Unfortunately, that is not how it works. Pro’s match their tire pressure to the conditions of the day.

Finding the Right Pressure

Generally speaking, road tires can require anywhere from 80 to 140 psi. The manufacturer’s recommendations should be printed on the tire and will be a specific range depending on the type of tire. You shouldn’t go above or below the manufacturer’s recommendations, but how do you find the ideal pressure within the recommended range?

Well, we all understand that rolling resistance is high at low pressure, but what happens when you inflate the tires with too much pressure?

Overinflated tires can rob you of speed by forcing your momentum up instead of forward as you bounce over every little bump and rock in the road. In recent tests the rolling resistance between a tire inflated to 85 psi as opposed to a tire inflated to 110psi is negligible. Additionally, and perhaps more importantly, safety is significantly reduced with high tire pressures. Ever try to take a sharp turn at speed around a moderately slippery corner with overinflated tires? Let me spare you the mystery and say that you will end up scrubbing dirt out of some road rash on your hips, ass, elbows and more.

Pros Of High Tire Pressure

  • Reduced Rolling resistance – less surface area of the tread is touching the road

Cons Of High Tire Pressure

  • Increased wear and tear on tires
  • Reduced handling and control due to less rubber touching the road
  • More vibrations through the tire and frame which reduces comfort of the ride
  • More vibrations and bumps reduces the forward momentum and slows you down

Adjusting PSI to Meet Specific Circumstances

The trick in finding the ideal road bike tire pressure is in adjusting to your particular ride that day.

The bumpier the ride, the lower your air pressure should be. If you’re planning to hit rough terrain, a lower psi will give you better handling and improved control. It will also make your riding more efficient by rolling over the little stuff and not bouncing skyward. Tire pressure needs to be adjusted for environmental conditions as well. A lower psi will improve a tire’s grip on rainy, wet roads.

A couple commonly overlooked factors in setting the proper tire pressure is the individuals weight and the overall weight distribution on each tire. For instance, a heavier rider should inflate the tires more than a lightweight rider. Also, the rear tire should be inflated a few psi more due to the fact that it takes 55% of your weight and the front tire only takes 45% of your weight.

Be careful not to set the pressure too low, however. Tires with low pressure pick up more road debris. Low pressure also increases the risk of pinch flats, which occur when the tube is squeezed between the road and the rim to the point where it punctures.

Keep in mind that the tires on road bikes are narrow, so a small leak can equal a significant change in psi. This is why it’s important to check the air pressure on a regular basis. Maintaining your tire pressure translates to a more efficient ride and cuts down wear on your bike, which ultimately means more time on the road and less money spent on costly repairs.

General Recommendations For Tire Pressure

As mentioned above it is very difficult to determine an ideal tire pressure for a particular road bike ride; however, I still have a generally a rule of thumb.

Fair weather, with moderately smooth road conditions: 105 psi for the rear tire and 102 psi for the front tire.

Rain/snow or bumpy conditions: 92 psi for the rear tire and 90 psi for the front tire.

Smooth road conditions and not many corners: 109 psi for the rear tire and 106 psi for the front tire.

These are just rules of thumb and are very dependant on the kind of tire you have, the rim width, air temperature, loand and a whole bunch of other factors. I just noticed when I went to research this years ago it was difficult to find a starting point.

What have you found is the ideal road bike tire pressure for you?

Best Bike Brands

November 28, 2014 by Lee Agur

Best Bike Brands

Everyone keeps asking what are the best bike brands? There is no one answer fits all. It depends what kind of cycling you are doing! Road biking, Mountain biking, commuting, triathlon, cross? Nevertheless, I do pick my favourite bike brands based on the type of cycling I am doing.

Truthfully, if you want to find the best bike you should decide on your price range first, then determine what kind of qualities you value most ie. ride feel (comfort, stiffness, handling) then look at which bike brands offer models of bikes that fit your criteria. That being said, there are industry leaders in certain categories but realize that by blindly selecting one model of a bike brand over another it is a style choice and not a performance choice.

Best Road Bike Brands

Selecting the best road bike brand is no easy task. There are thousands of models to choose from and price point is an incredibly important variable. Below is a list of the best mid range to high end bike brands on the market with a picture of one of their bikes. If you are looking for the best entry level road bikes then here they are: The Best Road Bikes Under $1000.

Trek

best bike brand

Cervelo

best bike brands

Giant

best bike brands

Specialized

best bike brands

Cannondale

best bike brand

What about you? Do you agree that these are the top 5 best bike brands? What is your favourite?

Best Mountain Bike Brands

What kind of mountain biking you anticipate on doing is the most important factor in the best brand to buy! Are you into cross country (XC), Trail/Enduro, All Mountain or Downhill (DH)? No matter what kind of riding you are doing here are the top 5 mountain bike brands:

Specialized

best bike brands

Santa Cruz

best bike brands for mountain bikers

Trek

best bike brand is trek

Yeti

Amazing Bike Brand

Giant

best bike brands

What is your favourite mountain bike brand?

Best Triathlon Bike Brands

For the best bike brands in the triathlon series I refer to Kona. As you may or may not know Kona is home to the Ironman World Championships and is arguably composed of the most well informed riders on the planet.

Cervelo

Cervelo continues to dominate the triathlon field at Kona or at any triathlon generally representing double or more of it’s closest competitor. Cervelo’s triathlon P series has a fantastic combination of aerodynamics, comfort and speed.

Trek

In 2009 Trek came out with the Speed Concept and blew everyone’s mind on how sleek the ride looked with all of its components so perfectly integrated. Many of the triathlon bikes these days have adopted Treks style. In the popularity contest, Trek is the second most popular bike ridden at Ironmans.

Specialized

Specialized now has the SHIV which is boasted to be stiff and amazing in cross-winds. It doesn’t hurt that Tony Martin won the UCI Time Trial World Championships on it back in 2013.

Felt

Felt has a wide range of triathlon bikes that appeal to the beginner all the way up to the elite. Felt is continually rising in popularity in the triathlon world.

BMC

Rounding up the top 5 in the best triathlon bike brands is BMC. The timemachine has become a very successful bike since 2011 and 2012 when Cadel Evans road to Tour de France Victory and Andrea Raelert established a new world record over the Ironman distance.

Which bike brands do you think are the best? Share them in the comment section below.

How To Stay Safe on the Streets

November 23, 2014 by Aaron Robson

How To Stay Safe on the Streets

Staying safe on the streets - how to stay safe on the streets
Cyclists protest in London for safer streets.

Biking is a fun, cheap and healthy way to get around town (and if your traffic is as bad as mine, faster too!) but all of that goodness can be ruined by a run in with one of those other occupants of the roadway. Some people subscribe to the view that if you bike regularly in traffic, it is just a matter of time before you get hit, but I’m not one of them. While I do agree that some car-bike accidents are just really bad luck and timing, in my opinion, these are rare. More often than not, when I hear about car-bike encounters, I can identify things that the cyclist could have done to avoid the collision entirely or at the very least mitigate the severity. This isn’t to say that the cyclist was in the wrong in these instances, but right or wrong doesn’t really matter when you end up on your backside in the street. So what can you do?

Gear Up!

First and foremost, safety gear. A helmet should be a given – the specific type doesn’t really matter. Get one that is comfortable, and that you will like wearing. Unless you are into wearing body armor while riding, there isn’t much else you can do to protect yourself, but there is a lot you can do to help you see and be seen. Lights are a necessity at night, but you can still use them during the day to increase your visibility. I also really like to use a rear view mirror in the city. It helps me stay aware of what’s behind me and means I don’t jump out of my shorts when a car buzzes past me at 45 mph honking their horn. There are both helmet and handlebar mounted versions available. Try them both out, and see what you like best.

Constant Vigilance

Now that you are suitably equipped, when you get out on the road in traffic, your biggest concern should be knowing everything that is going on around you. Where are the cars near you, and what are they likely to do? Are there any intersections coming up, or driveways that a car could suddenly pull out of? Is your lane going to end, or merge? It is impossible to cover every possibility that you might face on the road – good situational awareness develops over time – but generally, you should be thinking about what is going to happen before it actually does.

People are Dumb

Even though you are constantly assessing the situation around you, the next step to staying safe in traffic is assuming that all the other people on the road with you are the exact opposite – completely clueless. Never assume that someone sees you, or is going to stop for you, or won’t change lanes because you are already there. If you start expecting people to do silly things, it won’t come as a surprise when they do. You can take this assumption to the next level by imagining yourself to be invisible! This mind game helps you to pick out the safest places to be and routes to take as you navigate the maze of obstacles on the road.

Exit This Way

All of the awareness and foresight in the world still sometimes isn’t enough to keep you out of a sticky situation. Your last line of defense is to try and keep a buffer space around you, and always have ‘escape’ routes available. Obviously, you can’t always have the space you want, but for an example, when cycling past a line of parked cars, I will always ride far enough away that if a door opens suddenly, I’m not going to hit it. In heavy traffic, you should always be thinking about where you can go if, say, a car moves into your lane suddenly, or starts to turn into you. Hopefully, you will rarely have to use your emergency escape tactics, but it is better to have them and not need them, than to need them and not have them!


If you are new to city cycling, take it slow. Don’t start off riding down main street at rush hour. Pick a quieter neighborhood, and work your way up. Make sure to always keep these tips in mind, and your city riding experience will be a safe, and perhaps even enjoyable one! Good luck!


Why is the Front Brake More Powerful?

November 2, 2014 by Aaron Robson

Why is the Front Brake More Powerful?

Why is the Front Brake More Powerful?

Most of us don’t spend a ton of time thinking about braking. Squeeze brake lever. Stop. Not too hard, right? I was reminded in a recent conversation though, that not everyone fully understands what has to happen to bring your bike to a nice, safe, stop. I was about to head home after work, when, walking over to the bike racks, I noticed an older fellow and his son taking a good look at my bike as they were getting ready to leave. I had a feeling I was going to get some sort of comment about it when I arrived, and I was right. This was how our conversation started off:

“No rear brake, huh?” (weird first thing to say, I thought)

“Well, yea,” I replied “if you are gonna have one brake, you want it on the front”

“A physicist would disagree with you” he replied “you’ll end up over the handlebars like that…”

This is a misconception I’ve heard more than once, so I want to explain why, though my friend wasn’t exactly wrong, you would never want just a back brake instead of a front. If you are thinking ‘I’ll never have just one brake, so this doesn’t matter’, the implications of this are still very important with the normal allotment of two brakes – so read on!

The Physics of Braking

First, some basic bicycle physics. The braking on a bicycle is dependent on the friction between your tires and the ground and the friction between the brake pads and rim (or brake disc, if your ride is suitably equipped). Almost all modern brakes have sufficient power to exert enough friction on the rim (or disc) to completely lock the wheel up at moderate speeds. The ability to stop the rim from moving around isn’t a limiting factor in braking, generally. What is limiting is the friction between the tire and the ground. Why does this matter? Let’s think about two extreme cases – stopping using a rear brake only, or a front brake only.

Skid City

Applying a rear brake means that your only source of braking power is the friction between the rear wheel and the ground. How much friction there is is dependant on the downward force pushing the rubber into the pavement which in this case, is only your body weight (actually only a fraction of your body weight, since the front wheel is taking some weight as well). It is pretty easy to lock out the wheel and skid the tire (as anyone who rode a bike with a coaster brake as a kid can attest to), which isn’t good. You lose a degree of control, and you lose friction (think about ABS brakes on a car) so it takes longer to stop.

Over the Bars?

With a front brake, your braking power comes from the friction between the front wheel and the ground. This point is in front of your center of mass, which means that as you apply the brakes, the weight of you and your bike acts like a lever, pushing the tire down into the pavement, increasing the friction. Brake too much and yes, you can lock up the tire and flip. But that additional downward force means you have more friction between your tire and the ground, meaning you stop faster. If you do the math, the fastest way to stop a bicycle is to apply the front brake to the point where the back tire is just about to lift off the ground.

You can actually go out and test these two theories yourself. Find a safe, open space like a parking lot, and try braking from 10-15 mph – the first time using just your front brake, the next time using the back. I guarantee you will stop faster using the front. Next, try increasing your speed a bit, and stopping as fast as you can with just the front brake. It will take a bit of practice to find that point when your rear tire is about to come off the ground, but you will be surprised as how quickly you can stop when you get the hang of it! Now go off and spread the gospel!

Descending on a Bike

October 19, 2014 by Lee Agur

Descending on a Bike

descending on a bike, descending on a road bike, descending on a mountain bikeDescending on a bike can be intense! The main focuses while descending are improving your technique, confidence, awareness, anticipation and safety.

Technique

The most important factor to improve descending on a bike is to focus on your technique. Try to lower your centre of gravity by riding on the drops on a road bike, this will give you more stopping power and greater control. Also try to stay relaxed and the corners will become more fluid.

If you are looking to increase your speed while descending then get more aero by tucking your elbows in, lowering your head and keeping your knees in. Also make sure to pick the shortest line by entering the corner wide and cutting the corner as much as safely possible through the apex and exiting wide.

To decelerate as quickly as possible use do not forget to use the front brake as this is where most of the stopping power is while going downhill. Additionally, anticipate how much you need to slow down before you enter the corner because when you try to brake mid corner the bike will try and stand up on you making the corner much more difficult to navigate. Not slowing down enough before a corner while descending is the most common error an amateur will make… they will come in hot, try to brake mid corner forcing them to slow down much more than necessary and exiting the corner at a slow speed. Ideally you brake before the corner, lower your centre of gravity, push your outside foot down on the outside pedal, push down on your inside handlebar (not braking mid turn) while exiting with speed.

Confidence

Confidence is key. Second guessing actions leads to mistakes. Practice will inevitably beat confidence in to you; however, if you feel that is not quick enough… start descending slower in a zone that you are comfortable and relaxed. Practice your technique and skills and then continuously increase your speed as confidence rises. Watch other peoples lines and technique and adopt what works. Confidence will come with repetition and becoming comfortable with your limits.

Awareness and Anticipation

Awareness while descending on a road bike can mean watching out for cars, people, potholes and other cyclists; while, descending on mountain bike can mean watching out for rocks, logs, drops and loose dirt. Either way awareness is key while descending a hill so that you can anticipate what is coming and how to react. Keeping your eyes focused on what lies well ahead of you is paramount.

Safety

Safety never taking a holiday is never more true on a bike than when descending. Some cyclists will reach upwards of 60 miles per hour (100 kilometres per hour) while descending. Going downhill is safest when your technique is tried and true, your confidence is high but not unrealistic and you are aware and anticipating what is coming next.

Never cross the centre line of a road to take a corner faster, and go slow enough to be able to dodge unexpected obstacles! Getting injured because you are trying to push the limits too much is never worth it.

« Previous Page
Next Page »
  • Facebook
  • Tumblr
  • Twitter

Latest Articles

JOIN Cycling: A New Training Platform for Cyclists

May 27, 2024 By Eric Lister

cold exposure

The Benefits of Cold Exposure for Cycling & Life

June 13, 2023 By Eric Lister

hill climb

The Ultimate Hill Climb Training Guide

May 31, 2023 By Eric Lister

shoulder pain cycling

How to Treat & Avoid Shoulder Pain While Cycling

April 12, 2023 By Eric Lister

psoas stretch

The Importance of the Psoas Stretch for Cyclists

April 6, 2023 By Eric Lister

cycling neck pain

The Ultimate Guide to Cycling Neck Pain: Causes and Solutions

March 21, 2023 By Eric Lister

Useful Info

  • Contact
  • Finally, A Global Cycling Club That Is Focused On Community And Love Of Cycling!
  • Privacy Policy
  • Share Your Story!
  • Terms And Conditions Of Use
  • Welcome to I Love Bicycling
  • What Happened When I Stretched Every Day For a Month

Recent Posts

  • JOIN Cycling: A New Training Platform for Cyclists
  • How to Hang Bikes in Your Garage: 4 Inexpensive Options
  • Gravel Bike Vs. Road Bike: Which One Is Better For You?
  • The 6 Types of Mountain Bikes & How to Choose the Best One for You
  • What Is a Touring Bike Good For? 5 Benefits We Know You’ll Love

Search I Love Bicycling

Connect with Us

  • Facebook
  • RSS
  • Tumblr
  • Twitter

Copyright © 2026 · Magazine Pro Theme on Genesis Framework · WordPress · Log in