• Training
    • Injury Prevention
    • Training Tips
  • How To
    • Bike Fit
    • Gear
  • Nutrition
    • Nutrition Tips
    • Weight Loss
  • Repair
  • Reviews
  • Stories
    • Funny Stories
    • Jokes
    • Quotes
    • Videos
    • Funny Videos

I Love Bicycling

I Love Bicycling is a website that is geared towards cycling for beginners with road cycling tips, training articles, nutrition tips, weight loss, how to’s and bike repair articles.

How To

  • Bike Fit
  • Gear

How to Prevent Muscle Cramps on a Ride

August 5, 2020 by Sarah Lauzé

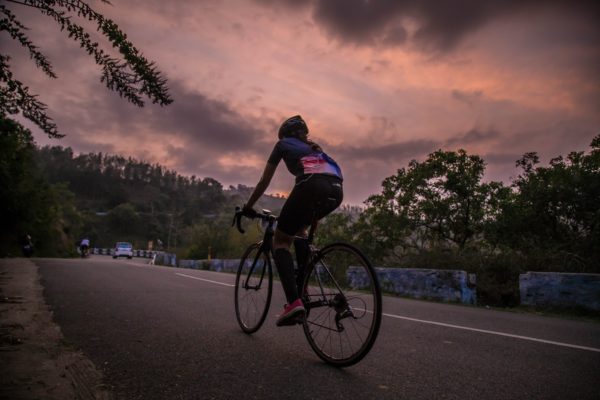
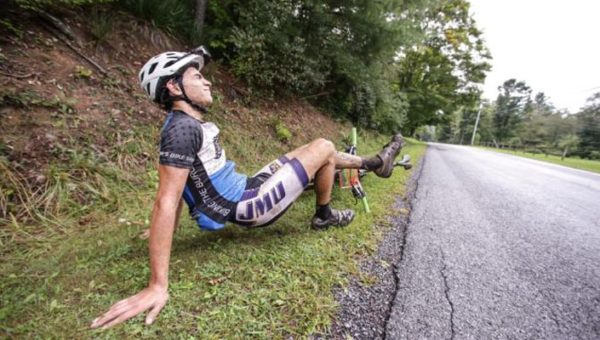
Getting a muscle cramp or spasm while out on a ride or during a race is a terrible feeling. Not only is it painful, but it can take a toll on your overall performance. So, what can you do to prevent muscle cramps on a ride? Well, there’s a whole lot of opinions out there, but are they all valid?

When it comes to curing or preventing muscle cramps, there’s no easy answer. Sure, you can drink the latest trendy sports drink, but it may not be the best plan of attack. The truth is, despite years of research, cramping and fatigue in general are still largely poorly understood. We don’t know why some people are more prone to cramping then others, just as you can’t know for sure why they show up. It could be overexertion, nutrition, dehydration, or any combination of factors.

Although the ambiguity can be frustrating, here’s what you need to know to help prevent muscle cramps on a ride.

What Causes Muscle Cramping?

As mentioned above, scientists have failed to come to a consensus of what causes muscle cramping. Historically, it has been thought to be a result of dehydration. When you sweat you lose fluids, and with them electrolytes. Electrolytes are used to help the chemical firing of muscle fibres, so when they are depleted muscle spasms and cramps are the result.

Although this is still a commonly held theory, recent studies have shown that altered neuromuscular control may be the more probable cause of muscle cramps and spasms. Basically, the nerves that carry signals to and from your muscles and your brain get tired just the same as your working muscles. Those nerve signals begin to misfire. This neuromotor fatigue can send overlapping, uncontrolled signals to your muscles. The result: twitching, cramping, complete locking up of your working muscles or the feeling of ‘dead-legs’ and an inability to produce power.

How To Treat and Prevent Muscle Cramps on a Ride

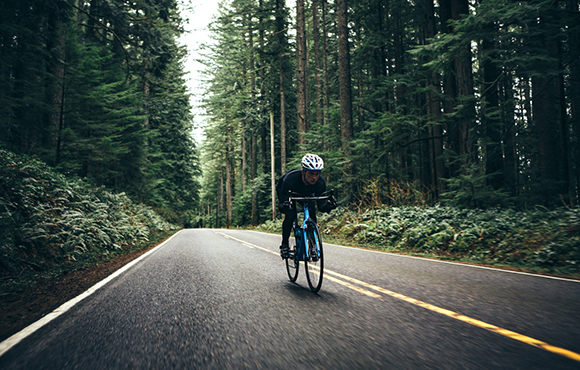
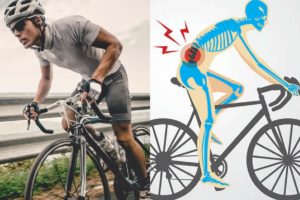
Endurance sports like cycling are all about pushing yourself and testing your limits. Unfortunately, there are a number of factors that are working against you. First, there is mental fatigue that can take on very physical effects causing you to bonk or otherwise slow down. Other times your body literally steps in and kicks your ass in the form of cramping. It’s something every athlete has dealt with at one time or another, but here’s what you can do to try and combat it.

Routine Stretching

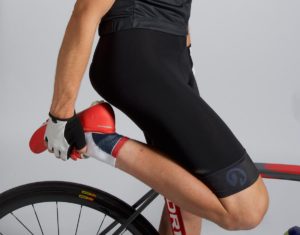
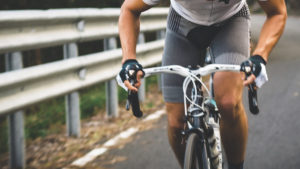
Routine stretching before, after, and during a ride can help prevent cramping altogether. If you feel a muscle starting to twitch or spasm, pull over and stretch it out with dynamic stretches (not static!). This can prevent a full-on cramp from forming in the muscle. Also, having healthy muscles that are flexible enough to maintain proper bike posture and position can help prevent cramping on those longer rides.

If you’re looking to take the guesswork out of stretching, you can check out Dynamic Cyclist. This comprehensive resource addresses the most common muscle imbalances and adaptive muscle shortening that lead to pain and reduced performance on the bike. With just 15 minutes a day, you can follow along with the video programs to alleviate tension and improve posture, so you can ride pain free and reach your full potential on the bike. Don’t let muscle imbalances hold you back – click here to try 7 days free!

Hydration & Nutrition

Don’t fuss too much over electrolytes unless you are doing a long hard ride, and if you do, make sure it is a quality sports drink or make your own. Otherwise, water needs to be your best friend. It’s important to stay hydrated before, during, and after a ride to ensure your body has what it needs. Also ensure you are consuming enough calories to sustain your efforts on the bike.

Proper Warm-Up

Nothing like going all-out right off the bat to make for some painful muscles. Ensure you start nice and slow and warm up those muscles before pushing yourself too hard. If you’re doing a short distance race, go for a warm up ride before starting out so you can give it your all right off the start line.

Slow It Down

If your muscles are cramping and you can see your quads rippling with muscle spasms, time to take it down a notch. Don’t go too hard too fast, but put in the proper training to be able to push yourself without putting too much stress on your muscles. One of the most common links to cramping is in response to an unaccustomed intensity or load.
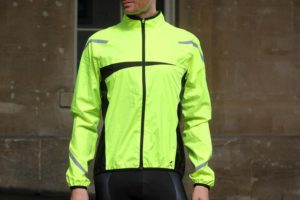
A Beginner’s Guide to the Cycling Essentials

August 1, 2020 by Sarah Lauzé

If you walk into a bike shop with zero context or little to no experience in the cycling world, the sheer amount of stuff can be overwhelming. If you’re not careful, you can end up buying a lot of things you don’t necessarily need, and missing out on some of the things you really need. Here are some of the cycling essentials (and near essentials) that will get you started in the world of cycling.

Cycling Essentials

The Cycling Essentials

A Bike

Okay okay, this one is a little obvious, but it can be confusing to know what to look for in a road bike when you’re first starting out. Do you get the bare minimum and upgrade later? Or do you invest a little more now? Check out this great article on “How to Buy a Bike” for some guidelines.

HelmetCycling Essentials

Riding without a helmet is NEVER cool. So, if you own a bike, you should also own a helmet. It doesn’t matter if you’re riding on busy roads, technical trails, or bike paths. If you go down and hit your head, a helmet can prevent disastrous consequences. There are a ton of cool looking options out there, so make sure you get one that fits you properly.

Glasses

You may have a pair on sunglasses you’ll wear on those bright, summer days, but wearing glasses while on your bike can do more than shield from the sun. Glasses help break the wind when you’re riding, preventing eye irritation. They also work wonders to keep bugs, rain, and other debris from smacking you in the eyeball (which is not a pleasant experience). Many cycling glasses will come with interchangeable lenses, so you can wear the same pair no matter what the weather.

A Bike Lock

If you’re ever going to leave your bike outside anywhere, then you’re going to want to lock it up. Bike locks may seem pricey, and it’s tempting to go for the cheapest option, but ensuring it’s difficult (if not impossible) for someone to steal will save you money in the long run.

A Bike Cover

If you don’t have room to keep your bike inside, you will want to get some sort of bike cover to keep it protected from the weather. If you leave it open to the elements, over the course of just a few weeks you will begin to see visible damage. The colour will fade, chain will rust, and your bolts will corrode and seize up. So, invest in a cover that fits well over your bike, keeping it dry while also allowing moisture to escape.

Cycling EssentialsCycling Jacket

A cycling jacket is an indispensable garment that will keep you comfortable and on your bike even when the weather goes bad. Most are lightweight and waterproof, so they will not only block the wind and cold, but rain as well. Most are small enough to roll up and stuff into a jersey pocket so you are always prepared in case of an emergency.

Pump, spares, a multi-tool

You won’t want to have to end your ride and take your bike into the shop every time you get a flat. You’ll need both the tools and the know-how to take care of some of the most common bike fixes. A good tire pump, multi tool and spare tubes (if you have clincher tires) will go a long way to keep you out on the road. For some basic maintenance and repair, check out “101 Best Bike Repair and Maintenance Tips.”

The Cycling Near-Essentials

Cycling Shorts

Possibly the most critical item of technical-gear you can purchase for cycling is a good pair of cycling shorts. A solid pair with a good chamois will allow you to feel more comfortable, powerful, and in control while on the bike. It will also allow you to ride for longer periods of time without discomfort.

Cycling CapCycling Essentials

A cycling cap is for both function and style. It keeps the sun out of your eyes as well as sweat and rain, and winter caps can keep you warm on a chilly day. Also, if you use your bike for commuting around town and are worried about having hemet-hair, a cycling cap can be a great lightweight fix.

Clipless Pedals and Cycling Shoes

Clipless pedals with cycling shoes is the most efficient and comfortable system out there when it comes to road biking. The stiff sole of the cycling shoe provides a rigid platform to transfer power from your legs to the drivetrain and propel the bike forward. Even if you’re just starting out, cycling in your regular running shoes can begin to hurt your feet, so getting used to the clipless system from the start may be the best idea.

Bike Computer

It can be fun and inspiring to track your progress over time, and the best way to do that is with a bike computer. It can track your ride metrics; from time and distance on the most simple computer, to location, power, and far more on the most powerful ones.

The History of the Cycling Cap

July 25, 2020 by Sarah Lauzé

The cycling cap, or the ‘casquette’ in French, is a bit of icon in the cycling world. The simple cloth cap graced the heads of all the greats, with the history of the cycling cap going back through the last century and beyond. Now it stands as a symbol, looking kind of ridiculous to the rest of the population, but serving as a nod to your cycling brethren.

Whether you admit to owning one or not, the cycling cap is part of the culture, along with weird tan lines and bib shorts. It speaks to its two wheeled history, and has seen a resurgence in the past few years. Here’s a short history of the cycling cap, as muddy as it is, so you can wear yours with pride as you head on down the coffee shop.

History of the Cycling Cap

The History of the Cycling Cap

The Early Days

The first documented cycling races started up in the late 1800s, exposing riders to the harsh elements. Some sort of headwear was immediately needed, so the rudimentary flat cap was the obvious choice as opposed to top hats and tails.

The Paris Roubaix start line, 1899

The flat cap was a step in the right direction, but tweed is not an ideal athletic material. This set the groundwork for the cycling cap. Riders wore plain white skull caps, which eventually turned brown and grey with dust and grime over the years. It was purely functional, keeping the sun out of the eyes, absorbing sweat, and keeping the rain and muck out.

The Hayday

By the 1950s, the cycling cap became the ultimate mark of a professional cyclist. The design was refined through the 60s, coming to resemble what we know it as today. Sponsors began branding caps, and it became a way to spread your name in the cycling world.

Not only were they worn on the bike, but on podiums and on the heads of coaches and everyone else inspired by the cycling greats. Those who may not be able to afford a Campagnolo-equipped bike could afford a Campagnolo cap, so it became an entry in the cycling culture.

The Decline

With the introduction of helmets to cycling in the 70s and 80s, the cycling cap became less of a necessity. Although it was no longer the mark of a professional cyclist, it remained a part of the cycling kit. The helmet and the cycling cap were not necessarily mutually exclusive, and many cyclists chose to wear a cap under their helmet in cold and wet weather.

When helmets become mandatory, the cycling cap took the backburner. It has even been largely replaced by baseball caps on podiums. For those entering the cycling world today, it holds no meaning as a once essential piece of gear.

The Comeback

Although the cycling cap has had its ups and downs, it is not a reserve of history. The cycling cap is seeing a comeback, and not just as geeky accessory that screams “I REALLY LOVE CYCLING” to onlookers. It is functional and useful, and even with a helmet still serves the purpose for which it was first created. There is more variety than ever before, with caps to keep your head cool, warm – or just looking really awesome.

If you’re looking for an easy way to have a little fun with your cycling kit, check out some of the best cycling caps. Not only are there a ton of styles, but also some creative ways to wear it!

A Guide to the Best Cycling Sunglasses

July 16, 2020 by Sarah Lauzé

When you’re first getting into cycling, sunglasses may not be on the top of your list of must-haves. Most people will throw on their everyday sunglasses and hop on their bike. However, depending on the fit, they may become a pain in a hurry. There are a few things that make cycling sunglasses (or sports performance sunglasses) more up for the task at hand.

What to Look for in Cycling Sunglasses

Fit

Fit with any type of apparel is important, but sunglasses that don’t fit properly can slide down your nose, give you a pressure headache, or even create blindspots in your vision. Most brands of cycling sunglasses will have hydrophilic rubber on the nose and arms, which actually gains grip as you sweat. You will also want to try sunglasses on with your helmet to make sure the arms are comfortable. Most will have straight-back temples for optimal helmet compatibility.

Shape and Coverage

When you’re on your bike, you want the biggest field of vision possible for your own safety. When you shoulder check, you don’t want the edge of your sunglasses getting in the way and blocking your view of traffic. This is why most cycling sunglasses wrap around and include your peripherals.

Lenses

Lighter lenses are better for cycling because they can help enhance the contrast of the road, allowing you to see obstacles or rough pavement before you hit it. Most of these will have UV protection, so they will protect your eyes, but grey lenses can make the ground, shadows and potholes all look the same. Investing in prescription sunglasses can also be great for those who don’t want to wear contacts, but you will want to get the wrap around lenses so you will have clear vision in your peripherals.

The Best Cycling Sunglasses

Oakley Radar EV

Price: $193

Oakley’s original Radar eyewear combined everything they learned from decades of research with the world’s best athletes, and came out with the Oakley Radar EV. These have taller lenses, extending vision, and PRIZM Road lenses. A step beyond polarized lenses, this technology enhances contract like never before. With a lightweight design and replaceable nosepiece, you won’t even feel like you’re wearing them.

Julbo Aerolite

Price: $189

Designed with the help of world-class ultrarunners, mountain bikers and road cyclists, the Julbo Aerolite is super lightweight and fast. They have a rimless design with a wide lens surface for broad field of vision and an aerated structure that allows complete air circulation to avoid fog. With a smaller design, these are a great option for women or people with small faces, and the nose pads are adjustable to ensure a snug fit.

Bolle B-Rock

Price: $115

The Bolle B-Rock sunglasses have the benefits of the single wrap around lens, but with the added stability of a full frame. The lenses are treated with an oleophobic layer (repelling dirt, grease and water), anti-fog, and anti-reflective technology. The nosepiece adjusts both front to back, and side to side –which is great if you find other models sit too close to your eyes and eyelashes.

Smith Attack Max

Price: $249

Lightweight with extended lenses, the Smith Attack Max are for the more aggressive rider. If you spend a lot of time down on your drops, then these are probably the glasses for you. With a hydroleophobic finish, they keep sweat or rain from fogging up the lenses.

Spy Helm 2

Price: $100

The Spy Helm 2 are a great option for those wanting to buy just one pair of sunglasses that will be good for running, cycling, and hitting the patio for some post-ride beers. This upgraded model has five-barrel hinges making them “nearly indestructible” and include Happy Lens technology. Spy claims that this let’s in the good rays, while blocking out the bad ones.

How To Prevent Injury Cycling

July 15, 2020 by Sarah Lauzé

We all know the wonderful feeling of cycling, but unfortunately it’s not always sun on the face and wind in the hair. Pedalling is a low-impact motion, making cycling one of the best ways to stay fit without putting stress on your joints. However, poorly set up bikes, wipe outs, or simply the activity of cycling itself can take its toll on our bodies. Injury is a part of almost every sport, and cycling is no exception, but it’s also what makes it a challenge worth taking on. Although some injury is impossible to avoid, there are things you can do as a cyclist to minimize the risks and stay in your saddle for years to come. Here are some of the common risks and what you can do to prevent injury cycling.

How To Prevent Injury Cycling

Safety First

As cyclists we share the road with vehicles, and we have to do all we can to ensure the two can co-exist safely.

  • Maximize visibility – Assume that you are invisible to motorists. Do whatever you can can to enhance your chances of being seen to avoid accidents. Ride where people and cars see you, wear bright 
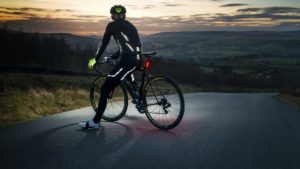
clothing, use lights and reflectors. Whenever possible, make eye contact with other cyclists and pedestrians. The article “Bikes Versus Cars, How to Ride in Traffic” can give more insight into safely riding with traffic.
  • Obey the rules of the road – Road bikes are subject to the same laws as motorists, follow them. You have the same rights and duties as drivers. Your safety, and the well-being of those around you depends on you interpreting the law in a predictable manner. Obey traffic signals and stop signs, and use hand signals to communicate any changes in speed or direction.
  • Be alert – Always pay attention to your surroundings and the road ahead. Look out for any obstacle or pot holes on the road to avoid any unexpected bumps. These can catch you off guard and cause a wipe out.

How To Prevent Injury Cycling

Broken Bones

The two most common broken bones for a cyclist are the clavicle (collarbone) and the scaphoid (a thumb bone). These are the bones that absorb the most force when you brace yourself in a fall. The obvious thing would be to avoid crashing altogether, but sometimes that is simply impossible. As you can’t really control whether or not you crash on your bike, you should at least know how to fall properly. It depends on what kind of crash is happening, for instance if you are going over the handle bars, try and get your hands out in front of you to brace your fall, tuck your head in and allow yourself to roll over the shoulder that has the leading arm out.

Road Rash

Sooner or later everyone will experience road rash, it’s a part of cycling, and almost a rite of passage into the cycling world. How you first handle your wounds will make all the difference in the amount of time it takes to recover. Treating the wounds correctly will save you a lot of pain and suffering if done the right way. Check out this detailed article on treating road rash to help make the process less painful and get you back on the road quicker.

Saddle Sores

Avid cyclists know this injury well. Saddle sores are caused by the friction between your skin and the bike seat during long bike rides. A bike seat that is too high and bike shorts that are too old with minimal protection are the most common secondary causes of saddle sores. You can avoid saddle sores by using chamois cream while you ride, especially if you’re a cyclist that moves around a lot. If you do develop saddle sores, you’ll likely have to take a break and treat with skin creams to ease the pain.

Lower Back Pain

Another very common cycling overuse injury is lower back pain. First, you have to understand why this occurs before taking action to fix it. While pedaling, the quadriceps pull the pelvis forward. To keep your body on the bike, your lower back resists that pull. It is an action that is not inherent to the design of your lower back muscles. The result is overworked lower back muscles that may cross into pain.

The best way to both prevent and treat lower back pain from cycling is to work on strengthening your core (transverse abdominal muscles) and glutes. A strong core will activate before any movement takes place in the limbs (like pedaling), and therefore takes the stress away from lower back and works to stabilize the motion.

Neck Pain

Neck pain can be caused by fatigue (just like lower back pain) or a poor bike fit and can be alleviated by strengthening exercises, stretching and a proper bike fit. Also, relax during your ride. A tight grip and tense posture will cause more pain in your neck than with a relaxed posture.

Numb Hands

Your hands go numb when nerves are being pinched, generally due to a poor position on the bike causing your hands to support too much of your weight or your hand position or wrist position is incorrect. To alleviate this common cycling injury tilt the nose of your saddle up a degree, make sure that your wrists and hands are flush with your forearms (no bends), and buy some gloves and better handle bar tape to spread out the pressure.

Foot Numbness or Tingling

Foot numbness usually occurs when the nerves between the bones under the ball of the foot become compressed. Besides numbness, symptoms can show up as cycling foot pain, tingling, bruising, or even a burning sensation. The likely culprit here is shoe fit, cleat position or socks. Particularly if the cleat is too far forward it can cause numbness, as it places pressure on the ball of your foot. Take the time to dial in your cleat placement, shoe fit and sock choice whether on your own, or with a professional bike fit.

Knee Pain

There are different types of knee pain that can point to different causes and, therefore, different solutions. The four main types of knee pain are anterior (front of the knee), posterior (behind the knee), medial and lateral pain (sides of the knee), and IT band syndrome. Some knee pain is a sign of an improper bike fit, whether it be cleat or saddle position, while some is caused by simple overuse or going too hard too soon. Regular and targeted stretching can be an easy solution.

Achilles and Patella Tendinitis

Another common injury that comes from overuse. However, this can also be caused by a poor bike fit and shoe cleats that are not properly positioned. Achilles tendinitis causes inflammation which in turn will cause you pain in your ankle. If you think this is developing, go easy on your training for a few days. After any exercise make sure you apply ice to the tendon to fight any inflammation you may have.

General Treatment and Prevention

Stretching

The most important thing for cyclists, and athletes in general, is to have a healthy range of motion and flexibility to move freely and efficiently. Stretching routines for cyclists can aid in aligning the thick and thin muscles back into their ordered state after movement, as well as remove the lactic acid buildup that causes soreness. Flexibility, or rather inflexibility, can lead to unbalance in the body and even cause the body’s structure to move out of alignment. Failing to properly stretch and maintain flexibility can not only affect you performance, but it will inevitably lead to injury and discomfort.

Strength Training

A common problem with cyclists is muscular imbalance. Some muscles become strong, while others are too weak to keep things balanced. By strengthening your muscles and connective tissues with strength training, you can keep your body balanced and even avoid some overuse injuries altogether. It can also help you maintain proper posture on the bike, as a strong core can keep your back nice and straight.

Bike Fit

Getting a proper bike fit is well worth the investment, or at least taking the time to fine tune things yourself. Getting everything adjusted just right for you will ensure you will be comfortable on the bike. You will be more efficient and have a higher degree of power and endurance. It can be overwhelming when you think about saddle height and angle, cleat position, handlebars, and so on, but it is worth taking it one piece at a time. It will lower the risk of developing any injuries associated with an improper bike position.

Beginner’s Guide: What To Wear Cycling

July 14, 2020 by Sarah Lauzé

Figuring out what to wear cycling can be a little confusing when you’re starting out. If you’re new to the sport, putting on a pair of funny looking shorts and a jersey may seem unnecessary. However, all it takes is a couple rides in a baggy t-shirt and you’ll be more than willing to give it a try.

A lot of it comes down to wind resistance, a snug fit to avoid chafing, and moisture wicking material. So, that loose fitting t-shirt won’t do you any favours as you get faster and stronger. Plus, having a cool looking jersey can make you feel like a pro and have you ripping up those climbs in no time.

What To Wear Cycling

What to Wear Cycling: The Cycling Kit

You may hear the term “cycling kit” thrown around when you’re just starting out. A cycling kit refers to the core cycling clothing: the combination of cycling shorts (with a chamois) and a jersey.

Step 1: Bike Shorts

Bike shorts may just be one of the most important pieces of gear you’ll get for cycling. Cycling shorts will include a chamois, which is the padded part. When you wear these shorts correctly (without underwear), the chamois not only adds a little extra padding for your sit bones, but it also but also prevents chafing. The three main reasons to wear bike shorts are:

  • Extra Cushion – The padded area provides a smooth surface for your bottom, with no uncomfortable seams or uneven bits.
  • Reduce Friction – The snug fitting fabric moves with you as you pedal, minimizing the chance of chafing.
  • Moisture Management – Normal pants or shorts can act as a trap to moisture, keeping sweat on your skin while making the material damp. Cycling shorts are made from materials that work to move and evaporate moisture away from your skin.

Not only will a good pair of bike shorts allow you to ride longer, a bad pair will make for a painful experience! Ensure shorts should be snug enough so they will conform to your body and not shift with your movements.

Shorts vs Bibs – Bike shorts come in two styles: regular shorts or bibs. Bibs are bike shorts with built in suspenders. Most beginners will shy away from the look of them, but once you try them, few go back. Since they have no need for an elastic waistband, bibs can be more comfortable as they conform to your body. When bibs are worn under a jersey, they look just like regular bike shorts.

Step 2: Jersey

Similar to bike shorts, cycling jerseys are made from materials that should work to get moisture away from your body. The general design will be a zipper down the front, with back pockets specifically designed to carry food, tools, and whatever else you’ll need out on the road. They have a shorter front panel (as you will be bent over on your bike), with a longer back panel. The bottom hem will have silicon grip tape to keep the jersey in place as you ride. A jersey should be fairly form fitting to keep you as aerodynamic as possible.

Step 3: Layers

Although bike shorts and a jersey are the basics, knowing how to layer to stay comfortable in any weather is an important skill. The most important thing is to keep your core temperature consistent as you ride. Being too warm or too cold both waste energy, so you want to avoid it whenever possible.

It’s always a good idea to take a waterproof outer shell with you just incase you get caught in a rainstorm. There are also bike tights or pants you can get to wear over your bike shorts to stay warm on those cooler rides.

Step 4: Accessories

Cycling Caps

Cycling caps are great to both keep your head warm in the winter, and keep the sun and sweat out of your eyes in the summer. Plus, they look pretty cool when you stop at a coffee ship on your ride.

Gloves

It’s nice for beginners to have a bit of padding on the palm of their hand, which cycling gloves can offer. You can get fingerless gloves for the summer, and then full moisture-wicking gloves for the winter months.

Cycling can be an intimidating sport to get into, especially when you walk into a bike shop with no idea where to start. You may see a ton of kitted out riders with all the bells and whistles, but you really don’t need much to get started. Start off with the basics, and you can build from there!

What Is Bike Geometry?

July 9, 2020 by Sarah Lauzé

Bike geometry is the collection of measurements (lengths and angles) that make up a bike frame. In short, everything on a bike can be changed, but the geometry cannot. Looking at geometry charts on manufacturer’s websites can be confusing, but all those numbers translate into very real and understandable concepts.

There is a lot to know about bike geometry, but understanding the basics can go a long way in ensuring you choose the right bike for your style of riding. Bike geometry can help you understand how a bike will handle, feel, and how comfortable it will be to you.

Most bike manufacturers provide bike geometry charts within the description of the bike, but what is included does vary. Most will include frame size, head and seat tube lengths, top tube length, wheelbase, and chainstay length. Others will also include stack and reach measurements, fork rake, bottom bracket drop, and trail.

Stack and Reach

Stack and reach are the two fundamental elements that can help you determine right away if a bike will fit you. This is especially important because it helps standardize fit between size and manufacturer. Even if a bike is labelled as “medium” or 53cm, the actual fit can differ by up to 2 cm.

  • Stack is the vertical distance (in cm) from the center of the frame’s bottom bracket to the top of the head tube, where the fork passes through the frame. It gives an indication of how tall a frame is.
  • Reach is the horizontal distance from the center of the bottom bracket to the top-centre of the head tube. This gives an indication of how long a frame is excluding the stem.

Head Tube Angle, Fork Rake, and Trail

Head Tube

The head tube angle is the angle of the head tube in relation to the ground, with the angle being either ‘slack’ or ‘steep.’ The classic head tube angle for a road bike is 73 degrees, so a steeper angle (higher number) will mean less effort to steer making it better for high speeds. A more slack angle (lower number) may require more effort to steer, but perform much better at slow speeds.

Head tube length is just what is sounds like. Longer head tubes result in a more upright riding position. Short head tubes lower the front of the bike, putting you in a more aerodynamic position.

Fork Rake (Offset)

Fork rake or fork offset is the distance between the steering axis and the wheel center. Whether the fork is curved forward or is straight, but angles, if the offset is the same then it will handle the same. Generally speaking, less fork rake will increase the trail as the center of the wheel is moved back from the steering axis, and more fork rake means less trail.

Trail

Trail is a bit more complicated, and can be difficult to wrap your brain around. Think of it as the tire patch trailing behind the steering axis, determined by the head tube angle and the fork rake. The steeper the headtube angle, the less trail there will be.

Its impact on the feel of the bike is arguably more important and much simpler. A small amount of trail will result in a fast handling bike, meaning it will require less rider input and will handle well at high speeds. The downside is a certain amount of twitchiness, making for a rougher ride.  A large amount of trail will result in a slow handling bike, so it will take more work from the rider to steer at high speeds, but will feel more stable and smooth.


Bottom Bracket Drop

The bottom bracket drop is effectively how low you sit on the bike. It is measured by the vertical distance the center of the bottom bracket sits below the wheel axis.

The lower (more) the bottom bracket drop, the better the bike will corner and the faster it will respond (as your center of gravity is lower). The issue is pedal clearance, because the bottom bracket can only be so low before the pedals will catch ground while leaning into a corner.

Less bottom bracket drop will feel more stable at slow speeds, but will be reluctant to corner. This means more input from you through the handlebars to corner.

Seat Tube Angle

The seat tube angle is the angle of the seat tube in relation to the ground. This angle will generally be between 71-74 degrees, and doesn’t vary as much as the head tube angle. You can effectively influence the seat tube angle by changing the saddle position to be more slack or steep.

Chainstay Length

Chainstay length is the horizontal distance from the center of the bottom bracket to the center of the rear axle.

The chainstay length impacts the length of the wheelbase (distance between front and rear wheel axles) as well as the handling of the bike. Bikes with long chainstays will have more stability, as well as allowing room for panniers, making great touring and endurance bikes. Performance bikes, however, will have a shorter chainstay length for sharper handling.

Each measurement on its own can give you a snapshot into how a bike will fit and feel, but they all rely on each other. To get an idea, try looking at two bikes with very different geometry and then ride each one, paying attention to how it handles. You can then refer to those charts, picking out elements that worked and others that didn’t. For more information, getting a professional bike fit is always a great place to start in figuring out what will work best for you and your type of riding.

How To Prevent and Treat Saddle Sores

July 1, 2020 by Sarah Lauzé

None of us like to talk about them, but unless you’re some sort of unicorn of the cycling world, then you’ve experienced saddle sores in one form or another. As an unfortunate side effect of those long rides, here’s what you need to know to get healed up and back in the saddle in no time.

saddle sores

What are saddle sores?

First things first, just what are saddle sores? They can vary from person to person, and are a side of cycling not many of us are too keen to talk about, but when it comes to that pain in the butt, there are actually two different types.

  1. Being “saddle sore” refers to deep muscle bruising that makes you wary to sit down for days post-ride. This is most often experienced by beginner cyclists, or at the beginning of the season. Unfortunately, the only cure is to get back out there and get your bottom used to it. However, if after your first couple weeks of riding it’s not getting any better, your saddle may not be the right fit for you.
  2. Having “saddle sores” is another experience entirely. They can show up as little red bumps (almost like a pimple or ingrown hair), a cyst, or even abrasion on the skin.

What causes saddle sores?

Saddle sores are caused by a combination of factors including heat, pressure, and friction. Although many look at the tiny saddle on a road bike and think it looks like a torture device, a seat that is too wide is more often the problem.

Different saddles have different pressure points, with the majority of the pressure resting on either your ‘sit bones’ or soft tissue.


The saddle comes into contact with your body at three main points: your two ‘sit bones’ (ischial tuberosities) and the soft tissue between your legs. Although you may experience that deep tissue bruising we mentioned earlier in your sit bones, it is the soft tissue that causes the most problems when it comes to saddle sores.

The number one cause of saddle sores is chafing. Combine constant friction with heat and sweat, and your skin is likely to become painful. Another issue can be the inflammation or infection at the base of a hair follicle (like an ingrown hair) that is caused by the constant pressure. Finally, skin ulcerations or boils can form and left raw and open to bacteria, these can quickly become infected.

How can you avoid saddle sores?

Although saddle sores may be an unavoidable part of the sport for many, there are things you can do to prevent them and ensure you heal up quickly.

Find the saddle that’s right for you.


  • Break your butt in – You’ve heard the saying “slow and steady wins the race” right? Well, when it come to cycling, breaking into long distances gradually, whether as a beginner or at the start of the season, can make all the difference.
  • The right chamois/saddle combination – You may have to do some trial by fire here, but finding the right combination of cycling short and saddle that fits your bottom just right can minimize friction and reduce the risk of developing saddle sores. If you think your saddle isn’t the right fit for you, go to your local bike shop and see if you can try a few out before committing to buying a new one.
  • Skip the underwear – This may seem kind of intimidating at first, but wearing underwear beneath your chamois is a recipe for disaster. Skipping the undergarments eliminates potential hot spots and lets the chamois work to its fullest potential.
  • Keep it clean – This should be a no brainer, but you should wear clean chamois shorts every ride. You don’t want to be adding dried sweat and chamois cream to the equation, as it will just speed up the chaffing process. Be sure to shower before and after riding when possible, and give any irritated skin ample time to breath.
  • Chamois cream – Chamois cream can help reduce the friction between your skin and cycling shorts, but using too much can also cause issues, so you will have to find the right amount that works for you.
  • Get a bike fit – Making sure your overall positioning on your bike and on your saddle is your first line of defence against saddle sores. If you’ve ever borrowed someone’s bike, you’ll know exactly what I mean. We are all shaped differently, and what works for one person won’t for the next. Lowering your seat to eliminate any side-to-side rocking can also help reduce friction.

How can you treat saddle sores?

As mentioned previously, for the deep tissue ‘saddle sore’ pain there is really nothing you can do. Fortunately, this pain goes away with practice, and an hour ride that leaves you tender at the beginning of the season won’t a couple weeks in.

For saddle sores themselves, rest may be in order to give your bottom time to heal up. Riding on raw and irritated skin will only increase pain and the chance of infection. Here are some things you can do in the meantime to speed up the process:

  • Keep the area clean – Frequent showers or even a quick wipe with a damp towel will help keep bacteria out of the area, and will speed up the healing process.
  • Let it breath – Think breathable underwear. Make sure the area isn’t trapping in heat and sweat, as this will continue to irritate the skin. Wear loose fitting pants or a skirt to minimize further chafing.
  • Ointment or cream – Some cyclists recommend the use of an over-the-counter acne cream like Noxzema to both prevent infection and act as pain relief. Tee tree oil also offers antiseptic properties while actively cooling and soothing the area.
  • Antibiotics – Antibiotics should only be used in extreme cases and at the advice of your doctor.

When to see a doctor

Most cases of saddle sores are uncomfortable, but aren’t cause for concern. However, if the sores are not going away within 2-3 weeks, are extremely painful, or get infectected, then it is time to see a doctor.

Although saddle sores are a pain in the ass, hopefully with these tips they won’t keep you off your bike for long! For more information, check out “Finding the best road bike saddle for you” and “Hygiene for cyclists – Why it’s important.”

Bike Saddle Height: Too High, Too Low, or Just Right

June 30, 2020 by Sarah Lauzé

Finding the right bike saddle height can be a bit of a process, but it’s the foundation of a good bike fit. Just imagine you’re Goldilocks, and have to go through the process of having it too hight, too low, and then just right. Once you find the perfect spot, you’ll want to mark it somehow. That way if it gets readjusted somehow (like your kid borrows your bike), then you can easily find the sweet spot again.

Bike Saddle Height

Why Bike Saddle Height Matters

Bike Saddle Height

Ensuring that your seat is at the right height will make a difference when it comes to how much power you transfer to the pedals, and how much energy you use to move forward. It also effects how comfortable you are on your bike, which simply results in being able to spend more time in the saddle. You’ll be able to ride longer and push yourself harder. Riding with the wrong bike saddle height will most likely result in pain and injury in the knees, lumbar vertebrae, and the ankles.

How to tell if your bike saddle height is too low

Riding with your seat too low is a common mistake for beginners, as it can be easier to get on and off that way. A saddle too low or too far forward can cause tendonitis of the patella or quadriceps, which will both show up as pain in the front of the knee. So, if you have pain in your kneecap after riding, you will want to try adjusting your saddle height and position.

Get someone to hold you steady on your bike, or balance yourself in a doorway. Hop on and get into pedalling position, while letting your legs dangle straight down. Pedal backwards until one leg is at it’s lowest point. Your heel should barely be able to touch at the bottom when your leg is fully extended. If you can easily reach make your saddle height higher.

With your heel on the pedal, your leg should be fully extended, but still touching the pedal.

How to tell if your bike saddle height is too high

A saddle that is too high will cause the hips to rock back and forth. Not only does this detract from pedalling efficiency, but it can also be extremely uncomfortable. Discomfort can show up in your lower back or as knee pain (especially in the back of the knee).

Have someone watch you ride from behind, whether out on the road or on a stationary trainer. The hip wobble should be easy for them to see, and you’ll want to bring your seat down a little. Or, if you bring your foot to the bottom of the pedal stroke, your heel should barely be able to touch at the bottom when your leg is fully extended (see photo above). If you can’t touch the pedal at all, then lower the seat.

When you get a new saddle

Generally speaking, most beginner cyclists set their bike seat position initially and then adapt to it, but that’s not the best option. This is particularly true when changing from one saddle to another. The differences in padding thickness and design can throw off your bike seat position drastically. Changing saddles should always include taking a good hard look at seatpost height.

If your new saddle is making you uncomfortable, don’t adapt to it before adjusting the seatpost to get your actual position exactly the same as the old one. Knowing how your seatpost is integrated with your saddle will allow you to change your position or saddle as needed to keep you the most comfortable on the bike.

How To Plan A Bike Route For Your Commute

June 16, 2020 by Josh Friedman


There are a lot of great reasons to commute to work on your bike. Not only will it save you gas money and wear and tear on your car, it also makes you feel energized and ready to attack the day. Having that buffer time at the beginning and end of your work day is important for you body and mind. However, getting started can seem daunting. Knowing how to plan a great bike route for your commute is the first step in ensuring you stay on your bike rather than defaulting to hopping in your car. It might be a bit of work to find the route, but once you do, you will be hooked. There are a few elements to keep in mind when planning a bike route, along with a few tools to help you choose that route.

Finding Safe Streets For Your Bike Commute

plan a bike route

The most important element of a good bike commute route is that it is safe. Separation from cars is ideal – the less time you are near them, the safer you will be. This holds true for any ride, but even more so on a commute, when everyone else is trying to get to work also. You will probably have to ride on a street with cars at some point. Be sure that they are quieter and that drivers expect to see cyclists and other road users. Good pavement and scenery are bonuses, although a quieter commute should be the main goal.

A bike commute generally goes from a less dense, more residential area to a more dense, more urban area. Both pose challenges. The residential area may have quiet neighborhood streets, but the roads that connect to the urban area may be higher speed roads. The urban area may have more non-driver users, but may also be more crowded. Weigh these aspects when choosing your route.

The Time of Day For Your Bike Commute

It is likely that during some point in the year, you will ride in low-light conditions. Planning a bike route that will allow other road users to see you with your fantastic light array on your bike and body along with your reflective clothing is imperative to staying safe. Street lights help light the way, but also consider the turns on a route and how you may sneak up on drivers and vice versa. Also note the position of the sun; if you are riding into the sun, it may be hard to for drivers behind you to see you. It may also be hard for you to see oncoming and merging cars and bikes. Try your best to avoid directly traveling into the sun’s path.

The Combo Commute with a Bike

If you cannot start your commute directly from your house because of distance or road conditions, consider a combo commute. Use your car, the bus or train to get to a better starting point with better conditions for you. It can allow you to get to a safer starting point for your bike commute and it can avoid some of the worst on-road traffic. This is a common strategy if the initial part of the commute gets you and your bike to a quiet bike path, while the on-road traffic gets worse as you get closer to your destination.

Tools for How to Plan A Bike Route For Your Commute

It is unlikely that you will see a good bike commute route from your standard car commute. There are a few valuable tools and strategies to find a route.

Experiment

If you know the area well enough and are confident enough, experiment with possible routes to work. It might be a good idea to try your first experiment on a day you are off from work. You will have the time to explore the best possible streets and not be late for work.

Scout the Route

For the section of the route that is on roads and not bike paths, you can scout the route in a car to see if you would feel comfortable on a bike. You can also experiment in your car to search for alternative streets that may be good for riding.

Talk With Other Commuters

Find out who else in your community (neighbors, coworkers, others in your work neighborhood) bike commutes and seek their input on a good bike commute route. Their experience is invaluable to shaping your own commute.

Google Bike Maps

Google bike maps can give you a route that should be safe for cyclists. That said, if the algorithm only sees one way to get somewhere, it may send you through a dodgy intersection or on a busy road. Use Google bike maps in conjunction with talking to other people and using street view to get a better perspective on the actual route. A great way to learn new roads to get places is to have a rough idea of where you want to go from first looking at the map, and then when you get to an intersection, stop and see which way you want to go next. It is a bit of a pain constantly stopping but once you know where to go, you won’t have to stop on your future rides.

Strava Heat Maps

Strava heat maps compile user data to show where people frequently ride. The brighter the street, the more cyclists that use it. It is a self-selecting map because a few people might ride busy or unsafe roads, but most users will ride on safe streets. This is among the best tools to find safe, common routes.

Map it Out

Knowing how to plan a bike route for your commute can help keep you out of your car and riding happily and safely. It can also change the shape of your day, avoiding the frustration of traffic and giving you more time to ride your bike.

« Previous Page
Next Page »
  • Facebook
  • Tumblr
  • Twitter

Latest Articles

JOIN Cycling: A New Training Platform for Cyclists

May 27, 2024 By Eric Lister

cold exposure

The Benefits of Cold Exposure for Cycling & Life

June 13, 2023 By Eric Lister

hill climb

The Ultimate Hill Climb Training Guide

May 31, 2023 By Eric Lister

shoulder pain cycling

How to Treat & Avoid Shoulder Pain While Cycling

April 12, 2023 By Eric Lister

psoas stretch

The Importance of the Psoas Stretch for Cyclists

April 6, 2023 By Eric Lister

cycling neck pain

The Ultimate Guide to Cycling Neck Pain: Causes and Solutions

March 21, 2023 By Eric Lister

Useful Info

  • Contact
  • Finally, A Global Cycling Club That Is Focused On Community And Love Of Cycling!
  • Privacy Policy
  • Share Your Story!
  • Terms And Conditions Of Use
  • Welcome to I Love Bicycling
  • What Happened When I Stretched Every Day For a Month

Recent Posts

  • JOIN Cycling: A New Training Platform for Cyclists
  • How to Hang Bikes in Your Garage: 4 Inexpensive Options
  • Gravel Bike Vs. Road Bike: Which One Is Better For You?
  • The 6 Types of Mountain Bikes & How to Choose the Best One for You
  • What Is a Touring Bike Good For? 5 Benefits We Know You’ll Love

Search I Love Bicycling

Connect with Us

  • Facebook
  • RSS
  • Tumblr
  • Twitter

Copyright © 2026 · Magazine Pro Theme on Genesis Framework · WordPress · Log in