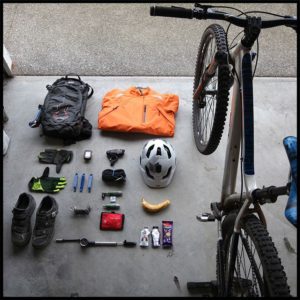
If you don’t want to go for a full pannier set up, a backpack can be a great way to carry your things while out riding. Most commuters opt for a cycling backpack, as you can also use it as a daypack, rather than just on your bike. However, some backpacks can be uncomfortable while you’re in the riding position on your bike, so you want to get one that doesn’t get in your way while you ride.
Backpack or Panniers
The main appeal for panniers is that there is no pressure put on the riders bike. Especially during the summer, if you’re riding with something heavy in your bag, having it weighing on your back can make for a sweaty ride. However, pannier racks and bags can be a nuisance to transfer between bikes, whereas a backpack can be worn no matter what bike you’re on. The best cycling backpacks will use lightweight materials and include a venting system to help avoid the awkward ‘t-shaped’ sweat mark that can come from riding with a backpack. You will also want to ensure the bag is water resistant or comes with a waterproof cover.
The Best Cycling Backpacks
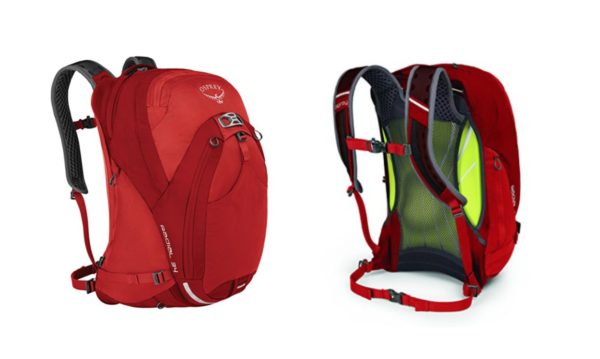
Osprey Packs Radial 26 Daypack
Price: $162
This cycling specific backpack from Osprey is one of the best out there. The harness and suspension system moves with you to provide incredible ventilation and comfort with heavy loads. There is also a helmet attachment to keep you hands free while you’re walking around. There is an integrated kickstand so the bag stay upright while you dig through your stiff, and the multitude of compartments make for easy organization. It’s hard to find a part of this bag that isn’t well designed, and it comes in both 26 and 34 liter versions.
Ortlieb Velocity Backpack
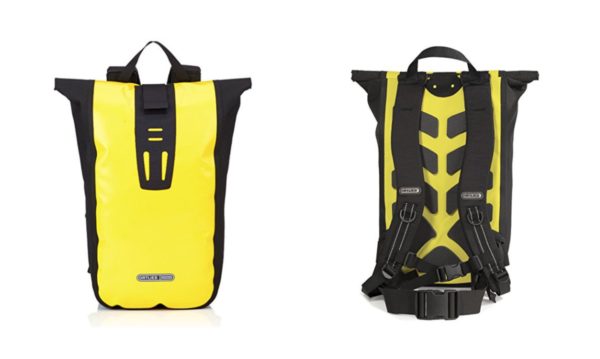
Price: $156
The Velocity Backpack from Ortlieb is the perfect bag for commuters who ride rain or shine. The design is simple, and with 20L you don’t have a ton of room, but it also fits snugly so you don’t have to worry about it flopping around as you ride. The foam backing and adjustable straps make for both ventilation and enhanced stability. The main compartment features a roll top with Velcro closure for easy access, and you can rest assured that your things will remain dry no matter what. There is a removable inner pocket for your smaller items like phone and wallet.
Deuter Race EXP Air Backpack
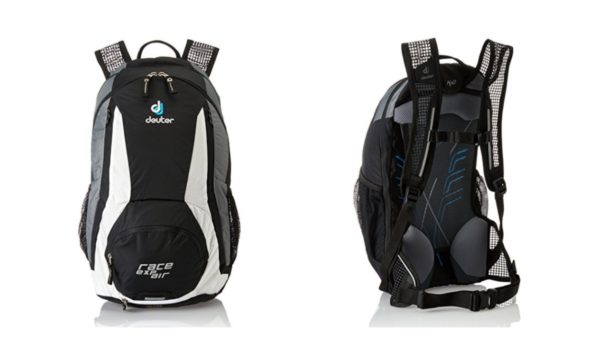
Price: $120
For those who struggle to find a pack that is long enough and fits just right, the Deuter Race Backpack is the answer. It’s long, sleek design features a flexible frame and three-sided ventilation to keep your back nice and cool. The mesh hip fins add stability, but are breathable and lightweight. There’s also a fold-away helmet flap, a wet laundry compartment, a rain cover, and reflectors on the front sides and back.
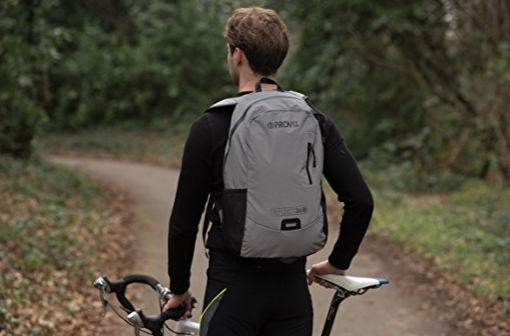
Proviz Reflect360
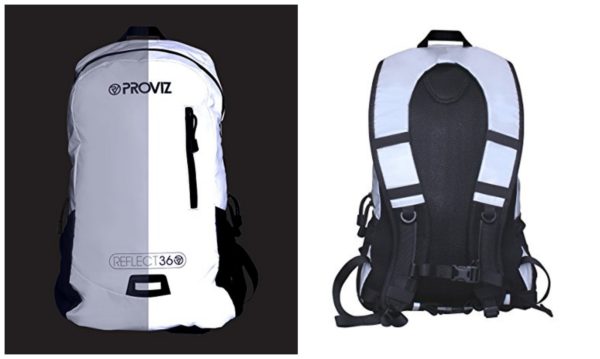
Price: $79 – $130
The Proviz Reflect360 rucksack is designed to keep you as visible as possible on the roads, no matter how dark it gets. Even the smallest amount of light will create a light bright enough to see a quarter of a mile away, giving drivers more time to react accordingly. The bag is completely waterproof, with aquaguard zippers, and has comfortable mesh backing.
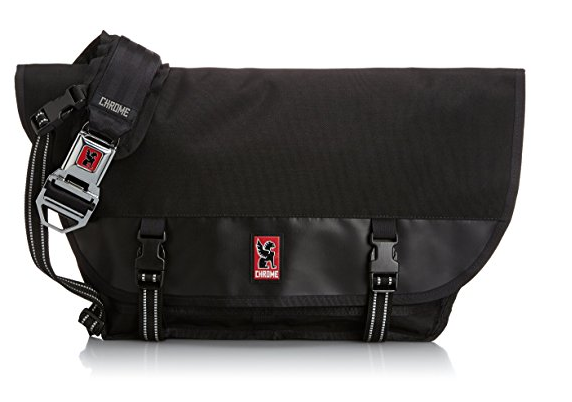
Chrome Citizen Messenger Bag