• Training
    • Injury Prevention
    • Training Tips
  • How To
    • Bike Fit
    • Gear
  • Nutrition
    • Nutrition Tips
    • Weight Loss
  • Repair
  • Reviews
  • Stories
    • Funny Stories
    • Jokes
    • Quotes
    • Videos
    • Funny Videos

I Love Bicycling

I Love Bicycling is a website that is geared towards cycling for beginners with road cycling tips, training articles, nutrition tips, weight loss, how to’s and bike repair articles.

Gear

  • Bike Fit

How to Measure a Bike Frame

March 24, 2018 by Corey Davis

Before purchasing the most expensive bike on the Internet or in a bike shop, it is important to understand how to measure a bike frame and what the frame size is. Obviously there are many different types of bikes you can purchase, but the basic measuring system is pretty universal. Mountain bikes may be sized small through large, or 21 inches, for example. Road bikes are typically always measured in centimeters such as 52cm or 56cm. For this article, the type of bike is irrelevant for how we are going to determine how to measure a bike frame correctly. With every bike there is a geometry sheet that will give the exact measurements of everything from the top tube length to the seat tube angle. These can be a blur if you don’t know what they mean and what to look for.

How to Measure a Bike Frame

Measuring Top Tube Length (Effective Top Tube Length)

This is the part of carbon fiber or aluminum that runs from the seat post tube to the head tube. In layman terms, it is the part below your chest when stretched out across the bike. On older bikes with a top tube parallel to the ground, the correct way to measure was from the centers of the head and seat tube. With a lot of today’s bikes featuring a sloping top tube, you need to measure from the center of the head tube straight back, parallel to the ground, to the center of the seat tube.

Effective Top Tube Length

Measuring Seat Tube Length

The seat tube is the part where the seat post meets the frame and runs down to the bottom bracket. To measure the seat tube length, measure from the center of the bottom bracket along the center of the seat tube, to the top. Some manufactures stop at the very top above the seat post clamp while others stop below. This measurement is typically taken in centimeters for road bikes.

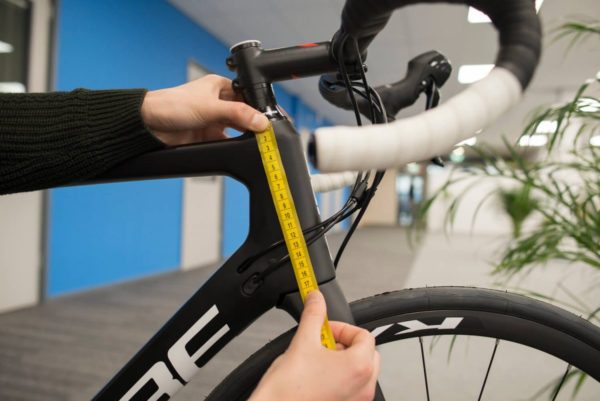
Measuring Head Tube Length

This is the front, closer to vertical tube on the front of your bike. It’s what the fork is inserted through. Head tube length is one of the less important measurements when fitting a bike, but is something to be considered for how aggressive of a riding style you plan to have. This is an easy measurement as it’s from the top, straight to the bottom.

Head Tube Angle

You probably won’t need to measure the head tube angle, but it’s good to know what it is. The head tube angle effects the steering and handling of the bike. As you can see in the image above, the head tube angle is the inside angle created with the ground. A steeper head tube angle (closer to 90 degrees) gives you a more aggressive and responsive bike. A lesser angle gives you a more relaxed ride; think beach cruiser.

Seat Tube Angle

Seat tube angle is another one that you probably won’t measure yourself but is also good to know. Again, in the image above, you can see that it’s the inside angle that is created with the seat tube and the ground. A steeper angle will be more on a time trial bike or aggressive road bike while a more relaxed angle is for a more relaxed bike.

The Importance of Knowing How to Measure a Bike Frame

Knowing how to measure a bike frame, and what the significance of each measurement is, will help you in finding the right type and size of bike for you be it a road bike, mountain bike, or bike for commuting around town. A professional bike fit is always a good idea as well. It’s hard to put a monetary value on being comfortable on a bike, but riding and being uncomfortable is only going to lead to riding less to not at all because it’s not enjoyable. A good fit will have you as comfortable as if you were walking down the street.

How To Use A Bike Pump

March 17, 2018 by Adam Farabaugh

New gadgets and toys often come with manuals but who actually opens them up let alone reads them? A bike pump seems simple enough to operate but not knowing how to use a bike pump is something that may have you flustered.

how to use a bike pump

Knowing How To Use A Bike Pump

Typically you find out that you don’t know how to do something when you precisely need to do that something. Knowing how to use a bike pump before you actually need to use it can be a headache saver but some of you likely found your way here to this article because you need to do that something right now; pump up your tires.

The Types of Bike Pumps

First, you need to know what kind of bike pump you have. Trying to pump up your tires with your feet holding the bottom of one pump won’t work too well with another. You will also need to know what type of pump head you have and how it works.

Floor Pump

A floor pump, as pictured above, is a pump you will likely leave at home or maybe in the back of your car. This is a tall pump that is held in place by placing you feet on the bottom of the stand.

Frame Pump

A frame pump is a long, slender pump that fits along the top tube on your bike to pump up your flat tire while out on a ride. It’s advantages over the below pumps are that it requires a lot less strokes and can reach a higher pressure; important if you’re on a road bike.

Hand Pump

A regular hand pump is small enough to fit in a jersey pocket or perhaps yours came with a mount that attaches next to your bottle cage. These ones are handy while out on the road but less than ideal if you’re using it to pump your tires up at home every few days.

Ultra Mini-Pump

Bike Mini Pump. Capability Pocket-Sized with Optimized Air Flow 100 PSI, Mounting Bracket, Presta-Schrader Valves, CNC Aluminum, Lightweight 72 Grams.

Having a pump that is small enough to easily fit in a jersey pocket amongst other stuff along with in a saddle bag or side pouch of a Camel-bak can be super convenient. It will get you out of a bind but be ready to do a lot of pumping.

CO2 Cartridge

A CO2 cartridge is super fast and efficient, unless you need to pump up more tires than you have CO2 cartridges; then you’re quick flat change is a long walk or wait for a ride.

The Differences in Pump Heads

Now that you know what kind of pump you have, you have to know how to attach it to the valve stem. But before you do that you need to know what kind of valve stem you have to make sure it is open as well as to make sure you are using the right style pump head. The two types of valves are Presta and Schraeder. Below, Presta is to the left. With this type you need to unscrew the top-most piece counter-clockwise to open the valve before pumping. To close, simply turn clock-wise. Schraeder valves, to the right, are ready to pump and don’t need opening nor closing. Just make sure you take off the plastic cap first.

Presta-vs-Schrader

Now that you know what valve type you’re working with, you need to know which head you have and how to use it. The first type, which you will find on all of the pump types, is the standard single nozzle head. These typically work with both Presta and Schrader valves by unscrewing the outer plate (in the image below, the silver piece) all the way off. This will expose a rubber nozzle. For Schrader, you will want the wider side pointed outwards. For Presta, you will want the narrower side pointed outwards. Behind this nozzle you will then probably find a plastic piece. For Schrader, place the pointy-tip side towards the outside. This is what de-presses the valve pin on the inside of the Schrader valve. For Presta, place the point-tip away from the nozzle. Once you have these pieces orientated for your valve type, simply screw the cover plate back on.

pump head
Single Nozzle

For a dual nozzle, pictured below, simply place the valve into the correlating hole. Large size for Schraeder, small size for Presta.

pump head 1
Dual Nozzle

Now that you have the valve in the correct size nozzle, you need to lift the lever on the rear of the valve head. This tightens down the rubber nozzle to ensure no air loss. (Note: On some fancier models this is reversed. Before placing the head on the valve you can lift the lever and see if the nozzle tightens down or not.)

How To Pump You Bike Pump

Now that you have the pump head securely attached, you are ready to pump. With all of the pump types, they will likely seal well when new but when they age you may need to hold the valve head tight to the valve with one hand while pumping with the other. With a floor pump, simply place a foot or two on the base and pump away. With the other pumps you will want to hold the other end of the pump with your other hand so all of the force isn’t placed on the valve stem. If you don’t do this you will likely brake the valve stem off leaving you with a less than ideal situation. A good way is to hold the valve head while also holding the rim to support your hand.

CO2 Option

With a CO2 cartridge, the attachment mechanism might be the same or perhaps a little different so you will need to do the same things mentioned above to make sure you’re using the right valve nozzle and then to make sure it’s securely attached. Then instead of pumping, you tighten down the cartridge to pierce it and either the tube will start filling up automatically or there will be a button to press to begin inflation. Either way, make sure you don’t over inflate the tire and when you take the valve head off a Presta valve, make sure it doesn’t freeze open. Simply give the valve a tap down and turn to close quickly.

What Pressure Should I Pump To?

Now that you know how to use a bike pump, what pressure should you pump to? With a floor pump you will be able to get your tires easily to whichever pressure you like. With the other pumps, it will likely be hard to get the pressure up to what you were riding originally. On road tires, get as much air in as you can to avoid pinch flatting. You won’t have a gauge so you will have to go by feeling the hardness of the tire with your thumb. For road tires, you should only be able to press in a tiny bit. For cyclocross and hybrid bikes, you should be able to press in a bit more, perhaps two to three millimeters. For mountain bike tires, you should be able to press in even more, five millimeters to one centimeter.

Easy Tricks for Tubeless Mountain Bike Tires

February 20, 2018 by Ryan Taylor

There is no doubt that the emergence of tubeless mountain bike tires and rims have changed the industry for the better. Riding tubeless enables the rider to run less pressure, giving the rider more grip, better ride feel and also less weight. Adding a sealant to the system adds an extra measure of security as many small holes or cuts in the tire can be patched internally by the sealant. Should a cut happen that is too large for the sealant to do its magic, then the rider can install a tube as normal to get home!

Tubeless Mountain Bike Tires

Tubeless has come a long way since the emergence of UST (universal system tubeless) over 10 years ago by Mavic and Hutchinson (two french companies, hence the french abbreviation). Now most rims and tires on the market can be made tubeless very easily, BUT there are few hidden tricks that both shop and home mechanics can use to make the system easier and more affordable.

Editors note: Most Bontrager rims do not apply to these tricks!

Gorilla Tape:

Tubeless rim companies have developed their own tape to ‘tape’ over the spoke holes on the inside of the rim causing it to be sealed. The valve is then poked through the tape. When sealant is added, the combination of these things is what makes the system air tight.

This tape is on the expensive side as it is designed to work with the specific rims. Many professional  mechanics, from local shops to World Cup DH, tend to use ‘Gorilla Tape‘. This tape is basically duct tape on steroids and can be bought on the cheap at any local hardware store. Not only that, it comes in many widths to accommodate different rim widths and tends to be thicker than the proper tape. In some opinions, it can lead to a more solid tire seal.

One of the main benefits to Gorilla Tape is how easy it can be found. Being able to buy it at Wal-mart at 10:30pm the night before a race is handy when you break a spoke on the course pre-ride! The key to it working well is to make sure the rim surface is clean for proper adhesion.

Tubeless Valves:

Like tubeless tape, specific valves are recommended to go tubeless. The main benefit of the specific valves is that the rubber base (what hugs the rim) is built up. This works to prevent sealant from going into the valve, clogging it, and also preventing it from pulling through. If you are on a very tight budget or in a pinch, you can cut up an old presta tube. This valve is very similar and can work. If you have a couple of extra bucks you can buy the proper tubeless valve.

Patching Tires:

We have all been there. Installing a new tire and cutting it on the first ride. Tubeless tires don’t come cheap these days and it is very frustrating to cut one before you get your moneys worth! It is possible to patch tubeless tires, but it is very tricky. It’s recommended to buy patches in the automotive isle of the hardware store as they tend to be thicker, more stiff, and generally cheaper. Your DON’T want a flexible, thin, patch with some stretch to it.

Be sure to clean the inner part of the tire thoroughly with alcohol and scuff it up with sandpaper. Once clean, buy the best crazy glue you can find. A favorite is ‘KLEBFIX’ from Wurth brand. It is a fantastic glue and doesn’t corrode rubber. Be careful as it will bond ANYTHING in a matter of seconds. Traditional patch glue doesn’t work well. Keep in mind, this is to get the remaining life from your tires. If you are concerned about it holding up before the biggest race of the year, you should error on the side of caution and buy a new tire.

The Rim-Pop technique:

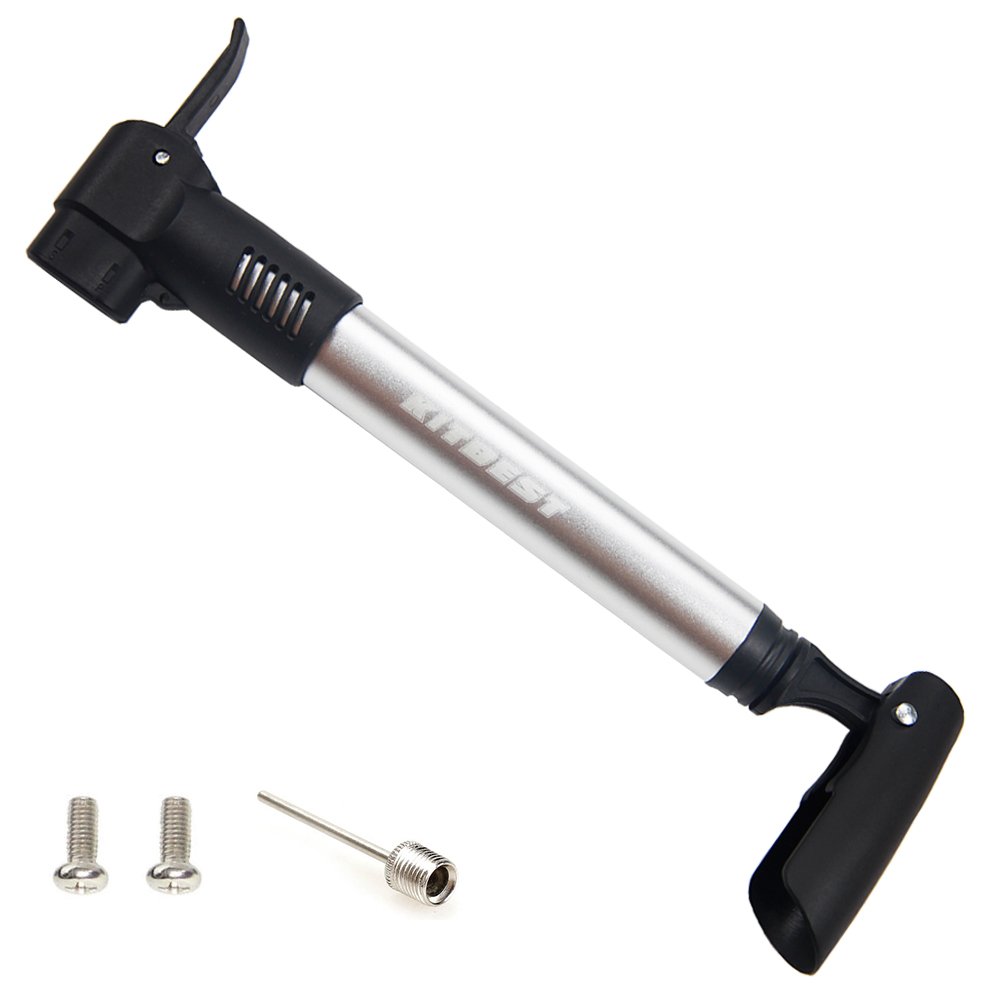
Lets face it: Tubeless is annoying to set up without a compressor. Thankfully
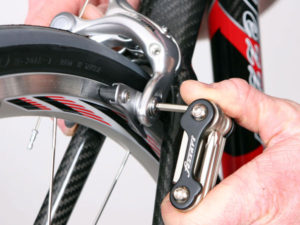
 Bontrager has come out with a pump that stores air inside of it causing a burst of quick air popping the tire into place. This is the definition of “Why didn’t someone think of this sooner?” type products.

However, there is another way! Once the tire, valve, tape, sealant are all installed, run your tire lever just under the bead of the tire, gently pulling it up onto the high spot of the rim (where it should sit when inflated). Run the lever all the way around the tire. You will feel it getting tighter and tighter as the lever approaches your starting point. From here, gently pull the lever out and do the same to the other side.

The goal here is to pre-set the tire on the high point of the rim so when you start pumping there are fewer places for the air to escape which aids in the force of the air ‘popping’ the tire into place so the sealant can do its magic.

You will almost always make a mess with this system, but it works. Once you get good at it, it usually works the first attempt. Again this is handy for those without a compressor or who happen to be at a race or on the road. Another good method is before you put the sealant in, install the tire with a tube and inflate it to seat the bead. Then carefully remove one side of of the tire to remove the tube, install the tubeless valve, and add sealant. Then do the above trick on the one side. Also wiping the bead of the tire with a warm, wet, soapy sponge will help the tire to seal.

The bicycle industry has come a long way from UST over the past 10 years. Tubeless tires are more accessible, more affordable, and much lighter compared to then. Is the ‘Stans’ system easier to use than UST? Depends who you ask, but these tips will help you out if you’re in a pinch.

The Best Cycling Computers

January 8, 2018 by Sarah Lauzé

Cycling computers can do a lot to enhance your training and track important aspects of your ride. Some riders are just curious, while others use the data as a means of motivation. So, whether you’re looking for an in-depth analysis of every second, or to simply track your routes to see where you’ve been – there’s a cycling computer for that.

There are an overwhelming amount of cycling computers on the market, with both brands and models coming and going each year. So what makes one better than the other? Well, that depends on what you want it to do.

What kind of cycling computer is best for you?

If you’re not interested in chasing any Strava segments or going into detail about every aspect of your cycling, then you don’t need one of the top of the line cycling computers. In fact, a basic unit will most likely provide you with all the information your want and need.  Most of them will include your distance, speed, and time. Most of these do not include GPS and do not allow you to transfer data to a computer or tracking service.

They are simple, easy to use, and effective if you’re just looking for those three areas of information. They will also be smaller, lighter, and often have better battery life than the pricier performance models.

Sigma BC 9.16 (Wireless)

Cycling Computers

Price: $40

The Sigma BC series has been a go-to for years when looking for simple reliability. The new BC 9.26 also includes some bells and whistles that previous models did not. The basic features include current speed, average speed, trip distance, total distance, ride time, total ride time, maximum speed, and calories. The unique thing about this model is there is an optional USB docking station, so you can transfer ride information to from the computer to your Mac/PC to keep track of your rides.

Cateye Velo 9 (Wireless)

Cycling Computers

Price: $26

The Cateye Strada includes all the basic stats, plus a few bonus features, all in a slim and lightweight design. On the display you can scroll through current, max, and average speed, your total distance, trip distance, elapsed time, calories burned, and a clock. The Strada is also a great computer to switch between your road and mountain bike, as there is an option to pre-program more than one bike with different wheel sizes.

This model is known for its long lasting battery life (upwards of three years) and it’s waterproof seal.

GPS Cycling Computers

The more complex GPS and ANT+ interface cycling computers can provide a lot more features. They will include things like mapping and navigation, while collecting information from heart rate monitors, cadence sensors, and power meters. They also track your ride using an internal GPS, so you can see your exact route.

With these cycling computers you can look at your time on any route or segments, and them compare to other users through Strava.

Cycling Computers

Edge 520

Cycling Computers

Price: $249-$299

The Edge 520 is great for training with it’s small size and ease of use, but it is not a touchscreen and therefore not as good for navigation. The Edge 520 led the way with new performance and power analysis, including Time in Zone, FTP tracking, cycling specific VO2 and recovery dynamics, but both the 820 and 1000 have since added these features. That being said, if you aren’t in need of much help with navigation, the 520 is a great budget-friendly option. It’s also great for people who prefer buttons over touch screen, if you ride a lot in the rain or with gloves on, but it comes down to personal preference.

Wahoo ELEMNT GPS

Cycling Computers

Price: $330

The Wahoo ELEMNT connects to all your peripheral sensors, as well as connect to your smartphone via Bluetooth. The in-unit menus are tedious to get through for set up, but are a breeze when connected to and operated through your smart phone. So unless you have a smartphone, either an iPhone 4s or newer or android 4.3 or newer, this isn’t the unit for you. That being said, it is a stand alone GPS unit. Once connected to your phone it’s simple to customize settings, configure workout pages, and link to popular cycling apps and wireless sensors. Post-ride, the app stores workout history can automatically sync to your linked third party Apps. The ELEMNT can also deliver on-screen alerts for phone calls, texts, and emails if you choose. The high contrast black and white screen is a selling point, making it easy to see even in sunlight.

Edge 820 GPS

Cycling Computers

Price: $395

The Garmin 820 is the hybrid, combining the touch screen of the Edge 1000 with the smaller size of the 520. So, is it the best of both worlds? Almost. The computer is easy to use, uploads your rides directly to Strava via your phone or wifi, and you can see incoming calls and texts while you ride. It’s downfall is the navigation. If you’re used to the larger screen of the Edge 1000 or even your smartphone, the 820 will take some getting used to. It’s not as if the navigation is terrible, but the touchscreen is much smaller, and can there seem a little cramped.

Giant NeosTrack

Cycling Computers

Price: $180

With over 30 hours of battery life, 2.6 inch screen, five button operation, and 80 functions, the Giant NeosTrack is a great budget friendly option. It’s no-nonsense, with a focus on functionality rather than flashy selling features. It can record all the standard metrics, as well as many of the more technical fields like TSS, normalized power, and L/R power. It is fully compatible with your smartphone via Bluetooth, but it a little slow when transferring ride data. Overall, it’s a great unit if you’re more concerned with data, and aren’t too worried about getting text notifications while out on a ride.

Edge 1000

Cycling Computers

Price: $299-$599

There has actually never been a better time to buy the Edge 1000, as the price has decreased with the recent release of the 1030. So far, the response to the upgrade as had mixed reviews, with most claiming it’s not worth the extra couple hundred dollars. For years the Edge 1000 was Garmin’s premium model, with the large screen making it great for training and navigation. When paired with your smartphone, the Edge includes including live tracking, incoming call and text alerts, social media sharing, weather, wireless uploads and sending/receiving courses and segments. As soon as your ride is complete, the data can be automatically sent to Garmin Connect via Bluetooth or Wi-Fi. Really, there’s not much this computer can’t do, but the battery can become an issue on long rides (one aspect that was improved with the 1030).


Your Smartphone

Why not just use your smartphone? With the Strava app, you can track data similar to on a GPS unit, and there are even ANT+ receivers for smartphone to integrate data from heart rate monitors, power meters, and cadence sensors.

The main issue will be your battery life. Most phones will not last a long ride while running GPS the entire time. Also, unless you have a handlebar mount, you won’t be able to see the screen as your riding, which is one of the main perks of a cycling computer.

Best Road Bike Upgrades

December 31, 2017 by Adam Farabaugh

As a cyclist we are always trying to improve. Improve ourselves in our fitness, bike handling skills, and the level at which we ride. There is general idea in cycling that you don’t need an upgrade to get faster, but rather ride up grades. While it’s true there are no shortcuts to get faster, there are some road bike upgrades can help you along your way.

Fortunately you don’t need a lot of time or money to make substantial improvements on your bike. Making a few improvements can help your riding in many ways, but the biggest issue is knowing which one is going to give you the most benefit.

Best Road Bike Upgrades

Upgrade #1: Comfort

The most important thing in riding is comfort. The more comfortable you are on your bike the more you’ll ride, so the first things that you should upgrade are things that improve how you feel on your bike. Whether your bike is an entry level road bike or a top of the line model, some of the features may just not be a good fit for you.

Saddle

The saddle on your bike is the biggest part that is going to give or take away from your comfort. It’s very important to have one that’s a good fit for you and your style of riding. The best way to find the right saddle is to ask around and see what other people have ridden and if they have one you could try (most all bike shops will let you try before you buy). Some key things to look for is how wide the saddle is as you want it to match up with your sit-bones, as well as how soft or firm it is. A new saddle doesn’t have to cost a lot of money either and any money spent on a saddle is a good investment in your comfort.

Shoes

Your feet are the second biggest contact point with the bike, so making sure they’re comfortable as well will go a long way. Cycling shoes can be a bit more expensive than a saddle, but they will last a very long time so the extra money you spend here will last you years. The key to finding the right shoes is fit. Feet come in all shapes and sizes and a lot of shoes have different styles of foot beds; meaning some are wider and narrower in different spots throughout the shoe. The best way is to try a lot of them on and find what feels the best.

Upgrade #2: Reliability

Depending on where you’re riding, having a reliable bike can trump comfort, so unless you can easily catch a ride home, invest in improvements that will keep you rolling no matter what is thrown your way.

Tires

The thing that will slow you down the most are flat tires. The best way to prevent this is by having a set of tires that are not prone to flatting and replacing them when they are getting close to worn out. A good starting point is to get a wider tire, 25mm to 28mm if your bike frame will allow it. This will lessen the likelihood of pinch-flatting. A tire with harder casing and harder rubber, will last longer as well as be less penetrable. If you want to lessen the likelihood of flatting even more, consider upgrading to a tubeless set up that uses sealant inside the tire to fill any leaks before all the air escapes.

Brake Pads

Another area of the bike that you should make sure is in top-notch are the brakes. Being able to stop quickly not only gives you piece of mind, but also can prevent unnecessary crashes. Replace your brake pads before they wear out. Not changing them has the potential to not only leave you without good brakes on a ride but also can potentially damage your rim which will cost much more to replace than what the brake pads would have cost you.

Chain

Although chains break relatively infrequently, they still break. If you’re mid-ride and without a chain tool to take a link out to get you home, you’re going to be asking for a ride. The best way to prevent this is to replace your chain before it becomes old and worn out. This will also save you from having to get a new cassette along with the chain as the chain won’t have stretched past the point where a new one won’t mesh with the old cassette.

Upgrade #3: Speed

Now that you’ve upgraded the parts to your bike that have the biggest impact on you, you can upgrade a few specifics to help you ride faster. The cheapest to ride faster is to ride more, but once you’ve done that upgrading your equipment comes next.

Helmet

A more aerodynamic helmet can save up to 1 minute in a 40 km time trial. Now, no self respecting road cyclist is going to go strap on an aero TT helmet, but the principle still remains. A more aero helmet will shave time off your ride and is your best bang for your buck. Just make sure the helmet has enough vents if you are prone to overheating.

Wheels

Your wheels can easily be changed and may be contributing to what is slowing you down. Cheaper wheels can be heavy as well as less aerodynamic. Depending upon the riding that you’re doing, choosing a lighter and/or more aerodynamic wheelset can drastically improve your speed on climbs and flat sections.

Wheels can go up in price past the cost of your bike, most likely, so you need to find a good balance of lightness to aerodynamics to cost. Typically the best are a clincher rim, to give you the ability to easily change a tire, with a moderate amount of depth and are fairly light with a lower spoke count. There are about a zillion wheelsets out there both in aluminum and carbon. A bit of homework is required to find your perfect wheel but it’s time worth spending if you’re looking to improve your speed.

Clothes

You may not think that clothing would have a significant effect on speed; however, a skin suit can save over 2 minutes on 40 km time trial. This emphasizes how important the clothing you wear can be. Scrap the baggy clothing and embrace the lycra bib shorts and tight fitting jerseys.

Upgrade #4: Style

The last thing to improve on your bike is how it looks. Some may think this should fall higher on the list of what to upgrade, but in reality it’s not how you look, but that you’re out there doing what you want and having fun. Even at the professional level.

Bar Tape

Having clean, well-wrapped bar tape will make your bike look much better particularly after it has been cleaned. Color is personal preference, but typically any colors other than black or white are only used if it goes with colors on the bike. White typically is the most professional, but keeping it clean can be hard. Having well wrapped bars with black bar tape is the best style as it stays clean and looks good.

Bottle Cages

You probably already have bottle cages on your bike, but upgrading them to something lighter and sleeker looking can be a good option. The first thing though in upgrading bottle cages is making sure they still hold a bottle well even down a bumpy road. It can be the sweetest looking bottle cage in the world but if your bottle falls out, it didn’t do its one job and is worthless. After you’ve determined that it can securely hold a bottle, find a style and weight you like and match the color with your bike. Black typically goes with everything but it all depends. It’s style, find yours.

Saddle Bag

Style on the bike continues to more than just the bike itself.  This continues to accessories on the bike such as a saddle bag that a lot of riders have just flopping around under their seat. Having a bag that isn’t too big and is securely attached to your seat not only has a purpose but also looks good. The best looking things are the ones that have a purpose and look good too.

Upgrading parts on your bike doesn’t have to be expensive and time consuming. Knowing which parts to upgrade first will help you get the most out of your riding. The best upgrades are the ones you need, not what other riders think you need. There is always the “latest and greatest” equipment out there but just because it’s sweet and functional for someone doesn’t mean that it’s a great investment. Often times the most simplest of upgrades will take your riding the farthest. Find that one upgrade, make it, and go on to the next when the time is right.

Road Bike Tires and Rolling Resistance

December 18, 2017 by Sarah Lauzé

The ideal road bike tire would weigh nothing, have zero rolling resistance, never malfunction, and maybe even help you out near the top of a tough climb. Unfortunately, tire technology is not quite there yet. (Fingers crossed for future hover bikes).

What we can look at is what makes up a road bike tire. What makes a tire faster than others? What makes it more stable? And what role does air pressure play in all of this? Because, at the end of the day, it all comes down to where the rubber meets the road.

Rolling Resistance

Types of Tires

There are three types of tires available: clincher, tubular, and tubeless.

Clinchers are the most common, and you’re most likely familiar with how they work. They have a wire bead around the edge that both holds their shape and fits into a hook on the rim, with an entirely separate inner tube that you can repair or replace. Tubular tires have typically been the number one choice for racers, but are both tough and expensive to fix. They have an inner tube that is actually stitched inside, then the tire is glued to the rim. Tubeless tires have become increasingly popular for mountain bikers, but have crossed into road cycling as well. Like a car tire, the open rubber tie sits firmly on the wheel’s rim, with the air sitting in the cavity between the rim and inside of the tire. In addition, a liquid sealant is used inside the tire to preemptively plug any small cuts in the tire without losing pressure at all.

Rolling Resistance

Everyone knows about wind resistance as a force that works against cyclists. Headwinds can be brutal and unrelenting, and also make for a handy excuse when your times are a little slower. Although not nearly to the same effect, rolling resistance is the much less obvious factor at play here.

Rolling resistance is a principle of physics, and isn’t specific to cycling. It refers to the energy that is lost where a tire makes contact with the road. As a tire rolls along, the rubber and casing flex and unflex. The energy needed for the constant deformation is then absorbed and turned into heat. It’s much more obvious on your car, and is the reason your tires get warm as you drive.

There are a number of factors that contribute to rolling resistance:

Tire Width

For many years, narrow 23mm tires have been the standard width for road bike tires. Racers would go even narrower to 21mm, with the general thought that the narrower the surface area, the less rolling resistance. However, this has proved to be untrue. At the same pressure, narrow and wide tires will have the same contact area. Narrow tires will flatten onto a narrower but longer section of the tire where it contacts the road, whereas wider tires will flatten over its width. The narrower tire loses more of its shape, and so does not roll as well. Wider tires have less deformation from its round shape, and therefore roll faster.

Tread Pattern

Any tread actually increases rolling resistance as the shapes or patterns can squirm as they come in contact with the road. Therefore, a smooth, slick surface is the best option, but most companies seem to want some kind of tread on their tires, if only for marketing purposes.

Casing 

Tire casings are specified in TPI (threads per inch), and have multiple layers of threads holding things together. The higher the TPI, the thinner the threads, as they can be more crowded together. In most cases, a higher TPI delivers less rolling resistance and therefore a faster tire.

Tube Choice

Clincher tires will be slightly slower than their tubeless counterparts as the inner tube and the casing create friction and raise the rolling resistance. However, the difference is not enough to make the switch for most riders. Your tube choice will have more of an impact, as running a thinner, lighter, and more flexible tube will create less rolling resistance.

Tire Pressure

Overinflated tires will deform less, and so technically will reduce the rolling resistance, but it also forces movement. Your momentum is forced up instead of forward as you bounce over every little bump and rock in the road. In recent tests the rolling resistance between a tire inflated to 85 psi as opposed to a tire inflated to 110psi is negligible. Additionally, safety is significantly reduced with high tire pressures. If you try to take a sharp turn at speed around a moderately slippery corner with overinflated tires, it’s not going to be pretty.

Your choice of tire depends on what your specific needs are and the type of riding you do. It is often a toss up between speed, longevity, puncture resistance, ease of use, and your budget. Click here to read more about how to choose the right tires for racing, or the the right tire by type.

5 Of The Best Cycling Power Meters

December 6, 2017 by Corey Davis

cycling power meters

What is a Cycling Power Meter?

Cycling power meters have been a common tool used to gauge training amongst professional cyclists for years, but really only within the last decade have they become affordable for the everyday cycling enthusiast. So what exactly is a power meter? Cycling power meters are strain gauges that measure the amount of displacement of an object, say your crank, which is imputed into an equation that gives you the amount  of work done which when combined with time gives you power measured in joules/second or watts. This work energy expressed in watts determines how much power a rider produces at any given second within a ride.

Why are Power Meters Good to Ride With?

The benefit of training with a power meter is that it can show how much power the rider is putting down to help track progress. It is a better measurement than heart rate to track training. Heart rate fluctuates a lot, whereas power is always consistent, but they are really best used together. Cycling power meters can help you also ride a much smoother pace throughout an entire ride, climb, or interval. You can pick a number and stick to it, whereas heart rate will creep up throughout the ride, hill, or interval. Cycling power meters are such a great training tool; soon you can expect to see them coming standard on bikes straight from the manufacture. Below is a list of 5 of the best cycling power meters and what makes them different.

5 of the Best Cycling Power Meters

PowerTap

PowerTap is one of the only companies that offer three positions for power to be read. Originally, PowerTap sold the rear hub power meter and now they offer chainrings and pedals to read power. All three are useful in their own way. The rear wheel is great because you can transfer it from bike to bike easily, but when race day comes, the race wheels replace the power meter.

SRM

SRM cycling power meters are certainly the most common amongst top professionals. The SRM is crank based and has its own head unit compared to most other brands that rely on Garmin head units. SRM claims to have a margin of error of less than 1%. SRM is the original power meter and focuses on quality; the price is certainly reflective of that.

Stages

Stages cycling power meters are in the left crank arm, and dependent on what drivetrain a rider is using. For instance, if a rider uses Shimano Ultegra and purchases a Stages, they would receive an Ultegra left crank arm to replace their original one. The only difference is that there would be a small black piece attached to the inside of the crank arm. Stages is certainly one of the more affordable power meters out there, and installation and setup is a breeze.

Pioneer

Pioneer power meters are crank based and have dual strain gauges to measure both left and ride side power. Pioneer offers complete cranksets and installation kits for user supplied cranks, i.e. you already have a DURA-ACE crankset and don’t want to buy another.

Garmin Vector

Vector™ 1

Garmin Vector pedal pods fit on your crank, taking only 15 minutes to install and calibrate. The pods do left/right pedal analysis, along with a feature called Pedal smoothness, to see where there are soft spots in your pedal stroke. These pedals are run on a simple CR 2032 battery, and the new Vector 2 design makes replacing the batteries much easier.

The Best Cycling Shoes By Type

November 6, 2017 by Sarah Lauzé

Going clipless is great way to quickly and easily improve your riding and become more efficient. Finding the right shoes can be tough as there’s no “one size fits all” solution, and there are a variety of features to look for.

Are you doing a lot of racing, or are you a commuter? Do you ride over the winter? Are you headed out bike touring? Each of these situations require a different type of cycling shoe, and you’ll want to think about what you’re looking for in a cycling shoe before investing in a pair.

The Best Cycling Shoes

Why go clipless?

Clipless pedals with cycling shoes is the most efficient and comfortable system out there when it comes to road biking. The stiff sole of the cycling shoe provides a rigid platform to transfer power from your legs to the drivetrain and propel the bike forward. Softer shoes lose some of that power as the flexible sole deforms around the pedal (and also makes your feet sore)

As well as having stiff soles, being clipped in encourages proper pedalling technique, using power through every part of the pedal stroke. Not only are you pushing down, but you are also pulling up to complete the 360 degree motion.

The clipless system is not just for racers, but can make cycling more enjoyable as you spend the same amount of energy, but get more return! So, if you’re a recreational rider who has always made fun of cyclists hobbling around in their cycling shoes, it may be time to give them a try. It can be intimidating to be locked in to your bike at first, but you will get used to the twist out motion in no time.

Types of road cycling shoes

The Best Cycling Shoes

There are two general types of road cycling shoes:

  1. Performance – Performance cycling shoes are as light and as stiff as possible, with the cleat attaching entirely on the outside of the shoe via a two or three bolt system. These shoes are not meant for walking, and will get you out to your bike, but that’s about it. They are not shoes that you would want to get stuck walking home in
  2. Leisure / Touring – For commuters, casual riders, and touring you may want something a little more versatile and easy to walk around in. These shoes will often have a much smaller cleat that is embedded into the sole, making it flat with the bottom of the shoe.

Key variables

  • Fit – You always want to try cycling shoes before you buy, as not all brands size the same. They’re awkward to walk around in, so The Best Cycling Shoestrying them out on your bike would be ideal. You want your feet to feel comfortable, but snug in the shoe. They shouldn’t be moving around within the shoe at all, as that will become very uncomfortable over a long ride.
  • Fastening system – The number one thing you want from the fastening system is to keep your foot firmly in place. This can be done with dials, ratchets, velcro, or laces.
  • Soles – Generally speaking, the stiffer the sole, the more efficient the shoe will be. More expensive shoe soles will be made from carbon to remain as lightweight as possible, whereas cheaper options will be plastic, and some are combination of the two.
  • Cleat style – The majority of  road cycling cleats are three bolt (SPD-L), with two bolt (SPD) being more appealing for commuting, touring, and mountain biking. Some cleats are a compatible with both.
  • Breathability / Water resistance – If you’re doing the majority of your cycling on hot summer days, then you’ll want to ensure the shoes you get are synthetic or leather and allow your feet to breath. There are specific winter cycling shoes for cold and wet riding, and it may be worth having two pairs if you are riding outside during all seasons.

Some of the Best Cycling Shoes

Performance Cycling Shoe

Shimano RP9

The RP9 road performance shoes are the quality and fit of a pro-level shoes, but at a much more affordable price point. They are designed for performance and speed, but with the heat moldable Custom-Fit, they are also comfortable enough for those long rides while giving you the ultimate power transfer. With a weaved carbon composite sole and a one piece synthetic leather upper, they are lightweight, breathable, and secure.

These shoes come in both men’s and women’s models.

Mid-Range Cycling Shoe

Men’s – Giro Treble II

The Treble II is exactly what you think of when you picture a cycling shoe. It’s simple, functional, and is compatible with both SPD and SPD-L cleats. The classic 3-strap closure makes for easy adjustments, but isn’t quite as durable or secure as it’s lace, ratchet, or dial counterparts. However, these are great entry level shoes that will having you set for a PR on your favourite climb with amazing efficiency and comfort.

Women’s – Shimano RP2

The entry level show in Shimano’s lineup, the RP2 is compatible with both SPD and SPD-L. The lightweight fibreglass soles increase power output, with the classic three strap upper keeping your foot firmly in place. The women’s model features a narrower fit, reduced volume, and added support in the instep to maximize comfort.

Leisure / Commuter cycling shoe

Women’s – Giro Whynd Womens Road Cycling Shoes

The best of both worlds. The sole of the Whynd is rigid enough to prevent the loss of power while remaining comfortable enough to walk in, featuring rubber “walking zones” to provide grip. The recessed cleat area accommodates two-bolt cleats, and the large strap across the top provides security and keeps the laces out of the way. These are perfect for weekend touring or running errands on your bike.

Men’s – Giro Rumble VR Cycling Shoes

The Giro Rumble features vibram soles for the ultimate support and casual look while out at the pub, with an injected inner shank to transfer power and have you feeling strong when you hop back on your bike. The mesh/microfiber upper upper will keep your feet from sweating and the non-slip laces will keep you nice and secure- no matter what the day brings.

5 Of the Best Cycling Rain Capes

November 3, 2017 by Sarah Lauzé

Sometimes when it rains, it pours. When it does you want to be prepared, there’s nothing worse than getting caught on your bike in a downpour, whether it be on your morning commute to work or out on a long ride. Cycling rain jackets are great for throwing on over a jersey, but fail to keep your legs (or backpack) dry. This is where rain capes come in.

When your hear the words rain cape or poncho, you may picture those cheap plastic capes you’d get on a water ride at Disneyland. However, there are cycling specific capes that are not only much more functional, but won’t make it look like you’re wearing a garbage bag.

Features of a cycling cape

Generally speaking, cycling capes will have an extra long tail that you sit on, both keeping your bottom dry and acting as an anchor so the cape doesn’t flap in the wind (you’re not trying to be a superhero). Many have little thumb holes or wrist straps in the front so the cape can sit right over your arms and handlebars, essentially creating a small tent over your legs and keeping your whole body dry. Finally, a cycling cape should have a drawstring that can be used to cinch tight around your waist and keep it in place.

Pros of a cycling cape

One of the main pros of a cycling cape over a jacket is its breathability. As the bottom of the poncho remains open and your arms unconstricted by sleeves, there is a lot more airflow, and therefore they are much more comfortable in hot weather. Capes are perfect for city commuters as they keep your legs dry, can be draped over your backpack so you arrive to work ready to go, and they’re quick to take on and off.

5 Of the best cycling rain capes

The weather can change quickly and without warning, so when it does be sure you’re prepared with a cycling cape at hand. Here are 5 of the best capes on the market to keep you dry no matter what mother nature decides to throw at you.

Electric Houndstooth rain cape

Price: $250

Cleverhood is top of the line when it comes to cycling capes. The Electric Houndstooth is carefully crafted to live up to the reputation of the brand with durable, waterproof polyester and tightly sealed seams to keep you dry. Featuring unique hidden reflective thread, the bright grid will make you stand out even on the darkest, wettest nights.

Brooks Saddles Cambridge Rain Cape

Price: $144

The Cambridge Cape is made of lightweight, waterproof nylon and is designed to be easy to carry with you or even attach to your bike when not in use. Featuring a carrying pouch, waterproof up to 10,000 mmH2O, and an adjustable hood to fit over or under your helmet, this is a great option for most cyclists.

Exped Daypack & Bike Ultralight Poncho

Price: $129

Exped really thought of everything with this lightweight and well designed rain cape. With reflective strips on the sides and back for visibility, large inner pockets doubling as a stuff sack, adjustable elastic hoops for the handlebars, and an adjustable inner elastic cord this is a great rain cape for cyclists. The hood has one hand operation cinch cords for the right fit without obstructing your peripheral vision.

Ferrino Dryride Cape

Price: $99

The Ferrino Dryride Cape has all the practical features you want in a rain cape with ripstop nylon, taped seams, a carry pouch, shaped hood, and a reflective band on the front and back for cycling on those dark, wet nights. There are loops for fastening to your wrist and anchoring the cape to the handlebars, and side openings for you hands if needed.

Happy Rainy Days Women’s Bike Cape

Price: $89

Featuring a long front panel to fit over the handlebars, the Happy Rainy Days is a great middle-of-the-road option. With a waterproof viscose outer shell and breathable fabric, it’s a great fit for the city commuter.

Are Cycling Shoes Worth The Leap?

June 13, 2017 by Andrew Funamoto

If you are thinking about buying cycling shoes, you may find yourself in the following circumstances:

  • Thinking of buying a bike and cycling shoes for exercise
  • Currently commuting to work
  • Riding on weekends with friends
  • Exploring the city & countryside

Seeing cyclists hobble around in cycling shoes is not pretty, so there must be a reason why people insist on wearing them.

What Do Cycling Shoes Do?

The first and most obvious aspect of a cycling shoe is that they clip into the pedals. With a distinctive “click,” cycling shoes with clipless pedals will encourage power through all portions of the pedal stroke. Think of a clock and how the second hand moves through all 360 degrees.

Secondly, cycling shoes provide a rigid platform that allow power to be transferred into the drivetrain with greater efficiency than running shoes, sneakers or high heels. When you apply power into the pedal with sneakers, the flexible sole that offers comfort when walking, deforms around the pedal. This means energy lost and sore feet.

Cycling in running shoes is like cutting veggies on a plate with a butter knife. Switch to cycling specific shoes and you’ll be cutting veggies with a proper chef’s knife on a wood cutting board. The combination of clipless pedal with cycling shoes will have you slicing and dicing your morning commute.

Types of Cycling Shoes

Mountain Bike Shoes

There are two main types of cycling shoes. For someone looking for an all-round cycling shoe, a mountain bike shoe will be a good primary option. Mountain bike shoes have thick tread that allow mountain bikers to navigate tricky terrain. It sounds counter-intuitive at first, but that same tread helps commuters and new cyclists navigate slippery tile floors and the stairs up to the office.

Contributor Morgan and her MTB shoes. They are more versatile than road shoes. (Photo by: David Gillam)

Road Bike Shoes

Road bike shoes are typically lighter and more breathable. But the weight comes at the expense of functionality. Road shoes don’t have robust tread like mountain bike shoes and they will often be completely smooth; this is by design. Road cyclists will sometimes ride hundreds of kilometers before un-clipping for a stop light or an esspresso. Hauling around a few extra grams is not efficient (yes roadies are that Type A)! The speed and efficiency comes at the expense of being awkward. The cleats that clip into the pedals protrude, and you’re left quacking around the supermarket during a quick grocery shop on the way home from your ride.

Even Blondie knows these road shoes are awkward to walk in!

So What Type of Cycling Shoe Should You Buy?

Are you doing a quick rip to the farmers market? Mountain bike shoes will likely be a good choice. The tread will be good for navigating mixed surfaces and the added strength of the nylon sole compared to your runners will make the ride home a lot less uncomfortable.

Are you doing a long commute to work and riding on the weekends? Road shoes might be a good option here! Check out these Shimano touring shoes. They can almost pass as your work shoes!

Are you riding a shorter distance but looking for more support? Brands like Chrome manufacture a happy medium between cycling shoes and runners. They add a stiff base plate in the heel and mid-shoe to help with power transfer, but still offer lots of comfort while walking around. These shoes last for years, they are extremely tough.

Taking the Leap: Cycling Shoes

New Bike Day

OK, so you’ve decided you want to give cycling shoes a go, now what? If you are new to riding and have just bought a brand new road bike, wait a few weeks before stepping into a pair of cycling shoes and clipless pedal. It takes a few weeks to get used to the handling of a new bike, and cycling shoes with clipless pedals can be one too many items for your brain to process. You might end up tumbling over at a stop sign– or maybe in your driveway. Take your new bike out a few times with flat pedals before leaping into clipless pedals.

Commitment

Now it’s time to commit to new shoes and clipless pedals in the parking lot. Practice clipping in and out with both feet.

Tip 1: When coming to a full stop, clip out one foot well before you know you need to and coast into the corner. Clipping out before you need to put your foot down sounds obvious, but tipping over happens to all of us!

Tip 2: When stopping, pick a side that you are more comfortable clipping out on, and stick to that side. Then, when you arrive at the stop gently lean you bike in that direction, using your un-clipped foot is your anchor. If you keep your bike verticle, a gust of wind can tip you over onto the side that you are still clipped in on! It’s happened before, and it will happen again!

Smash It With Cycling Shoes

Now get out there and start smashing your way commute back from the office, farmer’s market or apple orchard!

« Previous Page
Next Page »
  • Facebook
  • Tumblr
  • Twitter

Latest Articles

JOIN Cycling: A New Training Platform for Cyclists

May 27, 2024 By Eric Lister

cold exposure

The Benefits of Cold Exposure for Cycling & Life

June 13, 2023 By Eric Lister

hill climb

The Ultimate Hill Climb Training Guide

May 31, 2023 By Eric Lister

shoulder pain cycling

How to Treat & Avoid Shoulder Pain While Cycling

April 12, 2023 By Eric Lister

psoas stretch

The Importance of the Psoas Stretch for Cyclists

April 6, 2023 By Eric Lister

cycling neck pain

The Ultimate Guide to Cycling Neck Pain: Causes and Solutions

March 21, 2023 By Eric Lister

Useful Info

  • Contact
  • Finally, A Global Cycling Club That Is Focused On Community And Love Of Cycling!
  • Privacy Policy
  • Share Your Story!
  • Terms And Conditions Of Use
  • Welcome to I Love Bicycling
  • What Happened When I Stretched Every Day For a Month

Recent Posts

  • JOIN Cycling: A New Training Platform for Cyclists
  • How to Hang Bikes in Your Garage: 4 Inexpensive Options
  • Gravel Bike Vs. Road Bike: Which One Is Better For You?
  • The 6 Types of Mountain Bikes & How to Choose the Best One for You
  • What Is a Touring Bike Good For? 5 Benefits We Know You’ll Love

Search I Love Bicycling

Connect with Us

  • Facebook
  • RSS
  • Tumblr
  • Twitter

Copyright © 2025 · Magazine Pro Theme on Genesis Framework · WordPress · Log in