• Training
    • Injury Prevention
    • Training Tips
  • How To
    • Bike Fit
    • Gear
  • Nutrition
    • Nutrition Tips
    • Weight Loss
  • Repair
  • Reviews
  • Stories
    • Funny Stories
    • Jokes
    • Quotes
    • Videos
    • Funny Videos

I Love Bicycling

I Love Bicycling is a website that is geared towards cycling for beginners with road cycling tips, training articles, nutrition tips, weight loss, how to’s and bike repair articles.

Bike Fit

  • Gear

What are Bike Gear Ratios?

January 14, 2020 by Sarah Lauzé

Over the years, the number of gears on bikes has steadily increased. Today’s normal, generally speaking, is 22 gears through two chainrings and 11 sprockets. However, not only has the number of gears increased, but also the range of sizes for the chainrings and sprockets. Yes, this has allowed riders to fine-tune the gearing on their bike, but bike gear ratios can also be really confusing.

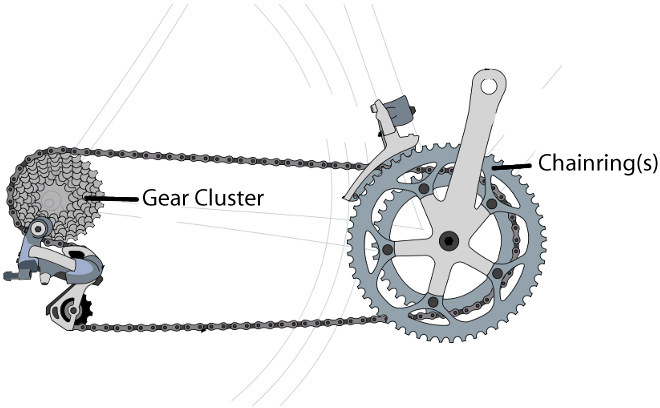
First, you need to understand that the size of chainrings and sprockets define the gearing on a bike. You can determine the size by the number of teeth (T) involved, but more important is the ratio. The ratio speaks to the way that the sprockets multiply the effort made with the chainring.

The Basics

Bicycle gears began with the introduction of the train drive, making the bicycle a lot more efficient. Historically, bikes were fixed gear, meaning one revolution of the pedals was equal to one revolution of the back wheel, for a 1:1 ratio. With a train drive, however, a single turn of the chainring can produce multiple revolutions of the rear sprocket and wheel.

Example: A 39T chainring is paired with a 12T cog, giving us a ratio of 39:12 or 3.25. So, one complete rotation of the crank will make the rear wheel rotate 3.25 times.

Do bike gear ratios matter?What are Bike Gear Ratios?

In short, yes. If your gears are too easy, you’ll get dropped on those flats as you spin out. On the other hand, if they’re too high you’re not going to be able to maintain an efficient cadence on steep climbs. Having the correct gears for you can impact the following:

  • Power Output – Your power output, measured in watts, is the most important factor in determining your speed. Bicycle gearing presents resistance, allowing you to transfer this power (through torque and cadence) from your legs into forward movement. Your gears should allow you to get the most from your power, which is varies from rider to rider.
  • Cadence – Cadence is the amount of times your foot completes a full pedal stroke in one minute (also known as rpm). First, you need to know what your preferred cadence range is. Do you like to spin in an easier gear, or push at a lower cadence but higher gear?

What are the choices?

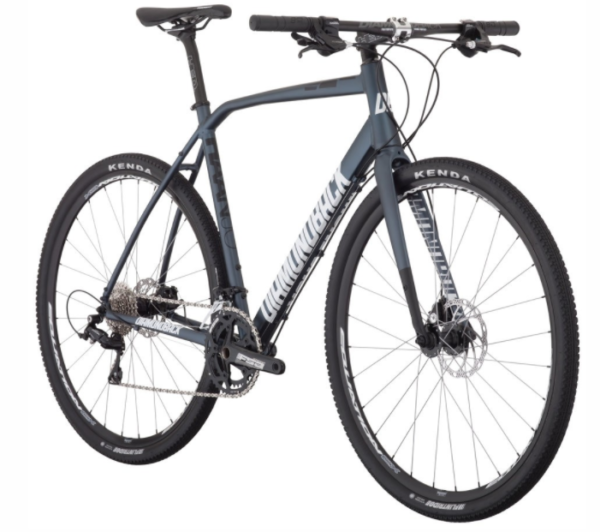
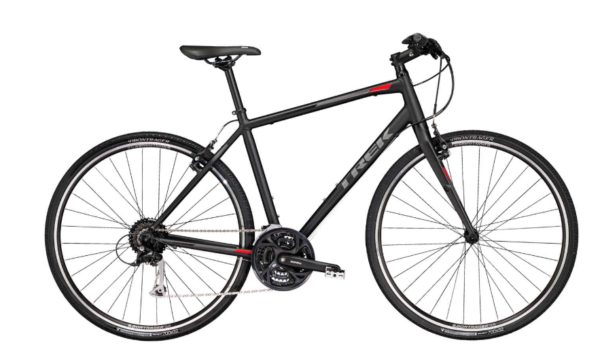
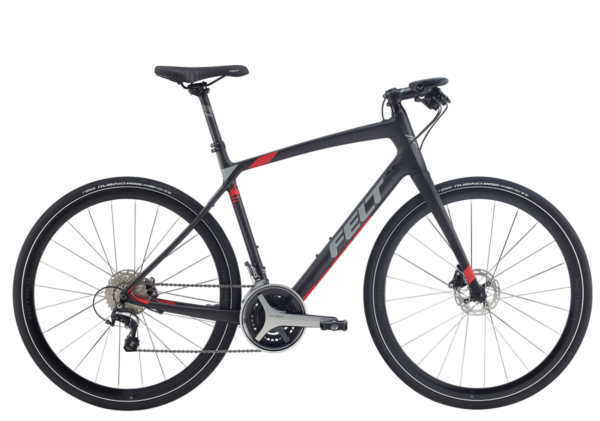
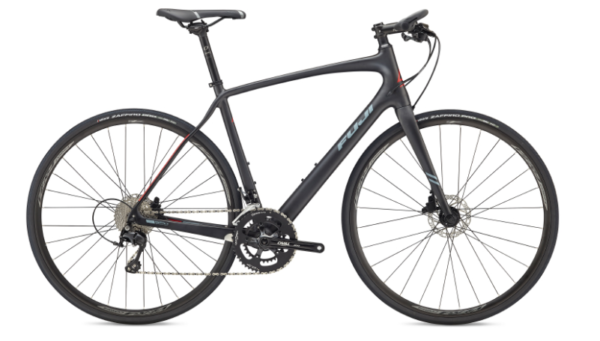
As mentioned previously, gear ratios are determined at the crankset and the cassette. Essentially the lower the number of teeth on the chainrings results in an easier gear, and the lower the number of teeth on the cassette creates more resistance (harder gear).

Cranksets

Cranksets set the tone for bike gear ratios on your bicycle. In general, there are three size options that will dictate your gearing and also set your bike up for its intended use.

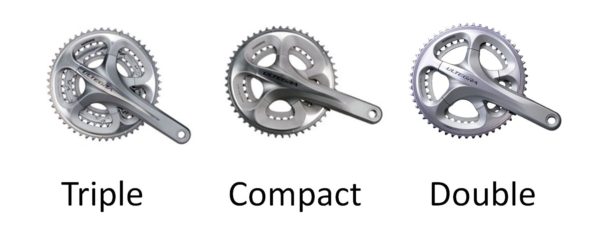
  • Standard (Double)- A standard crankset has a one hundred thirty millimeter bolt circle diameter (or BCD, Campagnolo cranks have a one hundred thirty five millimeter BCD). Almost always, the chainrings on standard cranks are 53 teeth and 39 teeth. Today it is still the choice for most cyclists, unless you will be tackling the steepest and longest of climbs consistently in your rides.
  • Compact – Compact cranksets allow a wider range of gearing options with their 110 millimeter BCD. Most often they will come with a 50 and 34 tooth pair of chainrings, but increasingly you will find 52 tooth and 36 tooth pairings. The former is a great all-around combination, especially if you are tackling significant climbs. The latter gives an easier gear for climbing and still has a big enough chainring to not lose very much top-end speed when compared to a standard crankset on the downhills and flat.
  • Triple – Until compact cranksets came out, triples were the only way to get a bike dedicated to climbing. The third chainring makes for a slightly heavier and more complicated shifting system. Today you will almost exclusively find them on touring bikes and mountain bikes.

Cassettes

What are Bike Gear Ratios?

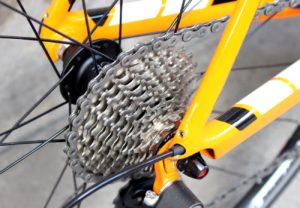
Your cassette will fine tune the gearing of your crankset. The flatter your riding, the closer your gearing should be on your cassette. You will encounter fewer difficulties on your daily rides. With eleven speed cassettes, you could get an 11/25 (referring to the smallest and largest cogs) cassette and never be overgeared and never have more than a two tooth gap between cogs.

The biggest cog on a cassette you can use with a short cage rear derailleur is 28 tooth. Paired with a compact crankset, it is sufficient to ascend all but the longest and steepest climbs. If you need lower gearing, you can get a medium or long cage derailleur and get up to a 36 tooth cog. Note that you may have large gaps between cogs, although that is offset by your ability to get over serious difficulties with relative comfort.

With cassettes less than 11 speeds, you will not have all of the potential options available to you, but you can still find a cassette that will suit your needs. Large cogs are still available and so are cassettes with small gaps between cogs. The small sacrifice you make is not having both large cogs and smaller gaps.

What are Bike Gear Ratios?

At the end of the day, you want to find the right gear setup so that you can forget about gears altogether and enjoy the ride! Click here for more information and charts to help you find the right gear ratio.

How To Choose Bike Stem Length

June 24, 2019 by Sarah Lauzé

When viewed in the context of an entire bike, stem length is one of the more minor adjustments you can make. That being said, it can affect the overall feel and handling of your bike in some not-so-minor ways.

Historically, stems were not adjustable or interchangeable. It wasn’t until the late 19th century when Marshall Taylor invented an adjustable stem, using a sliding clamp to move the handlebars towards or away from the rider. Now bike stem length can vary from 50mm all the way up to 150mm and beyond.

Every part of a bike is connected. So, swapping out the stem on a wrong sized bike can be a quick fix, but you have to take into account that it will effect the bike’s overall feel and handling.

Bike Stem Length

What should decide bike stem length?

The first thing you need to look at is not your bike, but your own priorities when it comes to:

  • Comfort
  • Performance
  • Steering and handling

Generally speaking, race bikes that place the rider in a low, aerodynamic position will need to have a longer stem. This also works to get more weight out in front of the wheel. In contrast, touring bikes will have shorter stems to keep the rider in a more upright position and provide responsive steering at slower speeds.

When choosing bike stem length consider:

1. Weight Distribution

Stem length dictates how much weight is placed on the front wheel . The longer the stem, the more weight will be pushing forward on the bars, making the bike more stable at high speeds. This can, however, make for a less responsive feel.

Bike Stem Length

2. Steering

The steering of a bike is dictated by the head angle and trail, but the length of the stem can enhance or dull these effects. Short stems steer more like a steering wheel, providing immediate response, but can cause a twitchy feel. The longer the stem, the slower the handling can be, making it more difficult to steer at slow speeds, but more stable at high speeds.

Reversing the Stem

Reversing the stem is one of the most effective ways to make your bike more comfortable as it raises your handlebars to a more comfortable position. The majority of stems can be flipped as they are angled for two handlebar heights.

One position is aggressive and flat, the other is angled upward for a more upright torso which can alleviate stress on the lower back as well as the amount of weight on the hands. Take a look at your stem. If it has a high degree of tilt in either direction, it can typically be reversed depending on what you need to get comfortable.

The Long and Short of It

Bike Stem Length

Getting the right bike stem length can make a huge difference to how you feel on your bike. You may be surprised at the difference even 10mm can make! If you have persistent numbing in your wrists or hands, it could be that the stem is too short. In contrast, if you are too stretched out, it can cause injury to your back.

Stem length needs to be looked at in relation to the bike size and geometry, and there is no definite answer of what would be best for you. It is a very individualized thing, and you have to look at your priorities before deciding to switch out your stem. Before experimenting with it too much, visit your local bike shop or try getting a profession bike fit to ensure everything is adjusted just right for you and your riding style.

Wide Cycling Shoes: Finding the Best Fit

June 3, 2019 by Sarah Lauzé

If you have wide feet, you know the feeling. A numbing pain and screaming pinky toes that have had enough of being crushed into the side of an ill-fitting cycling shoe. The good news it: you’re not alone. There are specifically made wide cycling shoes to cater to your aching toes.

Clipless pedals are a must when it comes to efficient pedalling on a bike, but their coinciding cycling shoes can be a little unforgiving. Unlike regular shoes, cycling shoes are rigid, most often made from materials that do not stretch out over time. So, if you’re feet measure somewhere in between hobbit feet and flippers, then here are some of the best options out there.

Wide Cycling Shoes

Before You Buy New Shoes

Wide Cycling Shoes

Getting a pair of specific wide cycling shoes, or at least a brand that has a bit more breathing room, is going to be your best option. However, before you make the investment, make sure you’ve tried everything to make your current shoes work.

  • Try ultra-thin socks – Assuming it’s not below freezing where you’re riding, trying a super thin pair of socks could help create enough space in your shoes to make them work. Check out Castelli’s line of thin cycling socks, or Swiftkick Aspire. Even if they don’t fix the shoe problem, they are great cycling socks to have.
  • Get a bike fit – Make sure the problem really is being caused by shoes that are too tight, and not an improper bike fit. If your cleats are not in the right spot, or if your saddle isn’t adjusted properly, it can cause pain in your feet. It’s worth a visit to your local bike shop for a bike anyways if you haven’t had one.

Finding The Right Fit

If you’re buying shoes in a store, you can actually take the insole out and measure it against your foot if you’re not sure how the shoe should feel. Your heel should be right at the back of the insole, and there should be 3-5mm from the end of your toes the top of the insole.

If you’re buying online, you will need to measure your foot. Get a regular piece of paper and put it on the floor, right up against a wall. Place your foot on the paper, with your heel pushed against the wall. Draw a line at the end of your big toe. Measure the length in cm, and add 5mm to the number to establish the length of shoe you need. You will also want to measure the circumference of the widest part of your foot. You can then reference these numbers with sizing charts from the manufacturer you choose to buy your shoes from.

Wide Cycling Shoes

It can be tempting to just go a size bigger when you’re purchasing cycling shoes for some extra room, but this can actually cause even more problems. The extra length may feel good on your toes while you’re in the store, but it will cause your feet to slip within the shoe when you’re clipped in. Not only will this feel awful, but it can cause your cleat to be placed too far forward, taking a toll on your power and efficiency.

That being said, there are shoes made specifically for wide feet that will ensure your toes are nice and comfy, but keep your foot is locked into the correct position. See the following for some of the best options out there.

Shimano Men’s RP3

Wide Cycling Shoes

$109

Shimano has the most options when it comes to the wider fit, offering regular and wide sizes on most of their shoes. The Shimano RP3 cycling shoes are a great entry level shoe, with a fiberglass reinforced nylon sole and three adjustment points for the perfect fit.

Lake CX 237 Wide Road Shoe

Wide Cycling Shoes

$289

Exactly the same as the CX237 shoe, the wide version gives an additional 15mm wiggle room compared to the regular width. With a carbon sole, and two micro-adjustable Boa dials, you have the ability to make adjustments to the fit of the heel and forefoot so you get a secure fit without sacrificing your circulation.

Bont: Riot or Vaypor

Wide Cycling Shoes

Riot: $99

Vaypor: $199+

They may be harder to find, but Bont Cycling has a few heat-molding shoe options that make them popular for those with wide feet. The Riot and Vaypor models both offer a custom fit through heat-molding that can be repeated until you are happy with the result.

Shimano R321

Wide Cycling Shoes

$299

The Shimano R321 was released in 2016 with heat moldable Custom-Fit technology applied through to the upper, insole, and heel cup. This does not, however, allow for a widening of the shoe in general, so they have a wide version available in each size. The sole construction itself gives an extra 11mm of adjustment range, so you can find the ideal shoe-pedal connection.

Best of Both Worlds: The Best Hybrid Bikes

October 1, 2018 by Sarah Lauzé

A hybrid bike is just what it sounds like – a cross between a road and a mountain bike. Versatile in nature, the best hybrid bikes can be used over a variety of terrain and are popular with commuters and casual cyclists. The flat handlebars on a hybrid bike offer a more upright position that can minimize the strain that can come from the more aerodynamic position on a road bike.

Not all hybrid bikes are created equal, and there is a lot of variety within the hybrid category. Some are designed more as a road / cruiser hybrid, whereas other are mountain / touring hybrids. So, you need to define what kind of riding you’re looking to do, and decide the best hybrid for your needs from there.

The Best Hybrid Bikes

The Benefits of a Hybrid Bike

  • More terrain – Most hybrids are suited to go off or on road, so this gives you more options for your weekend adventure or daily commute.
  • Wide tires – A hybrid can have a selection of fairly wide tires, which aids comfort and allows for various levels of off-road riding.
  • Comfortable fit – A hybrid’s horizontal bars provide a more relaxed, upright, and comfortable riding posture.
  • More gears – Hybrids typically have gears similar to a mountain bike, so riding hills shouldn’t be a struggle.
  • Easy to customize for commuters – Most standard hybrids are fitted for racks and mudguards, making it a popular choice for commuters.
  • Overall flexibility – Hybrids package quality and a variety of features at an affordable price. For a cyclist who rides slightly rough trails, flat city roads, bike paths, and the occasional sidewalk, the hybrid meets most purposes halfway.

The Best Hybrid Bikes


Mountain / Touring Hybrid

Specialized – CrossTrail Elite Alloy

The Best Hybrid Bikes

Price: $1000

The CrossTrail features an aluminum frame, plenty of tire clearance, a 60mm travel suspension fork, hydraulic disk brakes, and wheels and tires that are on the heavy-duty end of the road spectrum. It’s a perfect fit for commuting, light touring, urban and rural riding, and even light trail riding. Although the fork may not be on par with the average mountain bike, it certainly takes the edge off on rough terrain.

Cannondale Quick CX 3

The Best Hybrid Bikes

Price: $870

Built for pavement one day and dirt the next, the Cannondale Quick series features tough frames and quality components. The CX 3 is the middle of the road option, with a 50mm fork with lockout. Overall it handles well and is durable, but is quite heavy for the commuter or urban adventurer.

Diamondback Haanjo

The Best Hybrid Bikes

Price: $899

Part mountain bike, part road bike, the Haanjo is designed to leave to choice up to you. Although it may not be ready to hit any technical trails, the Gravel Disc alloy fork will have you easily tackling gravel roads and dirt paths. The Haanjo features butted and formed aluminum tubing to bring together a combination of light weight, strength, and durability. The mechanical disc brakes offer some serious stopping power, and the big tires will have you rolling through the rough patches.

Road / Commuter Hybrid

Bianchi Strada

The Best Hybrid Bikes

Price: $800

Based off the popular steel frame cyclocross bike, The Volpe, the Bianchi Strada is one of the smoothest hybrids out there. With a classic design and all steel frame, there is tire clearance for a up to a 38c tire (a great option for bad weather riding). The Strada has cantilever brakes which are less powerful than disc brakes, but are much easier to maintain. Like most hybrids, there are mounts for racks and fenders, but there are also mounts for front panniers.

Trek FX 3

The Best Hybrid Bikes

Price: $819

The Trek FX brings together the speed of a road bike with the comfort of a city commuter. Also known as a fitness bike, the FX is lightweight, fast, fun, and agile. The aluminum frame comes rack and fender ready, with the added DuoTrap S, which integrates a Bluetooth sensor into the frame. You can easily log routes and track your progress with a computer or smartphone, with no external sensor.

Diamondback Insight 1

The Best Hybrid Bikes

Price: $449

Uncomplicated comfort and easy on the budget, the Insight series is a perfect entry in the hybrid world. The aluminum frame is lightweight and durable, and will hold up on winding urban streets and rougher roads alike.

Carbon Hybrids

Felt Verza

The Best Hybrid Bikes

Price: $1599

With a lightweight carbon frame inspired by Felt’s line of road racing bikes, the Verza Speed 3 comes complete with Shimano’s Metrea group for smooth shifting and modern aesthetics. It is capable as a commuter, a weekend cruiser, or a workhorse for group rides, giving you the freedom to define what kind of rider you want to be.

Fuji Absolute Carbon

The Best Hybrid Bikes

Price: $1699

This C5 carbon frame provides incredible light weight and efficiency with VRTech built in to reduce road vibration. Its full-carbon fork keeps you on locked on track and includes hidden fender mounts, while the aluminum wheels keep the rolling weight low and easily handle rough roads. You pay the price for the carbon frame, but it could be worth it if you are a serious cyclist looking for something a bit more flexible than your road racing bike.

The Best Step Through Bikes for City Riders

August 28, 2018 by Sarah Lauzé

If you’ve ever struggled to get your leg up and over your bike, then you understand the reason for step through bikes. More and more manufacturers are coming to realize that there is huge market potential for easy to board bikes. Typically, even the best step through bikes suffered from weight bearing limitations, but with recent design breakthrough, they can make cycling more accessible to a lot of people.

What Are Step Through Bikes?

Step through bikes are pretty self explanatory. They are bikes with no top tube, making them easy to “step through” to mount. They often use a pedal forward design, with the pedals slightly forward of the seat tube. This makes it easier to maintain the proper seat to pedal distance, while also being able to put their feet flat on the ground while remain seated. The wheelbase will be a bit longer, which can effect handling, but it enhances the overall comfort.

Pro and Cons of Step Through Bikes

Historically, step through bikes have been regarded as women’s bikes as they allow the rider to wear a dress or skirt. However, more and more seniors, commuters, and heavier riders are opting for the easy to mount option. If you’re not quite as flexible and limber as you once were, then it’s a great option to keep you riding.

The biggest disadvantage of a step through frame is the weight, strength and stiffness. The regular diamond shaped design of most bikes is so widely used because it is the better design. The top tube gives the frame strength and stability, while allowing for the use of lightweight materials. To achieve the same strength, step through bikes have had to use heavier materials.

For city cruisers and commuters, the step through design can actually make the most sense. Stopping at stop lights and being able to remain seated while placing you feet on the ground can be plus for a lot of riders. Much more common in Europe, finding a step through bike can be a little tough depending on where you live. However, a lot of manufacturers will ship, so here are some of the best step through bikes.

The Best Step Through Bikes

Public C1

$395

If you live in a relatively flat area, the single speed Public C1 can be a great affordable option. Under $400, it has the iconic European style perfect for comfortable cruising.

Bike ID Step Through

$800

The Bike ID Step Through is made of Hi-Ten steel tubing, weighing in at 15.5kg or 34 lbs. It’s equipped with both a hand brake and a foot brake. Both brake and lever is made of aluminum, and due to a smart quick-release you can remove and replace the wheel without having to change the break settings. It is strong and durable, and will last through years of city cruising!

Shinola Bixby

$1950

The Bixby is offered in both a classic men’s and women’s frame design, with thoughtful touches like gender-specific saddle design and proportional geometry. The Bixby riffs off the fun look of the curved top tube, but improves on the fit and function with nimble frame geometry, a Shimano 3-speed internal hub and disc brakes. The Bixby is more of a hybrid between the step through and diamond design, giving the rider the best of both worlds.

Electra Amsterdam Royal 8i

$1400

The Royal 8i is a lightweight aluminum premium-edition Dutch bike: well-bred for stylish luxury and yet practical everyday cycling. Top-of-the-line Shimano Nexus 8-speed internal hub, smooth and powerful front and rear roller brakes and durable tires with Kevlar puncture-resistant casing are a few of the special upgraded features that make the Royal 8i worth every penny.


Pros and Cons of Tubeless Tires for Road Cyclists

May 14, 2018 by Sarah Lauzé

Tubeless tires have been a mainstay of the mountain biking world for years, and have inevitably made their way into road cycling as well. With mountain biking, tubeless tires allow riders to run their pressure much lower, providing enhanced surface area and grip without the risk of pinch flats. Road tires, however, are more efficient when run at a higher pressure, so what is the benefit of going tubeless?

Traditionally there have been two main options for road cycling tires: clincher and tubular. Clinchers are the best option for the majority of riders, as they are easy to use and fix by swapping out or repairing the inner tube. Tubular tires are lighter and are used by a lot of racers, but unless you have a support vehicle following you on every ride, then replacing a tire is a painfully long and technical process.

Now there is a third option with tubeless tires, but are they worth the leap?

Pros and Cons of Tubeless Tires for Road Cyclists

How do tubeless tires work?

Pros and Cons of Tubeless Tires for Road Cyclists

As the name suggests, tubeless tires do not have an inner tube, and are setup similar to a car tire. The open rubber tie sits firmly on the wheel’s rim, with the air sitting in the cavity between the rim and inside of the tire. In addition, a liquid sealant is used inside the tire to preemptively plug any small cuts in the tire without losing pressure at all.

Tubeless wheel setup

The nice thing about tubeless wheels is that they can be used with both a tubeless tire and the typical clincher (inner tube) setup. The shoulder in the inner rim will have a much more pronounced recess that the tire bead fits securely into (see diagram), rather than the traditional U-shaped rim bed on clincher wheels.

Tubeless tires themselves are designed with a tougher bead to provide an immediate seal with as perfect airtight fit. If you try to fit a tubeless tire on a clinched rim, it will come off as you add pressure.

Are tubeless tires worth it?

Pros

  • Speed – clincher tires have a level of friction between the tube and the tire that tubeless tires eliminate, lessening rolling resistance and making them faster.
  • Less flats – The tubeless setup rules out pinch flats completely, and dramatically lessens the danger of blowouts with the liquid sealant. This has a huge impact on the number of flats you’re likely to experience. Plus, if you do have a flat out on a ride that the sealant can’t handle, you can use a tube to get you home.
  • Comfort – Tubeless tires can be run at a lower pressure (dropping about 15-20 psi) without sacrificing performance. This can enhance your corner grip, traction, and overall comfort. You can even venture off road with the tires being a lot more forgiving than if they were running at full pressure.

Cons

  • Difficulty in fitting – As a system that depends on tight seals and high pressure, installing or removing the tire can be a difficult and frustrating job. So, while the likelihood of flats may be reduced, the process to fix it in the case of total failure can leave you swearing on the side of the road. You may even need an air compressor to get a proper seal.
  • Weight – Tubeless tires are largely heavier than a clincher setup, with thicker sidewalls that add weight.
  • Racers don’t use them – This may or may not matter to you, but racer’s do not use tubeless because of the added weight with minimal gain. However, for the recreational cyclist, the lower risk of flatting may be worth the sacrifice.

Tubeless tires are by no means taking over the roading cycling world (as they have with mountain biking), but as technology advances we may see them grow in popularity. Having tubeless-ready wheels is a great way to go, as it leaves the choice up to you whether you want to stick with clinchers or give tubeless a try.

Stretches to Treat Neck Pain from Cycling

December 29, 2017 by Sarah Lauzé

Neck pain from cycling is one of the most common injuries, but it is often left unaddressed. Pain of any kind is your body telling you something, and shouldn’t be ignored. Typically, the discomfort is localized in your anterior deltoids, upper trap muscles and neck extensors. This can be attributed to a few causes such as bike fit, head positioning when riding, and muscle tightness.

Neck Pain from Cycling

What Causes Neck Pain

Bike Fit

As a beginner cyclist it’s important to work with a bike fitting specialist and tweak one thing at a time, ride for about a week, and assess the changes. This allows you and the fitter to pinpoint the exact solution or cause in order to improve riding conditions.

Often neck pain from cycling is linked to having a high seat post in relation to your bars. When the seat post is too high it can place you in an aggressive position, which your body may not be ready for. It’s a better tactic to gradually increase the aero position as you get used to cycling. Additionally, if your road or aero bars are too far away causing you to overreach you can place unnecessary strain on these muscles. The solution would be to place the bars closer in relation to your body so you’re in a “tucked” position when riding.

Head PositionNeck Pain from Cycling

It’s natural to try and keep your head up on your bike, looking forward to ensure you don’t swerve off the road. The key is to learn to look up with you eyes, rather than your entire head. Keeping your head down puts less strain on your neck, and allows you to ride for longer periods of time without irritating the muscles.

Tight Muscles

As a beginner cyclist you are now forcing your body to use muscles either it hasn’t in other activities or in a different way. This leads to tightness, muscles spasms, and pain. However, there are a few stretching exercises that can be completed which will lead to disruption of the pain-spasm cycle.

How to Treat Neck Pain from Cycling

Stretching is the best way to keep the neck muscles relaxed and prevent neck pain. Adding these stretches into your routine (or building a routine around them) will help keep you pain free, or address any neck pain you may already have. Hold each one for 20-30 seconds, and repeat at least twice.

Neck bend

Stand with your back straight, feet shoulder-width apart, and your arms at your sides. Look straight ahead and relax. Let your head drop forward by bringing your chin to your chest. Keep your back straight and your eyes on your toes as you hold this position. You can put your hands behind your head and pull down gently to extend the stretch.

Neck Pain from Cycling

This stretch is for cyclists who experience muscle tension at the back of their neck after spending extended periods of time on the bike.

Neck and bend rotation

Stand with your legs slightly apart, your back and neck straight, and look forward. Your hands can be at your sides, or clasped behind your back. Lower and rotate your head to the left, looking down toward the ground. Relax into the stretch, trying to extend the movement. You should feel the stretch along the right side of the neck. Bring your left arm up and gently pull down on your head to lengthen the stretch. Repeat the movement, lowering your head to the right.

Neck Pain from Cycling

This stretch is especially important for track and road racers who spend a lot of time in an aerodynamic position, creating tension in the neck and head extensor muscles.

Lateral neck bend

Stand with your feet slightly apart, back and neck straight. Raise your right arm and place it on the left side of the head, with your forearm going over top of your head. Your fingers should be pointing towards the ground, with your fingertips touching your ear. Gently pull down on your head, leaning so your ear is approaching your shoulder. Keep your shoulder down and relaxed throughout the stretch. Repeat with your left arm reaching up to the right side of your head.

Neck Pain from Cycling

Rear neck pull

Turn your head slightly to the left. Raise your left arm and place your hand on the top of your head, fingers pointing down the back of your hand, forearm resting on the top of your head. Even though your head is turned, keep your neck and back in line with your body. Gradually pull on your head, rotating so your face is near your armpit.

Neck Pain from Cycling

Stars

Sit or stand, keeping your neck, shoulders, and torso straight. Looking straight ahead, imagine there is a star in front of your with a vertical line, horizontal line, and two diagonal lines. Trace the vertical line, looking up at the ceiling and then bringing the chin down to the chest three times. Next, follow the horizontal line side to side once. Finally, trace the two diagonal lines once each. Return to the starting position and repeat three more times. This is a great stretch because is combines flexion, extension, rotation and lateral rotation to give you a complete neck stretch.

If you want stretching routines for cyclists, check out Dynamic Cyclist for the daily video program.

Avoid the Pain in the Butt: Find a Comfortable Bike Saddle

December 19, 2017 by Sarah Lauzé

An uncomfortable bike saddle can quickly turn your bike from an instrument of joy to one of torture. Not only can it be extremely painful, but it can also lead to long term injuries or saddle sores as you contort your position on the bike trying to lessen the discomfort. There are a number of factors that contribute to how  comfortable bike saddle is, but the most important one is you.

We are all built differently, so there is no “one size fits all” when it comes to a perch for your unique bottom. What feels comfortable to one person, will feel like torture to another. So, we will outline some things to look into before starting the search for you dream saddle, but keep in mind that it will likely come down to trial and error.

Saddle Features

Width

You may think that the wider the saddle, the more comfortable it would be, but this is not the case. Neither are narrow saddles the be all end all when it comes to finding the best fit. The first step towards finding the most comfortable bike saddle is to measure the distance between your sit bones. This can be done with an “Assometer” at your local bike shop, or at home with a piece of paper and a pencil. Once you know the distance between your sit bones you will want to add 2 cm, 1 cm past the sit bones on each side.

If a saddle is too wide, the nose of it can start to rub on the inside of your quads. If it is too narrow then you sit bones will not be your main point of support for your weight. The pressure will then come down onto soft tissue, which can be extremely painful over any amount of time or distance.

Cut outs

The popularity of cut outs largely came from a 1997 study. It claimed that reduced blood flow caused by saddle pressure could potentially lead to erectile dysfunction and permanent reproductive failure in men. Although this has since been disproved, the concern is still there. It comes down to personal preference and what feels most comfortable to you.

A test to see if you might benefit from a center cut-out is to sit on a hard wooden chair or bench and lean forward without arching your back to where you can rest your elbows on your knees. Sit like this for a few minutes and if you find that there is adverse pressure and discomfort on the soft tissue being pressured then you will most likely benefit from a cut-out in your saddle.

Softness / Firmness

It’s easy to think that the more padding a saddle has the more comfortable it will be, but it actually puts more pressure on sensitive areas. It can pinch and chafe rather than support your sit bones. The ideal firmness will put enough weight on your sit bones, while still providing enough padding to be comfortable. Some riders prefer no padding at all as it puts the pressure exactly where they want it, but that isn’t the case for everyone.

Shape

There are two general shapes for saddles when viewed from above: T-shaped and pear-shaped. If you have issue with chafing or your quads rubbing together, then T-shaped will be the better option for you. A pear-shaped saddle can be good fit if you shift your position a lot while riding, as there will be more evenly dispersed support.

The second aspect of saddle shape if how flat or rounded the surface it. When viewed from the back, how much curvature does the saddle have? You want it to be slightly curved to keep you centered on the saddle, but not so curved that there is pressure on the central areas between your sit bones.

Gender Specific

Looking at saddles designed specifically for men or women may be a good place to start, but don’t let it dictate your decision. Women typically have wider set sit bones, and therefore require slightly wider saddles. That being said, many women find mens saddles that work perfect for them, just as many men ride on womens saddles.

Comfortable Bike Saddles

Touring Saddles

Brooks B17

$120

The B17 design was first introduce in 1910, so it may seem odd to be highlighting it here. However, the fact that this saddle has changed very little over the past century speaks to “if it’s not broke, don’t fix it.” It was made for those long distance tours, with a wider shape and a slim, short nose making it ideal for a more upright position on the bike. Handmade in Birmingham, this leather saddle molds to your bottom over time, giving you the ultimate personalized support.

Selle Anatomica X Series

$150

Unlike the Brook saddle, the X series has no break in period, and is quite comfortable for most riders right from the start. The leather top is supported by a stiffer laminate layer glues to the underside, striking the balance between comfort and durability. The slot shape is meant to eliminate perineal pressure, sit bone pain, and saddle sores.

All-Rounder Saddles

Bontrager Montrose Elite Saddle

$130

Intended to be one of the more all-purpose saddles on the market, the Bontrager Montrose Saddle has been perfected year after year. It uses something called inForm BioDynamics to optimize your natural movement on the bike. This helps eliminate any restrictions on your legs or power output, whether racing or heading out for a group ride.

Fabric Scoop Pro Saddle

$170

It may not look like much, but this simple design is one of the more popular in recent years. Available in three shapes to suit your position on the bike, you can find a specific fit to your riding style. It brings together the perfect combination of comfort, performance, and unique construction. Plus, with the waterproof microfiber, the Fabric Scoop is durable and will stand up to years of use.

Racing Saddles

Selle San Marco Mantra

$214

Weighing in at just 122.1g, this saddle is for racers who are worried about adding any weight to their bike. The stiff design allows for an efficient transfer of power, and is made for those who ride in an aggressive position.

Ritchey WCS Carbon Streem

$144

This light (155g), low-profile design and narrow carbon fibre injected shell is built for the faster riders who prize long-term support. The comfort comes from the shock-absorbing ‘Vector Wing’ rather than padding, so the flat profile will suit hardened racers, but can seem harsh for casual riders.

It is extremely important to find a saddle that not only fits your contour, but is also comfortable. Your saddle is the most important comfort piece on the bike as it holds the majority of your weight, so don’t rush into it. Even with the right size saddle, flat-ness, firmness, and cut-out preference, you may have to adjust your saddle further through minor tilt adjustments.

Bike Seat Position – How Your Saddle and Seatpost Integrate to Form It

December 14, 2017 by Wade Shaddy

Bike seat position is a personal thing; it’s delicate. Professional roadies obsess over seat height down to the half-millimeter. Dialing-in your bike seat position can require hours and hours in the saddle. The relationship between saddle and seat posts is critical, and it shouldn’t be taken for granted.

bike seat position

Bike Seat Position – It Changes

Dialed-in, bike seat position can be difficult to ascertain and maintain and even when you do get it right, it can change due to a plethora of factors and variables. Sometimes you run the same seat height for thousands of miles only to discover that your body has changed, requiring a change in saddle, seatpost, or both. Sometimes you have a nagging pain in your back, thigh, calf, or other body part that won’t go away. Sometimes you realize you’ve been running the wrong seat height all along because you just haven’t given it enough thought.

Seatpost Basics

Starting with a few basics is important if you’re new to cycling. All bikes have a seatpost. The seatpost is the tube that connects the frame of the bicycle to the saddle where you sit. Seatposts are vertically adjustable, allowing the frame to accommodate riders of different sizes.

All of the above reasons to change or alter your saddle height require a good, hard look at your seatpost, saddle, and how your bike fits your body. If things don’t measure up, moving your seatpost, or changing your saddle might not be enough for optimum performance regarding seatpost and saddle height. Use the methods provided in this article to find your ideal saddle height and set-back.

Bike Seat Position

  • Seatpost Diameter: Diameter is the first dimension to consider when changing, working with, or choosing a seatpost. It must correspond to the internal diameter of the seat tube on the bike’s frame inorder to have a snug fit. Most contemporary road bike frames accept a standard seatpost of 27.2-mm or an oversized 31.8-mm, but but other sizes between 21.15 and 35mm can also be found. Whatever the diameter, don’t try to force a big seatpost into a smaller sized seat-tube, or use a smaller seatpost in a frame that’s made for a larger diameter. Even if it seems like it fits, at some point it will come back to haunt you.
  • Big Versus Small: Oversized posts add stiffness and strength for optimum power transfer as well as resistance to bending. More narrow posts however can be more comfortable over rough surfaces because they tend to have a little more cushion, primarily because they do bend and flex.
  • Seatpost Length: Seatpost length is another variable. The amount of post emerging from the frame depends on frame size, geometry, and your own body dimensions. It’s important to have a minimum amount of post remaining inside the frame. Too much post extended above the frame makes for a leverage ratio that can crack or snap the post or actually break the frame itself. Most posts have a “minimum insertion” line etched on the shaft. It’s never a good idea to violate the minimum insertion rule. If your post is too long and bottoms out on the water bottle bolts, you can cut the post to shorten it. Just make sure you don’t cut it too short should you need to raise it in the future.
  • Clamps and Saddles: The majority of seatposts rely on clamps designed to accommodate saddles with a dual rails underneath which use bolts to secure the top part of a clamp to the rails of the saddle. The clamp bolts can be loosened, allowing you to slide the saddle forward and back to your preferred position. Most seatpost clamps also adjust for tilt enabling you to fine-tune your fit with the nose up or nose down but level is generally ideal. The tilt adjustment is one of those that you should ride for a few days or even weeks. The right amount of tilt can seem uncomfortable at first, but later on, you will thank yourself for getting it in the most comfortable position.

Bike Seat Position

Bike Seat Position

Setback

Setback is a design element of a seatpost. Setback refers to a bend or curve in the upper section of a seatpost that positions the saddle toward the back of the bike instead of directly above the center of the seatpost. It’s beneficial on frames with extremely vertical seat tubes, offsetting the rider from a  vertical position. Some riders also prefer a setback because it puts them and the saddle in a more efficient position to utilize the quad and hamstring muscles more effectively.

Set Forward

Seatposts are available with a “set-forward” position. This position puts the rider with more of their torso over the pedals. These harder-to-find models are sometimes used on time-trial or triathlon bikes to provide maximum power on flatter terrain. If you’re concerned about setback, getting a professional bike fit or determining your fit on your own is highly recommended to determine how much setback is needed for your frame and body or if you and your bike even need setback on your post.

Dropper PostBike Seat Position

It’s probably not an option for die-hard roadies, but some bikes with drop bars have borrowed technology from mountain bikers. The dropper post is an automatic seatpost that can be adjusted on the fly. The road bike version has two settings, one for cruising and one for descending. Flip a switch, and the dropper post lowers  to lower your center of gravity to go faster on the downhill, with better stability, while staying out of the way to more easily move around; particularly ideal on the mountain bike. When you reach the bottom of a descent, another touch of the lever shoots the post back up to your traditional height for optimum performance on flat ground.

Saddle Variables

The right saddle can make a world of difference in bike seat position and comfort. When changing a saddle however, you want to maintain the exact same seat height. The distance from the rails to where your sit-bones lie on a saddle needs to be considered when changing a saddle because of all the variables in saddle design and type. A different saddle could actually raise or lower your position by almost a centimeter in either direction if you just leave the seatpost itself at the same height.

Adjust Versus Adapt

Generally speaking, most beginner cyclists set their bike seat position initially and then adapt to it but that’s not the best option. This is particularly true when changing from one saddle to another. The differences in padding thickness and design can throw off your bike seat position drastically. Changing saddles should always include taking a good hard look at seatpost height. If your new saddle is making you uncomfortable, don’t adapt to it before adjusting the seatpost to get your actual position exactly the same as the old one. Knowing how your seatpost is integrated with your saddle will allow you to change your position or saddle as needed to keep you the most comfortable on the bike.

What tire pressure should I run on my mountain bike?

October 28, 2017 by Sarah Lauzé

It can be tough to find that perfect tire pressure for both mountain biking and road biking, because there is no easy answer. The perfect tire pressure can vary from day to day depending on the conditions, the type of trail, or the weight of the rider.

If you’re used to riding on smooth, paved roads, it can be difficult to switch your thinking around. The goal of tire pressure for road biking is to minimize the surface area of the part of the tire that makes contact with the road. With mountain biking, however, in many cases you actually want to increase the surface area to create better grip on the terrain.

mountain bike tire pressure

What is PSI?

Psi stands for ‘pounds per square inch’ and is measured by a gauge that is included with most bike pumps. Check out “How to use a bike pump” for a step by step guide.

What is the right tire pressure?

mountain bike tire pressure

As mentioned above, there really is no “right” pressure, just the right pressure for you. However, the best starting point is around 25 Psi for tubeless tires and 28 for tubed tires. Invest in a quality tire pressure gauge and use it consistently, as readings can vary depending on the gauge.

Your tires will most likely have manufacturer’s minimum and maximum pressure printed on the side. The max pressure will not be an issue for most mountain bikers (you will run below this number), but take note of the minimum pressure. If you go below this number, you are more likely to risk sidewall damage or pinch flats. Likely your perfect Psi will be somewhere between these two numbers.

Generally speaking lower psi will allow for a smoother ride, as your tires will absorb more of the trail, roll faster, and increase traction (surface area) on the trail. If your Psi is too high, you will find your tire bounces off every little rock or root, making for an uncomfortable ride.

Things to consider:

The Ridermountain bike tire pressure

  • Weight – The heavier you are, the higher your tire pressure will need to be to counteract the pressure you are putting down on the tires. 30 Psi may feel too hard for a 130lbs rider, but will be too soft for a 250lbs rider.
  • Style – Do you huck yourself off drops and ride down rocky hillsides with aggressive abandon? If so, then you will need to run a slightly higher tire pressure. Contrarily, if you are a bit more reserved, always light on your bike and finding the smoothest lines, then you can run a lower pressure without risking a pinch flat.

The Tire

  • Volume – Gone are the days of the uniform 26in tires, with plus size 27.5 and 29ers becoming increasingly popular. When switching up to a larger size, you are also increasing volume, which means you will need to find a new magic number that works for you.
  • Rim width – The rim width determines just how low you can go without compromising performance. The wider rim, the lower pressure you can run, as it will support the tire better than a narrow rim.
  • Construction – The outer casing of your tire and the TPI (threads per inch) will determine how the tire feels with more or less pressure.

The Environment

  • Conditions – If it has been raining for weeks on end and you’re mountain bike tire pressureheading out onto to slick, muddy trails, lower tire pressure will give you more grip and stability.
  • Terrain – Perhaps one of the more important elements to think about before heading out, your tire pressure can vary from trail to trail. Fast and flowy trails can handle a lower tire pressure to absorb those small bumps and have you feel like you’re flying. However, if the terrain is full of jagged rocks and drops, the same tire pressure will have you on the side of the trail with a flat in no time, so you’d want to bump that tire pressure up before heading out.

Finding the Magic Number

Finding your magic Psi is more of a trial by error than a science. A great place to start would be to choose a short section of trail (the type of trail you usually ride) and start at 27 Psi. Ride the section, taking note of whether the tire is compressing to the rim often or is glancing off small obstacles. Increase or decrease the pressure little by little, riding the same section and noticing the difference in grip and speed.

You will be able to run a lower pressure with tubeless or tubeless-ready tires than with a tube-and-tire setup.

The Number 1 Mistake Beginner Mountain Bikers Make

Everyone believes that more pressure = faster, but in mountain biking that is rarely the case. High tire pressure reduces traction and slows forward momentum when hitting a bump.

Professional cross country mountain bikers will run as low as 18 psi in a tubeless tire. Although you may not be a professional, your goal may still be the same, to have the smoothest and fastest ride possible. So change your thinking, less is more.

« Previous Page
Next Page »
  • Facebook
  • Tumblr
  • Twitter

Latest Articles

JOIN Cycling: A New Training Platform for Cyclists

May 27, 2024 By Eric Lister

cold exposure

The Benefits of Cold Exposure for Cycling & Life

June 13, 2023 By Eric Lister

hill climb

The Ultimate Hill Climb Training Guide

May 31, 2023 By Eric Lister

shoulder pain cycling

How to Treat & Avoid Shoulder Pain While Cycling

April 12, 2023 By Eric Lister

psoas stretch

The Importance of the Psoas Stretch for Cyclists

April 6, 2023 By Eric Lister

cycling neck pain

The Ultimate Guide to Cycling Neck Pain: Causes and Solutions

March 21, 2023 By Eric Lister

Useful Info

  • Contact
  • Finally, A Global Cycling Club That Is Focused On Community And Love Of Cycling!
  • Privacy Policy
  • Share Your Story!
  • Terms And Conditions Of Use
  • Welcome to I Love Bicycling
  • What Happened When I Stretched Every Day For a Month

Recent Posts

  • JOIN Cycling: A New Training Platform for Cyclists
  • How to Hang Bikes in Your Garage: 4 Inexpensive Options
  • Gravel Bike Vs. Road Bike: Which One Is Better For You?
  • The 6 Types of Mountain Bikes & How to Choose the Best One for You
  • What Is a Touring Bike Good For? 5 Benefits We Know You’ll Love

Search I Love Bicycling

Connect with Us

  • Facebook
  • RSS
  • Tumblr
  • Twitter

Copyright © 2025 · Magazine Pro Theme on Genesis Framework · WordPress · Log in