• Training
    • Injury Prevention
    • Training Tips
  • How To
    • Bike Fit
    • Gear
  • Nutrition
    • Nutrition Tips
    • Weight Loss
  • Repair
  • Reviews
  • Stories
    • Funny Stories
    • Jokes
    • Quotes
    • Videos
    • Funny Videos

I Love Bicycling

I Love Bicycling is a website that is geared towards cycling for beginners with road cycling tips, training articles, nutrition tips, weight loss, how to’s and bike repair articles.

Getting your Legs Ready for Cyclocross

September 17, 2015 by Adam Farabaugh

Getting your Legs Ready for CyclocrossThe endless number of accelerations, steep ride up’s and run up’s, barriers, as well as the intensity of cyclocross racing all add up to create a sport within cycling that is very demanding on your legs. Road or mountain bike fitness is great for coming into a season of cyclocross but adding in a variety of workouts will help you to better adapt to the racing as well as to set you up to do well. Cyclocross races are short so the training for it doesn’t have to be long either. You can do a variety of workouts which are hard and intense but also fun in a short amount of time a few times a week.

Accelerations

Cyclocross consists of a lot of turns which require you to slow and then reaccelerate out of each one of them. If you are only used to riding at a steady effort and accelerating a couple of times each ride, then after a few laps of a ‘cross race, your legs are going to ache. The best way to prepare for this is simply doing a lot of accelerations. If you are not yet on your ‘cross bike you can still do these on a road bike.

There are a number of intervalshttps://www.ilovebicycling.com/cyclocross-tips/ you could do but the easiest is to do 30 second intervals. Accelerate in the saddle for five to ten seconds alternating in and out of the saddle and then spinning easy for the remainder of the thirty seconds. Then when thirty seconds is up, do it again. Start with five minutes of this and build to twenty minutes. If you are on a ‘cross bike you can set up a mini-course that requires you to accelerate every thirty seconds.

Running

There is not a lot of running in ‘cross but the little bit that there is can really hurt you if your legs aren’t ready for it. The only real times that you’re running are when you have to get over barriers or up a steep hill, both of which put a lot of stress on your legs. The best way to start getting that stress is to do a short five to ten minute run where you run easily for thirty seconds and then walk for a minute. Build to one minute on, one minute off, and after about a week of doing this every day you can do the whole ten minutes. Once you can do this your legs are ready to practice the harder stuff.

Barriers

Assuming you already know how to dismount and mount your bike properly, set up two barriers about two meters apart and about 40cm high. Ride into it, dismount, run over it, remount and loop around and do it again. When you first start, do it slowly making sure your technique is good and then gradually increase your speed. Once you are up to speed, do five to ten of them with about thirty seconds between each one.

Run-Ups

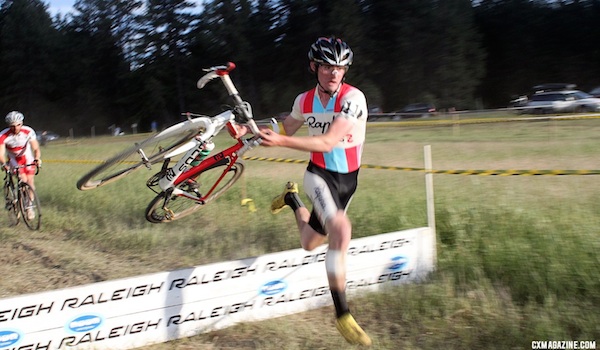
Next are the dreaded run-ups where the hill is too steep and/or technical to ride up. Find a steep hill that is too steep to ride up and takes about ten to twenty seconds to run up. In most races you probably won’t encounter run-ups quite this long but simulating them longer will ensure your legs are ready. Ride into the hill, dismount, shoulder the bike, run up the hill as hard as you can and then remount your bike at the top. Ride around easy for a couple of minutes and then do it again. Build from three to eight.

Ride-Ups

Some steep sections that some run up can actually be ridden but doing so requires practice. Riding a super steep climb necessitates a lot of strength that needs to be built. Even if you can do it once your legs are going to feel it after during the rest of the race. Like the run-ups you want to get your legs used to doing the effort over and over again.

Find a steep climb that you can barely ride up but you can still ride it without having to unclip. Sprint into and up it. Technique along with power is going to be what gets you up it efficiently. You will need to practice a lot to be able to do it in a race but once you’re good it can save you a lot of time each lap. Like the run-ups, start with three and build to eight, riding around easy in between each.

Overall Fitness

Along with needing specific fitness for ‘cross, having a solid base of fitness is essential. Ideally you come into ‘cross season with a bit of road or mountain fitness. If not, build your riding into longer and longer rides incorporating some intensity and then do these workouts to get ‘cross specific fitness. When you do come into the ‘cross season from a road or mountain season, it’s important to take a little bit of rest before you dive right in.

You will be tempted to keep racing with your fitness but if you do, after a weekend or two you will burnout and not have the intensity and drive to continue the ‘cross season in most cases. Instead, take a week or two easy and recover. You will start the ‘cross season fresh with these workouts which will have you feeling good in your races and most importantly, lessen the likelihood of injury.
Making a Group Ride Hard

September 16, 2015 by Alison Jackson

Making a Group Ride Hard

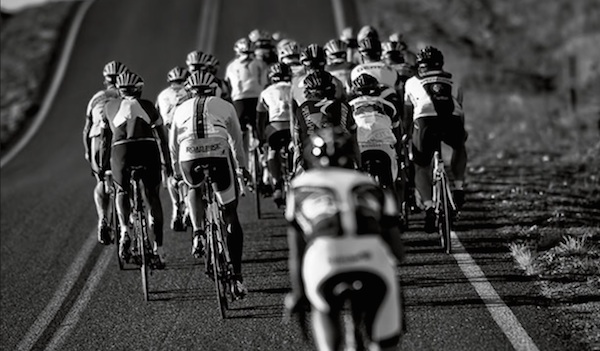
Making a Group Ride HardHave you been asked to go on a group ride that you know will be too easy for you?  You won’t have to find an excuse to get out of it and awkwardly meet the group on the road going opposite directions when using these quick tips on how to make an easy group ride hard.

Go to the Front

It takes more watts to be pulling the group than drafting at the back.  The group may not like you monopolizing the front of the group the entire ride but before you rotate through to the back set the pace with a longer stronger pull.

Spin Like a Squirrel

Another way to make an easy ride harder and a great way to work on leg speed is to shift up a couple of gears.  Riding with a high cadence raises the heart rate while maintaining a slower speed.  Keep shifting until you find a gear that suits the speed of the group and that you can sustain for the entire length of the ride.

Ride Longer

Training stress score (TSS) is a number system used to rate the effort of one’s ride by taking into account duration and intensity.  Longer rides get higher TSS scores as do hard intervals or race efforts.  A long easy ride will produce the same hurt as a short barf-bucket ride.  If you have the time, ride hard the hour before meeting up with the group and use the group ride as active recovery.

Stand Up

Challenge yourself to see how long you can spin while standing on your pedals.  Turn it into an interval ride where you stand up for 30-60sec then sit for 60-90sec, keep challenging yourself to stand longer and sit less often.  It is especially challenging to stand while descending because it forces your legs to spin faster to keep up with the speed.  When you don’t allow your butt to rest on the seat it makes the ride a lot harder.

Dust Off an Old Bike

Weight matters, so if you aren’t too concerned with looks or riding the best of the best, then dust off that old 6-speed in the garage that has a few extra pounds to it and take it out to the group ride.  If that old bike does indeed have 6 speeds your workout will feel different moving through fewer gears.  Add a bulkier wool jersey to go with it to increase negative drag and to impress the riders who will reminisce the old days while also impressing younger riders who love the retro get up.

Tell Stories, Whistle, or Breathe Through Your Nose

Training at altitude is harder because the air is thinner with less oxygen around to diffuse into your muscles.  Talking or whistling while riding has a similar effect as altitude by decreasing you oxygen intake.  You may be riding in an easy group ride but if you choose to tell stories, whistle or breathe through your nose you will be decreasing the regularity of breaths therefore less inhaled oxygen for your muscles.

The Convenience Store Stop: How to Make it the Most Efficient

September 12, 2015 by Adam Farabaugh

The Convenience Store Stop: How to Make it the Most EfficientAs rides start to get longer and longer, stops mid-way for food and water are going to become more frequent as well as important. The coffee shop is a great place to stop for a while and have great conversation over a few brews but during training rides you want to be in, out, and on your way in a timely manner. You also want to get what you need to fuel properly for the remainder of the ride. Knowing what you want to eat and drink prior to going into a store will help prevent you from milling around looking at every possibility which we’ve all done before, especially if we’re already a bit depleted from the ride.
The Drink

Hydrating properly mid-ride is super important because if you don’t, it doesn’t matter what you get to eat, you are going to be suffering the rest of the ride. Typically you are going to want more than just water. Water is good but you want it along with something with electrolytes at the very least because your body depends on them to function properly. It depends on the store but typically you don’t want to pay for water. Take one of your bottles into the store as a lot of stores have a fountain drink dispenser with an option for water. If they don’t, then buying it is the next best choice. Some people opt to fill their bottles in the bathroom but you never know the quality of the water. If you are with a few people, get a gallon jug of it and split it; way cheaper that way.

Electrolyte Drinks

For the electrolyte drink, some fountain drink dispensers have a sports drink which can be a lot cheaper than buying them individually from the refrigerators. Just remember to take it to the counter and tell the cashier what it is to pay for it. If you can’t get a sports drink from the fountain drink dispensers then getting a big bottle of Gatorade or PowerAid can be good as they also have carbohydrates and sugar to continue fueling your ride.

Again, if you are with others, many stores have a “Buy 2” price, so see what you can get for a deal by splitting it. Some sports drinks come with a zero calorie option. This is typically always a bad idea for two reasons. One, you should always fuel for your rides as otherwise you are riding in a depleted state and can’t reach your maximum riding potential. Second, because they are zero-calorie they have to make them taste good with other additives which are never good for you. If you are trying to lose weight, the place to do it is not on the bike. Fuel properly for your rides and then eat less and the right foods off the bike.

Cheapest Drink Option

The cheapest drink option a lot of the time, other than water from the fountain drinks dispenser, is the big cans or jugs of iced tea. These are not the best way to hydrate as they don’t have many electrolytes, and they have a lot of sugar, but drinking them along with a sports drink can be a good cheap option. With these however, you have to look out for high fructose corn syrup if you are trying to avoid it as a lot of them will have them listed as the second ingredient, meaning there is a lot of it in the product.

The Sodas

Soda is one other drink option that many riders swear by mid-ride. Sodas shouldn’t be looked toward to hydrate so much but rather to give you a good boost toward the end of a ride. The high sugar content as well as the potential caffeine can give you a good kick to finish off a ride strong. The trick with soda though is timing it right, because if you have it too early in a ride you can burn through all the sugar before the end of your ride and then you’re left bonked. You want to make sure you have it close enough to the end of your ride or that you have another soda ready to keep you going until the end.

The Food

After you pick out the best drinks for you to finish your ride strong, you need to find the best foods. Drinks are easy comparatively as there are endless food options. The first place to start is; what kind of a ride are you doing?

The Hard Ride

If you are riding hard, at threshold and above, you need foods that are easily digestible along with a high carbohydrate and sugar content and low protein and fat content. Simple granola bars without too many nuts can be a good healthy option. Other foods that are often thought of as bad for you can actually be a good choice mid-ride. Foods like cookies, pop-tarts, pastries, and other little sweets have a lot of carbohydrates and calories packed into a small goodie. The fire with these is that a lot of them are highly processed and contain a lot of ingredients so if you are trying to avoid all that, go with a good quality cookie or pastry that contains fewer ingredients as well as nothing that you can’t pronounce.

Other good options for the end of a hard ride are candy bars. These too are thought of as “junk food” but they contain a lot of sugar that your body pretty much burns exclusively when you are riding hard above threshold. Be careful not to get any that contain too many nuts but otherwise go with what you like. Snickers tend to be a lot of cyclist’s favorite.

The Endurance Ride

When you are training at a lower intensity you still need the carbohydrates to keep you rolling strong but you don’t need as many and the ones you do need don’t need to be from sugar. You are burning calories at a slower rate so you want longer burning fats and proteins along with the carbohydrates. Easy pocketable items include more nut based bars as well as protein bars provided you can stomach them and they don’t contain too much protein. Another option, although it’s not quite as quick, is to get a small sandwiches or wraps that many convenience stores have pre-made. This gives you some of the carbs in the bread along with the protein in the meat. Don’t eat too much at one time though as you don’t want a heavy brick in your stomach.

Depending upon where you live, there can be many options for where to stop to refuel. In most parts of the country, gas stations with convenience stores tend to be the most frequented as they are around from the big city to the only place around for miles and miles in parts of the American West. Plan ahead and know where you are going to stop mid-ride. You’ll not only get into a routine of which places you stop at, but also which food and drink you get at each place. Making good choices in the store will keep you going strong on the rest of your ride.

Neck Pain Cycling

May 10, 2015 by Dyani Herrera

Neck Pain Cycling

neck pain cycling One of things that takes getting used to when you first start cycling is the neck and shoulder discomfort. Even an experienced rider who has taken a short hiatus, and is returning to a regular regime can suffer from these aches. Typically, the discomfort is localized in your anterior deltoids, upper trap muscles and neck extensors. This can be attributed to a few causes such as bike fit, head positioning when riding and tightness of aforementioned muscles.
Bike Fit

If you’ve read our previous articles you will understand how many issues can be initiated due to an improper bike fit. As a beginner cyclist it’s important to work with a bike fitting specialist and tweak one thing at a time, ride for about a week, and assess the changes. This allows you and the fitter to pinpoint the exact solution or cause in order to improve riding conditions. Often neck and shoulder pain is linked to having a high seat post in relation to your bars. When the seat post is too high it can place you in an aggressive position, which as a beginner cyclist you are not ready for. It’s a better tactic to gradually increase the aero position as you get used to cycling. Additionally, if your road or aero bars are too far away causing you to overreach you can place unecessary strain on these muscles. The solution would be to place the bars closer in relation to your body so you’re in a “tucked” position when riding.

Head Position

When I first started riding solo I remember how afraid I was of either riding off the road, or going over debris that would make me fall, that I looked up for the entire duration of my ride. Although I would finish my rides in one piece I had a soreness in my neck and shoulders that would last for days. I remember, constantly moving it side to side while riding to try to minimize the discomfort. I mentioned this to the bike fitter and he told me to keep my head down and only use my eyes to look up. What a difference this made! I practiced this on my rides as I was in the aero position and I no longer felt the pain in my neck. I would only look up with my head if I knew I was coming up on an intersection or bump in the road. During long rides it’s best to look up with your eyes and only tilt your head up when necessary or intermittently. Not only will this decrease your neck discomfort, but it will also make you slightly more aero.

Tight Muscles

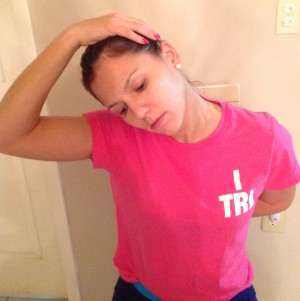
As a beginner cyclist you are now forcing your body to use muscles either it hasn’t in other activities or in a different way. This leads to tightness, muscles spasms, and pain. However, there are a few stretching exercises that can be completed which will lead to disruption of the pain-spasm cycle. One exercise involves a lacrosse ball as demonstrated in “Massage Tips for Tight Muscles.” You place the lacrosse ball between you shoulder blades and roll side to side as well as up and down on the floor. Another variation is to do the same thing, but against a wall instead. Make sure to put your body weight over the knot and roll over it a few times for 20-30 seconds. This will typically release the restriction and cause the trap muscles to relax. There are two stretches that can be done to release the upper traps and neck extensors. Complete each stretch for 20-30 seconds a total of 3 times, several times a day. The first stretch requires you to put your arm behind your back of the side you are stretching. Then, use the other hand to tilt your head to the opposite shoulder.

1st stretch
1st stretch

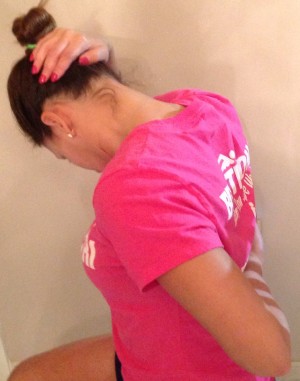
Stretch two, requires you to look down at a 45 degree angle, and place the arm of the side you’re stretching behind your back. After, use the opposite hand to push the back of your head down further in that 45 degree angle. You may refer to the pictures for further demonstration.

2nd Stretch
2nd Stretch

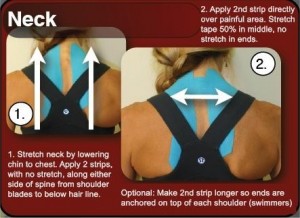
Another helpful tool is to have a partner help you in placing rock tape/kinesio tape along your posterior neck muscles and upper traps. Rock taping offers several advantages such as added support, increased blood supply, and propioceptive feedback. The latter works on nerves which alert your brain to where a particular body part is, and offers feedback to either adapt a movement pattern, or execute it properly. Usually when purchasing rock tape it comes with a pamphlet that teaches you how to apply the tape for different injuries. Nevertheless, YouTube offers plenty of videos teaching how to apply it correctly. It is important to initially wipe the area with rubbing alcohol to remove any oil on the skin, then wipe off the alcohol. Next, make sure to cut the tape with rounded edges, not straight across. Then, break the tape in the middle and slowly apply it with no extra tension. Last, rub the tape to activate the adhesive with the heat generated. In following these steps you’re ensuring the tape lasts for several days and even through showers. You may refer to the photo for further demonstration.

image

If after following all these steps you’re still experiencing discomfort remember that there’s an adaptation process involved as a beginner cyclist. Just like in any other sport it takes time for the muscles to adapt to these new demands and with time they become accustomed. Once your body becomes used to your cycling position, your rides will be neck and shoulder pain free.

Tips to Avoid and Treat Plantar Fasciitis

January 20, 2015 by Dyani Herrera

Tips to Avoid and Treat Plantar Fasciitis

tips to avoid and treat plantar fasciitisYou’ve been waking up in the morning with this intense pain on your heel and the arch of your foot, which goes away once you’ve walked around a bit. It also seems to come back whenever you’re on the downstroke while cycling. After researching your symptoms you come to the conclusion that you’re suffering from Plantar Fasciitis, but aren’t sure how to treat the condition, or prevent it from intensifying. Also, you may be wondering “what is a plantar fascia?”
Anatomy:

The plantar fascia is a series of fibrous structures found on the bottom of your feet. It begins at the heel and finishes at the ball of your foot. The main purpose is to help provide stability to your foot and maintain the integrity of your arch. It is neither categorized as a muscle or tendon.

tips to avoid and treat plantar fasciitis

CAUSES:

There are several causes for this nagging pain impeding your rides. One main cause is tight calf muscles. When your calf muscles are tight, it places extra tension on your Achilles’ tendon and plantar fascia. All of these structures are the continuum of the kinetic chain in your lower leg and foot. Another main cause is having high arches or flat feet. A probable cause can also be the type of shoes you wear when you’re not riding. Some include, converse (in particular if you’re flat footed), flip flops, sandals, or ballet flats. In essence, any shoes which don’t offer arch support.

STRETCHES:

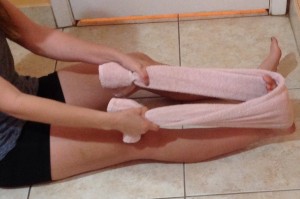
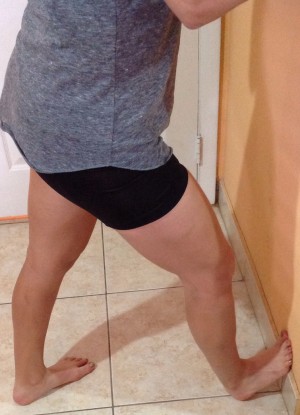
To increase flexibility there are a few stretches you can complete three times a day. These will help prevent and treat plantar fasciitis. When completing any of these stretches ensure you hold each of them for 20 seconds. One easy stretch requires you to fold a small bath towel, place it over the bottom of your foot, and then pull the ends towards you. Another stretch involves placing your heel against the edge of a pole or wall and leaning forward. If on my bike and feeling my calves tighten, I’ve found that standing off the saddle, rotating the affected leg slightly back, and leaning forward gives me a quick calf stretch when riding.

image     image

TREATMENT:

If you enjoy drinking Gatorade, don’t throw away the bottles they’ll come in handy for this treatment! Get an empty bottle, freeze water, and then roll the bottom of your foot several times. You can do this multiple times a day or on a as needed basis. With this treatment you’re getting the massage effect and breaking up any knots in the fascia. Additionally, you’re icing it to decrease pain and inflammation. You can also purchase a mini, dense foam roller with ridges to do a self myofascial release, which will decrease pain and increase flexibility. Lastly, you can have a friend who is nice enough to massage this area for you with some bio freeze or ALO analgesic lotion. This method really helps you pinpoint what area has the most restriction so you can focus on it more with the previous two methods.
It is helpful to take some Ibuprofen or naproxen sodium as directed on the bottle for a week. This will further aid in decreasing internal inflammation of the fascia, and in turn reduce pain.

ways to treat and prevent plantar fasciitis theraband

ORTHOTICS:

If you’re flat footed it would be beneficial to visit your local bike shop and have someone help you choose some orthotics that would fit your cycling shoes. I remember when I was having some issues due to my flat arches, the bike fitting specialist suggested these for me and made some adjustments to my clip positioning. These minor changes made a world of difference when I rode and minimized the pressure on my arches during my downstroke. However, if you’re having pain during normal activities of daily living it would be good to purchase some semi-rigid orthotics for your regular shoes as well. By removing the inner sole of the shoe, and replacing it with these orthotics it can aid you throughout the day.

In following these steps you can help prevent plantar fasciitis from worsening. If ignored, this injury can lead to several weeks in a walking boot, unable to ride. It can create a heel spur, which isn’t as easy to treat. Therefore, it’s imperative we listen to our bodies when it’s trying to alert us something is wrong. By catching plantar fasciitis early we can prevent an unwanted visit to our podiatrist.

Benefits of Positive Self Talk and Imagery

December 29, 2014 by Dyani Herrera

Benefits of Positive Self Talk and Imagery

benefits of positive self talk and imageryDay in and day out we ride, thinking which workouts will serve to increase the endurance of our bodies. However, we tend to neglect the one body part that serves as our center of command…our brains. We need to think of this part as a “muscle” as well, in which we exercise it, push it to its threshold, just to increase it’s endurance in the next workout.
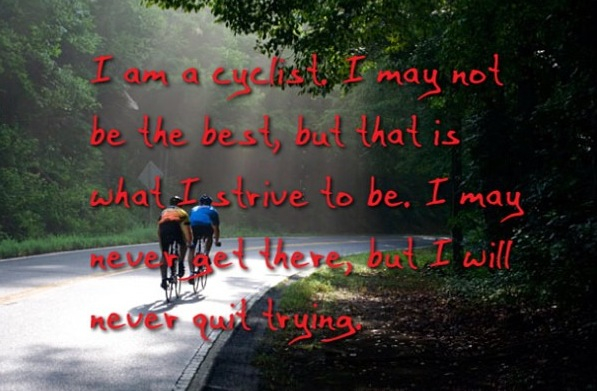
One of triathlon’s greatest veterans (and my personal favorite), Chris “Macca” McCormick, was disliked for the mental tactics he’d use on his opponents when racing. He would study his opponents, learn their tendencies, and find a way to break their mental game. Hence, why the mental aspect of cycling is just as important as the fitness aspect. Here are some tips to improve our mental toughness during training.

Positive Self Talk

As mentioned in the previous article “Positive Talk Increases Endurance,” it’s scientifically proven how vital our mental game can be. We must train ourselves to overcome that little devil on our shoulder telling us “you can’t do this”, because if there’s anything I love more about this sport, it is the ability to prove this voice wrong every day. Being able to do this consistently, really provides us with an intangible sense of confidence. Yet, as we’ve seen with cycling, endurance isn’t gained easily, and we must train ourselves to drown this voice when it rears it’s ugly head.

One effective method is positive self talk, where we replace these negative comments we say to ourselves with positive ones. Last year, I had the pleasure of sitting in a small seminar MACCA gave, and he discussed the idea of “folders.” Essentially, he explained we must create different mental folders for diverse situations we face in training and racing. I’ve modified this idea and have named my folders “not so bad”, “ok, this sucks,” and last one, “alright, I might die today.” In these, I’ve not only placed positive comments, but also memories of training/racing triumphs, motivational quotes, and lyrics to my favorite songs.

For my first folder I have comments like “you got this”, “keep working while others sleep”, “champions are made when no one is watching.” My second folder contains specific memories in training when I really thought I’d explode, and yet completed the session successfully. Also, I use some of my favorite quotes like “embrace the suck,” “when the pain comes I smile,” “keep going, this is going to make you better”, “you’re not a quitter”’ or “you’ve faced tougher things than this!” In my third folder, I typically keep lyrics to songs I like so I can sing them to myself such as “started from the bottom now I’m here”, “lose yourself”’, or “remember the name” by Fort Minor. I also remind myself of how I started cycling and how far I’ve come. Therefore, even if I’m not PRing, I’m in a better position than last year. Last thing, I make sure to keep adding material as new experiences arise and time goes on.

Imagery

This tactic involves imagining a particular goal manifesting itself. It is a great tool even outside of cycling, which can be used to cope through injuries and life trials. When struggling through a workout you can imagine yourself to be in a race setting, where giving up is not an option. On days when I’m lacking motivation, I imagine having someone behind me, and tell myself if I slack I’ll lose the race, and dishonor my hard training to date. Sometimes for fun, I envision my favorite Pro next to me, and not wanting to embarrass myself next to them.

Imagery is subjective to one’s feelings, goals, and experiences. There is no “wrong” image as long as it’s not one with negative outcomes or emotions. The idea is to stay positive and place yourself in an image where you are succeeding. Also, it helps to practice this often, and be as detailed as possible when creating the mental scene. By using this tactic, we can improve motivation, effort, and desired outcomes. It can also be used to decrease anxiety towards a particular experience such as riding in a large group, mountain biking over a treacherous hill, or returning from a cycling crash. The more we go over these scenes in our mind, the better prepared we will be when encountering these scenarios in real life.

By using both of these sport psychology tactics, we can increase our mental toughness in a sport that requires endurance in multiple ways. Sometimes the best athletes in cycling aren’t necessarily the most talented, but the most mentally tough, and know how to “suffer” more than their opponents.

Advantages of an Unbroken Bike Path

December 17, 2014 by Dyani Herrera

Advantages of Riding on an Unbroken Bike Path

unbroken bike path, continuous bike path

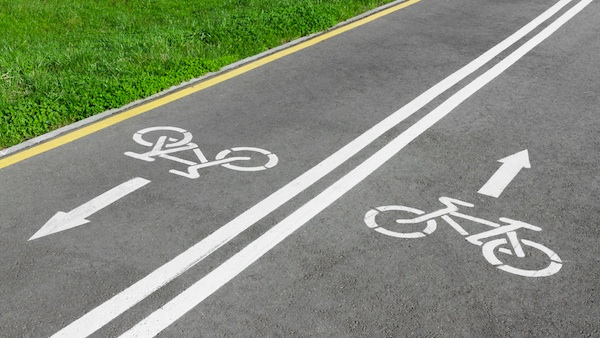
One of my favorite aspects of cycling is the feeling of freedom, and ability to take in my surroundings while exercising. Although I love long paths in my city that take me either along the beach or farmlands, these routes typically require several stops due to traffic lights and traffic overall. When I’m in training mode one of the most practical routes I use is a local golf course that goes around in a four mile loop, with no traffic lights or stops. There are several advantages I’ve found with this route as a beginner cyclist and now avid rider. Here are some advantages for riding on an unbroken bike path despite what level of experience you have riding.

Bike Handling

Riding on a continuous route allows you to practice several things required when riding, in particular if you are just learning how to ride. For one, you are able to practice the maneuvers required in turning, such as slightly leaning your body, weight distribution, and bringing up the leg closest to the turn. You can also practice wide turns versus sharp turns, because both skills are needed in different riding situations. It is ideal to practice this along a continuous stretch with no concerns for oncoming traffic, or having to clip and unclip. Also, it gives you the ability to play around with your gear shifters and familiarize yourself with the different speeds and your comfort level with each one. This is even better if your unbroken path is a flat one so you don’t have the resistance of any rolling terrain. Typically, with this type of route you will experience a tailwind and headwind, which may affect which gear you use when going into a headwind, depending on your fitness level. Playing around with gear shifting will teach you which gear is most efficient in each situation.

Bike Position

This type of path also lends itself to practicing bike positions without having to be as vigilant as you would be if riding in a higher traffic area. If you’ve recently purchased a tri bike, you can practice getting down in the aero bars, and still maintaining balance. I remember as a beginner I had a difficult time with this as I attempted practicing in a bike lane next to oncoming traffic. I was so nervous, and white knuckled on my aero bars I nearly rode off the bike lane into trees that were on the right of me. After this experience, I decided to practice in a low traffic area like my neighborhood. I would practice staying aero and gear shifting in this position as well as reaching down for my water bottle without having a tragically, embarrassing fall. Also, if you own a road bike you can play around with the position that is the most comfortable for you, and leaning forward on the road bars when going into a headwind.

Another position that is important to practice is pedaling off the saddle as this offers a few advantages as well. This requires some practice so you may become comfortable with the “dancing” motion required with this technique. When I ride on this route, I use this motion a lot to gain more speed after turns. Additionally, to simulate climbing since it is a flat route. This specific exercise helps your legs get stronger, and makes you more comfortable whenever you are actually climbing a hill or bridge. Since it is a continuous path I tend to time myself and do intervals of one minute pedaling off the seat and two minutes of riding with high rpms.

Training

Having a continuous path is ideal for interval training because you don’t have to interrupt your work sets by stopping at traffic lights or signs. You’re able to experience the advantages of interval training, and have a great workout. Also, you can fully focus on your gear shifting, pedal stroke, and RPMs. It is especially beneficial if you are completing a ride in a cycling group, and take turns drafting and pulling.

It is also great to practice different cycling drills within a workout without interruption. Some examples may include “spin-ups” where you’re in an easy gear and are working on maintaining high RPMs; Also, “pick-ups” where you do work intervals faster than your race pace. Another good drill to complete on this route is “isolated leg work”, where you complete intervals pulling with one leg, while the other one is “resting.”

Safety

When comparing this route to one which requires me to ride with traffic or alongside a busy road, I find this one to be a lot safer. As a beginner or someone who is still not comfortable riding with traffic you can still enjoy cycling without the constant worry of being hit. These paths typically are in low traffic areas with several signs indicating it’s a bike path and to respect cyclists. Therefore, the few cars that drive in these areas are aware that it is a common cycling location. There are also minimal, if any parking lot entry/exits so you don’t have to be in a constant high alert environment. Lastly, many cyclists ride on these routes so if you have any bike trouble such as a flat tire, you can count on someone being nice enough to stop and help you.

Although riding on an unbroken bike path may not be the most scenic route, as you can see it does have its advantages for all levels of cyclists. All of which, can improve your riding ability and make you a stronger cyclist.


Compact Cranks vs Standard Cranks vs Triple Cranks

October 13, 2014 by Lee Agur

Compact Cranks vs Standard Cranks vs Triple Cranks

Compact cranks vs standard cranks vs triple cranks. What is the real difference between compact cranks vs standard cranks vs triple cranks… What are the Pros and Cons of each?What is the real difference between compact cranks vs standard cranks vs triple cranks… What are the Pros and Cons of each?
For simplicity and comparison sake we have assumed that the rear cassette is the same.

Standard Cranks

General

  • The most common standard cranks are 53 teeth on the large chain ring and 39 teeth on the small chain ring – though other options do exist.

Pros

  • Best for flat and undulating terrain
  • Most efficient at same speed because a standard crank uses a larger front chain ring and larger rear cog meaning there is less friction due to the chain going around a larger circle
  • Best if you are trying to go fast down a hill as you have a higher top gear

Cons

  • The most difficult to get up hills
  • Often have to change the front chain ring at the same time as the rear cassette effectively yanking the chain in different directions at the same time straining it a bit more
  • People get sucked into standard cranks because of ego, they do not want to admit they need a compact. Don’t be that guy/girl.

Compact Cranks

General

  • The most common compact cranks are 50 teeth on the large chain ring and 34 teeth on the small chain ring – though other options do exist.

Pros

  • Compacts may get you up that hill that defeated you last time if switching from standard cranks
  • Best used for hilly terrain
  • Can keep your legs fresher as you keep a higher cadence going uphill instead of grinding it out

Cons

  • Your top gear is slightly smaller; therefore, you are not able to go quite as fast down hills (only important if racing)
  • Less efficient than standard cranks as there is slightly more friction with the chain
  • Drop chain off front derailleur more often under power due to a larger jump from big ring to smaller ring
  • Not as easy to get up hills as triple cranks

Triple Cranks

General

  • The most common triple cranks are 50 teeth on the large chain ring, 39 teeth on the middle chain ring and 30 teeth on the small chain ring – though other options do exist.

Pros

  • Easiest option for going uphill as they have the lowest gear ratio
  • Still have a high gear ratio to be able to go fast
  • Most options for gear ratios

Cons

  • Easier to get up hills than double cranks
  • Constantly using front derailleur and changing gears
  • Can’t use all of the gears and beginners have a harder time using the gears properly without creating a lot of chain rub
  • Least efficient crank set in terms of friction
  • Some people believe that triple cranks as more finicky to adjust and maintain
  • Many gear ratios are overlaps

Recommendation

If you are a strong rider and/or you do not plan to go up steep grades very often then standard cranks are likely your best bet.

If you are a casual rider and/or you want to do hill climbing then consider a compact.

If you are a weaker rider and/or you plan to tour with weight and do hill climbs then consider triple cranks.

Traditionally, entry level road bikes come with a compact or a triple and high end bikes come with a standard or a compact and this is done for good reason as you develop as a rider then you can build up to a standard crank.

Additionally, it is cheaper and easier to change your rear cassette than to change your cranks; therefore, if you find you need a couple extra gears try to go to a larger rear cassette. ie. You currently have a rear cassette that is 12 – 25 purchase one that is 12 – 28. See if that is enough before changing cranks all together.

For the record I use compact cranks, I believe I am a strong rider but I LOVE hills and need a couple easier gears for the steep stuff.

What do you use? Why?

The Best Way To Lose A Race!

August 28, 2014 by Lee Agur

The Best Way To Lose A Race!

starting too fast on a bikeWe have all been there, months of training and planning mounting to this one race and we destroy it with in the first minute.
Starting Out Too Fast

It is something so simple to avoid, yet escapes 90% of amateur racers (probably 100% of men amateurs and only 80% of the women – as I have learned they are smarter and less egotistical.) So why is it that in training we make a plan and then the gun goes off and all of it goes out the window within the first minute. Do we have supermen complexes thinking races are so much different than training?

As experience will teach you, the tortoise will beat the hare, more the steady than the slow, but you catch my drift. So in knowing this, as I do, why do I still continue to start off too fast and finish so slow? Well, sometimes it is because I believe my training has prepared me better, other times I don’t realize how tired my body actually is, sometimes it is nutrition, but most notably it is that I get caught up in the competition. I don’t bike my own race! I want to be first! I don’t want that guy (or girl) to pass me! I want to give myself a chance at my dream goal time! I have a lot of excuses…

So… how do I overcome this complex? Brutal honesty and experience!

The more I race the more I learn. I am realistic about how much I have trained, how I feel and how the elements are going to affect me. Hotter days = slower times + more hydration required and I adjust accordingly. The only way you are really going to learn this is through experience and testing out different theories. I have attempted several 1 hour time trials to finally convince myself that starting out slower than I think produces much better results! It only took me 7 years!

Make a Plan and Stick To It

Before I race, I look at the weather, and then make a nutrition plan, a hydration plan and a race/effort plan and then I try to stick to it the best I can with only minor adjustments. What you eat on a long ride  and how much you drink is just as critical as how much effort you put out. I have a power meter so it is very easy to measure effort; however, most people use heart rate. Whatever the measure try to be realistic. Training days will give you an accurate gauge of the race day!

Concentrate on your own pace and do not get caught up in the moment and understand that adrenaline can mask actual effort – especially in the beginning!

Bonking

June 3, 2014 by Lee Agur

Bonking

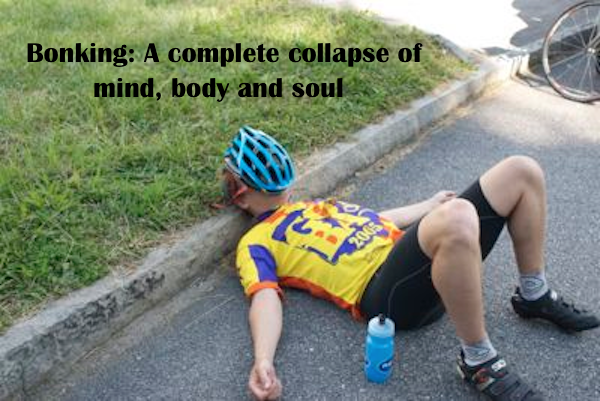
bonking, bonking while cycling, bonking definition, bonking means, bonking on the bikeBonking is one of the worst feelings you can have on two wheels. If you have ever bonked on a ride you will know what I am talking about, a complete collapse of your mind, body and soul. One minute you are smiling, flying along and the next minute you can barely stop the drool from coming out of your mouth, never mind trying to turn over the pedal crank!

What Does Bonking Mean

Bonking is when your glycogen stores have been depleted in your liver and muscles to dangerously low levels. You know when you have bonked because of the unmistakeable fatigue that comes over you.

Bonking while Cycling

Bonking on the bike, also known as “hitting the wall” in running, is simply when you are completely and utterly exhausted. You have no more energy left in the tank. The glucose levels in your blood is abnormally low so parts of you start to systematically shutdown.

Your legs and your brain both require glucose in order to operate, but your brain takes priority. In the beginning, your legs lose considerable power and it becomes increasingly difficult to continue pedaling, but as you continue to ride then your brain function also starts to deteriorate. So not only are you ridiculously weak, but you may turn to the dark side and become irritable, emotional and even hostile.

Types Of Bonks

Dead Legs – your legs just will not go even though the rest of your body is keen.

Complete Meltdown – a complete body shutdown. Nothing is working! A great combination of nutrition errors, dehydration, poor training and overexertion combined into one.

Signs That You Have Bonked

Physical Signs of bonking

  • Immense fatigue
  • Uncontrollable shaking or shivering
  • Unable to balance – dizzy or lightheaded
  • Increased sweating

Mental Signs of Bonking

  • Loss of concentration
  • Irritable, emotional or hostile
  • Confused
  • Mentally defeated – all thoughts turn negative ie. you have to stop, unable to finish event, feeling like the grim reaper has come to take you…

How do you avoid bonking?

Avoiding bonking in theory is simple – eat enough carbohydrates to convert into glucose to fill your glycogen stores. The problem is that you can only process 60g to 90g of carbohydrates an hour as discussed in what to eat on a long bike ride . So no matter how much you eat you can only convert so much of it to usable energy. Eating too much is a whole other can of worms… So if you are eating the correct amount then it will come down to monitoring intensity and making sure you are not exceeding your limit and staying properly hydrated.

The time to avoid bonking in a race really begins long before, in your training, and continues through the implementation of a pre-race plan of food and race nutrition, hydration and pacing.

Early Detection of Bonking

Bonking can hit you like a ton of bricks with no warning, but sometimes (especially if you have had extensive first hand experience with bonking) you can start to see the signs of the bonk coming on. Riding starts to get much more difficult, you start losing focus or getting hangry (hungry & angry).

What Do I Do If I Have Bonked or Feel it Coming On

Immediately decrease intensity, start to eat simple carbohydrates and try to rehydrate – drinking sports drink takes care of both of those at once.

If you are deep in to a bonk consider getting picked up or dropping out of the current event especially if it is not an important one. Recovery time is exponentially longer the harder you try to push through. If you are stubborn and want to finish – get off the bike, take in some carbohydrates and continue when you are no longer dizzy, disoriented and have sufficient energy.

If you catch yourself early enough then you may be able to continue riding slowly as you take in some simple carbs, often this can save a race.

Bonking is actually a way of protecting the body from further damage, if you will not look out for your body properly, it will! Do yourself a favour and don’t let it get to that point.

Have you ever bonked? Share your insight or stories below.

« Previous Page
Next Page »
  • Facebook
  • Tumblr
  • Twitter

Latest Articles

JOIN Cycling: A New Training Platform for Cyclists

May 27, 2024 By Eric Lister

cold exposure

The Benefits of Cold Exposure for Cycling & Life

June 13, 2023 By Eric Lister

hill climb

The Ultimate Hill Climb Training Guide

May 31, 2023 By Eric Lister

shoulder pain cycling

How to Treat & Avoid Shoulder Pain While Cycling

April 12, 2023 By Eric Lister

psoas stretch

The Importance of the Psoas Stretch for Cyclists

April 6, 2023 By Eric Lister

cycling neck pain

The Ultimate Guide to Cycling Neck Pain: Causes and Solutions

March 21, 2023 By Eric Lister

Useful Info

  • Contact
  • Finally, A Global Cycling Club That Is Focused On Community And Love Of Cycling!
  • Privacy Policy
  • Share Your Story!
  • Terms And Conditions Of Use
  • Welcome to I Love Bicycling
  • What Happened When I Stretched Every Day For a Month

Recent Posts

  • JOIN Cycling: A New Training Platform for Cyclists
  • How to Hang Bikes in Your Garage: 4 Inexpensive Options
  • Gravel Bike Vs. Road Bike: Which One Is Better For You?
  • The 6 Types of Mountain Bikes & How to Choose the Best One for You
  • What Is a Touring Bike Good For? 5 Benefits We Know You’ll Love

Search I Love Bicycling

Connect with Us

  • Facebook
  • RSS
  • Tumblr
  • Twitter

Copyright © 2025 · Magazine Pro Theme on Genesis Framework · WordPress · Log in