• Training
    • Injury Prevention
    • Training Tips
  • How To
    • Bike Fit
    • Gear
  • Nutrition
    • Nutrition Tips
    • Weight Loss
  • Repair
  • Reviews
  • Stories
    • Funny Stories
    • Jokes
    • Quotes
    • Videos
    • Funny Videos

I Love Bicycling

I Love Bicycling is a website that is geared towards cycling for beginners with road cycling tips, training articles, nutrition tips, weight loss, how to’s and bike repair articles.

Compact Cranks vs Standard Cranks vs Triple Cranks

October 13, 2014 by Lee Agur

Compact Cranks vs Standard Cranks vs Triple Cranks

Compact cranks vs standard cranks vs triple cranks. What is the real difference between compact cranks vs standard cranks vs triple cranks… What are the Pros and Cons of each?What is the real difference between compact cranks vs standard cranks vs triple cranks… What are the Pros and Cons of each?

For simplicity and comparison sake we have assumed that the rear cassette is the same.

Standard Cranks

General

  • The most common standard cranks are 53 teeth on the large chain ring and 39 teeth on the small chain ring – though other options do exist.

Pros

  • Best for flat and undulating terrain
  • Most efficient at same speed because a standard crank uses a larger front chain ring and larger rear cog meaning there is less friction due to the chain going around a larger circle
  • Best if you are trying to go fast down a hill as you have a higher top gear

Cons

  • The most difficult to get up hills
  • Often have to change the front chain ring at the same time as the rear cassette effectively yanking the chain in different directions at the same time straining it a bit more
  • People get sucked into standard cranks because of ego, they do not want to admit they need a compact. Don’t be that guy/girl.

Compact Cranks

General

  • The most common compact cranks are 50 teeth on the large chain ring and 34 teeth on the small chain ring – though other options do exist.

Pros

  • Compacts may get you up that hill that defeated you last time if switching from standard cranks
  • Best used for hilly terrain
  • Can keep your legs fresher as you keep a higher cadence going uphill instead of grinding it out

Cons

  • Your top gear is slightly smaller; therefore, you are not able to go quite as fast down hills (only important if racing)
  • Less efficient than standard cranks as there is slightly more friction with the chain
  • Drop chain off front derailleur more often under power due to a larger jump from big ring to smaller ring
  • Not as easy to get up hills as triple cranks

Triple Cranks

General

  • The most common triple cranks are 50 teeth on the large chain ring, 39 teeth on the middle chain ring and 30 teeth on the small chain ring – though other options do exist.

Pros

  • Easiest option for going uphill as they have the lowest gear ratio
  • Still have a high gear ratio to be able to go fast
  • Most options for gear ratios

Cons

  • Easier to get up hills than double cranks
  • Constantly using front derailleur and changing gears
  • Can’t use all of the gears and beginners have a harder time using the gears properly without creating a lot of chain rub
  • Least efficient crank set in terms of friction
  • Some people believe that triple cranks as more finicky to adjust and maintain
  • Many gear ratios are overlaps

Recommendation

If you are a strong rider and/or you do not plan to go up steep grades very often then standard cranks are likely your best bet.

If you are a casual rider and/or you want to do hill climbing then consider a compact.

If you are a weaker rider and/or you plan to tour with weight and do hill climbs then consider triple cranks.

Traditionally, entry level road bikes come with a compact or a triple and high end bikes come with a standard or a compact and this is done for good reason as you develop as a rider then you can build up to a standard crank.

Additionally, it is cheaper and easier to change your rear cassette than to change your cranks; therefore, if you find you need a couple extra gears try to go to a larger rear cassette. ie. You currently have a rear cassette that is 12 – 25 purchase one that is 12 – 28. See if that is enough before changing cranks all together.

For the record I use compact cranks, I believe I am a strong rider but I LOVE hills and need a couple easier gears for the steep stuff.

What do you use? Why?

The Best Way To Lose A Race!

August 28, 2014 by Lee Agur

The Best Way To Lose A Race!

starting too fast on a bikeWe have all been there, months of training and planning mounting to this one race and we destroy it with in the first minute.

Starting Out Too Fast

It is something so simple to avoid, yet escapes 90% of amateur racers (probably 100% of men amateurs and only 80% of the women – as I have learned they are smarter and less egotistical.) So why is it that in training we make a plan and then the gun goes off and all of it goes out the window within the first minute. Do we have supermen complexes thinking races are so much different than training?

As experience will teach you, the tortoise will beat the hare, more the steady than the slow, but you catch my drift. So in knowing this, as I do, why do I still continue to start off too fast and finish so slow? Well, sometimes it is because I believe my training has prepared me better, other times I don’t realize how tired my body actually is, sometimes it is nutrition, but most notably it is that I get caught up in the competition. I don’t bike my own race! I want to be first! I don’t want that guy (or girl) to pass me! I want to give myself a chance at my dream goal time! I have a lot of excuses…

So… how do I overcome this complex? Brutal honesty and experience!

The more I race the more I learn. I am realistic about how much I have trained, how I feel and how the elements are going to affect me. Hotter days = slower times + more hydration required and I adjust accordingly. The only way you are really going to learn this is through experience and testing out different theories. I have attempted several 1 hour time trials to finally convince myself that starting out slower than I think produces much better results! It only took me 7 years!

Make a Plan and Stick To It

Before I race, I look at the weather, and then make a nutrition plan, a hydration plan and a race/effort plan and then I try to stick to it the best I can with only minor adjustments. What you eat on a long ride  and how much you drink is just as critical as how much effort you put out. I have a power meter so it is very easy to measure effort; however, most people use heart rate. Whatever the measure try to be realistic. Training days will give you an accurate gauge of the race day!

Concentrate on your own pace and do not get caught up in the moment and understand that adrenaline can mask actual effort – especially in the beginning!

How Far Is Too Far?

April 16, 2014 by Lee Agur

How Far Is Too Far?

how far is too far overtraining
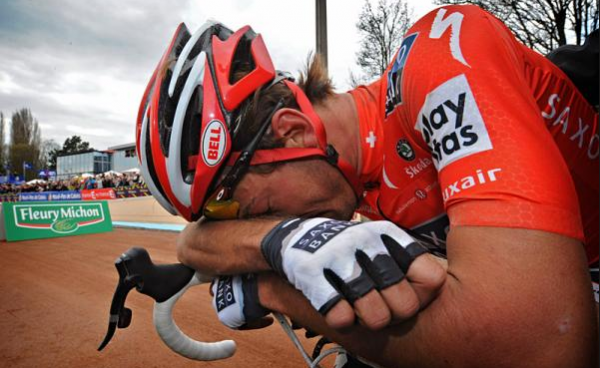
It’s great to be enthusiastic about cycling! When you love something you don’t just want to do it often, you want to do it well. It’s common for an athlete to push him or herself, trying to outdo their own record for mileage and/or speed. But it’s possible to push too hard. [Read more…]

What is Criterium Racing

April 11, 2014 by Aaron Robson

What Is Criterium Racing

what is criterium racingIf you are looking for something a little different to add to your bike racing calendar, or you just want a fun way to improve your bike handling skills, consider signing up for a criterium race. Criteriums are personally my favorite race to ride in, and everyone I know who has come to watch one has loved the whole event. What’s not to like?

What is a Criterium Race?

Criterium races (or crits, for short) are short, fast races held on closed loop courses usually between 0.5 and 2 miles in length. Crits differ from standard road races in that there is no fixed race distance. Instead, you race for a predetermined length of time…well, sort of. Here is how a crit works. The race starts off just like a standard road race – after the gun, the field will take off around the loop, jockeying for position, attacking, normal race stuff. The first distinguishing feature of crits are ‘primes’ – these are similar to intermediate sprint points in road races, but there are usually a lot more of them in crits. As the field loops past the start/finish line, a race official will ring a bell signifying the end of the next lap is a ‘prime’. Primes are often cash or merchandise prizes for whomever gets to the line first! Because they usually pop up every 5 minutes or so during the race, they tend to keep the pace fast and exciting.

The end of the race is where crits are really different. In a normal road race, you always know exactly how far you are from the finish. Not so here. The end of a crit race isn’t determined until shortly before the race actually ends. Here is what happens. While all the racing action is happening, race officials are monitoring how long each lap takes. Based on that, they will try to end the race close to the advertised duration of the race. At the appropriate point (usually 5-10 minutes before the end), they will ring a bell and display lap cards that tell the racers exactly how many laps are left until the finish. At this point, with a definite end in sight, the pace really heats up, and the racers typically have 3-5 laps to position themselves and prepare for the mad dash to the finish on the last lap!

The Good

There are a lot of great things about criterium races. Perhaps most importantly, they are awesome spectator events! Anyone who has watched a major bike race live knows that waiting a couple hours to see a bunch of multi-colored blurs zoom past you for a few seconds isn’t the most riveting viewing experience. Because crits are held on small, usually urban courses, you can pick a nice spot and see the action every couple of minutes – making it easy to follow what is happening in the race and providing plenty of chances to check out your favorite rider.

It’s not all about creating an awesome experience for those watching the race though – crits have been hands down the funnest races I’ve ever participated in. They go just about full throttle from start to finish, with attacks and counter-attacks happening all the time, and you have to be constantly alert to your position, who is around you, and how you are going to take that next corner. There is no chance of getting bored in a crit race!

In addition to the fun factor, crits are a great opportunity to develop fitness and bike-handling skills. Though the first few laps of your debut criterium might feel a bit overwhelming – there is nothing quite like heading into that first tight, 90 degree corner at 30+ mph with 60 or 70 other cyclists inches away from you – you very quickly get accustomed to the situation. You begin to corner with more confidence, you know exactly which lines to take to maintain your speed, and you no longer freak out about the close confines of the peloton. And, of course, you are doing all of this while your heart is threatening to burst out of your chest because you feel like you’ve been sprinting flat out for 10 minutes now – and the race has only just started!

The Bad

Not everyone is quite as enthusiastic about this style of racing as I am however. Criteriums can be prone to crashes, especially in the lower categories, when people are less experienced and haven’t fully developed the pack-riding skills to stay safe. The tight courses that a lot of criteriums are held on only exacerbates this problem, and a poorly laid out course can be downright dangerous regardless of your bike-handling aptitude. Starting off with lower-key crits is the best way to minimize your crash risk – most major cities will hold a weekly ‘twilight race series’ (no, nothing to do with the book) on weeknights, and these races tend to be smaller, shorter, safer races.

As we all know, crashing not only impacts you, but your bike as well. Humans are very good at repairing themselves – bicycles, unfortunately, haven’t evolved such abilities. I know a lot of people that don’t race crits because they don’t want to destroy their super expensive bike, to which I say ‘get another bike!’ A simple aluminum frame, mid-range bike can be had pretty cheaply and will be practically indestructible – aluminum is much less likely to shatter or crack from impact. In the event you are involved in a crash and break something, your replacement bill will only be a few hundred dollars, rather and a few thousand. And an added bonus – you can use the bike as your rain bike!

Is Criterium Racing For Me?

You’ve read about the good and bad sides of what is, in my opinion, an awesome style of bike racing – but is it for you? If you like excitement, speed and competition, it is! If you are looking for the next challenge on two wheels, give criterium racing a try. Even if you don’t love it, the benefits you get in fitness and bike skills will make you a much better rider on the road!

How to Choose a Power Meter

March 20, 2014 by Aaron Robson

How to Choose a Power Meter

how to choose a power meter
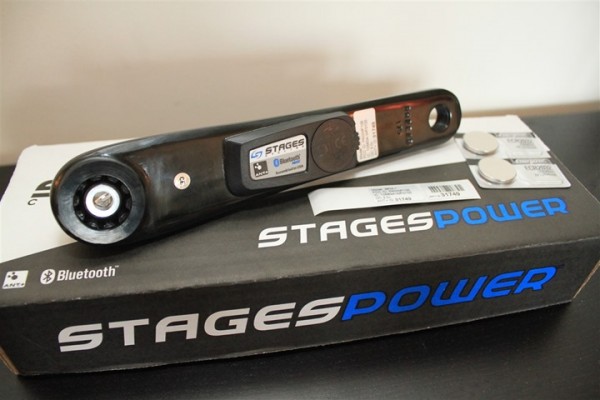
Previously, I introduced the concept of power training – that is, training using a power meter, not just really hard training! If you are interested in trying this out, the first thing you will need is, of course, a power meter. This article will tell you how to choose a power meter that will work the best for you.

There are two major classes of power meters – those that ‘directly’ measure power, and those that indirectly measure it. Direct-measure power meters use tiny things called strain gauges to measure microscopic bending in various components on your bike. Indirect meters generally take a bunch of measurements of speed, wind direction, wind speed, etc. and try to ‘guess’ your power based on these numbers. If you want to use a power meter for serious training, you don’t want an indirect-measure power meter – they simply aren’t accurate enough to be useful. Of the direct-measure power meters, there are three main types, which I discuss below.

Wheel-based

These power meters are integrated into the rear hub of a wheel. They measure power by measuring deflection in the rear hub. The most popular version is made by a company called PowerTap and the cheapest version of their ‘power hub’ retails for about $800. Of course, you have to get that hub attached to a wheel – either replacing your current hub, or getting a whole new wheel built up, which will push up that cost.

By placing the power meter in a wheel, you can switch your power meter between different bikes very easily. Of course, if you have more than one set of wheels for your bike, it is going to very quickly get very expensive to always have a power meter available. Most people who only invest in one power hub will attach it to their typical training wheels, but if you race on a different set of wheels, you lose the benefit of power readings while racing, which is one of the big advantages of power training.

Crank-based

There are a few different power meters that measure power based on readings from the crank area of the bike. Quarq and SRM make power meters that integrate with the bottom bracket and crank, while Stages offers a model that is attached to your crankarm. The Quarq/SRM models are on the very high end of the price and quality spectrum, at $1500 and $2000 for the base models of each, respectively, which Stages is currently the most affordable power meter of this bunch at $700.

These type of power meters allow you to use any kind of wheel you want, which a lot of people find valuable, however moving the unit from one bike to another is not something you would want to do very often – requiring completely removing and reinstalling the cranks and bottom bracket AND recalibrating the device. The Stages Power Meter is a bit easier to swap around, since it is only attached to your non-drive side crank arm.

Pedal-based

Recently, the bicycle world has seen a surge of pedal-based power meters. These units claim to offer the same precision as crank or wheel based units, but with far greater flexibility of use – all you have to do to is switch out a pedal to move your power meter, and you can use whatever wheels you desire. Both Garmin and Look have pedal-based power meters available currently, and while a lot of people thought this technology would provide more affordable power meters, it hasn’t panned out that way – Look’s model costs $2500 and Garmin’s is a slightly more palatable $1700.

Still, the flexibility to use this one power meter on any road bike you own, with whatever wheels you want means you only need one of these, instead of potentially being forced to by multiple models of the other types. As these type of power meters are fairly new on the market, there are likely to be some issues to work out, and prices will (hopefully) come down as the technology matures.

Your Decision?

So which one should you get? My number one recommendation would be the Stages Power Meter if you are just starting out with power training. It is cheap, reliable, and can be used with multiple wheels easily, and multiple bikes without a huge hassle. You won’t get quite the level of detail in your data as you will get with some of the more expensive systems, but until you are more familiar with power training, you won’t know what to do with all that information anyways. As you advance in your training, you can always upgrade if you feel it would help. Good luck!

Four Steps To Avoid Overtraining

January 23, 2014 by Lee Agur

Four Steps To Avoid Overtraining

avoid overtrainingAnyone can suffer from overtraining and in fact, it’s more likely to occur in beginner cyclists as they try and do too much, too soon.

As you go about doing your regular cycling sessions, one thing that you do need to keep yourself very aware of is the concept of overtraining. Some people mistakenly believe that overtraining will only happen to serious athletes and top notch cyclists who are training for hours each day, but this just isn’t the case.

To help ensure you are doing everything you can to prevent overtraining, let’s look at four steps you should take.

Sleep Well

First, one of the top things that you must keep in check is your sleep needs. If you are not sleeping enough each evening, this is going to sacrifice the recovery you make between rides and will most definitely put a dent in your recovery.

You should be sleeping at least 7 hours, preferably 8 or more during intense training times.

Take At Least One Off Day and A Cross Training Day Each Week

Second, it’s also important that you take at least one day off each week to allow for complete rest and recovery. Don’t exercise 7 days a week or you are on a fast road to overtraining. Remember, your body needs time to recover, so don’t be afraid to give it that time.

In addition to that, you would be best suited to doing a day of cross training as well at a moderate intensity level. Go for a swim or take a leisure walk with a friend. There are many ways to move and keep up your fitness without it being an intense ride.

Don’t Fear Carbohydrates

Make sure that you are eating enough carbohydrates as well. If weight loss is your goal, you may be cutting back on this particular nutrient quite readily in your diet, but that will set you up for some problems down the road. As your glycogen stores become more and more depleted, you will notice that it becomes harder and harder to do the rides you set out to do. Eventually, high amounts of fatigue will set in and when they do, your rides will cease to exist. Overtraining will set in and you’ll be required to take time off.

The most important times to consume carbohydrates are during your rides (especially ones at high intensity) and immediately after rides. After you have replenished the glycogen and carb stores you can go back to your paleo diet that is low in carbs or  The Paleo Diet for Athletes.

Assess Your Stress

Finally, be sure that you assess your stress levels. Remember that it’s not just exercise stress that can add up and impact your cycling performance. You can also start to experience stress from relationship, financial, or work related issues and this can wear you down as well. You want to keep your life as stress free as possible and that will go a long way towards helping you avoid overtraining.

So keep these quick tips in mind and you can forge onward and put the risk of overtraining behind you.

Maximizing Your Performance

January 20, 2014 by Guest Post

Maximizing Your Performance

This training article comes courtesy of Leah Guloien and Jamie Riggs, General Managers of the Cycling Division at Burnaby’s Catalyst Kinetics Group.

1. “What’s holding you back?”

maximizing your performanceAnswering this one question, and developing a strategy to turn that weakness into strength, will pay dividends with faster times and stronger rides. Most athletes, for example, never consider they’re breathing? Many athletes breathe with quick shallow breaths, which not only wastes energy, but also hinders your bodies’ ability to burn fat as fuel. Taking 5 minutes per day before bed to practice ‘belly breathing’ is one of the simplest and quickest things an athlete can do to change their performance. To do it, lie on your back in a relaxed position, and place one hand on your abdomen. Now focus on taking deep breathes using your diaphragm, if you’re doing it right your belly will be moving up and down quite a bit. If you feel yourself tensing any neck muscles, stop, and refocus on breathing from the belly. A few minutes a day, and you’ll be started down the path towards becoming an efficient breathing machine!

Fitness testing is another way to examine your current performance level. At Catalyst Kinetics Group we start every athlete off with a comprehensive physiological assessment, which quantifies every aspect of your performance, from your breathing frequency and cardiac function, to blood values and muscle oxygen saturation. These types of assessments require expensive equipment and knowledgeable people to run them, but you can get a great start on your own with nothing more than your bike, a stopwatch and a heart rate monitor. See below for an example of a field test we use to build an athlete’s training program.

Fitness test: After a 30-minute warm-up, pick a straight, relatively flat stretch of road that you can ride at least 20 minutes with a minimum of stops. Start your watch and ride a 20-minute time trial, making sure to record power (if available), heart rate, and speed along the way. Record these numbers for later, and see below for some ways you can use them to build workouts.

2. “Have a plan”

It’s been said a million times, but this simple advice will pay off for anyone with ambitious cycling goals. It can be as simple as writing out the ‘Fondos, races, and rides you hope to do this year on a calendar, and taking a look at the spacing between them. This can have surprising results, as maybe you weren’t aware exactly how close together those two massive rides you were planning were, or didn’t notice a gaping hole with no events just waiting to be filled.

Once you have your main events penciled in, go through and mark out your next most important training periods, the easy ones! A big ride, race or Fondo take a lot of energy, both physically and mentally, and it can be easy to ride the wave of endorphins that comes from completing one of these events into another hard week of training. The result is that you find yourself in a deep ‘hole’ of fatigue, with that next big ride looming on the horizon. So after each big goal event, be sure to schedule an easy week of training, and from there you can start to rebuild toward your next personal best.

3. “Keep the easy stuff easy, and the hard stuff hard”

One of the most important benefits to having a plan laid out in advance is that you are in effect giving yourself a reason to go easy sometimes. If every ride you head out with no idea about what you have done or what’s up ahead, it is very easy to fall into the dreaded ‘junk mile’ trap. These rides feel great. You’re pushing the pedals, working up a sweat, as well as an appetite. But then you notice that no matter how much you ride, you aren’t losing any weight, or that no matter how fast the average speed on that three hour Saturday ride, you’re still getting creamed in the local group ride sprint.

Instead of pushing it every day, arrange your weekly rides so that a few, no more than two, are your hard rides. The rest of the time on the bike should be spent at a pace where you can easily hold a conversation with a person beside you. These rides truly do lay the base of fitness, logging time in these easy zones allows your body to adapt structurally to the load being applied. More blood vessels, increased density of cellular powerhouses, and a whole raft of other changes that turn your body into a super efficient, fat-burning, watt-churning machine.

Example Structural Endurance Workout: Ride for two hours at a ‘conversational’ pace, keeping your cadence between 85 to 95 RPM. Every 15 minutes do a short, 15-second sprint, and finish with 5 to10 minutes at 110 RPM.

The two hard days are the chance for you to explore your limits. Since you won’t be as tired as you would have been had you been riding ‘medium’ all the time, your hard efforts will be truly hard, taking your legs and lungs up to their maximum capacity. By pushing against the limits of what you are currently capable of, you will see your ability to sprint and hang on to the fastest guys in town increase dramatically. Thirty-second all out intervals are all the rage lately, but in reality there is no end to the sessions you can dream up. Whether they’re short sprints or longer five and ten-minute efforts, they all have a place in a well-rounded cyclist’s plan.

Example Short Interval Workout: Start out with a 30-minute warm-up, gradually increasing your effort level. Include one, 8-minute interval at an effort level of 8 out of 10 during this warm-up. Next, proceed to do six 30-second maximal efforts, staying in the saddle as much as possible, ‘spinning’ rather than ‘mashing’ the pedals. Leave at least four minutes of very easy spinning between efforts. Finish the workout with another 10 minutes at an effort level of 8 out of 10.

Example 10 minute Interval Workout: Take the average power you found during the 20-minute field test (see above), and multiply it by 0.85 and 1.05. These two numbers will become your high and low-end thresholds. During a 2-hour ride, do two intervals of 20 minutes each, alternating 3 minutes at the low-end threshold, with 2 minutes at the high-end threshold power. If you don’t have access to a power meter, you can also use average heart rate, adding and subtracting five beats to your average during the field test to find the high and low end threshold values.

4. “Take care of your body”

Addressing muscular imbalances and inefficiencies on the bike, whether it is as a result of habitual patterns that the body has become accustomed to or as a result of an incorrectly fitting bicycle can assist in helping you achieve your optimal performance.

Designing a pre- and post-cycling routine can help set you up for success. Purchase a foam roller to help with muscle activation and localized tension within the muscles. The glutes and the quadriceps are important areas to focus on. Some specific exercises we like to incorporate prior to our PowerRide sessions are planks, thoracic spine openers and bridges. Activating the core, opening up through the chest, and activating the glutes are all-important to a strong posture and alignment on the bike.

After intense or long sessions on the bike, it is important to cool the body down properly and not only in the sense of pedaling easier. Making sure to stretch out the body and return the body back to an ideal posture is important. Stretches such as spinal twist, pigeon pose, and downward dog are all great stretches post cycling. Take 10 minutes and pick 5 to 10 stretches and hold each for approximately 30 to 60 sec, always easing into the stretch and never pushing to the point of pain.

We hope you’ve been able to learn something helpful from this article, and wish you nothing but the best in pursuing your cycling goals.

Leah Guloien and Jamie Riggs are General Managers of the Cycling Division at Catalyst Kinetics Group, a Vancouver area, multi-disciplinary health clinic, physiological assessment and sports & fitness training facility.

Thinking of doing a Granfondo this year? Check this one out: Okanagan Granfondo

5 Winning Cyclocross Tips

January 16, 2014 by Craig Richey

5 Tips For a Successful Cyclocross Season

If you were disappointed with how you raced last cyclocross season, had some issues with your cx skills, or simply felt you could have been faster, then these simple (and in many cases obvious) tips can make your next season a winning one.

1. Ride Your Cross Bike  Star Crossed Craig Richey

If you are serious about cyclocross you should not touch your road bike all cyclocross season, and limit your time on a mountain bike. Also mix in cyclocross rides during the spring and summer so you don’t look as shaky as a new born baby deer when you do a cross dismount in August. Most elite cross racers will mix in some cyclocross rides in the off-season, riding the bike more starting in July, and exclusively by September. Most racers will have a set of wheels mounted with road tires for their cross bike for training on the road and group rides. When you spend a lot of time on a bike it starts to feel like an extension of your body and becomes very predictable both on and off road. Predictable equals fast.

2. Do Your Cyclocross Workouts Off-road

When you start doing cross specific workouts and intervals make sure to do them off-road on mini-cross courses. It is easy to get sucked into wanting to do your intervals on the road where you can hit predictable power numbers, but in a cross race you are going to have to put power down on bumpy, slippery, and twisty terrain. Make your cross workouts into real cross workouts and do them off-road

3. Learn Proper Cyclocross Technique

Having proper technique for carrying, dismounting and mounting your bike in all different scenarios not only makes you a faster more efficient rider, but also cuts down on mechanical issues because you are not banging the bike around. Sadly many amateur riders have some holes in their technique and enrolling in a cyclocross skills clinic is the best way to fill those holes.

4. Strengthen Your Core

Cyclocross has a lot of weird unbalanced repetitive motions such as jumping on and off your bike from the same side as well as always carrying your bike on the other side. These repetitive motions can lead to weird and debilitating overuse injuries.

5. Take an Off-season

If you race cross all fall it is easy to jump into training for the upcoming road or mountain bike season after only a few weeks rest. For most people your body and soul need more than a few weeks rest. Take the time to recharge and do some other activities. Here is a list of the most popular off-season activities for cyclists.


About the Author: Louisville CX World Championships Craig Richey

Craig Richey is a multiple time Canadian National team member, representing Canada at mountain bike World Cups and cyclocross World Championships. Craig is currently doing an MBA in Boston and recently launched SponsorConnected.com

The Basic Goals of Training

January 8, 2014 by Lee Agur

The Goals of Training

goals of trainingThe principles of cycling training are fundamentally basic. Your goal is it overload and then allow for adaptation. Rinse and repeat.

So what are you trying to overload?

There are three variables in cycling training:

  1. Volume – How much
  2. Intensity – How hard or how easy
  3. Frequency – How often

In training the goal is to increase (overload) either volume, intensity and/or frequency in order to obtain “overreaching” (explained below) then allowing yourself to recover (adaptation). Repeat that process until you reach your desired goals.

The key to training is finding the correct combination of these three variables.

Great – What is the correct combination?

That really is the art and science behind a training plan. It really depends on the individual and their goals. For instance, someone trying to complete a century ride is likely going to focus on volume, where as, someone preparing for a criterium race is going to focus on intensity.

There are a lot of factors to consider when developing a training plan. Take something as simple as age, imagine a person at 20 and how quick recovery is. Now imagine that same person at 55. Generic training plans are much better than nothing and serve as great bases to work from, but you should take the time to educate yourself on what your body requires and when.

Overreaching

There are 4 classifications when talking about cycling training:

  1. Undertraining – When you spend too much time resting or recovering and not enough time on the bike, your performance does not improve.
  2. Acute overload – Positive physiological adaptations and minor improvements in performance, you are getting better albeit slowly.
  3. Overreaching – Optimal physiological adaptations and performance, your training plan should be designed to overreach.
  4. Overtraining – Physiological maladaptations and performance decrease, you feel very fatigued and have a lackluster attitude for training.

At the end of last season I spent a lot of my time in the overtrained classification, mostly because I solely focused on intensity and it drained my batteries at a very rapid rate. Again, overreaching is the goal, but it is difficult to know how little is too little and even more so how much is too much.

The essence of cycling training is very simple, but there are so many different ways to achieve the same goal. If you are new to training I suggest a cycling coach, even if it is just for a few months, they can save you a lot of wasted time and energy.

Information for this post gathered from: USA Cycling

Exercises to Strengthen Core

January 7, 2014 by Guest Post

Exercises to Strengthen Core

If you read the last post on core muscles and cycling, then you ought to know how important this group of muscles is and if that’s the case, then you’re probably wondering how best to improve them. Crunches only strengthen one small area of your core; you need exercises which work the whole system effectively.

These 5 core exercises can be done anywhere, without any equipment and are effective:

V twist exercises to strengthen core

V Twist: Start by lying on your back with your knees bent at a 90 degree angle and your feet off the floor (thigh should be perpendicular to the floor) and fold your hands over your chest. Then slowly straighten your legs away from you to the right until they are at a 45 degree angle to the floor. At the same time, contract your torso up and extend your arms forward. Then lower yourself (slowly!) back to your starting position. Feel free to contract your torso and reach out to the left or right as well. Repeat 10 to 20 times depending on ability.

side balance crunch exercises to strengthen core

Side Balance Crunch: Start with your left knee and your left hand on the floor and your right arm straight up. Extend your right leg so that your body forms a straight line. Pull the right knee to your torso and your right elbow towards your knee. Then straighten your arm and leg and repeat it ten times, then switch sides.

plank exercises to strengthen core

Plank: Start on your elbows and knees with your hands clasped. Then straighten your legs and raise your body so that your weight is being held up on your forearms and the balls of your feet (Feet should be hip width apart). Face the floor, don’t arch your back or stick your butt into the air and hold this position for at least 15 seconds. This move can be easily modified to the side plank and the circle plank.

oblique reach exercises to strengthen core

Oblique Reach: Sit with your knees bent and feet on the floor. Then straighten your right leg into the air and roll spine into a C-curve. Place your left hand behind your head and extend your right arm towards your right foot. Twist your body a bit to the left, roll back a bit more and hold for one count. Then come back up. Do five of these, then switch sides.

russian twist exercises to strengthen core

Russian Twist: Sit on the ground and hold your feet in the air. Then lean back until you are half way to a sit-up, then rotate from side to side, pausing slowly when you reach the end of a rotation. You can make this exercise harder by adding weights – hold a weight ball out and follow it with your head while rotating your torso. Either one, 2 sets of 10 to 20 reps will do.

Some information for this post was gathered at real simple.

How Long and How Often?

If you have a relatively weak core to powerful leg ratio then you may need to do some of these exercises. I generally do core exercises while watching TV, when I am bored or for a warm up right before my “real” workout. To maintain your core you probably only need to do core exercises once a week, but if you are looking to improve core strength then these exercises should be done two to three times a week.

You can do any and all combinations of the above exercises in less than 15 minutes. If you do them regularly and correctly, you’ll notice a real difference in your cycling performance. Keep that core strong and let us know which exercises you use to strengthen your core in the comment section below.

« Previous Page
Next Page »
  • Facebook
  • Tumblr
  • Twitter

Latest Articles

JOIN Cycling: A New Training Platform for Cyclists

May 27, 2024 By Eric Lister

cold exposure

The Benefits of Cold Exposure for Cycling & Life

June 13, 2023 By Eric Lister

hill climb

The Ultimate Hill Climb Training Guide

May 31, 2023 By Eric Lister

shoulder pain cycling

How to Treat & Avoid Shoulder Pain While Cycling

April 12, 2023 By Eric Lister

psoas stretch

The Importance of the Psoas Stretch for Cyclists

April 6, 2023 By Eric Lister

cycling neck pain

The Ultimate Guide to Cycling Neck Pain: Causes and Solutions

March 21, 2023 By Eric Lister

Useful Info

  • Contact
  • Finally, A Global Cycling Club That Is Focused On Community And Love Of Cycling!
  • Privacy Policy
  • Share Your Story!
  • Terms And Conditions Of Use
  • Welcome to I Love Bicycling
  • What Happened When I Stretched Every Day For a Month

Recent Posts

  • JOIN Cycling: A New Training Platform for Cyclists
  • How to Hang Bikes in Your Garage: 4 Inexpensive Options
  • Gravel Bike Vs. Road Bike: Which One Is Better For You?
  • The 6 Types of Mountain Bikes & How to Choose the Best One for You
  • What Is a Touring Bike Good For? 5 Benefits We Know You’ll Love

Search I Love Bicycling

Connect with Us

  • Facebook
  • RSS
  • Tumblr
  • Twitter

Copyright © 2025 · Magazine Pro Theme on Genesis Framework · WordPress · Log in