• Training
    • Injury Prevention
    • Training Tips
  • How To
    • Bike Fit
    • Gear
  • Nutrition
    • Nutrition Tips
    • Weight Loss
  • Repair
  • Reviews
  • Stories
    • Funny Stories
    • Jokes
    • Quotes
    • Videos
    • Funny Videos

I Love Bicycling

I Love Bicycling is a website that is geared towards cycling for beginners with road cycling tips, training articles, nutrition tips, weight loss, how to’s and bike repair articles.

How to Fix a Flat With No Tools

October 29, 2015 by Wade Shaddy

Flat tires are part of cycling, and most cyclists know how to deal with them. But there are options for changing tires without tools, and tricks that can help you get back on the road faster.

Pro cyclist get back on the road faster without using tools.
Experienced cyclist sometimes skip the tools when changing tires.

What if you’re caught in the middle of nowhere with a flat clincher? Or you might have already broken both your levers, without getting that damn tire off. Don’t lose hope, you can change that tire without any tools whatsoever if you go about it right.

Steps to fix a flat without tools

1. Remove the Tire

Focus on completely removing the tire from the wheel. Don’t attempt to pull it loose only on one side, you’ll need both hands pulling at the same time from one side, which results in the complete removal of the tire from the wheel.
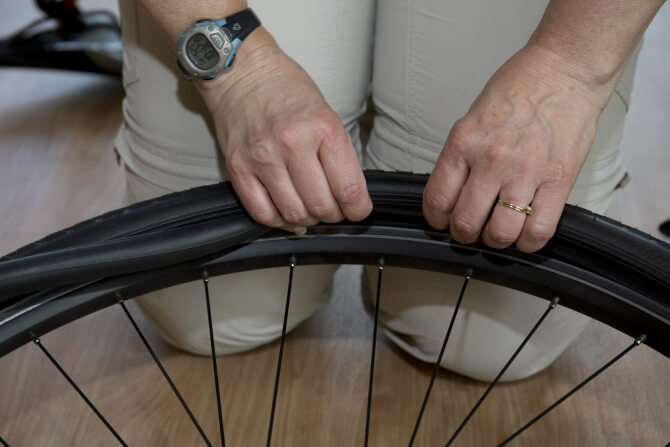
2. Break the Bead

Clinchers work when pressure from the inflated tube seats the bead of the tire inside the rim. It can be tricky to get loose initially, but once it starts it becomes easier. Crouch down and place the wheel in front of your knees. Grasp the tire and pinch it from both directions to break the bead on both sides, rolling it as you work around the circumference.
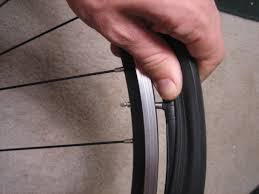
break bead two

3. Pull it Off

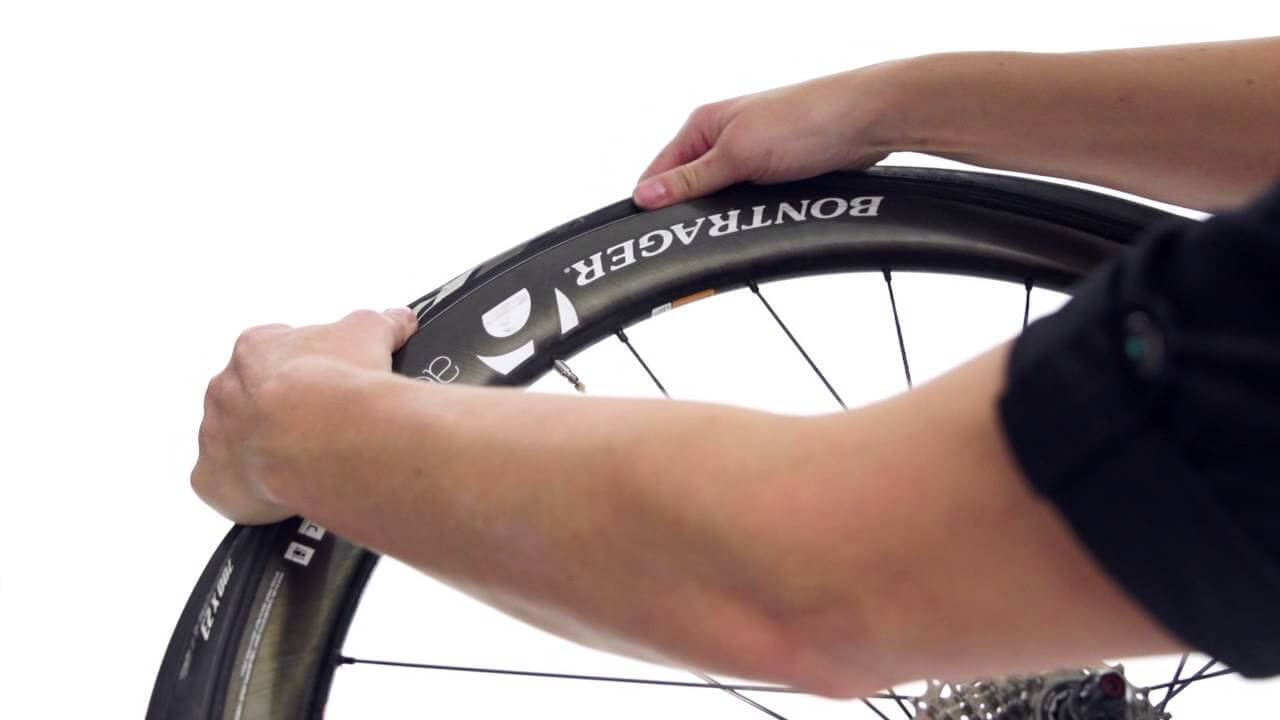
Place both hands at the top, with your thumbs on the rim. Pull the tire and tube together, toward your body, using your thumbs on the rim to add opposing pressure. Once it starts to come off, it gets easier. When it’s off, inspect it inside and out to find the source of the flat and remove it. Slip the tire back on the rim, seating the tire on the rim, only on one side.

together
Pull the tire and tube off together.

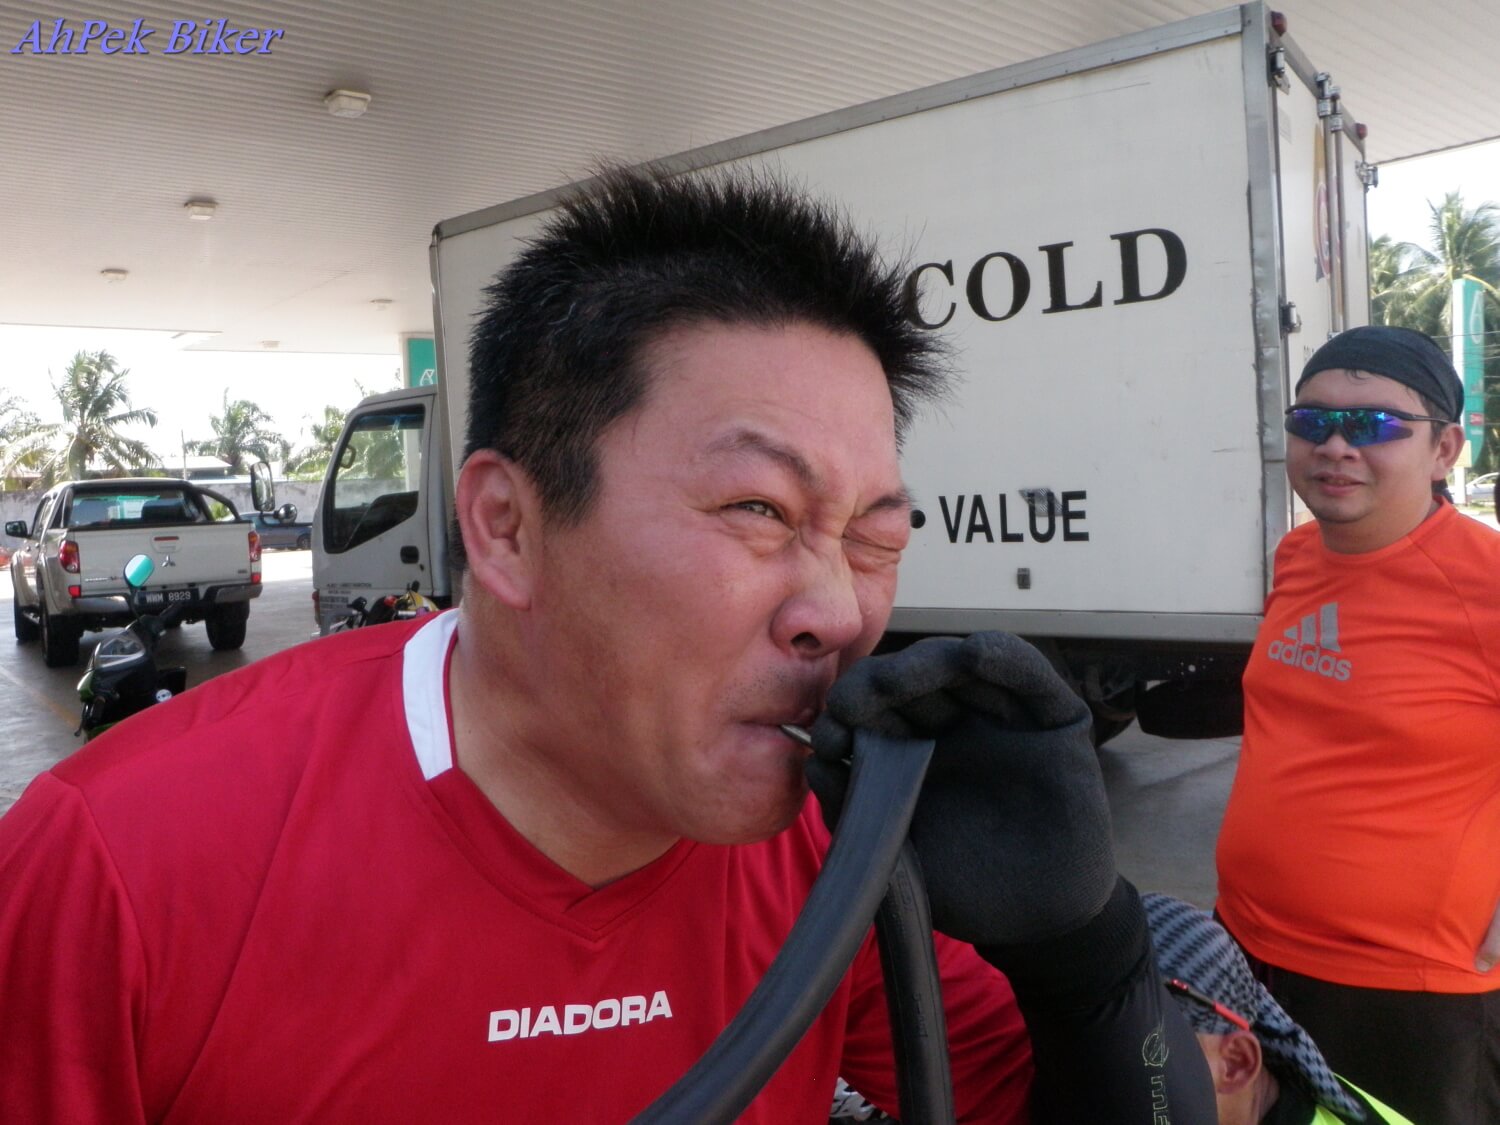
4. Impress Your Friends

If you’re on a group ride, nothing will impress your friends more than what you do next: Get out the new tube, open the Presta valve and use your cheeks to blow air into the tube. If there’s a Superman on this ride, it’s you. But seriously, it’s easier than it sounds, and only takes a bit of air to inflate the tube enough to stuff it back into the tire.

It's much easier than you think.
It’s much easier than you think.

5. Reverse the Procedure

Push the tire back over the rim using your thumbs. It’s easy enough until you get to the last few inches. If it gets too tough, its fine to roll the last few inches of tire over the rim, it will pop back into the bead as it when it passes over the tight edge. Use your frame pump to fill it the rest of the way, even Superman would have trouble filling it up to 100 lbs using only his cheeks.

stuff the tube

Old Versus New

Once you’ve accomplished the no-tools procedure, you might even find that it’s quicker and easier to fix a flat without tools. One thing comes into play though; if you’re working with brand-new tires, it is more difficult to accomplish. Tires with more than a few miles on them are easier, and some brands are just easier than others.

How To Properly Maintain Your Bike Chain

September 21, 2015 by U.M.

How To Properly Maintain Your Bike ChainYour bike chain is one of the most important parts of your bike. After all, without it you simply won’t be able to ride. Unfortunately, it is also one of the parts of your bike that is going to be subject to the most wear and tear, as it is constantly exposed and will likely get dirty and less efficient over time.

As such, properly maintaining your bike chain is crucial if you want to ensure that your bike performs to the best of its abilities. If you are interested in competitive cycling, you will need to know what should be done to keep it in good condition at all times, so that you have an edge over the competition.

How Does Riding Affect Bike Chain Performance?

Your bike chain is going to decrease in effectiveness every time you head out for a ride, assuming you don’t maintain it properly. Chain wear and reduced flexibility in the chain links themselves result from dirt clogging up the system, and all of this can combine to create added wear on drivetrain cogs and other aspects of the bike, affecting overall performance and occasionally causing you to have to spend more money on repairs.

Furthermore, when it comes to competitive cycling you will find that a poorly maintained bike chain will affect your ability to shift between gears, which is vital when you need everything to be at the optimum level to place well in the race.

How To Maintain Your Bike Chain

You should aim to check your bike chain on a regular basis by standing to the side of the bike and lifting the rear wheel off the ground. Rotate the pedals slowly and inspect each link in the chain to check for signs of dirt or debris that could affect performance. You also need to check for links that don’t bend particularly well and listen out for squeaks as the chain rotates.

If you spot any of these issues, you should carry out a spot clean by brushing the links with a form brush and lubricating the chain with a good bike lubricant. Wipe off any excess with a clean rag, as too much lubricant can actually cause more issues.

You will also need to periodically remove the chain from the bike to give it a full clean. Usually you can do this every month, though you might want to increase the frequency if you have a mountain bike. Use a chain-removal tool to safely get the chain off the bike and immerse it in a chain solvent so that you can rid the chain of the dirt that you are unable to get to with brushing alone. Clean it with a dry rag and relubricate before placing the chain back on the bike.

Things To Look Out For

Tight Links – These can be spotted by looking out for links in the bike chain that don’t bend easily. Usually this is because there has been some corrosion between links, or there is a particularly difficult chunk of dirt clogging up the system. Clean lubricate and flex the link lightly back and forth to gain back the flexibility that the link needs to allow for proper performance.

Chain Stretch – No matter how regularly you clean your chain, all of them are subject to what is known as chain stretch. This is caused by wear between the rollers and link pins and leads to the chain becoming less effective. If you have noticed that your bike is slipping gears, the likelihood is that your chain has stretched. Unfortunately, this is not something that can be cleaned or remedied, so use a wear-indicator to find out if the chain is usable. If the prong doesn’t fit in the chain gap, you should replace the chain rather than run the risk of it causing further damage to the bike.

Also Read: 20 Essential Bike Repair Tools

Pinch Flats

September 2, 2015 by U.M.

A detailed look at pinch flats, including: what is a pinch flat, what causes pinch flats, how to prevent pinch flats and what to do when you get a pinch flat.A flat tire is something that practically every cyclist has to deal with at some point or another, but many novices may be unaware that there are actually a number of different ways that you can get a puncture, each of which requires a slightly different method to deal with or prevent.

Pinch flats, which are known as Snakebites in some corners of the cycling world, are perhaps the most irritating of all flat tires because they can cause damage that a puncture repair kit will struggle to fix and often result from fairly innocuous riding. As such, it is possible to get a pinch flat if you are a road cyclist, meaning that even ensuring your route is as flat as possible isn’t always going to help you. As such, you need to take the proper precautions with your route before you ride.

What Is A Pinch Flat?

A detailed look at pinch flats, including: what is a pinch flat, what causes pinch flats, how to prevent pinch flats and what to do when you get a pinch flat.
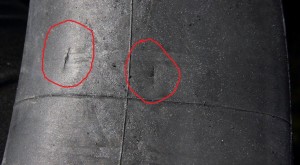
A pinch flat most commonly occurs when you run over something with your bike that causes the inner tube to punch against the wheel rim, resulting in a flat tire. In the worst case scenarios they will require you to replace the inner tube and, in some cases, may even lead to dents forming in the rim itself. However, in many cases, you should find that the tire itself is unaffected.

This type of flat is distinguishable because of the unique pattern that develops on your inner tube. You will notice two small holes that are side by side when you check the tube, creating a snakebite pattern that gives this type of flat its alternative name.

How Are Pinch Flats Caused

Pinch flats are caused by riding over something with your bike that is big enough to give your wheel a bit of a jolt. For example, stones and manhole covers are both capable of causing a pinch flat.

This is because what you hit isn’t what punctures the inner tube. Instead, it is the pinch between the tube and the rim that causes the damage. That means that any object, whether sharp or blunt, is capable of causing a pinch flat if the jolt to your wheel is big enough.

What To Do When You Get a Pinch Flat

In some cases you will be able to repair a pinch flat using a puncture repair kit, however this can only be done if the kit contains a patch that is big enough to cover both holes. It also doesn’t remedy the issue entirely, so you will probably have to do a little extra work on your bike when you get back.

Even if you have managed to patch the inner tube up, it is still advisable to replace the tube as soon as possible so that you can ensure that the bike continues to ride well and you don’t have to keep bringing puncture repair kits along with you.

How To Prevent Pinch Flats

One way to avoid a pinch flat is to be really careful with your riding so as to ensure you don’t ride over anything that could jolt the wheel. However, this is not always possible, especially if you are pushing yourself to your limits and need to focus on that aspect of the ride.

It is important to note that pinch flats are more common in bikes where the tires have fairly low air pressure. This allows for more room for the inner tube to slip and get caught against the rim, so if you want to give yourself the highest chance of avoiding the issue then it is a good idea to pump up your tires regularly and ensure that they have the proper air pressure. For mountain biking you want to ensure that you have a minimum of 25psi and road biking a minimum of 85psi.

If you continually find you are getting pinch flats, make sure to increase the air pressure in your tires.

Must Know Simple Fixes on your Bike

August 27, 2015 by Adam Farabaugh

Your bike is a finely tuned piece of machinery that allows you to travel at great speed and distances all under your own power.  Compared to a motor vehicle there are not very many parts and each one has a specific job.  Without almost any one of them, your bike will not work.  The good thing with a bike is that they are relatively easy to work on and fix, provided you have a few tools and a little know how.

Knowing these few simple fixes and how-to’s will get you out of the majority of breakdowns.  Practice them before you need to perform them on the side of the road in a cold, wet rainstorm.

Must know simple fixes on your bike

Taking the Wheels On and Off

You may never have had to before, but knowing how to take your wheels on and off will not only allow you to change a flat tire if the need arises, but also if you need to take them off to place them in your vehicle.  Most bikes have a “quick-release” skewer that holds the wheel in place through the axel.  If your bike has “nuts” on the end of the axel you will need two Metric wrenches of the same size.  Typically 15mm. Otherwise you need to open the lever on the quick release to loosen its grip on the frame.  Sometimes this will open the skewer enough and you can slide the wheel out.  If it is still too tight, the opposing side of the skewer is just a threaded nut.  Turn it counter-clockwise to loosen it.

On most bikes you are going to have to open up the brake in order for the tire to fit through the brake.  On road bikes, this is done by flipping the little lever up which will loosen the cable tension.  On other, more 
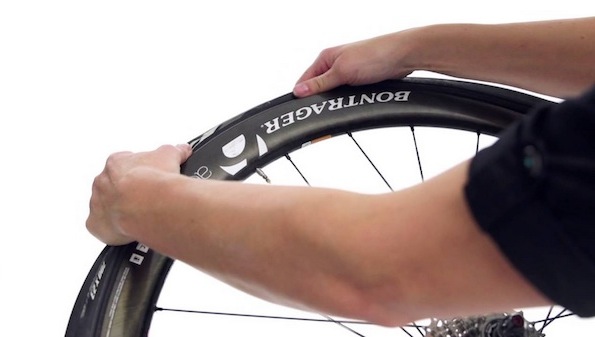
recreational, rimmed braked mountain or cyclocross bikes, you will have to disengage the “L” shaped noodle that holds the brake cable to the brake.  You do not need any tools to do this so don’t loosen any bolts.  Your brake may still be a bit different so learn and understand how your brake works to open and close it safely.

Once this is done you can easily pull the front or rear wheel down and out of the frame.  For the back wheel you are going to have to move the derailleur (device that changes the gears) down and out of the way to give enough space for the wheel to exit the frame.  Putting the bike in its hardest gear (gear you would go downhill on) will make this easier.

Now that the wheel is off, you need to put it back on.  Make sure both sides of the axel are in the hooks on the frame for the axel.  The best way to do this is to have the wheel sitting on the ground, vertical, and set the bike over top of the wheel onto the axel.  Once in place you can then push the quick-release lever into its closed position.  It should become firm half-way and then snug when it is pressed down all the way.  If it is too tight or lose you need to tighten or loosen the nut on the opposing side.  (counter-clockwise if it’s too tight, clock-wise if it’s too loose)

Once the wheel is tight in the frame reattach the brakes as they were prior.  Lift the bike and spin the wheel and test the brakes to make sure they are working properly as well as to ensure that the wheel is installed properly and will not fall out.

Fixing a Flat

Another important fix that will be hugely beneficial when it’s raining and cold on the side of the road is knowing how to fix a flat tire.  You first need to remove the wheel (that is flat) by following the instructions above.  Once you have the wheel off you need to take your tire levers (item number one that is needed) and hook one underneath the side of the tire to pull it back over the rim.  You only need to do this on one side.  Expose the inner tube all the way around and then pull out the inner tube with your hands.  You will need to push the valve through the hole in the rim to take the tube completely out.

Now take your hand pump (item number two that is needed) and pump up the tire to determine where the hole is.  Once you have found it, find that same place on the inside of the tire and make sure there is no glass or any other debris in there that can cause the new tube to go flat again.  If the tube has “snake-eyes” or a pinch flat, there’s no need to do this as the flat was caused by too low of air pressure and the tube was pinched causing it to flat.

Once you are sure that there is no glass or anything still in the tire, place the new tube in the tire.  First though, put a little bit of air in the tire to make it easier to work with.  Then place the valve through the hole in the rim and then work the rest of the tube into the tire all the way around.  Once the tube is completely inside the tire, start at the valve stem and press the tire back inside the rim.  This works best with your thumbs.  Now work your way all the way around until you get to the last few inches.  Now make sure the tube is still pressed all the way up into the tire.

This last part is the most difficult.  You need to push the remaining bit of tire onto the rim except it is going to be tight.  You may be able to do it with your thumbs but you may need a tire lever again.  If you can’t get it on with your thumbs, or by grabbing the other side of the wheel and rolling it over with your palms, then place the tire lever on the inside of the rim, making sure the tube is not pinched between the lever and the rim.  Then “lever” the tire up and over the rim into place.  This will take some trial and error and some time so practicing ahead of time will be beneficial.  Once the tire is on, and before inflating, work your way around the tire on both sides of the rim and make sure that you can’t see the tube anywhere.  It should be pushed up inside the tire out of site.  Once you are sure of this you can then inflate the tire with your hand pump.  Try and get it to your original pressure but this may be difficult with a hand pump.  Get as much in as you can as this will help prevent any additional flats.  Put your wheel back on, make sure your brakes are working properly, test them both, and off you go.

Making Sure the Bolts are Tight

Safety is priority number one when riding.  Checking to make sure everything is tight and ready to ride should be done frequently, especially if it’s been a while since the bike was ridden.  Take a Metric allen key (pretty much all bikes use Metric bolts so you must use Metric wrenches otherwise you risk stripping the bolts) and check and make sure the bolts holding the handle bar on are tight.  Then make sure the bolts holding the stem (the part that connects the handle bars to the bike) are also tight.  They should be hand tight.  Don’t over tighten them as that can be just as bad as under tightening them.

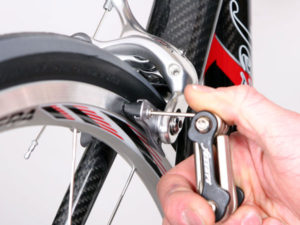
The next bolts to check are the bolts holding the brakes to the frame.  There are many different styles of brakes but you can look and figure out how it connects to the frame.  Most have an allen bolt on the backside of the frame from the brake.  Then make sure the bolt holding the brake cable is tight.  If this bolt is loose, when you engage the brakes the cable will slip and you won’t have any brakes.  Make sure this is properly tightened.

The last important bolt, or sometimes quick-release, to make sure is tight is the seat post clamp.  This is the bolt that tightens down on your seat post ensuring that it doesn’t slide down when you sit on it.  If it is a quick release, refer to the above piece about removing a wheel as it’s the same style quick-release as your wheel axel.

Knowing how to do these few simple things on your bike will help you in a lot of ways as well as save you money at the bike shop.  If you don’t know or are not completely sure if you did something right, take the bike to your local bike shop and they will make sure that it is done properly and that the bike is safe.  Riding a bike can be extremely dangerous and having a malfunctioning bike can be catastrophic so take the necessary steps to ensure that it is a safe machine to ride.  Once you get good at these simple fixes on your bike you’ll be able to get out of most situations thrown at you while out on the road.

All You Need To Know About Your Bike Chain

February 24, 2014 by U.M.

all you need to know about your bike chain
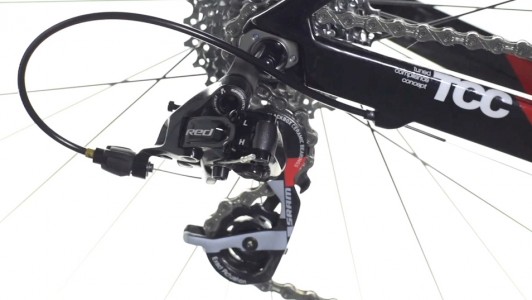
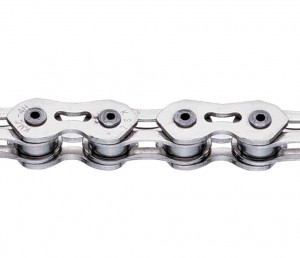
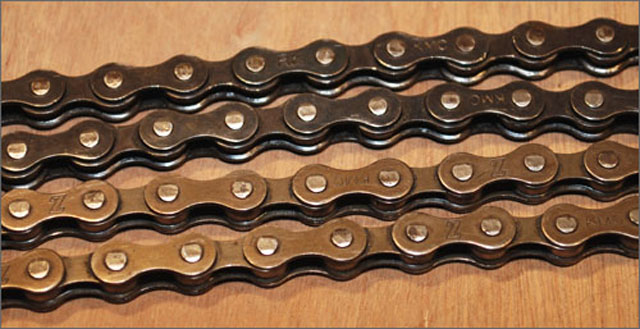
A bicycle chain is simply a roller chain that transfers the power you put into your pedals to the wheel of your bike. The harder you pedal, the faster your bike goes. Of course, that’s an oversimplification but that is essentially the role your bike chain plays in how the bike functions. [Read more…]

5 minute DIY Bike Maintenance

February 24, 2014 by U.M.

bike knowledge to beard ratio - DIY bike repairNo matter what kind of bike you ride you will eventually have to give that bike some sort of maintenance. This keeps the bike in good working condition for longer no matter how often you use it. This maintenance is just small upkeep and repairs that you can do at home in minutes. Here are a couple of quick DIY bike maintenance tips: [Read more…]

How To Adjust Rear Derailleur

December 29, 2013 by Lee Agur

How To Adjust Rear Derailleur

Having problems with your rear derailleur? Watch this short video to learn how to keep it shifting smoothly.

how to adjust rear derailleur

How To Adjust Front Derailleur

December 29, 2013 by Lee Agur

How To Adjust Front Derailleur

Having problems with your front derailleur? Watch this short video to learn how to keep it shifting smoothly.

how to adjust front derailleur

  • Facebook
  • Tumblr
  • Twitter

Latest Articles

JOIN Cycling: A New Training Platform for Cyclists

May 27, 2024 By Eric Lister

cold exposure

The Benefits of Cold Exposure for Cycling & Life

June 13, 2023 By Eric Lister

hill climb

The Ultimate Hill Climb Training Guide

May 31, 2023 By Eric Lister

shoulder pain cycling

How to Treat & Avoid Shoulder Pain While Cycling

April 12, 2023 By Eric Lister

psoas stretch

The Importance of the Psoas Stretch for Cyclists

April 6, 2023 By Eric Lister

cycling neck pain

The Ultimate Guide to Cycling Neck Pain: Causes and Solutions

March 21, 2023 By Eric Lister

Useful Info

  • Contact
  • Finally, A Global Cycling Club That Is Focused On Community And Love Of Cycling!
  • Privacy Policy
  • Share Your Story!
  • Terms And Conditions Of Use
  • Welcome to I Love Bicycling
  • What Happened When I Stretched Every Day For a Month

Recent Posts

  • JOIN Cycling: A New Training Platform for Cyclists
  • How to Hang Bikes in Your Garage: 4 Inexpensive Options
  • Gravel Bike Vs. Road Bike: Which One Is Better For You?
  • The 6 Types of Mountain Bikes & How to Choose the Best One for You
  • What Is a Touring Bike Good For? 5 Benefits We Know You’ll Love

Search I Love Bicycling

Connect with Us

  • Facebook
  • RSS
  • Tumblr
  • Twitter

Copyright © 2025 · Magazine Pro Theme on Genesis Framework · WordPress · Log in