• Training
    • Injury Prevention
    • Training Tips
  • How To
    • Bike Fit
    • Gear
  • Nutrition
    • Nutrition Tips
    • Weight Loss
  • Repair
  • Reviews
  • Stories
    • Funny Stories
    • Jokes
    • Quotes
    • Videos
    • Funny Videos

I Love Bicycling

I Love Bicycling is a website that is geared towards cycling for beginners with road cycling tips, training articles, nutrition tips, weight loss, how to’s and bike repair articles.

How To Lubricate Your Mountain Bike (A Step By Step Guide)

February 16, 2023 by Eric Lister

Mountain biking is an exciting and challenging outdoor activity that combines fitness, adventure, and nature in one. It’s a sport that requires a high level of skill, endurance, and physical strength, and is enjoyed by millions of people around the world. Whether you’re riding through challenging terrain, crossing streams, or soaring down steep descents, mountain biking is a sport that offers a unique and exciting experience.

However, with all the demands of the sport, it’s essential to maintain your mountain bike properly to ensure it lasts a long time and performs at its best. One of the most critical aspects of mountain bike maintenance is lubrication. By keeping your bike well-lubricated, you can reduce friction, prevent wear and tear, and ensure that all the components work properly.

Today we’re going to guide you through the steps on how to lubricate your mountain bike, including the benefits of lubrication and the difference between grease and lube. Whether you’re a seasoned mountain biker or just starting out, this article will help you keep your bike in top condition.
how to lubricate your mountain bike

Esther Pueyo/Adobe Stock

Lube Vs. Grease: Which is Better?

When it comes to lubricating your mountain bike, there are two main options: lube and grease. Both have their own benefits and disadvantages, and choosing the right one can be confusing.

Lube is a thin liquid that is applied to the bike’s components to reduce friction and prevent wear. It is specifically designed for bikes and is formulated to withstand the demands of cycling. Lube is easy to apply and spreads evenly over the surface, making it ideal for lubricating chains and other moving parts.

Grease, on the other hand, is a thicker substance that is designed to provide a long-lasting barrier between metal surfaces. It can be used for lubricating pivot points and other high-stress areas where erosion between heavy parts is likely to occur. Grease is also resistant to water, making it a good option for lubricating in wet conditions.

Both lube and grease have their own unique benefits, and are useful in different situations. By understanding the differences between the two, you can choose the best option for your mountain bike to help create an effortless and hassle-free riding experience.
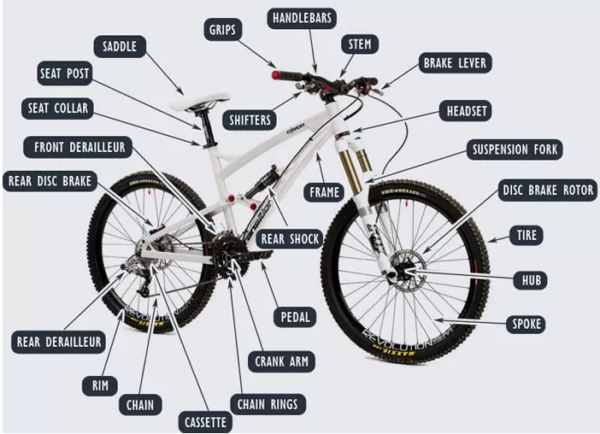
Parts of a mountain bike (how to lubricate your mountain bike)

Parts of a mountain bike. Credit: www.schoolworkerhelper.net

Reference the above diagram as we now delve into the steps required to make sure your mountain bike stays lubricated, increasing the chances that it will perform at a high level for years to come!

1. Preparing the Bike for Lubrication: Cleaning

Before lubricating, it’s essential to clean the bike to remove any dirt, grime, or debris that may have accumulated on its parts. Use a degreaser to clean the chain, derailleurs, and cassette. A simple mixture of warm water and dish soap will do the trick for the rest of the bike. Make sure to dry the components thoroughly before moving on to the next step (water and lubricant don’t mix!).

2. Lubricating the Critical Component: The Chain

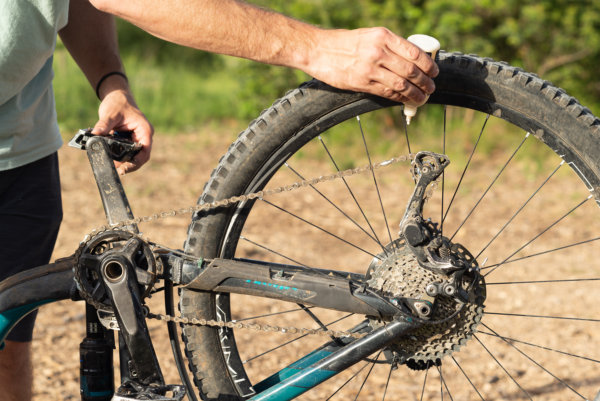
The chain is the most integral component to lubricate on your mountain bike. Apply a few drops of bike-specific lubricant to each link and work the chain back and forth to spread it evenly. Wipe off any excess lubricant to prevent attracting dirt and grime.

3. Smooth Shifting and Pedaling: Derailleurs and Cassette

The derailleurs and cassette can also benefit from a drop or two of lubricant. Apply the lubricant to the moving parts and pivot points, being careful not to get any lubricant on the brake rotors or rubber components where traction is necessary.

4. Reducing Friction at Pivot Points

Pivot points, such as the suspension pivots, can benefit from lubricant as well. These points see a lot of movement, so it’s essential to keep them transitioning smoothly to reduce friction and prolong the life of your bike.

5. Ensuring Optimal Operation: Lubricating Dry Spots

Check the rest of your bike for any dry spots that may need lubrication, such as the brake and shifter cables. Adding lubricant to these areas can contribute to the efficient and long-lasting use of your bicycle. 


Tim Foster/Unsplash

It’s recommended to lubricate your mountain bike every few rides, or at least once every three months, depending on the frequency and intensity of your use. In wet and muddy conditions, it’s a good idea to lubricate after each ride to prevent corrosion.

Lubricating your mountain bike is a simple and effective way to prolong its lifespan and get the most out of its performance capabilities. As part of a regular maintenance schedule, you can mitigate costly part repairs and service fees, and focus more on the sport you’ve invested in and grown to love.
Easy Tricks for Tubeless Mountain Bike Tires

February 20, 2018 by Ryan Taylor

There is no doubt that the emergence of tubeless mountain bike tires and rims have changed the industry for the better. Riding tubeless enables the rider to run less pressure, giving the rider more grip, better ride feel and also less weight. Adding a sealant to the system adds an extra measure of security as many small holes or cuts in the tire can be patched internally by the sealant. Should a cut happen that is too large for the sealant to do its magic, then the rider can install a tube as normal to get home!

Tubeless Mountain Bike Tires

Tubeless has come a long way since the emergence of UST (universal system tubeless) over 10 years ago by Mavic and Hutchinson (two french companies, hence the french abbreviation). Now most rims and tires on the market can be made tubeless very easily, BUT there are few hidden tricks that both shop and home mechanics can use to make the system easier and more affordable.

Editors note: Most Bontrager rims do not apply to these tricks!

Gorilla Tape:

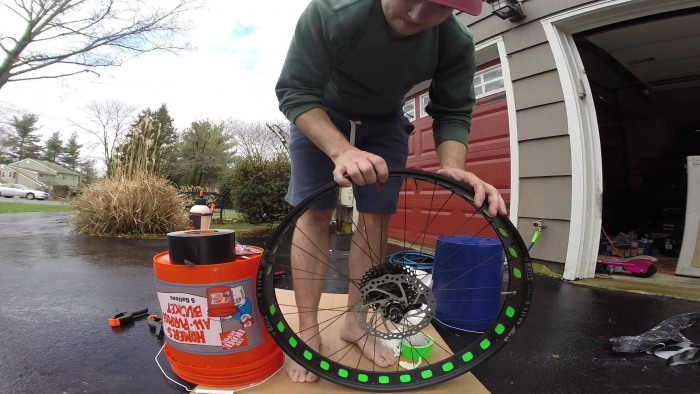
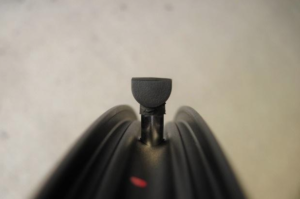
Tubeless rim companies have developed their own tape to ‘tape’ over the spoke holes on the inside of the rim causing it to be sealed. The valve is then poked through the tape. When sealant is added, the combination of these things is what makes the system air tight.

This tape is on the expensive side as it is designed to work with the specific rims. Many professional  mechanics, from local shops to World Cup DH, tend to use ‘Gorilla Tape‘. This tape is basically duct tape on steroids and can be bought on the cheap at any local hardware store. Not only that, it comes in many widths to accommodate different rim widths and tends to be thicker than the proper tape. In some opinions, it can lead to a more solid tire seal.

One of the main benefits to Gorilla Tape is how easy it can be found. Being able to buy it at Wal-mart at 10:30pm the night before a race is handy when you break a spoke on the course pre-ride! The key to it working well is to make sure the rim surface is clean for proper adhesion.

Tubeless Valves:

Like tubeless tape, specific valves are recommended to go tubeless. The main benefit of the specific valves is that the rubber base (what hugs the rim) is built up. This works to prevent sealant from going into the valve, clogging it, and also preventing it from pulling through. If you are on a very tight budget or in a pinch, you can cut up an old presta tube. This valve is very similar and can work. If you have a couple of extra bucks you can buy the proper tubeless valve.

Patching Tires:

We have all been there. Installing a new tire and cutting it on the first ride. Tubeless tires don’t come cheap these days and it is very frustrating to cut one before you get your moneys worth! It is possible to patch tubeless tires, but it is very tricky. It’s recommended to buy patches in the automotive isle of the hardware store as they tend to be thicker, more stiff, and generally cheaper. Your DON’T want a flexible, thin, patch with some stretch to it.

Be sure to clean the inner part of the tire thoroughly with alcohol and scuff it up with sandpaper. Once clean, buy the best crazy glue you can find. A favorite is ‘KLEBFIX’ from Wurth brand. It is a fantastic glue and doesn’t corrode rubber. Be careful as it will bond ANYTHING in a matter of seconds. Traditional patch glue doesn’t work well. Keep in mind, this is to get the remaining life from your tires. If you are concerned about it holding up before the biggest race of the year, you should error on the side of caution and buy a new tire.

The Rim-Pop technique:

Lets face it: Tubeless is annoying to set up without a compressor. Thankfully Bontrager has come out with a pump that stores air inside of it causing a burst of quick air popping the tire into place. This is the definition of “Why didn’t someone think of this sooner?” type products.
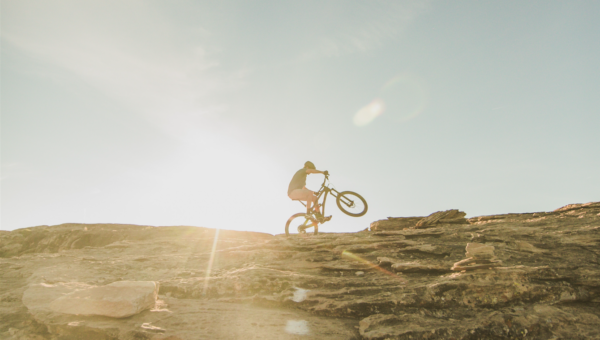
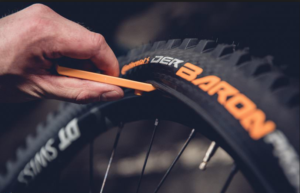
However, there is another way! Once the tire, valve, tape, sealant are all installed, run your tire lever just under the bead of the tire, gently pulling it up onto the high spot of the rim (where it should sit when inflated). Run the lever all the way around the tire. You will feel it getting tighter and tighter as the lever approaches your starting point. From here, gently pull the lever out and do the same to the other side.

The goal here is to pre-set the tire on the high point of the rim so when you start pumping there are fewer places for the air to escape which aids in the force of the air ‘popping’ the tire into place so the sealant can do its magic.

You will almost always make a mess with this system, but it works. Once you get good at it, it usually works the first attempt. Again this is handy for those without a compressor or who happen to be at a race or on the road. Another good method is before you put the sealant in, install the tire with a tube and inflate it to seat the bead. Then carefully remove one side of of the tire to remove the tube, install the tubeless valve, and add sealant. Then do the above trick on the one side. Also wiping the bead of the tire with a warm, wet, soapy sponge will help the tire to seal.

The bicycle industry has come a long way from UST over the past 10 years. Tubeless tires are more accessible, more affordable, and much lighter compared to then. Is the ‘Stans’ system easier to use than UST? Depends who you ask, but these tips will help you out if you’re in a pinch.

What tire pressure should I run on my mountain bike?

October 28, 2017 by Sarah Lauzé

It can be tough to find that perfect tire pressure for both mountain biking and road biking, because there is no easy answer. The perfect tire pressure can vary from day to day depending on the conditions, the type of trail, or the weight of the rider.

If you’re used to riding on smooth, paved roads, it can be difficult to switch your thinking around. The goal of tire pressure for road biking is to minimize the surface area of the part of the tire that makes contact with the road. With mountain biking, however, in many cases you actually want to increase the surface area to create better grip on the terrain.

mountain bike tire pressure

What is PSI?

Psi stands for ‘pounds per square inch’ and is measured by a gauge that is included with most bike pumps. Check out “How to use a bike pump” for a step by step guide.

What is the right tire pressure?

mountain bike tire pressure

As mentioned above, there really is no “right” pressure, just the right pressure for you. However, the best starting point is around 25 Psi for tubeless tires and 28 for tubed tires. Invest in a quality tire pressure gauge and use it consistently, as readings can vary depending on the gauge.

Your tires will most likely have manufacturer’s minimum and maximum pressure printed on the side. The max pressure will not be an issue for most mountain bikers (you will run below this number), but take note of the minimum pressure. If you go below this number, you are more likely to risk sidewall damage or pinch flats. Likely your perfect Psi will be somewhere between these two numbers.

Generally speaking lower psi will allow for a smoother ride, as your tires will absorb more of the trail, roll faster, and increase traction (surface area) on the trail. If your Psi is too high, you will find your tire bounces off every little rock or root, making for an uncomfortable ride.

Things to consider:

The Ridermountain bike tire pressure

  • Weight – The heavier you are, the higher your tire pressure will need to be to counteract the pressure you are putting down on the tires. 30 Psi may feel too hard for a 130lbs rider, but will be too soft for a 250lbs rider.
  • Style – Do you huck yourself off drops and ride down rocky hillsides with aggressive abandon? If so, then you will need to run a slightly higher tire pressure. Contrarily, if you are a bit more reserved, always light on your bike and finding the smoothest lines, then you can run a lower pressure without risking a pinch flat.

The Tire

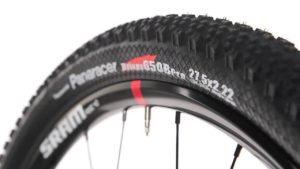
  • Volume – Gone are the days of the uniform 26in tires, with plus size 27.5 and 29ers becoming increasingly popular. When switching up to a larger size, you are also increasing volume, which means you will need to find a new magic number that works for you.
  • Rim width – The rim width determines just how low you can go without compromising performance. The wider rim, the lower pressure you can run, as it will support the tire better than a narrow rim.
  • Construction – The outer casing of your tire and the TPI (threads per inch) will determine how the tire feels with more or less pressure.

The Environment

  • Conditions – If it has been raining for weeks on end and you’re mountain bike tire pressureheading out onto to slick, muddy trails, lower tire pressure will give you more grip and stability.
  • Terrain – Perhaps one of the more important elements to think about before heading out, your tire pressure can vary from trail to trail. Fast and flowy trails can handle a lower tire pressure to absorb those small bumps and have you feel like you’re flying. However, if the terrain is full of jagged rocks and drops, the same tire pressure will have you on the side of the trail with a flat in no time, so you’d want to bump that tire pressure up before heading out.

Finding the Magic Number

Finding your magic Psi is more of a trial by error than a science. A great place to start would be to choose a short section of trail (the type of trail you usually ride) and start at 27 Psi. Ride the section, taking note of whether the tire is compressing to the rim often or is glancing off small obstacles. Increase or decrease the pressure little by little, riding the same section and noticing the difference in grip and speed.

You will be able to run a lower pressure with tubeless or tubeless-ready tires than with a tube-and-tire setup.

The Number 1 Mistake Beginner Mountain Bikers Make

Everyone believes that more pressure = faster, but in mountain biking that is rarely the case. High tire pressure reduces traction and slows forward momentum when hitting a bump.

Professional cross country mountain bikers will run as low as 18 psi in a tubeless tire. Although you may not be a professional, your goal may still be the same, to have the smoothest and fastest ride possible. So change your thinking, less is more.

Vittoria Mezcal Graphene Mountain Bike Tire Review

May 19, 2016 by Ryan Taylor

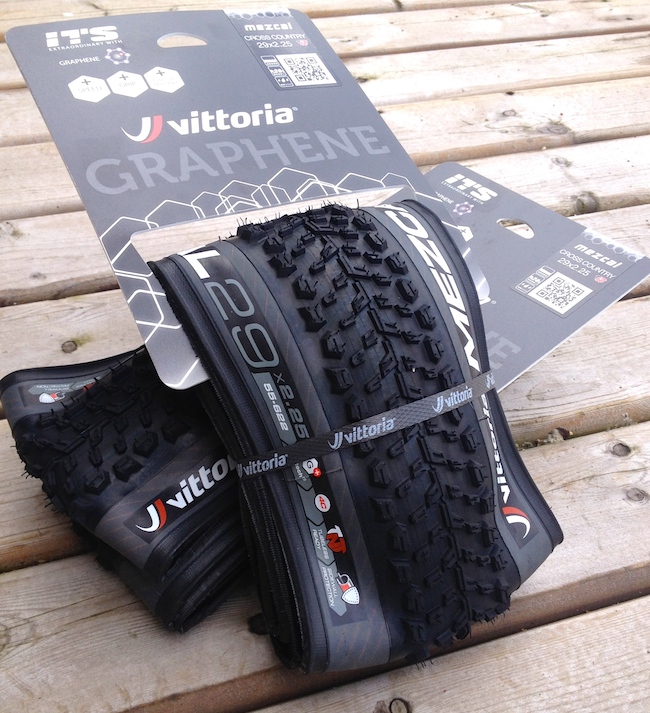
Vittoria has been updating its mountain bike line with a number of new treads, sizes, and has started using rubber compounds with Graphine, which we have recently written about here. The previous brand name of Geax is gone and the mountain bike line overall looks very impressive with a lot of depth for a less known Italian/North American brand. We put the Vittoria Mezcal with Graphene through its paces and this is what we think.

Vittoria makes no secret of their use of Graphene. Currently they are the only tire brand using it in the bike industry.

Setup and initial Impressions of the Vittoria Mezcal

The Sidewalls on the Vittoria Mezcal were durable, and we didnt have any issue with cuts in these throughout the test.
The Sidewalls on the Vittoria Mezcal were durable, and we didnt have any issue with cuts throughout testing.

The Mezcals we received were the 29 x 2.2 TNT model or ‘Tubes no Tubes’ casing. It is basically a half-way between a true UST (Universal Standard Tubeless) tire and a normal tubed tire. I set these up as normal with a mix of Stans sealant and slime with no issue. They pump up easily and pop into place without hassle and the tire ran very straight, which is not common.

I ran the Vittoria Mezcal on Easton’s 27mm and 24mm inner wide rims which allowed me to lower the pressure compared to most XC rim combinations. Throughout the test, the weather was remarkable consistent, resulting in slightly moist, to powdery soil as the summer approaches British Columbia. This is the terrain the Mezcal was designed for but unfortunately we didn’t get any wet weather during testing.

Performance of the Vittoria Mezcal

There is no denying the grip of the new Graphene rubber Vittoria is now using. For a dedicated XC tire and tread, it has plenty of bite. I would say the Mezcal has noticeably more bite than a traditional XC tire. Would I say its a game changer? Not really. That being said, as previously mentioned we didn’t get a chance to ride it in wet conditions where I suspect the Graphine rubber shines. Also, I think this tire would be well suited as a 2.35.

The Vittoria Mezcal offers a great tread pattern for fast, dry terrain.

Durability?

Over the course of one month of solid riding, I found the durability of the tire to be far from ideal. Toward the end of the test I found the sidewalls starting to become thread bare and the rear tire to wear faster than expected. Maybe this is the price you pay for that extra bite mentioned earlier, but it confused me as one of the claims of Graphene is that it extends tire life.

The achilles heal of the Mezcal is its puncture protection. While riding this tire in a variety of terrain(rocky, smooth, XC race course, wilder enduro tracks on a variety of bikes) I found I punctured a lot more than with normal tires. Oddly enough I never cut a sidewall(which I find normally happens in these areas) but always on the top between the tread. I punctured so often I had to patch the tires simply to feel I got a legitimate test out of them. For this tire to shine, improvements need to be made here.

Final Thoughts

The Vittoria Mezcal shows a lot of promise. Graphine rubber is definitely an upgrade in grip and the tread pattern offered is fantastic for fast, fun, riding ideally on XC or marathon type courses. The Vittoria Mezcal sets up remarkable easy, and has a great feel to it on the bike.

Unfortunately I found the tire simply doesn’t have enough puncture protection. Toward the end of the test I simply didn’t trust it come race day. If these issues were resolved and the tire was offered in a 2.35 as well, then it would be a major competitor in the XC category

2/5 stars.

Pros:

  • Great tread
  • Sets up easily
  • Light
  • Graphine works!

Cons:

  • Punctures way too easily
  • Not offered in a 2.35(ish)

Ideal Rider:

  • Someone who rides light XC in a dry-moderate climate.

Best Mountain Bike Tricks

September 21, 2015 by Lee Agur

Best Mountain Bike Tricks

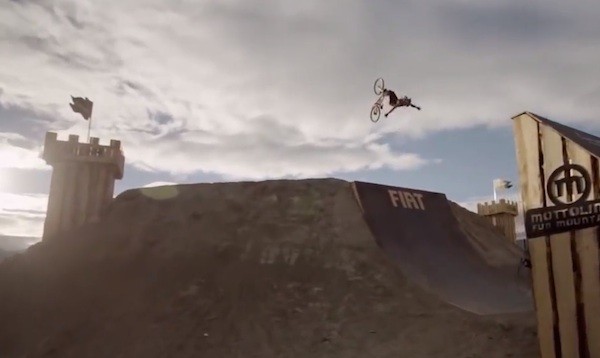
Just running through some of the best mountain bike tricks over the years and came upon this. My favourite is at 1:56.

Best Mountain Bike Tricks


Electric Mountain Bike

January 6, 2014 by Lee Agur

Electric Mountain Bike

Motorized Mountain Bike

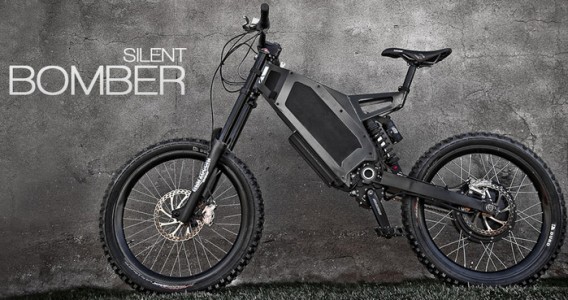
All I can envision is hammering up a climb sucking wind thinking how I am about to slay this Strava segment when all of a sudden my little sister (who rarely touches a bike) silently sneaks up on me… blows my doors off and yells “eat my dust sucker!” Feels like a nightmare that may come true.

This 9 speed monster can go up to 50mph… and weighs a whopping 116 lbs! It is like a silent dirt bike humming along at 65 dB (as loud as a normal conversation).

This bike’s ideal for downhillers that usually shuttle, instead of driving to the top, they can rip up the hill with their 4500 Watts of power.

With a charge time of 2 hours and a cost of less than $0.01 per mile it is… no wait we didn’t factor in the $10,000 initial cost…

Interesting concept but I suspect it will have to come down in weight… and price to be more feasible. I think it looks sexy… but that is where my compliments stop.

What do you think of the bike?

  • Facebook
  • Tumblr
  • Twitter

Latest Articles

JOIN Cycling: A New Training Platform for Cyclists

May 27, 2024 By Eric Lister

cold exposure

The Benefits of Cold Exposure for Cycling & Life

June 13, 2023 By Eric Lister

hill climb

The Ultimate Hill Climb Training Guide

May 31, 2023 By Eric Lister

shoulder pain cycling

How to Treat & Avoid Shoulder Pain While Cycling

April 12, 2023 By Eric Lister

psoas stretch

The Importance of the Psoas Stretch for Cyclists

April 6, 2023 By Eric Lister

cycling neck pain

The Ultimate Guide to Cycling Neck Pain: Causes and Solutions

March 21, 2023 By Eric Lister

Useful Info

  • Contact
  • Finally, A Global Cycling Club That Is Focused On Community And Love Of Cycling!
  • Privacy Policy
  • Share Your Story!
  • Terms And Conditions Of Use
  • Welcome to I Love Bicycling
  • What Happened When I Stretched Every Day For a Month

Recent Posts

  • JOIN Cycling: A New Training Platform for Cyclists
  • How to Hang Bikes in Your Garage: 4 Inexpensive Options
  • Gravel Bike Vs. Road Bike: Which One Is Better For You?
  • The 6 Types of Mountain Bikes & How to Choose the Best One for You
  • What Is a Touring Bike Good For? 5 Benefits We Know You’ll Love

Search I Love Bicycling

Connect with Us

  • Facebook
  • RSS
  • Tumblr
  • Twitter

Copyright © 2025 · Magazine Pro Theme on Genesis Framework · WordPress · Log in