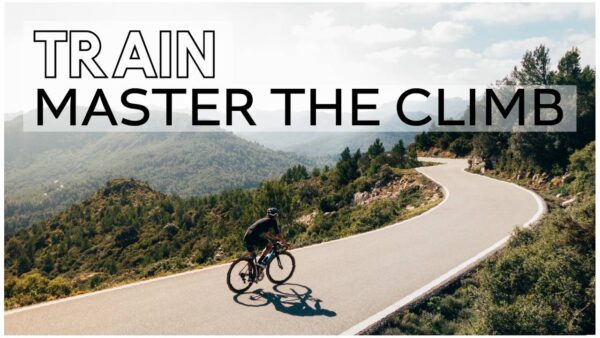
Hill climbs are definitely a love/hate relationship for most cyclists. We know how good they are for us, and we know how good it feels to finally reach the top and cruise through that descent – but man do they suck. We’re here to give you some tips on how to make hills the strongest part of your ride, and how you can train more efficiently and endure less suffering in the process.

(Image Credit: Adobe Stock)
Classic Cycling Hill Climb Training
If you’re a beginner cyclist, simply experimenting with different routes and building a general foundation of fitness is your first step towards developing any level of hill climbing prowess. There is simply no point in exhausting yourself with specific climbing workouts when you haven’t yet acclimated to general volume on the bike. So that’s step number one.
Step number two is doing repeated hill climbs on the bike. This type of training is definitely effective at developing leg strength and endurance…to an extent. You have to be careful about repeating the same gradients and hill distances (for example, ones in your general area), because you are going to adapt quite quickly if you already have some level of cycling fitness.
Try to vary the routes you take and incorporate ones that involve more, longer, and different gradient-type hills. Experiment with sessions where you isolate the hill climbing component, and spend time doing 5, 10, even 20 climbs on the same hill (depending on the length and severity of it, of course). Wrestle your way to the top, recover on the way down. Repeat.
There are ceilings to this type of training, as there are with all types of training. You are going to find limits not only physically but geographically. The methods we’ve just discussed are always something that should be regularly rotated into your programming, but let’s now take a look at some more conventional techniques that will greatly supplement your time on the bike.

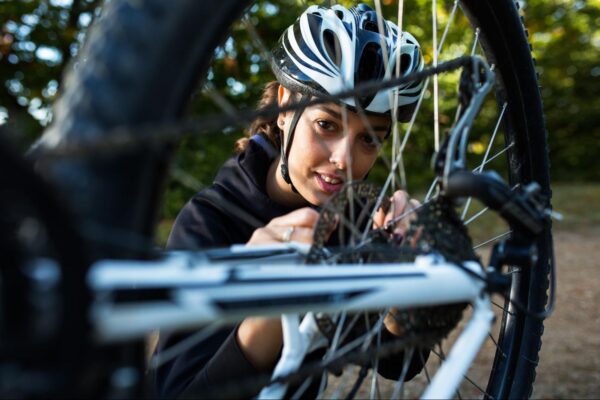
(Image Credit: Adobe Stock)
High-Intensity Interval Training (HIIT)
In recent years, studies from the running world have shown the efficacy of doing short, high-intensity, sprint-type workouts for improved performance in the longer distances. This is great news for cyclists, and even more specifically for the benefit of hill training on the bike. Let’s briefly explore how we can use this information to our advantage.
A HIIT workout using hill climbs will differ from the aforementioned hill climb repeats in the following way. You’ll want to keep the hill short and steep, and you’ll want to attack the climb with as much effort and intensity as you can manage, as opposed to just steadily making your way up. Descend and take whatever other necessary rest period, then repeat.
This form of training allows you to significantly reduce the amount of time you’re actually riding, but still get a massive benefit in the form of improved maximal oxygen uptake, cycling economy, and other physiological adaptations both muscular and metabolic. Let’s now extrapolate this method to an even more intense variation that you can do off the bike.
Sled Training for Hill Climbing Strength
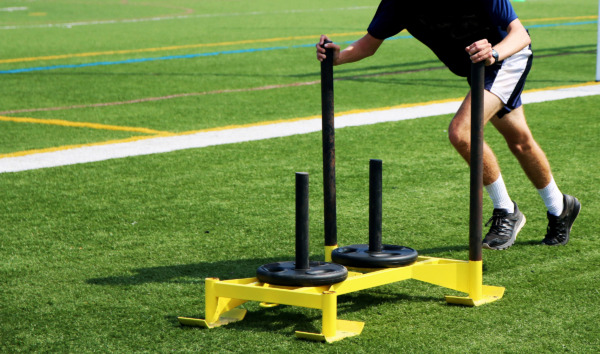
(Image credit: Adobe Stock)
Pushing and pulling a weighted sled is enormously transferable to cycling, mainly because of the lack of eccentric contractions in both. Refer to these brief definitions:
Concentric Contraction
The concentric phase of muscular contraction is when the muscle is shortening, thereby pulling on the tendon and moving the joint. This is typically seen in the lifting part of the exercise. For example, when you push yourself out of the bottom of a squat, your quadriceps (thigh) muscles are working concentrically to extend the knee joint.
Eccentric contraction
The eccentric phase of muscular contraction is when the muscle is lengthening under load, storing energy in the tissues and resisting the force that is being applied to it. This is often seen as the lowering part of a lift. In the squat example, when you are lowering yourself down into the bottom, the quadriceps are working eccentrically and resisting the force being applied to them.
In cycling, there are virtually no eccentric contractions, only concentric contractions. You’re never resisting a load under stretch, muscles are either working concentrically or are relaxing and going through a passive stretch. When you push a sled, it’s the same thing. You press your leg into the ground, but as soon as you lift it to take the next step, that leg relaxes.
The benefit of the sled is you can grossly overload the leg drive that you need to push a pedal, which will make those hill climbs feel so much easier by the time you’re doing them. It also gets you off the bike to train in a new and invigorating way, helping to reduce the likelihood of overuse injury. Try different sled pushing and pulling variations in your next workout.
Overall Strength & Conditioning
Similar to the use of a sled, performing separate strength training sessions, mobility, and other injury prevention work while off the bike is going to contribute massively to your hill climbing strength on the bike. By bringing up the weak points that cycling misses, your body will be in a better balance and more able to produce force when the incline gets tough.
Focus on building up your glutes through exercises that forcefully extend the hip, such as hip thrusts, deadlifts, and lunges. Also, having a strong core gives your legs a stable foundation from which to push off of. Challenge your abdominal muscles in various ways by doing exercises that flex the trunk, rotate the torso, lift the legs, and bend your body in all different directions.
Our programming over at Dynamic Cyclist has all the strength and mobility workouts you need to ride pain-free and become a force to reckon with when it comes to hill climbs. Simply press play, follow along, and do your best, no matter where you are. Included in the membership is a BONUS 4 week training plan specifically for mastering hill climbs. Try it out for 7-days free by clicking here.
Note on Mental Strength & Cycling Hill Training
A benefit to isolating hill climbs in your training and focusing specifically on them is learning how to deal with the negative self-talk and self-defeating programming you may or may not have already worked through. Tackling a nasty hill can make for some of your darkest moments while cycling, and learning to conquer that beast is something that usually takes a fair bit of practice.
By incrementally progressing to tougher, longer, and steeper climbs, you will gradually learn the limits of your body, and build confidence in your abilities on the bike (which will transfer over to the rest of your life, as well).
Remember this, you are far more capable than you think, you can always do one more pedal, and the pain will be all but gone just minutes after stopping. So, are you going to quit? Or are you going to keep going? Only you know that answer.


 After you have your new power meter ready to go on your bike, the next step is to do some baseline tests to determine your power profile. Ideally, you will want to determine the maximum power you can produce for 5 seconds, 1 minute, 5 minutes and 30+ minutes (this last one is referred to a
  There’s something about making the switch to clipless pedals that seems to signal to the world that you’ve made the jump from casual biker to biking enthusiast. But is the expense worth it? Are clipless pedals really necessary in order to take your cycling experience to the next level?
  A number of athletes turn to interval training in order to improve their performance. Interval training involves periods of high-intensity riding that alternate with low-intensity rest periods. The purpose of interval workouts is to improve a cyclist’s speed/
 So it finally happened. After years of close calls and near misses, you finally hit the deck. Maybe it was a errant patch of gravel, or someone’s back wheel that was the culprit, but the end result is always the same – you leave a significant portion of your skin behind on the road. Recovering from a crash can be a tricky process, and you will only ever do it the wrong way once (it hurts that much!). To spare you some learning pains, here are some tips on dealing with the dreaded road rash.
 You’ve been riding for a couple of years now. The days of struggling up every incline, and falling over at traffic lights because you can’t get your feet out of your pedals is over. You’ve done some epic long rides with friends. Maybe you have started commuting in to work. But now, riding is starting to get a bit stale. The motivation to get out the door on the weekend isn’t quite what it used to be. You are looking for the next thing to add to your bike riding experience. What you are looking for is bike racing.
 Many cyclists are into the sport for different reasons but there are some cycling moments that everyone experiences at least once in their cycling lives. Here’s the top 10 best cycling moments that everyone experiences.
  Being in a good place mentally is half the battle when it comes to preparing for a race. You want to be focused, relaxed, and confident when you begin. If you show up flustered, disorganized, or worried you’ll have a harder time focusing on what you need to do, how to pace yourself, or even