• Training
    • Injury Prevention
    • Training Tips
  • How To
    • Bike Fit
    • Gear
  • Nutrition
    • Nutrition Tips
    • Weight Loss
  • Repair
  • Reviews
  • Stories
    • Funny Stories
    • Jokes
    • Quotes
    • Videos
    • Funny Videos

I Love Bicycling

I Love Bicycling is a website that is geared towards cycling for beginners with road cycling tips, training articles, nutrition tips, weight loss, how to’s and bike repair articles.

How To Curb Tired Legs

December 15, 2014 by Dyani Herrera

tired-cyclistHow To Curb Tired Legs

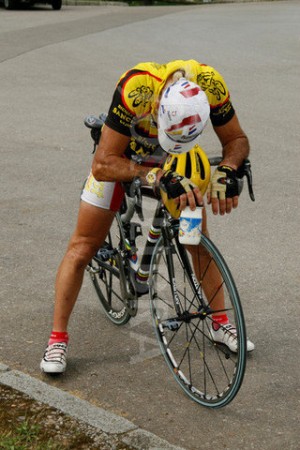
We’ve all been on those group rides, where we became overzealous and thought we were speed bikers at the Kona World Championships. Then, spent the next few days paying the price, feeling like you were lugging around cement blocks; thinking, how can you rid yourself of these tired legs so you can hop back on for your next ride? Here are a few tips to speed up recovery after a tough ride.

Post-Ride Recovery Shake

It’s crucial to have a protein shake with some carbohydrates within 45 minutes of finishing your ride. Research has demonstrated that when combining carbohydrates with protein immediately after exercise it increases muscle synthesis. As we ride we break down muscle, and the body builds more muscle after activity as a process of adaptation to exercise. Forty-five minutes is the time frame when your muscles are most hungry for nutrition, and absorb readily to aid with muscle repair. In addition, it is a crucial period in restoring the glycogen (energy) stores we’ve depleted during our ride. It’s also been shown that endurance athletes rely on protein during long rides as a last fuel source once we’ve depleted our glycogen and fat stores. Recommended daily allowances of protein for males include 84-112 grams and 66-88 grams for females. Furthermore, some of my favourite mixes include soy milk with a scoop of vanilla, whey protein, mixed with some strawberries, and blueberries for the antioxidant effect. If I’m craving something sweeter, then I add a scoop of peanut butter along with protein powder, and some banana slices.

Stretch Before and Post Ride

Make sure you stretch your leg muscles in order to minimize the decreased range of motion due to sore muscles, which could lead to strains. Vital muscles to be stretched include quadriceps, hamstrings, calves, IT bands, hip flexors, and glute maximus. There are several stretching techniques one can use to achieve elasticity. The most commonly known is “static stretching”, which requires you to stay in a stationary position, and place the muscle in a stretch, typically in the opposite direction the muscle performs.

There is also “proprioceptive neuromuscular facilitation (PNF) stretching”, which involves stretching the muscles with alternating sets of static stretching versus muscle contraction; with this style you would need a partner to assist you. A PNF stretching example includes a static stretch of the hamstring for 10 seconds, and 10 seconds of contracting the hamstring by pushing against the person’s hands/body, with a stretch-contract-stretch sequence. The advantage of this stretching is you see immediate gains in flexibility, more so than in static stretching.

Another form is “dynamic stretching”, which involves a person performing low intensity exercises involving that muscle action; for instance, walking lunges to stretch the hip flexors. These are best completed before a ride in order to get the muscles firing and geared up for cycling. Each stretch should be completed 2-3 times, for no more than 30 seconds each. It’s more effective to stretch these muscles once you’ve completed a 10-15 minute warm up, as well as immediately post ride. Research has shown minimal elasticity gains when performing these stretches prior to a warm up. “I Love Bicycling” has an article on some great stretches for cyclists with photos included.

Hydration Post-Ride

After a ride, drink plenty of water mixed with a cap of Pedialyte, per 8 ounces. Pedialyte contains condensed electrolytes, and aids in speeding up muscle recovery by hydrating muscles, and flushing out lactic acid. By drinking plenty of fluids with electrolytes, it helps your body eliminate the lactic acid through urine. In addition, it helps in hydrating your body in preparation for your next ride. There are formulas online, which can be used to figure out how much water is needed for your particular body weight and activity level. One way to check if you’ve hydrated adequately is by observing the colour of your urine. If your urine is yellow you’re still in need of hydration, but once it comes out clear or a pale yellow you are hydrated.

Ice Bath

A great way athletes minimize soreness and achy joints is by making themselves an ice bath. The advantage of an ice bath is allowing several muscles and joints to be treated at the same time. It is also the one ice treatment that has the deepest penetration effect of tissues. This treatment can be done in the bathtub of your home. Fill up the tub until it passes your thighs and dump in 1.5-2 bags of ice. In order for it to be therapeutic the temperature should be between 50-60 degrees. Granted, you’ll be freezing for the first 5 minutes, but afterwards you’ll be numb. If you don’t have a bathtub this can also be done by purchasing a 10 gallon garbage tub, and completing the same process. The ice bath can be completed for a minimum of 20 minutes, but no longer than 30, because then it has the adverse effect. If done for more than 30 minutes the body begins to think it’s entering a hypothermic state, and starts to dilate the blood vessels in order to increase body temperature. This is the opposite effect of the ice, which is intended to constrict blood vessels in order to decrease swelling and eliminate pain.

In following these four tips, it’ll help you avoid delayed onset muscle soreness (DOMS), which happens when you’ve pushed your body a bit too far. By speeding up recovery, we can gear ourselves up for our next ride, where this time we can imagine ourselves to be as fearless as Sebastian Kienle going into a headwind.

 

How To Stay Safe on the Streets

November 23, 2014 by Aaron Robson

How To Stay Safe on the Streets

Staying safe on the streets - how to stay safe on the streets
Cyclists protest in London for safer streets.

Biking is a fun, cheap and healthy way to get around town (and if your traffic is as bad as mine, faster too!) but all of that goodness can be ruined by a run in with one of those other occupants of the roadway. Some people subscribe to the view that if you bike regularly in traffic, it is just a matter of time before you get hit, but I’m not one of them. While I do agree that some car-bike accidents are just really bad luck and timing, in my opinion, these are rare. More often than not, when I hear about car-bike encounters, I can identify things that the cyclist could have done to avoid the collision entirely or at the very least mitigate the severity. This isn’t to say that the cyclist was in the wrong in these instances, but right or wrong doesn’t really matter when you end up on your backside in the street. So what can you do?

Gear Up!

First and foremost, safety gear. A helmet should be a given – the specific type doesn’t really matter. Get one that is comfortable, and that you will like wearing. Unless you are into wearing body armor while riding, there isn’t much else you can do to protect yourself, but there is a lot you can do to help you see and be seen. Lights are a necessity at night, but you can still use them during the day to increase your visibility. I also really like to use a rear view mirror in the city. It helps me stay aware of what’s behind me and means I don’t jump out of my shorts when a car buzzes past me at 45 mph honking their horn. There are both helmet and handlebar mounted versions available. Try them both out, and see what you like best.

Constant Vigilance

Now that you are suitably equipped, when you get out on the road in traffic, your biggest concern should be knowing everything that is going on around you. Where are the cars near you, and what are they likely to do? Are there any intersections coming up, or driveways that a car could suddenly pull out of? Is your lane going to end, or merge? It is impossible to cover every possibility that you might face on the road – good situational awareness develops over time – but generally, you should be thinking about what is going to happen before it actually does.

People are Dumb

Even though you are constantly assessing the situation around you, the next step to staying safe in traffic is assuming that all the other people on the road with you are the exact opposite – completely clueless. Never assume that someone sees you, or is going to stop for you, or won’t change lanes because you are already there. If you start expecting people to do silly things, it won’t come as a surprise when they do. You can take this assumption to the next level by imagining yourself to be invisible! This mind game helps you to pick out the safest places to be and routes to take as you navigate the maze of obstacles on the road.

Exit This Way

All of the awareness and foresight in the world still sometimes isn’t enough to keep you out of a sticky situation. Your last line of defense is to try and keep a buffer space around you, and always have ‘escape’ routes available. Obviously, you can’t always have the space you want, but for an example, when cycling past a line of parked cars, I will always ride far enough away that if a door opens suddenly, I’m not going to hit it. In heavy traffic, you should always be thinking about where you can go if, say, a car moves into your lane suddenly, or starts to turn into you. Hopefully, you will rarely have to use your emergency escape tactics, but it is better to have them and not need them, than to need them and not have them!


If you are new to city cycling, take it slow. Don’t start off riding down main street at rush hour. Pick a quieter neighborhood, and work your way up. Make sure to always keep these tips in mind, and your city riding experience will be a safe, and perhaps even enjoyable one! Good luck!


Why is the Front Brake More Powerful?

November 2, 2014 by Aaron Robson

Why is the Front Brake More Powerful?

Why is the Front Brake More Powerful?

Most of us don’t spend a ton of time thinking about braking. Squeeze brake lever. Stop. Not too hard, right? I was reminded in a recent conversation though, that not everyone fully understands what has to happen to bring your bike to a nice, safe, stop. I was about to head home after work, when, walking over to the bike racks, I noticed an older fellow and his son taking a good look at my bike as they were getting ready to leave. I had a feeling I was going to get some sort of comment about it when I arrived, and I was right. This was how our conversation started off:

“No rear brake, huh?” (weird first thing to say, I thought)

“Well, yea,” I replied “if you are gonna have one brake, you want it on the front”

“A physicist would disagree with you” he replied “you’ll end up over the handlebars like that…”

This is a misconception I’ve heard more than once, so I want to explain why, though my friend wasn’t exactly wrong, you would never want just a back brake instead of a front. If you are thinking ‘I’ll never have just one brake, so this doesn’t matter’, the implications of this are still very important with the normal allotment of two brakes – so read on!

The Physics of Braking

First, some basic bicycle physics. The braking on a bicycle is dependent on the friction between your tires and the ground and the friction between the brake pads and rim (or brake disc, if your ride is suitably equipped). Almost all modern brakes have sufficient power to exert enough friction on the rim (or disc) to completely lock the wheel up at moderate speeds. The ability to stop the rim from moving around isn’t a limiting factor in braking, generally. What is limiting is the friction between the tire and the ground. Why does this matter? Let’s think about two extreme cases – stopping using a rear brake only, or a front brake only.

Skid City

Applying a rear brake means that your only source of braking power is the friction between the rear wheel and the ground. How much friction there is is dependant on the downward force pushing the rubber into the pavement which in this case, is only your body weight (actually only a fraction of your body weight, since the front wheel is taking some weight as well). It is pretty easy to lock out the wheel and skid the tire (as anyone who rode a bike with a coaster brake as a kid can attest to), which isn’t good. You lose a degree of control, and you lose friction (think about ABS brakes on a car) so it takes longer to stop.

Over the Bars?

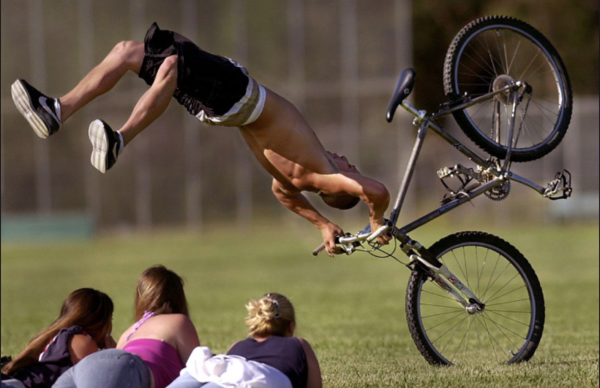
With a front brake, your braking power comes from the friction between the front wheel and the ground. This point is in front of your center of mass, which means that as you apply the brakes, the weight of you and your bike acts like a lever, pushing the tire down into the pavement, increasing the friction. Brake too much and yes, you can lock up the tire and flip. But that additional downward force means you have more friction between your tire and the ground, meaning you stop faster. If you do the math, the fastest way to stop a bicycle is to apply the front brake to the point where the back tire is just about to lift off the ground.

You can actually go out and test these two theories yourself. Find a safe, open space like a parking lot, and try braking from 10-15 mph – the first time using just your front brake, the next time using the back. I guarantee you will stop faster using the front. Next, try increasing your speed a bit, and stopping as fast as you can with just the front brake. It will take a bit of practice to find that point when your rear tire is about to come off the ground, but you will be surprised as how quickly you can stop when you get the hang of it! Now go off and spread the gospel!

Climbing Steep Hills

May 27, 2014 by Lee Agur

Climbing Steep Hills

Climbing Steep HillsClimbing a Steep hill is a gut busting experience, but with some of these tips hopefully it wont be as painful or dreaded as it previously was.
First of all, we are not talking about an ordinary hill here, if you want climbing techniques for hills read this post. Steep hills are a whole other animal all together.

Compact Ring

Before you even begin this precipitous climb set yourself up for success, make sure your bike is set up properly. Consider if getting compact cranks or even triple cranks upfront is right for you. If you are grinding away at 50 rpm for any extended amount of time then it may be time to make a switch.

Before The Climb

If you know the steep hill is coming up, take it easy before the climb, restore your energy. If you are in a group allow them to take turns upfront, try to come into the climb as fresh as possible.

Mental Game

Brain wash yourself into “loving” the climb, always saying how easy it is going to be or how you are looking forward to it. The mental game is a most of the battle, it is the same for any type of work… It sounds ridiculous, but I promise it makes it better.

Reduce Weight

Make sure to only pack what you need… especially if there is a store that you can get things at or an aid station on the other side.

Don’t Start Too Hard

Make sure that you don’t go in to oxygen debt immediately, you may hate life half way through the climb if you started out too hard.

Zig Zag

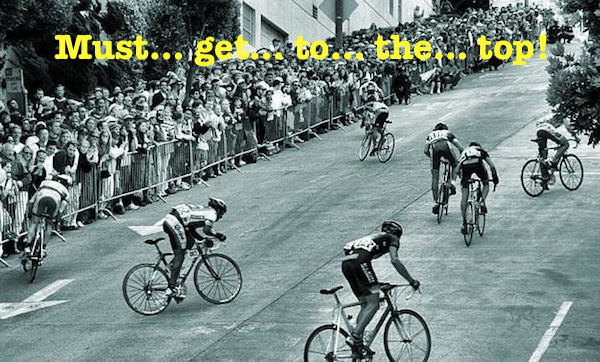
See that picture up above? The pros are doing it… so should you! I zig zag in order to reduce the grade and make it easier on myself, especially if it is a hill that is leading up to a strava segment. If your cadence is starting to slow to a grinding halt zig zagging may just save you from an embarrassing stall.

Take Wide Corners

Take the outside of the corners effectively reducing the grade. This will save your legs for steeper sections of the climb.

Stand up

Use your body weight to help you getup the hill. Make sure to rock the bike back and forth gently in order to put your body weight directly over the pedal on the down stroke.

Pull Down

As the grade continually increases you will need to start engaging more muscle groups in order to complete the climb. While standing up, pull down on the handle bars with both hands to give yourself more power.

Core Strength

It takes a lot of core strength and proper weight distribution to complete a steep climb. Your lower back might start to scream in agony, but just remember the mental mind games and how much you “love” it.

Secret Weapon

As with any hill… envision rocket boosters attached to your bike… it is practically cheating it is so effective.

Saddle Tilt

May 16, 2014 by Lee Agur

Saddle tilt

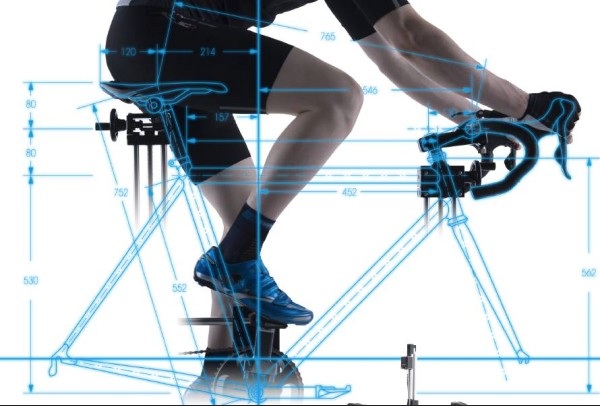
The saddle tilt angle up or down while cycling on a road bike can make a big difference. If improperly adjusted it can cause knee or back painThe saddle tilt is an important adjustment that needs to be taken into consideration. Lets take a look at what happens when the saddle angle is in the up, neutral and down positions.
Saddle Tilted Down

If the saddle angle is pointed down too much then there will be unnecessary pressure on your knee and upper body. Your knees are trying to hold you from sliding forward and are more susceptible to injury. Additionally, your upper body is now being enlisted to hold you back as well, instead of being relaxed and focused on proper breathing.

How much of an angle is too much? As little as a 3% saddle angle downwards is too much.

If you find yourself riding on the front part of the saddle often it is usually to alleviate the pressure on the knees, shoulders, arms and hands; however, you do not have adequate support from the saddle and this will cause problems.

Why Do People Tilt Their Saddle Too Far Down?

The most common reason people tilt the saddle angle down is to alleviate pressure on the groin, this is not a wise solution, find a saddle that fits properly and is able to support your weight without pain or numbness.

Many people have no idea that saddle tilt is a very big deal at all and take the bike as it comes from the shop… I did not have a clue when I bought my first bike.

Saddle Tilted Up

When the saddle angle is tilted upwards you may earn some unwanted lumbar pain as your pelvis is angled backwards and you forced reach forwards to the handlebars – this creates a weird and unnatural angle and stress point causinging lower back pain.

Since the pelvis is tilted back it will feel as if you have to reach for the handlebars and this can cause neck and shoulder pain. Another symptom the saddle angle is too far up is groin pain or numbness caused by unnecessary pressure around the soft tissue by your “special” area.

Why Do People Tilt Their Saddle Too Far Up?

The most common reason people tilt the saddle angle too far up is to keep from sliding forwards. It can be a vicious cycle, you tilt the saddle down to alleviate pressure on your groin, but then you start to slide forward too much and so you raise it too much… buy a proper fitting saddle and only make adjustments 1 degree at a time.

Saddle In the Neutral Position

A saddle in the neutral position allows you to keep your pelvis in a neutral position, which in turn, allows the proper alignment of your knees and optimizes the efficiency and enlistment of the quadriceps, gluteus maximus, gluteus medius, soleus, gastrocnemius, and hamstrings muscles.

As you can see, a small thing like the proper saddle tilt can make a big difference in comfort, efficiency and injury prevention. Make sure you have your saddle in the neutral position, or as close to it as possible.

If you climb a lot, perhaps you will want the nose to tilt down a slight bit, or vice versa for downhills. I ride with my saddle tilted down 0.5 degrees and find it just right. If you have a saddle tilt of more than 2 degrees up or down then you need to make other adjustments to feel comfortable as it is not the tilt that is the problem.

Fore Aft Saddle Position

May 15, 2014 by Lee Agur

Fore Aft Saddle position

Fore aft saddle position road biking and mountain biking should be found by the balance point method and not the KOPS method generally used. Knee painThe fore aft saddle position corresponds to how close or how far the seat is in relation to the handlebars. This positioning is important because it affects your balance as well as your overall comfort level, power and efficiency.
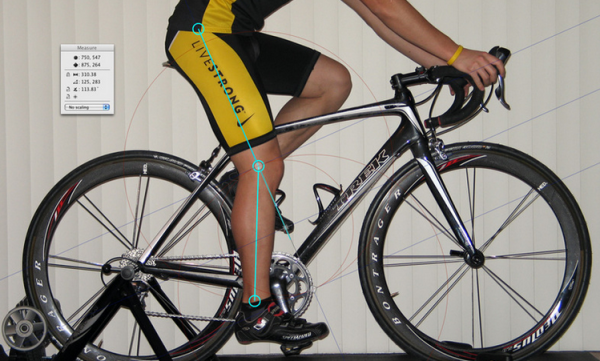
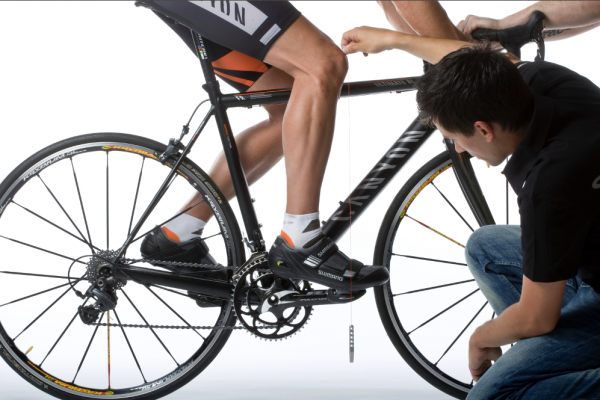
The Knee Over Pedal Spindle Method

The generally accepted way to find the proper saddle position is called knee over pedal spindle (KOPS). To find KOPS sit on the bike with the pedals at the 3 o’clock and 9 o’clock position. Hold a plumb bob at the front of your forward kneecap and see where it hits in relation to the pedal spindle. The line should intersect the pedal spindle/axel. If it falls in front, adjust the saddle rearward. If it falls behind, adjust the saddle forward.

Although the knee over pedal spindle method is quick and easy to do, it does not take into account your individual body type, flexibility or pedalling style.

The Balance Point Fore Aft Saddle Position Method

Grab a friend and warm up on an indoor trainer for 10 minutes, once you have sufficiently warmed up have your friend stand in front of the bicycle and wait. Get into the drops and start pedalling at approximately 80% of maximum effort (a pace you could maintain for an hour) and then swing your hands back behind your butt. You should be able to balance on that point WITHOUT falling forward (that is why your friend is there) or arching your back.

To find the ideal fore or aft saddle position it should be adjusted just forward enough so that your friend barely has to help your torso from falling (a bit forward of the centre of gravity). This is your ideal fore and aft saddle position assuming that your saddle height, saddle tilt and reach to the drops is approximately in the correct position. Ie. If your saddle height is too low or the saddle tilt is up, then it is easier to balance.

Signs That Your Fore Aft Saddle Position is Set Too Far Back

If your saddle is set too far back then you are going to have a lot of power on the flats and slight inclines because you will be able to produce a lot of power; however, once the road turns up (steep grade) then you will not have enough weight over the pedals and you will be forced to stand up to climb. Additionally, a saddle that is adjusted too far back will make it more difficult to maintain a high cadence. Knee pain in the back of the knee can also be caused by a saddle position located too far back.

Signs That Your Fore Aft Saddle Position is Set Too Far Forward

If your saddle is set too far forward then you may be using your upper body too much causing tension in the shoulders and arms as well as having sore hands. You will be able to have a quicker cadence but you will tend to sit back on the saddle up climbs. Additionally, you will be using your upper body muscles to support yourself, wasting valuable energy, and not allowing the torso be relaxed to be able to breathe deeply and properly. Knee pain in the front of the knee (under the knee cap) can be caused by a saddle that is set too far forward.

The Balance Point Method vs the KOPS Method

The whole point of finding the balance point is to allow your upper body to be relaxed and focused on breathing (feeding the engine) while the lower body is focused on propelling the bike forward. You want to optimize feeding the engine with as much fuel (oxygen) as you can so it can go as fast as possible.

If you use knee over pedal spindle method then differences in the lower and upper body are not taken into account. For example: if you are not flexible in the lower back then your centre of gravity is going to be more rearward; therefore, the saddle should come forward more than that of a flexible cyclist. As noted above  having a saddle too far back or too far forward is not a benefit.

I would recommend using the balance point method to find your fore aft saddle position as it takes in to account individual differences in body types, flexibility and riding style.

How to Find Your Ideal Saddle Height

May 6, 2014 by Lee Agur

It may not seem likely, but something as small as adjusting your seat can have a big impact on your ride. Ensuring that your seat is at the right height will make a difference in how much power you transfer to the pedals, and how much energy you use to move forward.

How you sit on your bike will also affect how comfortable you are, which could affect your enthusiasm level and overall motivation. Not to mention that you can develop injuries if your seat height doesn’t match your body.

How to Find Your Ideal Saddle Height [Read more…]

How to Choose a Power Meter

March 20, 2014 by Aaron Robson

How to Choose a Power Meter

how to choose a power meterPreviously, I introduced the concept of power training – that is, training using a power meter, not just really hard training! If you are interested in trying this out, the first thing you will need is, of course, a power meter. This article will tell you how to choose a power meter that will work the best for you.
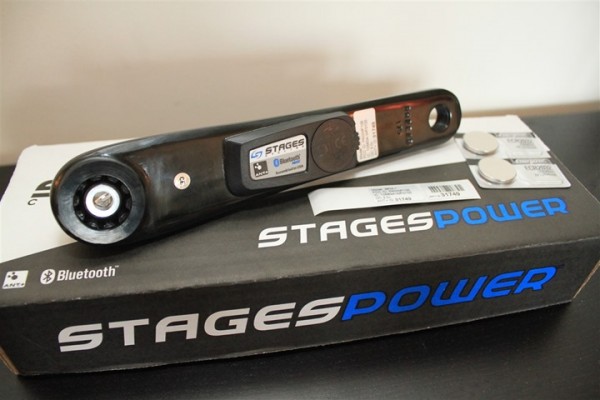
There are two major classes of power meters – those that ‘directly’ measure power, and those that indirectly measure it. Direct-measure power meters use tiny things called strain gauges to measure microscopic bending in various components on your bike. Indirect meters generally take a bunch of measurements of speed, wind direction, wind speed, etc. and try to ‘guess’ your power based on these numbers. If you want to use a power meter for serious training, you don’t want an indirect-measure power meter – they simply aren’t accurate enough to be useful. Of the direct-measure power meters, there are three main types, which I discuss below.

Wheel-based

These power meters are integrated into the rear hub of a wheel. They measure power by measuring deflection in the rear hub. The most popular version is made by a company called PowerTap and the cheapest version of their ‘power hub’ retails for about $800. Of course, you have to get that hub attached to a wheel – either replacing your current hub, or getting a whole new wheel built up, which will push up that cost.

By placing the power meter in a wheel, you can switch your power meter between different bikes very easily. Of course, if you have more than one set of wheels for your bike, it is going to very quickly get very expensive to always have a power meter available. Most people who only invest in one power hub will attach it to their typical training wheels, but if you race on a different set of wheels, you lose the benefit of power readings while racing, which is one of the big advantages of power training.

Crank-based

There are a few different power meters that measure power based on readings from the crank area of the bike. Quarq and SRM make power meters that integrate with the bottom bracket and crank, while Stages offers a model that is attached to your crankarm. The Quarq/SRM models are on the very high end of the price and quality spectrum, at $1500 and $2000 for the base models of each, respectively, which Stages is currently the most affordable power meter of this bunch at $700.

These type of power meters allow you to use any kind of wheel you want, which a lot of people find valuable, however moving the unit from one bike to another is not something you would want to do very often – requiring completely removing and reinstalling the cranks and bottom bracket AND recalibrating the device. The Stages Power Meter is a bit easier to swap around, since it is only attached to your non-drive side crank arm.

Pedal-based

Recently, the bicycle world has seen a surge of pedal-based power meters. These units claim to offer the same precision as crank or wheel based units, but with far greater flexibility of use – all you have to do to is switch out a pedal to move your power meter, and you can use whatever wheels you desire. Both Garmin and Look have pedal-based power meters available currently, and while a lot of people thought this technology would provide more affordable power meters, it hasn’t panned out that way – Look’s model costs $2500 and Garmin’s is a slightly more palatable $1700.

Still, the flexibility to use this one power meter on any road bike you own, with whatever wheels you want means you only need one of these, instead of potentially being forced to by multiple models of the other types. As these type of power meters are fairly new on the market, there are likely to be some issues to work out, and prices will (hopefully) come down as the technology matures.

Your Decision?

So which one should you get? My number one recommendation would be the Stages Power Meter if you are just starting out with power training. It is cheap, reliable, and can be used with multiple wheels easily, and multiple bikes without a huge hassle. You won’t get quite the level of detail in your data as you will get with some of the more expensive systems, but until you are more familiar with power training, you won’t know what to do with all that information anyways. As you advance in your training, you can always upgrade if you feel it would help. Good luck!

How To Mentally Prepare For A Race

March 1, 2014 by Guest Post

how to mentally prepare for a bike raceBeing in a good place mentally is half the battle when it comes to preparing for a race. You want to be focused, relaxed, and confident when you begin. If you show up flustered, disorganized, or worried you’ll have a harder time focusing on what you need to do, how to pace yourself, or even how to breathe properly. Here’s some tips on how to mentally prepare for a race. [Read more…]

How to Change Bike Gears

February 11, 2014 by U.M.

how to change bike gearsChanging your bike gears while cycling takes some practice in order to accomplish the change fluidly. Avid cyclists know that if you ride your bike off road or on any kind of terrain that isn’t flat you will need to change gears. Most bikes contain anywhere from ten to twenty-seven gears that are split between the front and back wheels. Knowing when and how to change them is an important part of cycling. [Read more…]

« Previous Page
Next Page »
  • Facebook
  • Tumblr
  • Twitter

Latest Articles

JOIN Cycling: A New Training Platform for Cyclists

May 27, 2024 By Eric Lister

cold exposure

The Benefits of Cold Exposure for Cycling & Life

June 13, 2023 By Eric Lister

hill climb

The Ultimate Hill Climb Training Guide

May 31, 2023 By Eric Lister

shoulder pain cycling

How to Treat & Avoid Shoulder Pain While Cycling

April 12, 2023 By Eric Lister

psoas stretch

The Importance of the Psoas Stretch for Cyclists

April 6, 2023 By Eric Lister

cycling neck pain

The Ultimate Guide to Cycling Neck Pain: Causes and Solutions

March 21, 2023 By Eric Lister

Useful Info

  • Contact
  • Finally, A Global Cycling Club That Is Focused On Community And Love Of Cycling!
  • Privacy Policy
  • Share Your Story!
  • Terms And Conditions Of Use
  • Welcome to I Love Bicycling
  • What Happened When I Stretched Every Day For a Month

Recent Posts

  • JOIN Cycling: A New Training Platform for Cyclists
  • How to Hang Bikes in Your Garage: 4 Inexpensive Options
  • Gravel Bike Vs. Road Bike: Which One Is Better For You?
  • The 6 Types of Mountain Bikes & How to Choose the Best One for You
  • What Is a Touring Bike Good For? 5 Benefits We Know You’ll Love

Search I Love Bicycling

Connect with Us

  • Facebook
  • RSS
  • Tumblr
  • Twitter

Copyright © 2025 · Magazine Pro Theme on Genesis Framework · WordPress · Log in