• Training
    • Injury Prevention
    • Training Tips
  • How To
    • Bike Fit
    • Gear
  • Nutrition
    • Nutrition Tips
    • Weight Loss
  • Repair
  • Reviews
  • Stories
    • Funny Stories
    • Jokes
    • Quotes
    • Videos
    • Funny Videos

I Love Bicycling

I Love Bicycling is a website that is geared towards cycling for beginners with road cycling tips, training articles, nutrition tips, weight loss, how to’s and bike repair articles.

How To Clean Your Bike in 5 Minutes or Less

January 3, 2018 by Adam Farabaugh

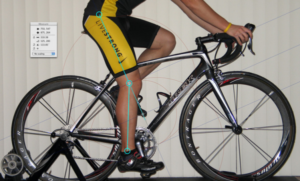
Having a clean bike that looks good and works flawlessly is something that all pro riders have for every single ride. Their trick though is that they have a mechanic who keeps their bike looking and working like new. You too can have that clean, smooth working bike without spending ages working on it after every ride. The trick is to know what to do and having everything set-up and ready to use when you clean your bike.

How to clean your bike

Washing

After a ride in the rain, mud, or other gnarly elements, using water on your bike is the easiest way to get your bike clean. It gets the big stuff off without having to wipe your bike a million times with a towel or rag.

The Hose Approach

If you have a hose, leave it set up so all you have to do is turn on the water and hose down your bike. Leave the wheels on as you aren’t doing a top to bottom scrub. You just want to hose everything off and get the grit out of the nooks and crannies.  Do a once over on the whole bike but when you get to the drivetrain put the spray on the chain and run the pedals backwards. After a few revolutions, keep spinning the pedals backwards but move the spray to the cassette and then the pulley wheels on the rear derailleur. Also get both brakes good.
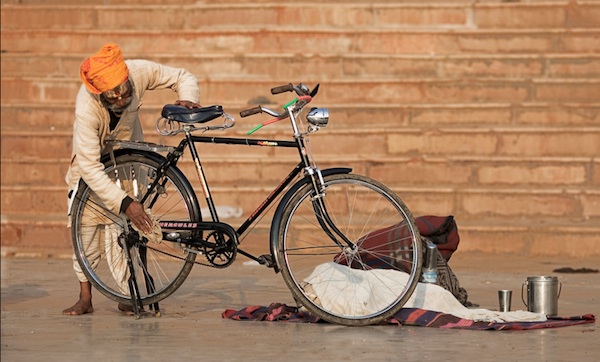
The Bucket Approach

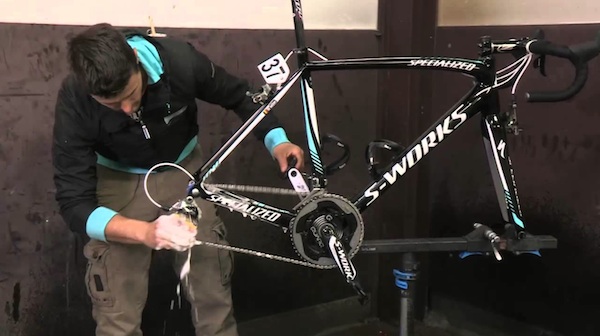
If you don’t have a hose, a bucket is your next best alternative. Get a sponge, or an old t-shirt, and get it sopping wet and wipe down the bike starting with the handle bars, then frame, then wheels, and then drive train to get to progressively dirtier and dirtier areas of the bike. You’ll have to ring out the sponge, or t-shirt, a few times depending on how dirty your bike is. When you get to the drivetrain you’ll spin the pedals backwards with the sponge in your other hand cupping the chain.  This will get a good bit of any gunk that has built up off. Then scrub what you can off both derailleurs. After you are done scrubbing, take the remaining water and dump it slowly over the whole bike washing away anything that was left behind.

Wiping Down

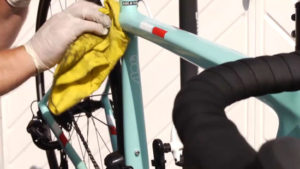
If your bike wasn’t too dirty you didn’t have to hose down or use a bucket luckily. Whether you just used water on your bike or it wasn’t too dirty, you will now wipe down the bike. The best approach to this is to get a dry rag and some simple degreaser.  Start with the dry rag and run it over the shifters and handle bars. Then spray a little degreaser (such as Simple Green which is light enough on everything) on a corner of the rag and wipe down the frame, scrubbing a little where it needs it. The degreaser will easily remove any dirt and grime on the bike and leave it shining like a pro’s bike. After you’ve gone over the frame, go over the rims but since you still want ample use of your brakes, don’t wipe the braking surface since the degreaser is quite slippery. A little bit won’t hurt it though if you do accidentally rub a little bit on it.

Next is the drivetrain. Take the degreaser and spray a little on both the front and rear derailleurs in their smallest gear and then again in the biggest. This allows the degreaser to get into the moving parts. Then wipe down both. Now that your rag has a descent amount of degreaser on it, run the chain backwards with the rag grasped around it. This will help to get it clean and shiny again. If you used a bit too much degreaser, take another clean dry rag and wipe down the bike again as you don’t want a slippery frame. Doing this will get your bike looking clean. How long it stays clean though is up to you.

Lubing the Chain

A smooth working bike, provided you’ve taken proper care of it with parts that aren’t too warn out, keeps it staying smooth and feeling like new due to proper lubrication. You should lube your chain every few rides at least but definitely after cleaning your bike. Since you already ran the chain through a rag when you were cleaning the bike you don’t have to do that again. If you didn’t and you’re just lubing the chain, run the chain backwards through a rag.

Take your bottle of lube and tilt the bottle slightly placing the nozzle so it just touches the top of the chain and a single drop comes out of the bottle. Now turn the pedals backwards getting roughly a drop on each link. The key to lubing a chain is that you want the lube inside the pins, not on the surface. Once you’ve gone around one to three times depending upon how dry you chain is, take the bottle away but continue running the pedals backwards. This will help to get the lube inside the chain itself. Now take a rag and run the chain backwards once again wiping off any excess lube. Your chain should now look sparkling clean.

Smooth Shifting

To keep your shifting working smooth you now want to put the bike in its biggest gear and then littlest putting a few drops of lube at all of the pivot points. Shift the gears from the biggest to the smallest and vice-versa a couple of times and then wipe off any excess lube. Now, assuming you have old school cables, flip your bike upside down, taking care not to scratch the shifters, and put a couple drops of lube underneath the bottom bracket on the cables where they slide through the plastic sleeves. Many bikes today have different cable routing designs so you’ll have to look at your bike and see where the friction points occur. They are going to be right around here where they make the bends to their respective derailleurs. Once you do this shift through all the gears a few times and add a few more drops if needed.

Now you have a clean, well-oiled machine that you obtained with minimal effort. Keep your sponges, rags, degreaser, and lube together in a convenient spot where you can grab it and be done with it five minutes after your ride. And if your bike tends to get a bit more dirty, keep a hose or bucket handy so you can do a once over on it quickly while still in your kit. Not only will you now show up on all your rides with a bike that looks like a pro mechanic took care of, it’ll work like one did too. Keeping your bike clean and lubed will also help your parts last longer too!

How To Fit a Bike Helmet

December 3, 2015 by Adam Farabaugh

How To Fit a Bike HelmetGetting the right helmet fit is imperative to your safety. Wearing a poorly fitted helmet is almost just as bad as not wearing one at all. A good fitting helmet worn properly will not only help to protect you in the event of a crash but also looks good. There are a few things to know when buying a helmet as well as when wearing it.
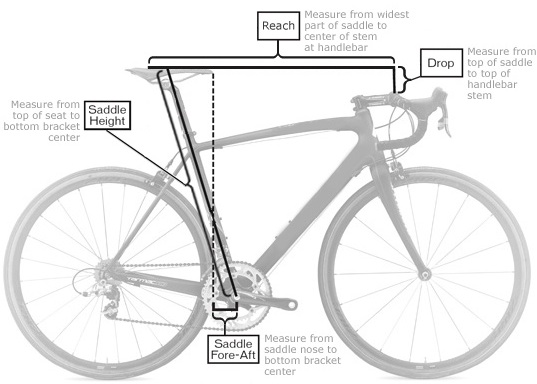
Find Your Size

There are two ways to find the right size helmet for your head. The first is measuring the circumference of your head just above your ears. This number, ranging from about 50 to 60 centimeters for the average adult, correlates with different sized helmets. Try the one on where your circumference falls in the range of the helmet size, typically labelled on a sticker on the inside of the helmet.

The second way to find the right size, provided you have an assortment of sizes to choose from, is to just try them on and see how much space is between your head and the helmet. With both methods you don’t want any more than one to two fingers to be able to fit in-between the helmet and your head.

If there’s too much room your head will actually be knocked against the inside of the helmet in the event of impact which can also cause injury. If there’s not enough room, the helmet simply won’t be comfortable and will likely sit too high on your head not protecting you as well as it should.

How to Wear Your Helmet

Now that you have the right sized helmet you need to make sure that you are wearing it properly. Most of today’s helmets are going to have an adjustable mechanism in the rear of the helmet to cinch down the inner retention system to your head. This is going to keep the helmet from moving around.It shouldn’t be overly tight but also shouldn’t be too loose. You should be able to grab a firm hold on the helmet and not have it slide around your head.

The helmet should also be worn in a level position with the front falling no more than one to two finger lengths above your eyebrows. If it’s too far up and more on the back of your head, it won’t protect the front of your head in the event of a fall. If it’s too far forward, you won’t be able to see for one as it will be in your eyes, but it also won’t protect the back of your head.

Adjusting the Buckles

The final but just as important step to making sure your helmet fits properly is to have the straps and buckle positioned correctly. With a new helmet this can often be a challenge as there are four straps that need to be aligned and positioned well to be comfortable as well as safe.

The first step is to release the adjusting plastic pieces on the sides of the helmet. These slide up and down the straps and can be locked in place to hold the strap where it’s supposed to be. Put the helmet on your head and slide the piece up so it falls just below your ear making a Y with one strap going in front of your ear and the other behind. Lock the plastic piece down in place. Then do the same on the other side so it’s even.

Now you need to make sure the buckle is centered under your chain. If the receiving piece of the buckle is too far one way or the other you are going to have to loosen or tighten it by pulling the strap up through the rest of the helmet. This will also move the plastic adjusters on the sides so you may have to readjust them. Once this is centered under your chin, you can then pull the straps tight so they’re snug but not overly tight when the buckle is clipped.

Depending on how much extra strap is left over you can tuck it into the rubber piece that is on most helmets to prevent the strap from dangling. If you do need to shorten the strap, use a pair of scissors and cut accordingly. The real trick comes in taking a lighter and singing the end of the cut piece so it doesn’t fray.

Wearing a helmet is imperative when riding a bike and almost just as imperative is wearing a helmet that fits properly. Getting the right sized helmet for your head along with properly adjusting it will help to ensure that the helmet does its job when the time is less than ideal, i.e. when you have a fall. Your head is much safer and you have the piece of mind that your head is taken care of while wearing a helmet.

How To Do a Proper Bike Fit

November 29, 2015 by Adam Farabaugh

How to do a proper bike fit addresses what you require to do a bike fit: a self assessment of your body, and outlines a step by step guide on how to get a perfect bike fit.

If you’re not riding too long nor hard you might be able to get away with a poor bike fit as your tendons and muscles can handle a certain amount of stress. The problem however resides when you start to ride longer and harder especially without increasing that intensity gradually.

Having a proper bike position will help to prevent injuries and improve performance. There is a lot to know to get your position dialed on your own, and we will briefly discuss some key factors so you do not have to spend hundreds of dollars on a professional fit. The professional fits however are worth it but aren’t always warranted by everyone so this is intended to touch on what a professional fitter would do despite the number of varying approaches to bike fitting. If you have questions or are uncertain on anything, seek out someone who knows as having a bad bike fit is just as bad as not having one at all.

How to Do a Proper Bike Fit

What You Need

First you are going to need a few things more than your bike and shoes to do a quality fit on your own. You are going to need:

  1. Stationary trainer – so you can get on and ride in place to see how all the incremental changes feel.
  2. Tape Measure – ideally in centimeters as it’s easier to work with.
  3. Plumb Bob – a string with a weight attached to the bottom to create a straight vertical line.
  4. Level – can be helpful to make sure the bike is level in the stand as well as to measure saddle set-back. You can get by without one if you don’t have one however.

Self-Assessment

When going to a professional fitter the first thing that they are going to do before you even get on the bike is to ask you a few questions along with doing a few flexibility and discrepancy tests. This is difficult to do on your own but if you know of any muscle inflexibility or leg length discrepancies, you are going to have to correct for them.

For Example – If you know you have tight hamstrings, you are going to have to have a more relaxed (less aero) position on the bike.

Making the Adjustments

The adjustments you are going to make on the bike need to be in the order described here as when you move one thing, it results in changes to the other measurements.

Cleat Position

Cleat position is the first thing we are going to address as moving this later after you get your saddle height and set-back dialed will change. If you have already been riding your specific shoes and pedals, leave the cleats where they are if you haven’t had any issues.

If your cleats are new, you first need to estimate your natural foot position. Stand barefoot or in your socks on a hard surface naturally and see how your feet are positioned. Are they pointed straight ahead, pointed out, or pointed in? You want your foot position on the pedal to replicate this as if you just try and set it straight, it will go against how your muscles and tendons naturally align your foot.

After this you will want to put your cycling shoes on and determine where the bone on the outside of your foot protrudes. This bone is where your pinky toe connects to the rest of your foot, also known as the ball of your foot.

For a starting point, this is where you want the center of the pedal to fall. Mark on both shoes where this point is with something that comes off so you don’t mark up your shoes. Then position your cleat in the center of your shoe, from side to side, and line up the center as well with where the mark on the side of your shoe is. Then make sure the cleat is angled to account for your natural foot alignment. Yes, this is a lot of steps and when you start riding you may need to stop and adjust them a few times to get it positioned perfectly.

Saddle Height

A bike fit encompasses the details of many areas of the bike but the one that is the most influential is the saddle height. Finding the proper saddle height has a number of varying approaches to get just right. A few of the approaches will be touched on, but the best approach is a combination of them in a certain order to get an exact height.

To get the same measurements you need to make sure that you are measuring from consistent points. This can be difficult on a saddle because they are always different and almost never completely flat. A good way to measure from the same point is measure 155mm back from the tip of the saddle (the nose) and make a mark. This is generally where the center of your pelvis will sit on the saddle. Any measurements that you make, make to this point except for when measuring the 109% and LeMond Approaches described below.

Heel Approach

The heel approach is the easiest and probably most widely used to get a rough estimate on saddle height. On the bike with your cycling shoes on, spin your pedals backwards with your right heel on the base of the pedal making sure that you keep your hips level and that they don’t rock from side to side. With your leg straight, you want your heel to be about a half to one centimeter from touching the pedal. No more, no less. You will probably have to get off and adjust your seat post a couple times.

109% Approach

The 109% approach takes the measurement of your inseam and multiplies it by 1.09. This is then the length from your saddle to the spindle of your pedal at the bottom of your pedal stroke. To get your exact inseam length, get a large hard cover book and a pencil. Stand with your back against a wall in your bare feet or socks with your legs straight. Place the binding side snuggly up between your legs and make sure it is level. With the book positioned close to the wall, level, and at the upper-most part of your crotch, place a light mark on the wall at the top of the book. Now with your tape measure, measure from the mark to the floor. This is your inseam.

Now doing some quick math in your head, alright probably with a calculator, multiply it by 1.09. With the pedal at slightly before the 6 o’clock position, (you want it to make a straight line with the seat tube coming down) measure from the spindle up the length of the seat tube and seat post to the top of your saddle. Now depending upon your frame geometry and current saddle set-up, this length is not going to be to the point you previously marked on the saddle. That’s ok; that mark is so you can get an exact measure of your set-up regardless of what bike or saddle you ride.

LeMond Approach

The LeMond method is a derivation of the 109% approach in that it uses the same inseam measure except is just multiplied by a different number and to a different point on the bike. This approach is better than the 109% approach as it’s easier to measure to a stationary point, the center of the bottom bracket. The variable here is going to be crank-arm length. It depends on riding style but typically shorter riders want crank lengths around 170mm or less. Medium sized riders, 5’6 or so to 6’-ish, 172.5mm and 175mm, heights above that. This is a very rough estimate so determine your riding style and what will work best for you.

Back to the inseam. Take your inseam measurement and multiply it by .883. This is the length from the center of your bottom bracket to the top of your saddle along your seat tube. Again, like above, the mark you put on your saddle won’t be used for this but is rather just a good way to get consistent measurements for your position when set.

Holmes Approach

Now that you got your saddle height to a pretty good height with the heel method and backed it up or adjusted it with the LeMond approach, you should have a height that is pretty close to where it should be. The goal of the above approaches is to get your knee angle within a certain degree. Instead of measuring other variables, why not just measure the exact variable that you are trying to get dialed in. Well because it’s more difficult. You need a goniometer which measures angles but with some improvisation you can probably come up with something similar on your own. The difficulty then becomes measuring your knee angle precisely. Getting someone to help you will be a big help.

With your foot at the bottom of the pedal stroke, slightly in front of 6 o’clock on your right leg, you want to measure the back angle that the femur (thigh bone) creates with the tibia (shin bone). The back angle isn’t the angle of your bent knee but rather the angle from if you would continue a straight line from your femur and measure the angle down to your tibia. You want an angle between 25 and 35 degrees and falling closer to 25 than 35 if possible.

If you don’t have someone who can help you, and even if you do, another way to do this is to record a video from the side of yourself pedaling and pausing the footage when your leg is at the bottom of the pedal stroke and measuring the angle with a protractor or other improvised device. Whether measuring the actual angle on your body or on a screen, make sure you are lining up with the bones precisely. Use the hip and ankle as reference points.

Seat Set-back

Now that you have your saddle height figured out, you may have to alter it a bit but that’s OK since you know how to measure it back to the proper height.

Moving the saddle back is going to effectively raise your saddle while moving it forward is going to do the opposite. The degree to which your saddle is positioned behind your bottom bracket is going to depend on the type of riding that you are doing. A position that is further forward, such as that for triathlon or time trials, will rotate your hips forward on the saddle while a mountain bike and largely road position will be further back with less forward rotation. Generally in the middle is ideal to start off with.

A good starting point is to set the nose of the saddle 6 to 8cm behind the bottom bracket. If you have a level this is where it can come in handy, otherwise take your plumb bob and position it so it falls at the center of the bottom bracket. Now measure from the tip of the saddle to this point directly above the center of the bottom bracket; it should be around 6 to 8cm.

Now that you have a ball park estimate, get on the bike and clip in. Having someone help you in this next part can be beneficial but is doable on your own as well. Stop your right leg at the 3 o’clock position with the crank arm level. Now position the string of the plumb bob not on your knee cap but rather the little boney bulge just below and in front of it. Now see where the plumb bob falls relative to the spindle of the pedal.

Ideally in a neutral position, you want it to line up directly with the spindle of the pedal. If it falls more than a centimeter in front of the spindle, you need to move your saddle back roughly that same amount and vice versa. This position in the center is a neutral position that you can change depending upon the type of riding that you are doing.

Going Back to Saddle Height

Now that you have the set-back correct you are going to have to go back to whichever method you used to find your saddle height as depending on how far you moved your saddle, your height is going to be off. As stated above, if you moved your saddle back you are going to have to lower your saddle a little and vice versa.

Once you get this properly adjusted again, double check where the plumb bob falls again and make adjustments as needed. Every time you move one thing it is going to impact the others so you need to check and make sure it didn’t throw the others too far off. Bike fits aren’t one and done but rather a good amount of try and try again and before long you will have it where you want it.

Handlebar Set-Up

The core of a bike fit is your seat position relative to your bottom bracket but where your upper body falls can have a big impact on comfort as well as overall performance.

The first thing is to determine your flexibility and what type of riding you are doing. If you have tight hamstrings as well as back muscles you simply aren’t going to be able to ride with super low handle bars. The handlebar set-up determines how far stretched out, or scrunched up you are on the bike. You want to be in a natural neutral position with not too much of either.

A good gauge is with your hands on the hoods, or whichever position you will be riding in the most, look down at the axle of the front wheel. Where does it fall relative to the handle bars? If the handlebars are behind the axle you are probably too scrunched up. If the handlebars are in front of the axle you are probably too stretched out. Leeway of a centimeter or two in either direction is OK but past that you will need a different size stem.  If it’s too much in either direction you are probably on the wrong size bike and may need a different frame size to get to that ideal position.

Raising or lowering the bars is going to depend on how much room you have on either side of your stem on the steerer tube. You can take spacers from below the stem and put them on top to lower your bars or vice versa. Be sure you properly tighten the head-set and stem bolts when you put it back together.

Adjusting to Your New Bike Fit

Now you’re all set. Your cleats, saddle height, saddle set-back, and handle bars are in an ideal position to ride comfortably with less chance of injury. Since your original bike fit probably wasn’t exactly what it is now you need to make sure you ease into riding in this position as your muscles and tendons won’t be used to it.

Depending on how far off your previous position was, you should ride for no more than an hour the first few days. Remember to increase intensity gradually and address any pains immediately. Riding at a lower volume and intensity will give your body time to adjust and get used to the position. If you feel something is off, stop and make adjustments as needed while on a ride. Only make small adjustments of about a millimeter or less each time.

As you can now see, there is a lot that goes into a proper bike fit and this doesn’t even include everything. You can go to the n-th degree when doing a bike fit, measuring angles and determining optimal power in varying positions among other things. This guide is intended to give you a basic idea of how to get your position as close to your ideal position without having to get an expert fit.

A professional fit is always advisable however as depending on your body and specific conditions, an expert is going to be able to make adjustments to correct for things that you may not even know are an issue for you. You can do it on your own, just make sure you pay attention to detail and are smart about the changes you are making. The above will get you close to where you should be and should help prevent overuse injuries as well as help you to ride faster and longer, after you ease into your new position.

At Home Bike Fit

MyVeloFit is a revolutionary new app that combines the powers of computer vision and artificial intelligence to help you do your very own bike fitting at home in a matter of minutes. Whether you’re an individual or a business that specializes in bike fitting, they have a subscription model that works for you. Everything from free to a fraction of the cost of an in-person fitting! Check them out today to start feeling better on your rides!

Tips For Riding in Gravel

November 28, 2015 by Wade Shaddy

Tips For Riding in Gravel

Road bikes are specialized for speed and hard pavement. Skinny, high-pressure tires are skittish, unstable and can be dangerous in gravel. But it’s a sure bet you’ll encounter gravel from a detour, road construction or a stretch of gravel on your planned route. Prepare yourself for the inevitable by following a few time-tested tips for getting through that rough patch. Your road bike is capable of much more than you think.

Gravel Upsides

Don’t be intimidated by gravel, it has it’s upside, there’s almost no traffic. Gravel roads are twisty, turny, and they often follow natural and beautiful landscapes that make cycling so much fun. You get to visit river beds, ghost towns, campsites and follow links allowing you to access stretches of pavement that you’ve always avoided. Gravel roads are often the best choices for cyclists in the need of a short cut.

Gravel Grinders

Every so often a movement arises in the bike world. While road racing on asphalt has been a seriously competitive sport for nearly a century, some cyclists have discovered that riding bikes on gravel might be fun. As a testament to gravel riding, races and ralleys in certain parts of the country have been springing up. The Grasshopper and Gravel Grinder series are two of them. Some of them are completely on gravel roads, others link asphalt and gravel roads together. It’s a given that you’re probably better off with a gravel-specific bike, gravel grinder participants use nearly every kind of bike, from full-suspension mountain bikes to cyclocross, and full-on road racing feather-weights.

Tire Concerns

Road bikes are made for hard surfaces such as asphalt and concrete. But road bikes are fully capable of riding in gravel. Tires are often the biggest issue. Some cyclists argue that road bike tires can’t handle gravel, that they pinch flat, tear or otherwise go flat. But unless you’re running the lightest, most minimalist racing tires, they hold up to gravel.

Size of Gravel

Generally speaking, when individual pebbles or rocks are smaller, or near the width of your tires, you can still ride. But take note when rocks are bigger than your tires. Riding in this type of gravel is not recommended. You run the risk of cutting your road tires —  they’re just not designed for it.

No Float

Mountain bikes or other bikes with fat tires float on gravel. But road bikes don’t float on gravel, they cut into it. More momentum helps you to float to a certain extent, but too much speed can cause you to lose control, hit deep patches, or follow a line in the gravel that you don’t want to follow. Approach a new patch of gravel cautiously, and try to maintain a constant speed.

Gear Down

Most riders will need to gear down to ride gravel. A high cadence with lots of torque is your best bet in situations where the gravel or dirt gets loose. Higher cadence allows you to power through situations where you lose traction, and allows you to stay on top of the gear without having to resort to standing up—which is bad news on gravel.

Scan Ahead

Scan ahead, particularly if you’re descending. Pick a line that you can live with, and stay aware. Gravel can be deceiving, with patches and holes over 6-inches deep. It’s not easy to read gravel surfaces, but scanning ahead gives you the benefit of the doubt, and can make all the difference. Skinny road bike tires sink fast in deep gravel. If that happens, you get an up close, personal look at the gravel.

Thin Layers

Thin layers of gravel might be the most dangerous. Especially if they’re located on hard pack. If you’ve done any serious miles, you’ve probably already hit gravel on pavement. The smallest pebble can cause the front end to wash out on corners. Road bikes on pavement typically lean into corners. On gravel, it’s best to steer into the corner, and try to keep the bike as close to 90-degrees as possible to prevent washing out your front tire.

Relax

Don’t be afraid and become tense. The most important technique is the simplest. When riding on gravel or dirt you’ll likely experience some lateral movement, and feel your bike wander from side to side. This is completely normal. The easiest way to control lateral flow is to relax and ride with it. Make sure to keep your shoulders, arms and hands loose and maintain a normal grip on your bars. Your bike will lose the centrifugal balance from the wheels that you’re so comfortable with on pavement, so use your core strength to maneuver the bike.

Turns and Curves

Avoid sharp turns: the deeper the gravel, the more your front wheel digs in and accentuates any sudden steering movements you might make. This is the one single mistake that causes the most falls in gravel. Consistent, smooth lines, and avoiding sudden movements, keeps you and your bike upright, particularity at higher speeds.

Don’t Be Afraid

There’s no need to avoid riding in gravel. If you do any long distance riding, adventure touring or participate in any overnight cycle events such as Cycle Oregon, the Seattle to Portland, the Alpine loop on the East Coast, or other similar rides, gravel riding is a great skill to have, and a necessary one. Don’ be intimidated by it. Learn to conquer it first, enjoy it and have fun.

If You Get Serious

If you get bit by the gravel riding bug, there’s options for doing it even more enthusiastically. In the last few years, bike builders have introduced gravel-specific models that have the toughness of a mountain bike, the geometry of a road bike and the clearance for big tires. Sometimes also referred to as adventure bikes, they’re better suited to the demands of on and off-road riding, splitting the difference between the two disciplines. Check them out if you get the chance. What have you got to lose.

Bike Cleaning 101 –The Dry Wash

November 27, 2015 by Wade Shaddy

Bike Cleaning 101 --The Dry WashIt’s partly psychological, but a clean bike just seems to ride better. Some cyclists clean their bikes after every ride. Some clean their bike only when it’s dirty. It’s a given that, if you can see dirt and gunk on your bike, it needs to be cleaned. But too much water is not a good thing. And with the onset of winter, it’s almost impossible to wash your bike with soap and water, and then expect it to dry instead of freeze. Maybe a dry wash is all it needs.

Delicate Machine

Road bikes are delicate, complex machines. The lighter they get, the more delicate they are. Washing them with a hose is sometimes necessary, but the less water on your bike the better. Water won’t hurt your bike, but constant immersion in water should be avoided when unnecessary.

Bike Shops

You might have noticed that bike shops have spotlessly clean, shiny bikes. They don’t wash each and every one with soap and water. They use ordinary household products to dry wash their bikes when needed, without soaking them.

Rust Forms

Water seeps into cable housings and between moving parts. Rims can rust, especially where brake pads wear them down. The chain is another steel part, if it’s wet, and you don’t have sufficient lube, it can rust overnight.

Don’t Blast It

Mountain bikes are one thing. They get caked with dirt and mud, and there’s nothing you can do but hit them with everything you’ve got. But unless you’ve been caught in the rain or rode a stretch of dirt covered pavement, your expensive road bike collects nothing in the way of dirt and grime that requires you to blast it with a garden hose.

Furniture Polish

Motorcycles really have little to offer cyclists, but borrowing a few secrets from them can’t hurt. Motorcycles collect bugs like you wouldn’t believe. Motorcycles have complicated electronics that shouldn’t get wet over and over again. Dealers sell expensive products that are specifically designed to remove bugs and road grime without spraying the motorcycle with water. But guess what, it’s more like common furniture polish. Some bicycle shops also sell bike-specific dry wash to customers, but when it comes down to polishing their own bikes, they often use common furniture polish instead.

Abrasive Particles

Wiping your bike with a dry cloth is not a good idea. Sand, grit and debris attached to the bike surface can scratch paint. By spraying the bike first with furniture polish, it helps to lift abrasive particles onto the cloth, and prevents them from scratching.

Clear Coat

Even though most household furniture polish works just fine to dry wash your bike, it’s always wise to read the instructions printed on the can. If it prohibits using it on leather, cloth or other components on your bike don’t use it. Get something else. Note that if the product can be used on delicate furniture finishes, it’s not likely going to hurt the clear coat on your bike.

Citrus Scent

Dry washing your bike is almost as easy as it sounds. Work in manageable sections by spraying it with furniture polish — after vetting it of course. Lemon-scented is nice, it gives your bike the pleasant citrus scent of summer.

Foam it Up

Spray the frame until it’s foamy. Allow the foam to soften bugs, dirt and grime for a few minutes and then wipe it off with a soft cloth. If the foam begins to deteriorate and disappear before you can wipe it off, work in smaller areas.

Repeat as Needed

Don’t scrub hard initially, it’s still possible to scratch your paint or clear coat with abrasive grit that your rag has picked up. If you feel that the rag has particles, shake it out or use a different rag. It’s fine to go over the top tube, down tube or steering tube individually, and then repeat if needed until it gleams.

Polish to Shine

Hit the grips, seat and handlebars with the furniture polish if you desire. But be aware that furniture polish will make things slick; don’t use it on your rims where they contact the brake pads. Slick brakes are dangerous — it feels nice on the seat though. Allow the bike to dry for about 15 minutes, and then bring out the luster by polishing it shiny with a soft, dry cloth.

Pedal Power

Don’t forget your clipless pedals. Foam them up. Use a toothbrush or other small brush to get the sand out of them. Furniture polish has just the right amount of lubricant for these delicate parts. If you’ve ever hit them with oil, you know that they can release when you don’t want them to. Furniture polish has just enough slick stuff to keep them working like they should.

Handy Wipes

Car detailing products are other options to furniture polish. They come in handy wipes, similar children-safe baby wipes, but they have a silicone protectant that provides a bit of armour to your bike’s finish. Keep a container of these handy, they’re good for quick touch ups right before or right after you ride. Just wipe the bike with them and it shines, it’s almost too easy.

The Last Resort

If you’ve hit a patch of mud, ridden on soft dirt or wet gravel, dirt and gunk can get into the brakes, collect on the chainstays, splatter the down tube or pack into the derailleur. A dry wash isn’t going to do it in this instance. A garden hose and bucket of soapy water is in order.

Soap and Water

Tutorials for washing a bike are all over the internet. It’s just like washing a car, with a few exceptions: Remove your saddle bag and computer for starters. Washing it is easy enough, but make sure it’s dry. Air compressors are handy if you have one, they can dry your bike in minutes.

Lube Tips

One of the big issues with soap and water is that it removes lubricants, and then they need to be replaced. Some cyclists tend to over-lubricate. It leads to poor performance and excessive component wear when dirt and grime attach to the extra lube. Go easy on the lube.

Ride It

Under normal riding conditions, your bike will remain cleaner longer if you ride it. Dust from your garage is a common reason bikes need to be cleaned in the first place.

How to Buy a Bike

October 16, 2015 by Adam Farabaugh

How to Buy a Bike, buying a bike
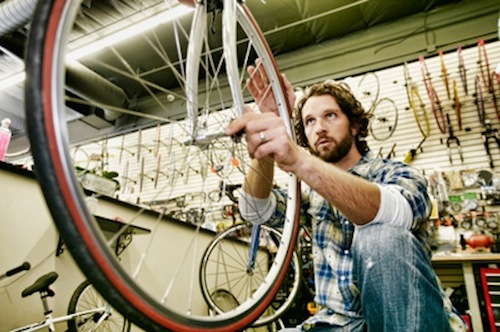
Buying a bike is an important investment in your health, wellbeing, and overall enjoyment. Getting the right one that is perfect for you will help ensure that you get the most out of your purchase and are thoroughly happy with it. Whether you have ridden a little bit before or you are a first time buyer, knowing a little bit about what you’re looking for will go a long way and will make the buying process easier.

Following this guide starting from before you even go to your local bike shop to your first ride on your new bike will help you get the most out of your buying and riding experience.

Homework Ahead of Time

Before you go to a bike shop to take a look around, you should do a little bit of homework first so you know what you’re looking for.

First, determine what type of riding you are going to do and where your fitness level is at. Are you going to be riding primarily on trails, the road, cinder bike paths? Is your riding just going to be a short commute to work or are you looking to build to 100 mile century’s on the road. Knowing what type of riding you are going to be doing will allow you to narrow your focus on bikes specific for your type of riding.

Buy a Road Bike

Buy a road bike if you are looking to stay on the road, stay away from any sort of rough terrain and are looking to go fast.

Buy a Mountain Bike

Buy a mountain bike if you are looking to do a little off road exploring or mountain biking. The suspension system will absorb the shock of the rocks, bumps and roots out on the trail.

Buy a Hybrid

Buy a hybrid or a commuter if you are looking to cruise around at a medium pace, want a relaxed upright position, want to carry items, or plan to be on a mix of pavement and gentle off road riding.

Research and Price Range

Once you have determined what type of bike you want to buy, ask your cyclist friends what specific bike they might recommend. If you don’t have cyclist friends (and even if you do) go on the internet and look at the varying options and prices of a number of different brands with the style of bike you are looking for.

Call or go on the websites of your local shops and see what they carry and use that as a starting point.

Each company breaks down their bikes by category and you can get a better look at the kind of bikes you’re looking to get. Look at the frame and component specifics with their corresponding prices. This will give you a better idea when you get into the bike shop of how to compare bikes. As you’re doing this, it doesn’t hurt to write down a few questions to take with you to the local shop.

At the Shop

Before you go into a shop, call or go on their website and see what their focus is. If you’re looking for a mountain bike, you want a shop that has a good selection and isn’t focused mainly on road bikes and vice versa.

If you’re looking for a bike for commuting and around town, make sure they have those too. After you have a bit of a background on what you’re looking for, go into your local shop. Also ask around to see which shops are good or better known in the area. When you get there, browse around and get a feel for what they have.

Then talk to a knowledgeable employee and explain what you’re looking for and why. They will be able to help guide you toward the bike that is perfect for you and your price range. Ask questions about the bike and ask to see a bike one level up as well as down from what they recommend to get a feel for what you’re getting and for what price.

Test Ride

Once you find a bike you like, take it for a test ride. You’re not going to get the full feel of what it’s like on a normal ride but just a ride around the parking lot will give you a feel for its fit and how it handles. Shift through the gears, test the brakes, get out of the saddle, do some turns.

You should get a good feel for the bike. After riding this one, ask to ride the next level up bike as well as down so you have a good comparison for what you’re getting. You may find that the cheaper bike feels just fine for you or that the more expensive one is well worth the upgrade.

If you are reading this guide on how to buy a bike it is likely you are a beginner cyclist, in saying that, you should be focused on one thing above all else, comfort. If you are not comfortable on your bike, no matter the price, you are not going to enjoy it.

Make sure to test ride a minimum of 3 to 5 bikes before making any decisions at all. Discuss with the sales person what you liked about one bike, but perhaps not the other, especially regarding comfort or bike fit. Sometimes a small adjustment of the saddle, or stem length will make all the difference.

Buying a New or Used Bike in Person

Once you’ve gotten a good feel for the bike and have compared it to others along with its price, ask about what comes with the bike. Does the shop offer free tune ups for the first year that you own it? How about a discount on other products like helmets or a jersey?

Most shops will have some sort of extra incentive to buy from their shop. If they don’t, ask for something like it. They may not give a discount on the bike but they may throw in some extra free tune ups if you buy a bike and up to 50% of any accessories you buy.

Once you’re comfortable with the bike and everything you’re getting with it, make the purchase. You can sweat all the little details but in the end it’s how much you like the bike and want to ride it. Also, if you can’t afford the full price of the bike up front, a lot of shops will offer financing, so ask ahead of time if that’s something they can do.

Buying a New or Used Bike Online

Honestly, if this is your first bike purchase I highly recommend against buying online unless you are able to test ride elsewhere first. You have to be very confident that it is the right bike for you.

The amount of money you save from buying a bike online will be outweighed by the service, knowledge and fit that you would receive from your local bike shop. If you are purchasing a bike for under $1000 then your savings are generally negligible by purchasing online. Save yourself the headache of purchasing additional parts to make your bike fit properly or other such disasters that occur online.

First Ride

After you’ve bought the bike, you’re going to want to take it for a ride straight away. Be sure that you have a good fit on the bike such as the saddle height and the reach to the handle bars. The shop can help you with this as well.

Also make sure you know how to make all the necessary adjustments so if you have to raise or lower the seat mid-ride you can. Make sure you have a multi-tool to do this as well. Once you’re riding, don’t go to crazy straight away. Any bike is going to take some getting used to so ease into your riding and get comfortable with it. You’ll be glad you did once you get everything dialed.

Buying a bike is an exciting time and knowing a few things going into your purchase will make the experience that much better. It will also help to make sure that you are getting the best bike for you. There’s nothing worse than making a purchase and realizing it wasn’t the one you wanted. Doing a little homework, asking the right questions at the shop, and taking multiple test rides will help ensure that you’re getting the best bike for you as well as your price range.

Bike Skills: Cornering – Techniques to Know and Get Good At

October 11, 2015 by Adam Farabaugh

Bike Skills- Cornering - Techniques to Know and Get Good At
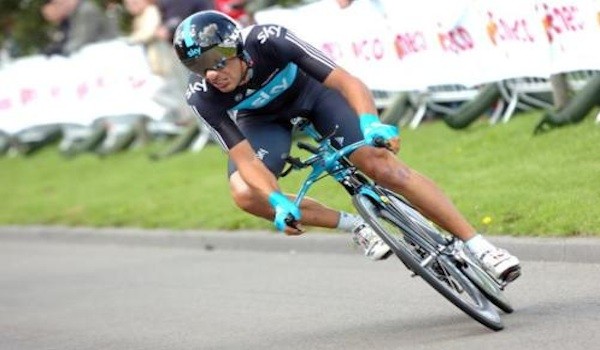
Riding a bike comes with the amazing potential to be able to do more than just go down the street or trail at a quicker pace than walking or running. With riding you can go fast enough and maneuver enough to give you a feeling unlike that of any other. Your heart pumps, the adrenaline flows, you can feel the excitement of what you just rode. You could have crashed but you didn’t. You had the skills to not only get through it but to get through it with style. These few tips will help you ride through corners better and with more confidence.

Cornering

Whether on the road or trail, cornering is the best skill you can learn to be a really good bike handler. If you can do all the other cool stuff but can’t corner, you’re riding is going to suffer. The biggest thing with cornering is having confidence in yourself and your tires. Like anything, practice is what is going to make you good. You will fall and if you don’t, you won’t find your limits. Practice, but practice smart so if you do fall, the damage is minimal.

Technique

On the road, cornering well is imperative because if you’re at your limit, you are probably going pretty fast and if you mess up it’s not going to feel good. To start, the first thing is to gauge your speed. Every corner you go through is going to have a rough maximum speed that you can get through it. As you improve, this speed will go up but there is always a limit. If you come into a corner faster than what you can handle, you are going to overshoot it. Brake and slow before the corner, not in it.

Position

Typically when going fast and through technical turns, you want your hands positioned in the drops of your road bike. This lowers your center of gravity and gives you a solid base of which to corner from. As you enter the turn, make sure your outside legs is at the bottom of the pedal stroke thus making sure your inside pedal doesn’t clip the pavement. As you do this, put a bit more weight on your inside hand while putting extra pressure on that outside leg as well. This is going to weight the tires and bike in a way to get the maximum grip out of the tires in contact with the road.

Control

Some riders swing their inside knee out while some keep it close to the top tube. Swinging it out gives a bit more stability but try it and see what feels best. As you start the turn and continue through it, look at where you want to go and keep your eyes moving toward that point. Avoid any rocks or other debris mid-turn with small adjustments as any real objects that you ride over during the turn has the real potential to cause your tire to slide out thus causing a crash.

Braking Mid-Turn

If you need to brake mid-turn, you are not going to be able to do it well while leaned over. You are going to have to straighten the bike back up, going straighter for a bit, and then applying the brakes. If there is still more corner to navigate, hopefully you slowed enough and can then re-enter the turn to make it through, otherwise start to look for exit options.

Exit Options for the Worst Case

If you do come into a turn too hot, or for whatever reason can’t make the turn, you are going to have to find exit options. This is going to just be reaction but the key is to stay cool and don’t over react. One of the first things less experienced riders do is to grab a handful of brakes. If still leaned over and cornering, this is going to send you right to the pavement. Instead, like above, straighten the bike back up, and then slow as much as you can.

If there’s a soft exit off the side of the road, take it and continue to slow and hope you don’t hit anything hard. If that’s not an option, say there is a guard-rail, you are going to have to try and make as much of the turn as you can. You may make it, but if you don’t you’ll have at least slowed some and created less of an angle into the object so it is less of a direct impact making your landing softer. You don’t need to be thinking about this as you enter every turn but when you do encounter it, you need to know what to do. It’s going to just be reaction but the fact that your brain has thought of it once before and has some inclination on what to tell your body to do will go a long way.

Practice

The more you go through corners, the better and more comfortable you are going to get at going through them. The best way to practice cornering is to find an empty parking lot where there is good pavement and no traffic. Practicing on the open road is dangerous and lends itself to traffic and having to focus on them instead of cornering.

First make a corner out of the parking lines or something of the like. Make sure however that at the outside of your turn there isn’t a curb or anything that you may hit if you do overshoot the corner. The first time you go through the corner, do so at a slower speed, exaggerating your actions such as the weight on your inside hand and outside pedal. Get a feel for it and then go through again from the other direction. You want to get equally good at turning in both directions, not just one. As you get more comfortable, go faster and faster but don’t overshoot your ability. Feel how the tires are contacting the pavement and try leaning the bike over more and less along with playing around with other things until you get extremely comfortable. Practice this once a week until you’re an expert at cornering and extremely comfortable with it.

Becoming good at cornering is going to allow you to be more comfortable on the bike because you are always going to feel in control. If you go too fast for what you’re comfortable with your body will tell you and you’ve found your limit. The key is to raise that limit and always be comfortable. Don’t test your limits where you shouldn’t such as on busy streets or descents where if you overshoot a corner you’re crashing. Do it safely and with that you’ll still have fun with it. Always be in control.

Goal Setting for Cyclists

October 10, 2015 by Alison Jackson

Goal Setting for CyclistsWhether you are aiming for a podium at National Championship or just want to be a little healthier, all bike riders can benefit from setting appropriate SMART goals.  SMART is an acronym used to set Specific, Measurable, Action-Oriented, Realistic, and Time-bound goals.

S – Specific

The first step to making a SMART goal is to be very specific.  You can set a broad big picture goal but from there it is important to articulate the smaller process goals that will help you achieve the big goal.  An example of a broad goal is ‘to do better than last year’ or ‘get fit’.  Ambiguous big-picture goals need to be funnelled down into attainable process goals to be check-marked along the way to the big goal.  Specific goals look at what is needed to get to the big-picture goal.  A more specific goal might be to place higher at your next National Championships.  Even more specific would be to notice that the championship course has a lot of climbing in it and choose a specific goal of becoming a faster climber.  Also, to get fit, what does that look like or mean to you?  Perhaps it means riding more kilometers, a goal weight or size, or the ability to achieve a fitness task.

M – Measureable

Another way to help select a specific goal is to determine if there is a good way of measuring success.  A SMART goal will have an end result that can be measured.  A measureable goal produces accountability and keeps you on track to know if you are getting closer to reaching your goal.  Becoming a better climber can be measured by a hill climbing workout done every week or every other week, whether it is increasing the number of hill repeats in a workout, or reaching the top in a single effort with the KOM or QOM Strava record.  If the goal is to ride more kilometers to get fit, start keeping a log of kilometers each week and increase the weekly count by 5 or 10km.  If the goal is to lose 10lbs use the scale regularly to keep you on track.

A – Action-orientated

In order to achieve your goal you must do something.  You will not reach your goal just by wishing for it to happen.  Make a plan and choose a couple of steps that will lead you to reaching your goal.  To be the best climber you need to commit to doing hill repeats regularly.  If you want to get fit, ride more kilometers this year than ever before, or lose that weight, you need to oil that chain and lay down some rubber on the road.

R – Realistic

A successful goal needs to be realistic.  A good assessment of your present situation will help you determine what a realistic goal might be.  Consider your work schedule, your family needs, current commitments and present fitness while setting your goals.

T – Time-bound

Finally, your goal needs to be written on a calendar with an end-date.  An open-ended goal becomes a never ending fight where preoccupation with previous habits distract you from really digging in and reaching your goal.  If you want to climb faster and have decided to include hill repeats in your weekly training plan, set up monthly markers such as ‘x’ number of hill repeats by the 30th of each month.  In addition to setting a year-end kilometer goal, set monthly kilometer goals to keep you on track.  If you want to lose weight before the next big race or before your best friend’s wedding make sure you circle that date on the calendar.  A deadline will help keep you motivated to work hard because you know that it has a foreseeable end.

How To Use Bike Gears Properly

October 4, 2015 by Lee Agur

Bike Gears – How They Work

How To Use Bike Gears Properly
This bike is in the easiest gear possible. It is in the small chainring upfront, and it is in the largest gear in the back.

Bikes have anywhere from one front chainring to three chainrings these days, accompanied by seven to eleven gears in the back. The different combinations of these gears will determine how easy or difficult it is to pedal and will dictate your speed. If you are looking to make small adjustments in the speed/difficulty then you will want to change your back gears (also known as cogs).

If you are looking to make a big change in your effort or speed then you will likely want to change the front chainring. A great example would be when you are heading from a downhill in the big ring and then switching to the small chainring as you climb up the other side of the hill.

Shifting Bike Gears

Left Shifter – Changes the front chainring and makes the biggest shift change.

Right Shifter – Changes the rear cogs and makes the smallest incremental shift changes.

What Is the Proper Gear To Be In?

The appropriate gear to be in is a gear that allows you to have a good steady cadence without feeling like you are pedaling too hard or too gently.

If you select a gear that is too high for the conditions, it will force you into a slower cadence. Pedaling slower than your ideal cadence is wasteful of energy. You also run a higher risk of muscle strains and joint damage, particularly to the knees and hips. Pedaling faster than your ideal cadence can allow you to generate an extra burst of speed, but you will tire yourself out too soon if you try to maintain an excessively fast cadence.

Aim for a constant cadence of 75 – 95rpm.

What To Avoid When Changing Bike Gears

Cross chaining occurs when the chain is on a big slant. The chain should not go on the big ring up front and the big ring on the back simultaneously, nor should it go on the small ring upfront and the small ring in the back. Cross chaining wrecks your chain, decreases efficiency and it also gives you less options when trying to find a new gear.

Using Bike Gears

  1. To begin with, start in your small chainring up front.
  2. Get on your bike and become familiar with changing your back gears with your right shifter.
  3. Get comfortable shifting through the gears (while avoiding cross chaining) before you start shifting with the front gears as well.
  4. Attempt to maintain a smooth steady cadence of about 75 – 95 rpm while maintaining a moderate effort when pushing on the pedals. Change the gears appropriately to maintain this steady cadence and effort.

How To Use Bike Gears On a Hill

Use the small or middle chainring upfront and the bigger gears in the back. You will want to switch in to these gears early as you approach the climb allowing you to climb the hill slowly and with less effort.

How To Use Bike Gears On a Flat

Use the middle front chainring and the middle or small gears in the back. Focus on small adjustments with your back gear.

How To Use Bike Gears Descending

Use the large front chainring and the middle or small gears in the back.

Tips For Biking In Large Groups

September 18, 2015 by U.M.

biking in large groupsBiking alone is actually much easier than biking in a large group. The tips in this article will list some general rules for biking in large groups for fun and not as a race. Group rides and races are two separate events and require two sets of skills. Keeping that in mind, here are some tips for biking in large groups.

1. Do Not Start A Race

When you begin riding, do not try to muscle your way into a position. Group rides are not the time to strain your muscles and show your strength. You’ll more than likely cause a wreck or make someone upset. Here you are trying to create friends, not enemies.

2. Bar-To-Bar Alignment

The safest formation for a group ride is by pairs (also known as a double paceline). Each pair should line up their handlebars and maintain a speed that is comfortable for the both of them. Pairs that will not tire easily should stay in the front of the group.

3. Moving To A Back Position

If you or your partner start to feel tired, the best thing you can do is move to the back of the pack. This will keep you from slowing down the riders behind you and getting in their way. The best way to accomplish this movement is for the both of you to ease to the side. The riders behind you will ride forward in-between you. You and your partner should then slow your speed and come together again where there is ample room. If you think you’ll have to be careful to get into a space, assume the space is too cramped and dangerous to try to move into. Always err on the side of caution in order to avoid accidents.

4. Being Second Is Equally Important As First

If the front pair moves to the back you have to be prepared to lead the group. If you don’t think you can handle this physically, keep to the middle and back of the pack. You can maintain your position by letting others have the right of way and rejoin the group in front of you.

5. No Gaps!

Good riding formation does not allow for any gaps. Don’t ride tire to tire but don’t leave glaring holes either. If you spot a gap, ease up to fill it. Try not to change your pedaling speed too much as you can throw off the balance of the group.

6. No Sudden Movements

The worst thing you can do when biking in large groups is to make a sudden move or turn. Also, never suddenly change your speed or slam on your brakes. When moving positions, filling in gaps, or steering to avoid road damage and obstructions, always move gradually. This will give the person behind you time to notice and react to your movements.

This tip also requires that you pay close attention to what’s going on around you. Look ahead in the road, follow the movement of the person in front of you but look well ahead of them to see upcoming obstacles, and do not wear headphones in case you need to hear someone shouting a sudden warning.

7. How To Signal

Except in an emergency, group cycling etiquette calls for hand signals over verbal signals. This is because a shout can be easily missed but to someone paying attention, a hand signal is mostly unavoidable. Signals should be simple and agreed upon by all riders before the group starts out.

8. Obstacles

If you’re in the front, your primary responsibility is to spot trouble coming your way. As a rule, if you don’t think the obstacle can cause damage to the people and bikes behind you, don’t bother pointing it out. If the obstacle isn’t immediately in front and can’t be hit when people change positions, don’t bother with it either. Basically, keep an eye out but don’t be annoying.

Biking in large groups requires some practice. If you’re nervous, stick to the back of the pack and really watch the people around you and how they maneuver. Just keep going, keep calm, pay attention to your group and surroundings, and, most importantly, enjoy yourself!

« Previous Page
Next Page »
  • Facebook
  • Tumblr
  • Twitter

Latest Articles

JOIN Cycling: A New Training Platform for Cyclists

May 27, 2024 By Eric Lister

cold exposure

The Benefits of Cold Exposure for Cycling & Life

June 13, 2023 By Eric Lister

hill climb

The Ultimate Hill Climb Training Guide

May 31, 2023 By Eric Lister

shoulder pain cycling

How to Treat & Avoid Shoulder Pain While Cycling

April 12, 2023 By Eric Lister

psoas stretch

The Importance of the Psoas Stretch for Cyclists

April 6, 2023 By Eric Lister

cycling neck pain

The Ultimate Guide to Cycling Neck Pain: Causes and Solutions

March 21, 2023 By Eric Lister

Useful Info

  • Contact
  • Finally, A Global Cycling Club That Is Focused On Community And Love Of Cycling!
  • Privacy Policy
  • Share Your Story!
  • Terms And Conditions Of Use
  • Welcome to I Love Bicycling
  • What Happened When I Stretched Every Day For a Month

Recent Posts

  • JOIN Cycling: A New Training Platform for Cyclists
  • How to Hang Bikes in Your Garage: 4 Inexpensive Options
  • Gravel Bike Vs. Road Bike: Which One Is Better For You?
  • The 6 Types of Mountain Bikes & How to Choose the Best One for You
  • What Is a Touring Bike Good For? 5 Benefits We Know You’ll Love

Search I Love Bicycling

Connect with Us

  • Facebook
  • RSS
  • Tumblr
  • Twitter

Copyright © 2025 · Magazine Pro Theme on Genesis Framework · WordPress · Log in