• Training
    • Injury Prevention
    • Training Tips
  • How To
    • Bike Fit
    • Gear
  • Nutrition
    • Nutrition Tips
    • Weight Loss
  • Repair
  • Reviews
  • Stories
    • Funny Stories
    • Jokes
    • Quotes
    • Videos
    • Funny Videos

I Love Bicycling

I Love Bicycling is a website that is geared towards cycling for beginners with road cycling tips, training articles, nutrition tips, weight loss, how to’s and bike repair articles.

Cycling Through Life: How to Enjoy Family Biking

May 9, 2023 by Eric Lister

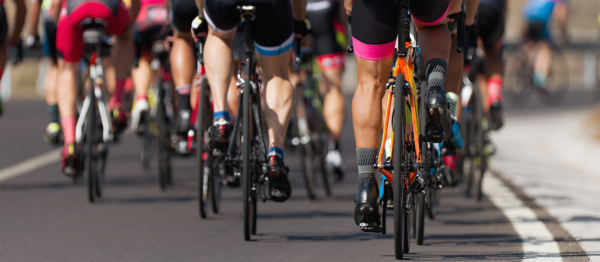
As cyclists, we are huge advocates for family biking as a way to improve the physical and mental health of children, adolescents, adults, and seniors. No matter your age or current level of fitness, cycling is a sport that is low-impact, accessible, and brings people together through the exploration of surroundings, breathing of fresh air, and enjoyment of physical exercise.

family biking

(Image credit: Adobe Stock)

With society still lingering in the fog of the COVID-19 pandemic, and a resultant 25% and 20% of youth, respectively, experiencing clinically elevated levels of depression and anxiety, we are all now more than ever overdue for some quality time together outside. Cycling provides a sense of adventure for everyone involved, and can indeed take you to places you’ve never been before.

Benefits of Family Biking

Aerobic exercise like cycling has been shown to have an incredibly positive effect on a child’s brain. From executive functions like planning, organizing, and memory to having improved concentration, a longer attention span, and better academic performance at school. The elusive elixir that calms our kids and keeps them occupied doesn’t have to be a phone, why not a bike?

For adults, regular cycling will contribute to weight loss, better modulation of stress levels, reduction in anxiety and depression, and so many more positive outcomes. We often use the excuse and blame poor health on the fact that we’re getting old, when the truth is more likely that we’ve just stopped doing the things that were keeping us healthy.

family biking

(Image credit: Adobe Stock)

Senior citizens are not exempt from the benefits of cycling. In fact, for older adults, cycling has been shown to improve inhibition (control of impulsive or automatic responses), keeping track of changes in the environment, cognitive processing speed, and engagement with the outdoors. All important parts of maintaining a high quality of life as we age.

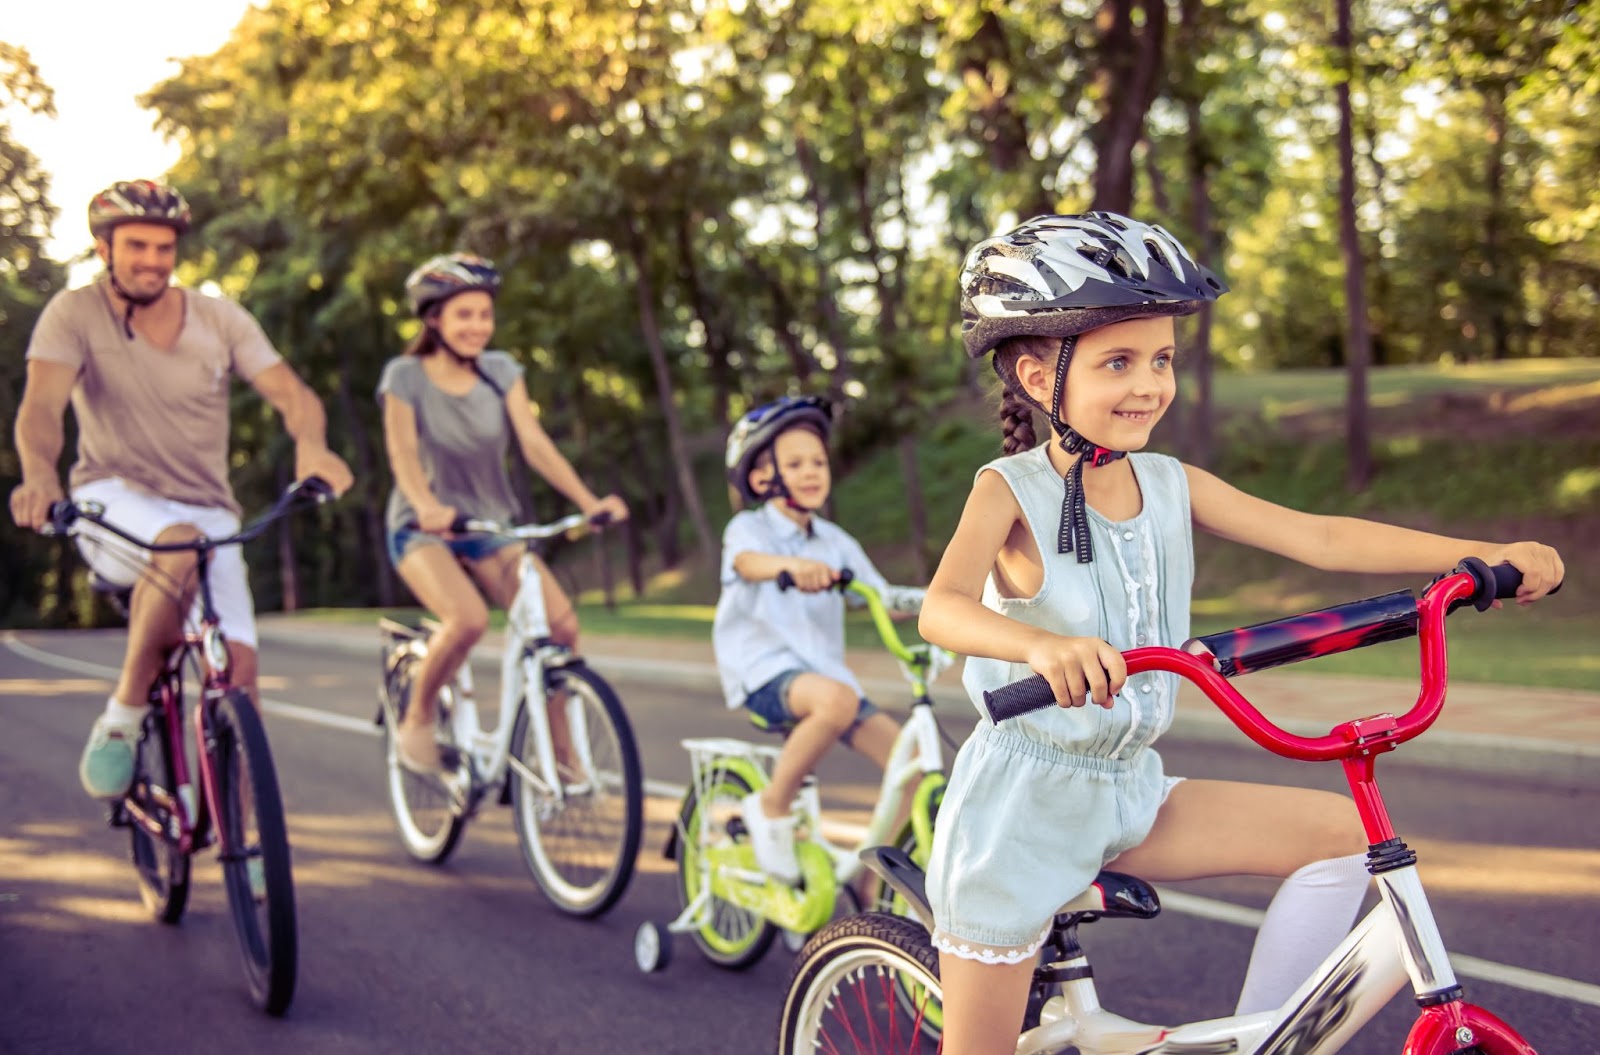
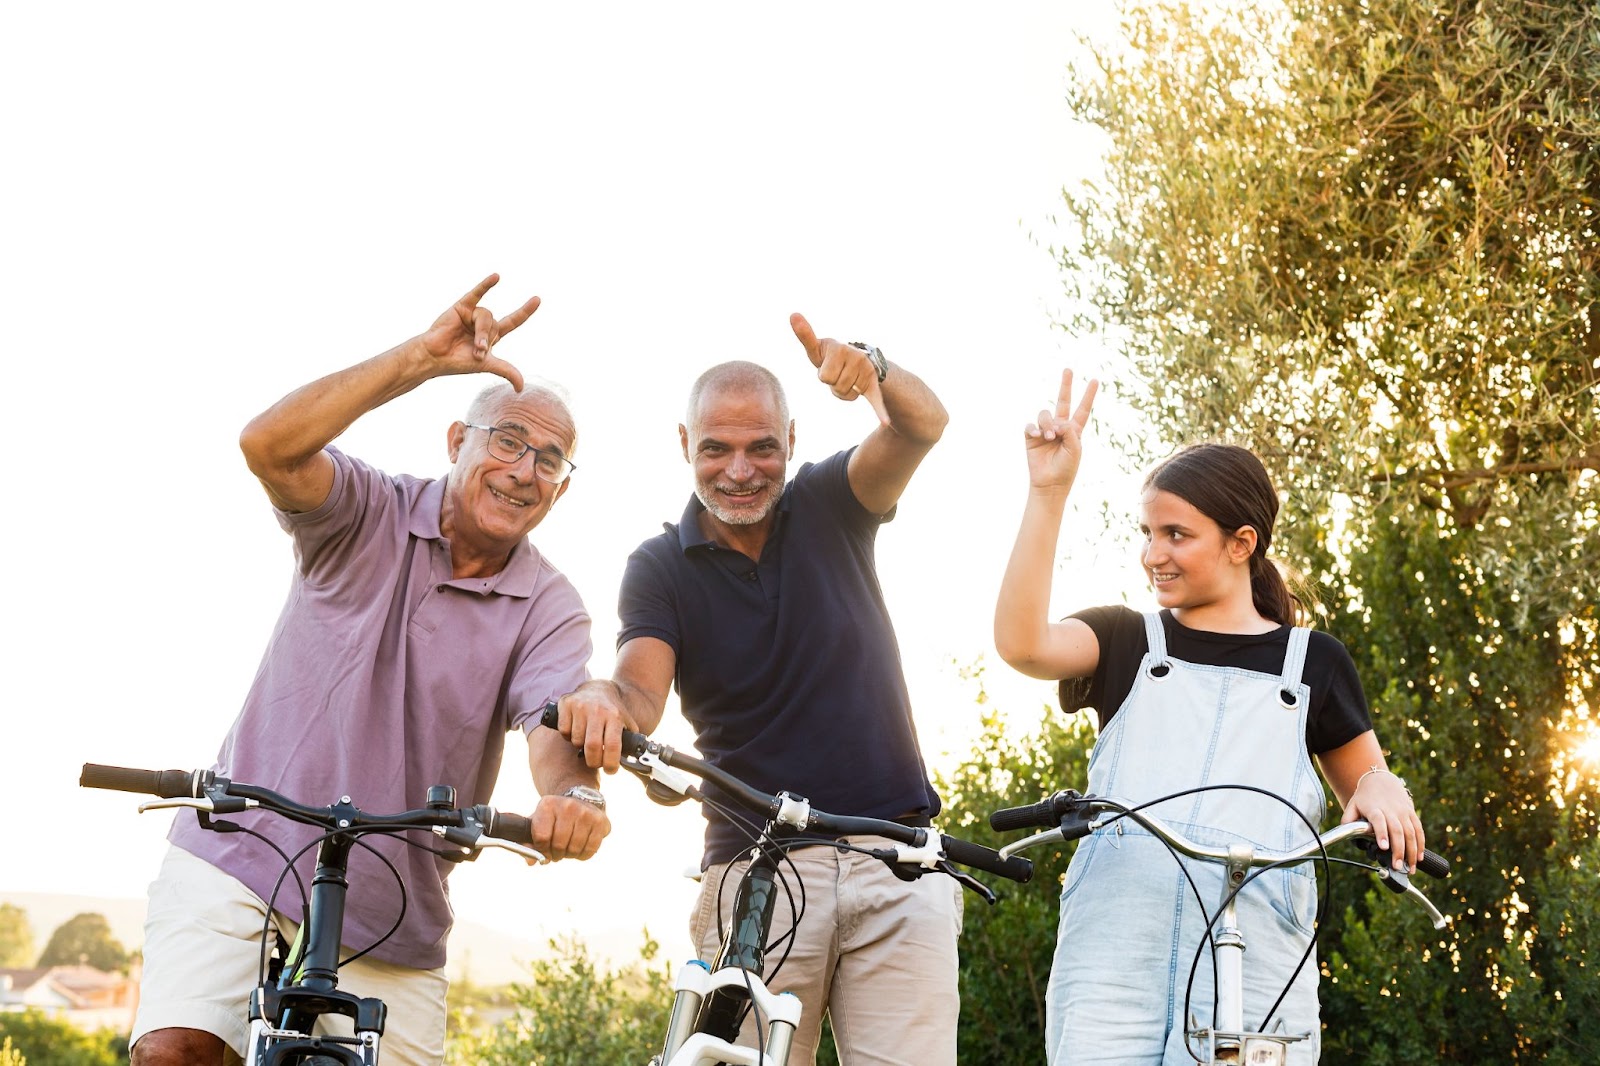
Whether its parents and kids, grandparents and grandchildren, or any other mix of relatives, partners, or siblings, cycling is a generational sport that we can all enjoy, be a part of, and benefit from. Teaching kids to exercise early has prolonged effects throughout childhood, and cycling as a form of transportation has massive cost-saving and environmental benefits to society at large.

How to Start Biking as a Family

Getting everyone to go riding together can be challenging, especially if each person has a varying level of biking experience or different attitudes towards cycling. However, that shouldn’t discourage you from enjoying the benefits of family biking we’ve just talked about. Below are some helpful tips that will make it easier to integrate biking into your regular routine.

family biking

(Image credit: Adobe Stock)

Plan Your Gear

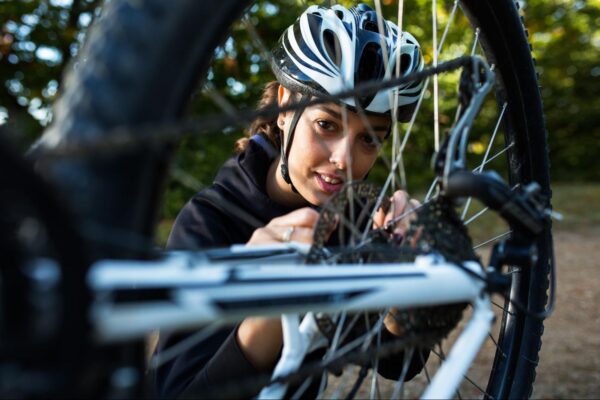
Safety is always the first thing you want to check off your list. Especially for the younger kids and beginner riders of all ages, getting a properly fitted helmet is key to mitigating the repercussions (and concussions) that can happen as a result of a fall. Gloves, knee pads, and elbow pads too are all great pieces of equipment that should be considered.

Plan Your Route

If you’re heading out as a group for the first time, try planning your ride in leisurely areas that are comfortable and spacious for people of all skill levels. Paved community paths, parks, or even laid-back trails are perfect for learning to safely explore the outdoors on a bicycle without the risk of traffic and crowded areas that can intimidate beginners and kids.

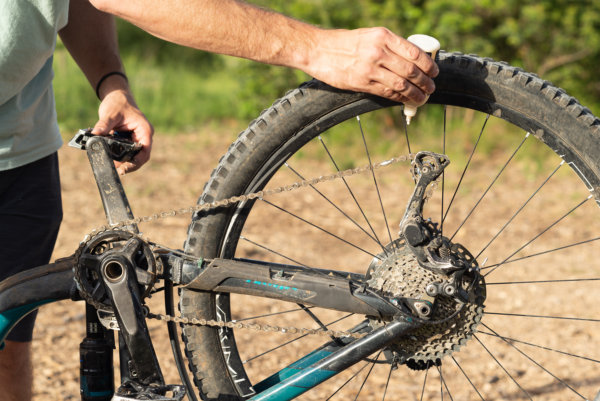
Pack Food & Supplies

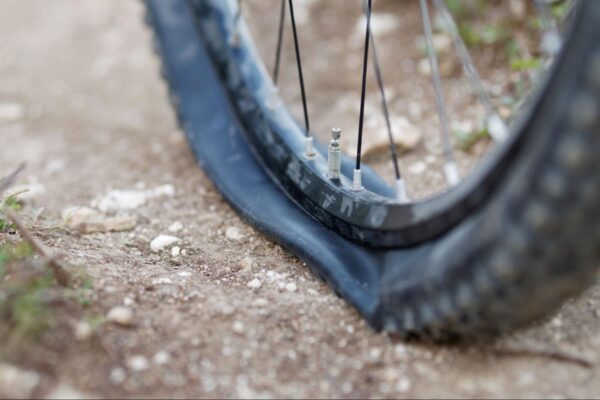
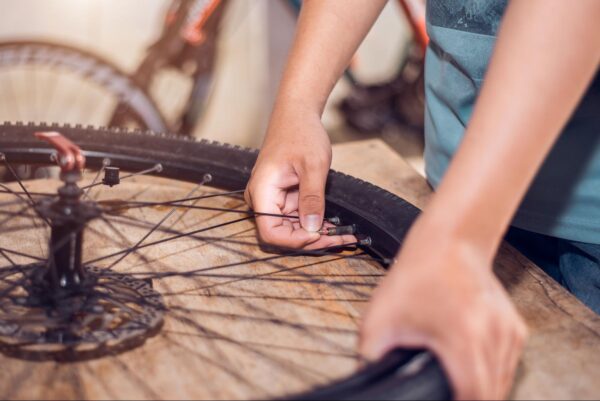
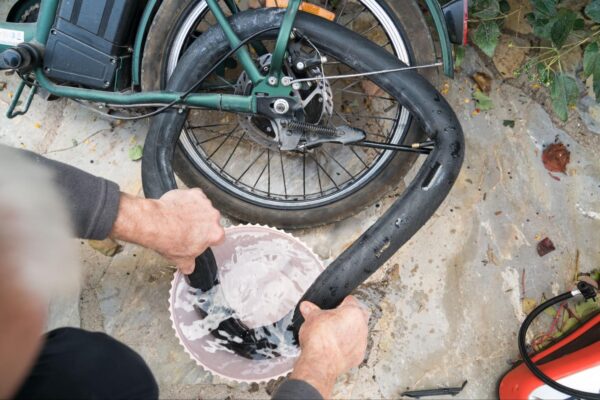
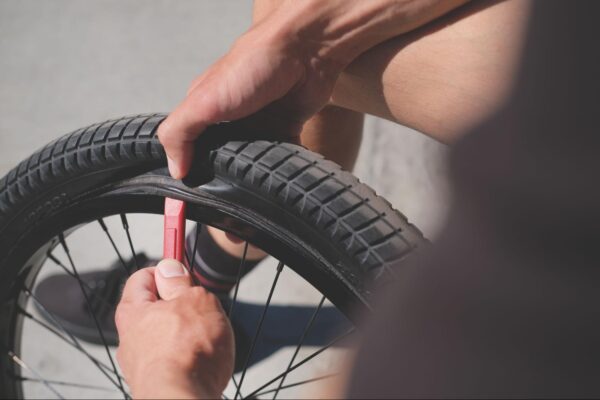
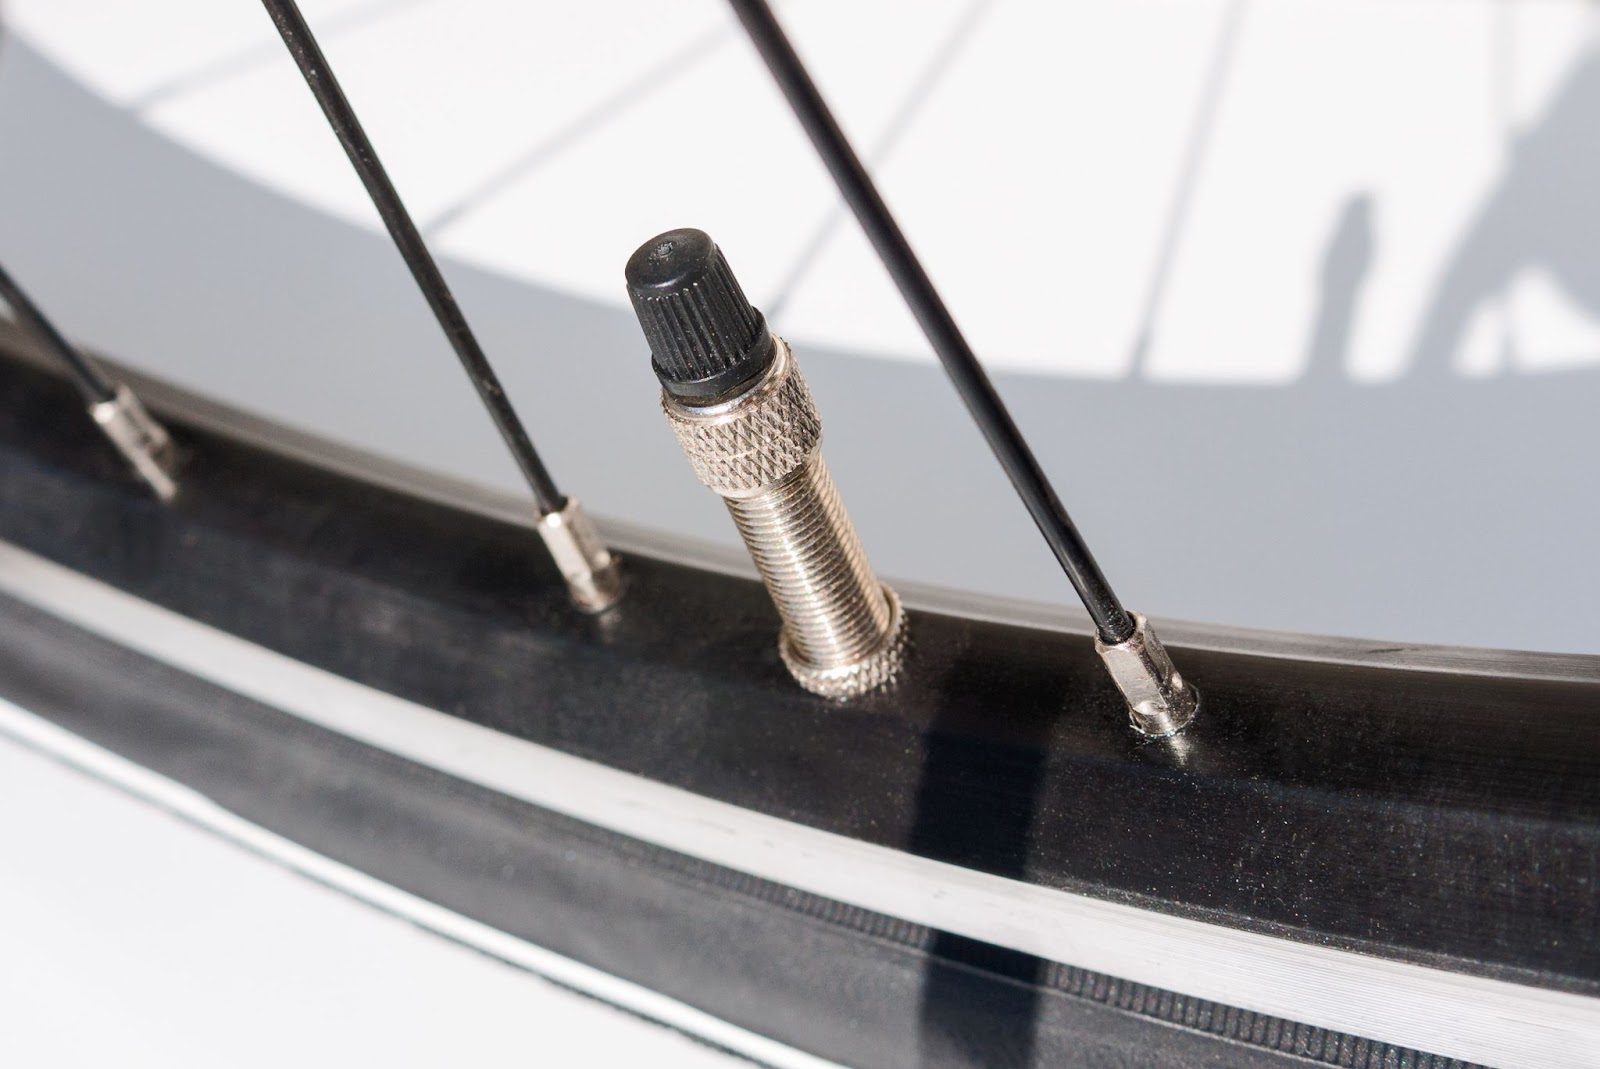
It’s always good to be ready for falls, scrapes, cuts, flat tires, and other likely scenarios that are all just a part of cycling. Bring along some basic first-aid items like band-aids, as well as a tire patch kit and even a mini pump to get you through should somebody get a flat. Remember too to pack lots of water to stay hydrated and snacks in case someone starts to get tired or cranky!

Split Responsibilities

If you have people of varying skill, age, or fitness levels, it can sometimes be good to have one parent with one group and another parent with another group. This way you can travel and explore at different speeds or even along similar but different routes to keep everyone stimulated, challenged, and excited to be out riding together. Reconvene at a checkpoint for water and food!

Embrace the Opportunity

Being outside as a family is a great time to bond over each other’s interests, personalities, and the exploration of surroundings. Nature and exercise are healing powers that bring out emotions, foster ideas, and nurture relationships. When you’re out riding together, you’ll share an experience with so much more sustenance than just sitting around watching TV, embrace it!

Looking for Fun Workouts the Whole Family Can Do?

Get in shape as a family! To complement your newfound cycling adventures, why not exercise the whole body with the versatile programming we’ve created over at Dynamic Cyclist! We have hundreds of scalable workouts that anyone can do and benefit from. High-quality follow-along instructional routines. Try us out for 7-days FREE by clicking here!

How to Treat & Avoid Shoulder Pain While Cycling

April 12, 2023 by Eric Lister

In cycling, the shoulder doesn’t get challenged in many ways, apart from the load we bear as a result of leaning on the handlebars. Many of us have experienced shoulder pain while cycling, and it can be largely due to a number of factors, including the inadequate stimulation of all the tissues that surround, support, and move this complex joint.

shoulder pain cycling

(Image credit: anut21ng/Adobe Stock)

Shoulder injuries are one of the most common gradual onset injuries in recreational cyclists. This means that they develop slowly over time, usually as a result of the overuse of some muscles to the neglect of others. It often starts as a dull, aching sensation that gets worse with further use, as opposed to a sharp, acute pain that we really only see as a result of falls and accidents.

It’s important to know that the most mobile joint in the human body is the shoulder joint. Several bones, muscles and other tissues have influence on its structural integrity and movement capacity, which can make the causes of non-specific shoulder pain from cycling hard to identify. However, there are some common issues cyclists face simply due to the nature of the sport.

Poor Bike Fit & Prolonged Riding

Making sure your bike is fitted properly to your body is always one of the first things you should check when addressing pain. This is because as cyclists we stay more or less in the same positions for long periods of time, making us incredibly susceptible to overuse injuries and muscle imbalances.

If your handlebars are too low or too far away from you, it will force you to lean more forward, and you’ll resultantly have to support more of your bodyweight over the handlebars than you would otherwise. Think of an incline pushup (where your hands are elevated on something), and how the pushup gets harder as you move your hands lower towards the floor.

The constant weight bearing on the arms has a significant effect on the shoulder, and can often result in something called shoulder impingement syndrome. Pain when lifting the arms, pain while trying to reach overhead or behind you, pain in the front/side of the shoulder, arm weakness and stiffness are all symptoms of shoulder impingement syndrome.

Two of your four rotator cuff muscles (infraspinatus, supraspinatus) have tissues that pass between the humerus (upper arm bone) and acromion (top outer part of the shoulder blade). Constant load bearing on the arms, like you see in cycling, can compress, rub against, pinch or otherwise impinge upon these tissues, resulting in the symptoms previously listed.

(Image credit: VectorMine/Adobe Stock)

How to Fix It

  1. Get a professional bike fitting: Find a local shop that can do it in person or use an AI app like MyVeloFit to do it yourself at home. Either way, ensuring your bike is fitted to your body will immediately reduce your likelihood of injury and increase comfort while riding.
  2. Reduce cycling intensity: If you are dealing with some sort of shoulder impingement syndrome, you can see, just by its nature, how it’s not a problem you can simply work through. The body needs time to let this irritating condition settle while you work on creating more balance throughout the joint (next step).
  3. Strengthen the rotator cuff muscles: Cycling doesn’t challenge the shoulder in many ways, which is a disaster for shoulder health. It needs complex stimulation from a variety of exercises. Having a well-balanced program that trains the shoulder from all angles and in all positions is key to avoiding shoulder pain from cycling.

Faulty Breathing, Tense Neck & Shoulders

These three things are all related, and commonly found in the average cyclist. Because of the intimate and complex relationship between the humerus (upper arm), clavicle (collarbone), scapula (shoulder blade) and all their attaching tissues (which collectively form the shoulder joint), compromising any one of them can negatively influence the others.

x-ray showing shoulder joint

This x-ray shows the complex arrangement of bones that meet to form the shoulder joint. (Image credit: Nut/Adobe Stock)

Cyclists are prone to inefficient breathing and excessive stress on the neck through their positioning on the bike. The head juts forward and back the more you bend over on the bike, this can place a load of 60+ pounds on your cervical (neck) spine, because the head’s weight gets multiplied every inch it moves forward in front of the body.

A forward folded position can also inhibit movement of the diaphragm, your primary respiratory muscle. This encourages you to breathe through the chest, which strains small secondary respiratory muscles in your neck responsible for lifting the ribs. Because cycling is such a cardio-intensive activity, this type of breathing can cause significant irritation.

Both of these things can carry over into daily life, and both can contribute to shoulder pain while cycling. By compromising the head, neck and upper back through poor breathing and positioning, the shoulder will have no choice but to try and compensate. This is one example of how shoulder pain is not always directly linked to the shoulder itself, but its surrounding parts.

How to Fix It

  1. Strengthen the neck extensors & upper back: The muscles that pull your head back, as well as extend (flatten) your upper back, tend to get very weak if all you do is cycle. This is because they are constantly being stretched out on the bike. This article will show you what exercises to do and why they work for less neck and shoulder pain while riding.
  2. Practice diaphragmatic breathing: This means breathing into your belly. Most neck and head pain in cyclists can be attributed to faulty chest/neck breathing patterns. A good exercise is lying back over an exercise ball and taking long deep breaths. This stretches the abdominals while stimulating the diaphragm and forcing it to be more active.
  3. Relax the neck: Stretching the neck muscles prior to and even during your ride can force them to relax while you focus on breathing more into your belly. Being conscious of how much tension you’re holding in your shoulders will also be beneficial. Try to catch yourself while riding if your shoulders get shrugged up close to the ears.

Note on Nutrition & Cycling Shoulder Pain

Many people fail to consider the role of the organs when it comes to shoulder pain in cyclists. The phrenic nerve is a major nerve that originates from the third to fifth cervical spine nerves (C3-C5) in the neck. It descends through the thorax (chest cavity) and travels between the lungs, in front of the heart and along the surface of the diaphragm. 

You have two phrenic nerves, one going down the left and right side of the body. If the stomach, which is on the left side of the body, gets too distended or inflamed, it can press on the diaphragm and irritate the left phrenic nerve. Similarly on the right side, if the liver becomes enlarged, it can press on the right phrenic nerve via the diaphragm.

When these tissues become irritated or inflamed, they can send pain signals to the spinal cord through the sensory fibers of the phrenic nerve. In the spinal cord, the incoming pain signals from the phrenic nerve can activate nerve cells (neurons) that also receive sensory input from other areas of the body, including the shoulder. This is called referred pain.

Attention should be paid to the diet of a cyclist who is experiencing shoulder pain, especially if physio/massage interventions are proving ineffective. Stomach problems can contribute to left shoulder pain/weakness, and liver problems can do the same for the right shoulder. Common irritants like dairy, gluten and alcohol should be looked at as initial culprits.

Phrenic nerve

Phrenic nerve, highlighted in yellow. This is a frontal view. The diaphragm is the large dome-shaped muscle at the bottom. Under the elevated right side would sit the liver, and under the left side would sit the stomach. (Image credit: vesalii/Adobe Stock)

Eliminate Cycling Shoulder Pain!

By incorporating a well-rounded strength, mobility, flexibility and injury-prevention plan into your training, you can greatly reduce the risk of injury to your shoulders and every other part of your body. That is exactly what the programming at Dynamic Cyclist is designed to do. Try us out for 7-days FREE by clicking here!

The Importance of the Psoas Stretch for Cyclists

April 6, 2023 by Eric Lister

Your primary hip flexor, psoas major, is a muscle that seems to have its hand in just about everything. When it comes to cycling, we are constantly putting it into a shortened position through contraction in the upstroke and our bent forward, flexed hip postures on the bike. This article will show why having a psoas stretch or two in your recovery toolbox might save you from countless days of lost riding due to tension, pain, and ache. 

cyclist with lower back pain

We’ll see later in this article how the psoas muscle is one of the main causes of lower back pain in cyclists. (Image credit: Beaunitta Van Wyk/Adobe Stock)

Sounds dramatic, doesn’t it? Well, the truth about this tissue is a tricky one, especially in our sport. When we say it has a hand in everything, we really mean it. It is (perhaps infamously) known as the stress muscle because of its proclivity towards holding tension as a result of stress and trauma in all areas of our lives.

For example, the psoas has an intimate relationship with the diaphragm, your primary respiratory (breathing) muscle. They cross over each other and share nerve innervations through similar vertebral segments of the spine. Dysfunction in one can cause problems in the other.

Cycling is unique in that there is a lot of cardiorespiratory stress, and also postural stress on the body because of how it has to move with the bicycle. A proper bike fit can certainly help, but there is simply no way around the fact that our hip flexors are going to get smashed as a result of too much biking. 

Psoas Anatomy & Positioning on the Bike

psoas stretch

(Image credit: VectorMine/Adobe Stock)

Our psoas is the only muscle that connects the upper and lower body. It attaches to all five of the lumbar (lower back) vertebrae, which is slightly troublesome (sarcasm) if you’re going to be chronically shortening it, as is the case with cyclists, but also just people in general with modern lifestyles that involve a lot of sitting at desks, on couches, and in cars.

The reason is because as the psoas shortens, it starts to pull on those lumbar vertebrae. This hyperextends the back into a position called lordosis, and consequently tilts the pelvis forward into a position called anterior pelvic tilt. Tightness in the hip flexor muscles also weaken their opposing muscles, the glutes (butt), in what is known as reciprocal inhibition.

anterior pelvic tilt
Different pelvic positions. (Credit: sumaki/Adobe Stock)

Cycling exacerbates this process because of the positioning of our hips while riding. They are always in a somewhat flexed position, even at the end of our downstroke. This constant flexion is a recipe for psoas tightness, and is one of the reasons why cyclists are plagued with so much lower back pain.


Notice the position of this cyclist’s left hip. It is almost completely flexed, further exacerbated by her bent forward torso. (Image credit: Artem Varnitsin/Adobe Stock)

Benefits of Psoas Stretching for Cyclists

A testament to this muscle’s activity while we ride is that it has a bigger volume in more competitive cyclists, and grows even further with intense cycling training. By performing a variety of psoas stretches on off-days or even during and/or after your ride, it’s possible to mitigate the effects of psoas stiffness that will inevitably inhibit its function and wreak havoc throughout the rest of your body.

More than half of cyclists experience low back pain, and much of that can be attributed to dysfunction in the muscles surrounding the hip joint. Not only can a tight psoas pull on your lower back and anteriorly tilt your pelvis, but it can disrupt the timing and action of different muscles, causing some to overwork and others to become weak and underutilized.

As previously mentioned, there is a distinct relationship between the psoas and how you breathe because of its proximity to the diaphragm. Cyclist’s are already prone to faulty breathing patterns through their bent forward postures and the cardio demand of the sport. All the more reason to take care of our hips so they don’t contribute to what is often a cause of neck pain in cyclists.

Psoas Stretches

Below you’ll find some excellent hip flexor stretches that you can incorporate into your recovery routines, downtime, and even pre/during/post ride if you are experiencing low back pain as a suspected result of hip flexor tightness. Stretching before/during a ride can cause a subtle relaxing effect on the hyperactive hip flexor muscles, sometimes alleviating the pain that would otherwise arise.

Half Camel

half camel stretch

Instructions:

  1. Start in a kneeling position with your knees, hips, and shoulders all stacked posturally on top of one another
  2. Place your hands on your hips or lower back
  3. Gently press forward and arch backwards, feeling a stretch in the abdominals and front of the hip
  4. Hold here for one minute

The psoas sits deep inside your abdomen, attaching to all the lumbar vertebrae. This stretch serves as a gentle opener to the hip and mid-section, and strives to reach into those internal fibers to help them release tension and relax. This is a great one to do in between periods of sitting.

Lifted Hip Flexor Stretch

lifted hip flexor stretch

Instructions: 

  1. Rest one foot on top of a chair, focus on squaring your hips forward
  2. Keeping your chest tall, press the hips forward, extending your elevated leg behind you
  3. Hold for one minute
  4. Switch to the other leg
  5. Hold for one minute

This stretch allows you to go slightly deeper into the psoas muscle by keeping the torso erect and elevating the back leg. The elevation forces the hip to go into greater extension, which is the inverse function of the psoas and other hip flexor muscles.

Low Lunge Quad Stretch

low lunge quad stretch

Instructions:

  1. Start in a kneeling lunge position, both legs bent at 90°
  2. Squeeze your butt to tilt your pelvis backwards into a neutral position
  3. Engage your core at the same time to lock the position in place
  4. From here, gently stretch the back quad and hip muscles by pressing the hips forward
  5. Hold for one minute
  6. Switch to the other leg
  7. Hold for one minute

Your rectus femoris is a quadricep muscle that gets hammered while cycling. It has a dual function of knee extension and hip flexion, both repetitive movements in pedaling. Since they’re both hip flexors, by releasing the rectus femoris it helps the psoas to relax as well.

Get Rid of Cycling Back Pain!

Are you tired of suffering from back pain and discomfort while cycling? Look no further than Dynamic Cyclist. This comprehensive resource addresses the most common muscle imbalances and adaptive muscle shortening that lead to pain and reduced performance on the bike. With just 15 minutes a day, you can follow along with the video programs to alleviate tension and improve posture, so you can ride pain free and reach your full potential on the bike. Try out their 2 month Low Back Focus program and experience the results for yourself. Click here to try 7 days free!

How to Fix a Flat Bike Tire: Steps & Procedures

March 29, 2023 by Eric Lister

Seldom will you come across a more frustrating and annoying problem than the sudden deflation of your bicycle tire while out on a ride. A sure way to mitigate the stress of this inevitable situation is by familiarizing yourself with your bike and learning how to fix a flat all on your own. 

While it may be intimidating at first, a few practice run-throughs of the steps involved can make all the difference when you have to do it in an unfamiliar environment, perhaps tired from the journey, or even after a resultant spill or injury. 

A saying, attributed commonly to the Greek poet Archilochus, could be most appropriately referred to in our preparation:

“We don’t rise to the level of our expectations, we fall to the level of our training.”

So let us train properly! And learn one of the most fundamental skills any cyclist should know, one with the potential to get you home in any variety of sticky situations anytime out there on the road or trails.

fix a flat

(Image credit: Andrei/Adobe Stock)

Things to Carry With You

The following items should be carried with you so you’re prepared to fix a flat on your bicycle at any time in any place:

  • Spare inner tube (same size as your tire)
  • Patch repair kit
  • Tire levers
  • Pump

Once you have these items, the next step is learning where and how to use them. Here is how to fix a flat, step-by-step, using the tools above.

Step 1: Remove the Wheel

Depending on whether it is your front or rear wheel with the flat will vary this step a little bit. Regardless of which one, it will be easier to place the bike upside down resting on the saddle and handlebars so you don’t have to worry about balancing it while working.

Front Wheel

On modern bikes, the front wheel usually has a quick release lever that can simply be opened to free the front tire from the forks it sits in. It can also be helpful to release the brakes by looking for a caliper lever up near the top of the forks and opening it. This allows more room between the tire and the brake pads, making it easier to remove the tire.

Rear Wheel

A little more tricky, but easy to master with just a bit of practice. 

  1. Start by putting your gears to the smallest cog (gets the chain out of the way) 
  2. Then, as with the front wheel, open up the brake pads by using the release lever
  3. Many wheels today have a quick release axle system, if this is present on your bike, you’ll have to open the lever to release the wheel
  4. Pull the derailleur gently backwards to free the wheel
  5. Remove the wheel and be sure it is free from the chain

These processes can vary depending on your style of bike, so be sure to refer to specific instructions or follow-along videos, and practice the procedure(s) prior to going out on the road.

(Image credit: Novak/Adobe Stock)

Step 2: Deflate & Remove the Inner Tube

To do this, first deflate the tire by locating the valve. Depending on whether you have a Schrader or Presta valve, the instructions to do this are slightly different:

  • To deflate a Schrader valve, simply press the small pin in the center of the valve.
  • To deflate a Presta valve, unscrew the top cap on the valve and then press down.

It’s not necessary to completely deflate the tire, we just want to create separation and provide room to help remove the tube. 

This is where your tire levers will come in handy. Start directly opposite of your tire valve to avoid damaging the stem, and proceed to use the long end of one lever to pry the tire bead overtop of the rim. You can then anchor it to a spoke while you insert another lever two to three spokes down, and work the remainder of the tire out of the rim.

Pull the valve stem out of the rim, and remove the tube.

(Image credit: Maxky/Adobe Stock)

Step 3: Find the Problem

If you just plan to replace the tube with a new one, you can skip to step five, otherwise, we need to locate the problem so we can fix it. It may be obvious like a protruding object, or more minute like a pinhole rupture. Remove any visible insults to the tube, and if you can’t find where it’s leaking, you’ll have to do some more thorough investigation.

Two of the simplest methods to find the opening are as follows: Inflate the tube so it holds some shape, then cycle it slowly through water while looking for bubbles. You can also squeeze the tube gently as you rotate it near your ear, listening for any air that is escaping. Once you find the culprit, be sure to mark it so you don’t lose it while you prepare your patch.

(Image credit: Bulent/Adobe Stock)

Step 4: Patching

As mentioned in step three, determine whether it’s better to replace the old tube entirely. If there are multiple patches or the tube seems to be deteriorating because of age and frailty, more repairs may only further decrease its integrity. However, sometimes you don’t have a tube and don’t have a choice! Here’s how to patch your leaking one:

  1. Patch kits will often contain a small piece of sandpaper, use this to rough up the leaking area for better adhesion of the patch. 
  2. Apply the glue generously to the affected area, give it a moment to set.
  3. Place the patch firmly over the puncture, press down to help with adhesion.

(Image credit: Ole/Adobe Stock)

Step 5: Replace the Inner Tube

Inflate the tube to the point where it holds its shape but is still flexible and easy to maneuver, make sure it holds its air. Insert the valve stem into the valve hole on the rim. Starting from the valve, tuck the tube completely inside the tire all the way around. 

Once the tube is inside, begin tucking the tire bead back over the rim. Use your hands to work around the whole perimeter, you may need to use the tire levers for the last bit. Be sure not to snag the inner tube with levers or by pinching it against the rim throughout this step. After you have the tire together, inflate it to the appropriate pressure.

(Image credit: Tatonka/Adobe Stock)

Step 6: Reinstall the Wheel

For the front tire, simply set it back into the forks and securely tighten the quick release lever. If it’s the rear wheel:

  1. Position the top part of the chain over the smallest sprocket on the cassette. 
  2. Lower the wheel axle into the dropouts while moving the derailleur out of the way. 
  3. Securely tighten the quick release and close the brake caliper lever/reconnect the brakes if necessary.

It’s best to watch a video of this being done on your specific model of bike to get a better idea of how to do this part. 

Step 7: Final Checks & Go!

Go over all the parts that have been manipulated to ensure everything is snug and back where it’s supposed to be. Double check that your tire pressure is good, check that your brakes are working, and make sure all levers are closed and tucked away into their riding positions. After that, you’re ready to go!

(Image credit: Clement C/Adobe Stock)

Again, be sure to practice this procedure several times at home so you can build the confidence to do it when the situation occurs. Fixing a bicycle flat is one of the most essential skills for any cyclist, and you’re well on your way to knowing how to do it yourself! 

Thank you for taking the time to learn with us, and we wish you safe travels!

The Ultimate Guide to Cycling Neck Pain: Causes and Solutions

March 21, 2023 by Eric Lister

Cycling neck pain is one of those nagging issues that can really hinder the other aspects of your life. The muscles in your neck are constantly supporting your breathing, interacting with your shoulders, holding up your head, and countless other important functions liable to irritate any pain, soreness, or injury that could be developing or already present from cycling. 

The reality of our sport means that the neck is going to have to sit in some uncomfortable positions from time to time. In fact, up to 60% of cyclists experience some sort of discomfort in this area. Whether our necks are prepared to go into those positions, how we can prepare them, and what we can do to optimize our necks on the bike will be the focus of this article. 

Neck pain from cycling doesn’t have to slow you down, and we’re here to help you fix it once and for all.

neck pain

(Image credit: SciePro/Adobe Stock)

Causes of Cycling Neck Pain

Does cycling cause neck pain? The short answer is yes, but the reasons behind it can be complicated. We have to approach the topic of cycling neck pain through a wide-angle lens, because it’s seldom a single factor causing the problem. 

Forward Head Posture (FHP)

FHP is an epidemic not just amongst cyclists but the general populace as a whole. The term is referring to the forward position of the cranium (head) relative to the shoulders and spine. Also commonly called text neck, scholar’s neck, or computer neck posture because of its correlation and likelihood of development after prolonged texting, reading, or spending time on a computer.

What many people don’t realize is that their head, on average, weighs 10-12 pounds, and that this weight gets amplified tremendously as the head moves/tilts forward from the midline. For every inch of FHP, it adds roughly 10 pounds to the head. As you can see in the below picture, this can equate to the neck having to support 60+ pounds of sustained pressure throughout the day.


(Image credit: New York Spine Surgery & Rehabilitation Medicine)

The big ropes you see on the sides of a person’s neck are called your sternocleidomastoid muscles. These muscles get overdeveloped and tight as a result of FHP, and can also flatten the natural backwards curve in your cervical spine. These conditions strain the neck, reduce blood flow to the brain, and weaken the extensors of the neck resulting in reduced stability. 

Cycling naturally puts us in positions of FHP, and trains us to hold those positions for long periods of time. Leaning over the handlebars causes the head to protrude forward and the neck to crane back in order to keep our eyes level with the horizon (righting reflex). Because these positions are unavoidable, we have to find ways to correct them in other parts of our training.

cycling neck pain

Notice the position of the head and neck of this cyclist; protruding forward, craned back. (Image credit: Artem Varnitsin/Adobe Stock)

Improper Breathing

Breathing and neck pain are intimately connected. Optimal inhalation is accounted for primarily by the diaphragm, a large, thin sheet of muscle that separates the chest cavity from the abdominal cavity. When contracted, its dome shape flattens out to pull air into the lungs and create room for them to expand. If it’s stiff or not functioning properly, however, other muscles get overloaded.

A muscle group in this category is known as the scalenes. They work as accessory respiratory muscles to help you inhale by lifting the first two ribs. When a person breathes through their chest as opposed to their diaphragm, these muscles get overworked and start to become irritated as a result. Chronic neck pain is often improved by addressing these kinds of faulty patterns.


The three muscles of the scalene group; anterior, medial, posterior. Notice the insertions on ribs one and two. (Image credit: Mikael Häggström/Public Domain)

Because cycling is a cardiovascular intensive sport, coupled with the positions we find ourselves in while riding, make it probable that we will develop a faulty breathing pattern that overworks the neck. Being folded over on the bike can discourage movement of the diaphragm and push our breath up into the chest, where we are only able to inhale ⅓ of the oxygen we could otherwise.

Opening up the breath through breathing re-education exercises, fixing the posture, and corrective stretching are all tools we can use to help combat this issue. By now you’re probably starting to see the links between these causes and how they all can contribute to cycling neck pain.

Upper Cross Syndrome (UCS)

Upper cross syndrome (UCS) is a postural imbalance that occurs as a result of prolonged sitting or standing in a forward head and rounded shoulder posture. It is characterized by tightness in the upper trapezius, levator scapulae, and pectoralis major muscles, as well as weakness in the deep cervical flexors, lower trapezius, and serratus anterior.

upper cross syndrome (UCS)

(Image credit: art4stock/Adobe Stock)

Cycling requires a sustained forward head and rounded shoulder posture, which can exacerbate UCS. The tightness in the upper trapezius, levator scapulae, and pectoralis major muscles can cause increased tension and compression in the cervical spine, as well as inhibit your breathing, which all further contribute to the problem.

Additionally, weakness in the deep cervical flexors, serratus anterior, and lower trapezius muscles can lead to decreased stabilization of the cervical spine. This can be especially problematic for cyclists who spend prolonged periods in a forward head position, as the neck muscles are required to maintain stability and support the weight of the head.

Poor Bike Fit

Having an improperly fitted bike is going to exacerbate all of the above causes of neck pain in cyclists. Symptoms of a poor bike fit include:

  • Handlebars too low or having to reach too far forward
    • Rounds the back/shoulders and closes the chest, encourages forward head posture
  • Arms locked out in extension
    • Having a soft bend in the elbows allows force from the handlebars to be cushioned while riding, otherwise reverberating up into the neck
  • Saddle tipped too far forward
    • This increases weight bearing load on the arms and increases the likelihood of the previous point occurring
  • Poor adjustment of helmet and/or eyeglasses
    • A helmet too low on the head will cause a cyclist to crane their neck excessively, the same problem will occur with eyeglasses sitting too low on the nose

Solutions for Cycling Neck Pain

The causes of neck pain in cyclists are often co-contributing to one another, sometimes making it difficult to pinpoint the exact root of the problem. However, there are some common preventative/corrective measures we can take to help alleviate the above causes and more by following the advice below.

Strengthen the Upper Back & Neck Extensors

To combat forward head posture and upper cross syndrome that develops as a result of cycling (and other modern activities like office work and driving), we can do exercises in our supplemental training to strengthen the muscles that get weak and hyperactive as a result of improper positioning/loading. 

Here are two exercises to help address this:

Prone Cobra/Cobra Hold

Instructions:

  1. Lying prone on your mat, pull your shoulder blades down and together so your arms are in a position like our coach Alisha’s (pictured above)
  2. From here, lift your chest as high as possible off the ground
  3. Squeeze the shoulder blades together, flatten and extend the mid back, and contract the glutes and lower back muscles as well
  4. Keep your neck in a neutral position by pulling it backwards (think of making a double chin)
  5. Hold this position for 30 seconds
  6. Rest for 30 seconds
  7. Repeat three times

This exercise works the mid/upper back, as well as the extensors of the neck in a static hold, which is important for postural endurance. Increased strength in these areas has multiple benefits, including a significantly reduced risk of concussions.

Wall Lean

Instructions:

  1. Start with your feet about one foot away from the wall
  2. Place a towel behind your head and lean into it, keeping the body in a stiff, neutral position (straight line)
  3. Support yourself with your neck in this position, if it is too easy, you can place your feet farther away from the wall
  4. Hold for 30 seconds
  5. Rest for 30 seconds
  6. Repeat three times

The wall lean is a simple exercise to work the neck extensors, which get weak if the head is constantly protruding forward. Strengthening these muscles will help correct forward head posture and pull the head back into better alignment.

Stretch the Sternocleidomastoid, Shoulder & Chest

It is important to couple the following stretches with the above strengthening exercises. These muscles are getting tight and causing neck pain because they’re working hard to try and support us in unnatural positions on the bike. If we stretch them without providing support through corrective strengthening we will only further our risk of pain and injury. 

Try these three stretches to counter the muscle tightness that develops from cycling and contributes to neck pain in cyclists:

Lateral Neck Stretch

Instructions:

  1. Stand in a relaxed and comfortable position
  2. Tilt your head gently to one side, make sure to avoid tilting forward or backward
  3. Rest your hand on the top side of your head
  4. Don’t pull, but let the weight of your hand gently stretch your neck to the side
  5. Hold for 15-30 seconds
  6. Repeat on other side

Cyclists with neck pain will help release a likely hyperactive sternocleidomastoid muscle by performing this stretch. Coupled with the neck and upper back exercises listed above, you’ll be offering multiple modes of relief to the painful areas.

Dynamic Shoulder Rolls

Instructions:

  1. Stand with your shoulders relaxed
  2. Roll your shoulders up high towards your ears, then back (squeezing your shoulder blades together), and finally back down and pulling away from your ears
  3. Complete these circles continuously for 30 seconds
  4. Reverse the motion, rolling your shoulders forward
  5. Repeat for another 30 seconds

This simple exercise helps loosen up and mobilize your shoulder blade and trapezius muscle. The upper trapezius and levator scapulae muscles often get tight as a result of cycling. This movement helps loosen them and is great to do pre/post ride.

Single Arm Chest Stretch w/Wall

Instructions:

  1. Start facing the wall with your arm straight out to the side (shoulder height), palm against the wall
  2. Staying close to the wall, slowly rotate away from your arm until you feel a stretch in the chest and front of the shoulder
  3. Hold here for 30 seconds
  4. Switch to the other arm and repeat

Tight chest and shoulder muscles are common with faulty breathing patterns that often develop as a result of cycling. By opening up these tissues we also open up our lung capacity so that the muscles in our neck don’t have to work so hard as we inhale. 

Professional Bike Fitting/ AI Bike Fitting

To avoid exacerbating all of the aforementioned causes of neck pain in cyclists, it’s recommended that you find a reputable local bike fitter to help optimize the positioning on your bike to your unique body and proportions.

Another option is to use an at home bike fitting app like MyVeloFit. This app utilizes the power of AI to analyze your bike fit and make recommendations on how to correctly adjust different components of the bike and ensure your joint angles fall into the optimal range.

The money and time you spend on a bike fit, whether it’s at home or in person, will most certainly be returned in the form of saved physiotherapy, chiropractic, and massage therapy appointments long-term.

Prevent Cycling Neck Pain & Become A Stronger Cyclist!

The above solutions were borrowed from our programming over at Dynamic Cyclist, a fully online and interactive training platform designed for the health and well-being of people in our sport. We address mobility, strength training, injury prevention and more in routines that are fun to follow-along with! Try it out FREE for 7-days by clicking here!

Everything You Need to Know About Bike Tire Valve Types & Which One to Choose

March 13, 2023 by Eric Lister

Replacing a tube, changing your tires, buying a pump…these are all routine tasks for any road cyclist or mountain biker. And if you’re new to cycling, working on your rig for the first time, trying out a new brand, or switching disciplines within the sport, you’re bound to be introduced at one point or another to the different types of bike tire valves.

Today’s article will teach you about the differences between the three most common types of bike tire valves. They’ve evolved over the years and each have their own benefits, drawbacks, and specific purposes.

Bike Tire Valve Types

Knowing what valve(s) you’re working with will help you be prepared for repairs, maintenance, and helping out a buddy midway through a troublesome ride. You’ll be able to identify each valve and ensure you have the proper equipment to tackle the job. Let’s jump in.

Schrader Valve

bike tire valve

Schrader valve. (Credit: todja/Adobe Stock)

The Schrader valve is the most common valve type, also known as the American valve, named after its inventor, August Schrader. It was designed in 1891 and patented in the United States in 1893.

It is a sturdy valve type found on almost all cars and motorcycles. It has a wider diameter and can hold higher air pressures than other valves, making it easy to fill up at gas stations and suitable for mountain bikes or other heavy-duty suspension systems. The Schrader valve has a spring-loaded pin that closes the valve when the pump is removed, ensuring a secure seal.

Schrader valves are common in agriculture, hospitals, firefighting, and a wide range of other industries. In cycling, apart from road bikes, the Schrader valve can be found on most kid’s bikes, cruisers, hybrids, and mountain bikes.

Presta Valve


Presta valve. (Credit: Narayan/Adobe Stock)

The Presta valve is a narrower and lighter valve type. It was invented by Frenchman Etienne Sclaverand, and was initially known as the Sclaverand valve. Today, it is also known as the French valve or a high-pressure valve. 

It is commonly found on road bikes and high-performance bikes, including some mountain bikes. It is designed for high-pressure tires and can hold up to 120 PSI. The Presta valve has a threaded stem that screws into the rim, creating an airtight seal. It also has a lock nut that secures the valve stem to prevent air from leaking.

The hole on a bike tire valve is usually the weakest point on the rim. But because the Presta valve has a smaller opening, it can maintain strength in the wheel and support the razor thin tires fitted onto top-of-the-line racing bikes.

Woods (Dunlop) Valve


Woods (Dunlop) valve. (Credit: rdnzl/Adobe Stock)

The Dunlop valve was originally invented by a Scottish inventor by the name of John Boyd Dunlop in the late 1800’s. It was however quickly improved upon by a man named C.H. Woods, who made it easier to inflate and maintain than the original. This is why the Dunlop valve is now often referred to as the Woods valve.

Originally, this valve type used a tight rubber sleeve to regulate airflow. This sleeve unfortunately would break down overtime and took substantial air pressure to be forced open when pumping. Modern Woods valves use an internal ball bearing or spring-loaded rubber plug that is easily unsaddled with pumping.

Woods valves are not often seen in North America, and are more common in Europe, across Asia, and developing countries around the world. Their durable stem and easy to perform maintenance make them popular where resources are more scarce.

Bike Tire Pumps & Valve Adapters

Knowing what valves you’re dealing with or may come across is one thing, the next step is ensuring you have the right equipment to service them if and when the time comes. 

Bike Tire Pumps

There are four main types of pumps that are commonly used in the sport of cycling, they are: 

  • Floor Pumps
  • Mini Pumps
  • Frame Pumps
  • CO2 Inflators

Each of these have their own unique advantages and disadvantages. 

Cyclist using a mini pump

Cyclist using a mini pump. (Credit: Odua Images/Adobe Stock)

Floor pumps are the most durable and one of the fastest ways to inflate your tires, but are often too large and cumbersome to carry while riding.

Mini pumps take longer to inflate your tires and can have some pressure limitations, but are small enough to carry in your jersey pocket or hydration pack. 

Frame pumps attach easily to your frame and come in different sizes that offer varying inflation speeds, however some don’t like having the extra hardware hanging off their bike.

CO2 inflators are compact and extremely efficient when it comes to inflating your tires. The biggest drawback is their limited use and disposability.

Depending on the brand and model, each of these pump types can be found to accommodate both Schrader and Presta valves, the two most common bike tire valve types. Some will come equipped to serve both, while others you may need to fit with a valve extender/reducer or adapter.

Bike Tire Valve Adapters

Bike tire valve adapters are small, but essential, components that allow you to use one type of valve with another. Especially if you ride with others, they’re good to have on hand should you or your partners need help on the side of the road.

Presta to Schrader Adapter

Converts a Presta valve to a Schrader valve, allowing you to inflate a tire with a Presta valve using only a Schrader pump.

Schrader to Presta Adapter

Ideal when using a Presta pump to inflate a tire with a Schrader valve.

Presta Valve Extender

Attach a small metal or plastic tube to a Presta valve with a Presta valve extender, lengthening the valve above the rim for easy access with a pump head.

Schrader Valve Extender

When a Schrader valve is too short to reach the pump head or buried deep in the rim, you can use this extender to enhance the valve beyond the rim’s surface.

Valve Reducers

For those with a Schrader pump and a tire with a smaller Presta valve, valve reducers can convert the Schrader pump head to fit the smaller valve diameter.


Left to right: Presta, Dunlop/Woods, Schrader.  (Credit: NilsZ/Adobe Stock)

Being prepared for those inevitable roadside flats starts with knowing what kind of tire you’re riding and how to service it. Having the right equipment and fittings on hand can turn a would-be-day-wrecker into a quick and simple fix! 

Understanding the different bike tire valve types will help you get to know your bike better, and make you more confident going out on long rides where the ability to be self-sufficient becomes ever more important. 

We hope this article has been helpful on your journey to better, stronger, pain (and headache) free cycling!

Anterior Pelvic Tilt: How To Correct Imbalances & Improve Performance

March 7, 2023 by Eric Lister

Two of the most common problems amongst cyclists are knee pain and lower back pain. In fact, 94% of cyclists experienced injury during a one-year period of study; low back pain and anterior knee pain being prevalent for 58% and 36% of participants, respectively. While the causes of these issues are numerous and varied, there are several similar originating factors between them, and consequently a structured approach to relieving them short and long-term. 

One of those commonalities is the presence of an anterior pelvic tilt in the cyclist’s body. This basically translates to the pelvis, which is the bony structure that your spine sits on and your femurs attach to (it also supports the intestines, contains the bladder, reproductive organs, colon, and more), is tilted farther forward than normal.

anterior pelvic tilt

Different pelvic positions. (Credit: sumaki/Adobe Stock)

This has ramifications for the entire body, and can be the source of much pain and dysfunction in cyclists at all levels of performance, especially compared to non-cycling individuals. In this article we’re going to talk about why anterior pelvic tilt tends to develop in cyclist’s, the problems it can cause, and what we can do to prevent it from happening.

Common Causes of Anterior Pelvic Tilt in Cyclists

When we look at a cyclist positioned on her bike, there are some immediate red flags that we can point out as likely contributors to this postural phenomena we’re calling anterior pelvic tilt. We’re about to see very quickly that just the way people ride their bikes in general (because of their design) is one of the biggest pieces of this puzzle. 


Use this picture for reference when reading the next section. (Credit: Artem Varnitsin/Adobe Stock)

Compressed Hips

If you look at the picture above, our rider has her left leg at the top of a pedal stroke. If we look at her left hip, it’s in a fully flexed position, accentuated by her bent forward torso. Because this happens thousands of times every time we trek out for a lengthy cruise, our poor hip flexor muscles are being subjected to a lot of short, cramped positions. Over time, this will make them tight.

Tight hip flexors are one of the main causes of anterior pelvic tilt, resulting also in lower back pain. The reason for this is because one of your main hip flexors, the psoas major, attaches to all five of your lumbar (lower back) vertebrae. When the psoas becomes short and tight, it pulls on all those vertebrae, arching your lower back, and tipping your pelvis forward.


Psoas Major. Notice its attachments to all of the lumbar vertebrae. (Credit: SciePro/Adobe Stock)

Other aspects of our modern lifestyles (mainly sitting, by way of office work, driving, and excessive leisure time) further overwork our hip flexors and encourage them to stay tight 24/7. It’s an inevitable part of riding, and something we need to address it in order to get our hips and spine back into a good position.

Weak Glutes

Having a strong backside is not only attractive, but also incredibly important for keeping your pelvis in a balanced, neutral alignment. The gluteus maximus in particular is your biggest, most powerful hip extensor, and is crucial to maintaining good posture through its action of posteriorly rotating the pelvis and counteracting the pull of the hip flexors. 

Our hips never fully extend while we’re cycling. This is largely due to the fact that we’re always hinged over at the hips to keep our hands on the handlebars, and almost completely folded in half when dropping down into the aero position. Cycling has been promoted in the past as a good activity for developing our glutes, but these positions unfortunately make that almost impossible.


Biomechanically, the positions we get into while pedaling make it hard to recruit our gluteus maximus. (Credit: Jacek Dylag/Unsplash)

Because the gluteus maximus is such a big powerful muscle, it often needs intense, full hip extension to be optimally stimulated for growth and development. Cycling doesn’t offer that, and in fact causes the body to recruit secondary hip extensors (hamstrings) to do most of the hip extension as an energy conservation method. Weak glutes = anterior pelvic tilt.

Weak Abdominal Muscles

Cycling primarily occurs in what is called the sagittal plane of movement. This plane divides the body down the middle (refer to below picture) so it is split evenly in half, and accounts for forward/backward movements. There is slight frontal plane (side to side) motion when shifting weight from pedal to pedal and leaning to take hard corners, but it is minimal.


The three anatomical body planes and corresponding motions in the human body. (Credit: VectorMine/Adobe Stock)

This is important because our core musculature needs to be challenged in all planes of movement to function correctly. We need to learn to brace and be strong while twisting, moving our legs independently of our torso, lifting loads off the ground, etc. Cycling limits these opportunities by keeping us fixed and reliant on the bike frame in place of support from our core musculature.

Muscles like the exterior obliques, rectus abdominis and transversus abdominis stabilize the back by creating intra-abdominal pressure and influence the position of the pelvis by rotating it backwards. Cycling discourages mechanisms like this from happening whilst riding, allowing our pelvis to be pulled forward by the hip flexors while the core remains relatively dormant.

Other Causes of Anterior Pelvic Tilt in Cyclists

Having your bike properly fitted is essential to avoid a whole host of injuries, pain, and dysfunction, including anterior pelvic tilt. Having a saddle too high will force you to learn forward excessively to reach the handlebars, compressing the hip joint. If it’s too low, your hip will be forced into extreme flexion at the top of the pedal stroke, further tightening the hip flexors.


Our partners at MyVeloFit offer an AI powered bike fitting app you can use to adjust your bike right at home. (Credit: MyVeloFit)

There are other factors in a person’s lifestyle that are going to encourage anterior pelvic tilt, these include: Having a sedentary job, driving, spending a lot of time sitting on couches and chairs, not participating in any type of explosive movements like sprinting and jumping, etc. All of these things contribute to tight hips, weak glutes, and bad posture overall.

Symptoms of Anterior Pelvic Tilt in Cyclists

Without getting a professional postural assessment done on your body, there are some common symptoms you may be able to relate to that point to an anterior pelvic tilt being present in the body. Some of these include:

  • Knee pain: When the pelvis tilts forward, it internally rotates the femur (your thigh bone). This puts awkward strain on the structures in your knee, resulting in pain and discomfort.
  • Lower back pain & tightness: Excessive pull from the hip flexors can arch your lower back into a posture known as lordosis, often resulting in significant ache, pain, and tightness of the lower back muscles.
  • Mid back tightness: When the lower back arches excessively, sometimes the mid back will round to compensate posturally. This chronically stretches muscles in the mid back, making them feel like they need to be stretched, when actually they need to be strengthened.
  • Distended abdomen: When the pelvis tilts forward it stretches the muscles on the front of your abdomen, making them weak over team. This results in a loss of abdominal tone, and a belly that sags forward as the organs fall against a weak abdominal wall.
  • Loss of power on the bike: If the core can’t maintain optimal stability, it can’t create a strong base for your legs to push off while pedaling, resulting in a loss of power.
  • Hip pain: An individual is likely to experience ache, discomfort, and pain in the hip if the hip flexor muscles are being overworked and holding excessive tension even in time spent off the bike.

Prevention Strategies for Anterior Pelvic Tilt in Cyclists

While the picture we’ve painted so far hasn’t been favourable to our beloved sport, hope is far from lost for those of us with a tilted pelvis! Actually, the fixes for this problem, depending on the cause(s), can be quite straightforward and easy to integrate with some supplemental training. Try out some of these protocols and see what they do for you and your cycling performance.

Hip Flexor Mobility & Stretching

It has become evident now throughout the duration of this article that the hip flexors are major culprits in cyclists with anterior pelvic tilt. To combat the stiffness that is bound to develop in our time on the bike, we can actively work to lengthen and mobilize these muscles so they rest and function in a more balanced position.

Give this exercise a try, the Reverse Lunge w/Leg Lift. It offers an amazing blend of benefits for the hips as a whole. Stepping back into a deep lunge helps lengthen the hip flexors and also strengthen them in those stretched positions at the same time. The added leg lift (and lunge action in general) also helps to strengthen the glutes and pull the pelvis back down into a neutral position.

Perform three sets of 10 reps per leg, adjusting as necessary. You can also hold a dumbbell in front of you for extra intensity.

Strengthen the Glutes

As previously mentioned, the gluteus maximus, your body’s largest muscle, is our most powerful hip extensor, and plays an important role in maintaining a neutral pelvis by rotating it backwards. If we aren’t getting enough activation of this muscle through our riding, then we need to make up for it in our strength and conditioning routine. Here are some ways to make it stronger.

Any sort of squat, lunge, or deadlift type exercise is going to stimulate the glutes and help them develop. A great bang for your buck exercise is the Jump Squat to Jumping Jack, because it combines a deep squat with a jumping jack which forces you to spread your legs and extend the hips simultaneously, an amazing stimulus for all the muscles in your posterior and lateral hip.

See how you feel doing three sets of 10 reps, adding more or less sets/reps to moderate difficulty.

Strengthen the Core

Being fixed on the bike through the saddle and handlebars discourages any significant use of our abdominal musculature. The bike does all the stabilizing for us, a much different environment than a soccer player sprinting down the pitch or a powerlifter lifting a heavy squat. Certain muscles in our abdomen help to posteriorly rotate the pelvis and counter the pull of the hip flexors. Those are the ones we are going to focus on in this next exercise.

The deadbug is a wonderful introduction to low back/trunk stability and overall core strength. The main focus is keeping your lower back flat on the ground as you move alternating arm/leg away from the torso. By keeping you back flat, you’re using your exterior obliques and rectus abdominis to counter the pull of your hip flexors, and strengthen the core in concert with your extremities.

Three sets of 10 total reps (five/side) is a good start for this exercise. If you feel your lower back coming off the ground, limit the range of motion of your limbs so you can maintain that hollow position. 

Build a Better Body With Dynamic Cyclist

The above exercises were pulled from our extensive mobility, strength, and conditioning programming over at Dynamic Cyclist! We have hundreds of follow along instructional videos and routines to help you correct postural problems, prevent injury, get stronger, and become an overall better cyclist in the comfort of your own home! Sign up for a 7-day free trial by heading over to our website.

The Ultimate Guide to Cycling Training for Ironman Distances

February 22, 2023 by Eric Lister

Pursuing the Ironman is not for the faint of heart, and certainly not for the beginner cyclist. A full Ironman distance prescribes the grueling effort of a 112 mile ride which, if not already strenuous enough, is sandwiched in between a 2.4 mile swim to start, and a 26.2 mile marathon run to finish. 140.6 miles of gritty, heart-pounding, non-negotiable endurance.

This race is here to test people’s limits and set a standard. Saying that you crossed the finish line of an Ironman garners respect worldwide for all those that understand its incredible demands. If you’re reading this article, we assume you might be someone crazy enough to start prepping for one (and we like that!). 

Since we’re cyclists at heart, this article will serve as a broad overview for how to prepare to ride that (almost incomprehensible) 112 mile journey. A feat on its own, made that much more difficult by the pre and post exhaustive swim/run workouts both preceding and awaiting you! We’re here to help you succeed, so let’s dive in.


mh90photo/Adobe Stock

What Are the Ironman Distances? 

There are two types of Ironman races you can enter in, the full Ironman and the half Ironman. Here’s what they look like:

Ironman 140.6 (Full) – Distances

2.4 mile (3.8 km) swim

112 mile (180 km) bike

26.2 mile (42.2 km) run

Ironman 70.3 (Half) – Distances

1.2 mile (1.9 km) swim

56 mile (90 km) bike

13.1 mile (21.1 km) run

The cycling portion for each is going to be both a significant physical and mental challenge, often taking up the majority of a racer’s time on the course. Check out this breakdown of average times for reference:

Ironman 140.6 (Full) – Average Times

Swim: 50-90 minutes

Bike: 5-8 hours

Run: 3-6 hours

TOTAL: 11-13 hours

Ironman 70.3 (Half) – Average Times

Swim: 30-50 minutes

Bike: 2.5-4.5 hours

Run: 1.5-3.5 hours

TOTAL: 5-7 hours

Keep in mind, these times can change drastically depending on the level of each competitor, environmental conditions, accidents, rest time, aid stations, medical intervention, etc.

It is important to understand the amount of cycling capacity you need to possess during prep and also going into the race. Especially knowing that you have either a half or full marathon to complete after getting off the bike, making sure your cycling is solid will provide a considerable, likely much-needed, boost in morale as you enter into the latter stages of the competition. 

Ironman Cycling: What to Expect

While the duration itself is certainly a challenge, don’t expect a smooth, leisurely, “active-rest” kind of cruise. Start thinking (and training) more along the lines of steep climbs, winding roads, unpredictable weather, live traffic, and hundreds of other riders trying to hit PB’s, finish, and receive their hard-earned medals. 

Cycling Ironman distances

pavel1964/Adobe Stock

If you’re used to working out on a trainer, it would be wise to hit the pavement and start getting comfortable being uncomfortable. It’s hard to overemphasize the mental impact and strain of being outside in natural environments while exerting yourself over long periods of time. It’s truly something you have to experience for yourself, and we certainly recommend you do so.

Another important point is that you’re going to be pre-fatigued from the swim. Depending on your competency in the water, this has the potential to seriously deplete the energy reserves in your legs, and, consequently, your riding abilities. Familiarizing yourself with these sensations can only help you come race day. Doing a ride following a swim, or doing a morning swim followed by an afternoon bike, are great ways to introduce this to your body. 

Ironman Cycling Training

Training for the cycling portion of an Ironman can be a daunting task, but with the right plan and mindset, it can be an enjoyable and rewarding experience. Here are some tips to help you train effectively:

Get a Bike Fit

Before delving into a goal as serious as the Ironman, it is recommended that you get a professional bike fit or perform one yourself. Stacking miles on top of bad form is a sure fire way to cause aches, pain, and long-term injury. Get yourself in a good position, and start building strength on top of it.

Start Small, Build Big

Depending on where you are in your cycling journey, you’ll want to make sure you don’t overexert yourself when getting ready to ride the Ironman. It can be tempting to try and cram that whole 56/112 miles of volume into your first training week, but that’s only going to get you hurt. Start small, and build gradually, giving your body time to adapt and strengthen to handle the distance.

Ride Outside

As mentioned earlier, riding 20 miles on a stationary rig versus 20 miles with the wind blowing in your face and the sun beating down on your skin, are two very different experiences. Endurance is not just physical, it’s mental as well, especially in this race, and you never know what you’re going to encounter. Get outside as much as possible.

Join a Training Group

There’s nothing better than some friendly competition. Not only will this get you used to riding around other bikers, but you’ll be able to feed off one another’s progress and push each other to be the absolute best versions of yourself on race day. There will be days where you don’t feel like putting in the work, but your training partners will be there to keep you accountable.

Diversify Your Training

You’re sure to encounter a large variety of terrain during your Ironman. You’ll be on the pavement, but this isn’t going to be a casual ride. Expect lots of steep hills, descents, sharp turns, gradual inclines, and everything in between. Switch up your training routes often to stay on your toes, and even try replicating parts of the route in your local area.

Get Your Rest

You are going to have to train hard, very hard, but that doesn’t mean running yourself into the ground. We can justify that on race day, but that’s one day, and for one very big goal. You shouldn’t be red lining in your training sessions. That’s not being a badass – that’s just bad training. Be sure to incorporate some strength work, stretching, and mobility as well.

Hire a Coach

Having someone in your corner who has been there before is always a smart move. If you can, find someone in your local area that you can meet face-to-face with. Someone who has experience riding the Ironman and can help you structure your training appropriately. Especially if you’re a beginner (but really, for anyone), this can be a game-changing investment.


Andriy Bezuglov/Adobe Stock

Remember, the cycling portion of an Ironman is just one part of the race. Make sure to also prioritize your training for the swim and run portions. With dedication and a solid training plan, you can successfully complete the Ironman and achieve your goals!

Ironman Cycling Nutrition

Proper nutrition is another key part of your Ironman training and competition. During the race, your body will burn a significant amount of calories, making it essential to fuel yourself with the right foods and fluids. A nutrition plan should be developed well in advance of the race to ensure that you are consuming enough calories to maintain energy levels, but not so much that it causes digestive issues.

During those longer rides, it can be helpful to carry energy bars or gels that will offer a quick source of fuel. Aim to consume around 200-300 calories per hour to maintain energy levels. This is also going to be important to prepare you for the run, because just “surviving” the bike could easily mean a DNF on your race record. You can also try rice cakes, fruit, raisins, and (a classic) stroopwafels if bars or gels tend to upset your stomach.

Your hydration levels should also be constantly considered and addressed throughout your training. Studies have shown that by losing just a small percentage of your body weight through water loss can cause a drastic reduction in endurance performance. Aim to drink plenty of water and electrolyte drinks, especially on longer rides. This will help to reduce cramping, fatigue, and loss of motivation.

In the days leading up to the race, focus on consuming complex carbohydrates, lean protein, and healthy fats to prepare your body for the challenge ahead. And don’t forget to celebrate your achievement after the race with a well-deserved post-race meal!

Get on the Path to Peak Performance

Dynamic Cyclist is your virtual companion on the road to Ironman success! We’ve created an online training platform to help cyclists get stronger, increase their mobility, and ride pain free. Join our incredible community and take your training to the next level. Click here for a 7-day free trial!

How To Lubricate Your Mountain Bike (A Step By Step Guide)

February 16, 2023 by Eric Lister

Mountain biking is an exciting and challenging outdoor activity that combines fitness, adventure, and nature in one. It’s a sport that requires a high level of skill, endurance, and physical strength, and is enjoyed by millions of people around the world. Whether you’re riding through challenging terrain, crossing streams, or soaring down steep descents, mountain biking is a sport that offers a unique and exciting experience.

However, with all the demands of the sport, it’s essential to maintain your mountain bike properly to ensure it lasts a long time and performs at its best. One of the most critical aspects of mountain bike maintenance is lubrication. By keeping your bike well-lubricated, you can reduce friction, prevent wear and tear, and ensure that all the components work properly.

Today we’re going to guide you through the steps on how to lubricate your mountain bike, including the benefits of lubrication and the difference between grease and lube. Whether you’re a seasoned mountain biker or just starting out, this article will help you keep your bike in top condition.

how to lubricate your mountain bike

Esther Pueyo/Adobe Stock

Lube Vs. Grease: Which is Better?

When it comes to lubricating your mountain bike, there are two main options: lube and grease. Both have their own benefits and disadvantages, and choosing the right one can be confusing.

Lube is a thin liquid that is applied to the bike’s components to reduce friction and prevent wear. It is specifically designed for bikes and is formulated to withstand the demands of cycling. Lube is easy to apply and spreads evenly over the surface, making it ideal for lubricating chains and other moving parts.

Grease, on the other hand, is a thicker substance that is designed to provide a long-lasting barrier between metal surfaces. It can be used for lubricating pivot points and other high-stress areas where erosion between heavy parts is likely to occur. Grease is also resistant to water, making it a good option for lubricating in wet conditions.

Both lube and grease have their own unique benefits, and are useful in different situations. By understanding the differences between the two, you can choose the best option for your mountain bike to help create an effortless and hassle-free riding experience.

Parts of a mountain bike (how to lubricate your mountain bike)

Parts of a mountain bike. Credit: www.schoolworkerhelper.net

Reference the above diagram as we now delve into the steps required to make sure your mountain bike stays lubricated, increasing the chances that it will perform at a high level for years to come!

1. Preparing the Bike for Lubrication: Cleaning

Before lubricating, it’s essential to clean the bike to remove any dirt, grime, or debris that may have accumulated on its parts. Use a degreaser to clean the chain, derailleurs, and cassette. A simple mixture of warm water and dish soap will do the trick for the rest of the bike. Make sure to dry the components thoroughly before moving on to the next step (water and lubricant don’t mix!).

2. Lubricating the Critical Component: The Chain

The chain is the most integral component to lubricate on your mountain bike. Apply a few drops of bike-specific lubricant to each link and work the chain back and forth to spread it evenly. Wipe off any excess lubricant to prevent attracting dirt and grime.

3. Smooth Shifting and Pedaling: Derailleurs and Cassette

The derailleurs and cassette can also benefit from a drop or two of lubricant. Apply the lubricant to the moving parts and pivot points, being careful not to get any lubricant on the brake rotors or rubber components where traction is necessary.

4. Reducing Friction at Pivot Points

Pivot points, such as the suspension pivots, can benefit from lubricant as well. These points see a lot of movement, so it’s essential to keep them transitioning smoothly to reduce friction and prolong the life of your bike.

5. Ensuring Optimal Operation: Lubricating Dry Spots

Check the rest of your bike for any dry spots that may need lubrication, such as the brake and shifter cables. Adding lubricant to these areas can contribute to the efficient and long-lasting use of your bicycle. 


Tim Foster/Unsplash

It’s recommended to lubricate your mountain bike every few rides, or at least once every three months, depending on the frequency and intensity of your use. In wet and muddy conditions, it’s a good idea to lubricate after each ride to prevent corrosion.

Lubricating your mountain bike is a simple and effective way to prolong its lifespan and get the most out of its performance capabilities. As part of a regular maintenance schedule, you can mitigate costly part repairs and service fees, and focus more on the sport you’ve invested in and grown to love.

2023 Tour de France: A Thrilling Preview of the Upcoming Race

February 9, 2023 by Eric Lister

The 2023 Tour de France is positioned to deliver non-stop action and excitement, making it one of the most memorable races in recent history. With the Grand Départ starting in Bilbao, Spain, the race will showcase some of the country’s most breathtaking landscapes, including rolling hills, pristine coastline, and quaint villages.

As the race makes its way to France, cyclists will face a number of challenging routes that test their endurance and ability to tackle difficult terrain. The return of the Puy de Dôme, a dormant volcanic dome in the Massif Central, is a particularly exciting addition to this year’s route. The climb is known for its steep incline and breathtaking views, making it a popular destination for cyclists and fans alike.

In addition to the challenging routes, the 2023 Tour de France is also notable for its short time trial distance. With the time trial portion totaling only 22 kms, this year’s race is set to be a test of speed and skill, as cyclists race against the clock to determine who has the best all-around abilities. This, combined with the arduous itinerary, will make the 2023 Tour de France a true test of athleticism, as cyclists push themselves to their limits in an effort to come out on top.

2023 Tour de France route
Aurélien PAPA, Adobe Stock

The Stages

Featuring a balance of flat terrain for sprinters, mountain peaks for climbers, and a time-trial for specialists, the 2023 Tour de France promises to be a thrilling evaluation of endurance and technical ability. The race kicks off in Bilbao, Spain with a 185 km loop that includes five climbs and over 3,300 m of ascent. The first week takes riders through the Basque region, with highlights including San Sebastian, Bayonne, Nogaro Circuit, and Pau.

The mountains make their appearance in the second week, with stages that feature the Aspin, Tourmalet, Col de la Ramaz, Joux Plane, Col de la Loze, and the final climbs in the Tour. The individual time trial on July 18 offers a chance for the specialists to gain time, before the sprinters return front and centre in the final phases. The race concludes, as is tradition, on the Champs-Elysées in Paris.

In total, the Tour de France 2023 features 21 stages, covering over 3,000 km and 50,000+ m of ascent. It begins on July 1st and finishes on July 23rd. Whether you’re a fan of the sprinters, the climbers, or the specialists, there is something for everyone in this year’s race. So get ready to follow the action as the world’s best riders take on the challenge.

The Riders

With the race fast approaching, you can bet that all the world’s top racers have been preparing diligently for the most prestigious event of the year. 2023’s race promises to be a gripping battle between three of the best riders on the planet. 

Let’s take a closer look at Jonas Vingegaard, Tadej Pogačar, and Egan Bernal and their chances in the Tour de France 2023. With similar strengths and a wide breadth of combined experience, the battle for this year’s Maillot Jaune is projected to be a nail-biting adventure the entire way through.

Jonas Vingegaard

2023 Tour de France rider
Jonas Vingegaard, Getty Images

Age: 26
Team: Jumbo Vismo
Nationality: Denmark

Jonas Vingegaard, winner of the Tour de France 2022 and runner-up in 2021, is considered the top favourite for victory in 2023. He might have been a surprise package in 2021, but his performance last year was nothing short of a masterpiece. His biggest weakness is his limited experience in Grand Tours, but his ability to adapt to new roles has already been put to the test, one which he has passed with flying colours. 

The 2023 Tour route, with its emphasis on ascents, is the perfect opportunity for Vingegaard to once again take the tournament by storm. He is an exceptional mountain climber and time trial specialist, undoubtedly boosted by his confidence from last year’s win, making him a monster to face in this year’s competition.

Tadej Pogačar

Tadej Pogačar, Getty Images

Age: 24
Team: UAE Team Emirates
Nationality: Slovenia

Tadej Pogačar, the winner of the Tour de France in 2020 and 2021, is the number one rival for Jonas Vingegaard. He has been the most successful Tour de France racer in the last three years with his results speaking for themselves. He is powerful on all terrains, and it’s safe to say he has any mistakes from last year sitting very comfortably at the forefront of his mind.

The 2023 Tour route is tailor-made for Pogačar, with its hilly start in the Basque Country and plenty of high mountain stages. He is a rider who thrives on unpredictability, and in a route where anything can happen, he will feel right at home and ready to take back his title.

Egan Bernal

Egan Bernal, Getty Images

Age: 26
Team: Ineos Grenadiers
Nationality: Colombia

Egan Bernal is a bit of a mystery figure in this year’s race. Despite his life-threatening injuries from a crash in 2021 and potential complications in his recovery, he has made a remarkable comeback. Bernal remains cautious, stating that merely completing the race in Paris would be a major accomplishment, yet he possesses several advantages, including real-life victory experience from his win back in 2019.

The climbing-focused route of the 2023 Tour suits Bernal perfectly, providing him with an opportunity to regain his top form. He excels in climbing and performs well in time trials, making him a strong contender for the overall win.

The Classifications

The Tour de France is renowned for its challenging terrain and fierce competition. However, it’s not just about the overall winner, as there are several classifications that riders can compete for throughout the race. Here’s a look at the main categories:

Yellow Jersey (Maillot Jaune) 

This is the most prestigious classification, awarded to the rider with the lowest overall time after each stage. The rider wearing this jersey is considered the leader of the race.

Green Jersey (Maillot Vert)

This classification is awarded to the rider with the most points earned through intermediate sprints and stage finishes. Sprinters are usually the top contenders for this jersey.

Polka Dot Jersey (Maillot à Pois Rouges)

This classification is awarded to the best climber of the race, given to the rider who accumulates the most points from reaching the summit of designated mountain stages.

White Jersey (Maillot Blanc)

This classification is awarded to the best young rider under the age of 26. It is calculated in the same way as the Yellow Jersey, but only for riders within the age range.

Team Classification

This classification is awarded to the team with the lowest overall time for its three best riders in each stage.

Tour de France jersey winners, www.sportingnews.com

These classifications add extra excitement and competition to the race, with riders striving to be the best in their respective categories. The Tour de France is a true test of endurance, skill, and teamwork, with each classification representing a different aspect of cycling. 

The beauty of this system is it allows the individual strengths and skill sets of different riders to shine through and be recognized on the world stage. Even if you aren’t the overall winner when your bike crosses the line in Paris, you’ll have had the chance to make your mark on this prestigious event, and cement your name in cycling history.

Whether you’re a beginner, amateur, or professional cyclist, there’s few things more exciting than getting to watch the best of the best compete in the sport that you love. We’ll be following this year’s race closely to see what the world’s top cyclists can produce, and look forward to the new standards that will be set in this ever-changing and always dynamic global display of grit and determination.

We hope you get to enjoy the spectacle alongside us as we all work towards our own personal bests of becoming better, stronger, healthier cyclists!

« Previous Page
Next Page »
  • Facebook
  • Tumblr
  • Twitter

Latest Articles

JOIN Cycling: A New Training Platform for Cyclists

May 27, 2024 By Eric Lister

cold exposure

The Benefits of Cold Exposure for Cycling & Life

June 13, 2023 By Eric Lister

hill climb

The Ultimate Hill Climb Training Guide

May 31, 2023 By Eric Lister

shoulder pain cycling

How to Treat & Avoid Shoulder Pain While Cycling

April 12, 2023 By Eric Lister

psoas stretch

The Importance of the Psoas Stretch for Cyclists

April 6, 2023 By Eric Lister

cycling neck pain

The Ultimate Guide to Cycling Neck Pain: Causes and Solutions

March 21, 2023 By Eric Lister

Useful Info

  • Contact
  • Finally, A Global Cycling Club That Is Focused On Community And Love Of Cycling!
  • Privacy Policy
  • Share Your Story!
  • Terms And Conditions Of Use
  • Welcome to I Love Bicycling
  • What Happened When I Stretched Every Day For a Month

Recent Posts

  • JOIN Cycling: A New Training Platform for Cyclists
  • How to Hang Bikes in Your Garage: 4 Inexpensive Options
  • Gravel Bike Vs. Road Bike: Which One Is Better For You?
  • The 6 Types of Mountain Bikes & How to Choose the Best One for You
  • What Is a Touring Bike Good For? 5 Benefits We Know You’ll Love

Search I Love Bicycling

Connect with Us

  • Facebook
  • RSS
  • Tumblr
  • Twitter

Copyright © 2025 · Magazine Pro Theme on Genesis Framework · WordPress · Log in