• Training
    • Injury Prevention
    • Training Tips
  • How To
    • Bike Fit
    • Gear
  • Nutrition
    • Nutrition Tips
    • Weight Loss
  • Repair
  • Reviews
  • Stories
    • Funny Stories
    • Jokes
    • Quotes
    • Videos
    • Funny Videos

I Love Bicycling

I Love Bicycling is a website that is geared towards cycling for beginners with road cycling tips, training articles, nutrition tips, weight loss, how to’s and bike repair articles.

How To Use A Bike Pump

March 17, 2018 by Adam Farabaugh

New gadgets and toys often come with manuals but who actually opens them up let alone reads them? A bike pump seems simple enough to operate but not knowing how to use a bike pump is something that may have you flustered.

how to use a bike pump

Knowing How To Use A Bike Pump

Typically you find out that you don’t know how to do something when you precisely need to do that something. Knowing how to use a bike pump before you actually need to use it can be a headache saver but some of you likely found your way here to this article because you need to do that something right now; pump up your tires.

The Types of Bike Pumps

First, you need to know what kind of bike pump you have. Trying to pump up your tires with your feet holding the bottom of one pump won’t work too well with another. You will also need to know what type of pump head you have and how it works.
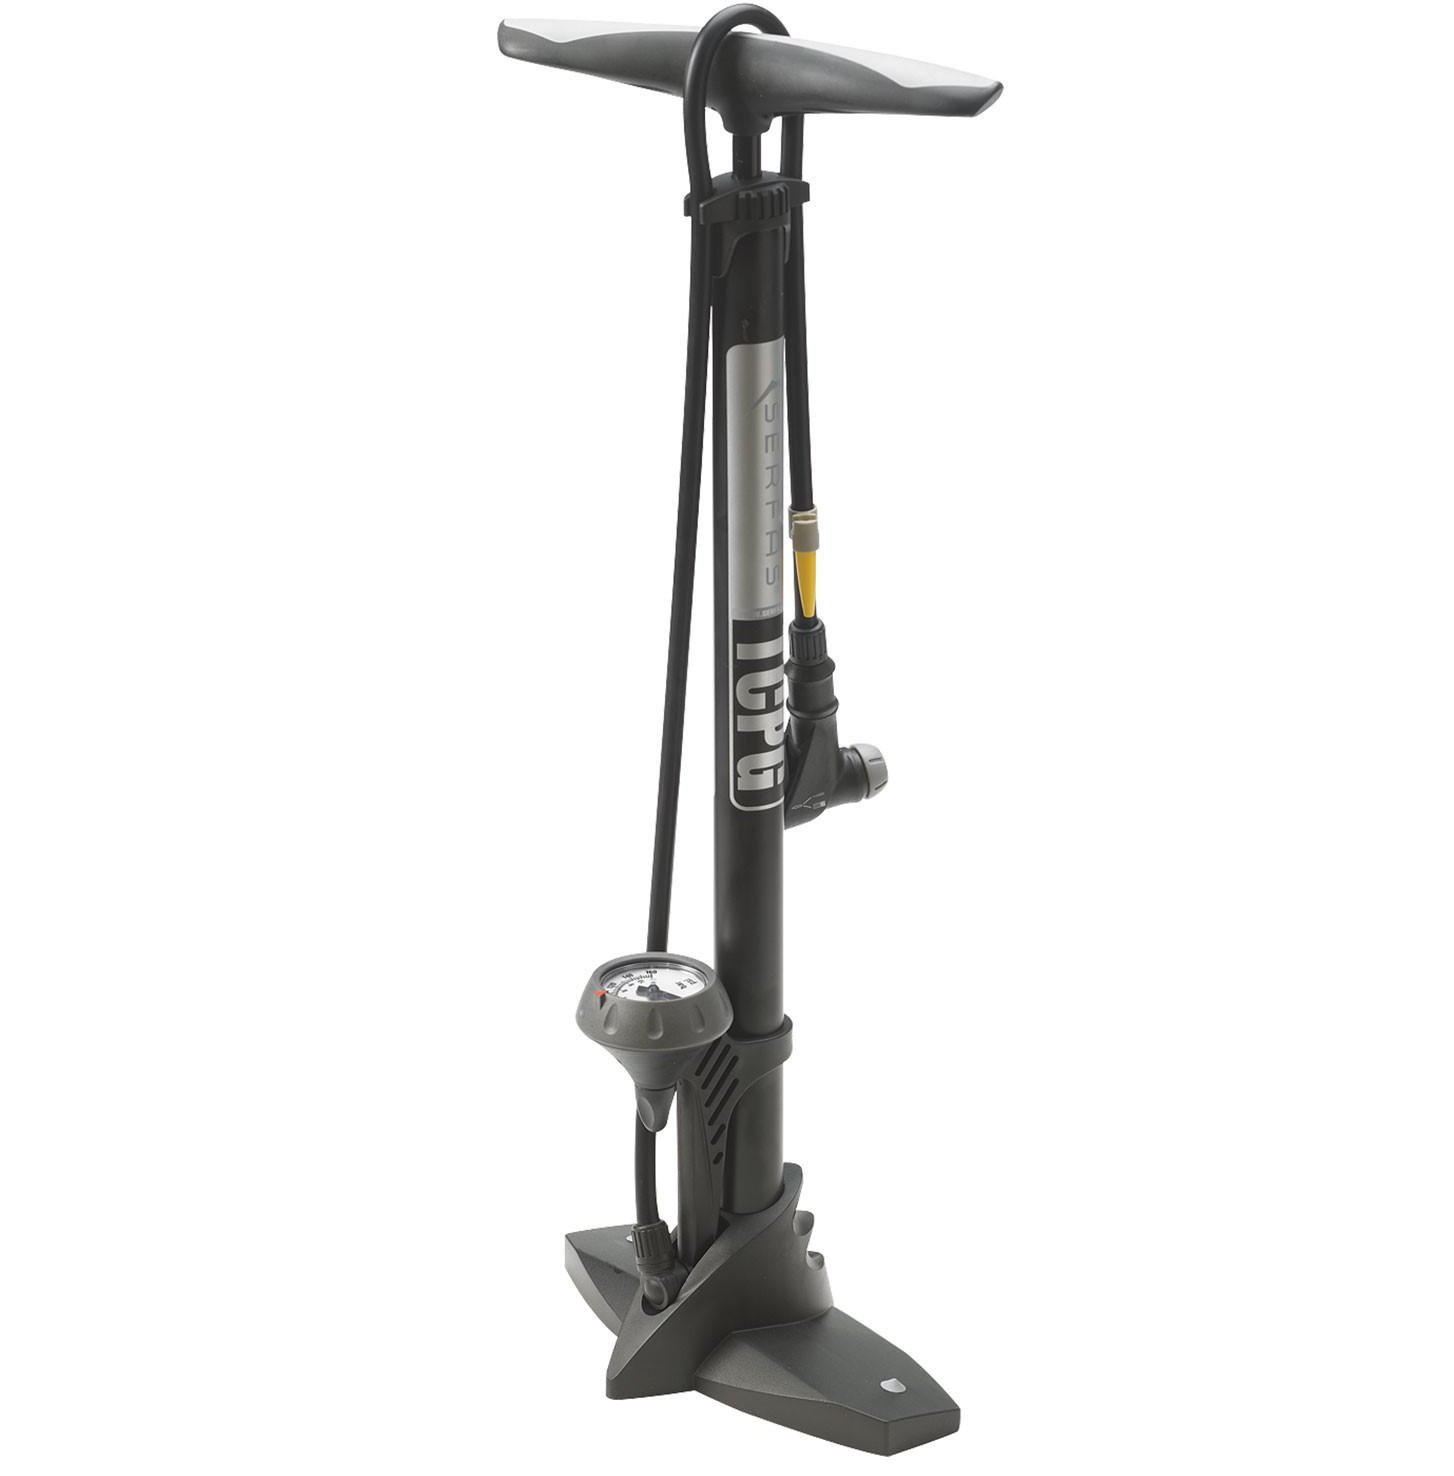
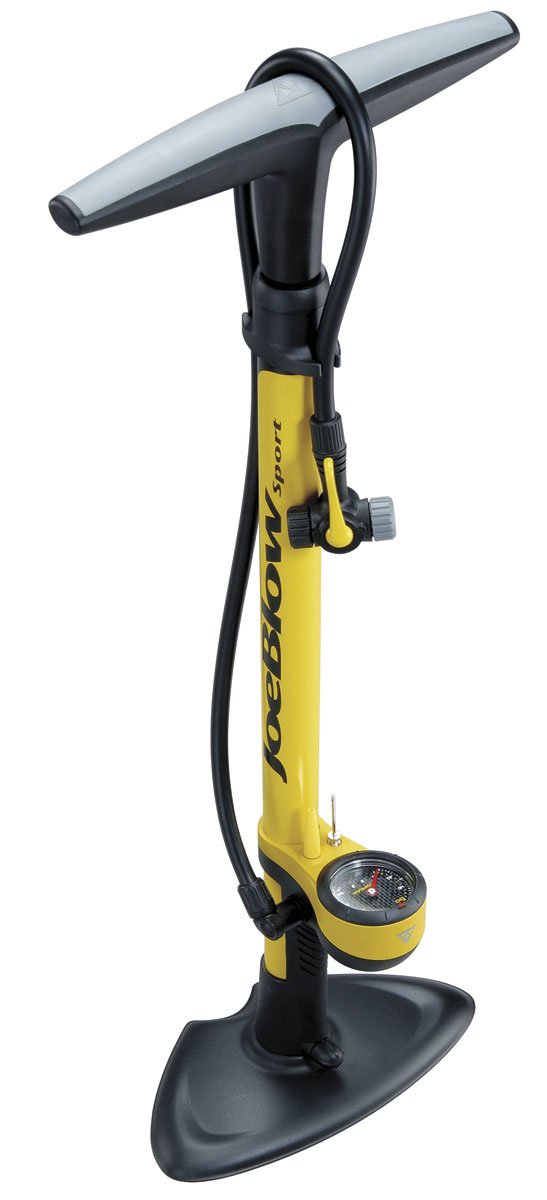
Floor Pump

A floor pump, as pictured above, is a pump you will likely leave at home or maybe in the back of your car. This is a tall pump that is held in place by placing you feet on the bottom of the stand.

Frame Pump

A frame pump is a long, slender pump that fits along the top tube on your bike to pump up your flat tire while out on a ride. It’s advantages over the below pumps are that it requires a lot less strokes and can reach a higher pressure; important if you’re on a road bike.

Hand Pump

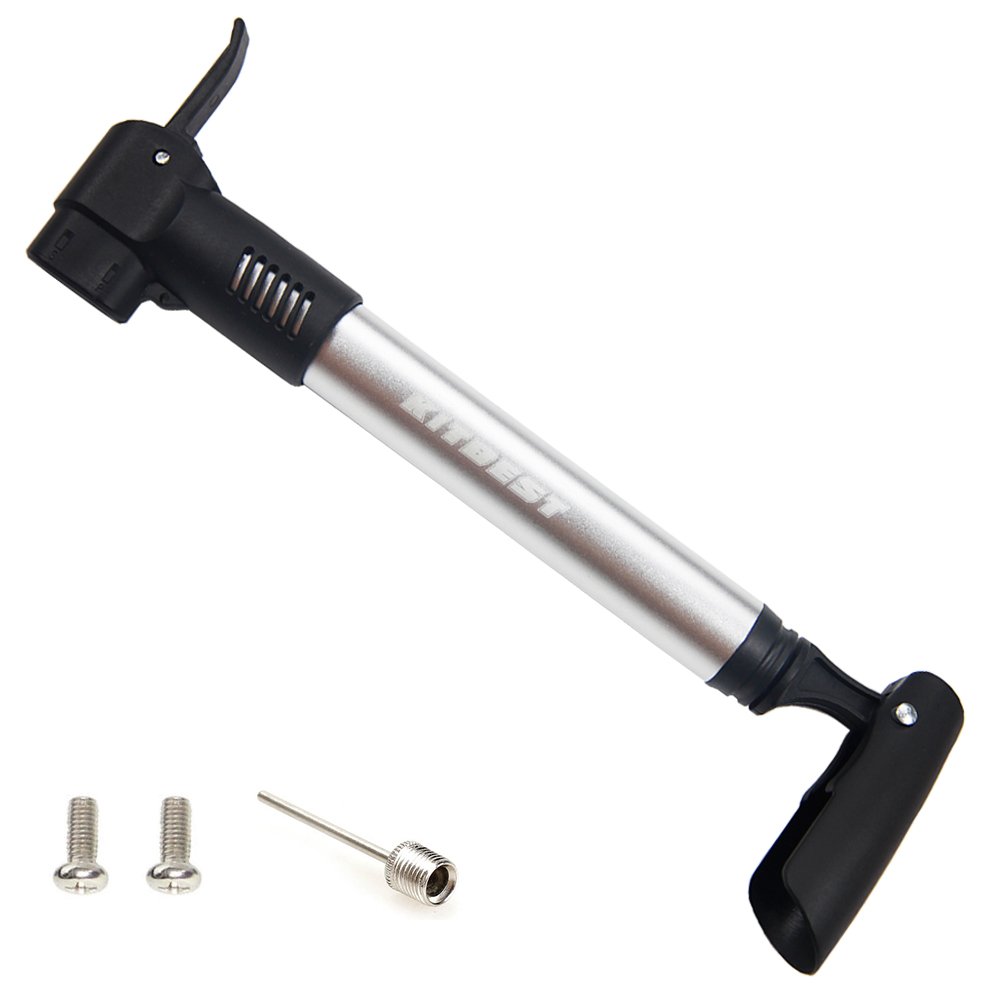
A regular hand pump is small enough to fit in a jersey pocket or perhaps yours came with a mount that attaches next to your bottle cage. These ones are handy while out on the road but less than ideal if you’re using it to pump your tires up at home every few days.

Ultra Mini-Pump

Bike Mini Pump. Capability Pocket-Sized with Optimized Air Flow 100 PSI, Mounting Bracket, Presta-Schrader Valves, CNC Aluminum, Lightweight 72 Grams.

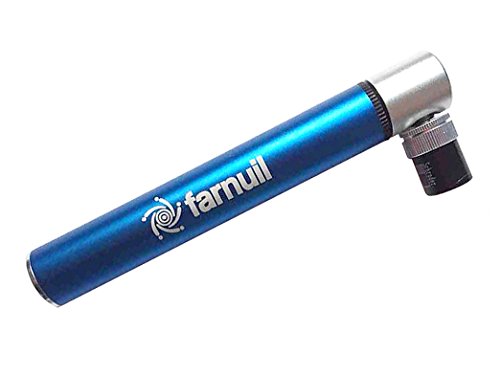
Having a pump that is small enough to easily fit in a jersey pocket amongst other stuff along with in a saddle bag or side pouch of a Camel-bak can be super convenient. It will get you out of a bind but be ready to do a lot of pumping.

CO2 Cartridge

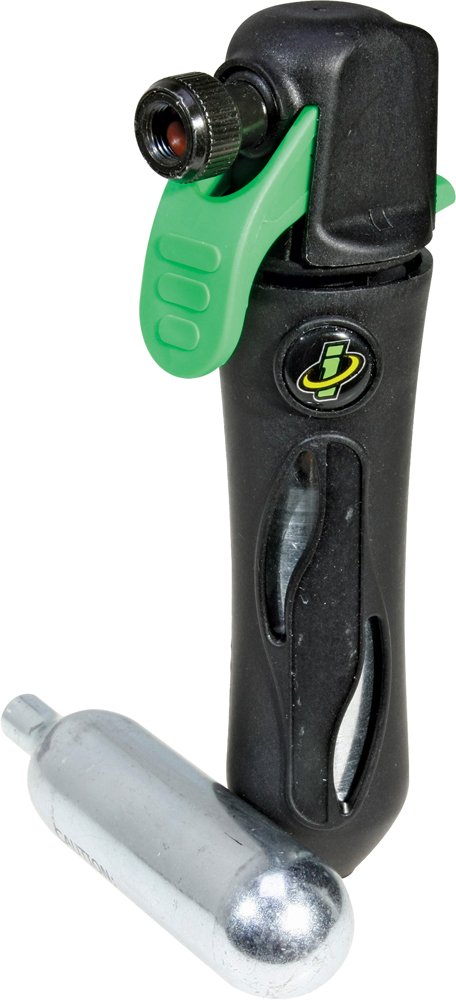
A CO2 cartridge is super fast and efficient, unless you need to pump up more tires than you have CO2 cartridges; then you’re quick flat change is a long walk or wait for a ride.

The Differences in Pump Heads

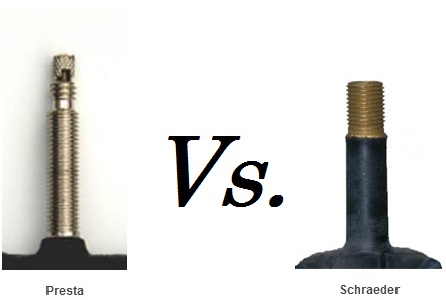
Now that you know what kind of pump you have, you have to know how to attach it to the valve stem. But before you do that you need to know what kind of valve stem you have to make sure it is open as well as to make sure you are using the right style pump head. The two types of valves are Presta and Schraeder. Below, Presta is to the left. With this type you need to unscrew the top-most piece counter-clockwise to open the valve before pumping. To close, simply turn clock-wise. Schraeder valves, to the right, are ready to pump and don’t need opening nor closing. Just make sure you take off the plastic cap first.

Presta-vs-Schrader

Now that you know what valve type you’re working with, you need to know which head you have and how to use it. The first type, which you will find on all of the pump types, is the standard single nozzle head. These typically work with both Presta and Schrader valves by unscrewing the outer plate (in the image below, the silver piece) all the way off. This will expose a rubber nozzle. For Schrader, you will want the wider side pointed outwards. For Presta, you will want the narrower side pointed outwards. Behind this nozzle you will then probably find a plastic piece. For Schrader, place the pointy-tip side towards the outside. This is what de-presses the valve pin on the inside of the Schrader valve. For Presta, place the point-tip away from the nozzle. Once you have these pieces orientated for your valve type, simply screw the cover plate back on.

pump head
Single Nozzle

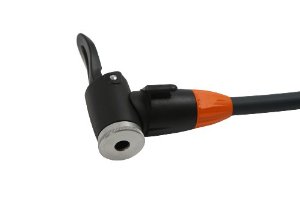
For a dual nozzle, pictured below, simply place the valve into the correlating hole. Large size for Schraeder, small size for Presta.

pump head 1
Dual Nozzle

Now that you have the valve in the correct size nozzle, you need to lift the lever on the rear of the valve head. This tightens down the rubber nozzle to ensure no air loss. (Note: On some fancier models this is reversed. Before placing the head on the valve you can lift the lever and see if the nozzle tightens down or not.)

How To Pump You Bike Pump

Now that you have the pump head securely attached, you are ready to pump. With all of the pump types, they will likely seal well when new but when they age you may need to hold the valve head tight to the valve with one hand while pumping with the other. With a floor pump, simply place a foot or two on the base and pump away. With the other pumps you will want to hold the other end of the pump with your other hand so all of the force isn’t placed on the valve stem. If you don’t do this you will likely brake the valve stem off leaving you with a less than ideal situation. A good way is to hold the valve head while also holding the rim to support your hand.

CO2 Option

With a CO2 cartridge, the attachment mechanism might be the same or perhaps a little different so you will need to do the same things mentioned above to make sure you’re using the right valve nozzle and then to make sure it’s securely attached. Then instead of pumping, you tighten down the cartridge to pierce it and either the tube will start filling up automatically or there will be a button to press to begin inflation. Either way, make sure you don’t over inflate the tire and when you take the valve head off a Presta valve, make sure it doesn’t freeze open. Simply give the valve a tap down and turn to close quickly.

What Pressure Should I Pump To?

Now that you know how to use a bike pump, what pressure should you pump to? With a floor pump you will be able to get your tires easily to whichever pressure you like. With the other pumps, it will likely be hard to get the pressure up to what you were riding originally. On road tires, get as much air in as you can to avoid pinch flatting. You won’t have a gauge so you will have to go by feeling the hardness of the tire with your thumb. For road tires, you should only be able to press in a tiny bit. For cyclocross and hybrid bikes, you should be able to press in a bit more, perhaps two to three millimeters. For mountain bike tires, you should be able to press in even more, five millimeters to one centimeter.

101 Best Bike Repair and Maintenance Tips

May 22, 2016 by Adam Farabaugh

bike repair

Bike maintenance is a difficult aspect of owning a bike, especially for beginners. We cover 101 different bike repair and maintenance tips that we think will help you maintain your bike and keep it rolling in pristine condition. We cover everything from cleaning your bike, to the pre-ride check, to on the road and at home fixes. We also cover a few of the higher end stuff that you may not wish to do on your own but always wondered how it was done. Without further ado:

101 Best Bike Repair and Maintenance Tips.

Table of Contents

Cleaning Your Bike

After The Wash – Lube

A Thorough Pre-Ride Check

Bolts to Check on Your Bike

Back to the Pre-Ride Check

On the Road Bike Fixes

Preventative Bike Maintenance

Mountain Bike Specific Maintenance

At Home Fixes

Cleaning Your Bike

cleaning your bike

#1 –      Spray it Down

Grab some clean rags, soap, water, brushes and solvents to clean your bike. First, spray down your bike with a hose making sure that you avoid (particularly with high pressure) any areas that contain bearings or shocks.

#2 –      Wipe It

Make sure most of the dirt and mud is off before you wipe everything down with soap and a rag (or a sponge). Then use the brushes to get in to the hard to reach areas such as the brakes, chain, and cassette. Lastly, use the solvent to remove any built up grease from your bike chain.

#3 –      Scrubbing the Cassette

Over time your cassette will develop gunk between the cogs. You can either take a long, sturdy bristled brush and scrub between each cog or you can fold a rag in half and slide it back and forth all the way around each cog.

#4 –      Cleaning the Chain

Chains get dirty quick. Use a degreaser such as Simple Green or Purple Power and spray it on the chain and let it set for a minute. Then take a soapy brush and scrub both the underside and top of the chain. Your chain should sparkle after you hose it off if you do it right.

#5 –      Cleaning Your Rims

Brake residue can form on rims and if simple scrubbing with soap and water doesn’t work, use rubbing alcohol on a rag and scrub the rim.

#6 –      Spray it Down Again

After scrubbing and using some elbow grease, spray the bike down again to get all the remaining dirt and soap off the bike. Also run the chain backwards spraying in the chain and cassette to get all the nooks and crannies.

#7 –      Wipe It… Again

With a clean dry rag, wipe down the frame, components, and wheels from any excess water. With a dry rag that can get dirty, wipe down the chain by holding it in the rag and running the pedals backwards.

#8 –      Cleaning Schedule

Obviously you aren’t going to clean your bike meticulously after every ride. Give your bike extra TLC when you ride in the rain or mud, but put your bike on a regular cleaning schedule. At the very least clean it once per month. It obviously depends on how often you ride, but if you want to keep your bike in smooth working condition, once a month is a bare minimum.

After the Wash – Lube

lube

#9 –      Lube Properly

If you do nothing else, make sure your bike is lubricated properly as it protects moving parts from excessive wear and tear. On the other hand, make sure not to go nuts as too much lubrication will attract dirt and cause just as much damage. Allow the lube to soak in and then wipe any excess off with a clean rag.

#10 –  What Lube to Use

Choose an appropriate lube for the riding conditions you’re in. If you’re riding in mud, rain, or snow, choose a thicker lubricant made specifically for that. For everyday riding use a thinner lube which can be found at any bike shop or online.

#11 –  How to Lube

With the correct kind of lube, spin your chain backwards about two times, ideally putting a drop on each link each revolution. Once you’ve gone around twice, stop applying lube but keep spinning the chain backwards a few more times to allow the lube to soak in.

#12 –  Wipe It

Once the lube has been absorbed, spin the chain backwards while running it through an old rag to remove any excess.

#13 –  Other Areas to Lube

Oil is also good for brake and derailleur levers, cables, and other moving parts on the bike. Don’t apply too much though as it will just get everywhere.

#14 –  Lube the Pulley Wheels

Putting a few drops of oil on both sides of both pulley wheels will ensure that they run smoothly and don’t squeak. Spin the chain backwards as you drop a few drips in.

#15 –  Lube the Derailleurs

Apply a few drops oil to the pivot points on both the front and rear derailleurs to keep them moving smoothly.

#16 –  Lube the Brakes

At first glance, this looks like a bad idea, but if you’re brakes have been through a lot, lubing the pivot points can help to keep them moving. Just put a rag underneath to make sure you don’t drip any on the brake pads or rim.

#17 –  Lube for Dummies

The general rule of thumb when it comes to lubing is that if something moves, it has to be lubed. Think of what would happen if you didn’t lube moving parts; metal against metal never sounds or feels good.

A Thorough Pre-Ride Check

tighten bolts

#18 –  Brakes

If you’re shifting doesn’t work, it’s not the end of the world. If your brakes don’t work, oh boy, you’re in for it. Always do a simple check of squeezing the brakes to make sure they grab and don’t slip.

#19 –  Steering

After making sure your brakes work, check the steering. Lift your front wheel off the ground and turn it make and forth. It should turn with little to no push but rather move under its own weight. If it doesn’t, the headset likely is too tight and needs loosened or new bearings.

#20 –  Headset Tightness

With the wheels on the ground, pull the front brake and rock the bike forward. There should be no movement of the steerer tube (where the stem connects to the fork) relative to the frame. If there is play in it, your headset is loose and your steering will be compromised.

#21 –  Tightening the Headset

Tightening a headset can be tricky. It can’t be too loose nor too tight. The key is to tighten down the top bolt before tightening the bolts on the stem. Here is a more detailed description on how to tighten a headset.

#22 –  Loose Bolts

If you have a loose bolt, screw or nut it can be a serious safety concern but it can also lead to wear and tear and inefficiencies while riding. Routinely check the tightness of the bolts with a torque wrench. DO NOT simply tighten every bolt as much as possible as this will also lead to similar issues as loose bolts. The owners manual of your bike should contain how much torque is required for each bolt.

Bolts to Check on Your Bike

tightening bolts with a tourque wrench

#23 – Using a Torque Wrench to Check Bolt Tightness

Using a torque wrench is the best way to tighten bolts and to be sure that they’re not under or over tightened. It’s typically labeled on each part for how much torque you should use, say on the stem itself. If there are other bolts, tighten them down evenly and then “click” the torque wrench when they’re all just about snug.

#24 –  Handlebar Bolts

Check the tightness of the bolts that attach the handlebars to the stem. They should all be tightened evenly and ideally with a torque wrench. If you don’t have a torque wrench, they should be snug but not overly tight by any means.

#25 –  Brake Bolts

Check the tightness of the brake bolt that cinches down on the brake cable itself; generally with a 5mm hex wrench. If a brake fails, this is most likely where it’s going to happen because the bolt wasn’t tight enough and the cable slipped through under heavy braking. Don’t strip the bolt but you can go fairly hard on this bolt. Make sure you check both the front and back.

#26 –  Brake Mount Bolts

While you’re at it with the brake, you may as well check the bolts that mount the brake. Behind the fork there will be a hole for a hex wrench. You will need a longer one and make sure you have the right size, normally 5mm. Again, don’t over tighten this but make sure it’s snug. The rear will be easily to get to and will be the same size. If the brake itself turns while you’re tightening, don’t worry, you can just rotate the brake back to center with your hand after the bolt is tight.

#27 –  Derailleur Cable Bolts

Normally with a 5mm allen key, make sure both the front and rear derailleur cables are tight.

#28 –  Derailleur Mount Bolts

Generally with a 5mm hex wrench, make sure the rear derailleur is tight to the frame as well as the front. If the front derailleur is mounted on a clamp around the seat tube, make sure that is tight also.

#29 –  Disc Brake Bolts

If you have disc brakes, make sure the two bolts on both the front and rear are tight. If you have cable actuated disc brakes, make sure that too is tight.

#30 –  Seat Post Clamp Bolt

Check the tightness of the seat clamp bolt that tightens down onto the seat post. This should be snug but not overly tight especially for carbon posts.

#31 –  Saddle Bolts

There are generally two bolts underneath the saddle that attach it to the seat post. If these are slightly loose, when you hit a bump, especially a big one, your saddle will tilt. Make sure they’re tight.

Back to the Pre-Ride Check

tire check

#32 –  True Wheels

Pick up the front of your bike and spin your tire, check for wobbles. If it wobbles, the wheel needs to be trued. Do the same check on the back wheel. (see #67 – Truing a Wheel below under At Home Fixes)

#33 –  Tire Check

Turn each wheel slowly looking for small cuts or wear spots that could end your ride short. Also look at the sidewalls as you spin the tire as small cuts can form and the tube can actually start to push through without yet popping. If there are any small tears, take the inner tube out and place a piece of electrical tape over the cut on the inside of the tire. If it is a larger tear, also place a rubber boot or other similar material that will ensure that the tube won’t push through or make the hole bigger. If there are a number of tears or any of them are simply too big, replace the tire. It’s not worth flatting on the side of the road and then not being able to fix it.

#34-  Pressure Check

With cycling tires, they generally loose air relatively quickly so you should pump up your tires every ride. They may only need one pump but doing that is better than pinch flatting on the road because you didn’t have too much pressure. Once you get good, you can feel with your thumb how much pressure there is and if you need more air or not.

#35 –  Proper Pressure

There is never one pressure fits all. You should change your tire pressure for the type of riding you’re doing and terrain you’re covering. Typically the larger diameter the tire, the lower the air pressure.

#36 –  Tire Pressure for Normal Road Conditions – Dry, No Gnarly Stuff

Riding 100 to 110 psi is about the ideal range. If you’re running tubeless, you can go down a bit from there and if you’re a bit heavier, up from there to avoid pinch flats. Remember the harder your tires are the harder your ride is going to be.

#37 –  Tire Pressure for Dirt Roads and the Like

A lot of people think you shouldn’t ride road bikes on dirt roads or otherwise; nonsense. Add 5 to 10 psi to your tires to help prevent pinch flats. Learn to ride gingerly and lightly choosing a good line and shifting your weight. Carry two extra tubes isn’t a bad idea and/or a patch kit. If you’re really out there, strap an extra tire to your saddle bad and seat rails. It’ll be a lifesaver if you need it.

#38 –  Tire Pressure for Wet Conditions

If the roads are wet and especially if you’re cornering a lot, take 5 to 10 psi out of your tires. This will allow your tire to compress more and have a larger contact patch with the road aiding in traction.

#39 –  Check the Chain

Before every ride you should make sure that your chain is properly lubed. A poorly lubed chain will not only squeak and be more inefficient but will also wear out quicker and need replaced.

#40 –  Lubing the Chain

First, take a rag and run the chain backwards through it to get off any gunk or road debris. Then, while spinning the pedals backwards, apply a light trickle of lube onto the chain for about two revolutions depending on how dry the chain was previously. Then stop apply lube but keep spinning the pedals backwards to work it in. Then spin the chain backwards through a rag removing any excess lube.

#41 –  Brake Pads

Quickly check the brake pads and make sure they are not too worn down. Then test the front and back brakes independently of each other to assess the braking power.

#42 –  Skewer Check

Check and make sure that both the front and rear skewers are tight. They should be firmly snug as to not rattle free on bumpy roads. And to make sure you don’t look like a newb, place quick-releases on the left side of the bike.

On the Road Bike Fixes

ride tools

#43 –  Tools to Bring for A Bike Ride

You should be prepared with the right tools on the road or trail and know how to use them should a mechanical or flat tire occur. The tools to bring are:

  • Spare Tube
  • Pump or CO2 Inflator with an extra cartridge just in case.
  • Tire Levers
  • Patch Kit
  • Multi-tool with a chain tool on it

#44 –  Fixing a Flat

If you ride a bike more than just around town you should know how to fix a flat. Fortunately it’s easy. This article will give a full breakdown on how to remove your tire and change the tube.

#45 –  Broken Chain

Broken chains don’t happen too often when riding but when they do, you’re not going very far until you fix it. A chain will either break completely or a link will become kinked. To fix it, all you need to do is to remove that link. Here is a complete guide to fixing a broken chain.

#46 –  Tear in Tire

A tear in a tire can end your ride. If it’s not extremely big however, you can fix it with a few little tricks. The first is the dollar bill trick where you fold up a dollar bill and place it between the tube and the tire where the hole is. This will only work if the hole is small enough. Once the hole is past a few millimeters in size, you are going to need a tire boot which should also be carried in your saddle bag. This rubber strip will be large enough to place over the hole and not allow the tube to poke out. The problem with both the dollar bill trick and the tire boot is that the tire can continue to split particularly if you’re on rough roads or terrain. Adding a piece of electrical tape in place of or in conjunction with, will help to hold the tire in place and not have the hole continue to grow.

#47 –  Broken Spoke

broken spoke

A broken spoke can also end your ride if you don’t know how to deal with it. Typically a spoke breaks at the nipple and leaves the rest of the spoke flopping around. The easy fix is to just remove it but your wheel could be too out of true to continue riding. This is how to fix it.

#48 –  Broken Front Derailleur Cable

With a broken front derailleur cable you are going to be stuck in the little ring for the rest of the ride. With a triple chain ring, you might be able to turn the limit screws enough to line up the derailleur up with the middle chain ring but it depends on your derailleur and set-up.

#49 –  Broken Rear Derailleur Cable

With a broken rear derailleur cable you are going to be stuck in your smallest gear, normally an 11 or 12 tooth. To get the chain up to a bigger, easier gear, turn the H or high speed limit screw in as far as it can go. This should push the derailleur up at least a cog or two. You may have to back it back out a tad if it doesn’t line up well.

#50-  Broken Brake Cable

It’s going to be rare that you have a broken brake cable as they’re made not to fail. If you’re riding anything other than perfectly flat roads without many intersections or traffic you might be able to gingerly make it home otherwise it’s best to get a ride and not risk needing to stop quickly and not being able to.

#51 –  Shifting Becomes Off

A lot of times, particularly after a new cable is installed, your rear derailleur shifting will become slightly off. This is because the cable stretched ever so slightly. To tighten it, simply turn the barrel adjuster on your derailleur counter-clockwise a quarter turn until the pulley wheel lines up exactly with the gear. You won’t have to turn it much unless it’s way off.

Preventative Bike Maintenance

checking a wheel

#52 –  Keep Your Bike Inside

The sun, water and dirt will cause more damage to your bike and cost you more in repairs if you keep your bike outside. If you’re in a humid climate, rust on certain metal components can also develop quicker.

#53 –  Check Tires For Debris Or Cuts

If your tire has debris in it make sure to remove it before it causes a flat tire. Also inspect your tires from time to time to make sure that there are no major cuts or gouges. If there is, replace the tire. Also, make sure you inspect the sidewalls as cuts can form here often as well.

#54 –  Checking a Chain for Wear

A chain will increase in length over time causing it to “skip” when under pressure from pedaling. Not only is it annoying when it happens, but it also will wear out the rest of your drivetrain. Check this with a chain wear indicator or if you know how you can use a ruler. This article gives a full run down on checking your chain length.

#55 –  Frame Inspection

inspecting a bike frame

Inspect the frame for cracks or serious dents that are more than just cosmetic. Specific areas to look at are the joints particularly around the head tube and bottom bracket. If there are any cracks, even if it looks like it’s just paint, take the bike to an expert as if the paint is cracked, there is likely a reason for it.

#56 –  Component Inspection

Also, it’s a good idea to look over your components and make sure they are functioning properly as well as are properly tightened. See the bolt check section earlier in this article.

#57 –  Spokes

Check for loose spokes. An easy way to do this is to simply grab two spokes part way between the hub and rim and squeeze them together. They should all flex about the same. If any are looser than the others, make sure to tighten them and also to make sure your wheel is true.

#58 –  Keep the Chain Lubed

Keeping your chain cleaned and adequately lubed will drastically lengthen its life. An under-lubed chain will sound horrible as well as begin to stretch eventually causing it to slip off the gears, or worse, break.

#59 –  Grease

Many beginner cyclists do not have grease in their essential bike tool kit. If you ever want to take your pedals off again, make sure to grease them. Grease is great for any threaded bolts such as the stem or derailleurs. Also, if you have any bearings apart, make sure they are well greased.

#60 –  Carbon Paste

Carbon paste should be used wherever there is carbon against carbon, or carbon against metal. The two places where this occurs is where the handlebar attaches to the stem and the seat post. Put a thin layer on each spot as it will help to make sure the carbon doesn’t slip.

#61 –  Replace Cables Before they Break

The key to not having anything break is to replace it before it has a chance to break. Cables will eventually break and if they don’t, will develop a lot of cable drag from dirt and debris. Replace them every six months to a year depending on how much you’re riding. If you’re really racking up the miles, even sooner.

Mountain Bike Specific Maintenance

mountain bike suspension check

#62 –  Suspension Check

Compress the shocks and then let them go. Do they appear to work as they should? Also check the sag of the shock by getting on your bike and seeing if the shock sags approximately 25%. Measure this with the small rubber ring, does it go down 25% of the entire length of the shock once you get off and look? If it is more than 25% – 30% add some air with your shock pump, if it less then let some air out. Your suspension will have exact recommendations also for what psi you should be using. Check this and dial it in that way as well.

#63 –  Oil Check

Look at your suspension to see if you are leaking any oil. If you start leaking a significant amount, so much so that you are attracting a lot of dirt on the forks, then it is time to do a little maintenance work on the shocks such as replacing the seals and oil.

#64 –  Hydraulic Disc Brake Check

hydraulic disc brakes

Alright, not just for mountain bikes anymore. Air can develop in your lines overtime. To check to see if you need a break bleed, stand the bike upright with the front wheel directly over the rear wheel, and pump the brakes. If they start to pull all the way to the bar, you’re in need of a brake bleed. Standing the bike upright allows any air bubbles to move in the line up toward the brake lever. If the levers don’t pull to the bars, you’re good to go.

#65 –  Dropper Post Check

Dropper posts may develop play in them over time. Check this regularly to see if yours develops an excessive amount. Also if your post doesn’t spring back up as quick, you may need to tend to your hydraulics and seals if it’s a hydraulic post.

At Home Bike Repair Fixes

bike repair tools

#66 –  Bicycle Repair Tools

The first thing you’re going to need to do any at home repairs are tools. The second thing you’re going to need is the know-how on using them. The following list is the short list of everything you need to do the basic stuff on your bike.

  • Allen Key/ Hex Wrench Set
  • Tire Levers
  • Straight Bladed Screwdriver
  • Philips Head Screwdriver
  • Chain Whip
  • Cassette Lock Ring Remover Tool
  • Crescent Wrench/Wrench Corresponding to Cassette Lock Ring Remover Tool
  • Cable Cutters
  • Chain Tool
  • Spoke Wrench – Size 0-2 and/or your specific spoke style
  • Electrical Tape
  • Pedal Wrench

# 67 – Keep Your Tools Organized

As with any workshop you should keep your tools neat and organized. If you have a full workshop with a peg board, keep all your tools in the same spot by outline where they go on the board with a sharpie. If you’re storing them in a toolbox, keep them organized and separated by type. And always, always, put your tools back where they belong after using them. It’s always a pain when you need a tool and can’t find it which just makes working on your bike stressful from the get go. Also, make sure you wipe down your tools before putting them away getting any dirt or grease off of them. No one wants to grab a tool and be immediately covered in grease.

# 68 – Making Your Own Bike Repair Stand

A bike repair stand makes it super convenient and easy to work on your bike and perform your own bike repair. It’s up in the air so you don’t have to bend down and work on it as well as it’s held firmly in place so it won’t fall over. It’s also not upside down leaving you with having to figure out which way things go when it’s right side up. If you don’t have a repair stand you can make one. One easy way is to simply hang a piece of rope and put a loop in it so you can just hook the saddle on it. Then with another piece of rope attach it to the stem so the bike isn’t constantly moving.

#69 –  Installing New Bar Tape

installing bar tape

There are a number of ways to wrap your road bars but the tried and true is to start at the end of the bar by overlapping the end by about half an inch. This is so you can stuff the excess inside the bar with a bar plug and be sure that it stays. Hold the end of the tape and make sure it’s a little bit taught when wrapping. Overlap the tape by about a 1/4 inch holding the exposed layer with your other hand until you wrap it in place. Your new bar tape should have came with a small strip of tape. Wrap this around the bracket of the shifter on the backside of the bar.  Continue wrapping up to the shifter. There are a number of ways to go around the shifter which you will have to play with to make sure that none of the bar is exposed, particularly behind the shifter. A simple way is to just wrap as far up to the shifter as you can and then wrapping around to the inside and up to the top of the shifter and continue wrapping. You will want to make sure you don’t overlap too much otherwise you will run out of tape before you get to about two to three inches from the stem. If you’ve gone long, you can simply trim the tape with scissors but make sure you cut it so it’s horizontal. Then take some electrical tape and wrap the very end of the bar tape a couple of times. You can then place the nicer tape that comes with the bar tape over top of this.

# 70 – How to Keep Bar Plugs From Falling Out

If you or whoever wrapped your bars, didn’t leave enough overextending the end of your bars, your bar plugs are likely going to fall out, especially if you have a crash. An easy way to make sure they stay in place is to wrap electrical tape about one centimeter around the plug before inserting it. Then double the tape back on itself so the sticky side is out. Do at least two layers and then cut it. Then press the bar plug into place.

#71 –  Truing a Wheel

We touched on truing a wheel before but not in a truing stand at home. Having a truing stand makes truing wheels way easier but it can be done by using the brake pads as guides. The simple premise is that you tighten a spoke by turning the nipple counter-clockwise to pull the rim further in that direction. And for every half-turn you make tightening a spoke, you loosen each spoke on either side a quarter turn to make sure the wheel stays round otherwise you risk making an oval. The full scope can be found in this article.

# 72 – How To Install Rim Tape

There are rubber rim strips that you can get for about a buck. Don’t fall for them as they will deteriorate over time and need replaced again. Instead get the cloth rim tape. First, completely remove your old rim tape and then line up the valve stem hole on the rim. As you hold the tape a bit taught and lay it, press it firmly in place with your other hand. Do this all the way around the rim being sure that all the nipple holes are completely covered. When you get back to the valve stem, overlap the tape a little bit and then cut it with scissors.

#73 –  Replacing Derailleur Cables

Replacing derailleur cables is super easy. You don’t always have to replace the housing with the cables but if it has been awhile or a lot grit has gotten into the housing you should replace that as well. For the cable, first shift into the smallest gear in the back and flip the hood cover up. Then push the cable back through the housing and out the shifter. Then simply just feed the new cable back through the same hole you just pulled the old cable out of. After you’ve pulled the cable tight and tightened the bolt down on it, give the cable a couple of tugs on the down tube. This pre-stretches the cable so you don’t have to adjust your shifting as much during the first ride. Then undo the cable bolt, pull it tight again, and re-tighten it. Adjust your shifting by turning the barrel adjuster on the back of the derailleur.

# 74 – How to Route Internal Cables

Internal cable routing can be a pain if you don’t know what you’re doing. Trying to fish a cable through a frame can be a nightmare. Save yourself the hassle and get inner cable housing to slide over the cable to slide through the frame so you can just simply slide the cable back through. And if you don’t want to buy it, you can simply take derailleur housing in splice it to remove the inner core.

#75 –  Adjusting Rear Derailleur Limit Screws

limit screws

The limit screws are to limit how far up and down the derailleur moves keeping the chain from hitting the frame or spokes. Shift all the way to the smallest gear. Then turn the H, for high, limit screw in until the chain lines up perfectly with the lowest gear. You may have to turn it counter-clockwise if it’s already turned in too far. And then a good way to check to see if it’s good is to spin the pedals, with the bike in a stand, and push the derailleur up to larger gears with just your finger. Then release it and it should slap back down to the smallest gear without any hiccups.

Once that’s good shift all the way to the larges gear but be careful not to push the derailleur into the spokes. Once you’re in the larges gear, take your finger and push the derailleur toward the spokes while lightly turning the pedals. The derailleur should not touch the spokes. If it’s too far toward the spokes, turn the L, for Low, screw in which pushes the derailleur back down. Just be sure not to turn it to far as you then can shift up to your easiest gear.

#76 –  Replacing Brake Pads

Cartridge brake pads are easy to change on a road bike. They can be changed with the wheel in but it’s easier if you take them out. With a small hex wrench, loosen the tiny bolt on the outside and back of the brake pad. Don’t turn it out all the way though as it can be a pain to get back in. Just do it enough so you can slide the brake pad back and out of the cartridge. If they’re stuck, this happens often, take the side of a larger hex wrench and press backwards on the front of the pad. This should easily push it out. Then with the new pads, make sure you get the left and right correct, simply slide them back in and re-tighten those small bolts on the outside of the pad. Now your wheel may not spin because of the extra pad on both sides. You’ll have to adjust your brake cable tension.

# 77 – How to Fix Brake Chatter 

Brake chatter on a cyclocross bike or bike with cantilever brakes can be a huge pain, not to mention degrading of your stopping power. Brake chatter occurs when the brakes are applied, thus flexing the fork backwards, which places more tension on the brake cable that is held by a brake stop typically above the headset. The elongated cable applies more pressure on the brake pads until either the wheel comes to a complete stop and you’re sent over the bars, or the pads slip free a bit only to then have the fork flex back again under the continued braking. This then draws more tension on the brake cable and thus tightens the pads down again and so the process continues, thus creating brake chatter. The easiest way to combat it is to toe your pads in to a fairly large degree. The narrower pressure point is going to allow the pads to slip free more easily. You can even shorten the length of your brake pads if you’re so inclined by cutting them. Using the right brake pad for your rim will also help as if your pads are too sticky, it will grab the rim too much. Aside from making adjustments to your current setup, you can shorten the length from the cable stop to the brake by using a fork-crown mount but you will need a normal brake mount on your fork which you likely don’t have. If these solutions don’t fix your problem you can put on a short pull or mini v-brakes. A typical v-brake will not work with your standard road levers as the pull length of the cable is too great but these short ones are designed to work together.

# 78 – Setting Up Cantilever Brakes Properly

setting up cantilever brakes

Cantilever brakes are a pain to set up. The first thing to do is to make sure your brake cable coming down is exactly in the center of the yolk (the Y that connect to either brake arm). Secondly, get the yolk as close to horizontal as you can while still allowing enough room for tire clearance. This will pull the brake arm more directly in increasing your stopping power. Pull the brake so the pad is on the rim before you tighten it so you can line up where it needs to go. Position the pad so the front touches the rim slightly before the rear does; toed in. Now you will need to position the pads on the rim so there’s about the width of a penny between the pad  and the rim when not engaged. This will take a few tries but be patient.

# 79 – Which Brake Pads to Use With Each Wheel and In What Conditions

You need to use the correct brake pad for the type of rim, aluminum or carbon, and for the conditions you’re riding in. Your average pad is going to be made for an aluminum wheel in most conditions but best in dry. If you have carbon rims, you need carbon specific pads otherwise you risk reduced braking power as well as taking the laminate off the rim. With both types of pads, you can get stickier ones for in the rain and mud. If you’re only ever in dry conditions, you can get pads for that. You best bet is to get a pad that does alright in all conditions so you’re not constantly changing them and of course specific to your rim type.

#80 –  Patching Tubes

Patching tubes is an easy, great way to save money with bike repair. There are few different kinds of patch kits but the most common is the simple one with glue. First find your hole by pumping up your tube and marking an X with a pen across the hole that goes out at least an inch in all directions. Then with the sand paper or scuffer, lightly scuff the tube an area greater than the size of the patch. Then apply a thin layer of glue also greater than the area of the patch. Let this glue dry for a couple of minutes. If you didn’t draw a mark on the tube, you’re going to have a hard time seeing the where the hole was so hopefully you did that. Center the patch over the hole and press it on flat and making sure you don’t have any air bubbles, A pro tip is to leave the clear piece of plastic on the patch as pulling it off can pull up one of the corners of the patch. It’s best to wait a bit to let the glue set up more but you’re probably fine to ride if you’re stuck on the side of the road.

#81 –  Installing a New Chain

removing a bike chain

To install a new chain, start by removing the old one and laying it next to the new one. Cut the new one to the exact same length. If the old one is stretched, just make sure they both have the same number of links. Then snake the new chain through the derailleurs and link it either with a connector pin or a master link. A full description of how to do this can be found in this article.

#82 –  Removing a Cassette

To remove a cassette you will need a chain whip, cassette lock ring remover tool, and a wrench. (either a crescent or the right sized closed or open-ended wrench or the right sized hex if your cassette remover tool accepts it) First, set the wheel at your feet with the cassette facing away from you. Place the chain whip at the two o’clock position with the long end of the chain going up and over the cassette. Then insert the cassette lock ring remover tool fully into the lock ring on the outside of the cassette. Then place your wrench at the ten o’clock position and then place it on the cassette lock ring remover tool. Then holding both the wrench and chain whip, press down. The cassette lock ring will loosen and you can then take it off all the way.

#83 –  What to do if there are gouges or groves on the freehub from the cassette digging in.

filing a cassette body

This can happen because the metal of the freehub is softer than that of the cassette. As long as your cassette can still slide on and off, it’s nothing to worry about. If you can’t slide the cassette off, use a straight bladed screwdriver and stick it between the cogs and lightly twist. Just make sure your removing and individual cog and not one piece that has three or more cogs on it. If you can’t easily slide the cassette back on, file down any of the large burrs and then slide the cassette on.

#84 –  Installing a Cassette

Installing a cassette is the reverse of moving it except you don’t need the chain whip since you’re not working with the freewheel. Thread the lock ring on by hand for the first couple of turns and then use a wrench to snug it down. Don’t over-tighten it though as you can strip the threads. Applying a light coat of grease on these threads also isn’t a bad idea.

#85 –  Replacing Cleats

Replacing cleats can be finicky because you want them in the exact same spot. Before removing the old ones, take a sharpie and go around the cleat outlining exactly where it is positioned. Then you can remove the bolts. Only do one shoe at a time. Once you get the cleat lined up with the washers where they belong, put a little bit of grease on the threads of the bolts. This is super important particularly if you don’t change your cleats very often. Then start all the bolts but don’t tighten them down all the way. Make sure your cleat is lined up perfectly with your stencil and then cinch the bolts down. They don’t have to be crazy tight as you don’t want to risk stripping them.

#86-  Changing Pedals

To change pedals you will either need a pedal wrench or a hex wrench of the appropriate size. The right, or drive side, is threaded normally meaning right-tighty, lefty-loosy. Position the pedal at the three o’clock position with the wrench at the nine o’clock position and simply press down, counter-clockwise using gravity as a friend. On the left, or non-drive side, position the crank and wrench in the same manner except on this side the threads are reversed meaning counter-clockwise tightens while clockwise loosens.

#87 –  Removing a Tire

To remove a tire first make sure all the air is out of the tube. Then with a tire lever, insert it on the opposite side of the valve stem underneath the bead of the tire and lever it up. If the tire is super tight, hook the lever on a spoke, and insert another one and do the same. Gradually work both levers away from each other. You should then be able to use your fingers to remove the bead the rest of the way around the rim and easily remove.

#88 –  Installing a Tire

changing a flat

Put on side of the tire on the rim all the way around. Then insert the tube through the valve stem hole and place the tube inside the tire all the way around the rim. Then start at the valve stem and work the bead of the tire over the rim and onto the tire ending opposite the valve stem with a small section waiting to be pulled up and over the rim. Insert a tire lever carefully under the bead of the tire being careful not to pinch the tube, and then lever the tire up and over the rim. You may need two tire levers starting at opposite sides and working toward the center of the remaining tire on particularly tight tires. Then go around the tire and make sure the tube is not pinched between the tire and the rim and that you can’t see it. Then simply pump it up.

#89 –  Squeaky Brakes

Squeaky brakes are annoying and often times not as effective as they should be. First, make sure your brake pads are slightly toed in on the front. If they still squeak, roughen up the brake pad with sand paper and wipe down the rim with rubbing alcohol. See this article for more details.

#90 –  Inefficient Brake Pads

Brake pads are ineffective for two reasons. One is the surface of the pad and two is the amount of force being exerted inward on the rim to slow it with friction. Take a piece of sand paper and roughen up the surface of the brake pad. This removes any residue or buildup on the pad. Second, make sure your brake pads are position so they have about the width of a penny between them and the rim. Make sure the pivot points on the brake are properly lubed and that the brake cable doesn’t need replaced.

#91 –  Installing Tubeless Tires

Installing tubeless tires can be a bit more of a hassle than regular clinchers but the effort is worth it for the added flat protection and riding ability. After you’ve installed the valve stem, install your tubeless ready tire like a normal tire except don’t put a tube inside it. When you get to the last couple of inches of bead to pull over the rim to finish installing the tire, stop. Take your sealant and pour the appropriate amount in. Then being careful not to spill it all out, finish putting the tire on.

#92 –  Pumping Up And Getting Tubeless Tires to Seat

The easy way to seat tubeless tires is to use an air compressor. Simply pump it up and the rapid filling of air should set the bead. You will hear a pop as the bead seats all the way around the rim. If the tire isn’t super tight and the air just comes out the sides, make sure the tire is centered all the way around the rim. Then take warm soapy water and a sponge and wipe around the rim getting the soapy water on the bead. This will help to hold the air as well as to provide a smooth surface for the bead to slide into place on.

If you don’t have an air compressor you might be able to get it to seat by pumping really fast but otherwise a CO2 cartridge will work. Another way is before you put any sealant in the tire, pump the tire up with a tube in it seating the beads. Then only take off one side of the tire being careful not to unseat the other bead. Then install the sealant and the other bead onto the tire. Then use the soap and water method and pump really fast. The tire should seat relatively quickly.

#93 –  Gluing Tubulars

gluing tubulars

Not everyone rides tubulars and even of those that do, even fewer glue their own. But regardless, it’s good to know how they go on and a valuable bike repair skill. There are multiple methods of gluing tubulars using varying number of layers of glue, and using or not using tape. The basic method starts with make sure the bed of the rim is void of any old, dried up glue that is not well adhered. You can remove any of this with a hard scraper of sorts and/or acetone. Then apply a thin layer of tubular glue to the bed of the rim being careful not to get it on the rim. Then apply a thin layer also to the tire. Let these dry overnight. Then add a second layer to both. Let them dry overnight. Then add a third layer to the rim only. Then start mounting the tire starting at the valve stem and working your way around. The final little bit is going to be hard to get on and you’ll need some umph. If you put glue on the tire at this point, it is going to get all over the rim when you try and mount the tire. Once you get the tire mounted, go around and make sure the tire is centered exactly all the way around. Once centered, still without any, or very much, air in the tire, roll the tire on the ground all the way around a couple times with a bit of weight on it to really press in the tire. An even better way to do this is to get a broom handle and roll the wheel on it so the handle pushed the tire down into the bed of the rim. Then pump the tire up and roll it again. Wipe off any glue from the rim with acetone as any glue on the braking surface will catch on the brake pad ever time around when braking.

#94 – Storing a Bike For an Extended Period of Time

If you’re storing your bike for an extended period of time it’s a good idea to do a few things to it first so when you return, it’s still in good working order. The first is to lube your chain. (Tip #9) The second is to drip a little bit of oil down the cables into the housing to prevent them from seizing up. Third is to drip a bit of oil on the pivot points of the derailleurs and brakes. Also, place your chain in the smallest rear cog and small chainring up front to take the pressure off the springs and cable. If you have a steel bike, and are leaving it someplace cooler where condensation can form, place a light coat of rust-proofing oil on it to prevent it from rusting. Finally, if you’re leaving your bike on a concrete floor, place a piece of cardboard under the tires to prevent them from dry rotting.

#95 – Removing a Crankset

There are a number of different styles of crankset and each one uses a different method. You need to first figure out which kind you have. On some you remove the cranks bolt and thread in a crank-puller to push the crank off the spindle of the bottom bracket. Others, particularly new models, simply just pull off by hand.

#96 – Removing a Bottom Bracket

As with cranksets, there are a number of different styles of bottom brackets, each requiring their own approach. Older, threaded bottom brackets require the use of a tool such as this or this. The big thing with threaded bottom brackets is that the right side is reversed threaded meaning that you turn clockwise to loosen and counter-clockwise to loosen. The left side is threaded normally. Other newer bottom brackets are pressed in and simply need tapped out from the opposing side. When reinstalling the new ones of these, make sure they are straight going in!

#97 – How to Service Cup and Cone Bearings

servicing cup and cone bearings

Cup and cone bearings are the old style bearings that tighten down into place as opposed to modern day cartridge style bearings which don’t need any adjusting. First loosen the outer nuts (normally threaded, ie. righty tighty, lefty loosey) then loosen the inner nuts and make sure you have enough grease on the bearings them selves. To tighten, take two wrenches and place on on each of the inner nuts and tighten them down so they’re just touching the bearings. If you over-tighten them, your wheel won’t spin. If you under tighten them, your axel will rock back and forth with play. It will take a couple of tries to get the feel. Once you have the inner nuts tightened to your desired tightness, place one wrench on the inner nut and the other on the outer nut on the same side. Tighten the outer down into the inner being sure the inner nut doesn’t move but is rather just held in place. You should go fairly snug. Then do the same on the other side. Now spin the wheel and see how tight the bearings are. If the wheel doesn’t spin smoothly, you’ve gone too tight. Undo it and loosen the inner nuts a bit. If there’s play you didn’t tighten the inner bearings down enough. A trick here is to place a wrench on either of the outer nuts and tighten them down. This will press everything in. If you go to far you will then have to undo everything and go back to the inner nuts.

#98 – How to Straighten a Bent Derailleur Hanger

If you crash on your right side, it’s likely that you bent the derailleur hanger. In this case it’s advised to replace it but that’s not always possible, especially in a short amount of time because each bike has their own specific hanger. (gotta love industry) To straighten it if it’s not bent too far, take the derailleur off and remove the hanger from the frame, typically with two little hex bolts. Then place frame end in a vice being carefully not to crush it, and then take a pair of pliers or vice-grips and carefully straighten the hanger. Aluminum does not do well with bending so don’t overdo it as it could easily break.

# 99 – When to Take Your Bike To a Professional

Knowing when to take your bike to a professional and when to do the bike repair yourself will save you time, money, and the expense of breaking something. First, if you don’t have the tools to do a bike repair properly, take it to a professional. If you kind of know what you’re doing you can use online resources (such as this) to help guide you but if it still doesn’t make sense, take it to a professional. If you don’t want to take your time and learn to do it properly, say in changing a bottom bracket, take it to a professional as if you try and rush through something, you risk stripping the threads of something or breaking it all together; take it to a professional.

# 100 – How to Do a Carbon Repair Job

bike carbon repair

This is another one of those bike repair things that you may not be inclined to do on your own but always wondered how it was done. First it’s difficult to repair a carbon frame into a joint without added know how. On a tube, say the top tube, it’s relatively straight forward. With some 120 to 150 grit sand paper, sand all of the clear coat and paint off the frame down to the raw carbon. You’ll know you’ve hit carbon when the dust on the sandpaper turns black. You will want to do it about an inch further than where the carbon will lay, typically two to four inches on either side of the crack.

You then want to cut your carbon sheet into the shape you want with it overlapping itself by about an inch. Then mix your two part epoxy, one hardener, one resin, and apply a thin coat to the frame just lager than your carbon sheet. Carefully apply the sheet (rubber gloves are essential here) with the seam being on the bottom so you can’t see it. Work out any bubbles and make sure it lies flat. Then, with electrical tape, tape about an inch on the dry frame and double the tape back on itself so the sticky side is out. Then tightly wrap the carbon all the way around to press it firmly against the layer beneath it. Then with a pin, go around and poke holes in the tape to let out excess resin. Then let it dry over night.

After drying, remove the tape and sand all of the resin off down to your new carbon layer. Again, you should get black dust on your sandpaper indicating your down to carbon. Then do the process again, typically three to eight times depending on how bad the break was. To finish you can either leave the last layer of epoxy on or sand it off and apply paint.

Bonus Bike Repair Tip 101 – Don’t Let Your Friends Work on Your Bike

Unless you know that your friend, or loved one, knows what they’re doing 100%, don’t let them work on your bike. They may make it worse and when you or a shop needs to fix what they did, you won’t even know what they did. Also if they, mess something up, or worse cause an accident, you don’t and they don’t want that blame placed on them. In addition, if they’re working on it, you’re not learning, so learn how to work on your bike yourself and do your own bike repair.

We don’t expect you to take every single item we mention to heart an implement it immediately; however, if you can pick up a few extra simple bike repair and maintenance tips and tricks and add them to your repertoire you will save money, time, and also be safer.

Setting Bike Chain Length

April 7, 2016 by Wade Shaddy

bike chain length

Chain sizing is one of the most misaligned topics of bicycle maintenance. It’s due in part because chains have about 400 individual moving parts depending on length. Even seasoned mechanics argue about bike chain length and it can be controversial.

Gear Accommodations

Changing or replacing the chain, chainrings, or altering the gears in back can result in a different bike chain length. But how do you know? Road bikes employ derailleurs with springs that tension the chain to accommodate gearing, so it’s difficult to determine just how long the chain should be.

Err on the Long Side

Most mechanics agree if you’ have to err, err on the long side. Specifically, you want the chain to be as long as possible without causing problems such as sagging.

No Shortening

In this day and age, when everything in the cycling world is measured in grams, it might be tempting to remove a few links to save weight. But again, most mechanics agree it’s never a good idea to shorten a chain in order to save weight or to run a chain that’s too short, even if it works. For one thing, it puts too much strain on the derailleur and it’s unwise to force the rear derailleur to work beyond its limits.

Derailleurs Have Needs Too

Understanding what’s expected from your derailleur is vital to proper chain length. Your rear derailleur shifts between gears on your cassette, obviously. But because the chain isn’t always wrapped around the same number of gear teeth, the derailleur must also manage the chain tension and capacity.  The least amount of tension your chain requires is when it’s on the small gear in the front and the small gear in the back. The most tension the chain requires is in the big-to-big gear combination. The pivot and spring action of the rear derailleur is what makes it all possible, but it has it’s limits.

The Basic Setup – Bike Chain Length

Determining bike chain length is not rocket science. It basically means that if your bike shifts clean and the chain doesn’t rub on the upper pulley’s chain guard and the tension pulley is vertical or slightly behind the guide pulley, it should work.

By Observation

Generally speaking, the derailleur limit is reached when the lower pulley is directly below the upper. The lower or tension pulley should never be in front of the upper. If this is the case, the chain is too short.

Easy to Replace

Snapping a chain is just one of the reasons why you might be replacing a chain in the first place or you simply have worn out your chain. New chains are typically around $20 depending on the model and type and they’re easy to replace. But how much chain do you need? How long should it be? It would seem simple enough to just measure the old chain and get a new one based on the measurement — but it doesn’t work that way. For one thing, chains can be cut only at whole inch increments. Chains cannot be cut into fractions of an inch.

Measuring Won’t Work

You have probably heard of chain “stretch” as if the chain was made of rubber. But chains are metal and metal won’t stretch — this is not how chains get longer. Chain “stretch” is metal wearing away where the link pin rotates inside of the bushing. If you take apart a worn-out chain, you can see notches worn into pins by the inside edges of the bushings. It’s not much, but when you multiply it over and over again it adds up. Because of chain elongation, measuring a broken chain is not a viable option to get the length. The chain, if it has any wear on it, will always measure longer than it was originally.

Equations Can Work

Even though it’s possible to determine chain length from equations and then cut the chain before installing it on the bike, it’s not easy, and you run the risk of getting it wrong. There’s easier ways to go about it.

Counting Links

Cyclists have long relied on a simple, effective way to get a replacement bike chain length right — count the links. Take your old chain and count each and every link. Purchase a new chain with at least that many links and use your chain breaker to remove links as needed from the new chain until the count is the same on both chains. It’s important to note that new chains are always longer than necessary and always require links to be removed.

On the Bike Sizing

On the bike sizing is another method that most mechanics seem to agree on when replacing chains. There are other methods, but using them typically winds up requiring more work with the same results.

Thread On New Chain

Assuming that you have no chain on the bike, shift the front and rear derailleurs into the smallest gears. Take the new chain out of the package and thread it on the front derailleur. It’s typically recommended that the open end of the chain be facing the back tire.

Wrap and Snap

Wrap the chain around the small cog from the rear of the bike, and through the rear derailleur. If this is your first time, it’s smart to snap a photo of the rear derailleur before you remove the old chain. If you forgot to snap a photo, use a spare bike as a model. It’s possible to thread the chain through the derailleur the wrong way. Lots of cyclists have done it which results in a non-functioning derailleur.

Use Your Fingers

From here it’s a bit of trial and error and you will get accustomed to it as you work with it. Begin by pulling down on the left half of the chain with your fingers, pulling the bottom pulley with it. When the chain clears everything, the length is adequate. This should allow the chain to operate without rubbing the derailleur in this combination — but with enough slack to operate — even if you’ve absent-mindedly cross-chained the bike.

Match the Ends

Bring the two ends together and mark the link that needs removed. This method should leave you with access to all of your gears – and without too much tension on your derailleur. Trim the length with a chain tool, and join the two ends of the chain with the master link or link pin. Note that there are no fractions in bike chain length calculations, rounding up one link is the typically accepted method.

How to Tighten a Headset

January 27, 2016 by Adam Farabaugh

how to tighten a headset

Knowing how to tighten a headset is simple and is something that could save your ride if yours is loose for whatever reason, without a trip to the bike shop. There are only three bolts on most stem/headset combos but you have to know which ones to tighten first and how much.

First – Test Your Headset Tightness

To determine if your headset is too loose or tight, lift your front wheel off the ground and spin the bars back and forth. They should turn with ease and not bind in any one place. If they do your headset is likely too tight or in more rare cases, your headset bearings may need replaced. Second, with your wheel on the ground, lock the front brake and rock the bike forward and back. What you are looking for is to see if the steerer tube rocks forward in relation to the frame. It should not move at all and if it does, your headset is too loose and needs to be tightened.

How to Tighten a Headset – Starting From Scratch

First with how to tighten a headset, loosen all the bolts on the stem that tighten down onto the fork. Secondly, take the top-cap bolt on the top of the steerer tube/fork completely off. The top cap will now come off as well. The way the headset works is that the spacers, or the stem itself (depending on how many spacers you have) press down on the outside of the steerer tube. The top cap does not press on, or even touch, the steerer tube/fork. This means that you have to have enough of the spacers or stem sticking up above the steerer tube. You can see this in the image below. Also, remember that when you tighten down the top cap, that gap is going to shrink and could be enough to cause the top cap to touch the steerer tube. You may need to add another small spacer.

tightening a headset

Install the Top Cap

Once you have enough of a gap put the top cap and bolt back on and tighten it down snug but not too tight as if you over tighten it you won’t be able to turn the handle bars as the bearings will be compressed. Also make sure your handle bars are straight with your front wheel otherwise you’re going to have to re-loosen everything to line it back up.

Tightening the Stem Clamp Bolts

Once you have the top cap tight enough, now tighten the two bolts (normally two) on the side of the stem to cinch the stem to the steerer tube. Tighten them down evenly meaning tighten one a little and then do the other. Again, these should be snug but not overly tight as you can strip the bolt or crush the steerer tube particularly if it’s carbon.

There you have it; how to tighten a headset. Your headset should now be properly tightened. You can test it by doing the headset tightness test again to make sure it’s not too loos or too tight.

Female vs Male Cycling Joke

December 16, 2015 by Adam Farabaugh

Her vs. His Diary

Her Diary:

Tonight, I thought my husband was acting weird. We had made plans to meet at a nice restaurant for dinner. I was shopping with my friends all day long, so I thought he was upset at the fact that I was a bit late, but he made no comment on it. Conversation wasn’t flowing, so I suggested that we go somewhere quiet so we could talk. He agreed, but he didn’t say much. I asked him what was wrong; He said, “Nothing I asked him if it was my fault that he was upset. He said he wasn’t upset, that it had nothing to do with me, and not to worry about it.  On the way home, I told him that I loved him. He smailed slightly, and kept driving. I can’t explain his behavior – I don’t know why he didn’t say, “I love you, too.” When we got home, I felt as I had lost him completely, as if he wanted nothing to do with me anymore. He just sat there quietly, and watched TV. He continued to seem distant and absent. Finally, with silence all around us, I decided to go to bed. About 15 minutes later, he came to bed. But I still felt that he was distracted, and his thoughts were somewhere else. He fell asleep – I cried.  I don’t know what to do. I’m almost sure that his thoughts are with someone else.  My life is a disaster.

His Diary:

There’s this creaking on my bike that sounds like it’s coming from the bottom bracket … can’t figure out why.

Bike making weird noises? They can be a pain to figure out and even once you do they can be tricky to fix. This should help a little “Bike Noises — Don’t Let Them Scare You” Don’t let the noises get to you though.

Bike Chain Maintenance

November 30, 2015 by Adam Farabaugh

Bike Chain Maintenance

What’s the one part of your bike that has the most individual pieces to it? Not many would guess the chain but today’s chain has eight parts per link which makes for a lot of moving parts with over fifty links in the average chain. Maintaining your bike chain will make it shift more smoothly and quieter, it will also last longer and help preserve the life of your cassette. With that many moving parts there’s more than one step to keeping it rolling like it should.

Bike Chain Wear

As with any other part on your bike, chains wear out, often quicker than we would like. Chains wear by ‘stretching’ and no longer lining up perfectly with the teeth of the cassette. This stretch is not the actual metal stretching but rather the pin in each link wearing against the inner and outer plates of the chain causing the hole in each to be ever so slightly larger. This happens the fastest when it is metal on metal when the pin rotates within the plates. To keep this from happening as much, oil keeps these contact points properly lubricated so the metal doesn’t grind into each other and wear out as quickly.

Measuring Chain Wear

A little bit of chain stretch over time is ok and will always occur. The problem becomes when it stretches too far and the teeth on the cassette begin to wear out as well. Before long you will not only have to replace the chain but the cassette as well.

There is a handy tool that measures if a chain is stretched but you can do the same with a tape measure. A full link measures one inch in length when brand new. To account for a number of links, measure one foot from the exact same point on the chain to see how much it has stretched. If the foot mark falls less than 1/16th of an inch from the same point on the link, the chain is still golden. If it’s over 1/16th of an inch you need to replace the chain but probably don’t have to replace the cassette.

The only real way to test if you have to replace the cassette as well is to ride the bike with the new chain and put pressure on the pedals in a few of the smaller gears. If the chain slips, they don’t line up enough, but if there are no issues, you’re good to go. If the chain measures over 1/8th of an inch off you will need a new chain and cassette.

Washing a Chain

There are a number of approaches to washing a chain including taking it completely off the bike, but the best and easiest way is to clean it while on the bike with a degreaser. Before washing your bike, spin the pedals backwards applying a degreaser (there are a number of good citrus-based solvents out there. I use Park Tool Citrus ChainBrite Cleaner).  Then with a sturdy bristled brush, scrub the chain to get the degreaser further into the links while also dislodging any grit and grime.

One added effective way to clean your chain is to use a chain cleaner mechanism that has a number of rotating brushes in a small plastic box that is filled with degreaser. Running your chain through this not only coats it with degreaser but also brushes a lot of the grit and old oil off of it easily.

After degreasing and brushing, wash the chain with regular soap and water as you would the rest of your bike and then follow it up with a good spray through the links to make sure all the grit is out of it as well as any leftover degreaser.

Wiping Your Chain

Following a thorough wash, spin the pedals backwards running the chain through a clean rag to get as much moisture out of the chain as possible. This should actually be done after every ride because when you ride, oil seeps onto the entirety of the chain while collecting debris from the road. If left on, this debris will eventually work its way into the moving parts of the chain causing it to wear out even faster. Plus wiping your chain leaves your it looking like new for every ride and not black which can cause a nice mark on your leg if you’re not careful.

A good trick is to leave a rag easily accessible next to where you leave your bike and whenever you finish a ride, give it a quick wipe down. And then any oil that does get on your hands can just be washed off as you go inside.

Lubing

Now that we’ve gotten all of the prerequisites out of the way – washing and wiping the chain, we can now apply bike specific chain lube. I use Triflow and just so you know chain lube isn’t just oil. Oil specifically for bikes is thin enough to get into the tiny spaces between the pins and links yet thick enough that it doesn’t wear off super quick. Don’t use motor oil as it contains detergent that washes away byproducts of an engine and is made to be constantly restored to the place it is needed. Household oils can become gunked up because they are too thick so the best and easiest is regular bike chain oil that you can get from your local bike shop or online.

Where To Lube and How Much

Now that you know what to put on your chain, you have to know where to put it and how much. The objective of oiling a chain is to get the oil inside the moving parts of the chain, not on the outside as it doesn’t do anything there. The best way to do this is to use an oil can that has a small nozzle that you can apply directly to the rollers of the chain in the center with a drop or two on each. Do this while spinning the chain backwards; once if you’re certain that you applied enough oil on the first go around, otherwise a second or third time. Once you stop dripping oil on the chain, keep spinning the pedals backwards. This will keep all the parts of the chain moving to get the oil further into the chain itself. You can even let it set a minute if you’re willing to wait.

After the oil has made its way inside the chain, take another clean rag and wipe off all of the excess by spinning the pedals backwards through the rag a few times. You need to do this because you don’t need oil on the outside of the chain as it can collect road grit more easily and get into the chain itself along with just being dirty in general.

If you keep your chain properly lubed as well as washed on a regular basis to keep grit from getting inside of it, your chain will last much longer and will shift and sound better. It doesn’t take a lot to keep your chain lubed and running smooth but it does take knowing how to do it. Just keep a rag and bottle of lube next to where you keep your bike and you’ll be sure to remember especially after now knowing exactly what causes your chain to wear out and stretch.

That Alarming Chain Skip

November 29, 2015 by Wade Shaddy

That Alarming Skip - Chain Issues

There’s never a good time for your chain to skip, but it almost always comes at the wrong time, typically under a load when standing or climbing. It can be a subtle click, or a body dropping tremor. It takes you by surprise, and just for a moment, you’re not exactly sure what happened.

Chain Skip Will Happen Again

It can happen once, or sound like a series of pops in your drivetrain. The harbinger of bad news, it’s a sure bet it will happen again and again, getting worse as you add the miles.

Shifting Skip

Some cyclists confuse chain skip with shifting issues caused by poor tension on the cable, causing the chain to miss its intended target, skips, and then grabs hold of consecutive teeth as it was supposed to do the first time. This type of skip can be easily fixed by using the barrel adjuster to add tension to the cable. It’s a shifting issue, not a chain skip issue.

True Skip

True chain skip happens when one component of a drive train has just been replaced, or the drive train has been used so much that the chain skips over the top edge of the cog teeth. The most common skip happens when you begin a climb in high gears, stand up on the pedals, and apply torque to the chain. The chain rides up the gear and slips up and over the tooth. It might skip one tooth or several before hooking up again.

Favorite Gear

Chain skip usually occurs in your favorite gear or gears, as these are the gears you use more than the others, and therefore wear out first.

Chain Stretch

Blaming skip on a stretched chain is misleading. Chains get longer when the holes in the links become elongated where pins pass through. Pins also wear to a certain extent, because pins do not have bearings that serve to reduce metal to metal friction.

Chain Specs

Every time you ride your bike, your chain gets longer. It might be minimal, but it’s there in theory. New chains typically measure exactly one pin for every half inch. A chain that has thousands of miles ridden on it should have pins that match up on every half inch mark, but by the time you get to twelve inches the twenty-fourth pin will likely be past that marker. How much it is past will indicate chain wear and determine if you require a new chain all together.

Shark Fins

As a chain elongates it wears the leading, top edge off of the cogs, because it doesn’t match up with them. Worn out gears look like shark fins or hook slightly on the worn edge, giving the gear the appearance of a table saw blade. In other words, the gears conform to the chain, resulting in the shark tooth sawblade appearance. Therefore, if you replace your chain regularly, gears shouldn’t wear out at a significant rate.

Chain Suck

You’ve probably heard the term “chain suck.” It is also a product of worn chains and gears. Chain suck is a condition where worn chains fail to disengage from the worn gears. The chain rides back up the gear. It’s more common on mountain bikes, often locking up the gear. It’s characterized by a noisy clatter on road bikes, when the chain rides up and then disengages with a noisy clatter. If you hear it consistently, you will likely be having chain skip issues to accompany it.

What Causes Chains to Wear

Chain wear is caused almost exclusively by road grit that enters the chain when it’s oily. Grit adheres to the oil. It’s the ugly black stuff that gets on your calf, causing the badge of honor, the chain ring tattoo. The black stuff is oil colored with steel particles, most of which come from pin and sleeve wear, which causes the elongation of the sleeves in the links. The rate of wear is mostly a result of how clean the chain is.

Cleanliness and Lube

Chain and gear wear depends almost entirely on cleanliness and lubrication. For example, chains and gears operated in clean conditions, such as timing chains on vehicles, last for years, spin around millions of times, and go the equivalent of hundreds of thousands of miles before skipping is an issue. So theoretically, if you kept your chain perfectly clean, it would run for thousands of miles without excessive wear or skipping. But it’s impossible to keep it spotless without removing it, submerging it in solvent, and putting it back on. Almost nobody wants to go to that much effort.

Chain Expiration Date

Chain life expectancy depends on who you talk to, but it typically falls in the range of between 1,000 and 3,000 miles. Anywhere in this range is considered safe on gears. Bike shops recommend replacing your chain at these recommended miles. If you’re inclined to change your chain that often then do it.

Gears Conform to Chains

If you do run your chain longer than it’s expiration date, it means that your gears are conforming to your elongated chain, and it won’t necessarily result in skipping. Worn chains and gears can run smoothly and efficiently together, and the fact that your chain is elongated doesn’t mean that your chain will skip. If your bike isn’t giving you any problems with skipping, you can keep riding it if you want to, without changing your chain. If you get more than three or four thousand miles on it don’t worry about it. Just be aware, that you are wearing down your gears, and instead of just replacing your chain, you may been to replace your bike gears as well.

Better Chains

If you’re running an Ultegra or Dura Ace drivetrain — they can take a real beating for years. If you’ve neglected to change the chain, keep riding it until it skips, and then change your cassette, front rings and chain all at the same time. They all wear out together. Switching to a new chain without replacing the gears is a recipe for skipping when the drivetrain has excessive miles. However some riders report 15,000 miles on a single drivetrain without skipping.

Dealing With Roadside Flats

October 8, 2015 by Lee Agur

With so many objects and pieces of debris littering our cycle paths – it’s inevitable that we’ll have to deal with a puncture at the road side at some point! Before setting out on your journey, whether it’s simply to work at the office, or for a more adventurous excursion over the weekend; you should always be sure to prepare your pack in case the worst should happen.

We’re talking a repair kit, a manual pump, a bike wrench and at least one spare inner tube. The essential bike tools! It’s better to have them on hand should they ever be needed!

So what can you do when the worst case scenario becomes a reality, and you find an object has damaged one of your tires? Even the sturdiest bicycle will lose functionality with a flat tire, but it’s really not the end of the world, especially if you have a repair kit handy. The main concern will arise from your location – especially if you’re near moving vehicles.

The Plan of Action

Dealing With Roadside Repairs Safely

As soon as you notice a puncture, safely dismount your bicycle and make your way to a quiet, safe spot away from danger. Avoid riding your bike if it’s suffered a puncture – especially if the cause of the puncture is still sticking out like a confident cage fighter.

As soon as you can, remove your wheel, and locate the scene of the crime. There are normally one of two typical discoveries at this point – either the cause of the damage has fled the scene, or it’s still embedded, daring you to check if it’s made a way into the inner tube.

Double Check for Safety

If you haven’t already done so, take a look at your location and make sure that you’re not standing in an active pathway. A repair will only take a short while depending on your level of expertise, but it’s not worth standing in harm’s way. Ideally you are able to change a flat tire in 5 minutes or less. This should be practiced before it is a necessity out on the road.

Dealing with Flat Tires

We know that external damage is a minimal concern, and it’s more about whether or not the inner tube has been punctured. If it has, no amount of pumping will keep it filled with air, so the next best thing is to tackle the puncture head on.

Some punctures are tiny, others are very obvious, and the latter event will normally need a replacement tube altogether. For smaller punctures however, it should be a simple matter of grabbing your repair kit, sealing the source and allowing the adhesive to dry. If you are dealing with a tiny puncture, then half the challenge is locating the hole itself!

If you are able to pump air in to the tube, then do so carefully and then run your fingertips along the outside of the tube. You’ll want to pay careful attention to any small gusts of air, as these will give away the location of the puncture. Once you’ve spotted the damage, you can apply your seal, secure it with adhesive and then allow it to dry, before re-assembling your bicycle tire.

Handling Tricky Punctures

The life of a cyclist is never simple, and if your bike has suffered a slightly more challenging puncture, then you may want to pull out the big guns – in the form of your replacement tube. The rubber tire itself is now your main priority, and you’ll want to check if it’s simply been punctured, or split. A split is a bad sign, and there’s not much that can be done beyond sourcing a replacement, but if the rubber seems okay, then the next step is to check the damage on your inner tube.

It’s not uncommon for the object to remain embedded within the tire, and as tempting as it might be to ride to your destination with the debris sticking out, it’s never a good idea as you may be causing more damage to the tire and tube.

A better idea would be to safely dismount your bicycle, remove the object, evaluate the damage, and then perform the same repair procedure as mentioned above! The worst case scenario? You’ll need to make your way to your destination on foot. The best? You’ll be back on your journey in less than 10 minutes!

5 minute DIY Bike Maintenance

February 24, 2014 by U.M.

bike knowledge to beard ratio - DIY bike repair
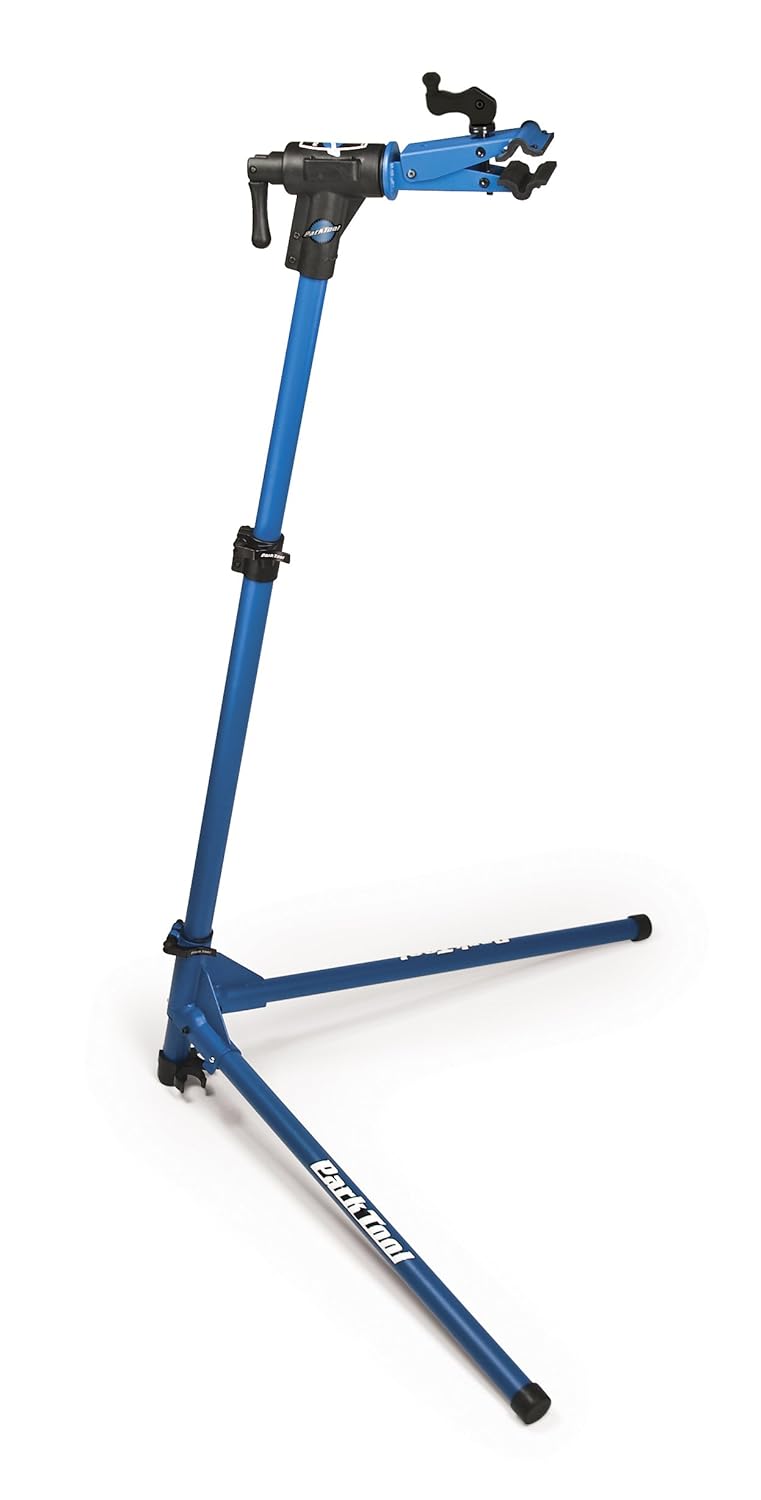
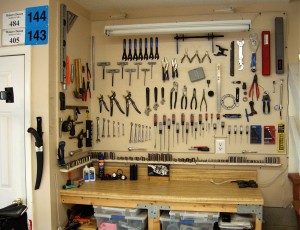
No matter what kind of bike you ride you will eventually have to give that bike some sort of maintenance. This keeps the bike in good working condition for longer no matter how often you use it. This maintenance is just small upkeep and repairs that you can do at home in minutes. Here are a couple of quick DIY bike maintenance tips: [Read more…]

20 Essential Bike Repair Tools

October 11, 2013 by Lee Agur

Essential bike repair toolsYou do not need a lot of bike repair tools, but you do need the right ones.
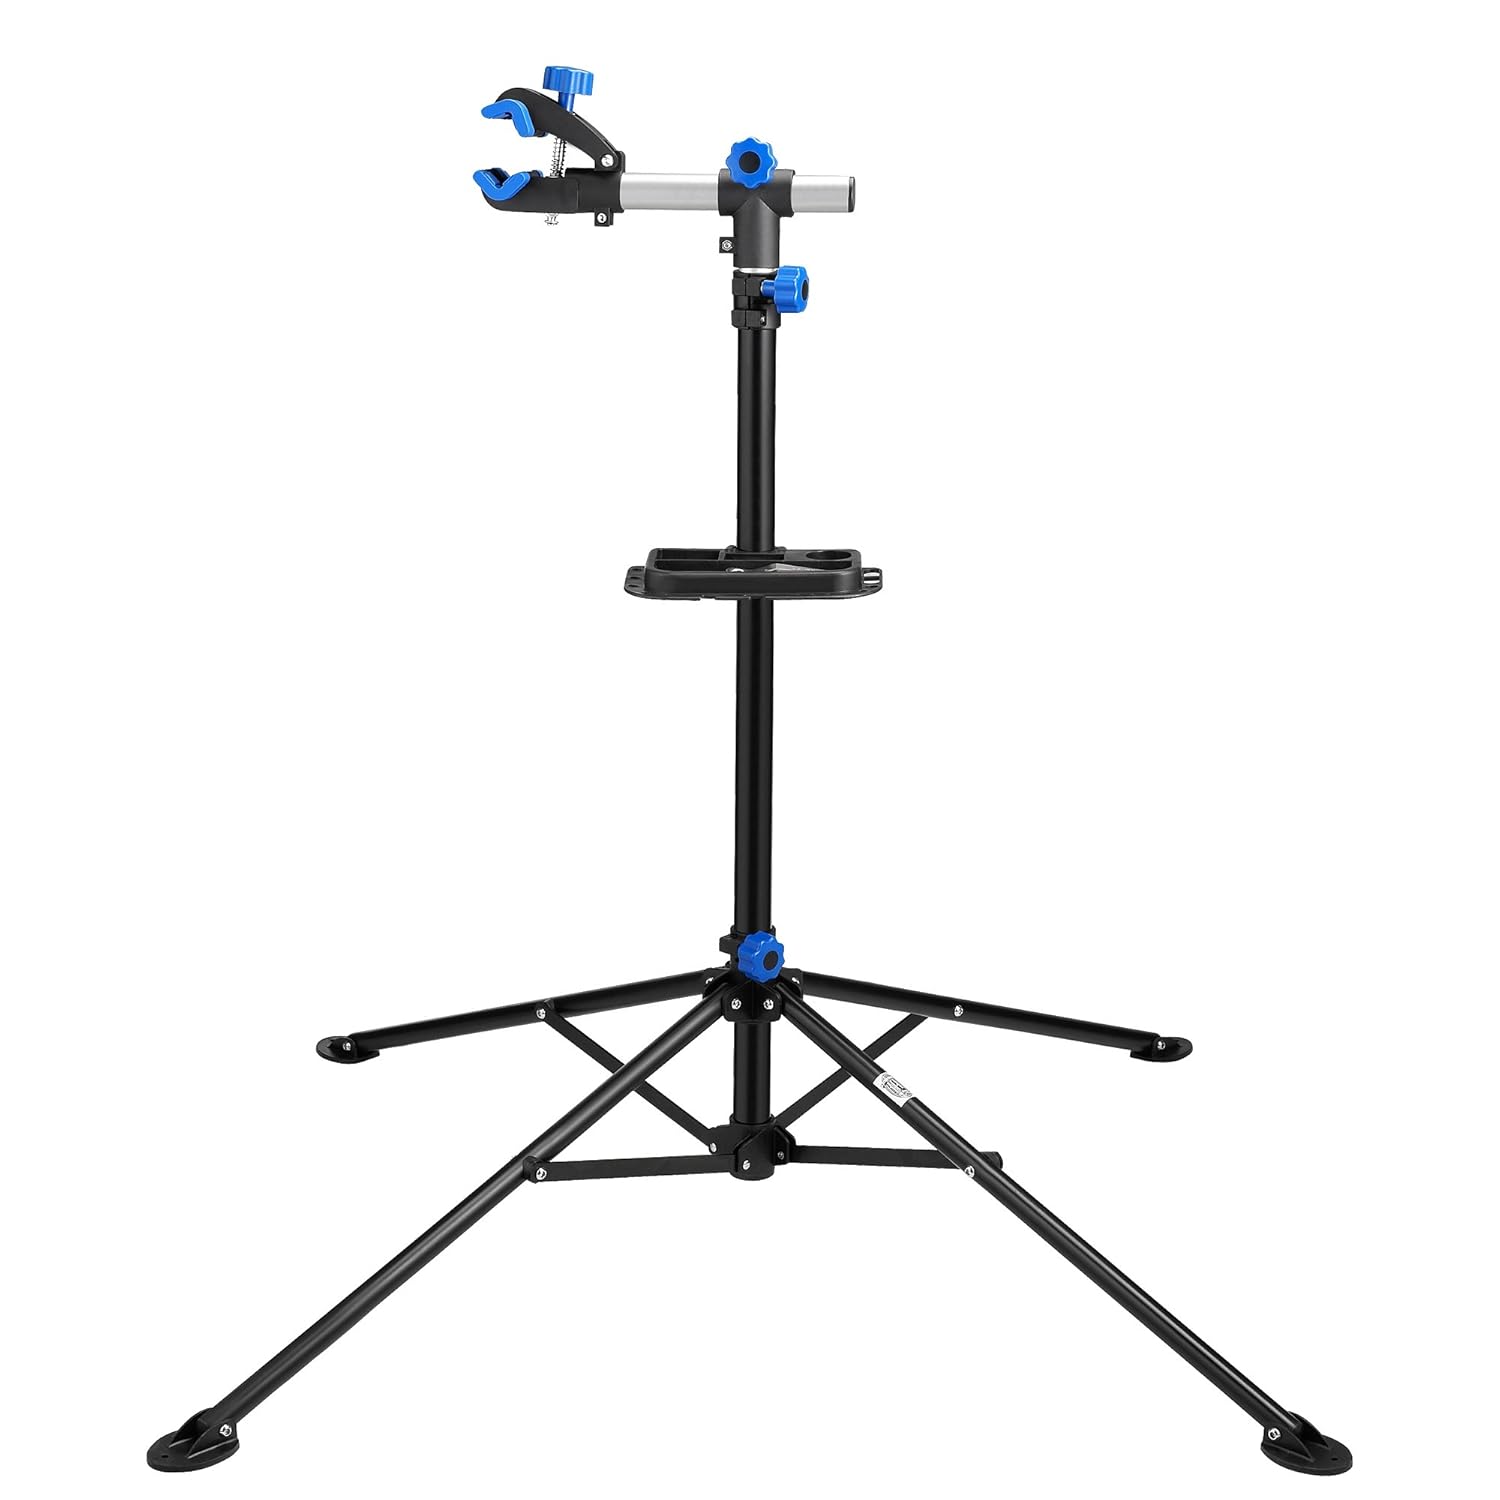
You do not want to be forced to go to your local bike shop every time there is a little squeak or creak. Getting the essential bike repair tools can save you time and money. Time? Yes time, unless you are lucky enough to have a mobile bike shop like Velofix in your town, then you have to drop off and pick up your bike. I have 5 bikes and one small car… you do the math… it is frustrating.

To be honest, I like going to the local bike shop to catch up and see what is going on, but not for small bike repair maintenance issues. If you have a real problem leave it for the professionals.

Before we even get to the tools, you have to know how to do the repairs. This 101 Bike Repair and Maintenance Tips article is sure to have the info on what you need to get rolling. And if you’re looking for a hard-copy book or videos, I highly recommend Dave Delgado’s bike repair book & videos. I personally prefer watching a very short clip than reading through a bike repair book and trying to figure it out from the pictures. All the videos are short and to the point!

Ok… on to the tools…

20 Essential bike repair tools

Note: Click on the images to compare prices and read reviews.

1. Bike Repair Stand

Have you ever tried to work on a bike without a bike stand? That is the way I used to work on bikes, not recommended…

RAD Cycle Products Pro Bicycle Adjustable Repair Stand
Park Tool Repair Stand

Recommendation: You can get the economy one at amazon as well. The one thing I do not like about the RAD Cycle Products Stand is that the legs are large and there are 4 of them… might be in your way. (I love park tools)

2. Bike Pump

Well… I think we all know what this does… but… you do want to make sure that the bike pump works on both presta and schrader valves… all of these do.

Recommendation: To be honest I have never really found a difference in bike pumps… Get a cheaper one… their air is just as good, I promise.

 3. Hex Wrenches

Want to adjust something? Hex wrenches are an integral part of bike repair. You will use these quite often and I suggest the P wrenches and not the inexpensive all in one.

Recommendation: Using the inexpensive set is very annoying but it is good if you’re traveling.

 4.  Cable Cutters

Cable cutters for your cable housing and cables.

5. Electrical Tape

The duct tape of the cycling world! How I Love you!

Recommendation: Go support your local department store next time you are there. Electrical tape is everywhere.

6. Chain Tool

Did you break your chain? Need to take a link out?.

-Expensive
-Inexpensive

Recommendation: Just get a multitool that has one in it (below)

 7. Chain Lube

Everyone likes a lubed chain.

bike repair tools

8. Screwdrivers

To adjust derailleur stops and other jobs.

9. Tire Levers

Need to change a flat? Put your race tires on?

bike repair tools

Bike Repair Tools10. Hammer

Everyone needs to give their bike a little love tap once in a while. Just make sure it is a soft one… you don’t want to hurt your baby.

Park Tool Shop Hammer

Recommendation: Having a hammer with a rubber end is a good idea!

11. Scissors

Want to open that brand new package? Cut some Zip ties? Cut the handle bar tape?

Recommendation: Pick up from your local department store.

12. Adjustable wrench

Need to take those fenders off?

bike repair tools

Recommendation: Pick up from your local department store.

13. Gear brush

A clean bike is a fast bike! You can actually lose power if there is buildup in your chain and rings. Keep it squeaky clean.

14. Grease

Metal on metal? Grease it up… I didn’t put grease on the pedals with my first bike… never going to come off… I will have to buy a new crank arm just to replace the pedals. Whoops.

bike repair tools

15. Multitool

Do not leave home without it! I have made that mistake a few times… unfortunately walking home is much slower than biking!

bike repair tools        bike repair tools – Fully Loaded

Recommendation: If you don’t mind a little extra weight go with the Amazon fully loaded option – it is the Topeak Alien II 26-Function Bicycle Tool. The reason you have a multitool is to be prepared for anything… this bike repair tool will do that.

16. Minipump

A phone does not pump up your tires! It is still amazing how many people do not bring a pump on a ride. All it takes is once… especially if you are out of cell service!

         bike repair tools          bike repair tools

Recommendation: C02 or non-C02? I use both! I have a C02 for my road bike because it is much faster than a hand pump (races etc.). I use a hand pump for my mountain bike because they are more reliable.

17. Chain whip

Chain whips are used to replace cassettes.

bike repair tools

Recommendation: No need to get an expensive chain whip, it is unlikely you will use it too often.

18. Lock Ring Tool

You use the lock ring tool in combination with the chain whip to take the cassette off.

bike repair tools

Recommendation: It is easier to use a lock ring tool with a guiding pin.

19. Spoke Wrenches

bike repair tools

20. Beer! Just me?

Essential Bike Repair Tools

Not an essential bike repair tool for everyone? Personal preference I guess.

Bonus

If you are just getting started and do not have any of the items it is better to start off with purchasing a whole kit like these ones:

Park Tool AK-38 Advanced Mechanic Kit from Amazon
Starter tool kit from Amazon

Bike repair tool kits are a great way to start. It is a large upfront investment that will save you money in the future.

There are many other tools that are helpful i.e.. Permanent marker, paper, measuring tape, zip ties to name a few, but the above list should get you started and then you can continue to add items on an as needed basis.

Bike maintenance can be very rewarding. I hope you are able to learn and enjoy it.

« Previous Page
  • Facebook
  • Tumblr
  • Twitter

Latest Articles

JOIN Cycling: A New Training Platform for Cyclists

May 27, 2024 By Eric Lister

cold exposure

The Benefits of Cold Exposure for Cycling & Life

June 13, 2023 By Eric Lister

hill climb

The Ultimate Hill Climb Training Guide

May 31, 2023 By Eric Lister

shoulder pain cycling

How to Treat & Avoid Shoulder Pain While Cycling

April 12, 2023 By Eric Lister

psoas stretch

The Importance of the Psoas Stretch for Cyclists

April 6, 2023 By Eric Lister

cycling neck pain

The Ultimate Guide to Cycling Neck Pain: Causes and Solutions

March 21, 2023 By Eric Lister

Useful Info

  • Contact
  • Finally, A Global Cycling Club That Is Focused On Community And Love Of Cycling!
  • Privacy Policy
  • Share Your Story!
  • Terms And Conditions Of Use
  • Welcome to I Love Bicycling
  • What Happened When I Stretched Every Day For a Month

Recent Posts

  • JOIN Cycling: A New Training Platform for Cyclists
  • How to Hang Bikes in Your Garage: 4 Inexpensive Options
  • Gravel Bike Vs. Road Bike: Which One Is Better For You?
  • The 6 Types of Mountain Bikes & How to Choose the Best One for You
  • What Is a Touring Bike Good For? 5 Benefits We Know You’ll Love

Search I Love Bicycling

Connect with Us

  • Facebook
  • RSS
  • Tumblr
  • Twitter

Copyright © 2025 · Magazine Pro Theme on Genesis Framework · WordPress · Log in