With so many objects and pieces of debris littering our cycle paths – it’s inevitable that we’ll have to deal with a puncture at the road side at some point! Before setting out on your journey, whether it’s simply to work at the office, or for a more adventurous excursion over the weekend; you should always be sure to prepare your pack in case the worst should happen.
We’re talking a repair kit, a manual pump, a bike wrench and at least one spare inner tube. The essential bike tools! It’s better to have them on hand should they ever be needed!
So what can you do when the worst case scenario becomes a reality, and you find an object has damaged one of your tires? Even the sturdiest bicycle will lose functionality with a flat tire, but it’s really not the end of the world, especially if you have a repair kit handy. The main concern will arise from your location – especially if you’re near moving vehicles.
The Plan of Action

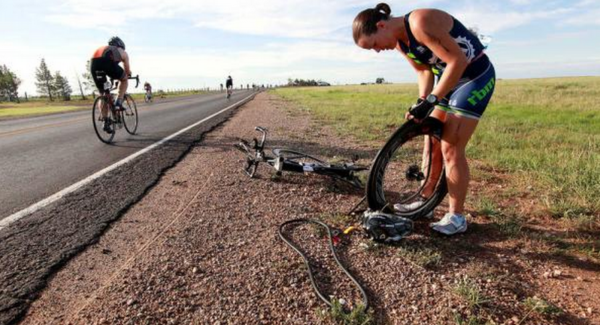
As soon as you notice a puncture, safely dismount your bicycle and make your way to a quiet, safe spot away from danger. Avoid riding your bike if it’s suffered a puncture – especially if the cause of the puncture is still sticking out like a confident cage fighter.
As soon as you can, remove your wheel, and locate the scene of the crime. There are normally one of two typical discoveries at this point – either the cause of the damage has fled the scene, or it’s still embedded, daring you to check if it’s made a way into the inner tube.
Double Check for Safety
If you haven’t already done so, take a look at your location and make sure that you’re not standing in an active pathway. A repair will only take a short while depending on your level of expertise, but it’s not worth standing in harm’s way. Ideally you are able to change a flat tire in 5 minutes or less. This should be practiced before it is a necessity out on the road.
Dealing with Flat Tires
We know that external damage is a minimal concern, and it’s more about whether or not the inner tube has been punctured. If it has, no amount of pumping will keep it filled with air, so the next best thing is to tackle the puncture head on.
Some punctures are tiny, others are very obvious, and the latter event will normally need a replacement tube altogether. For smaller punctures however, it should be a simple matter of grabbing your repair kit, sealing the source and allowing the adhesive to dry. If you are dealing with a tiny puncture, then half the challenge is locating the hole itself!
If you are able to pump air in to the tube, then do so carefully and then run your fingertips along the outside of the tube. You’ll want to pay careful attention to any small gusts of air, as these will give away the location of the puncture. Once you’ve spotted the damage, you can apply your seal, secure it with adhesive and then allow it to dry, before re-assembling your bicycle tire.
Handling Tricky Punctures
The life of a cyclist is never simple, and if your bike has suffered a slightly more challenging puncture, then you may want to pull out the big guns – in the form of your replacement tube. The rubber tire itself is now your main priority, and you’ll want to check if it’s simply been punctured, or split. A split is a bad sign, and there’s not much that can be done beyond sourcing a replacement, but if the rubber seems okay, then the next step is to check the damage on your inner tube.
It’s not uncommon for the object to remain embedded within the tire, and as tempting as it might be to ride to your destination with the debris sticking out, it’s never a good idea as you may be causing more damage to the tire and tube.
A better idea would be to safely dismount your bicycle, remove the object, evaluate the damage, and then perform the same repair procedure as mentioned above! The worst case scenario? You’ll need to make your way to your destination on foot. The best? You’ll be back on your journey in less than 10 minutes!