• Training
    • Injury Prevention
    • Training Tips
  • How To
    • Bike Fit
    • Gear
  • Nutrition
    • Nutrition Tips
    • Weight Loss
  • Repair
  • Reviews
  • Stories
    • Funny Stories
    • Jokes
    • Quotes
    • Videos
    • Funny Videos

I Love Bicycling

I Love Bicycling is a website that is geared towards cycling for beginners with road cycling tips, training articles, nutrition tips, weight loss, how to’s and bike repair articles.

How To Lubricate Your Mountain Bike (A Step By Step Guide)

February 16, 2023 by Eric Lister

Mountain biking is an exciting and challenging outdoor activity that combines fitness, adventure, and nature in one. It’s a sport that requires a high level of skill, endurance, and physical strength, and is enjoyed by millions of people around the world. Whether you’re riding through challenging terrain, crossing streams, or soaring down steep descents, mountain biking is a sport that offers a unique and exciting experience.

However, with all the demands of the sport, it’s essential to maintain your mountain bike properly to ensure it lasts a long time and performs at its best. One of the most critical aspects of mountain bike maintenance is lubrication. By keeping your bike well-lubricated, you can reduce friction, prevent wear and tear, and ensure that all the components work properly.

Today we’re going to guide you through the steps on how to lubricate your mountain bike, including the benefits of lubrication and the difference between grease and lube. Whether you’re a seasoned mountain biker or just starting out, this article will help you keep your bike in top condition.

how to lubricate your mountain bike

Esther Pueyo/Adobe Stock

Lube Vs. Grease: Which is Better?

When it comes to lubricating your mountain bike, there are two main options: lube and grease. Both have their own benefits and disadvantages, and choosing the right one can be confusing.

Lube is a thin liquid that is applied to the bike’s components to reduce friction and prevent wear. It is specifically designed for bikes and is formulated to withstand the demands of cycling. Lube is easy to apply and spreads evenly over the surface, making it ideal for lubricating chains and other moving parts.

Grease, on the other hand, is a thicker substance that is designed to provide a long-lasting barrier between metal surfaces. It can be used for lubricating pivot points and other high-stress areas where erosion between heavy parts is likely to occur. Grease is also resistant to water, making it a good option for lubricating in wet conditions.

Both lube and grease have their own unique benefits, and are useful in different situations. By understanding the differences between the two, you can choose the best option for your mountain bike to help create an effortless and hassle-free riding experience.

Parts of a mountain bike (how to lubricate your mountain bike)

Parts of a mountain bike. Credit: www.schoolworkerhelper.net

Reference the above diagram as we now delve into the steps required to make sure your mountain bike stays lubricated, increasing the chances that it will perform at a high level for years to come!

1. Preparing the Bike for Lubrication: Cleaning

Before lubricating, it’s essential to clean the bike to remove any dirt, grime, or debris that may have accumulated on its parts. Use a degreaser to clean the chain, derailleurs, and cassette. A simple mixture of warm water and dish soap will do the trick for the rest of the bike. Make sure to dry the components thoroughly before moving on to the next step (water and lubricant don’t mix!).

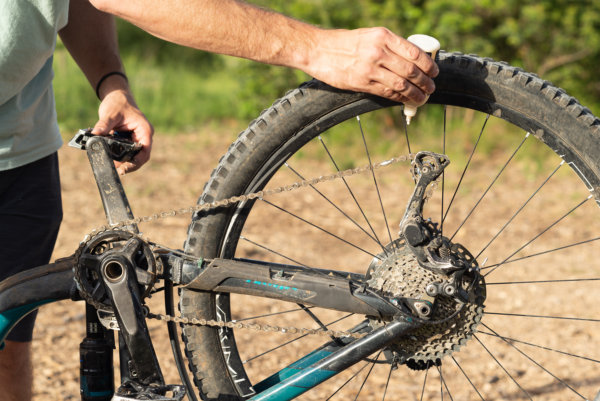
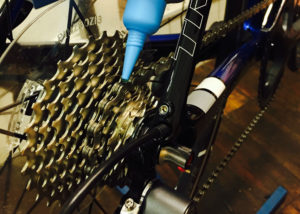
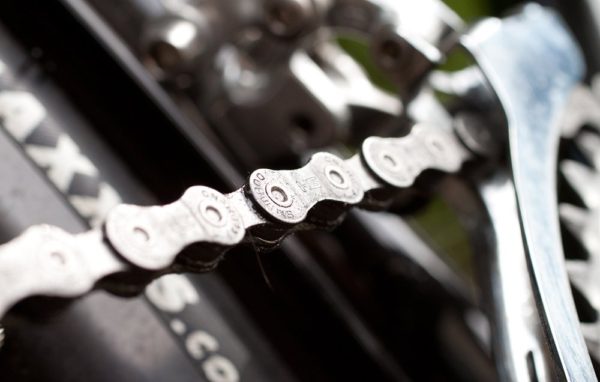
2. Lubricating the Critical Component: The Chain

The chain is the most integral component to lubricate on your mountain bike. Apply a few drops of bike-specific lubricant to each link and work the chain back and forth to spread it evenly. Wipe off any excess lubricant to prevent attracting dirt and grime.

3. Smooth Shifting and Pedaling: Derailleurs and Cassette

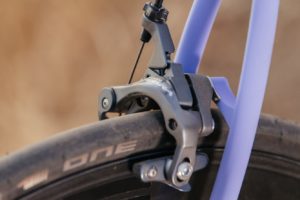
The derailleurs and cassette can also benefit from a drop or two of lubricant. Apply the lubricant to the moving parts and pivot points, being careful not to get any lubricant on the brake rotors or rubber components where traction is necessary.

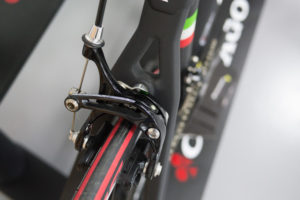
4. Reducing Friction at Pivot Points

Pivot points, such as the suspension pivots, can benefit from lubricant as well. These points see a lot of movement, so it’s essential to keep them transitioning smoothly to reduce friction and prolong the life of your bike.

5. Ensuring Optimal Operation: Lubricating Dry Spots

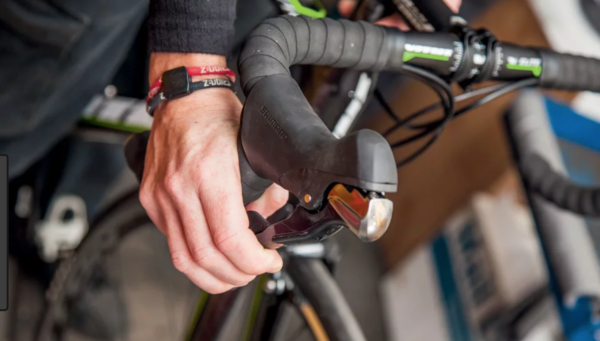
Check the rest of your bike for any dry spots that may need lubrication, such as the brake and shifter cables. Adding lubricant to these areas can contribute to the efficient and long-lasting use of your bicycle. 
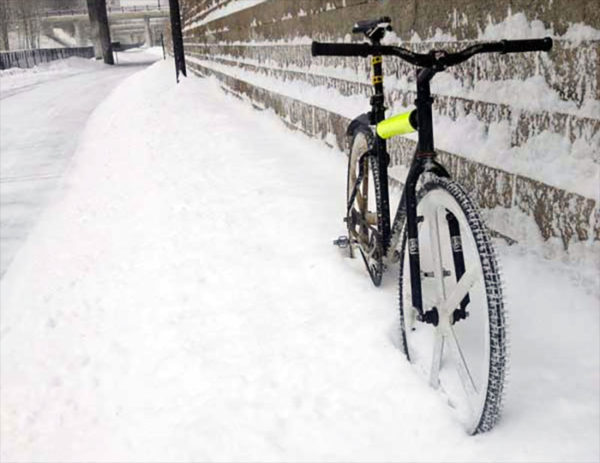

Tim Foster/Unsplash

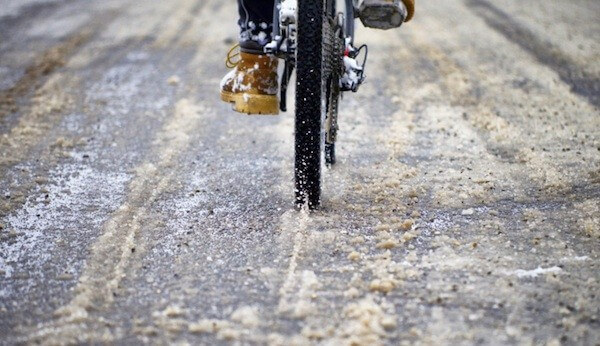
It’s recommended to lubricate your mountain bike every few rides, or at least once every three months, depending on the frequency and intensity of your use. In wet and muddy conditions, it’s a good idea to lubricate after each ride to prevent corrosion.

Lubricating your mountain bike is a simple and effective way to prolong its lifespan and get the most out of its performance capabilities. As part of a regular maintenance schedule, you can mitigate costly part repairs and service fees, and focus more on the sport you’ve invested in and grown to love.

How To Fix Sloppy Bike Steering

August 31, 2020 by Sarah Lauzé

You may have noticed a clunking noise in your front end. You might feel a bit of play in your steering. You might notice more vibration than you think is normal. All of these symptoms are typical of loose bike headsets. Bike steering adjustments are routine, and nothing you can’t handle yourself.
Bike Steering

Bike Steering

Bike steering is made possible by your headset. The headset is a rotating joint at the bottom of the stem. It allows the steering column (tube) and front wheel to rotate and turn. The headset is your focus for bike steering issues. All you need to fix it is your multi-tool, or alternatively a 4-mm, 5-mm or 6-mm hex wrench, depending on model of bike. Tightening your headset is one of the most basic of all bike maintenance procedures.

Quick Test For a Loose Headset

If you’re not sure about bike steering or your headset, a quick test will help you decide if it needs attention, here’s how to do it: Apply pressure to your front brake by squeezing the lever. Place your other hand on the front of the stem, just above the fork. Rock the bike forward and back. If you feel a slight knocking your headset is loose. If you look close, you may even be able to see a slight separation (very slight) between the steering tube and the bushing when you rock the bike. A loose headset may also produce a more dramatic clunking sound when you bounce the front tire, or if you hit a bump when riding. That sharp clunk when you pass over railroad tracks is a perfect example.

Step One: Loosen the Pinch Bolts

Your bike should have two pinch bolts (some people call them stem clamp bolts) located on the vertical part of the stem facing the seat.  The bolts are horizontal and perpendicular to the top tube, and a critical part of bike steering. Note that one bolt typically enters the stem from the left, and the other from the right. Loosen them just enough so that the stem goes slack, or that you can move the handlebars without turning the wheel. Start with the 5-mm hex wrench, if it doesn’t fit, use the 4-mm or the 6-mm.

Step Two: Tighten the Headset

Tighten the large, vertical bolt (aka pre-load bolt) on the top cap of the stem using the 5 or 6-mm hex wrench. This is important: tighten it only enough to take the play out of the headset. The tightening motion squeezes the parts together (bearing tension) inside the headset, if you get them too tight, your bike steering will be stiff, and it will wear out the headset. In most cases, you won’t need to tighten the bolt more than about 1/4-to-1/2-turn. If you think you’ve over-tightened it, back it off a 1/4-turn.

Step Three: Test It

Grasp the front brake, and rock the bike forward and back. If you hear a clunking it’s not tight enough. If you’re not sure, do the test with your hand on the front of the stem. When you’re satisfied, go to Step four.

Step Four: Align The Handlebars

Your bike steering is still loose at this point. Stand over the bike and do a visual straightening of the handlebars. One way is to center the drop-outs (the ends of the axle on the front tire) with the center of the stem. Or you can just use the tire. This can be tricky, but easy to adjust later if you’ve tweaked it the wrong way. When you’re satisfied that the handlebars are straight, tighten the pinch bolts. These bolts need to be tight, they’re the only thing securing your stem to the steering tube.

Torque and Carbon

Something should be said about over-tightening bolts on bikes, especially carbon-fiber bikes. Even a slight miscalculation in torque can be a very expensive mistake on a carbon fiber frame. That sickening crunch can literally cost you thousands. Here’s how to avoid it: Invest in a bicycle specific torque wrench. A majority of carbon fiber bikes require a setting of 5nM. (newton meters) Using the torque wrench won’t allow you to ruin your carbon fiber frame, because you’ve set it according to manufacture’s instructions. (Don’t use the torque wrench to tighten the top cap bolt on your headset though, that’s a feel thing — unless specified to do so by your bike’s manufacterer).

Check With A Mechanic

If you’re not sure about any of your bolts torque requirements, or  how your bike steering mechanism (headset), works, check with your bike’s manufacturer or local mechanic. For extra help, check out the video below!

How To Adjust Road Bike Brakes

June 14, 2020 by Sarah Lauzé

It’s normal for brakes to start to squeak or get a little soft over time. This may mean it’s time to replace the pads (for calliper brakes) or that the cables need some adjusting. Here’s how to adjust road bike brakes, whether at home or in the shop.

No matter what kind of bike you have, the tension on your brakes is controlled by one of two things: a brake cable or hydraulic fluid. If you have hydraulic disc brakes, there’s not a lot that you can do to adjust them, other than bleeding them, which is generally a job best left for professional mechanics. However, if you have rim brakes or cable-actuated disc brakes, adjusting your brakes is pretty simple and should be something you can do at home.

What You’ll Need

  • Allen Key/ Hex Wrench Set
  • Brake Wrench

How To Adjust Road Bike Brakes

Small AdjustmentsAdjust Road Bike Brakes

If you have a mountain bike, hybrid, or city bike, you’ll notice that there are screw-like adjusters on your levers where the brake cable housing meets the lever. If you have a road bike, you’ll notice a similar adjuster on the brake itself, again, where the cable housing meets the brake. These are called barrel adjusters, and they allow you to take up cable tension, which brings the brake arms closer to the rim of the bike (or the pads closer to the rotor in the case of disc brakes).

If your brakes are too loose, and you have to squeeze the levers all the way to the handlebar to get any kind of stopping power, you’ll want to loosen your barrel adjusters a few turns. This actually tightens the brake cables and therefore tightens the brakes. If your brakes are so tight that they don’t let your wheels turn, then you can tighten the barrel adjusters back down and make some room.

Bigger Adjustments

These small adjustments don’t require any tools, and you can even do them while you’re riding your bike if you have good enough bike handling skills (but it’s much better to do it while the bike is not in motion). If you’ve already turned a barrel adjuster all the way out or all the way back in, though, you’re going to need to grab either a five-millimeter hex wrench or a ten-millimeter box-end wrench (depending on your brakes).

With your wrench, loosen the pinch bolt that holds the brake cable in place. Then roll your barrel adjuster about halfway out. Pull the cable tight and put enough tension on the brake that it lightly touches the rim. While you do this, tighten the pinch bolt down again. Then roll the barrel adjuster back in, and you should have a well-adjusted brake. If not, you can play with how far you roll the barrel adjuster out and/or how much tension you put on the cable as you tighten the pinch bolt back down. With a little bit of patience, you should be able to adjust your brakes without much trouble at all.

Good luck, and, as always, if you run into too much trouble, don’t hesitate to take your bike to your local bicycle shop for some professional care.

Routine Bike Maintenance: Make your bike last longer

April 29, 2020 by Sarah Lauzé

We all want our bikes to last us a lifetime, but we do have to give them a little love and attention to prolong their lifespan. Staring at your bike lovingly or tucking it into your bed at night may be tempting, but it won’t do much in making it last longer. Routine bike maintenance is the easiest way to ensure the financial and emotional investment you’ve put into your bike doesn’t go to waste.

Routine bike maintenance isn’t complicated, but it can take some dedication. When you’ve finished a long ride, you may want to just lean up your bike and go have a nap, but it’s better if you establish a post-ride routine that includes a little bit of TLC.

Routine Bike Maintenance

1. Keep it clean

It’s simple, but so important. Keeping your bike clean ensures your bike not only looks great, but also keeps all it’s part working flawlessly. Obviously you aren’t going to clean your bike meticulously after every ride, make sure you do whenever you ride in the rain or mud.

In addition to that, but put your bike on a regular cleaning schedule. At the very least clean it once per month. It obviously depends on how often you ride, but if you want to keep your bike in smooth working condition, once a month is a bare minimum. For some tips on how to clean your bike, check out “How To Clean Your Bike in 5 Minutes or Less.”

2. Lubrication and Grease

Make sure your bike is lubricated properly as it protects moving parts from excessive wear and tear (choose an appropriate lube for the riding conditions you’re in). On the other hand, make sure not to go nuts as too much lubrication will attract dirt and cause just as much damage. Allow the lube to soak in and then wipe any excess off with a clean rag.

Most importantly you want to lube the chain, but also all the other moving parts including brake and derailleur levers, and cables. You’ll also want to grease any threaded bolts such as the stem, derailleurs, and pedals. If you have any bearings apart, make they are all well greased.

3. Regularly Replace the Chain

Chains travel countless times over sharp gears, often under a heavy load. They wear out and stretch over time because of dirt, gunk and attrition. A little bit of chain stretch over time is ok and will always occur. The problem becomes when it stretches too far and the teeth on the cassette begin to wear out as well. Before long you will not only have to replace the chain but the cassette as well.

You’ll want to replace your chain every 1,000 – 2,000 miles, once a year, or whenever the chain is starting to show signs of wear. It’s a simple task that any cyclist can accomplish on their own with the right tools and know-how.

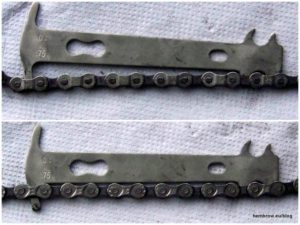
4. Inspect Your Bike

Inspect the frame for cracks or serious dents that are more than just cosmetic. Specific areas to look at are the joints particularly around the head tube and bottom bracket. If there are any cracks, even if it looks like it’s just paint, take the bike to your local bike shop to be looked at by an expert. For this reason (and a lot of others) it’s a good idea to take you bike in for a yearly tune up and checkover at your LBS.

5. Ride Clean Roads

Okay, that may not be possible, but riding in the rain and mud is going to wear out your bike and components more quickly. If you can be strategic with your route to avoid areas with a lot of mud and gravel it can go a long way. That being said, this is why many cyclists have a more budget friendly bike to ride in such conditions, and keep their more expensive bike out of the elements.

6. Cover it up or keep it inside.

Leaving your bike open to the elements will speed up the aging process. The sun, water and dirt will end up causing damage to your bike and cost you in repairs. If you’re in a humid climate, rust on certain metal components can also develop quicker. If possible, keep your bike inside. However, if you live in an apartment building or do not have adequate space, you will want to at least keep it covered.

8 On-the-Road Bike Repairs You Need to Know

February 20, 2020 by Sarah Lauzé

Cycling is beautiful for its simplicity, but that doesn’t mean things don’t go wrong. When you’re out on a ride and you get a flat or your chain breaks, it shouldn’t mean the end of your ride. Although these things can be fixed with ease back in your garage with all the right tools (or at your local bike shop), it’s important to learn some of the most common on-the-road bike repairs that will come up. Being stranded miles from home is no fun, and although it may be easier to call for a ride home, you’ve got what it takes to do a quick fix and keep riding!

On-the-Road Bike Repairs

Tools to Bring

You should be prepared with the right tools on the road or trail and know how to use them should a mechanical or flat tire occur. The tools to bring are:

  • Spare Tube
  • Pump or CO2 Inflator with an extra cartridge just in case.
  • Tire Levers
  • Patch Kit
  • Multi-tool with a chain tool on it

8 On-the-Road Bike Repairs

1. Fixing a Flat

If you ride a bike more than just around town you should know how to fix a flat. Fortunately it’s pretty easy:

2. Broken Chain

Broken chains don’t happen too often when riding but when they do, you’re not going very far until you fix it. A chain will either break completely or a link will become kinked. To fix it, all you need to do is to remove that link.

  1. First locate the broken link. There should be two plates that are loose, and flapping around or a link that has a bend in it. These are the ones that get removed. You do not need to remove the chain from the bike. Keep the chain threaded through the derailleurs if you can as it will save you time.
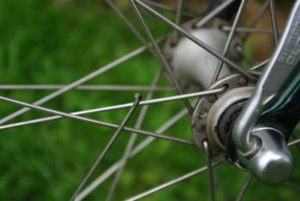
  2. Examine the chain breaker tool. You’ll notice a circular cradle that the push-pin moves through. Rest the link in this cradle where the pin lines up with the push-pin of the link you’re removing.
  3. Turn the push-pin to push the pin through and out the other side. If you’re using a master link, you will need to have both ends of the chain an inner link as the master link is an outer link. If you don’t have a master link or another connector pin, do not push the pin all the way out the other side of the chain. Leave it so the pin is over enough to remove the inner link but not so far that it falls out. This will be important in the next step. Now do the same one full link removed, one inner link followed by one outer link or vice-versa, from the pin you just pressed out with the broken link being in-between.
  4. If you removed the chain from the derailleurs, thread it back through being sure that it’s going the right way. Then place the chain in the smallest gear in the back and rest the chain to the inside of the chain rings on the front against the bottom bracket to give enough slack.
  5. Now install the master link if using one through both the inner links and lock into place. If you have a connector pin, line up the ends of the chain and press that through breaking off guide end with your chain tool. If using the same pin that you just pushed out and left on the outer link, line the end up and push the pin back in. You want it so both sides of the pin are flush with the outer plate of the chain. If you pushed the pin too far through when you were removing it, line the chain up in the chain tool and set the pin on the resting plate to then press the pin in. It may be a bit off at first but it should line up as you continue to push it through the hole.
  6. That’s it. The link with the pin you just installed may be a bit stiff but if you bend it laterally slightly with your fingers, it should loosen up to where you can’t even tell which link it was. The chain is now one link shorter, unless using a master link, but will still be good to go.
  7. One note is that reinserting a pin is now the week point of the chain. When you do make it home, take out that pin and put in a connecting pin which will better strengthen the chain. The problem is you may not be able to tell which link it was so it’s recommended that you replace the entire chain.

3. Tire Tear

A tear in a tire can end your ride. If it’s not extremely big however, you can fix it with a few little tricks. The first is the dollar bill trick where you fold up a dollar bill and place it between the tube and the tire where the hole is. This will only work if the hole is small enough. Once the hole is past a few millimeters in size, you are going to need a tire boot which should also be carried in your saddle bag. This rubber strip will be large enough to place over the hole and not allow the tube to poke out. The problem with both the dollar bill trick and the tire boot is that the tire can continue to split particularly if you’re on rough roads or terrain. Adding a piece of electrical tape in place of or in conjunction with, will help to hold the tire in place and not have the hole continue to grow.

4. Broken Spoke

First, you need to get the spoke out of the way so that it doesn’t interfere with your wheel turning. If you have a broken spoke on the front wheel, you should be able to just slide it out of the hub. If it’s on the rear wheel, bend the broken spoke around one of the spokes adjacent to it. Then you can adjust the tension on the rest of the spokes in your wheel.

To adjust the other spokes to accommodate for one missing spoke, you’ll need a spoke wrench, conveniently on many multi-tools, to tighten or loosen them by turning their nipples at the rim. Turn each spoke on either side of the one that just broke clockwise as if you’re looking from the hub of the wheel toward the rim. This will loosen those spokes. If this doesn’t move the rim back to center enough, ie. it’s still bouncing off the brake pads, go one more spoke in either direction and turn them counter-clockwise. This will tighten the spokes pulling the rim back toward the side of the broken spoke.  fIf the rim is moving too far to the right, you’ll want to either tighten the spokes that attach to the left side of the hub or loosen the spokes that attach to the right side of the hub. You’ll make this decision by testing the spokes and determining whether they feel too loose or too tight.

Never make drastic changes to the tension of a spoke at any one time. Just make half-turns with the spoke wrench each time and check and see how true the wheel is. It is easy to go too far. Once you get it roughly straight, you can ride the wheel. If the rim is still slightly touching the brake pads, open the brake quick-release to allow for more space. Once you get home, check out this article on how to finish up the repair.

5. Broken Front Derailleur Cable

With a broken front derailleur cable you are going to be stuck in the little ring for the rest of the ride. With a triple chain ring, you might be able to turn the limit screws enough to line up the derailleur up with the middle chain ring but it depends on your derailleur and set-up.

6. Broken Rear Derailleur Cable

With a broken rear derailleur cable you are going to be stuck in your smallest gear, normally an 11 or 12 tooth. To get the chain up to a bigger, easier gear, turn the H or high speed limit screw in as far as it can go. This should push the derailleur up at least a cog or two. You may have to back it back out a tad if it doesn’t line up well.

7. Broken Brake Cable

It’s going to be rare that you have a broken brake cable as they’re made not to fail. If you’re riding anything other than perfectly flat roads without many intersections or traffic you might be able to gingerly make it home otherwise it’s best to get a ride and not risk needing to stop quickly and not being able to.

8. Shifting Becomes Off

A lot of times, particularly after a new cable is installed, your rear derailleur shifting will become slightly off. This is because the cable stretched ever so slightly. To tighten it, simply turn the barrel adjuster on your derailleur counter-clockwise a quarter turn until the pulley wheel lines up exactly with the gear. You won’t have to turn it much unless it’s way off.

Your Bike Tune-Up Checklist

January 2, 2020 by Sarah Lauzé

You may not get rusty after not riding for a while, but your bike just might. Doing a regular bike tune-up is what will keep you cruising safely and comfortably, and will make your bike last for the long haul. Routine bike maintenance isn’t complicated, but it can take some dedication. When you’re headed out for a long ride, or are just pulling your bike out of storage, you may want to just hop on and go, but it’s better if you establish a pre and post ride routine that includes a little bit of TLC.

It’s recommended that you get a bike tune-up every 2000 miles, but it’s great to make a habit of checking things off this list.

Bike Tune-Up Checklist

Make Sure It’s Clean

You should always put your bike away clean, but if you happened to stash it away before giving it a good wipe down, take the time to clean it now. Use some degreaser to clean off the chain, chainrings, derailleur and cassette. Then use a wet rag to to give the whole frame a wipe down.

Check Your Brakes

Next you’ll want to check your brakes. First, look at the pads and check for signs of wear and tear. If you can see lines or metal poking through the brake pads, then it’s time to replace them. Adjust them so they are hitting the rim properly, and make sure the lever pull isn’t too loose or too tight. If you find they are grinding after being adjusted, you may need to sand them down or check your rims for imperfections. Take a look at your brake cable for wear, looking out for and loose strands or rust.

Check Your Seat

Check that your seat is firmly in place and hasn’t wiggled loose over the miles.

Tire Pressure

This may be a temping one to skip, but you should always check your tire pressure before heading out on a ride. To do this, use a gauge and match the psi to the numbers printed on the side of the tire (most will be around 120 psi).

Check Your Chain

Chains travel countless times over sharp gears, often under a heavy load. They wear out and stretch over time because of dirt, gunk and attrition. A little bit of chain stretch over time is ok and will always occur. The problem becomes when it stretches too far and the teeth on the cassette begin to wear out as well. Before long you will not only have to replace the chain but the cassette as well.

You’ll want to replace your chain every 1,000 – 2,000 miles, once a year, or whenever the chain is starting to show signs of wear.

Lube It Up

Make sure your bike is lubricated properly as it protects moving parts from excessive wear and tear (choose an appropriate lube for the riding conditions you’re in). On the other hand, make sure not to go nuts as too much lubrication will attract dirt and cause just as much damage. Allow the lube to soak in and then wipe any excess off with a clean rag.

Most importantly you want to lube the chain, but also all the other moving parts including brake and derailleur levers, and cables. You’ll also want to grease any threaded bolts such as the stem, derailleurs, and pedals. If you have any bearings apart, make they are all well greased.

Inspect Your Bike

Inspect the frame for cracks or serious dents that are more than just cosmetic. Specific areas to look at are the joints particularly around the head tube and bottom bracket. If there are any cracks, even if it looks like it’s just paint, take the bike to your local bike shop to be looked at by an expert.

Things You Need to Know About Maintaining Your Bike Chain

December 11, 2019 by Sarah Lauzé

What’s the one part of your bike that has the most individual pieces to it? Not many would guess the chain, but today’s chain has eight parts per link which makes for a lot of moving parts with over fifty links in the average chain. Maintaining your bike chain will make it shift more smoothly and quieter, it will also last longer and help preserve the life of your cassette. With that many moving parts there’s more than one step to keeping it rolling like it should.

Maintaining Your Bike Chain

Things You Need to Know About Maintaining Your Bike Chain

Bike Chains Wear Out

As with any other part on your bike, chains wear out, often quicker than we would like. Chains wear by ‘stretching’ and no longer lining up perfectly with the teeth of the cassette. This stretch is not the actual metal stretching but rather the pin in each link wearing against the inner and outer plates of the chain causing the hole in each to be ever so slightly larger. This happens the fastest when it is metal on metal when the pin rotates within the plates. To keep this from happening as much, oil keeps these contact points properly lubricated so the metal doesn’t grind into each other and wear out as quickly.

How To Measure Chain Wear

A little bit of chain stretch over time is ok and will always occur. The problem becomes when it stretches too far and the teeth on the cassette begin to wear out as well. Before long you will not only have to replace the chain, but the cassette as well.

There is a handy tool that measures if a chain is stretched but you can do the same with a tape measure. A full link measures one inch in length when brand new. To account for a number of links, measure one foot from the exact same point on the chain to see how much it has stretched. If the foot mark falls less than 1/16th of an inch from the same point on the link, the chain is still golden. If it’s over 1/16th of an inch you need to replace the chain, but probably don’t have to replace the cassette.

The only real way to test if you have to replace the cassette as well is to ride the bike with the new chain and put pressure on the pedals in a few of the smaller gears. If the chain slips, they don’t line up enough, but if there are no issues, you’re good to go. If the chain measures over 1/8th of an inch off you will need a new chain and cassette.

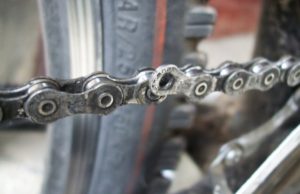
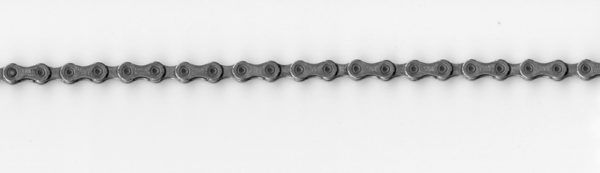
How To Wash a Bike Chain
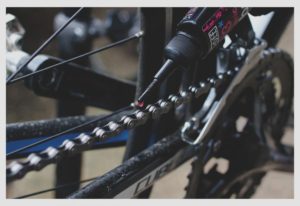
There are a number of approaches to washing a chain including taking it completely off the bike, but the best and easiest way is to clean it while on the bike with a degreaser. Before washing your bike, spin the pedals backwards applying a degreaser. Then with a sturdy bristled brush, scrub the chain to get the degreaser further into the links while also dislodging any grit and grime.

One added effective way to clean your chain is to use a chain cleaner mechanism that has a number of rotating brushes in a small plastic box that is filled with degreaser. Running your chain through this not only coats it with degreaser but also brushes a lot of the grit and old oil off of it easily.

After degreasing and brushing, wash the chain with regular soap and water as you would the rest of your bike and then follow it up with a good spray through the links to make sure all the grit is out of it as well as any leftover degreaser.

Wiping Your Chain

Following a thorough wash, spin the pedals backwards running the chain through a clean rag to get as much moisture out of the chain as possible. This should actually be done after every ride because when you ride, oil seeps onto the entirety of the chain while collecting debris from the road. If left on, this debris will eventually work its way into the moving parts of the chain causing it to wear out even faster. Plus wiping your chain leaves your it looking like new for every ride and not black which can cause a nice mark on your leg if you’re not careful.

A good trick is to leave a rag easily accessible next to where you leave your bike and whenever you finish a ride, give it a quick wipe down. And then any oil that does get on your hands can just be washed off as you go inside.

Applying Chain Lube

Now that we’ve gotten all of the prerequisites out of the way – washing and wiping the chain, we can now apply bike specific chain lube. Chain lube isn’t just oil. Oil specifically for bikes is thin enough to get into the tiny spaces between the pins and links yet thick enough that it doesn’t wear off super quick.

  • Where To Lube and How Much

The objective of oiling a chain is to get the oil inside the moving parts of the chain, not on the outside as it doesn’t do anything there. The best way to do this is to use an oil can that has a small nozzle that you can apply directly to the rollers of the chain in the center with a drop or two on each. Do this while spinning the chain backwards; once if you’re certain that you applied enough oil on the first go around, otherwise a second or third time. Once you stop dripping oil on the chain, keep spinning the pedals backwards. This will keep all the parts of the chain moving to get the oil further into the chain itself.

After the oil has made its way inside the chain, take another clean rag and wipe off all of the excess by spinning the pedals backwards through the rag a few times. You need to do this because you don’t need oil on the outside of the chain as it can collect road grit more easily and get into the chain itself along with just being dirty in general.

If you keep your chain properly lubed as well as washed on a regular basis to keep grit from getting inside of it, your chain will last much longer and will shift and sound better. It doesn’t take a lot to keep your chain lubed and running smooth but it does take knowing how to do it. Just keep a rag and bottle of lube next to where you keep your bike and you’ll be sure to remember especially after now knowing exactly what causes your chain to wear out and stretch.

7 Essential Bike Tools Every Cyclist Should Have

October 10, 2019 by Sarah Lauzé

Working on your own bike can be satisfying, plus it can save you a bunch of money and trips to the bike shop. Having the essential bike tools for the job is necessary on both accounts. Seeing as you are the one who rides your bike all the time, only you really know what’s going on with it. If it’s making a certain noise, or feeling weird in a way, it can be tough to describe those smaller issues to a bike mechanic. With the right tools and general know-how, you can diagnose and fix the problems– and even have fun doing it!

That being said, botching a quick repair or making it worse because you’re trying to get through it with some multi-tools you had lying around can make for an embarrassing trip to the bike shop. Make sure the tools you have are up to the task, and ensure your also know how to use them. Seek out someone to teach you, watch videos online, read articles and practice on an old beater in a low-stakes repair before moving on to your top bike.

7 Essential Bike Tools

1. Floor Pump

While a floor pump is not the most exciting bike tool, proper and regular use can avoid the most common bicycle repair: a flat tire. Correct inflation pressure for the rider/tire/rim/surface condition combination can lead to fewer flats, along with better handling for your bike. Pressure that is too low risks pinch flats and pressure that is too high can lead to more puncture flats. Finding the right pressure will keep your bike rolling, keep you more comfortable on the bike, and more confident in your bike handling.

2. Tire Levers

Bad tire levers are really frustrating. If you’re out on a ride and get a flat, struggling to get your tire off with your bare hands can be tough, so you reach for your tire levers. If they proceed to break, then you’ll most likely be ready to pull your hair out. Good tire levers are the difference between a simple fix and the above situation. It is not a huge investment, so get the good ones and they will last you.

3. Hex Keys/Torx Keys

Most bolts on bicycles have metric hex bolts, so a good set of hex keys with ball-end drivers will make repairs a breeze. They will fit in your bolts securely, minimizing the chance of stripping the bolts. The ball end allows you to tighten and loosen hard to reach bolts at angles other then perpendicular. The set should have a full range of sizes to accommodate all of the bolts you will work on. Again, this is not a huge investment.

More and more bike parts have Torx bolts, six pointed star heads that give their wrenches more surface area, reducing the chance of stripping them. The same rules that apply to hex keys apply to Torx keys, except that they cannot accommodate ball-ends.

4. Cable Cutters

Replacing cables is not a complicated job with the right cable cutters. And there is only really one right cable cutter, which is often copied. With the wrong cable cutter, you risk fraying the cable or housing you are working with. A frayed cable is useless as the frayed section can spread and will not go cleaning through the housing, compromising its function.

5. Chain Tool

Cutting your a new chain to the correct length and installing it is one of the most satisfying repairs to do. It increases the longevity of your drivetrain if done at the correct intervals and makes it more efficient with crisper shifting. The only way to push the pins through a chain is with a chain tool.

6. Screwdrivers

There are a few adjustment screws on bikes, usually for derailleur limits (although some have moved to small hex heads) and usually number two Philips heads. But not all screwdrivers are equal, a good fit goes a long way to preserving your screws. Additionally, you should have a flat head screwdriver around, but this is mostly for scraping clean derailleur pulleys and other hard to reach places.

7. Torque Wrench

The last tool, the torque wrench, is a recent necessity. With the explosion of lightweight parts that require a certain torque to both hold fast and not fatigue prematurely, a torque wrench is the only tool for the job. Fortunately, most bike parts that require a certain torque have it printed right on them. Make sure you get the right bits for your bikes. Lots of people say they can do it by feel, but that has been proven wrong time and again.

Your own work is always more satisfying than relying on someone else’s, and it can also give you a sense of ownership of your bike. These bike tools should get you on your way to mastering most basic repairs. Remember to learn how to use a tool properly before attempting any repairs.

Get Your Bike Ready For Winter

October 3, 2019 by Adam Farabaugh

With the days getting shorter and the temperature dropping, winter is fast approaching. Riding in the winter not only requires a little bit of extra prep in the clothing department, but also for your bike to keep running smooth and minimize breakdowns.

Having a mechanical issue in the warmer months of the year can be inconvenient, but during the winter months it can spell disaster. Avoiding situations before they arise is the best solution, but mechanicals do happen, so being prepared to fix them quickly will ensure you’re not in a bad situation for long. Other measures for the bike can also be taken to keep you warmer as well as safer with the waning light.

Getting Your Bike Winter Ready

Winter Maintenance – Fix it Before it Breaks!

The biggest reason things break on a bike are due to over wear. Newer, well-functioning parts are very rarely going to fail unless due to a crash or some other catastrophic event. Cold temperatures, snow, ice, and grit can quickly deteriorate parts, but starting winter with a few fresh additions will help ensure that they last until spring and beyond.

Chain

With the possibility of snow as well as water spraying up and freezing in your chain along with added road grit, the chain takes a lot more stress in winter months. Start the season with a new one to minimize the risk of it breaking.

Brake Pads

In a lot of areas winter brings with it wet roads which wear down your brake pads much more quickly. This combined with the possibility of roads being slippery due to snow as well as loose sand, cinders, and grit means that you have to brake harder to slow your speed to safely navigate corners, thus further wearing down your brake pads. Start winter with a set that is dedicated to moist conditions.

Cables/Housing

With the grit of salt, cinders, sand, and who knows what else in winter, anything that moves is going to start to experience more drag and friction. Derailleur and brake cables in particular are going to take a lot of abuse and will snap if not properly looked after. Don’t only get new cables on your bike before winter starts, but also new housing if they look worn.

Tires

The dirt and grit on the roads is the biggest factor in what can cause breakdowns. Flats will be much more frequent with this unless you get a more durable tire as well as bigger. A good tire is going to be the biggest deterrent to flats along with keeping enough air in your tires to help prevent pinch flats. Two potential additions to new tires to further help prevent flats are tubeless tires with sealant and thorn proof tubes which are tubes with thicker rubber.

Winter Additions For You Bike

During the summer months the bike is generally stripped down to be the lightest and fastest possible. During the winter, however, it’s highly unnecessary as well as much less functional. Having a few add-ons to the bike will keep you more comfortable, safer, as well as get you out of a situation you would otherwise be stuck on the side of the road with.

Fenders

Even on warmer days as the snow melts, if that’s a thing in your area, the roads are probably still going to be wet. Having fenders will not only keep you dry but will also keep your bike cleaner. In many areas around the country you not only need fenders on group rides, but also a “buddy flap” which is essentially a mud flap that hangs off your rear fender preventing wheel spray into the rider behind you.

Lights

With the shorter amount of daylight, having lights permanently mounted on your bike for when it does in fact get dark or even if it’s just starting to, is more than a good idea and could potentially be a lifesaving decision. In winter in a lot of areas, drivers aren’t always looking for cyclists so even if it’s just starting to get dark, it’s a good idea to turn them on.

Chain Tool

Even with a new chain, they can still break, particularly if you get snow packed into your cassette. Many multi-tools come with a chain-tool that can be used to take out the broken link and shorten the chain to make it home.

Pump

Another valuable addition to your winter setup is a pump instead of CO2 cartridges. With CO2 you only get one try with each and ifit doesn’t work, that’s it. During winter especially, the valve can become frozen while open, letting out all the air you just put into the tire.

Extra Tube

With all the grit on the roads, flatting is an increased possibility and thus having one extra tube might not be enough. Bringing a second or third one can give you piece of mind to keep riding longer on your original route instead of just looking to make it home.

Insulated Bottles

Although separate from your bike, having insulated water bottles will keep you warmer on the road by keeping your liquids from freezing solid as quickly. Put warm water in them when you start and make sure you close the top to push any liquid out that can get trapped in the opening to keep it from freezing shut.

Riding in winter does require more dedication and planning, but if you take the necessary steps to make sure you’re prepared along with your bike, it will keep it fun and enjoyable like every ride should be. Stay ahead of the curve on winter and your rides will stay pleasant and enjoyable all the way until spring.

The Best Waterproof Bike Covers

October 1, 2019 by Sarah Lauzé

A bike cover is one of the most simple and effective ways to protect your bike. A bike can be considered an investment, so it’s worth doing what you can to protect that investment and make it last as long as possible. A quality waterproof bike cover can protect your bike from the elements and ensure it lasts for years to come.

Ideally you want to keep your bike inside, but depending on your living situation this is not always possible. If bringing one more bike into the house is going to be the last straw for your significant other, then you need to take advantage of other options.

Leaving your bike open to the elements will speed up the aging process. The sun, water and dirt will end up causing damage to your bike and cost you in repairs. If you’re in a humid climate, rust on certain metal components can also develop quicker.

When you are choosing a bike cover, first thing to look at is what material it is made from. You want to ensure that it is, in fact, waterproof and that it will not snag when you’re taking it on and off. Next you will want to try it on your bike to make sure it fits and covers the entirety of the bike, including the wheels.

Here are some of the best waterproof bike covers to ensure you do all you can to protect your bike.

5 Of the Best Waterproof Bike Covers

Pro Bike Tool Cover

Price: $30 – $40

The Pro Bike Tool Cover is on the more pricey end of the the spectrum, but it does offer high performance protection. Made from Ripstop Oxford Fabric and with heat sealed seams, it really does keep out the snow, ice, wind, dust, sun, and pretty much anything else you throw at it. With a variety of sizes, you can get one to fit over your road bike, mountain bike (even with 29ers), or multiple bikes.

MayBron Gear Bike Cover

Price: $27

This heavy duty MayBron Gear bike cover is also made from durable Oxford fabric, which is not only heavy-duty but also relatively lightweight. Be sure to measure your bike before purchasing as there isn’t much wiggle room when it comes to the cover fitting snugly over your tires. This cinching bottom works great, and it includes holes for your bike lock.

YardStash Bicycle Cover

Price: $30

The YardStash bike cover is designed to offer ground up coverage, made from durable 210D Polyester. It has an elastic bottom, and also includes a middle buckle making it a good choice if it will be exposed to a lot of wind. There are two vents in the front of the cover that aim to eliminate condensation and corrosion if you live in a humid environment.

COVRIR Ultra-Tech Waterproof Bike Cover

Price: $20

The COVRIR Ultra-Tech bike cover was designed to offer lasting quality at a affordable price in an attempt to eliminate waste created by replacing a bike cover every year. Using a three strap system, this cover is “hurricane proof” while made from breathable fabric to prevent condensation. It also comes with a lock and cable, although you may want to invest in a secondary lock to ensure your bike’s security.

Kotivie Waterproof Sun Protective Bike Cover

Price: $26

The Kotivie bike cover is double sided, so black on one side and reflective on the other for UV protection. It is made from durable Polyester Oxford fabric, with a Silver PU coating to keep it from breaking down in extended sunlight. It is large enough to fit 1-3 bikes, with straps to pull it snug.

Next Page »
  • Facebook
  • Tumblr
  • Twitter

Latest Articles

JOIN Cycling: A New Training Platform for Cyclists

May 27, 2024 By Eric Lister

cold exposure

The Benefits of Cold Exposure for Cycling & Life

June 13, 2023 By Eric Lister

hill climb

The Ultimate Hill Climb Training Guide

May 31, 2023 By Eric Lister

shoulder pain cycling

How to Treat & Avoid Shoulder Pain While Cycling

April 12, 2023 By Eric Lister

psoas stretch

The Importance of the Psoas Stretch for Cyclists

April 6, 2023 By Eric Lister

cycling neck pain

The Ultimate Guide to Cycling Neck Pain: Causes and Solutions

March 21, 2023 By Eric Lister

Useful Info

  • Contact
  • Finally, A Global Cycling Club That Is Focused On Community And Love Of Cycling!
  • Privacy Policy
  • Share Your Story!
  • Terms And Conditions Of Use
  • Welcome to I Love Bicycling
  • What Happened When I Stretched Every Day For a Month

Recent Posts

  • JOIN Cycling: A New Training Platform for Cyclists
  • How to Hang Bikes in Your Garage: 4 Inexpensive Options
  • Gravel Bike Vs. Road Bike: Which One Is Better For You?
  • The 6 Types of Mountain Bikes & How to Choose the Best One for You
  • What Is a Touring Bike Good For? 5 Benefits We Know You’ll Love

Search I Love Bicycling

Connect with Us

  • Facebook
  • RSS
  • Tumblr
  • Twitter

Copyright © 2025 · Magazine Pro Theme on Genesis Framework · WordPress · Log in