• Training
    • Injury Prevention
    • Training Tips
  • How To
    • Bike Fit
    • Gear
  • Nutrition
    • Nutrition Tips
    • Weight Loss
  • Repair
  • Reviews
  • Stories
    • Funny Stories
    • Jokes
    • Quotes
    • Videos
    • Funny Videos

I Love Bicycling

I Love Bicycling is a website that is geared towards cycling for beginners with road cycling tips, training articles, nutrition tips, weight loss, how to’s and bike repair articles.

Things You Need to Know About Maintaining Your Bike Chain

December 11, 2019 by Sarah Lauzé

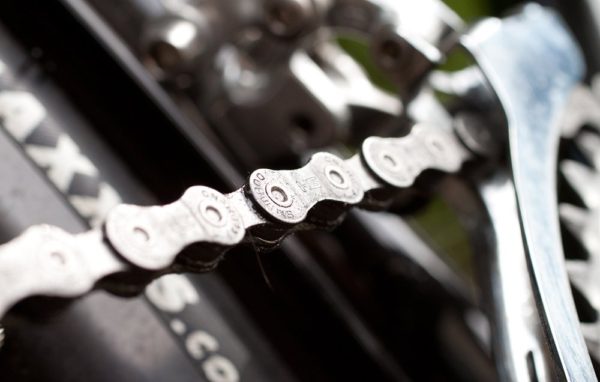
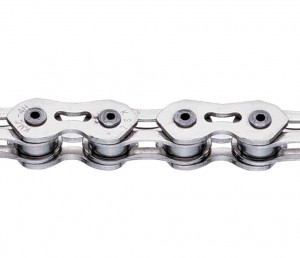
What’s the one part of your bike that has the most individual pieces to it? Not many would guess the chain, but today’s chain has eight parts per link which makes for a lot of moving parts with over fifty links in the average chain. Maintaining your bike chain will make it shift more smoothly and quieter, it will also last longer and help preserve the life of your cassette. With that many moving parts there’s more than one step to keeping it rolling like it should.

Maintaining Your Bike Chain

Things You Need to Know About Maintaining Your Bike Chain

Bike Chains Wear Out

As with any other part on your bike, chains wear out, often quicker than we would like. Chains wear by ‘stretching’ and no longer lining up perfectly with the teeth of the cassette. This stretch is not the actual metal stretching but rather the pin in each link wearing against the inner and outer plates of the chain causing the hole in each to be ever so slightly larger. This happens the fastest when it is metal on metal when the pin rotates within the plates. To keep this from happening as much, oil keeps these contact points properly lubricated so the metal doesn’t grind into each other and wear out as quickly.

How To Measure Chain Wear

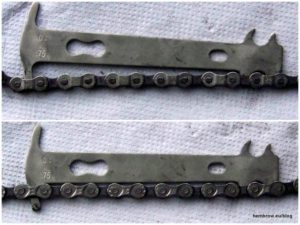
A little bit of chain stretch over time is ok and will always occur. The problem becomes when it stretches too far and the teeth on the cassette begin to wear out as well. Before long you will not only have to replace the chain, but the cassette as well.

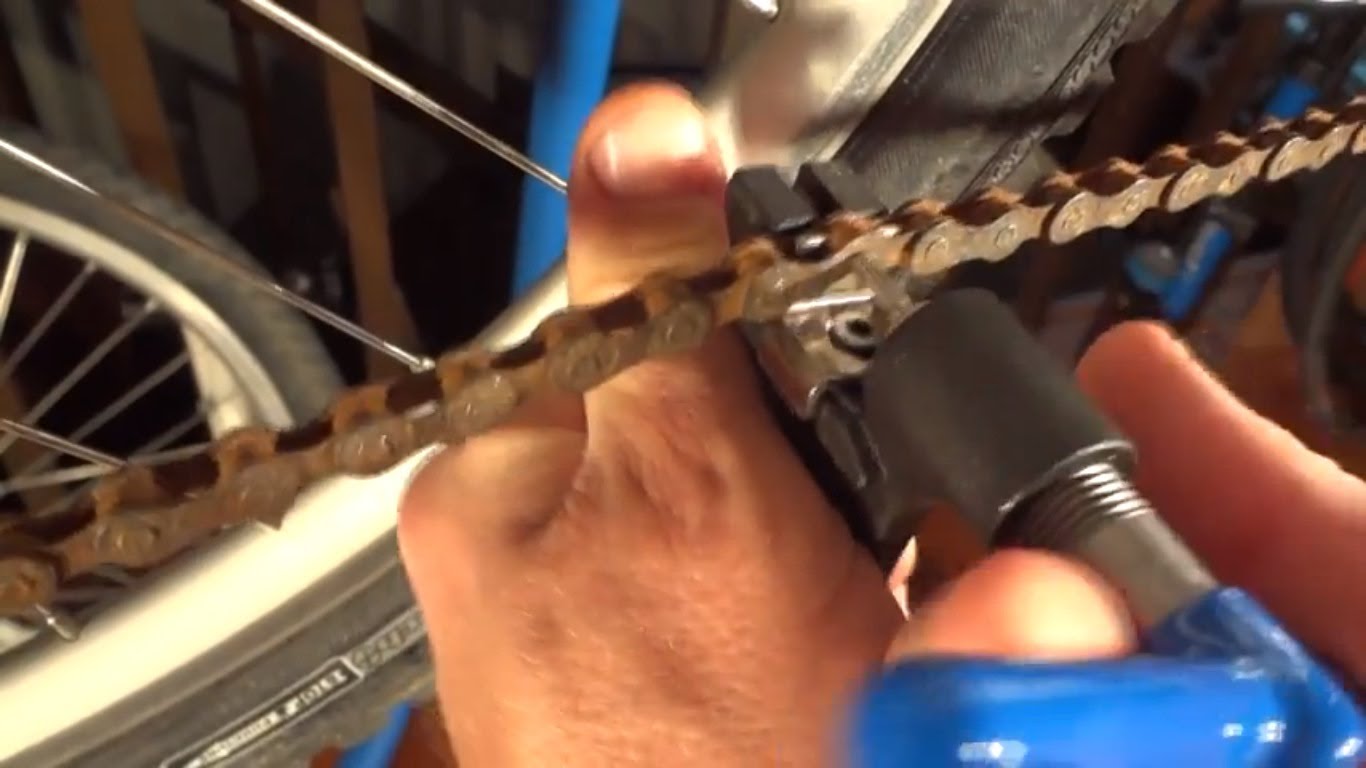
There is a handy tool that measures if a chain is stretched but you can do the same with a tape measure. A full link measures one inch in length when brand new. To account for a number of links, measure one foot from the exact same point on the chain to see how much it has stretched. If the foot mark falls less than 1/16th of an inch from the same point on the link, the chain is still golden. If it’s over 1/16th of an inch you need to replace the chain, but probably don’t have to replace the cassette.

The only real way to test if you have to replace the cassette as well is to ride the bike with the new chain and put pressure on the pedals in a few of the smaller gears. If the chain slips, they don’t line up enough, but if there are no issues, you’re good to go. If the chain measures over 1/8th of an inch off you will need a new chain and cassette.

How To Wash a Bike Chain

There are a number of approaches to washing a chain including taking it completely off the bike, but the best and easiest way is to clean it while on the bike with a degreaser. Before washing your bike, spin the pedals backwards applying a degreaser. Then with a sturdy bristled brush, scrub the chain to get the degreaser further into the links while also dislodging any grit and grime.

One added effective way to clean your chain is to use a chain cleaner mechanism that has a number of rotating brushes in a small plastic box that is filled with degreaser. Running your chain through this not only coats it with degreaser but also brushes a lot of the grit and old oil off of it easily.

After degreasing and brushing, wash the chain with regular soap and water as you would the rest of your bike and then follow it up with a good spray through the links to make sure all the grit is out of it as well as any leftover degreaser.

Wiping Your Chain

Following a thorough wash, spin the pedals backwards running the chain through a clean rag to get as much moisture out of the chain as possible. This should actually be done after every ride because when you ride, oil seeps onto the entirety of the chain while collecting debris from the road. If left on, this debris will eventually work its way into the moving parts of the chain causing it to wear out even faster. Plus wiping your chain leaves your it looking like new for every ride and not black which can cause a nice mark on your leg if you’re not careful.

A good trick is to leave a rag easily accessible next to where you leave your bike and whenever you finish a ride, give it a quick wipe down. And then any oil that does get on your hands can just be washed off as you go inside.

Applying Chain Lube

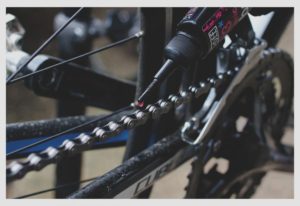
Now that we’ve gotten all of the prerequisites out of the way – washing and wiping the chain, we can now apply bike specific chain lube. Chain lube isn’t just oil. Oil specifically for bikes is thin enough to get into the tiny spaces between the pins and links yet thick enough that it doesn’t wear off super quick.

  • Where To Lube and How Much

The objective of oiling a chain is to get the oil inside the moving parts of the chain, not on the outside as it doesn’t do anything there. The best way to do this is to use an oil can that has a small nozzle that you can apply directly to the rollers of the chain in the center with a drop or two on each. Do this while spinning the chain backwards; once if you’re certain that you applied enough oil on the first go around, otherwise a second or third time. Once you stop dripping oil on the chain, keep spinning the pedals backwards. This will keep all the parts of the chain moving to get the oil further into the chain itself.

After the oil has made its way inside the chain, take another clean rag and wipe off all of the excess by spinning the pedals backwards through the rag a few times. You need to do this because you don’t need oil on the outside of the chain as it can collect road grit more easily and get into the chain itself along with just being dirty in general.

If you keep your chain properly lubed as well as washed on a regular basis to keep grit from getting inside of it, your chain will last much longer and will shift and sound better. It doesn’t take a lot to keep your chain lubed and running smooth but it does take knowing how to do it. Just keep a rag and bottle of lube next to where you keep your bike and you’ll be sure to remember especially after now knowing exactly what causes your chain to wear out and stretch.

Removing a Bike Chain

January 11, 2016 by Wade Shaddy

removing a bike chain

With some 800 million bicycles outnumbering cars by two to one, bicycles are one of the world’s most popular modes of transportation.  Bicycles are also the most energy-efficient machines —a cyclist burns about 35 calories per mile while an automobile burns 1,860 calories per mile. Bike chains, pound for pound, probably do more work than any single component on your bike. Removing a bike chain is going to be necessary at some point for cleaning or replacement.

Lots of Parts

The chain on your bike could possibly be the most important component on your bike, except for your heart and lungs of course. A standard chain is just about 56 inches in length. A typical chain has about 114 inner links and 114 external ones.

Why Remove It

The reasons to remove a chain include a bad link, broken link or simply to give the chain a bath. But in order to remove the chain, it’s nice to know a bit about how it’s made, and what to expect when you’re cleaning it, or replacing it.

How Chains are Made

Chains are made by a machine, or a bunch of different machines. The process starts with a punch press, cutting and pressing about 10,000 links steel inner links per hour, which look like a figure eight. Each of the links have been engineered accurately to interconnect, with smooth contours to travel easily across gears and through derailleurs.

Tested and Measured

Inner links are measured to confirm the space between the holes is precisely 12.7-mm. The test also gauges the diameter of the holes which must be accurate to within a fraction of a millimeter.

Baked and Hardened

Links are baked in an oven at more than 1500 degrees fahrenheit. They harden as they cool. Ceramic and silica powders are added with water to form an abrasive paste, and the links are shaken up to polish them smooth.

Bath Time

After a nickel-teflon bath, the inner links are ready to form into a chain, with the addition of outer links, which receive only a nickel finish, since they don’t travel over sprockets like the inner rings, and don’t require that smooth finish. The parts, including retainer rings and pins, spacers and bushings are then fed into an assembly machine.

Add Lube

The chain then takes a dip in hot oil to lubricate the links preventing squeakiness and wear down the road — that’s the tacky, somewhat oily feel on a new chain. Bearing all this in mind, it’s no wonder, with all these parts, assembled by a machine, that chains need removed and replaced from time to time.

Chain Maintenance

Chain maintenance is a controversial topic of bicycle mechanics. Is it really necessary to replace a chain every 1,000 or 2,000 miles? Chain durability is in direct proportion to riding style, gear, rain or snow, soil and sand, type of lubricant, lubrication method, and the condition of the gears it travels over. Everybody’s advice about chain maintenance and even cleaning is based on their own experience. Even professionals disagree when to remove or replace a chain. But when you’re ready, it’s a simple matter of the right tool for the job.

Removing a Bike Chain When it’s Wedged

If you’ve got a broken chain, just pull it from the derailleur — if it hasn’t already fallen off on the ground like a dead snake. It might be stuck, bunched up and wedged between gears or even the chainstay. If this is the case, don’t force it. Gently pull it loose, focusing on where it’s really stuck. Don’t resort to prying it out with tools unless you absolutely have to, and then be very careful not to bend anything. If you can’t pull it out, take the wheel off the bike which will relieve some of the pressure on the gears. If this still doesn’t work, you can remove the cassette with a cassette tool and then you should be able to remove the chain easily.

Use a Retainer

It’s a good idea to place a chain retainer on your chain before removing it from your bike. A chain retainer is nothing more than a small — about 2-inches long — piece of wire with two 90-degree bends on both ends — you can make one out of an old spoke. Slip the bent ends on the chain, over the link that you plan on removing. That way, when you break the chain, the retainer won’t allow the derailleur to snap back when the pressure is released. Use the retainer the same way when re-installing the chain. You also can just simply knock the chain off the front chain rings so it rests on the frame on the inside of the crankset. This will also take the tension off the chain.

Removing Chain Links

You’ll need a chain breaker tool to remove the chain for cleaning or replacement. It sounds complicated, but it’s really simple. The chain breaker tool is a small press. Look at it closely and you’ll see a small cradle, centered over a small hole. There’s a handle, or a bolt above the cradle that turns and pushes a pusher-pin against the pin on the chain to push out.

Employ the Chain Breaker

Fit the desired link into the small cradle, with the pin centered over the hole. It should fit snug, and the chain breaker is designed to help you get it centered. Twist the handle on the chain breaker to lower the drive cylinder directly onto the pin. Continue twisting — it typically takes five or six turns, to drive the pin out the bottom of the link. You should feel a slight bump when the pin releases from the link.

Re-use Versus Master Link

If you’re going to re-use the same pin when removing a bike chain and re-installing the same one, don’t push it completely out of the bottom link. Twist slowly until the link becomes loose and the chain is separated, but the pin is still stuck in the outer link at the bottom. It is not recommended to do this as that pin creates a week point in the chain. It is advised to use a new connector pin that easily installs into the link and breaks off on the other side to line up flush with the outer plate of the chain. If you plan on using a master link — recommended — then push the pin completely out of both outer links.

Remove the Chain

Finish removing a bike chain by unscrewing the drive pin and removing the chain tool from the chain. Hold both ends of the chain with your hands, and remove the retainer, releasing the tension from the derailleur. Snake the chain back through the derailleur and off the gears, it should come off easy from here.

Replace the Chain

If you’re re-installing the same chain, using the original pin or connector pin, it’s a bit tricky, but doable, just reverse the procedure with the chain tool pushing the pin back through the outer and inner link. If you’re using a master link, you’re done with the chain tool. Thread it back through the derailleur, use the retainer, or have someone hold both ends for you, and snap the master link back on to join the two ends.

Notes and Variations

Only some brands of chain can be serviced by pressing out a rivet partially, then re-pressing the same rivet to reinstall. Reusing any old pin can result in failure of the chain, because it shears the mushroom head off the rivet, and that’s what keeps the pin from coming out in the first place. Additionally, some chains include a master link that is removable by hand, without using a chain tool at all. Check with the manufacturer’s literature when in doubt, or consult with your local bike shop mechanics. Removing a bike chain is easy once you know the steps and what tool you need.

Fixing a Bike Chain

January 9, 2016 by Wade Shaddy

fixing a bike chain

Chain manufacturers attempt to make all of their links equally strong, but a chain is only as strong as its weakest part. The problem is, chains often consist of about 400 moving parts. Fixing a bike chain is a routine task that you should be able to accomplish in a few minutes whether on the road or trail or in the garage.

Fixing a Bike Chain – Chain Breaker and Master Link

Before fixing a bike chain, you’ll need one tool in particular; a chain breaker, if you don’t already have one in your saddle bag and a master link that fits your chain. Note that some chains come with their own master link included with the purchase.

Fixing a Bike Chain – Get the Length Right

If you’re simply fixing a bike chain, you don’t have to worry about chain length. Simply remove the broken link, and replace it with a master link, sometimes referred to as a power link, or missing link, depending on brand. If you don’t have a master link, you can just remove the broken link, and reinsert the pin provided you don’t push the pin all the way out the other side.  If you’re replacing an old chain with a new one, count the links in the old chain, and use the chain breaker to remove links on the new chain so that they both have the same number of links.

Steps to Fixing a Bike Chain

  1. First locate the broken link. There should be two plates that are loose, and flapping around or a link that has a bend in it. These are the ones that get removed. You do not need to remove the chain from the bike. Keep the chain threaded through the derailleurs if you can as it will save you time.
  2. Examine the chain breaker tool. You’ll notice a circular cradle that the push-pin moves through. Rest the link in this cradle where the pin lines up with the push-pin of the link you’re removing.
  3. Turn the push-pin to push the pin through and out the other side. If you’re using a master link, you will need to have both ends of the chain an inner link as the master link is an outer link. If you don’t have a master link or another connector pin, do not push the pin all the way out the other side of the chain. Leave it so the pin is over enough to remove the inner link but not so far that it falls out. This will be important in the next step. Now do the same one full link removed, one inner link followed by one outer link or vice-versa, from the pin you just pressed out with the broken link being in-between.
  4. If you removed the chain from the derailleurs, thread it back through being sure that it’s going the right way. Then place the chain in the smallest gear in the back and rest the chain to the inside of the chain rings on the front against the bottom bracket to give enough slack.
  5. Now install the master link if using one through both the inner links and lock into place. If you have a connector pin, line up the ends of the chain and press that through breaking off guide end with your chain tool. If using the same pin that you just pushed out and left on the outer link, line the end up and push the pin back in. You want it so both sides of the pin are flush with the outer plate of the chain. If you pushed the pin too far through when you were removing it, line the chain up in the chain tool and set the pin on the resting plate to then press the pin in. It may be a bit off at first but it should line up as you continue to push it through the hole.
  6. That’s it. The link with the pin you just installed may be a bit stiff but if you bend it laterally slightly with your fingers, it should loosen up to where you can’t even tell which link it was. The chain is now one link shorter, unless using a master link, but will still be good to go.
  7. One note is that reinserting a pin is now the week point of the chain. When you do make it home, take out that pin and put in a connecting pin which will better strengthen the chain. The problem is you may not be able to tell which link it was so it’s recommended that you replace the entire chain.

Fixing a Bike Chain – Why Chains Break

One of the most common reasons for chain breakage is bad closure at the factory. With hundreds of thousands of parts going through, it’s inevitable that pins fail to center properly. The giveaway is a bulge on the inside of the outer plate that indicates that the end of the pin being pushed through wasn’t lined up, and bent the plate before going through the hole. This can also occur after you’ve ridden the bike for a while. Keep an eye out for this, even on brand new chains.

Bad Gear Combinations

Chains rarely break while in a straight line. The energy is evenly dispersed across the links while pedaling normally, even under load. Chains typically break when using extreme gear combinations, like big front to big back or little front to little back, also known as cross-chaining. The force is temporarily focused to a few links, slightly diagonal to each other, as the chain moves from one cog to another. Cross-chaining bends the chain, and it’s a recipe for snapping chains.

Chain Suck

Chain suck occurs when downshifting under load to a smaller chainring. The bottom of the chain doesn’t  disengage from the larger ring and gets carried upward (sucked up,) and wedges between rings and snaps. Chain suck is commonly caused by bent chainring teeth, dirty chains, or occasional burrs on the teeth of new chainrings.

Listen and Feel

If you hear or feel a regular click or your chain hangs up each and every revolution, it could mean that one of the pins has come loose on one side, allowing the link to bulge slightly to the side. The chain hasn’t broken yet, but it’s too wide to fit through the cage on the bottom of the derailleur. As it passes through the bottom of the guide, the leaf ticks or, in worst case scenario, hooks the side of the derailleur and locks up.

Bad Shifts

Broken chains, when in good working condition, are really not that common and are almost always the result of putting load on the chain when it’s not fully in gear.

Let Up

Experienced riders intentionally “let up” on the pedals during the shift when under hard effort such as hill climbing or sprinting. This has two effects, the first being less stress being placed on the chain and the second being simply more efficient and responsive shifting. Even top-of-the-line Dura-Ace drivetrains don’t shift well under load.

Fixing a bike chain isn’t too difficult of a task and can save you when out on the road or trail otherwise stranded. If doing longer rides farther from home, you should be able to fix a broken chain as easily as being able to fix a flat. Both leave you on the side of the road but if you know how to fix them, you’re home free.

How To Properly Maintain Your Bike Chain

September 21, 2015 by U.M.

How To Properly Maintain Your Bike ChainYour bike chain is one of the most important parts of your bike. After all, without it you simply won’t be able to ride. Unfortunately, it is also one of the parts of your bike that is going to be subject to the most wear and tear, as it is constantly exposed and will likely get dirty and less efficient over time.

As such, properly maintaining your bike chain is crucial if you want to ensure that your bike performs to the best of its abilities. If you are interested in competitive cycling, you will need to know what should be done to keep it in good condition at all times, so that you have an edge over the competition.

How Does Riding Affect Bike Chain Performance?

Your bike chain is going to decrease in effectiveness every time you head out for a ride, assuming you don’t maintain it properly. Chain wear and reduced flexibility in the chain links themselves result from dirt clogging up the system, and all of this can combine to create added wear on drivetrain cogs and other aspects of the bike, affecting overall performance and occasionally causing you to have to spend more money on repairs.

Furthermore, when it comes to competitive cycling you will find that a poorly maintained bike chain will affect your ability to shift between gears, which is vital when you need everything to be at the optimum level to place well in the race.

How To Maintain Your Bike Chain

You should aim to check your bike chain on a regular basis by standing to the side of the bike and lifting the rear wheel off the ground. Rotate the pedals slowly and inspect each link in the chain to check for signs of dirt or debris that could affect performance. You also need to check for links that don’t bend particularly well and listen out for squeaks as the chain rotates.

If you spot any of these issues, you should carry out a spot clean by brushing the links with a form brush and lubricating the chain with a good bike lubricant. Wipe off any excess with a clean rag, as too much lubricant can actually cause more issues.

You will also need to periodically remove the chain from the bike to give it a full clean. Usually you can do this every month, though you might want to increase the frequency if you have a mountain bike. Use a chain-removal tool to safely get the chain off the bike and immerse it in a chain solvent so that you can rid the chain of the dirt that you are unable to get to with brushing alone. Clean it with a dry rag and relubricate before placing the chain back on the bike.

Things To Look Out For

Tight Links – These can be spotted by looking out for links in the bike chain that don’t bend easily. Usually this is because there has been some corrosion between links, or there is a particularly difficult chunk of dirt clogging up the system. Clean lubricate and flex the link lightly back and forth to gain back the flexibility that the link needs to allow for proper performance.

Chain Stretch – No matter how regularly you clean your chain, all of them are subject to what is known as chain stretch. This is caused by wear between the rollers and link pins and leads to the chain becoming less effective. If you have noticed that your bike is slipping gears, the likelihood is that your chain has stretched. Unfortunately, this is not something that can be cleaned or remedied, so use a wear-indicator to find out if the chain is usable. If the prong doesn’t fit in the chain gap, you should replace the chain rather than run the risk of it causing further damage to the bike.

Also Read: 20 Essential Bike Repair Tools

All You Need To Know About Your Bike Chain

February 24, 2014 by U.M.

all you need to know about your bike chain
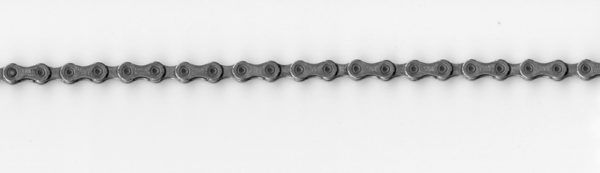
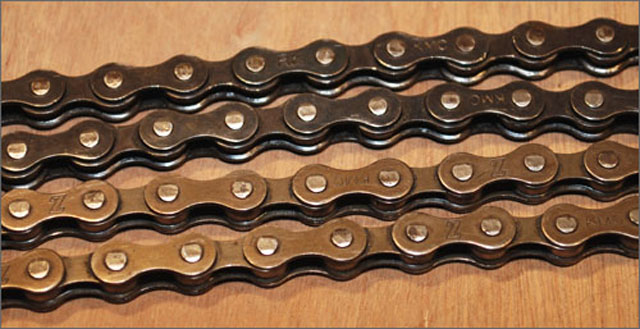
A bicycle chain is simply a roller chain that transfers the power you put into your pedals to the wheel of your bike. The harder you pedal, the faster your bike goes. Of course, that’s an oversimplification but that is essentially the role your bike chain plays in how the bike functions. [Read more…]

  • Facebook
  • Tumblr
  • Twitter

Latest Articles

JOIN Cycling: A New Training Platform for Cyclists

May 27, 2024 By Eric Lister

cold exposure

The Benefits of Cold Exposure for Cycling & Life

June 13, 2023 By Eric Lister

hill climb

The Ultimate Hill Climb Training Guide

May 31, 2023 By Eric Lister

shoulder pain cycling

How to Treat & Avoid Shoulder Pain While Cycling

April 12, 2023 By Eric Lister

psoas stretch

The Importance of the Psoas Stretch for Cyclists

April 6, 2023 By Eric Lister

cycling neck pain

The Ultimate Guide to Cycling Neck Pain: Causes and Solutions

March 21, 2023 By Eric Lister

Useful Info

  • Contact
  • Finally, A Global Cycling Club That Is Focused On Community And Love Of Cycling!
  • Privacy Policy
  • Share Your Story!
  • Terms And Conditions Of Use
  • Welcome to I Love Bicycling
  • What Happened When I Stretched Every Day For a Month

Recent Posts

  • JOIN Cycling: A New Training Platform for Cyclists
  • How to Hang Bikes in Your Garage: 4 Inexpensive Options
  • Gravel Bike Vs. Road Bike: Which One Is Better For You?
  • The 6 Types of Mountain Bikes & How to Choose the Best One for You
  • What Is a Touring Bike Good For? 5 Benefits We Know You’ll Love

Search I Love Bicycling

Connect with Us

  • Facebook
  • RSS
  • Tumblr
  • Twitter

Copyright © 2025 · Magazine Pro Theme on Genesis Framework · WordPress · Log in