• Training
    • Injury Prevention
    • Training Tips
  • How To
    • Bike Fit
    • Gear
  • Nutrition
    • Nutrition Tips
    • Weight Loss
  • Repair
  • Reviews
  • Stories
    • Funny Stories
    • Jokes
    • Quotes
    • Videos
    • Funny Videos

I Love Bicycling

I Love Bicycling is a website that is geared towards cycling for beginners with road cycling tips, training articles, nutrition tips, weight loss, how to’s and bike repair articles.

Reviews

  • Funny Stories
  • Jokes
  • News

The Best Cycling Podcasts

December 20, 2018 by Sarah Lauzé

How do you stay motivated and stoked to get out and ride? Podcasts can be a great resource because you can listen to them anytime, anywhere. If you haven’t already jumped on the podcast train, it may be time. There are a ton of cycling specific programs that can help you learn more about the sport, your bike and how to best train. Rather than getting sucked into the popular world of true crime podcasts, join the cycling community instead! It’s the perfect thing to listen to on your commute or while cleaning, cooking, doing maintenance, lazing around and pretty much anything else. Here are some of the best cycling podcasts to get you started.

Best Cycling Podcasts

4 Of the Best Cycling Podcasts

The Cycling Podcast

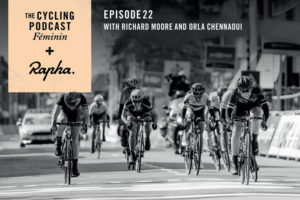
Okay, The Cycling Podcast seems obvious. The name may be a little on the nose, but the production and quality of their content is one of the highest in the game. Sponsored by Rapha, each 30 minute weekly episode features authors and journalists Richard Moore, Lionel Birnie and Daniel Friebe. UK based, The Cycling Podcast cover the world of professional cycling with race reports, speculation and cycling news.

The Slow Ride Podcast

Another show about racing, but with a comic slant. The Slow Ride Podcast gets funny sarcastic, and a little weird sometimes, but it’s a ton of fun to listen to. So, if you want to take a breather from the seriousness that can be the cycling world, this show is a great breath of fresh air.

Velocast

As one of the longest running cycling podcasts, Velocast is just two guys who took their passion for watching and talking about cycling and made it into a show. A pro-level commentary on all things cycling, it’s the perfect blend between facts, knowledge and banter. You have the option of limited free shows, or you can subscribe to gain access to a ton of material.

The Paceline Cycling Podcast

The Paceline is a cycling podcast aimed at roadies, mountain bikers, commuters, cyclocross enthusiasts , those who grind gravel—indeed anyone who claims cycling for their own. The bicycle is more than a thing, discusses the bike’s place in society. The hosts love bike gear so expect some banter about what works and what does not on the road and trail. The show is backed by the Fatcyclist and Red Kite Prayer.


The Best Step Through Bikes for City Riders

August 28, 2018 by Sarah Lauzé

If you’ve ever struggled to get your leg up and over your bike, then you understand the reason for step through bikes. More and more manufacturers are coming to realize that there is huge market potential for easy to board bikes. Typically, even the best step through bikes suffered from weight bearing limitations, but with recent design breakthrough, they can make cycling more accessible to a lot of people.

What Are Step Through Bikes?

Step through bikes are pretty self explanatory. They are bikes with no top tube, making them easy to “step through” to mount. They often use a pedal forward design, with the pedals slightly forward of the seat tube. This makes it easier to maintain the proper seat to pedal distance, while also being able to put their feet flat on the ground while remain seated. The wheelbase will be a bit longer, which can effect handling, but it enhances the overall comfort.

Pro and Cons of Step Through Bikes

Historically, step through bikes have been regarded as women’s bikes as they allow the rider to wear a dress or skirt. However, more and more seniors, commuters, and heavier riders are opting for the easy to mount option. If you’re not quite as flexible and limber as you once were, then it’s a great option to keep you riding.

The biggest disadvantage of a step through frame is the weight, strength and stiffness. The regular diamond shaped design of most bikes is so widely used because it is the better design. The top tube gives the frame strength and stability, while allowing for the use of lightweight materials. To achieve the same strength, step through bikes have had to use heavier materials.

For city cruisers and commuters, the step through design can actually make the most sense. Stopping at stop lights and being able to remain seated while placing you feet on the ground can be plus for a lot of riders. Much more common in Europe, finding a step through bike can be a little tough depending on where you live. However, a lot of manufacturers will ship, so here are some of the best step through bikes.

The Best Step Through Bikes

Public C1

$395

If you live in a relatively flat area, the single speed Public C1 can be a great affordable option. Under $400, it has the iconic European style perfect for comfortable cruising.

Bike ID Step Through

$800

The Bike ID Step Through is made of Hi-Ten steel tubing, weighing in at 15.5kg or 34 lbs. It’s equipped with both a hand brake and a foot brake. Both brake and lever is made of aluminum, and due to a smart quick-release you can remove and replace the wheel without having to change the break settings. It is strong and durable, and will last through years of city cruising!

Shinola Bixby

$1950

The Bixby is offered in both a classic men’s and women’s frame design, with thoughtful touches like gender-specific saddle design and proportional geometry. The Bixby riffs off the fun look of the curved top tube, but improves on the fit and function with nimble frame geometry, a Shimano 3-speed internal hub and disc brakes. The Bixby is more of a hybrid between the step through and diamond design, giving the rider the best of both worlds.

Electra Amsterdam Royal 8i

$1400

The Royal 8i is a lightweight aluminum premium-edition Dutch bike: well-bred for stylish luxury and yet practical everyday cycling. Top-of-the-line Shimano Nexus 8-speed internal hub, smooth and powerful front and rear roller brakes and durable tires with Kevlar puncture-resistant casing are a few of the special upgraded features that make the Royal 8i worth every penny.


Best Road Bike Pedals

July 2, 2018 by Sarah Lauzé

When you’re riding your bike, you make contact with it at three main points: the handlebars, the saddle, and the pedals. As your legs are working to drive the bike forward, the road bike pedals are arguably one of the most important components on a bicycle.

When we talk about road bike pedals, we are generally talking about the clipless cleat and shoe system. There are over the toe straps that can work great for some, but for the purposes of this article we are referring to the clipless (or strapless) system.

What are Clipless Pedals

Clipless pedals have a spindle just like a normal platform pedal, but the plastic or metal platform is shaped in a way to allow the second part of the system, a matching cleat, to snap into it. A spring-loaded mechanism then secures the cleat in place so it doesn’t slide around or release. A cleat is then attached to the cycling shoe, made specifically for these cleats to be attached to the bottom via bolts.

How they work

On the pedal there is a spring mechanism that holds the cleat to the pedal. To clip in, line the cleat up with the pedal and then push down, just like a ski binding. To release the shoe from the pedal, a simple twist of the heal outward releases the cleat.

Why go clipless?

Why go clipless? Clipless pedals with cycling shoes is the most efficient and comfortable system out there when it comes to road biking. The stiff sole of the cycling shoe provides a rigid platform to transfer power from your legs to the drivetrain and propel the bike forward. Softer shoes lose some of that power as the flexible sole deforms around the pedal (and also makes your feet sore).

As well as having stiff soles, being clipped in encourages proper pedalling technique, using power through every part of the pedal stroke. Not only are you pushing down, but you are also pulling up to complete the 360 degree motion, making the switch to clipless pedals well worth it.

What to look for when buying pedals

  • Cleats – The majority of  road cycling cleats are three bolt (SPD-L), with two bolt (SPD) being more appealing for commuting, touring, and mountain biking. Some cleats are a compatible with both.
  • Tension Adjustment – When you’re first switching to clipless pedals, the most intimidating thing is not being able to get unclipped quickly when you need to stop. The slow motion topple over is almost a right of passage, but it can be lessened by decreasing the tension. Be sure to get pedals that allow you to adjust this tension, starting low and increasing the tension as you become more confident.
  • Float – Float refers to the wiggle room you have while clipped into the pedal to get into the most comfortable position for your legs. Most pedals have about 3-9° of float, but keep in mind the more float you have the more you will have to twist your foot to release. Some pedals are zero float, but you will want to make sure you’ve had a detailed bike fitting before locking in with zero wiggle room.
  • Stack height – Stack height is the measurement from the middle of the pedal axle to the bottom surface of the shoe. The smaller the stack height, the more efficient your pedaling will be as your foot is closer to the axle.

The Best Road Bike Pedals

Best All-Round Pedal: Shimano Ultegra PD-R8000 SPD-SL Pedals

Price: $120

Before going into any of the features that make this pedal great, the ease of use is its greatest selling point. They require little to no maintenance, are durable,  and remain easy to clip in and out of even when mud and snow is involved. They also hang well when unclipped to make for a quick and easy clip in.

With a carbon composite body, these pedals are a great choice for competitive and casual cyclists alike. Evolved from the Pd-6800, the R-8000 has a 0.7mm lower stack height and a lighter weight at just 248g.

Most Adjustable Pedal: Speedplay Zero Pedals

Price: $189

If you struggle with knee pain, then these are the pedals for you. The twisting motion to release the pedal can be painful on the knee joint, so the Speedplay Zero allows the widest range of tension adjustment to ensure this isn’t a problem. All three foot-axis adjustments can be set independently of each other for a precise and comfortable fit. The locking mechanism does not rely on spring tension for security, so entering and exiting Zero pedals is easy, and they are dual-sided entry to allow for an easy clip in.

Most Budget-Friendly Pedal: Shimano PD-R550

Price: $56

The Shimano PD-R550 are the perfect pedal for cyclists looking to transition to the clipless system. Not only are they extremely affordable, but that have a wide platform that feels more like a traditional platform pedal while giving you the efficiency of being clipped in. There is a wide range of tension adjustments so you can start with a lower tension and build up your confidence. Made from a resin body with a stainless steel cover, they are durable and have a large entry point to keep from struggling to get your foot in just the right position.

Pros and Cons of Tubeless Tires for Road Cyclists

May 14, 2018 by Sarah Lauzé

Tubeless tires have been a mainstay of the mountain biking world for years, and have inevitably made their way into road cycling as well. With mountain biking, tubeless tires allow riders to run their pressure much lower, providing enhanced surface area and grip without the risk of pinch flats. Road tires, however, are more efficient when run at a higher pressure, so what is the benefit of going tubeless?

Traditionally there have been two main options for road cycling tires: clincher and tubular. Clinchers are the best option for the majority of riders, as they are easy to use and fix by swapping out or repairing the inner tube. Tubular tires are lighter and are used by a lot of racers, but unless you have a support vehicle following you on every ride, then replacing a tire is a painfully long and technical process.

Now there is a third option with tubeless tires, but are they worth the leap?

Pros and Cons of Tubeless Tires for Road Cyclists

How do tubeless tires work?

Pros and Cons of Tubeless Tires for Road Cyclists

As the name suggests, tubeless tires do not have an inner tube, and are setup similar to a car tire. The open rubber tie sits firmly on the wheel’s rim, with the air sitting in the cavity between the rim and inside of the tire. In addition, a liquid sealant is used inside the tire to preemptively plug any small cuts in the tire without losing pressure at all.

Tubeless wheel setup

The nice thing about tubeless wheels is that they can be used with both a tubeless tire and the typical clincher (inner tube) setup. The shoulder in the inner rim will have a much more pronounced recess that the tire bead fits securely into (see diagram), rather than the traditional U-shaped rim bed on clincher wheels.

Tubeless tires themselves are designed with a tougher bead to provide an immediate seal with as perfect airtight fit. If you try to fit a tubeless tire on a clinched rim, it will come off as you add pressure.

Are tubeless tires worth it?

Pros

  • Speed – clincher tires have a level of friction between the tube and the tire that tubeless tires eliminate, lessening rolling resistance and making them faster.
  • Less flats – The tubeless setup rules out pinch flats completely, and dramatically lessens the danger of blowouts with the liquid sealant. This has a huge impact on the number of flats you’re likely to experience. Plus, if you do have a flat out on a ride that the sealant can’t handle, you can use a tube to get you home.
  • Comfort – Tubeless tires can be run at a lower pressure (dropping about 15-20 psi) without sacrificing performance. This can enhance your corner grip, traction, and overall comfort. You can even venture off road with the tires being a lot more forgiving than if they were running at full pressure.

Cons

  • Difficulty in fitting – As a system that depends on tight seals and high pressure, installing or removing the tire can be a difficult and frustrating job. So, while the likelihood of flats may be reduced, the process to fix it in the case of total failure can leave you swearing on the side of the road. You may even need an air compressor to get a proper seal.
  • Weight – Tubeless tires are largely heavier than a clincher setup, with thicker sidewalls that add weight.
  • Racers don’t use them – This may or may not matter to you, but racer’s do not use tubeless because of the added weight with minimal gain. However, for the recreational cyclist, the lower risk of flatting may be worth the sacrifice.

Tubeless tires are by no means taking over the roading cycling world (as they have with mountain biking), but as technology advances we may see them grow in popularity. Having tubeless-ready wheels is a great way to go, as it leaves the choice up to you whether you want to stick with clinchers or give tubeless a try.

The Difference Between Freewheel and Cassette

April 21, 2018 by Sarah Lauzé

If you’ve been using the two terms (freewheel and cassette) interchangeably, don’t worry because you’re not alone. If you don’t know which you have on your bike, you can end up wasting a lot of money due to the error. We’re going to help remove some of the confusion by explaining the difference between freewheel and cassette freehubs.

freewheel and cassette

Freewheels (for Threaded Hubs)

Traditional rear hubs have a standardized set of threads that a freewheel or sprocket cluster can be screwed onto. This meant any brand of freewheel could be mounted on any brand of hub. The extractor splines do not turn when the sprockets are spun backwards.Freewheels come with sprockets bolted together, without possibility of swapping them. Pretty much all bikes made through the late 80s used this system.

Cassettes & Freehubs

Over the past few decades, the cassette replaced the conventional threaded rear hub. This newer style hub works so well that they have replaced the traditional freewheel and have become the new standard for contemporary road bikes. One of the major differences between a freewheel and a freehub is the location of the coasting mechanism

It incorporates the ratchet mechanism into the hub body, so you can replace the sprockets only, rather than the ratchet mechanism. Unlike the freewheel and threaded hub system, the lockring splines will turn with sprockets when spun backwards. Additionally, many  freehubs will have a distinctive bulge on the right end of the hub barrel.


freewheel and cassette

Whereas freewheels come with sprockets bolted together, without possibility of swapping them, cassettes come with loose sprockets that have spacing between them. Some cassettes do come with sprockets held together with bolts or rivets, but these are just for easier mounting – they can be removed without affecting functionality, so that individual sprockets can be swapped.

Which One Do I Have?

If you’re still not sure what you have on your bike, it’s possible to ID it by how it looks. Freewheel axles are typically recessed slightly into the axle. Cassettes are typically flush with the face of the gears, and you can see the splines, appearing as the rays of the sun around the perimeter. Freewheel axles may also show splines, but not as many as a cassette, and are recessed into the body deeper, around the axle itself, not the gear like a cassette.

Not all Freehubs have this bulge, but whenever you see it, you can be sure that it is, in fact, a cassette Freehub.

Buying and Changing Sprockets

Attention should be paid to this when buying and changing sprockets, so that the right ones are used. Freewheel is screwed onto the rear hub, while cassette is just slid onto the hub splines, held in place with a special lockring. The very end of the (rear) hub differs for each type, so it is easy to identify the standard, even before removing sprockets.

Easy Tricks for Tubeless Mountain Bike Tires

February 20, 2018 by Ryan Taylor

There is no doubt that the emergence of tubeless mountain bike tires and rims have changed the industry for the better. Riding tubeless enables the rider to run less pressure, giving the rider more grip, better ride feel and also less weight. Adding a sealant to the system adds an extra measure of security as many small holes or cuts in the tire can be patched internally by the sealant. Should a cut happen that is too large for the sealant to do its magic, then the rider can install a tube as normal to get home!

Tubeless Mountain Bike Tires

Tubeless has come a long way since the emergence of UST (universal system tubeless) over 10 years ago by Mavic and Hutchinson (two french companies, hence the french abbreviation). Now most rims and tires on the market can be made tubeless very easily, BUT there are few hidden tricks that both shop and home mechanics can use to make the system easier and more affordable.

Editors note: Most Bontrager rims do not apply to these tricks!

Gorilla Tape:

Tubeless rim companies have developed their own tape to ‘tape’ over the spoke holes on the inside of the rim causing it to be sealed. The valve is then poked through the tape. When sealant is added, the combination of these things is what makes the system air tight.

This tape is on the expensive side as it is designed to work with the specific rims. Many professional  mechanics, from local shops to World Cup DH, tend to use ‘Gorilla Tape‘. This tape is basically duct tape on steroids and can be bought on the cheap at any local hardware store. Not only that, it comes in many widths to accommodate different rim widths and tends to be thicker than the proper tape. In some opinions, it can lead to a more solid tire seal.

One of the main benefits to Gorilla Tape is how easy it can be found. Being able to buy it at Wal-mart at 10:30pm the night before a race is handy when you break a spoke on the course pre-ride! The key to it working well is to make sure the rim surface is clean for proper adhesion.

Tubeless Valves:

Like tubeless tape, specific valves are recommended to go tubeless. The main benefit of the specific valves is that the rubber base (what hugs the rim) is built up. This works to prevent sealant from going into the valve, clogging it, and also preventing it from pulling through. If you are on a very tight budget or in a pinch, you can cut up an old presta tube. This valve is very similar and can work. If you have a couple of extra bucks you can buy the proper tubeless valve.

Patching Tires:

We have all been there. Installing a new tire and cutting it on the first ride. Tubeless tires don’t come cheap these days and it is very frustrating to cut one before you get your moneys worth! It is possible to patch tubeless tires, but it is very tricky. It’s recommended to buy patches in the automotive isle of the hardware store as they tend to be thicker, more stiff, and generally cheaper. Your DON’T want a flexible, thin, patch with some stretch to it.

Be sure to clean the inner part of the tire thoroughly with alcohol and scuff it up with sandpaper. Once clean, buy the best crazy glue you can find. A favorite is ‘KLEBFIX’ from Wurth brand. It is a fantastic glue and doesn’t corrode rubber. Be careful as it will bond ANYTHING in a matter of seconds. Traditional patch glue doesn’t work well. Keep in mind, this is to get the remaining life from your tires. If you are concerned about it holding up before the biggest race of the year, you should error on the side of caution and buy a new tire.

The Rim-Pop technique:

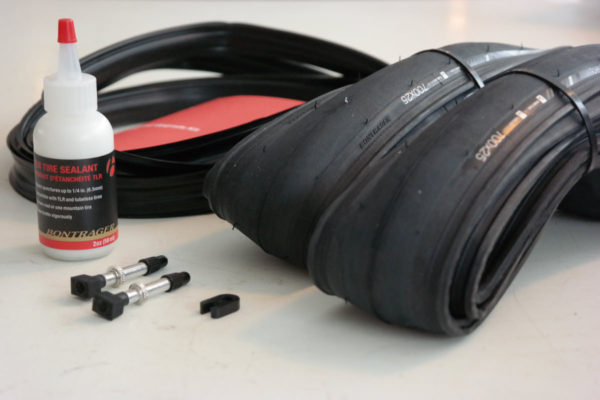
Lets face it: Tubeless is annoying to set up without a compressor. Thankfully Bontrager has come out with a pump that stores air inside of it causing a burst of quick air popping the tire into place. This is the definition of “Why didn’t someone think of this sooner?” type products.

However, there is another way! Once the tire, valve, tape, sealant are all installed, run your tire lever just under the bead of the tire, gently pulling it up onto the high spot of the rim (where it should sit when inflated). Run the lever all the way around the tire. You will feel it getting tighter and tighter as the lever approaches your starting point. From here, gently pull the lever out and do the same to the other side.

The goal here is to pre-set the tire on the high point of the rim so when you start pumping there are fewer places for the air to escape which aids in the force of the air ‘popping’ the tire into place so the sealant can do its magic.

You will almost always make a mess with this system, but it works. Once you get good at it, it usually works the first attempt. Again this is handy for those without a compressor or who happen to be at a race or on the road. Another good method is before you put the sealant in, install the tire with a tube and inflate it to seat the bead. Then carefully remove one side of of the tire to remove the tube, install the tubeless valve, and add sealant. Then do the above trick on the one side. Also wiping the bead of the tire with a warm, wet, soapy sponge will help the tire to seal.

The bicycle industry has come a long way from UST over the past 10 years. Tubeless tires are more accessible, more affordable, and much lighter compared to then. Is the ‘Stans’ system easier to use than UST? Depends who you ask, but these tips will help you out if you’re in a pinch.

The Best Cycling Computers

January 8, 2018 by Sarah Lauzé

Cycling computers can do a lot to enhance your training and track important aspects of your ride. Some riders are just curious, while others use the data as a means of motivation. So, whether you’re looking for an in-depth analysis of every second, or to simply track your routes to see where you’ve been – there’s a cycling computer for that.

There are an overwhelming amount of cycling computers on the market, with both brands and models coming and going each year. So what makes one better than the other? Well, that depends on what you want it to do.

What kind of cycling computer is best for you?

If you’re not interested in chasing any Strava segments or going into detail about every aspect of your cycling, then you don’t need one of the top of the line cycling computers. In fact, a basic unit will most likely provide you with all the information your want and need.  Most of them will include your distance, speed, and time. Most of these do not include GPS and do not allow you to transfer data to a computer or tracking service.

They are simple, easy to use, and effective if you’re just looking for those three areas of information. They will also be smaller, lighter, and often have better battery life than the pricier performance models.

Sigma BC 9.16 (Wireless)

Cycling Computers

Price: $40

The Sigma BC series has been a go-to for years when looking for simple reliability. The new BC 9.26 also includes some bells and whistles that previous models did not. The basic features include current speed, average speed, trip distance, total distance, ride time, total ride time, maximum speed, and calories. The unique thing about this model is there is an optional USB docking station, so you can transfer ride information to from the computer to your Mac/PC to keep track of your rides.

Cateye Velo 9 (Wireless)

Cycling Computers

Price: $26

The Cateye Strada includes all the basic stats, plus a few bonus features, all in a slim and lightweight design. On the display you can scroll through current, max, and average speed, your total distance, trip distance, elapsed time, calories burned, and a clock. The Strada is also a great computer to switch between your road and mountain bike, as there is an option to pre-program more than one bike with different wheel sizes.

This model is known for its long lasting battery life (upwards of three years) and it’s waterproof seal.

GPS Cycling Computers

The more complex GPS and ANT+ interface cycling computers can provide a lot more features. They will include things like mapping and navigation, while collecting information from heart rate monitors, cadence sensors, and power meters. They also track your ride using an internal GPS, so you can see your exact route.

With these cycling computers you can look at your time on any route or segments, and them compare to other users through Strava.

Cycling Computers

Edge 520

Cycling Computers

Price: $249-$299

The Edge 520 is great for training with it’s small size and ease of use, but it is not a touchscreen and therefore not as good for navigation. The Edge 520 led the way with new performance and power analysis, including Time in Zone, FTP tracking, cycling specific VO2 and recovery dynamics, but both the 820 and 1000 have since added these features. That being said, if you aren’t in need of much help with navigation, the 520 is a great budget-friendly option. It’s also great for people who prefer buttons over touch screen, if you ride a lot in the rain or with gloves on, but it comes down to personal preference.

Wahoo ELEMNT GPS

Cycling Computers

Price: $330

The Wahoo ELEMNT connects to all your peripheral sensors, as well as connect to your smartphone via Bluetooth. The in-unit menus are tedious to get through for set up, but are a breeze when connected to and operated through your smart phone. So unless you have a smartphone, either an iPhone 4s or newer or android 4.3 or newer, this isn’t the unit for you. That being said, it is a stand alone GPS unit. Once connected to your phone it’s simple to customize settings, configure workout pages, and link to popular cycling apps and wireless sensors. Post-ride, the app stores workout history can automatically sync to your linked third party Apps. The ELEMNT can also deliver on-screen alerts for phone calls, texts, and emails if you choose. The high contrast black and white screen is a selling point, making it easy to see even in sunlight.

Edge 820 GPS

Cycling Computers

Price: $395

The Garmin 820 is the hybrid, combining the touch screen of the Edge 1000 with the smaller size of the 520. So, is it the best of both worlds? Almost. The computer is easy to use, uploads your rides directly to Strava via your phone or wifi, and you can see incoming calls and texts while you ride. It’s downfall is the navigation. If you’re used to the larger screen of the Edge 1000 or even your smartphone, the 820 will take some getting used to. It’s not as if the navigation is terrible, but the touchscreen is much smaller, and can there seem a little cramped.

Giant NeosTrack

Cycling Computers

Price: $180

With over 30 hours of battery life, 2.6 inch screen, five button operation, and 80 functions, the Giant NeosTrack is a great budget friendly option. It’s no-nonsense, with a focus on functionality rather than flashy selling features. It can record all the standard metrics, as well as many of the more technical fields like TSS, normalized power, and L/R power. It is fully compatible with your smartphone via Bluetooth, but it a little slow when transferring ride data. Overall, it’s a great unit if you’re more concerned with data, and aren’t too worried about getting text notifications while out on a ride.

Edge 1000

Cycling Computers

Price: $299-$599

There has actually never been a better time to buy the Edge 1000, as the price has decreased with the recent release of the 1030. So far, the response to the upgrade as had mixed reviews, with most claiming it’s not worth the extra couple hundred dollars. For years the Edge 1000 was Garmin’s premium model, with the large screen making it great for training and navigation. When paired with your smartphone, the Edge includes including live tracking, incoming call and text alerts, social media sharing, weather, wireless uploads and sending/receiving courses and segments. As soon as your ride is complete, the data can be automatically sent to Garmin Connect via Bluetooth or Wi-Fi. Really, there’s not much this computer can’t do, but the battery can become an issue on long rides (one aspect that was improved with the 1030).


Your Smartphone

Why not just use your smartphone? With the Strava app, you can track data similar to on a GPS unit, and there are even ANT+ receivers for smartphone to integrate data from heart rate monitors, power meters, and cadence sensors.

The main issue will be your battery life. Most phones will not last a long ride while running GPS the entire time. Also, unless you have a handlebar mount, you won’t be able to see the screen as your riding, which is one of the main perks of a cycling computer.

5 Of The Best Cruiser Bikes

December 13, 2017 by Sarah Lauzé

You may have seen them around your city, cruising along like they haven’t a care in the world. Coming out in fleets around beaches in the summertime, cruiser bikes offer a different take on cycling as a means to urban adventure. No, it won’t replace your carbon road bike anytime soon, but they are a ton of fun.

The beauty of cruiser bikes is simplicity– they’re relaxed and casual in both design and essence. Cruiser bikes are designed for those who want a comfortable ride, functionality, and, of course, to look good while riding. You may not get anywhere fast, but you can hop on, take in the scenery, and see where you end up.

5 Of The Best Cruiser Bikes

Things To Look For In A Cruiser Bike

  • Gears – Many cruiser bikes are single speed, meaning that you’ve got one gear to get you around. This might be fine if you’re routes will be largely on flat terrain, but can be an issue if you hit a hill. So, if you want more flexibility from your cruiser you’ll want to get a multi-speed.
  • Coaster Brakes vs Hand Brakes – The coaster brake is featured on classic single speed cruisers. While they may have freewheeling abilities, when back-pedalled they will engage the brake after a fraction of a revolution. Hand brakes are what you may be more accustomed to from road or mountain biking.
  • Steel vs Aluminum Frame – Steel frames can be a great budget-friendly option, but they are slightly heavier and are more susceptible to rust than their aluminum counterparts. So, if you don’t mind spending a little more, aluminum will probably be the better option, as they are more durable and are often equipped with higher quality components.
  • Style – It’s okay to admit it, how attractive the bike looks will weigh into your decision. So, think about what you want from a cruiser. Do you want it to be subtle and functional, or colorful with a basket and tassels? From chopper styles to the traditional curvy design, there are a ton out there to choose from.

5 Of The Best Cruiser Bikes

Firmstrong Urban Beach Cruiser

5 Of The Best Cruiser Bikes

Price: $165

This classic curvy design is available in a single or three speed cruiser, boasting a smooth and simple ride. Sized for women from 5-6 feet tall, it makes for a smooth ride with aluminum wheels and a slight curve in the fork that helps with steering and shock absorption. The single speed option makes for a simple ride, with no cables hanging off the bike, and you can maintain a consistent cruising speed from 3 to 15 miles per hour.

Huffy Nel Lusso Women’s Cruiser Bike

5 Of The Best Cruiser Bikes

Price: $118

This classic steal frame includes matching fenders, a rear luggage rack, a kickstand, a front basket, and even a cupholder. For someone looking to invest in their first cruiser, the Huffy Nel Lusso is function, plus it looks great. There is only a single speed available.

Schwinn Men’s Sanctuary

5 Of The Best Cruiser Bikes

Price: $152

The Schwinn Sanctuary 7 cruiser equipped with a Schwinn steel cruiser frame and fork for comfortable riding, the full fenders help keep the water off you in the rain and the rear rack can be used for carrying cargo. The Shimano 7 speed rear derailleur with twist shift makes for simple quick gear shifting–the best of both worlds.

Sixthreezero Beach Cruiser Bicycle

5 Of The Best Cruiser Bikes

Price: $299

Where sophistication meets functionality. Build around a sturdy steel frame, the cruisers handlebars are extended outwards a little more than most models. This creates an even more relaxed riding position, and easy handling. There are single, three, and seven speed version available of this model.

Critical Cycles Chatham Men’s Beach Cruiser

5 Of The Best Cruiser Bikes

Price: $219

Inspired by the dawn of feel-good surfer culture, Critical Cycles new beach cruiser line is streamlined for little to no maintenance and impressively straightforward riding. Available in single, three, and seven speeds, the Chatham is practically unstoppable. With a hand-built steel frame, cushy grips on high handlebars, and a classic surf paint job, you’ll be riding around on an impressively comfortable and shock-absorbent cruiser.

If you’re looking for a simple commuter, or a way to get to the beach next summer, a cruiser bike is a great option. Not only do that look really cool, but they a ton of fun to ride. For more on commuter bikes, check out “The Best Commuter Bike – Matching Your Needs to a Bike.”

5 Of The Best Cycling Power Meters

December 6, 2017 by Corey Davis

cycling power meters

What is a Cycling Power Meter?

Cycling power meters have been a common tool used to gauge training amongst professional cyclists for years, but really only within the last decade have they become affordable for the everyday cycling enthusiast. So what exactly is a power meter? Cycling power meters are strain gauges that measure the amount of displacement of an object, say your crank, which is imputed into an equation that gives you the amount  of work done which when combined with time gives you power measured in joules/second or watts. This work energy expressed in watts determines how much power a rider produces at any given second within a ride.

Why are Power Meters Good to Ride With?

The benefit of training with a power meter is that it can show how much power the rider is putting down to help track progress. It is a better measurement than heart rate to track training. Heart rate fluctuates a lot, whereas power is always consistent, but they are really best used together. Cycling power meters can help you also ride a much smoother pace throughout an entire ride, climb, or interval. You can pick a number and stick to it, whereas heart rate will creep up throughout the ride, hill, or interval. Cycling power meters are such a great training tool; soon you can expect to see them coming standard on bikes straight from the manufacture. Below is a list of 5 of the best cycling power meters and what makes them different.

5 of the Best Cycling Power Meters

PowerTap

PowerTap is one of the only companies that offer three positions for power to be read. Originally, PowerTap sold the rear hub power meter and now they offer chainrings and pedals to read power. All three are useful in their own way. The rear wheel is great because you can transfer it from bike to bike easily, but when race day comes, the race wheels replace the power meter.

SRM

SRM cycling power meters are certainly the most common amongst top professionals. The SRM is crank based and has its own head unit compared to most other brands that rely on Garmin head units. SRM claims to have a margin of error of less than 1%. SRM is the original power meter and focuses on quality; the price is certainly reflective of that.

Stages

Stages cycling power meters are in the left crank arm, and dependent on what drivetrain a rider is using. For instance, if a rider uses Shimano Ultegra and purchases a Stages, they would receive an Ultegra left crank arm to replace their original one. The only difference is that there would be a small black piece attached to the inside of the crank arm. Stages is certainly one of the more affordable power meters out there, and installation and setup is a breeze.

Pioneer

Pioneer power meters are crank based and have dual strain gauges to measure both left and ride side power. Pioneer offers complete cranksets and installation kits for user supplied cranks, i.e. you already have a DURA-ACE crankset and don’t want to buy another.

Garmin Vector

Vector™ 1

Garmin Vector pedal pods fit on your crank, taking only 15 minutes to install and calibrate. The pods do left/right pedal analysis, along with a feature called Pedal smoothness, to see where there are soft spots in your pedal stroke. These pedals are run on a simple CR 2032 battery, and the new Vector 2 design makes replacing the batteries much easier.

The Best Cycling Gifts for Him

December 2, 2017 by Sarah Lauzé

Do you have a cyclist on your gift list? Or are you one yourself? Either way, it can be tough to think of a cycling gift for someone who most likely has everything they need. Luckily, cycling includes a long list of useful gadgets that can make for great gifts or stocking stuffers. Plus, the right amount of anything to do with cycling is n+1, with ‘n’ being the current number.

If you’re looking for gifts for the female cyclists in your life, check out “10 Best Cycling Gifts for Her” or “50 Of The Best Cycling Gifts” for a larger range of products.

Water Bottle

You can never have enough water bottles, between losing them and your kids stealing them. Camelbak water bottles are particularly great as they won’t leak and make it east to squirt water into your mouth while your on the bike.

Bicycle Calendar

Everyone needs a calendar, so it may as well include inspiring photos to get them out riding. There are a ton of options, from road cycling to mountain biking, and it’s just in time for the New Year!

Socks

Socks don’t have to be boring! Pick up some fun socks that are also a great fit for in a cycling shoe and you can’t go wrong.

Beginner tool kit

If you own a bike, then you need to own at least the basic tools. This beginner tool kit by Park Tool has everything you need to get you through basic maintenance and repairs. For a step-by-step guide to get you going, check out “101 Best Bike Repair and Maintenance Tips.”

Go Pro

Do you know someone who’s always fumbling with their phone out on a ride trying to get the perfect footage? The GoPro Hero series has made getting sports video on the go simple and fun. With specific handlebar or chest mounts, you can take both photos and video with a click of a button. Well worth the price tag, this one will be sure to please.

Patch Kit

Patch kits are something you can use up in a hurry if you’re riding a lot, so a spare or two is always a good idea. Find a kit that includes both the patches and a tube of self-vulcanizing fluid to ensure they can make it home with no issues after a flat.

Multi Tool

A good multi-tool can be the difference between a minor roadblock in your ride or a long walk home. If your chain breaks mid-ride and you don’t have a multi-tool with you, then you could be in trouble. For some things to think about before purchasing a multi tool for yourself or someone else, check out “Best Biking Multi-Tools 2017.”

Gloves

Cycling gloves are great for those early morning commutes or winter rides. As the hands are essentially breaking the wind, they can easily become cold and numb. Be sure to get a pair with a breathable and padded palm for ultimate comfort.

Cliff Bars

The original “better tasting energy bar,” cliff bars are a staple in many cycling kits. Perfect for stuffing into stockings, or as a present all their own, you can be sure these bars will sustain many rides.

Cleaning Kit

Although splashing some water on your bike will take off some of the more noticeable dirt, doing a deep clean on a bike every so often can go a long way in ensuring its longevity. Brushes can make this a whole lot easier, especially when it comes to cleaning the chain. Check out some of the best degreasers as well to include with a cleaning kit.

Bike Light

Cycling at night may seem daunting at first, but with a proper light there’s no need to hide inside. This can be a perfect gift to get someone outfitted for cycling safely at night or on their daily commute.

Event Entry

It may not be the best idea to buy someone an entry into a race you’re not sure they want to do. However, if they’ve been talking about doing a century ride forever, you could buy them and yourself entries and train together!

Garmin Cycling Computer

Garmin has come a long way in the past few years, with Bluetooth integration, in-ride challenges through Strava live segments, and more fields of information than you can imagine. It is an invaluable tool for the cyclist that diligently keeps track of ride data.

Strava Premium

The free version of Strava is great on its own, but the premium membership includes features like: personalized coaching, live feedback, and advanced analysis. You can buy a month’s trial for someone, or go ahead and get them a year’s membership.

« Previous Page
Next Page »
  • Facebook
  • Tumblr
  • Twitter

Latest Articles

JOIN Cycling: A New Training Platform for Cyclists

May 27, 2024 By Eric Lister

cold exposure

The Benefits of Cold Exposure for Cycling & Life

June 13, 2023 By Eric Lister

hill climb

The Ultimate Hill Climb Training Guide

May 31, 2023 By Eric Lister

shoulder pain cycling

How to Treat & Avoid Shoulder Pain While Cycling

April 12, 2023 By Eric Lister

psoas stretch

The Importance of the Psoas Stretch for Cyclists

April 6, 2023 By Eric Lister

cycling neck pain

The Ultimate Guide to Cycling Neck Pain: Causes and Solutions

March 21, 2023 By Eric Lister

Useful Info

  • Contact
  • Finally, A Global Cycling Club That Is Focused On Community And Love Of Cycling!
  • Privacy Policy
  • Share Your Story!
  • Terms And Conditions Of Use
  • Welcome to I Love Bicycling
  • What Happened When I Stretched Every Day For a Month

Recent Posts

  • JOIN Cycling: A New Training Platform for Cyclists
  • How to Hang Bikes in Your Garage: 4 Inexpensive Options
  • Gravel Bike Vs. Road Bike: Which One Is Better For You?
  • The 6 Types of Mountain Bikes & How to Choose the Best One for You
  • What Is a Touring Bike Good For? 5 Benefits We Know You’ll Love

Search I Love Bicycling

Connect with Us

  • Facebook
  • RSS
  • Tumblr
  • Twitter

Copyright © 2025 · Magazine Pro Theme on Genesis Framework · WordPress · Log in