Bike seat position is a personal thing; it’s delicate. Professional roadies obsess over seat height down to the half-millimeter. Dialing-in your bike seat position can require hours and hours in the saddle. The relationship between saddle and seat posts is critical, and it shouldn’t be taken for granted.

Bike Seat Position – It Changes
Dialed-in, bike seat position can be difficult to ascertain and maintain and even when you do get it right, it can change due to a plethora of factors and variables. Sometimes you run the same seat height for thousands of miles only to discover that your body has changed, requiring a change in saddle, seatpost, or both. Sometimes you have a nagging pain in your back, thigh, calf, or other body part that won’t go away. Sometimes you realize you’ve been running the wrong seat height all along because you just haven’t given it enough thought.
Seatpost Basics
Starting with a few basics is important if you’re new to cycling. All bikes have a seatpost. The seatpost is the tube that connects the frame of the bicycle to the saddle where you sit. Seatposts are vertically adjustable, allowing the frame to accommodate riders of different sizes.
All of the above reasons to change or alter your saddle height require a good, hard look at your seatpost, saddle, and how your bike fits your body. If things don’t measure up, moving your seatpost, or changing your saddle might not be enough for optimum performance regarding seatpost and saddle height. Use the methods provided in this article to find your ideal saddle height and set-back.

- Seatpost Diameter: Diameter is the first dimension to consider when changing, working with, or choosing a seatpost. It must correspond to the internal diameter of the seat tube on the bike’s frame inorder to have a snug fit. Most contemporary road bike frames accept a standard seatpost of 27.2-mm or an oversized 31.8-mm, but but other sizes between 21.15 and 35mm can also be found. Whatever the diameter, don’t try to force a big seatpost into a smaller sized seat-tube, or use a smaller seatpost in a frame that’s made for a larger diameter. Even if it seems like it fits, at some point it will come back to haunt you.
- Big Versus Small: Oversized posts add stiffness and strength for optimum power transfer as well as resistance to bending. More narrow posts however can be more comfortable over rough surfaces because they tend to have a little more cushion, primarily because they do bend and flex.
- Seatpost Length: Seatpost length is another variable. The amount of post emerging from the frame depends on frame size, geometry, and your own body dimensions. It’s important to have a minimum amount of post remaining inside the frame. Too much post extended above the frame makes for a leverage ratio that can crack or snap the post or actually break the frame itself. Most posts have a “minimum insertion” line etched on the shaft. It’s never a good idea to violate the minimum insertion rule. If your post is too long and bottoms out on the water bottle bolts, you can cut the post to shorten it. Just make sure you don’t cut it too short should you need to raise it in the future.
- Clamps and Saddles: The majority of seatposts rely on clamps designed to accommodate saddles with a dual rails underneath which use bolts to secure the top part of a clamp to the rails of the saddle. The clamp bolts can be loosened, allowing you to slide the saddle forward and back to your preferred position. Most seatpost clamps also adjust for tilt enabling you to fine-tune your fit with the nose up or nose down but level is generally ideal. The tilt adjustment is one of those that you should ride for a few days or even weeks. The right amount of tilt can seem uncomfortable at first, but later on, you will thank yourself for getting it in the most comfortable position.
Bike Seat Position
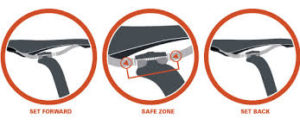
Setback
Setback is a design element of a seatpost. Setback refers to a bend or curve in the upper section of a seatpost that positions the saddle toward the back of the bike instead of directly above the center of the seatpost. It’s beneficial on frames with extremely vertical seat tubes, offsetting the rider from a vertical position. Some riders also prefer a setback because it puts them and the saddle in a more efficient position to utilize the quad and hamstring muscles more effectively.
Set Forward
Seatposts are available with a “set-forward” position. This position puts the rider with more of their torso over the pedals. These harder-to-find models are sometimes used on time-trial or triathlon bikes to provide maximum power on flatter terrain. If you’re concerned about setback, getting a professional bike fit or determining your fit on your own is highly recommended to determine how much setback is needed for your frame and body or if you and your bike even need setback on your post.
Dropper Post
It’s probably not an option for die-hard roadies, but some bikes with drop bars have borrowed technology from mountain bikers. The dropper post is an automatic seatpost that can be adjusted on the fly. The road bike version has two settings, one for cruising and one for descending. Flip a switch, and the dropper post lowers to lower your center of gravity to go faster on the downhill, with better stability, while staying out of the way to more easily move around; particularly ideal on the mountain bike. When you reach the bottom of a descent, another touch of the lever shoots the post back up to your traditional height for optimum performance on flat ground.
Saddle Variables
The right saddle can make a world of difference in bike seat position and comfort. When changing a saddle however, you want to maintain the exact same seat height. The distance from the rails to where your sit-bones lie on a saddle needs to be considered when changing a saddle because of all the variables in saddle design and type. A different saddle could actually raise or lower your position by almost a centimeter in either direction if you just leave the seatpost itself at the same height.
Adjust Versus Adapt
Generally speaking, most beginner cyclists set their bike seat position initially and then adapt to it but that’s not the best option. This is particularly true when changing from one saddle to another. The differences in padding thickness and design can throw off your bike seat position drastically. Changing saddles should always include taking a good hard look at seatpost height. If your new saddle is making you uncomfortable, don’t adapt to it before adjusting the seatpost to get your actual position exactly the same as the old one. Knowing how your seatpost is integrated with your saddle will allow you to change your position or saddle as needed to keep you the most comfortable on the bike.


 trying them out on your bike would be ideal. You want your feet to feel comfortable, but snug in the shoe. They shouldn’t be moving around within the shoe at all, as that will become very uncomfortable over a long ride.
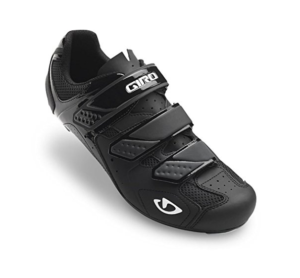


 chainring, and the rear to the smallest.


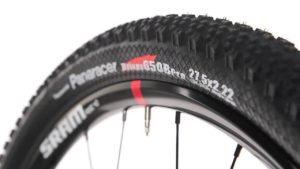

 heading out onto to slick, muddy trails, lower tire pressure will give you more grip and stability.