• Training
    • Injury Prevention
    • Training Tips
  • How To
    • Bike Fit
    • Gear
  • Nutrition
    • Nutrition Tips
    • Weight Loss
  • Repair
  • Reviews
  • Stories
    • Funny Stories
    • Jokes
    • Quotes
    • Videos
    • Funny Videos

I Love Bicycling

I Love Bicycling is a website that is geared towards cycling for beginners with road cycling tips, training articles, nutrition tips, weight loss, how to’s and bike repair articles.

Gear

  • Bike Fit

Removing a Bike Chain

January 11, 2016 by Wade Shaddy

removing a bike chain

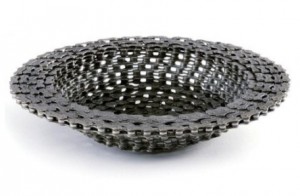
With some 800 million bicycles outnumbering cars by two to one, bicycles are one of the world’s most popular modes of transportation.  Bicycles are also the most energy-efficient machines —a cyclist burns about 35 calories per mile while an automobile burns 1,860 calories per mile. Bike chains, pound for pound, probably do more work than any single component on your bike. Removing a bike chain is going to be necessary at some point for cleaning or replacement.

Lots of Parts

The chain on your bike could possibly be the most important component on your bike, except for your heart and lungs of course. A standard chain is just about 56 inches in length. A typical chain has about 114 inner links and 114 external ones.

Why Remove It

The reasons to remove a chain include a bad link, broken link or simply to give the chain a bath. But in order to remove the chain, it’s nice to know a bit about how it’s made, and what to expect when you’re cleaning it, or replacing it.

How Chains are Made

Chains are made by a machine, or a bunch of different machines. The process starts with a punch press, cutting and pressing about 10,000 links steel inner links per hour, which look like a figure eight. Each of the links have been engineered accurately to interconnect, with smooth contours to travel easily across gears and through derailleurs.

Tested and Measured

Inner links are measured to confirm the space between the holes is precisely 12.7-mm. The test also gauges the diameter of the holes which must be accurate to within a fraction of a millimeter.

Baked and Hardened

Links are baked in an oven at more than 1500 degrees fahrenheit. They harden as they cool. Ceramic and silica powders are added with water to form an abrasive paste, and the links are shaken up to polish them smooth.

Bath Time

After a nickel-teflon bath, the inner links are ready to form into a chain, with the addition of outer links, which receive only a nickel finish, since they don’t travel over sprockets like the inner rings, and don’t require that smooth finish. The parts, including retainer rings and pins, spacers and bushings are then fed into an assembly machine.

Add Lube

The chain then takes a dip in hot oil to lubricate the links preventing squeakiness and wear down the road — that’s the tacky, somewhat oily feel on a new chain. Bearing all this in mind, it’s no wonder, with all these parts, assembled by a machine, that chains need removed and replaced from time to time.

Chain Maintenance

Chain maintenance is a controversial topic of bicycle mechanics. Is it really necessary to replace a chain every 1,000 or 2,000 miles? Chain durability is in direct proportion to riding style, gear, rain or snow, soil and sand, type of lubricant, lubrication method, and the condition of the gears it travels over. Everybody’s advice about chain maintenance and even cleaning is based on their own experience. Even professionals disagree when to remove or replace a chain. But when you’re ready, it’s a simple matter of the right tool for the job.

Removing a Bike Chain When it’s Wedged

If you’ve got a broken chain, just pull it from the derailleur — if it hasn’t already fallen off on the ground like a dead snake. It might be stuck, bunched up and wedged between gears or even the chainstay. If this is the case, don’t force it. Gently pull it loose, focusing on where it’s really stuck. Don’t resort to prying it out with tools unless you absolutely have to, and then be very careful not to bend anything. If you can’t pull it out, take the wheel off the bike which will relieve some of the pressure on the gears. If this still doesn’t work, you can remove the cassette with a cassette tool and then you should be able to remove the chain easily.
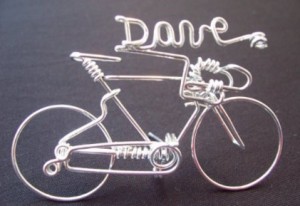
Use a Retainer

It’s a good idea to place a chain retainer on your chain before removing it from your bike. A chain retainer is nothing more than a small — about 2-inches long — piece of wire with two 90-degree bends on both ends — you can make one out of an old spoke. Slip the bent ends on the chain, over the link that you plan on removing. That way, when you break the chain, the retainer won’t allow the derailleur to snap back when the pressure is released. Use the retainer the same way when re-installing the chain. You also can just simply knock the chain off the front chain rings so it rests on the frame on the inside of the crankset. This will also take the tension off the chain.

Removing Chain Links

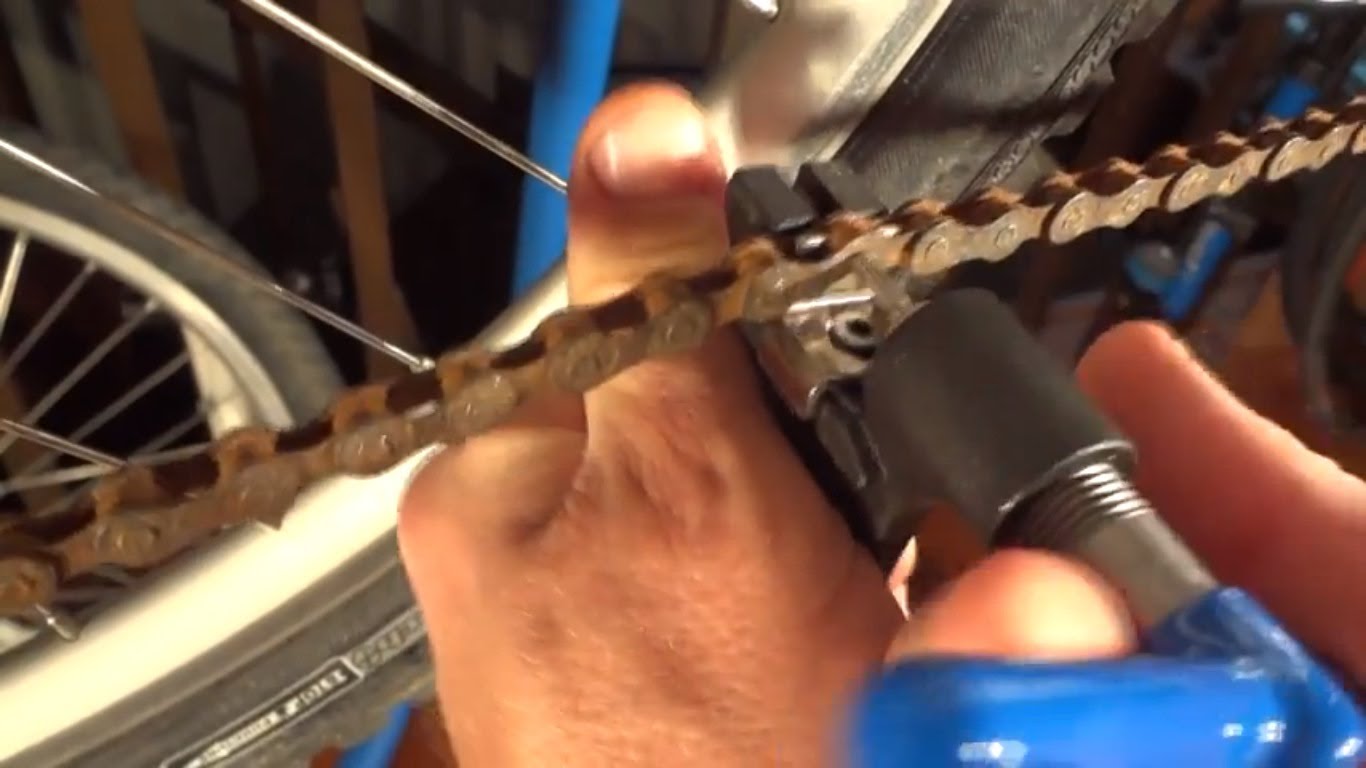
You’ll need a chain breaker tool to remove the chain for cleaning or replacement. It sounds complicated, but it’s really simple. The chain breaker tool is a small press. Look at it closely and you’ll see a small cradle, centered over a small hole. There’s a handle, or a bolt above the cradle that turns and pushes a pusher-pin against the pin on the chain to push out.

Employ the Chain Breaker

Fit the desired link into the small cradle, with the pin centered over the hole. It should fit snug, and the chain breaker is designed to help you get it centered. Twist the handle on the chain breaker to lower the drive cylinder directly onto the pin. Continue twisting — it typically takes five or six turns, to drive the pin out the bottom of the link. You should feel a slight bump when the pin releases from the link.

Re-use Versus Master Link

If you’re going to re-use the same pin when removing a bike chain and re-installing the same one, don’t push it completely out of the bottom link. Twist slowly until the link becomes loose and the chain is separated, but the pin is still stuck in the outer link at the bottom. It is not recommended to do this as that pin creates a week point in the chain. It is advised to use a new connector pin that easily installs into the link and breaks off on the other side to line up flush with the outer plate of the chain. If you plan on using a master link — recommended — then push the pin completely out of both outer links.

Remove the Chain

Finish removing a bike chain by unscrewing the drive pin and removing the chain tool from the chain. Hold both ends of the chain with your hands, and remove the retainer, releasing the tension from the derailleur. Snake the chain back through the derailleur and off the gears, it should come off easy from here.

Replace the Chain

If you’re re-installing the same chain, using the original pin or connector pin, it’s a bit tricky, but doable, just reverse the procedure with the chain tool pushing the pin back through the outer and inner link. If you’re using a master link, you’re done with the chain tool. Thread it back through the derailleur, use the retainer, or have someone hold both ends for you, and snap the master link back on to join the two ends.

Notes and Variations

Only some brands of chain can be serviced by pressing out a rivet partially, then re-pressing the same rivet to reinstall. Reusing any old pin can result in failure of the chain, because it shears the mushroom head off the rivet, and that’s what keeps the pin from coming out in the first place. Additionally, some chains include a master link that is removable by hand, without using a chain tool at all. Check with the manufacturer’s literature when in doubt, or consult with your local bike shop mechanics. Removing a bike chain is easy once you know the steps and what tool you need.

How to Fix a Broken Spoke

January 10, 2016 by Lee Agur

how to fix a broken spoke

You’re out ride and you just got out of the saddle to accelerate up a small hill and suddenly you hear a small “ping” followed by a clunk, clunk, clunk of a spoke bouncing off your frame with each turn of the wheel. If you don’t know what to do and how to fix a broken spoke, this can end your ride right there.

With just one broken spoke, your whole wheel can go out of true, making it impossible for the wheel to turn without hitting your brake pads and/or your fork or frame (depending on if you have a broken spoke in the front or rear wheel). Basically, this repair involves a two-step process: getting the wheel true enough to get home and then replacing the spoke and re-truing the wheel once you get home.

How to Fix a Broken Spoke Just to Get Home

First, you need to get the spoke out of the way so that it doesn’t interfere with your wheel turning. If you have a broken spoke on the front wheel, you should be able to just slide it out of the hub. If it’s on the rear wheel, bend the broken spoke around one of the spokes adjacent to it. Then you can adjust the tension on the rest of the spokes in your wheel.

To adjust the other spokes to accommodate for one missing spoke, you’ll need a spoke wrench, conveniently on many multi-tools, to tighten or loosen them by turning their nipples at the rim. Turn each spoke on either side of the one that just broke clockwise as if you’re looking from the hub of the wheel toward the rim. This will loosen those spokes. If this doesn’t move the rim back to center enough, ie. it’s still bouncing off the brake pads, go one more spoke in either direction and turn them counter-clockwise. This will tighten the spokes pulling the rim back toward the side of the broken spoke.  fIf the rim is moving too far to the right, you’ll want to either tighten the spokes that attach to the left side of the hub or loosen the spokes that attach to the right side of the hub. You’ll make this decision by testing the spokes and determining whether they feel too loose or too tight.

Never make drastic changes to the tension of a spoke at any one time. Just make half-turns with the spoke wrench each time and check and see how true the wheel is. It is easy to go too far. Once you get it roughly straight, you can ride the wheel. If the rim is still slightly touching the brake pads, open the brake quick-release to allow for more space.

Finishing the Repair at Home

After you’ve gotten home and you’ve gone to your local bike shop to buy a new spoke and nipple, you’ll install the spoke and thread it into place in the same pattern as the other spokes around it. Then use your spoke wrench to loosen the nipples on the spokes in the area around the broken spoke as you tightened and loosened them to get home. Then test the tension on all of the spokes around the whole wheel.

Go ahead and take tension off of any spokes that feel overly tight, and then work your way around the wheel truing out any wobbles by turning the nipples counter-clock wise to tighten and clockwise to loosen a spoke if looking from the hub at the nipple. This time, however, if you can, you’ll want to use a truing stand and get the wheel as straight as possible. Watch out for overly tight or overly loose spokes, as you could be looking at another broken one in the near future if the tension is off. As always, if you have trouble, take the wheel to your favorite local bike shop and get a little bit of professional attention.

There you have it; how to fix a broken spoke. When it first happens it’s always like “Danggg-it”, but it’s actually pretty straight forward to fix. There are far worse things that could break on your bike. Safe Riding!

Road Bike Shifters

January 8, 2016 by Wade Shaddy

road bike shifters

Road bike shifters could be the most efficient mechanism on earth for transferring human energy to a machine. Shifters and derailleurs have been around for many years, and developed into relatively complex machines.

What Road Bike Shifters Do For You

Road bike shifters and gears make it possible to maintain motion and speed by being in the correct gear on your bike no matter the terrain, wind or weather. When used properly, shifters make it easier on the knees, lungs, heart and they prolong the life of your chain, cassette and body.

Gears and Efficiency

With a stack of gears on the front and back, shifting can seem intimidating but they serve to tame the confusion. Understanding the basics about road bike shifters goes a long way to keep you moving at a steady pace up hills and to find that comfortable gear to grind out long miles on flat ground.

Left Shifter, Front Gears

Road bike shifters have standard configurations. The shifter on the left side controls the front gears, also known as chainrings. It has either two or three positions which moves the the chain up or down accordingly. Bikes with two gears up front are known as a “standard or compact-double” Bikes with three gears up front are referred to as a “triple.”

Right Shifter, Back Gears

The road bike shifter on the right side controls the gears on your back wheel. Older road bikes may have only seven or eight gears in the back. Contemporary road bikes typically employ 9, 10 or 11 gears in back. The right-side drivetrain shifters are more complicated because they have more work to do, in a smaller space.

How Road Bike Shifters Work

Road bike shifters work by releasing or adding tension to a cable attached to a derailleur. When the rider operates the shifter, the tension is changed, and the derailleur moves the chain up or down, switching the chain to a different gear.

Positioned by Index

The vast majority of modern shifters are indexed. This means that each time you click the shifter with your fingers or thumb, the shifter allows the cable to move a precise amount equivalent to one gear shift.

Friction Shifters

Old-school shifters did not have indexing, the rider determined when the bike shifted by feel and how it sounded. Also known as friction shifters, they are still around today on some bikes, but are considered antiquated.

Three Competitors

Most modern road bikes employ one of three different brands of indexing shifters: Shimano, Campagnolo and SRAM, with Shimano being at the top of the market numbers wise for standard production bikes. High-end bikes often rely on Campy or SRAM, but Shimano also has that covered too. The three top brands look similar, and are positioned in the same place, but the actual functioning or mechanism of the shifting levers differ.

Shimano STi

Shimano designed the STi (Shimano Total Integration) system, which is a brake lever and shifter integrated into one unit. Cyclists shift to larger sprockets by pressing the brake lever sideways. Downshifting is done by pressing a small, separate lever behind the brake lever.

SRAM DoubleTap

SRAM uses a single lever to shift gears up and down. Tapping the lever inward a short distance on the right shifter shifts the rear derailleur down. Pushing that same lever further inward produces an up-shift on the rear derailleur. The front shifter is reversed as a small tap shifts down while a larger sweet shifts up to the big chain ring.

Campagnolo Ergopower

Rather than using the brake lever to shift up like Shimano, Campy uses a small lever behind the brake lever to shift up. A small button inside the hood is used to shift down. Because Campy is indexed on the right side only, it’s compatible with any chainring, unlike Shimano and SRAM, which must be specifically matched to the size and number of chainrings used.

Which One is Best

When choosing between road bike shifter brands, it depends on the existing groupset that you use. The shifter should correspond to the other components on your bike. For example: Shimano shifters are designed to work with Shimano components. The best way to choose your road bike shifter is to try them before purchasing to see which one you find more comfortable, and which lever system you prefer. It’s also a matter of how much you can afford.

Handlebar and Shifter Position

Shifter and handlebar position is a personal preference; there’s no wrong way to do it within reason if the position is comfortable for you. Old-school set-ups typically have the drops horizontal, but it’s common these days to see the drops pointed down somewhat. Find a happy medium for your handlebars, and then adjust the shifters/hoods from there.

Adjust the Position

It might be necessary, depending on how much you want to move the shifters, to remove or loosen the bar tape. You might be able to get by with minor adjustments without disturbing it. Begin by slipping a 5-mm hex wrench under the rubber brake hood to loosen the hoods via a small hex bolt. Sit on the bike, grasp the hoods, move them as needed, and then snug each clamp bolt just enough to hold the position.

Not Too Tight

Don’t over-tighten shifters on the bars. They should be tight enough so that they won’t slide when you put your full weight on them, but loose enough so that you can still twist them if you apply enough force. The idea is to allow them to move in a crash instead of breaking.

Clean and Degrease

Peel back the rubber shifter hoods so that you have access to the guts of the shifter. Use an evaporative degreaser to remove the grit and accumulated caked grease in the shifter mechanism. Don’t be afraid to get dirty. It may take quite a bit of the degreaser to get the shifters to loosen up. If you have access to pressurized air, use that lightly to blow out dirt and gunk. Run the shifter through the gears to work it in after spraying the degreaser. Repeat the process until the shifters are functioning normaly.

Lube and Ride

Lube the shifter with a light, bicycle-specific spray lube. Let the bike sit for an hour to allow the solvents to evaporate. Replace the road bike shifter hoods and go for a ride with well functioning shifting.

Winter Cycling Gloves; Which Ones are Best and Why

January 5, 2016 by Adam Farabaugh

winter cycling gloves

Keeping your hands warm in winter can be a challenge as they can get cold easily and still need to be functional to shift, brake, and handle your bike. Regular gloves or mittens that are made more just to keep warm are often times going to be too bulky along with other drawbacks that makes riding in the cold even more uncomfortable. Finding the right winter cycling gloves for the conditions you’re riding in will keep your paws toasty throughout the ride.

What to Look For in Winter Cycling Gloves

The first thing to determine in choosing winter cycling gloves is know what weather you are going to be wearing them in. Generally a glove has a window of ten or so degrees before it becomes uncomfortably warm or cold. You should have a glove for each of those ranges depending on where the majority of your riding falls within.

Lightweight Winter Cycling Gloves

winter cycling gloves

As you get into the fifties, if that’s winter in your area, you are going to want a thin knit glove such as the DeFeet Duraglove-Wool . This glove is tightly knit so is relatively small and can easily fit in your pockets when the temperature do rise but when it starts to dip they’ll keep your hands warm down to around fifty degrees and maybe a little less depending upon your individual blood flow levels.

Mid-Weight I Winter Cycling Gloves

winter cycling gloves

With temperatures firmly in the lower fifties and dipping into the forties, you are going to want a winter cycling glove that has a bit more insulation as well as wind protection. The insulation is going to provide a bit of warmth while the windproof outer is going to keep the wind from blowing through the glove to your hand robbing it of all its heat. A good option for this is the Garneau-Super Prestige Cycling Glove . This glove is nice because it has a windproof cover that pulls over your fingers in two parts to preserve functionality. As the temperature warms, this cover can be tucked back into a crafty little sleeve on the back of your hand allowing you to have all five fingers again. These are also still small enough to tuck in a pocket if needed.

Mid-Weight II Winter Cycling Gloves

winter cycling gloves

The second mid-weight category is lower forties into the thirties. This is an area where you’re positively going to need a good bit of insulation as well as windproof material to stay warm. As you get to this temperature also, any amount of rain is going to make you very cold so having a waterproof glove as well will give you some added warmth but with some drawbacks. With windproof material, the glove can still breathe enough to not cause your hands to become clammy. With a waterproof glove however, moisture cannot get in nor out. As your hands warm and start to sweat they can start to get a bit clammy and if you don’t have enough insulation, cold, if they are not breathable. Fortunately some gloves give you the best of both worlds, waterproof and breathable. The Sealskin Brecon XP Glove  gives you enough insulation to keep your hands warm while dry also if it does begin to rain.

Liner Winter Cycling Gloves

winter cycling gloves

As the temperature dips to the freezing mark and below, you are going to need winter cycling gloves like the second mid-weight option just with more insulation. As you get to this temperature and below, changes in temperature throughout a ride are much more pronounced such as going up a climb or down a descent. With a heavy weight glove, a good option, especially if it is on the colder side of its range, is to wear a liner glove. A thin silk glove such as the Terramar Termalsilk Glove Liner will allow you to take your outer glove off and stuff it up the front or back or your jersey while going up a longer climb. This will still keep your hands warm but prevent them from overheating and sweating out your outer glove.

Heavy Weight I Winter Cycling Gloves

winter cycling gloves

You will want a good mitten to wear over liner gloves when you hit the top of a climb to then stay warm on the chilly descent. (And a side note; keep stops at the top of a climb to a minimum as going down is going to chill you so you want as much heat as possible in you before you hit the descent, namely right after you finish climbing.) A good glove for temperatures below freezing but not absurdly cold is the Craft Touring Insulated Bike and Training Glove. This mitten also has the added benefit of neoprene on the cuff to keep warmth in.

Heavy Weight II Winter Cycling Gloves

winter cycling gloves

As the temperature dips to the lower twenties and teens you are going to need a substantial glove to keep you warm. At this temperature and lower, gloves have and increasingly difficult time of keeping your hands warm. The Craft Siberian Split Finger Wind and Waterproof Bike Glove will keep most of your hands warm. If you normally have cold hands or the temperature dips below this area, it’s going to be difficult to keep your hands warm with a cycling specific glove or mitten. You’re going to need a mitten more catered to skiing as the insulation and windproof material is what is going to keep you warm but it’s going to impact functionality a bit but that’s winter riding.

One thing that a lot of people don’t think you can do is shift an indexed shifter (Shimano or Sram) with large mittens. You can’t do it quite as quick but it’s still functional. Having a mitten that’s waterproof at this temperature is not needed as water isn’t water at this temperature, it’s snow and ice. One added feature to look for is a mitten that has cuffs that go up your arm a descent amount as this will add in keeping you warm as a whole.

Riding in winter is a different challenge and with the right preparation can be a season that is actually looked forward to. Having the right gear and good winter cycling gloves for the task at hand is going to not only make it more enjoyable but also pretty cool in that you’re doing something that’s normally reserved for the warmer months of the year in winter. It’s kind of like you’re getting away with something that you shouldn’t be doing. And with any slippery roads you have enough gear on so hopefully in the event of a fall, you just slide without injury, hopefully, if you do it right. Keep the rubber side down and stay warm this winter with the right winter cycling gloves for the weather at hand.

Saddle Bag Essentials

December 30, 2015 by Wade Shaddy

Saddle Bag Essentials

It doesn’t take many tools, but having the right gear in your saddle bag is vital to your next ride. Essential saddle bag gear should include the tools to fix anything that might occur while riding a deserted stretch of blacktop, or a quick run to the nearest convenience store.

Saddle Bag Essentials – The Right Stuff

Without tools and supplies you’re walking, or calling for help. It’s not so much having a tool for each and every issue, it’s about having the right tools and supplies to get you back on the road again. Bike equipment manufactures have designed compact tools and gear that don’t take up a lot of extra space, and perform exactly what you want it to, when you want it to.

Spare Tubes

Nothing is more important than a spare tube. If you’re doing any serious distance, pack two tubes. Discard the box, but keep the rubber band. Take care to keep it as small and unrolled as possible. If you have any kind of baby powder available, sprinkle it on both sides of the tube, and slip it in a zip-lock bag. The zip-lock bag helps to protect the fresh tube against drying out and protects it from friction from the constant rubbing inside your pack. More than a few cyclists have pulled fresh tubes out of their pack, only to discover they won’t hold air because of a small hole caused from friction.

Tire Levers

Tire levers are vitally important. It’s possible fix a flat without any levers, but it’s tricky. You only need two levers, but three levers come in handy if you have the space. Don’t pack those flimsy, flat levers that snap off the first time you use them. Invest in some substantial levers that will get that tire off and on when you’re using those stiff all-weather, puncture-resistant, clincher tires.

Patch Kit

Modern patch kits are minimal, and worth packing, particularly if you’re doing long distances, and running the risk of using all your fresh tubes. There are several types available, but most cyclists agree that messing around with glue is time consuming, and glue takes up extra space. Get some of those glue-free patches that stick right over the hole without glue. This type of patch is actually flatter, and more minimal than bulky patches that require glue, and better for skinny road bike tubes.

Presta to Schrader Adapter

This one might not be essential, but it’s so small that it’s a no-brainer to include one in your saddle pack. The small adapter allows you to use any air compressor or air pump, anywhere, to fill your presta-equipped valves. You should already have a frame pump, or device to fill your tubes anywhere on the road, and most of them have adaptable heads for both Schrader and Presta. But if your pump, or another cyclists pump fails, you can get them back on the road again with this small adapter and any air pump you can find.

Multi-Tool

The addition of a multi-tool to your saddle bag is critical. The multi-tool has underwent many changes over the years, some include things that you may or may not need. Choose one with basic hex wrenches and screwdrivers to keep it minimal in size, or go all out with the Swiss Army knife type if you have the room for it. In most instances, the basics are all you need to fix just about anything that goes wrong with your bike, or make minor adjustments to cables, or anything that’s loose on your bike. Don’t leave home without it.

Chain Breaker

It’s not often that you break a chain, but when you do, you’re dead in the water without a chain breaker. The chain breaker allows you to remove broken pins from your broken chain. Even though you might not anticipate that you will break a chain, the chain breaker is so small that it doesn’t make sense to leave it at home. It is best to get a multi-tool that has a chain breaker on it.

Master Link

The master link goes hand in hand with the chain tool. After removing the broken pin from the chain, the master link snaps together to join the two ends of the chain together. Get on your bike, add some torque to the chain to finish the job. The master link is smaller and thinner than a matchbook. Sometimes referred to as a missing link, there are different sizes for some chains. Make room for it in your pack.

Practice Makes Perfect

Fixing a broken chain can be tricky if you don’t understand how to use the chain breaker and master link. It’s highly advisable to practice at home on a spare or discarded chain. Get one from a bike shop if you have to, and use the chain breaker to practice removing pins. Master-links are user friendly, and you should be able to figure it out without practicing with a new one.

Fix a Flat

If you’re not familiar with repair procedures, it’s smart to practice them at home before attempting to do it on the side of the road. Remove a wheel, tire and tube from a spare bike. Use your patch kit to patch a hole on a tube, air it up and replace everything. You should be able to do it in your sleep. It saves time and you’ll never be intimidated again.

Personal Items

Make room for medications and identification. Place your meds in a small, flat container, and don’t forget to add some cotton. The constant vibration can pulverize pills and other meds. Always keep some form of identification in your pack, with your credit card or cash. Lots of saddle bags have exterior pockets for this kind of thing. Add some type of ointment  — Neosporin is good — in case you go down. The spray type works better on grungy, dirty road rash. Add a few gauze pads.

Fast and Light

Road bikers travel fast and light, with minimalistic saddle bags. What you include in your underseat pack is up to you, and you can include anything you like, but your pack will only hold so much. The essentials of any pack should be there to get you back on the bike, without a lot of fuss and extra weight.

Bar Tape Basics – That’s a Wrap

December 19, 2015 by Wade Shaddy

Bar Tape

It’s cold outside, and your bike is just waiting for some attention. Changing your bar tape can be the perfect way to spend a cold afternoon with your bike. Bring it in the house, settle in with a warm cup of hot chocolate and get busy. Your bike will thank you with a comfortable, new appearance.

Bar Tape – Cosmetic Designs

The harlequin, or double-diamond are just a few of the cosmetic, yet functional designs to consider. But bar tape is about more than looks. It takes into account how your hands fit and feel on the handlebars. Good planning and design adds the longevity needed for long days and many miles in the saddle, while offering cushion in the drops and a slip-proof grip.

Bar Tape Life

Bar tape can last for years, and it typically comes already installed on a new bike. It might seem easy enough; wrapping tape around bars. But it’s not that simple. Not all cyclists know how to wrap a bar and make it last. In fact, it’s one of the most common things done wrong on bicycles.

How Often Should you put on New Bar Tape

Cyclists know that certain items, tires, chains and gears should be replaced at regular intervals, but how often should you replace your bar tape? If you measure it in years, professionals consider it way too long, some cyclists consider it gross. Bar tape is similar to  running shoes and socks, most get changed way more often than once a year.

Nasty Stuff

The sweat, water, dirt, gunk and nasty stuff on your hands is on your bars. So once a year is considered a bare minimum if you’re an active rider. Of course, it also depends on how many bikes you own and how much you ride each of them. If you ride one bike all the time and pile up the miles, it probably deserves fresh bar tape every few months.

Choose Your Bar Tape

Inferior tape can be hard, slippery when wet and doesn’t last very long. Good tape is durable, comfortable, and makes gripping the bars for miles on end a little nicer. Good quality tape also tends to have some stretch, making it easy to achieve a nice, tight wrap; a wrap that that doesn’t move when you’re shifting your hands around on the bars.

Thick or Thin Bar Tape

There’s also a wide variation in feel between various types of tape. Padding and thickness varies, the depth of which depends on what you expect from a grip, and what type of riding you do. Choose thicker tape for rough riding conditions, thinner tape for a more streamlined approach.

Types of Bar Tape

Bar tape is prone to wear and tear, and most bar tape is relatively inexpensive. There are plenty of options to explore too, and new tape will always rejuvenate a tired-looking bike. It’s worth experiencing the subtle differences in comfort, feel and performance offered by different brands and materials.

Cotton Bar Tape

Cotton is old-school. Any bike built before about 1985 probably has cotton bar tape. Cotton tape is very cheap but it’s not widely available, and your best bet may be to go shopping online for it. Cotton tape comes in a roll with an adhesive backing that is easy to apply to a clean set of bars. Cycling purists like to give cotton tape several coats of shellac to protect the material and prevent it from unwrapping. That’s why some older bikes seem to have shiny handlebars.

Cork/Synthetic Bar Tape

By 1987, cork tape had for the most part replaced cotton as the tape of choice. Contemporary cork tape is actually a synthetic blend of cork and ethylene vinyl acetate. Cork/synthetic tape is more expensive than cotton, but typically also comes with a with a small strip of adhesive backing. Cork/synthetic tape needs to be stretched carefully when wrapping the bars, otherwise it looks untidy and is prone to unravelling. Take care with cork blends, stretch them too tight and they will break. Cork tape is typically too thick for designs such as the harlequin or other pattern making. The main advantage of cork is that it absorbs shock and sweat like nothing else.

High-Tech Bar Tape

Most contemporary bar tapes are made from a lightweight and durable synthetics, in combination with a foam or gel core for cushioning. Materials such as polyurethane, synthetic nylon or silicone are strong, lightweight and durable and often have a tacky  texture that aids grip and contributes to a positive feel to your hands. Some have a perforated surface, others a ‘microfiber’ smooth feel, while others have a textured surface. Some look like faux leather or faux carbon. These newer formulas add good vibration dampening, without the bulkiness that can come from old-school tapes like cork.

Leather Bar Tape

If you’ve ever heard of the Brooks saddle you won’t be surprised that leather bar tape is at the top of the heap. Leather tape just feels good in your hands. Expect to pay around $100 for leather handlebar tape. You can also expect it to last forever. Some cyclists claim that it improves with age, just like a Brooks saddle. If you’re into changing the tape every year as suggested, leather probably isn’t the best choice. The downside to leather is that it doesn’t provide a vibration dampening effect like cork or gel.

Off With The Old

Do whatever it takes to remove the old bar tape. It might just unravel when you remove the plugs, or you can use tweezers or pliers to grip it an pull it off delicately.

Clean The Bars

Clean the bars thoroughly. Use a bike specific cleaner or anything that will remove tacky substances. Make sure it’s dry and without any residue to ensure a good bond with your handlebars.

Position the Hoods

If you’re replace existing tape, the hoods should already be in the right position, but this is your chance to move them if you desire. Make the adjustments, and tighten the hoods to the handlebars. It’s typically done with a 5mm hex wrench. The bolt is usually on the outside of the lever under the hood. Its a good idea to ride the bike before applying the tape, to ensure the hoods are where you want them, because after wrapping the bars, they’re difficult to move without disturbing the tape.

Secure Cables

Use black electrical tape to secure the brake cables to the bars if applicable. Some bars have holes in them for this purpose, and you can skip the electrical tape while others bikes require the use of black tape. It typically takes 3 or 4 strips of electrical tape to secure the brake line to drop bars.

Wrap It

The jury is still out on the direction, and whether to wind clockwise or counterclockwise is up to you. Some prefer to start in the center, on either side of the handlebars. Some prefer to anchor the tape with the plugs, and work toward the handlebars. Because the procedure varies wildly due to your choice of designs, the procedure can vary wildly. In general the most used way is to start at the end of the bars leaving about a half-inch overhanging the end of the bars. This is so you stuff it inside the bars when you insert the bar-end plug to secure it. Then start wrapping the bar tape leaving about 1/4 of an inch to a half overlapping the previous. Make sure you keep it snug as you go. When you get to the hoods there are a few ways to do it but in general, you want to make sure that no metal on the bars is showing. Then continue toward the stem stopping two to three inches from the stem. Cut the tape so it forms a straight edge and wrap a few layers of electrical tape around the end to secure it. Then the nice tape that generally comes with new bar tape can be wrapped over the electrical tape giving it a sleek look.

That a wrap. New bar tape will not only make your bike look better but will also give you added comfort to your riding. Make sure you pick a good bar tape color!

25 of the Best Gifts for Cyclists

December 11, 2015 by Lee Agur

So you are looking for the the perfect gifts for cyclists that have everything. Here is a list of gift ideas they may not have.

Cyclists love gadgets, do they need them? Probably not. But adding new gear to your cycling regimen can aid your performance, motivation, safety and comfort, and besides that, gadgets are just cool. Designers, inventors and technology has given cycling some of it’s coolest toys. Can cyclists get by without them, probably, but they are sure fun to use.

For those looking for something that goes beyond gloves, helmets, shoes or jackets for cycling enthusiasts, there are also many useful, unique and sometimes unusual gifts for Christmas, Birthdays or just because, that can make cycling more interesting.

Cool Gifts For Cyclists

Magnetic Lights

gifts for cyclists

Price: $25 – $50

Stand out and stay safe on your next ride down the block or through the trails with powerful, palm-sized bike lights. LED powered, typically white for the front, and red for the back–shine in three different settings. Choose a steady beam, slow or quick flash. Strong magnets ensure that the lights stay put even on the roughest roads, but remember, magnets only work on selected frames, if you’re on carbon they won’t work. When you reach your destination, the brilliant little light snaps off and can be popped in your pocket or backpack until the next time you need to hit the road. There are lots of magnetic lights out there, but those from Lucetta run for 40 hours.

Glowing Bikes

gifts for cyclistsgifts for cyclists

Price: $300 – $400

If you like riding in the dark, a fixed gear nut, maybe even a bicycle messenger, or you just like green, glowing things, the Zulu is a fixed-gear bike that might be just the thing to use for night riding. The white-frame bike glows neon green after being in the sun for a half-hour during the day. The manufacturer says it will glow in the dark for an hour.

Laser Beams

gifts for cyclists

Price: $10

This is one cool laser beam, actually two laser beams. It’s called the Cyclist’s Virtual Safety Lane. It’s a device that mounts on your seat and emits two red laser “virtual lanes,” one on either side of the bicycle, increasing your safety when cycling on dark highways, paths or anywhere else.. The six-foot long lanes are said to be visible from a mile away.

Giant Sock

gifts for cyclists

Price: $60

The Velo Sock fits over a bike to keep sand and other dirt off the floor. The bike sock, which comes in a choice of colors and patterns, is machine washable.

Battery Charger

gifts for cyclists

Price: $130

Transform energy from your next ride into reserve power by downloading your energy into a removable battery pack. Use the fully loaded pack to charge your USB-powered devices anywhere your ride takes you. The little powerhouse pack takes less than two minutes to install on your back wheel and lets you use the momentum you create while biking to fill the removable battery. This weather-proof charger/battery comes to your aid when you’re biking to an outdoor destination, such as a campsite or park, and will revive your phone, GPS, camera, or any of your other go-to devices.

Folding Helmet

gifts for cyclists

Price: $99 – $200

Not sure why you would need a folding helmet, but they’re out there. Utilizing an elastic system, the helmet from Carrera folds up when it’s not in use, making it easy to store in your bag while you’re shopping, eating or otherwise off your bike. While it does collapse when you’re not using it, the brand ensures that top level safety is their priority when the helmet is strapped on your head.

Ass Savers

gifts for cyclists

Price: $2 – $15

This one is a no-brainer if you cycle in wet weather, maybe commute or just don’t want to show up at work with the tell-tale stripe up your butt. Constructed from recycled materials, the lightweight mudguards fit on your seat rails in minutes to help prevent embarrassing stains from showing up on your backside.

Bike Pizza Cutter

Gifts For Cyclists

Price: $10 – $20

What a cosmopolitan way to slice a pie! Durable stainless steel, double-wheel pizza cutter will take you on a gastronomic tour from crust to crust.

Phone Controlled Lock

gifts for cyclists

Price: $139 – Not available yet… coming soon.

This gift is for all those cyclists who do everything with their phone. The phone technology is infused into the old-school, mechanical bike lock. Built from cut-resistant stainless steel, the BitLock employs a proximity sensor that automatically locks/unlocks your bike when your mobile phone — equipped with the app — is within a 3 feet radius. It also lets you grant access to other users, track calories burned, map your ride, and has GPS.

Barr Mitts

gifts for cyclists

Price: $50 – $75

Cold weather riding is doable with gloves, but when your gloves aren’t enough, maybe adding bar mitts can do it for you. The neoprene cover slides right over your handlebars acting as a shield against the harsh weather conditions, protecting your fingers from freezing. They might appear bulkish, but they work, to keep direct wind off your hands. For just under $50, they’re cheaper than some gloves.

Boom Bottle

gifts for cyclists

Price: $75 – $150

The boombottle is a wireless Bluetooth speaker, geared toward listening to music while you ride. It fits in your water bottle cage, with a built in microphone that works as a speaker phone. The rechargeable lithium battery lasts about 10-hours. The speaker feature comes in handy with group rides, or organized cycling events.

Crash Sensor

best gifts for cyclistscool gifts for cyclists

Price: $100 – $135

This gift could literally save your life. The ICEdot Crash Sensor, attaches  to your helmet, and sends alerts to your contacts, with a GPS coordinates, when you’re in an accident. A countdown on the sensor app is triggered during the accident. If you’re not injured, you can shut it down.

50 Bikes That Changed The World

Unique gifts for cyclists

Price: $10 – $15

A gift for the knowledgeable cycling historian – From the Penny-Farthing, the Dandy-Horse and the Velocipede the design of the bicycle has evolved over the decades both in terms of style and technology. From high-performance cycles to practical run-arounds, conceptual bikes to commercial models, here are the 50 most important, pivotal bicylces from around the world.

Balaclava

Cycling gifts for the cycling enthusiast

Price: $20 – $40

A gift for the hardcore cycling enthusiast, this balaclava will keep them warm in all weather. The Chinook Multi-Tasker Pro can be worn as balaclava, a balaclava with face mask or as a neck gaiter.

Bike Chain Bottle Opener

Best gifts for cyclists

Price: $10 – $20

Know a cyclist that likes a beer once in a while? I know I do. Get them the gift that keeps on giving, the handy bike chain bottle opener.

Bike Wine Holder

gifts for cyclists

Price: $25 – $30

What if your cyclist isn’t a beer lover… it is ok, we will forgive them. Grab them a bike wine holder and put a little gift of wine to go with it.

Bike Chain Frame

gifts for cyclists

Price: $30 – $40

Want to keep some memorable moments, grab this picture frame from recycled bike chain.

Bike Clock

gifts for cyclists

Price: $25 – $30

Simplistic yet elegant vintage-style wrought iron bicycle frame is handsomely detailed with seat, springs, pedals, fenders, chain, brake cables, and more.

Bike Earrings

gifts for cyclists

Price: $24

Women love any type of gift, but when you get them jewellery you know you are winning.

Bike Chain Bowl

gifts for cyclists - bike chain bowl

Price: $50 – $89

This unique and gorgeous bowl is made from the most unlikely medium a recycled bike chain. With a great weight and classic shape it is perfect on an entry table for your keys a coffee table in the living room or even your desk at work. A great gift for the cycling enthusiast in your life.

Cycling Socks

gifts for cyclists - cycling socks

Price: $10

Socks and underwear, that is all I generally need for Christmas… or my birthday. Keep it simple, or use them as stocking stuffers.

Road ID

gifts for cyclists - Road id

Price: $25

Safety first with this gift in mind. Road ID can literally be a life saver.

Handcrafted Personalized Name Bike

gifts for cyclists - handcrafted personalized name bike

Price: $30 – $35

Want a handcrafted bike with your name on it? Perfect for coffee tables, cakes and home decor, there is a choice between mountain bikes or road bikes. Select a maximum of 6 characters for the name and let them make it. You also have the option of adding a heart after the name.

Cycling Calendar

gifts for cyclists - cycling calendar

Price: $8 – $17

Can’t think of a gift to give the cyclist who has everything. Grab them a cycling calendar! Everyone can use another calendar.

Shut Up Legs Cycling Shirt

gifts for cyclists - cycling shirt

Price: $15 – $30

Who doesn’t love Jens Voigt? This “Shut Up Legs” shirt is going to kill as a present. You can’t go wrong here.

Best Gifts For Cylists

What have you found to be the best gifts for cyclists? Did any of our ideas make the list?

105 Versus Ultegra – What’s The Deal?

November 29, 2015 by Wade Shaddy

105 Versus Ultegra

There’s lots of bike components out there, but walk into an average bike shop, and you’ll likely be offered a choice between two groups, the 105 and Ultegra, both of which are manufactured by Shimano. Bike shops often carry a majority of these two because they’re mid-range in price and entry-level, but still offer the status needed to compete and are reliable recreation riding.

Shimano is Everywhere

Shimano product sales constitute about 50 percent of the global bicycle component market. It’s the most prevalent supplier of bike components worldwide, but there are others. The hierarchy of brand names include SRAM, based in the United States, and Campagnolo, based in Italy.

It’s a Price Thing

Price is the biggest decision maker when choosing a bike. It’s one thing to say that you want the best. But the reasons to compare 105 and Ultegra go beyond that. The price difference between 105 and Ultegra is about $300 dollars. The price jump from the mid-range Ultegra to the high dollar Dura Ace is a whopping $700 or more.

Full Groups

You’ve probably heard bike shop salesmen state that a given bike is full Ultegra, or full 105. This means that the bike has been priced accordingly, and contains all the components from the stated group. In this case, a full 105 bike should be priced lower than a full Ultegra.

Recreational 105

Think of the 105 group as an entry-level component.  It’s capable of racing, but cheaper. Lots of first-time racers run their first races using 105. If they like racing, and plan on doing more of it, then moving up to Ultegra is the next step up. If racing was a one-time fling, the purchase of 105 was the right move.

What 105 is Not

The 105 group is not a department store component. Shimano produces cheaper components for department store bikes. Sora and Tiagra, both lower on the tier than 105, are targeted more for entry level bikes or even department store bikes.

Ultegra Character

Ultegra has the status and performance required to be on a racers list, but not so spendy that it’s not appropriate for recreational riding as well. It’s not the high-priced racing gear of the professionals, who might go with Shimano Dura-Ace, SRAM red or Campagnolo super record, but it’s still got what it takes to win races.

Differences are Valid

The performance differences between 105 and Ultegra might seem subtle to the average cyclist, but they’re valid. It comes down to weight, engineering, performance and maybe a bit of cosmetics.

Shifter Handles

Cosmetically, Ultegra boasts a carbon shifter blade, while the 105 sports an aluminum blade. On the inside, Ultegra’s lighter, harder parts, higher quality bushings and springs make for overall better feel when operating the brakes or shifting the bike.

Subtle Shifting

If you’re new to cycling, you might not notice the differences in shifting. Even though subtle, Ultegra shifts with a slightly cleaner feel than 105, which can seem to have a robotic click, instead of a smooth transition. Again, it’s subtle, and virtually unnoticeable to the untrained cyclist.

Brakes

Braking power on both models is more than enough to get you stopped fast. Neither one claims the top spot for reliability, but 105 may be noisier than Ultegra. Better quality springs on the Ultegra, and in this case, pivots, allow for more braking power than 105. Brake pad quality is another significant factor in the performance of Ultegra brakes over 105.

Drivetrain Specs

With chains and cassettes, the differences between 105 and Ultegra are slight but still affect performance. Ultegra has a nickel-like finish on the chain, and a stronger riveting process that allows for a stiffer chain. The chain on a 105 chains has a duller finish, and due to a different riveting process, are more stretchy than Ultegra. An Ultegra cassette substitutes the aluminum lock ring for the steel one found on a 105. The machining on the aluminum cogs of an Ultegra cassette are held to tighter tolerances than 105.

Up Front

The Ultegra crankset is hollow.  The Ultegra chainring shape blends nicely into the body of the Ultegra crankarm. The overbuilt structure of the crankset coupled with the chainring has better power transfer over the 105, which doesn’t sport a hollow outer chainring.

Trickle Down

It’s common for Shimano to introduce new engineering every few years. The previous years engineering advancements trickle down to the lower tier, meaning that the Dura Ace from last year, is now identified as a contemporary Ultegra. The trickle down engineering advantage is more likely to be found on Ultegra, than 105.

Basic Machining

New engineering means that Ultegra, for example, is machined to a higher degree than 105. The same goes for the brakes, shifters and drivetrain.

Stiffer

New designs and finer machining typically go hand in hand with new alloys that are stiffer, meaning that the parts on an Ultegra are lighter than the parts on a 105.

Lighter Not Always Better

It’s not always best to go with the lightest components. The lighter they get, the more delicate they are. In some instances, such as in dirty conditions, the 105 may be able to withstand more punishment, just because it’s heavier, and more substantial.

The Breakdown

105 vs ultegra105

  • Complete group weighs just under 6 lbs.
  • Entry level, recreational, but is race capable.
  • Reliable, maybe even more so when dirty or wet
  • Cheaper to repair or replace
  • Available in 11 speed, but more likely only 10.


ultegra vs 105Ultegra

  • Weighs in over a 1/2 pound less than 105 at 5.38 lbs.
  • Race level performance
  • Cleaner shifting and braking, subtle but noticeable.
  • 11 speed more likely than 105

Wheel Advantage

It’s already been established that that spending $300 dollars more for Utegra saves weight, and theoretically makes your bike faster and more efficient. But there’s another way to accomplish the same thing, and some cyclists say with better results. Cyclists on a budget can often save more weight on wheels.

It can make sense to purchase 105, and invest the $300 in racing wheels. It might even be possible to talk the bike shop owner into swapping out the wheels on the 105 before purchase. It’s an option worth considering.

Winter Cycling Shoes – Choosing the Best

November 15, 2015 by Adam Farabaugh

The worst part about winter riding is being cold. The things that get cold the easiest are the extremities; your head, hands, and feet. Fortunately getting a thick hat and pair of mittens is relatively easy. Keeping your feet warm on the bike while still being functional is more of a challenge. In general, cycling shoes are designed to be lightweight and to keep your feet cool during the warmer months of the year. In the cold, wet, and snow, those attributes aren’t so beneficial. Luckily to keep all your paws warm there are shoes specifically made for cycling in winter as well as ways to make your current shoes useable in winter.

Winter Specific Cycling Shoes

The warmest and most functional option to keeping your toes warm in winter is to get a pair of winter cycling shoes. These cycling shoes are built specifically to keep your feet warm and dry with insulation, higher ankles, and thicker material. Choosing any one depends on your budget and what you’re looking for in a winter shoe. One sure thing to look for in a winter shoe is mounting for mountain bike cleats. Being winter you will probably walk in snow a time or two which can get caked and then frozen in the cleat rendering, them unclip-able. Road cleats are easily prone to this while mountain bike cleats are a much better option for traipsing around in the snow.

Louis Garneau – 0° LS-100

Garneau Winter Shoe


Price: $150 – 200

Louis Garneau always makes quality shoes at a solid price and their winter shoe is no different. Not only do you have to worry about cold toes in winter, but you also have to worry about how functional the shoes is when you have cold finers. The 0° LS-100 has a BOA tightening system keeping everything functional even with cold fingers.

Lake CX 145

winter cycling shoes

Price: $200 – $250

If your riding includes a lot more wet riding and not so much cold, the Lake CX 145 will help keep your feet dry. They don’t have as much insulation as a normal winter shoe but can keep out the elements when needed.

Shimano SH-MW7 Winter Shoe

winter cycling shoes

Price: $250

Shimano is, well Shimano. They make anything from top of the line fishing gear to your Dura-Ace Electronic shifter. Their shoes are in a similar category especially their winter shoe which they partnered with Gore-Tex to create a waterproof and insulated riding shoe.

Sidi MTB Ghibli Cycling Shoes

winter cycling shoes

Price: $250

Sidi has a few different shoes for winter and one of their solid ones are the Ghibli’s. They have a durable sole for when you’re off the bike as well as use neoprene to insulate the upper part of the shoe.

Using your Current Cycling Shoes

Buying a second pair of shoes for only one time of the year can seem a bit much so if you’re looking to save and work a little harder to keep your feet warm, you can do it with your current shoes. Since it is winter and the shoes will take a bit of a beating, using an old pair of shoes is recommended and if you can get a used pair from someone who is a size larger, even better. You’ll start with wearing a thicker wool sock and your normal sized cycling shoe will scrunch your toes limiting blood flow which is what makes your feet cold.

The first thing to do is cover all those vents to prevent air from just billowing through. Although rudimentary, the best way to do this is with duct tape as it will stay sticking overtime. And don’t forget the hole on the sole of the shoe if there is one. After this you’ll need to find insulated as well as waterproof shoe covers. Instead of the insulation being in the shoe, it’s over the shoe. If it’s not enough insulation add a second shoe cover. It’s not the most functional, especially putting on and taking off but it gets the job done on the cheap.

Riding in winter can be quite fun but that fun can be short lived with getting cold. Getting the right gear for the task is the best way to keep it enjoyable. Since they’re only going to be worn part of the year, winter cycling shoes will last you many years. They’re a worthwhile investment. And if that investment’s not yet in your wallet you can still ride all winter by making some additions to your current shoe. Keep the toes warm and see how low the mercury can go before they start to get cold. You’ll be surprised at just how cold of weather you can comfortably ride in.

How to Fix a Flat With No Tools

October 29, 2015 by Wade Shaddy

Flat tires are part of cycling, and most cyclists know how to deal with them. But there are options for changing tires without tools, and tricks that can help you get back on the road faster.

Pro cyclist get back on the road faster without using tools.
Experienced cyclist sometimes skip the tools when changing tires.

What if you’re caught in the middle of nowhere with a flat clincher? Or you might have already broken both your levers, without getting that damn tire off. Don’t lose hope, you can change that tire without any tools whatsoever if you go about it right.

Steps to fix a flat without tools

1. Remove the Tire

Focus on completely removing the tire from the wheel. Don’t attempt to pull it loose only on one side, you’ll need both hands pulling at the same time from one side, which results in the complete removal of the tire from the wheel.

2. Break the Bead

Clinchers work when pressure from the inflated tube seats the bead of the tire inside the rim. It can be tricky to get loose initially, but once it starts it becomes easier. Crouch down and place the wheel in front of your knees. Grasp the tire and pinch it from both directions to break the bead on both sides, rolling it as you work around the circumference.

break bead two

3. Pull it Off

Place both hands at the top, with your thumbs on the rim. Pull the tire and tube together, toward your body, using your thumbs on the rim to add opposing pressure. Once it starts to come off, it gets easier. When it’s off, inspect it inside and out to find the source of the flat and remove it. Slip the tire back on the rim, seating the tire on the rim, only on one side.

together
Pull the tire and tube off together.

4. Impress Your Friends

If you’re on a group ride, nothing will impress your friends more than what you do next: Get out the new tube, open the Presta valve and use your cheeks to blow air into the tube. If there’s a Superman on this ride, it’s you. But seriously, it’s easier than it sounds, and only takes a bit of air to inflate the tube enough to stuff it back into the tire.

It's much easier than you think.
It’s much easier than you think.

5. Reverse the Procedure

Push the tire back over the rim using your thumbs. It’s easy enough until you get to the last few inches. If it gets too tough, its fine to roll the last few inches of tire over the rim, it will pop back into the bead as it when it passes over the tight edge. Use your frame pump to fill it the rest of the way, even Superman would have trouble filling it up to 100 lbs using only his cheeks.

stuff the tube

Old Versus New

Once you’ve accomplished the no-tools procedure, you might even find that it’s quicker and easier to fix a flat without tools. One thing comes into play though; if you’re working with brand-new tires, it is more difficult to accomplish. Tires with more than a few miles on them are easier, and some brands are just easier than others.

« Previous Page
Next Page »
  • Facebook
  • Tumblr
  • Twitter

Latest Articles

JOIN Cycling: A New Training Platform for Cyclists

May 27, 2024 By Eric Lister

cold exposure

The Benefits of Cold Exposure for Cycling & Life

June 13, 2023 By Eric Lister

hill climb

The Ultimate Hill Climb Training Guide

May 31, 2023 By Eric Lister

shoulder pain cycling

How to Treat & Avoid Shoulder Pain While Cycling

April 12, 2023 By Eric Lister

psoas stretch

The Importance of the Psoas Stretch for Cyclists

April 6, 2023 By Eric Lister

cycling neck pain

The Ultimate Guide to Cycling Neck Pain: Causes and Solutions

March 21, 2023 By Eric Lister

Useful Info

  • Contact
  • Finally, A Global Cycling Club That Is Focused On Community And Love Of Cycling!
  • Privacy Policy
  • Share Your Story!
  • Terms And Conditions Of Use
  • Welcome to I Love Bicycling
  • What Happened When I Stretched Every Day For a Month

Recent Posts

  • JOIN Cycling: A New Training Platform for Cyclists
  • How to Hang Bikes in Your Garage: 4 Inexpensive Options
  • Gravel Bike Vs. Road Bike: Which One Is Better For You?
  • The 6 Types of Mountain Bikes & How to Choose the Best One for You
  • What Is a Touring Bike Good For? 5 Benefits We Know You’ll Love

Search I Love Bicycling

Connect with Us

  • Facebook
  • RSS
  • Tumblr
  • Twitter

Copyright © 2026 · Magazine Pro Theme on Genesis Framework · WordPress · Log in