How to do a proper bike fit addresses what you require to do a bike fit: a self assessment of your body, and outlines a step by step guide on how to get a perfect bike fit.
If you’re not riding too long nor hard you might be able to get away with a poor bike fit as your tendons and muscles can handle a certain amount of stress. The problem however resides when you start to ride longer and harder especially without increasing that intensity gradually.
Having a proper bike position will help to prevent injuries and improve performance. There is a lot to know to get your position dialed on your own, and we will briefly discuss some key factors so you do not have to spend hundreds of dollars on a professional fit. The professional fits however are worth it but aren’t always warranted by everyone so this is intended to touch on what a professional fitter would do despite the number of varying approaches to bike fitting. If you have questions or are uncertain on anything, seek out someone who knows as having a bad bike fit is just as bad as not having one at all.

What You Need
First you are going to need a few things more than your bike and shoes to do a quality fit on your own. You are going to need:
- Stationary trainer – so you can get on and ride in place to see how all the incremental changes feel.
- Tape Measure – ideally in centimeters as it’s easier to work with.
- Plumb Bob – a string with a weight attached to the bottom to create a straight vertical line.
- Level – can be helpful to make sure the bike is level in the stand as well as to measure saddle set-back. You can get by without one if you don’t have one however.
Self-Assessment
When going to a professional fitter the first thing that they are going to do before you even get on the bike is to ask you a few questions along with doing a few flexibility and discrepancy tests. This is difficult to do on your own but if you know of any muscle inflexibility or leg length discrepancies, you are going to have to correct for them.
For Example – If you know you have tight hamstrings, you are going to have to have a more relaxed (less aero) position on the bike.
Making the Adjustments
The adjustments you are going to make on the bike need to be in the order described here as when you move one thing, it results in changes to the other measurements.
Cleat Position
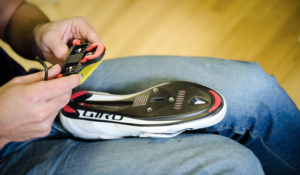
Cleat position is the first thing we are going to address as moving this later after you get your saddle height and set-back dialed will change. If you have already been riding your specific shoes and pedals, leave the cleats where they are if you haven’t had any issues.
If your cleats are new, you first need to estimate your natural foot position. Stand barefoot or in your socks on a hard surface naturally and see how your feet are positioned. Are they pointed straight ahead, pointed out, or pointed in? You want your foot position on the pedal to replicate this as if you just try and set it straight, it will go against how your muscles and tendons naturally align your foot.
After this you will want to put your cycling shoes on and determine where the bone on the outside of your foot protrudes. This bone is where your pinky toe connects to the rest of your foot, also known as the ball of your foot.
For a starting point, this is where you want the center of the pedal to fall. Mark on both shoes where this point is with something that comes off so you don’t mark up your shoes. Then position your cleat in the center of your shoe, from side to side, and line up the center as well with where the mark on the side of your shoe is. Then make sure the cleat is angled to account for your natural foot alignment. Yes, this is a lot of steps and when you start riding you may need to stop and adjust them a few times to get it positioned perfectly.
 Saddle Height
A bike fit encompasses the details of many areas of the bike but the one that is the most influential is the saddle height. Finding the proper saddle height has a number of varying approaches to get just right. A few of the approaches will be touched on, but the best approach is a combination of them in a certain order to get an exact height.
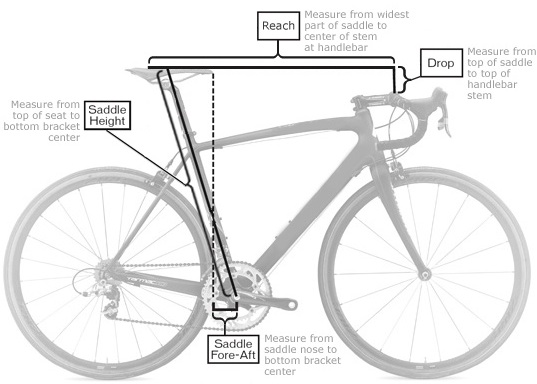
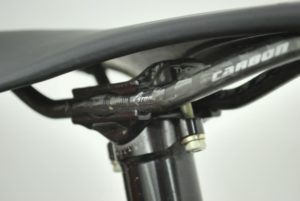
To get the same measurements you need to make sure that you are measuring from consistent points. This can be difficult on a saddle because they are always different and almost never completely flat. A good way to measure from the same point is measure 155mm back from the tip of the saddle (the nose) and make a mark. This is generally where the center of your pelvis will sit on the saddle. Any measurements that you make, make to this point except for when measuring the 109% and LeMond Approaches described below.
Heel Approach
The heel approach is the easiest and probably most widely used to get a rough estimate on saddle height. On the bike with your cycling shoes on, spin your pedals backwards with your right heel on the base of the pedal making sure that you keep your hips level and that they don’t rock from side to side. With your leg straight, you want your heel to be about a half to one centimeter from touching the pedal. No more, no less. You will probably have to get off and adjust your seat post a couple times.
109% Approach
The 109% approach takes the measurement of your inseam and multiplies it by 1.09. This is then the length from your saddle to the spindle of your pedal at the bottom of your pedal stroke. To get your exact inseam length, get a large hard cover book and a pencil. Stand with your back against a wall in your bare feet or socks with your legs straight. Place the binding side snuggly up between your legs and make sure it is level. With the book positioned close to the wall, level, and at the upper-most part of your crotch, place a light mark on the wall at the top of the book. Now with your tape measure, measure from the mark to the floor. This is your inseam.
Now doing some quick math in your head, alright probably with a calculator, multiply it by 1.09. With the pedal at slightly before the 6 o’clock position, (you want it to make a straight line with the seat tube coming down) measure from the spindle up the length of the seat tube and seat post to the top of your saddle. Now depending upon your frame geometry and current saddle set-up, this length is not going to be to the point you previously marked on the saddle. That’s ok; that mark is so you can get an exact measure of your set-up regardless of what bike or saddle you ride.
LeMond Approach
The LeMond method is a derivation of the 109% approach in that it uses the same inseam measure except is just multiplied by a different number and to a different point on the bike. This approach is better than the 109% approach as it’s easier to measure to a stationary point, the center of the bottom bracket. The variable here is going to be crank-arm length. It depends on riding style but typically shorter riders want crank lengths around 170mm or less. Medium sized riders, 5’6 or so to 6’-ish, 172.5mm and 175mm, heights above that. This is a very rough estimate so determine your riding style and what will work best for you.
Back to the inseam. Take your inseam measurement and multiply it by .883. This is the length from the center of your bottom bracket to the top of your saddle along your seat tube. Again, like above, the mark you put on your saddle won’t be used for this but is rather just a good way to get consistent measurements for your position when set.
Holmes Approach
Now that you got your saddle height to a pretty good height with the heel method and backed it up or adjusted it with the LeMond approach, you should have a height that is pretty close to where it should be. The goal of the above approaches is to get your knee angle within a certain degree. Instead of measuring other variables, why not just measure the exact variable that you are trying to get dialed in. Well because it’s more difficult. You need a goniometer which measures angles but with some improvisation you can probably come up with something similar on your own. The difficulty then becomes measuring your knee angle precisely. Getting someone to help you will be a big help.
With your foot at the bottom of the pedal stroke, slightly in front of 6 o’clock on your right leg, you want to measure the back angle that the femur (thigh bone) creates with the tibia (shin bone). The back angle isn’t the angle of your bent knee but rather the angle from if you would continue a straight line from your femur and measure the angle down to your tibia. You want an angle between 25 and 35 degrees and falling closer to 25 than 35 if possible.
If you don’t have someone who can help you, and even if you do, another way to do this is to record a video from the side of yourself pedaling and pausing the footage when your leg is at the bottom of the pedal stroke and measuring the angle with a protractor or other improvised device. Whether measuring the actual angle on your body or on a screen, make sure you are lining up with the bones precisely. Use the hip and ankle as reference points.
Seat Set-back
Now that you have your saddle height figured out, you may have to alter it a bit but that’s OK since you know how to measure it back to the proper height.
Moving the saddle back is going to effectively raise your saddle while moving it forward is going to do the opposite. The degree to which your saddle is positioned behind your bottom bracket is going to depend on the type of riding that you are doing. A position that is further forward, such as that for triathlon or time trials, will rotate your hips forward on the saddle while a mountain bike and largely road position will be further back with less forward rotation. Generally in the middle is ideal to start off with.
A good starting point is to set the nose of the saddle 6 to 8cm behind the bottom bracket. If you have a level this is where it can come in handy, otherwise take your plumb bob and position it so it falls at the center of the bottom bracket. Now measure from the tip of the saddle to this point directly above the center of the bottom bracket; it should be around 6 to 8cm.
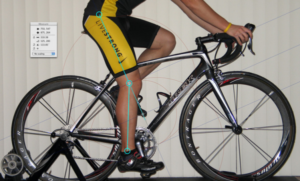
Now that you have a ball park estimate, get on the bike and clip in. Having someone help you in this next part can be beneficial but is doable on your own as well. Stop your right leg at the 3 o’clock position with the crank arm level. Now position the string of the plumb bob not on your knee cap but rather the little boney bulge just below and in front of it. Now see where the plumb bob falls relative to the spindle of the pedal.
Ideally in a neutral position, you want it to line up directly with the spindle of the pedal. If it falls more than a centimeter in front of the spindle, you need to move your saddle back roughly that same amount and vice versa. This position in the center is a neutral position that you can change depending upon the type of riding that you are doing.
Going Back to Saddle Height
Now that you have the set-back correct you are going to have to go back to whichever method you used to find your saddle height as depending on how far you moved your saddle, your height is going to be off. As stated above, if you moved your saddle back you are going to have to lower your saddle a little and vice versa.
Once you get this properly adjusted again, double check where the plumb bob falls again and make adjustments as needed. Every time you move one thing it is going to impact the others so you need to check and make sure it didn’t throw the others too far off. Bike fits aren’t one and done but rather a good amount of try and try again and before long you will have it where you want it.
Handlebar Set-Up
The core of a bike fit is your seat position relative to your bottom bracket but where your upper body falls can have a big impact on comfort as well as overall performance.
The first thing is to determine your flexibility and what type of riding you are doing. If you have tight hamstrings as well as back muscles you simply aren’t going to be able to ride with super low handle bars. The handlebar set-up determines how far stretched out, or scrunched up you are on the bike. You want to be in a natural neutral position with not too much of either.
A good gauge is with your hands on the hoods, or whichever position you will be riding in the most, look down at the axle of the front wheel. Where does it fall relative to the handle bars? If the handlebars are behind the axle you are probably too scrunched up. If the handlebars are in front of the axle you are probably too stretched out. Leeway of a centimeter or two in either direction is OK but past that you will need a different size stem. If it’s too much in either direction you are probably on the wrong size bike and may need a different frame size to get to that ideal position.
Raising or lowering the bars is going to depend on how much room you have on either side of your stem on the steerer tube. You can take spacers from below the stem and put them on top to lower your bars or vice versa. Be sure you properly tighten the head-set and stem bolts when you put it back together.
Adjusting to Your New Bike Fit
Now you’re all set. Your cleats, saddle height, saddle set-back, and handle bars are in an ideal position to ride comfortably with less chance of injury. Since your original bike fit probably wasn’t exactly what it is now you need to make sure you ease into riding in this position as your muscles and tendons won’t be used to it.
Depending on how far off your previous position was, you should ride for no more than an hour the first few days. Remember to increase intensity gradually and address any pains immediately. Riding at a lower volume and intensity will give your body time to adjust and get used to the position. If you feel something is off, stop and make adjustments as needed while on a ride. Only make small adjustments of about a millimeter or less each time.
As you can now see, there is a lot that goes into a proper bike fit and this doesn’t even include everything. You can go to the n-th degree when doing a bike fit, measuring angles and determining optimal power in varying positions among other things. This guide is intended to give you a basic idea of how to get your position as close to your ideal position without having to get an expert fit.
A professional fit is always advisable however as depending on your body and specific conditions, an expert is going to be able to make adjustments to correct for things that you may not even know are an issue for you. You can do it on your own, just make sure you pay attention to detail and are smart about the changes you are making. The above will get you close to where you should be and should help prevent overuse injuries as well as help you to ride faster and longer, after you ease into your new position.
At Home Bike Fit
MyVeloFit is a revolutionary new app that combines the powers of computer vision and artificial intelligence to help you do your very own bike fitting at home in a matter of minutes. Whether you’re an individual or a business that specializes in bike fitting, they have a subscription model that works for you. Everything from free to a fraction of the cost of an in-person fitting! Check them out today to start feeling better on your rides!