 Truing a wheel is not rocket science, even though it might seem that way. We’re not talking micro-adjusted, fine-tuned wheels that trained professionals build, but maintenance and adjustment that almost anyone can do using only a spoke wrench. Getting a wheel perfectly true takes experience, but you can remove a pesky wobble from your wheel in a few minutes.
Two Types of Truing
To understand the procedure of removing a minor — or major wobble — it’s necessary to understand the dynamics of the wheel: There are two types of wheel turing; radial and lateral. Radial is the up and down truing of a wheel. It’s more difficult, not typically done by the average cyclist. Lateral is the side-to-side movement of the wheel, the one that causes it to wobble. You can remove it without using a stand.
Right and Left Tension
Bicycle wheels are composed of a rim suspended with tensioned spokes around a center hub. Each spoke pulls on a section of rim. Spokes coming from the right side of the hub pull the rim to the right. Spokes coming from the left side of the hub pull the rim to the left. Spokes are attached to the rim are offset in a left-right-left-right pattern to counter and balance the pull of the other side. If one or more spokes lose tension to any degree, the opposing spokes, which are tighter, pull the wheel in the opposition direction, causing the wheel to wobble.
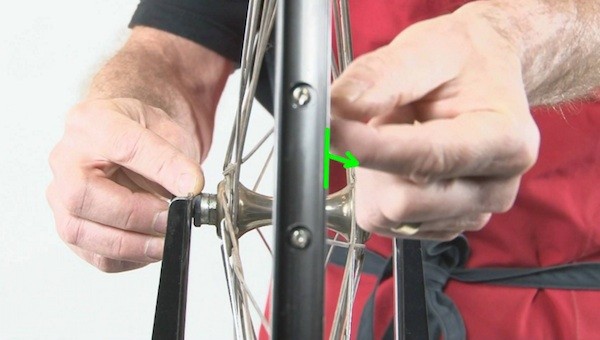
Get an Old Wheel
Get your hands on an old bike that you can practice on, they’re all over the place. It doesn’t matter if it’s a child’s bike, mountain bike or cruiser, the wheels work the same. Using old bikes and wheels to practice on illustrate how spokes work, it’s a lesson well learned. It allows you to radically twist and turn spokes, and watch how they affect the wheel in relation to the brake pads. It’s important that you understand the physics, and the cause and effect before twisting spokes on your $300+ road bike wheel.
Use Your Brake Pads
Remove a wobble from your wheel by flipping your bike upside down. If you own a bike stand use it instead. Give your wheel a spin by hand. Watch the wheel where it passes through the brake pads. If it wobbles from side to side, stop the wheel with the wobble centered on the brake pad closest to the wobble. If it touches the pad, that’s the high spot of the wobble. The spoke nearest the center of the wobble is lacking tension. Check to see if it’s on the right or left of the hub. Mark it with tape. That’s the first spoke to tighten.
The Controversy
The most complicated, confusing part of wheel truing is the direction in which to turn spokes. The controversy is understandable because of two different perspectives; looking at the spoke nipple from inside the wheel, or outside the wheel. Most mechanics prefer the perspective from inside the wheel. In other words, you’re looking at the nipple from the hub side. Looking at it as if you were looking through the wheel reverses the procedure, or which way to turn the spoke.
Clear as Mud
Looking at the nipple from inside the wheel, tighten spokes counterclockwise. Loosen them clockwise. Get this in your head before attempting to true a wheel or removing a wobble. If this is clear as mud, it’s because it is. This is the point where you get your old bike and start twisting spokes. If the spoke gets tight, you’re doing it right, if it gets loose go the other direction.
Spokes Don’t Turn
Part of the left or right turning controversy lies with the fact that you don’t actually turn the spoke. Instead, you turn the nipple that holds the spoke into the rim. Common cyclists often refer to the turning of the “spoke,” when in reality, it’s the nipple that gets turned. Turning the nipple instead of the spoke means you really have to concentrate on what you’re doing, because it’s really easy to mix up “tight” and “loose.” Never allow the spoke to turn with the nipple, which may cause it to twist and break. If it does turn, apply some light oil to the nipple threads and try again.
Spoke Wrench
To adjust tension at the nipple, first select the correct wrench. Spoke nipples are typically square, and come in different sizes. The correct wrench is the smallest size that can be used, even if it seems slow or cumbersome putting the wrench on the nipple. Make sure the wrench is fully engaged on the nipple before turning. A wrench that is partially engaged may damage the nipple and make truing difficult.
Work in Pairs
Tighten your target nipple 1/4-turn. Skip to the next nipple — which applies opposite tension — and loosen it a 1/4-turn. Repeat tightening and loosening on adjoining nipples working in pairs of four. Give the wheel a spin, check the wobble and repeat if necessary. It’s likely that your wobble issue is related mostly to a single spoke, but it’s typically necessary to balance it by adjusting nipples to the left and right of it.
Take Your Time
Take your time, be patient. It’s a process of trial and error for the most part, working in small increments. If the nipple is too tight, drip a bit of penetrating oil on it. Generally speaking spokes should be as tight as the wheel allows. Spoke tension that’s too low decreases spoke life by increasing the stress on the wheel every time it rotates under weight. Tension that’s too high can damage the rim or hub by pulling too much. The rim may crack where the nipple exits the rim, or the hub may crack.
Spoke Tension
Check spoke tension by plucking each spoke in the middle, and listen to the sound. Front wheel spokes should sound the same on both sides. On the rear wheel, because of the dish, each side should sound slightly different, but the spokes on each side should sound the same as each other. Most people don’t have a spoke tension/meter, so it’s smart to compare the sound of your spokes to the sound of a wheel that you already know has proper tension, if possible. Spoke adjustment changes the whole wheel, so expect to repeat the steps several times before it is true. Trial and error is the key here.