 Long bikes rides are a wonderful way to enjoy your time to yourself or others and get in some much needed fun. However, if you do plan on spending hours or even days on your favorite bike route, there are some things that you will want to take with you. This simple checklist will help you take on any challenge or emergency you may meet on the bike trail. [Read more…]
Training
Post Ride Recovery Rituals
Many cyclists have different ways of cooling down after a long ride. In fact, each person will find that they have different needs when it comes to their muscles depending on the ride itself. Of the multiple post ride recovery rituals, here are a few of the most popular.
Stats
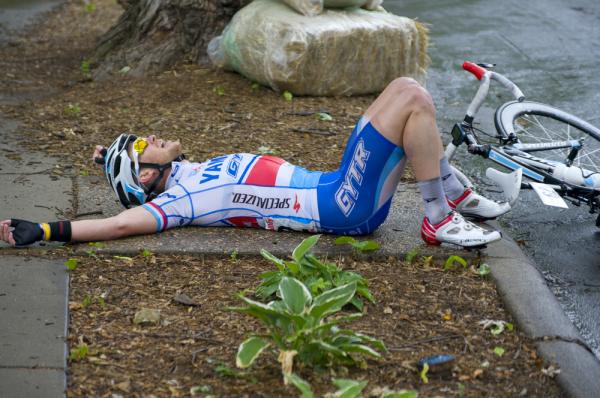
Not everyone is in to stats, but the ones that are are obsessed. One of the most common things to do after a ride is to upload your stats and check them – even before you take off your shoes. Did you capture that KOM? Did you have a higher average power output? How fast did you climb that hill…
Fluids and Food
One of the most efficient ways to recover is to replace the lost fluids in your body. During your bike ride you will most likely find that you sweat quite a bit. Sweat is the body’s way of cooling you down so that you don’t overheat, but it can also cause dehydration. Because water drives nearly every metabolic function in your body, dehydration is no joke. You can also lose the salts in your body through sweat. Both the fluids and the salts need to be replaced.
Eating food after your ride will also help you recover by replenishing the fuel stored in your body. By eating the proper food, you will be able to recover energy more quickly and your body will also be able to repair any tissue damage caused by exercise. The ideal time to eat after your bike ride is within 60 minutes of finishing.
Stretching/Massage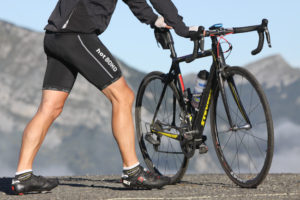
An important part of a post ride recovery is stretching. Don’t bother with strenuous stretching, but rather very gentle stretching. This will keep your loose muscles from becoming too rigid too quickly as they try to return to their resting state. This will also help prevent muscle soreness.
Massage is also going to help clear the lactic acid out and help you recover; however, not everyone can afford a massage after every ride. I recommend using a foam roller, if you do not already, it will change your life.
Rest
Rest is the most important thing you can do to recover from any sort of exercise. Even if you just take a few minutes to rest, you will feel better than if you didn’t rest at all. A 10 – 30 minute nap is ideal if you are able to sneak it in, but a good night’s sleep is the best thing you can do for yourself. Not only will you be able to recover fully but you will be more prepared for the next time you get on your bike.
When you are in recovery mode remember: Never stand when you can lean, never lean when you can sit and never sit when you can lie down!
Your post ride recovery ritual will depend on how hard of a bike ride you had. By tailoring your ritual for what your body needs, you will be able to recover quickly and efficiently. By recovering properly you will also be able to prevent the injuries that come with tired or strained muscles.
The Perfect Sprinting Technique
The Perfect Sprinting Technique
To be a great sprinter not only do you need great tactics but you need the perfect sprinting technique.
Choosing the Proper Gear
 Before you can even begin to sprint it is crucial to select the proper gear, it has to be one that you can accelerate very quickly, but not one that you are going to spin out of too soon. Gear selection will come with practice. Challenge yourself to mini sprints while on training rides to get a better feel for gear selection.
A more advanced technique to keep in mind is that suddenly changing gears can signal to people that you are about to get up and sprint, so try to soft pedal for a moment and then feather the gear change if you are trying to catch them off guard.
The Jump
Once you have selected the proper gear it is time to start the sprint. Wait until your “power foot” (likely your right foot if you are right handed) reaches the 2 o’clock position then get out of the saddle, push down on the pedal and go like a bat out of hell. To generate the maximum amount of explosive power you should be pulling down on your drops while pushing down on your pedals. Use your weight to your advantage and rock the bike side to side so that your weight is over the pedal on each down stroke. The first 5 pedal strokes should be extremely explosive.
Sprinting
Now that you have started to sprint it is important to keep technique top of mind. Keep your body low and elbows in as much as possible as you continue to accelerate. You are able to go faster with the same amount of power if you are more aerodynamic as the air resistance increases exponentially as speed increases. Keep your upper body quiet, low and focused on where you want to go.
If you are not racing for the line, look back once or twice to make sure you have created enough of a gap to continue to breakaway but do not keep looking back. Find a steady hard effort and continue to push.
Changing Gears
Ideally in a sprint finish you have selected the proper gear to use the entire sprint; however, in a breakaway sprint you may need to change gears once you have created the gap. Changing gears effectively while standing takes a lot of practice, so it is a good skill to hone in while you are out training.
Tactics
Tactics is a whole other art that is equally as important as the perfect sprinting technique. Stay tuned.
Four Steps To Avoid Overtraining
Four Steps To Avoid Overtraining
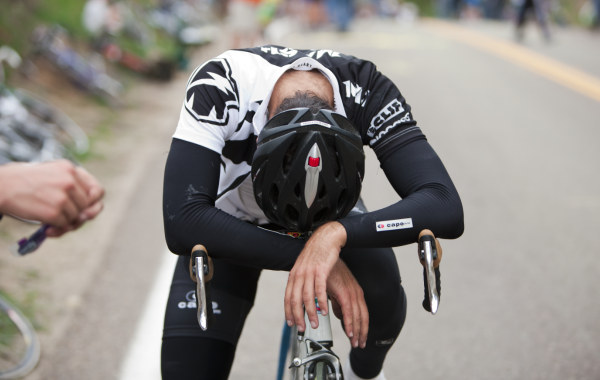 Anyone can suffer from overtraining and in fact, it’s more likely to occur in beginner cyclists as they try and do too much, too soon.
As you go about doing your regular cycling sessions, one thing that you do need to keep yourself very aware of is the concept of overtraining. Some people mistakenly believe that overtraining will only happen to serious athletes and top notch cyclists who are training for hours each day, but this just isn’t the case.
To help ensure you are doing everything you can to prevent overtraining, let’s look at four steps you should take.
Sleep Well
First, one of the top things that you must keep in check is your sleep needs. If you are not sleeping enough each evening, this is going to sacrifice the recovery you make between rides and will most definitely put a dent in your recovery.
You should be sleeping at least 7 hours, preferably 8 or more during intense training times.
Take At Least One Off Day and A Cross Training Day Each Week
Second, it’s also important that you take at least one day off each week to allow for complete rest and recovery. Don’t exercise 7 days a week or you are on a fast road to overtraining. Remember, your body needs time to recover, so don’t be afraid to give it that time.
In addition to that, you would be best suited to doing a day of cross training as well at a moderate intensity level. Go for a swim or take a leisure walk with a friend. There are many ways to move and keep up your fitness without it being an intense ride.
Don’t Fear Carbohydrates
Make sure that you are eating enough carbohydrates as well. If weight loss is your goal, you may be cutting back on this particular nutrient quite readily in your diet, but that will set you up for some problems down the road. As your glycogen stores become more and more depleted, you will notice that it becomes harder and harder to do the rides you set out to do. Eventually, high amounts of fatigue will set in and when they do, your rides will cease to exist. Overtraining will set in and you’ll be required to take time off.
The most important times to consume carbohydrates are during your rides (especially ones at high intensity) and immediately after rides. After you have replenished the glycogen and carb stores you can go back to your paleo diet that is low in carbs or The Paleo Diet for Athletes.
Assess Your Stress
Finally, be sure that you assess your stress levels. Remember that it’s not just exercise stress that can add up and impact your cycling performance. You can also start to experience stress from relationship, financial, or work related issues and this can wear you down as well. You want to keep your life as stress free as possible and that will go a long way towards helping you avoid overtraining.
So keep these quick tips in mind and you can forge onward and put the risk of overtraining behind you.
Maximizing Your Performance
Maximizing Your Performance
This training article comes courtesy of Leah Guloien and Jamie Riggs, General Managers of the Cycling Division at Burnaby’s Catalyst Kinetics Group.
1. “What’s holding you back?”
 Answering this one question, and developing a strategy to turn that weakness into strength, will pay dividends with faster times and stronger rides. Most athletes, for example, never consider they’re breathing? Many athletes breathe with quick shallow breaths, which not only wastes energy, but also hinders your bodies’ ability to burn fat as fuel. Taking 5 minutes per day before bed to practice ‘belly breathing’ is one of the simplest and quickest things an athlete can do to change their performance. To do it, lie on your back in a relaxed position, and place one hand on your abdomen. Now focus on taking deep breathes using your diaphragm, if you’re doing it right your belly will be moving up and down quite a bit. If you feel yourself tensing any neck muscles, stop, and refocus on breathing from the belly. A few minutes a day, and you’ll be started down the path towards becoming an efficient breathing machine!
Fitness testing is another way to examine your current performance level. At Catalyst Kinetics Group we start every athlete off with a comprehensive physiological assessment, which quantifies every aspect of your performance, from your breathing frequency and cardiac function, to blood values and muscle oxygen saturation. These types of assessments require expensive equipment and knowledgeable people to run them, but you can get a great start on your own with nothing more than your bike, a stopwatch and a heart rate monitor. See below for an example of a field test we use to build an athlete’s training program.
Fitness test: After a 30-minute warm-up, pick a straight, relatively flat stretch of road that you can ride at least 20 minutes with a minimum of stops. Start your watch and ride a 20-minute time trial, making sure to record power (if available), heart rate, and speed along the way. Record these numbers for later, and see below for some ways you can use them to build workouts.
2. “Have a plan”
It’s been said a million times, but this simple advice will pay off for anyone with ambitious cycling goals. It can be as simple as writing out the ‘Fondos, races, and rides you hope to do this year on a calendar, and taking a look at the spacing between them. This can have surprising results, as maybe you weren’t aware exactly how close together those two massive rides you were planning were, or didn’t notice a gaping hole with no events just waiting to be filled.
Once you have your main events penciled in, go through and mark out your next most important training periods, the easy ones! A big ride, race or Fondo take a lot of energy, both physically and mentally, and it can be easy to ride the wave of endorphins that comes from completing one of these events into another hard week of training. The result is that you find yourself in a deep ‘hole’ of fatigue, with that next big ride looming on the horizon. So after each big goal event, be sure to schedule an easy week of training, and from there you can start to rebuild toward your next personal best.
3. “Keep the easy stuff easy, and the hard stuff hard”
One of the most important benefits to having a plan laid out in advance is that you are in effect giving yourself a reason to go easy sometimes. If every ride you head out with no idea about what you have done or what’s up ahead, it is very easy to fall into the dreaded ‘junk mile’ trap. These rides feel great. You’re pushing the pedals, working up a sweat, as well as an appetite. But then you notice that no matter how much you ride, you aren’t losing any weight, or that no matter how fast the average speed on that three hour Saturday ride, you’re still getting creamed in the local group ride sprint.
Instead of pushing it every day, arrange your weekly rides so that a few, no more than two, are your hard rides. The rest of the time on the bike should be spent at a pace where you can easily hold a conversation with a person beside you. These rides truly do lay the base of fitness, logging time in these easy zones allows your body to adapt structurally to the load being applied. More blood vessels, increased density of cellular powerhouses, and a whole raft of other changes that turn your body into a super efficient, fat-burning, watt-churning machine.
Example Structural Endurance Workout: Ride for two hours at a ‘conversational’ pace, keeping your cadence between 85 to 95 RPM. Every 15 minutes do a short, 15-second sprint, and finish with 5 to10 minutes at 110 RPM.
The two hard days are the chance for you to explore your limits. Since you won’t be as tired as you would have been had you been riding ‘medium’ all the time, your hard efforts will be truly hard, taking your legs and lungs up to their maximum capacity. By pushing against the limits of what you are currently capable of, you will see your ability to sprint and hang on to the fastest guys in town increase dramatically. Thirty-second all out intervals are all the rage lately, but in reality there is no end to the sessions you can dream up. Whether they’re short sprints or longer five and ten-minute efforts, they all have a place in a well-rounded cyclist’s plan.
Example Short Interval Workout: Start out with a 30-minute warm-up, gradually increasing your effort level. Include one, 8-minute interval at an effort level of 8 out of 10 during this warm-up. Next, proceed to do six 30-second maximal efforts, staying in the saddle as much as possible, ‘spinning’ rather than ‘mashing’ the pedals. Leave at least four minutes of very easy spinning between efforts. Finish the workout with another 10 minutes at an effort level of 8 out of 10.
Example 10 minute Interval Workout: Take the average power you found during the 20-minute field test (see above), and multiply it by 0.85 and 1.05. These two numbers will become your high and low-end thresholds. During a 2-hour ride, do two intervals of 20 minutes each, alternating 3 minutes at the low-end threshold, with 2 minutes at the high-end threshold power. If you don’t have access to a power meter, you can also use average heart rate, adding and subtracting five beats to your average during the field test to find the high and low end threshold values.
4. “Take care of your body”
Addressing muscular imbalances and inefficiencies on the bike, whether it is as a result of habitual patterns that the body has become accustomed to or as a result of an incorrectly fitting bicycle can assist in helping you achieve your optimal performance.
Designing a pre- and post-cycling routine can help set you up for success. Purchase a foam roller to help with muscle activation and localized tension within the muscles. The glutes and the quadriceps are important areas to focus on. Some specific exercises we like to incorporate prior to our PowerRide sessions are planks, thoracic spine openers and bridges. Activating the core, opening up through the chest, and activating the glutes are all-important to a strong posture and alignment on the bike.
After intense or long sessions on the bike, it is important to cool the body down properly and not only in the sense of pedaling easier. Making sure to stretch out the body and return the body back to an ideal posture is important. Stretches such as spinal twist, pigeon pose, and downward dog are all great stretches post cycling. Take 10 minutes and pick 5 to 10 stretches and hold each for approximately 30 to 60 sec, always easing into the stretch and never pushing to the point of pain.
We hope you’ve been able to learn something helpful from this article, and wish you nothing but the best in pursuing your cycling goals.
Leah Guloien and Jamie Riggs are General Managers of the Cycling Division at Catalyst Kinetics Group, a Vancouver area, multi-disciplinary health clinic, physiological assessment and sports & fitness training facility.
Thinking of doing a Granfondo this year? Check this one out: Okanagan Granfondo
5 Winning Cyclocross Tips
5 Tips For a Successful Cyclocross Season
If you were disappointed with how you raced last cyclocross season, had some issues with your cx skills, or simply felt you could have been faster, then these simple (and in many cases obvious) tips can make your next season a winning one.
1. Ride Your Cross Bike 
If you are serious about cyclocross you should not touch your road bike all cyclocross season, and limit your time on a mountain bike. Also mix in cyclocross rides during the spring and summer so you don’t look as shaky as a new born baby deer when you do a cross dismount in August. Most elite cross racers will mix in some cyclocross rides in the off-season, riding the bike more starting in July, and exclusively by September. Most racers will have a set of wheels mounted with road tires for their cross bike for training on the road and group rides. When you spend a lot of time on a bike it starts to feel like an extension of your body and becomes very predictable both on and off road. Predictable equals fast.
2. Do Your Cyclocross Workouts Off-road
When you start doing cross specific workouts and intervals make sure to do them off-road on mini-cross courses. It is easy to get sucked into wanting to do your intervals on the road where you can hit predictable power numbers, but in a cross race you are going to have to put power down on bumpy, slippery, and twisty terrain. Make your cross workouts into real cross workouts and do them off-road
3. Learn Proper Cyclocross Technique
Having proper technique for carrying, dismounting and mounting your bike in all different scenarios not only makes you a faster more efficient rider, but also cuts down on mechanical issues because you are not banging the bike around. Sadly many amateur riders have some holes in their technique and enrolling in a cyclocross skills clinic is the best way to fill those holes.
4. Strengthen Your Core
Cyclocross has a lot of weird unbalanced repetitive motions such as jumping on and off your bike from the same side as well as always carrying your bike on the other side. These repetitive motions can lead to weird and debilitating overuse injuries.
5. Take an Off-season
If you race cross all fall it is easy to jump into training for the upcoming road or mountain bike season after only a few weeks rest. For most people your body and soul need more than a few weeks rest. Take the time to recharge and do some other activities. Here is a list of the most popular off-season activities for cyclists.
Craig Richey is a multiple time Canadian National team member, representing Canada at mountain bike World Cups and cyclocross World Championships. Craig is currently doing an MBA in Boston and recently launched SponsorConnected.com
How To Stay Cool While Cycling
How To Stay Cool While Cycling
 The summer heat can press down on you like a sweaty blanket learn how to stay cool while cycling.
What Do You Wear to Stay Cool?
One of the most important considerations is what you are wearing on days where you are cycling in the heat. It’s important to wear clothing with the following traits:
- Light colored – to reflect away the sunlight. I now only buy white jerseys because I am very prone to overheating.
- Wicking – to move sweat away from your skin and to the outer surface where it can evaporate.
- Zippers – so you can unzip and catch a nice breeze.
Another way… wear as little as possible. While this could keep you cooler, it also opens you up to sun damage. However, there is something to be said for at least keeping your arms and shoulders bare as these are places where your axillary arteries are. Axillary arteries carry cooled blood back to the heart to cool the rest of your body, so it’s worth keeping them exposed if possible.
Accessorize
Accessories are not just for looks, they are for functionality as well:
- Sunglasses – a surprising amount of heat can be absorbed through your eyes. Keeping the sun out, as well as bugs and dirt, will keep you cooler.
- Helmet – pay a little extra for well ventilated helmets, no one enjoys heat stroke.
Water
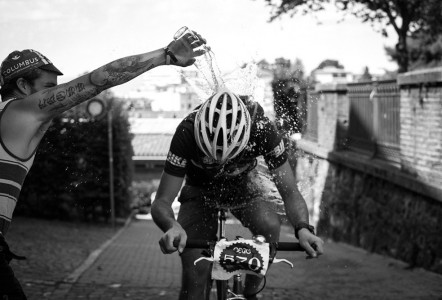
Not only do you need to stay well hydrated, but you should keep extra water to soak yourself. Take advantage of those big vents you paid extra for on your helmet and spray some water down them. Keep your head cool first, and if you have enough to spray under your armpits, near your groin and down your back as these are the places that your blood vessels are close to the skin.
Sunscreen
I used to hate wearing sunscreen, but I noticed a major improvement in performance when I slapped it on… now I don’t leave home without it. I have read that applying sunscreen can keep your body temperatures 10% cooler.
Avoidance
Take a look at the forecast and if you know it is going to be hot, ride in the morning/evening when you don’t have to battle the heat.
A little common sense goes a long way in the heat. If you start to feel woozy or start overheating stop and take the time to cool down because heat stroke can kill you or cause permanent damage to your brain and internal organs. It is serious stuff… so stay cool.
How To Bike Safely On Wet Roads
How To Bike Safely On Wet Roads
Braking
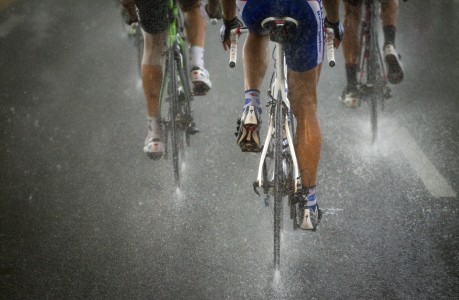 Braking on wet surfaces is much more dangerous than braking on dry surfaces and requires a bit of practice and skill. Most of your braking power is still in your front brake; however, apply to much pressure and you are sure to have a front wheel slip out. It is important to get a “feel” for your bike and know how much brake to apply front AND back. On wet surfaces I apply a little more even braking; approximately 60% front brake and 40% back brake depending on the conditions. The dryer the surface the more front brake you can apply.
Since the surface is wet there is less traction, since there is less traction you need to start braking earlier not to mention that your braking is slowed even further because of the water on your rims. You will notice when you brake on wet roads that your brakes take a few seconds to “kick in” that is because there is water on your rims and your brake pads must clear it before you are able to get adequate friction on the rims.
One trick to better braking is actually shedding this water before you even want to start braking; this is done by gently squeezing the brake so that the brake pad caresses the rim and clears the water without slowing down.
When you are ready to brake apply more pressure on the front brake than the back, but not so much as to cause a front wheel slip out. You will get a better feel for this the more you practice. You will even get to a point where you can start to feel the front tire want to go on you and that is how you know to back off a little.
Turns
Don’t forget to brake much earlier than you are normally accustomed and make sure that you have slowed down enough so that you are not required to brake during the actual turn. Braking during the turn is one of the more common mistakes and I have seen a few people go down as a result.
Try to take the turn as wide as possible to cut down the angle as much as possible (straighter line = safer). Always look ahead at where you want to go and not at what you are trying to avoid. Keep in mind want kind of tires you have on, racing slicks in a turn can be disastrous at the same speed where a winter treaded tire can be safe.
Tire Pressure
Biking with a lower psi in your tube will allow greater traction as more of the tires surface area will be in contact with the road. I know most roadies jack up the psi as high as possible as they think it results in faster times, (not always true) but try and avoid this especially on a wet road. I reduce psi from my standard 105 psi to 95 psi in my tubes.
Any other tips? Leave a comment below:
The Basic Goals of Training
The Goals of Training
 The principles of cycling training are fundamentally basic. Your goal is it overload and then allow for adaptation. Rinse and repeat.
So what are you trying to overload?
There are three variables in cycling training:
- Volume – How much
- Intensity – How hard or how easy
- Frequency – How often
In training the goal is to increase (overload) either volume, intensity and/or frequency in order to obtain “overreaching” (explained below) then allowing yourself to recover (adaptation). Repeat that process until you reach your desired goals.
The key to training is finding the correct combination of these three variables.
Great – What is the correct combination?
That really is the art and science behind a training plan. It really depends on the individual and their goals. For instance, someone trying to complete a century ride is likely going to focus on volume, where as, someone preparing for a criterium race is going to focus on intensity.
There are a lot of factors to consider when developing a training plan. Take something as simple as age, imagine a person at 20 and how quick recovery is. Now imagine that same person at 55. Generic training plans are much better than nothing and serve as great bases to work from, but you should take the time to educate yourself on what your body requires and when.
Overreaching
There are 4 classifications when talking about cycling training:
- Undertraining – When you spend too much time resting or recovering and not enough time on the bike, your performance does not improve.
- Acute overload – Positive physiological adaptations and minor improvements in performance, you are getting better albeit slowly.
- Overreaching – Optimal physiological adaptations and performance, your training plan should be designed to overreach.
- Overtraining – Physiological maladaptations and performance decrease, you feel very fatigued and have a lackluster attitude for training.
At the end of last season I spent a lot of my time in the overtrained classification, mostly because I solely focused on intensity and it drained my batteries at a very rapid rate. Again, overreaching is the goal, but it is difficult to know how little is too little and even more so how much is too much.
The essence of cycling training is very simple, but there are so many different ways to achieve the same goal. If you are new to training I suggest a cycling coach, even if it is just for a few months, they can save you a lot of wasted time and energy.
Information for this post gathered from: USA Cycling
Exercises to Strengthen Core
Exercises to Strengthen Core
If you read the last post on core muscles and cycling, then you ought to know how important this group of muscles is and if that’s the case, then you’re probably wondering how best to improve them. Crunches only strengthen one small area of your core; you need exercises which work the whole system effectively.
These 5 core exercises can be done anywhere, without any equipment and are effective:
V Twist: Start by lying on your back with your knees bent at a 90 degree angle and your feet off the floor (thigh should be perpendicular to the floor) and fold your hands over your chest. Then slowly straighten your legs away from you to the right until they are at a 45 degree angle to the floor. At the same time, contract your torso up and extend your arms forward. Then lower yourself (slowly!) back to your starting position. Feel free to contract your torso and reach out to the left or right as well. Repeat 10 to 20 times depending on ability.
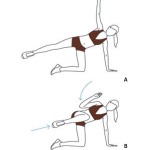
Side Balance Crunch: Start with your left knee and your left hand on the floor and your right arm straight up. Extend your right leg so that your body forms a straight line. Pull the right knee to your torso and your right elbow towards your knee. Then straighten your arm and leg and repeat it ten times, then switch sides.
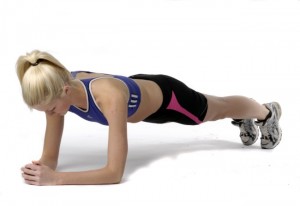
Plank: Start on your elbows and knees with your hands clasped. Then straighten your legs and raise your body so that your weight is being held up on your forearms and the balls of your feet (Feet should be hip width apart). Face the floor, don’t arch your back or stick your butt into the air and hold this position for at least 15 seconds. This move can be easily modified to the side plank and the circle plank.
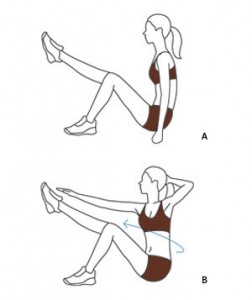
Oblique Reach: Sit with your knees bent and feet on the floor. Then straighten your right leg into the air and roll spine into a C-curve. Place your left hand behind your head and extend your right arm towards your right foot. Twist your body a bit to the left, roll back a bit more and hold for one count. Then come back up. Do five of these, then switch sides.
Russian Twist: Sit on the ground and hold your feet in the air. Then lean back until you are half way to a sit-up, then rotate from side to side, pausing slowly when you reach the end of a rotation. You can make this exercise harder by adding weights – hold a weight ball out and follow it with your head while rotating your torso. Either one, 2 sets of 10 to 20 reps will do.
Some information for this post was gathered at real simple.
How Long and How Often?
If you have a relatively weak core to powerful leg ratio then you may need to do some of these exercises. I generally do core exercises while watching TV, when I am bored or for a warm up right before my “real” workout. To maintain your core you probably only need to do core exercises once a week, but if you are looking to improve core strength then these exercises should be done two to three times a week.
You can do any and all combinations of the above exercises in less than 15 minutes. If you do them regularly and correctly, you’ll notice a real difference in your cycling performance. Keep that core strong and let us know which exercises you use to strengthen your core in the comment section below.

