Before trying to find a remedy for back pain, it is necessary to know the reasons that back pain happens to cyclists. They body of a cyclist is one complete system; if one element of the body is not doing what it is supposed to, the entire body suffers. This is the root of most back pain in cyclists. Strengthening your core may be the solution to eliminating that weak link.
Understanding Core Strength
Traditionally core muscles were defined as from the diaphragm to the pelvic floor. More recently, core muscles are defined muscles that insert or originate at the spine or pelvis. It is a broad definition that includes major arm and leg muscles. For the purpose of this article and cycling, strengthening your core will refer to muscles between the base of the skull and the abdominal floor. Those are the muscles that stabilize the body on the bike, resulting in a very smooth looking pedaling style. A silent upper body results in a very stable platform for the muscles that provide power on the bike to push against.
Making the core muscles function as a unit with proper motor control is the goal of strengthening the core; not developing brute strength or a tone beach body. You may see some physical changes, you may not, but you will feel better while riding.
Lower Crossed Syndrome
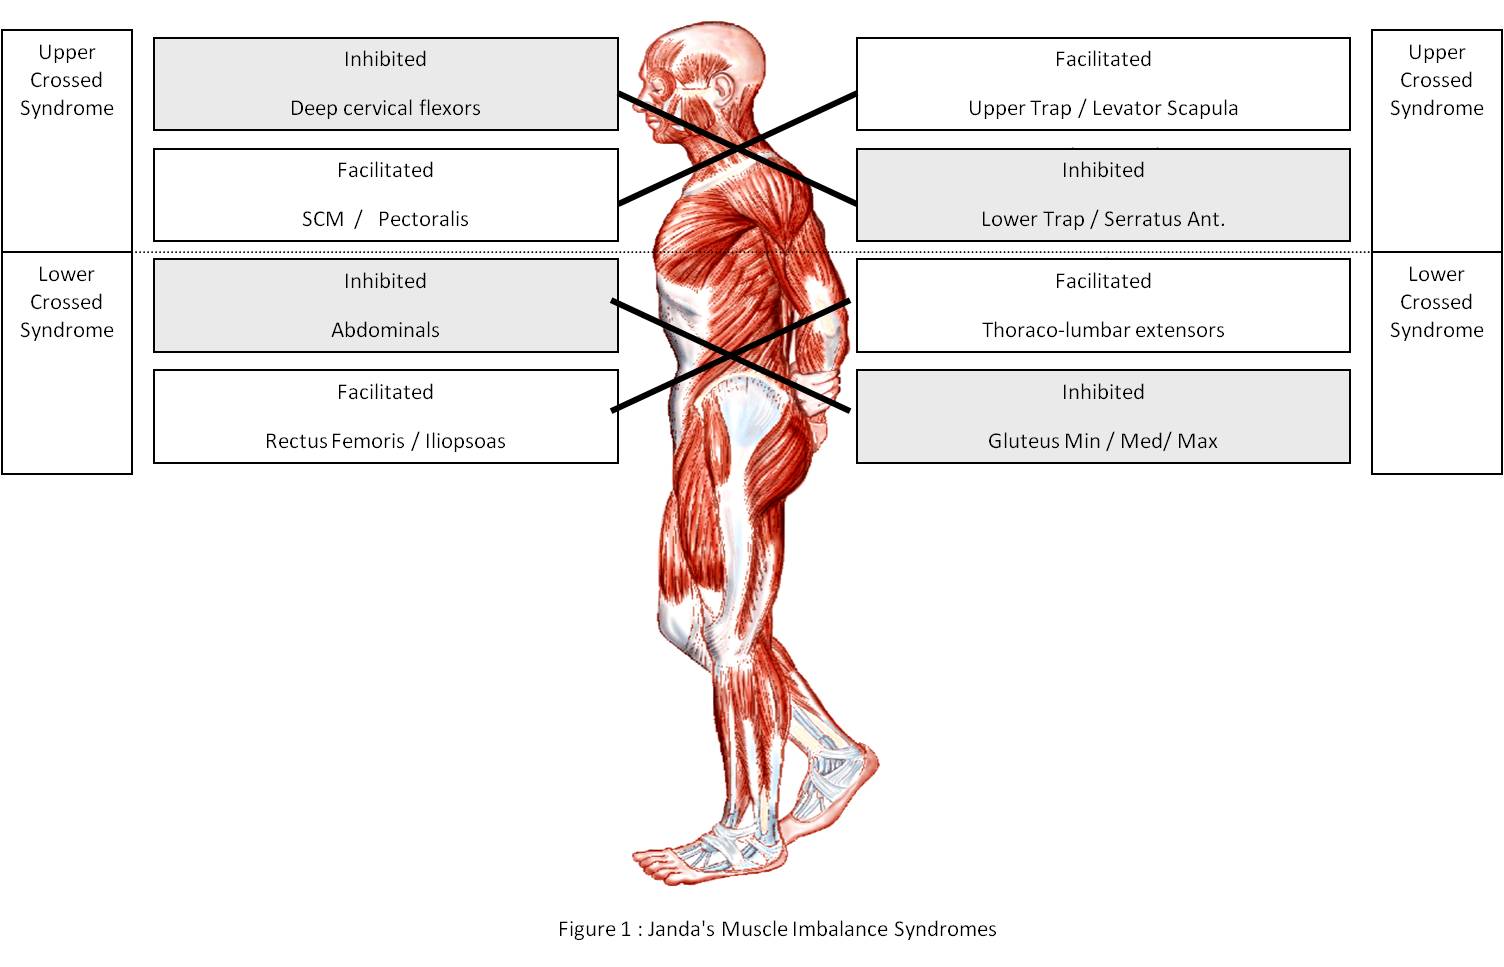
Understanding Lower Crossed Syndrome will help you understand one of the most common causes of back pain in cyclists. The image below illustrates improper muscle loading that results in pain and discomfort. The inhibited muscles, abdominals and gluteals, are never fully engaged in cycling, while the facilitated muscles, rectus femoris (quadraceps), iliopsoas and thoraco-lumbar extensors are always engaged and often overworked. Constantly engaging those lower back muscles without proper support from a stable core often results in lower back pain.
While pedaling, quadraceps pull the pelvis forward. To keep your body on the bike, your lower back resists that pull. It is an action that is not inherent to the design of your lower back muscles. The result is overworked lower back muscles that may cross into pain.
Stable Pelvis – Healthy Body
The seat of power on a bicycle is the pelvis. When the pelvis is properly aligned the rest of the body can pedal efficiently. When the pelvis is misaligned and unstable, it is a recipe for not only lower back problems but hamstring problems too. An unstable pelvis leads to rocking. With each rock, the pelvis engages lower back muscles and hamstrings in ways that should not be involved in pedaling, overworking and straining the muscles unnecessarily.
A stable pelvis gives a platform for the quads to push against in the most powerful part of the pedal stroke, easing strain on the lower back. Strengthening your core will lead to a stable pelvis, a lower likelihood of injury, and more efficient riding.
Basics of Core Exercise
Strengthening your core should be based on the principle of proximal stability and distal mobility, according to Craig Abrams who is a Doctor of Chiropractics with a special interest in cyclists. Proximal stability is keeping the core still, providing a platform to work against, while distal mobility is moving the extremities against the stable core. This will replicate how your body should work when it is in action and will build towards proper motor control.
Stretch the Facilitated & Strengthen the Inhibited
Be mindful of which muscle groups need what kind of work. The facilitated (overworked) muscles, like quadraceps and lower back, do not need strengthening but stretching. They are always engaged in cycling. The inhibited muscles benefit most from strengthening your core – the abdominals and gluteals. Keeping this in mind will restore balance through your core.
Exercises
Dr. Abrams provided a few exercises to get you started on the road to strengthening your core. As you advance, you should seek out more advanced and strenuous movements.
Foam Roller Exercises
This should be the first thing you do after you get off the bike every ride. It’s one of the most effective ways to
develop your daily postural work.
#1
- Start by lying with your spine running down the length of the foam roller with your knees bent so your feet are flat on the ground.
- Once stable, begin by placing your hands together above your chest with your arms straight up into the air.
- Now press your finger tips towards the ceiling.
- Movement should come from your shoulders. You will be arching your shoulders forward toward the ceiling.
- Repeat ten times.
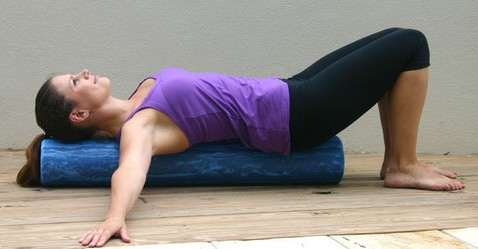
#2
- While keeping your hands above your chest, carefully lift one foot at time off the ground, as if you’re are marching in place.
- The goal is to lift each foot ten times.
#3
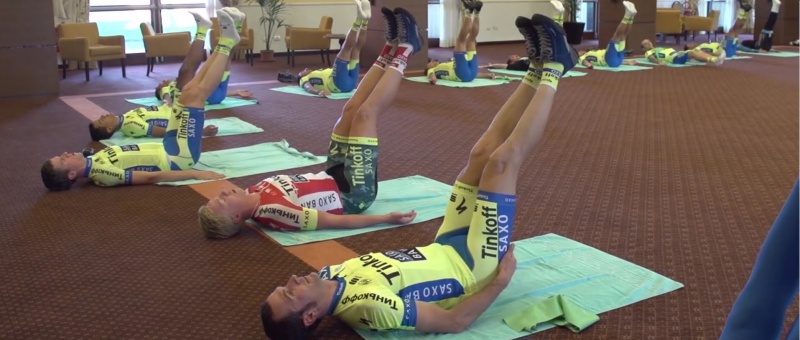
- Finally, place both arms on the ground next to you and raise both legs as if you are sitting in a chair.
- If you find it exceptionally hard to stay balanced on the roller, slide it down so it’s more under your lower back.
- While keeping one leg still, reach the other leg forward towards the opposite wall.
- Do ten reps on each leg.
Remember to maintain a comfortable natural breathing rhythm throughout the entire routine.
Movement and Static Exercises for the Core
Side Bridge on Knees
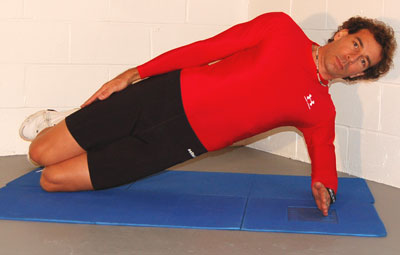
- Start by lying on your side with your hips in-line with your legs and torso while having your knees bent at 90 degrees or a bit less. You should have your elbow under shoulder with your wight positioned on your forearm and the side of your knee. Your hips will be off the ground in the air. One note is that you will want something soft under your fore-arm and knee such as a soft carpet or yoga mat.
- Next make sure that you feel like the shoulder is in a strong position. The ideal position is a place that you could hold for about one minute. Make sure you stick your chest out.
- While maintaining the above position, drive your hips forward. The common mistake is to raise the hips up. To avoid this, think forward/backwards with your hips, NOT up/down.
- Do this ten times and repeat on the opposite side and increase the number as you progress.
- This works the muscles on the side of your abdomen and hips so it is about movement and not a static hold.
Side Plank
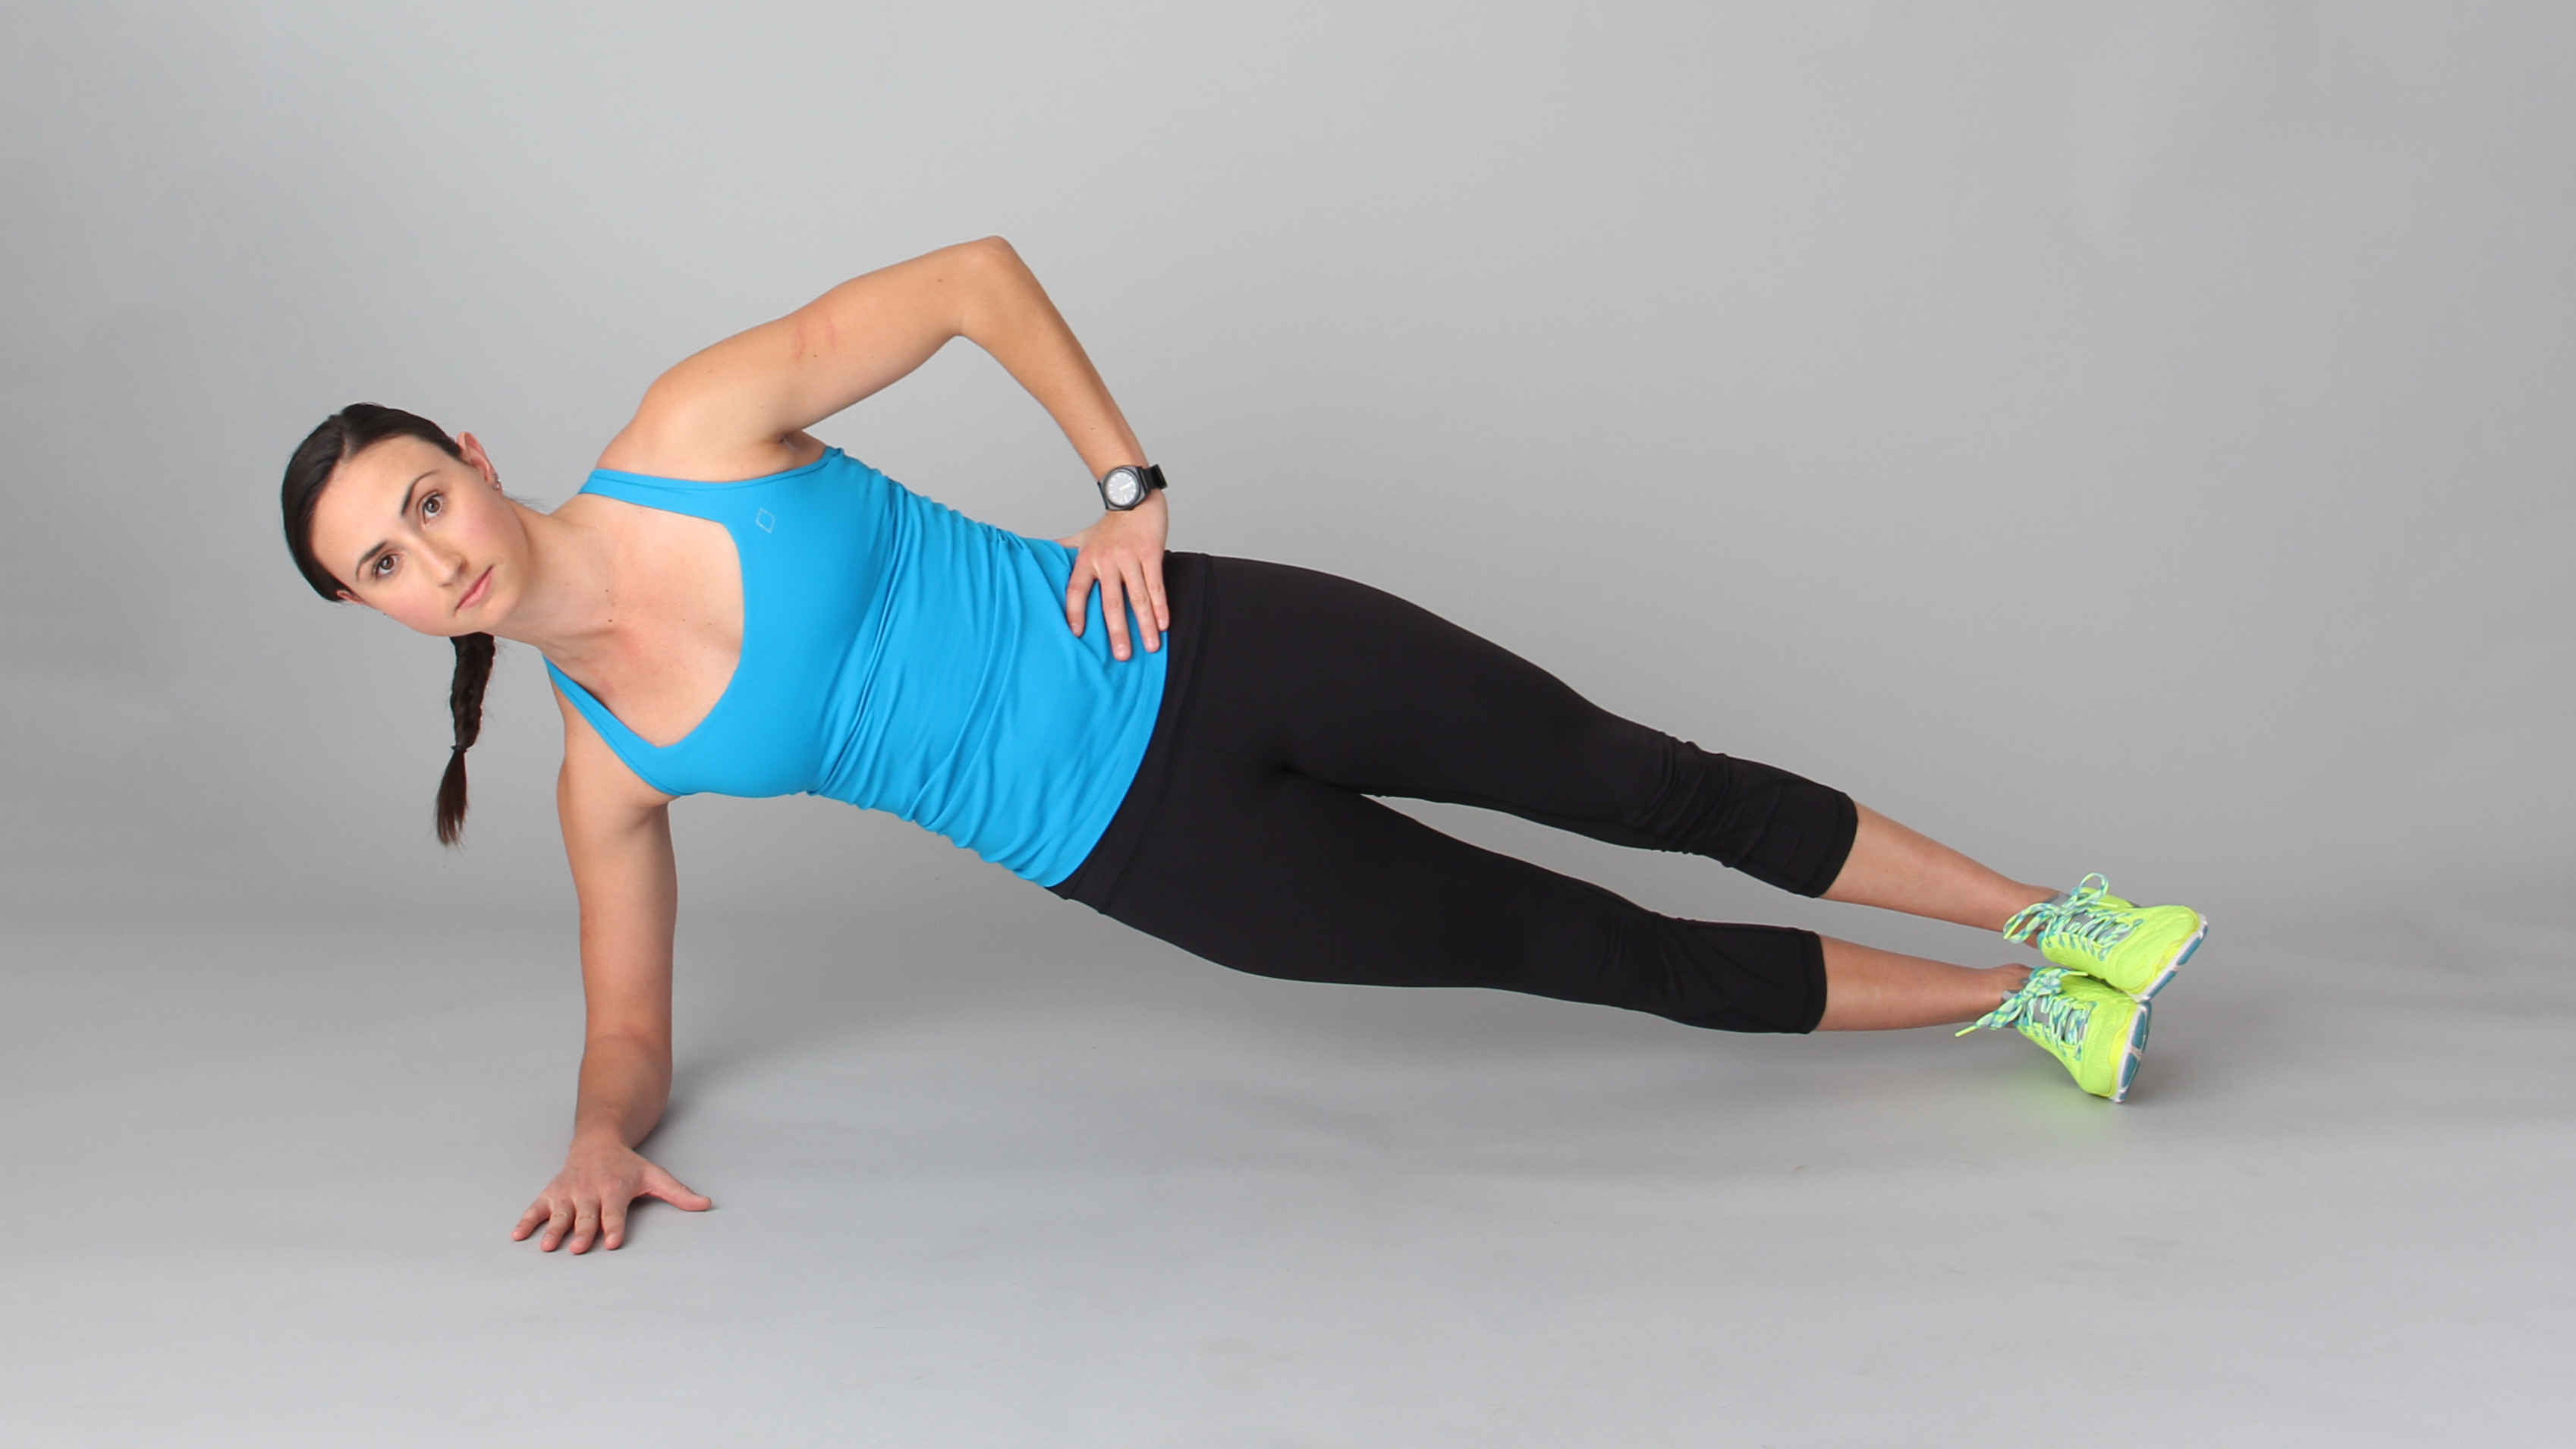
- Once you are able to perform twenty reps of the side bridge on your knees with ease, move on to the side plank.
- The set up is the same except that the legs are straight and your weight is placed on the side of your foot/ankle.
- Make sure you keep you back, hips, and legs all in a straight line while you hold the pose.
- Once you are up, engage your glutes, abs, quads, and hold for ten seconds.
- This should be difficult. Repeat on both sides.
Bear
- Start on all fours in a quadruped position.
- If you can, place your palms FLAT on the ground and have your knees directly below your hips and hands directly below your shoulders. If you need to place a yoga mat or towel under the knees, do that.
- Perform 2-3 light cat/cows to relax your back.
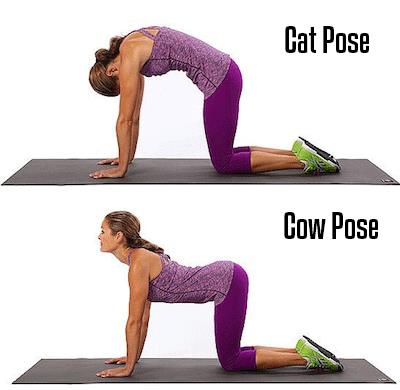
- Once you are ready, set your back. The ideal position is an exaggerated lumbar lordosis (cow pose). The easiest way to do this is by dropping your belly to the ground and pressing your chin back as if you are trying to make a double chin. Do not look forward, aim your head/eyes at a spot about 2 feet in front of you.
- Now tuck your toes and lift your knees about one inch off the ground. Take two deep breaths.
- Drop your knees back to the ground.
- Repeat two to three times.
- To add an additional challenge work on lifting each hand off the ground just like you did with the legs in the previous exercise.
Remember to try to keep the body stable (limit the twisting/bending).
Plank / Plank roll
- Start with a side plank position with your top foot in front of the bottom. Make sure you activate the side of your body by pulling your shoulder towards your feet.
- Hold this for ten seconds.
- Now keeping shoulders and hips “locked” together, roll to a front plank. (Try to avoid any twisting during this phase.)
- Once in the front plank, hold for five seconds.
- Again keeping shoulders and hips “locked”, roll to the opposite side. The key here is to really pull that shoulder underneath your body to help lock the plank as you roll.

Goblet Squat
- Hold either a kettle bell by the horns or a dumbbell by one end (or whatever else you have that is heavy.)
- Start in an upright posture with feet just wider than shoulder width apart with the elbows in tight.
- Your target is to have your elbows touch the inside of your knees as you squat down.
- Keep your back straight in the same position as you squat down. Don’t allow it to bend forward.
- Once “in the hole” rock side to side. Then come back to the center and stand.

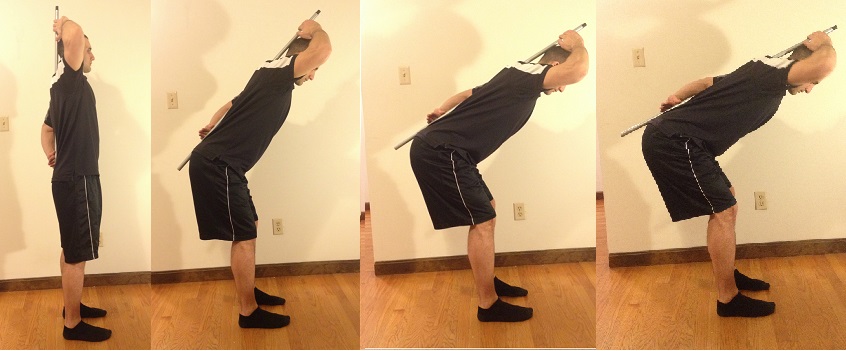
Hip Hinge with Dowel
- Start by standing and holding a long dowel against the back of your head, mid-back, and your sacrum.
- Keep your knees soft and drive your hips backward as you back tilts forward.
- Maintain the three points of contact at all times.
- If you need, reset to maintain a neutral spine (ie. three points of contact)
- Do this ten times.
If you are unable to do this while standing. You can try while kneeling. It is the exact same hip/back movement but we remove the added strain of the legs.
Bike Fit
While it is not part of strengthening your core, a proper bike fit is key to allowing your muscles to function in their appropriate ranges. A bike fit from a professional involves more than just adjusting your saddle to the correct height. The bike fitter will test your range of motion off of the bike. That range will then transfer over to the bike to ensure that your muscles will not extend past their limits, ensuring that you will not overwork or strain muscles.
Bike fits are something that changes with time. Your fitness improves, strengthening your core changes how you ride, maybe you had an injury. Lots of factors affect your fit on the bike; be aware of any changes and get a new fit.
The Importance of Strengthening Your Core
Strengthening your core is the single most important movement you can do off the bike for injury prevention. The great news is that it is usually easy and quick. If you have back problems or want to prevent them, you should be strengthening your core.

 Another season begins, the snow melts, and the flowers bloom. The giddiness and excitement of your new bike overwhelms you and you’re putting a ton of kilometers in the bank. Your quadriceps are sore, your hamstrings are tight, your hips begin to seize. This is all part of getting faster, right? Wrong. Speed and strength does not have to come at the expense of mobility.