• Training
    • Injury Prevention
    • Training Tips
  • How To
    • Bike Fit
    • Gear
  • Nutrition
    • Nutrition Tips
    • Weight Loss
  • Repair
  • Reviews
  • Stories
    • Funny Stories
    • Jokes
    • Quotes
    • Videos
    • Funny Videos

I Love Bicycling

I Love Bicycling is a website that is geared towards cycling for beginners with road cycling tips, training articles, nutrition tips, weight loss, how to’s and bike repair articles.

Injury Prevention

  • Training Tips
  • Training Camps

How To Improve Pedaling Efficiency

February 26, 2020 by Sarah Lauzé

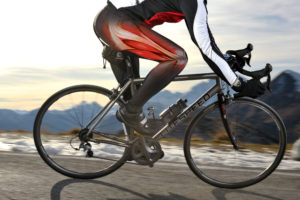
Cycling is all about pedaling. No matter the bike, kit, and all the other bells and whistles, if you don’t start moving your legs you’re not going anywhere. In fact, the pedaling motion comes so naturally to most of us that we don’t even give it a second thought. With all the focus on cadence, a lot of times pedaling efficiency gets left behind.

Yes, cadence is important and has a large effect on how efficient your pedaling is, but it’s not the whole story. If you’re completing 90 revolutions a minute for a two hour ride, that’s over 10,000 revolutions. So, just think about the effect it could have on your riding if you made each one of those revolutions everything it could be.

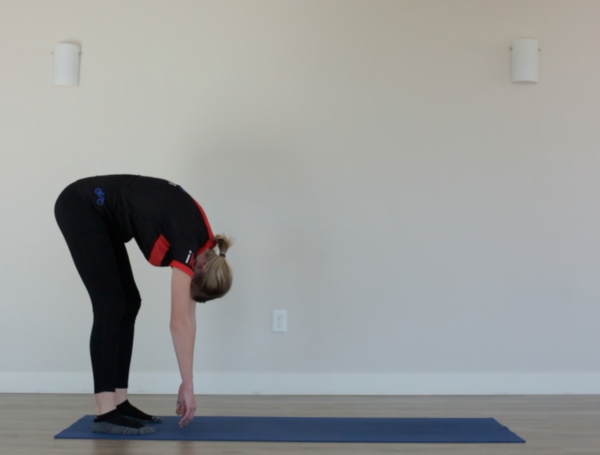
Check Before You Start

The hip, knee, and angle should all be in as straight of a line as possible when pedaling.

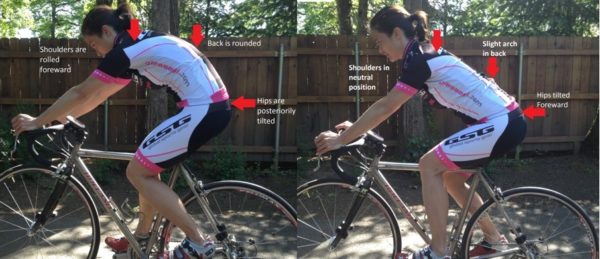
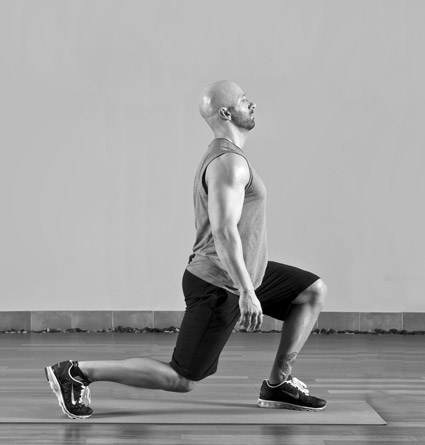
Before your start working on your pedaling technique you’ll want to ensure your bike is setup properly for you. The first thing to look at will be your saddle height. If the saddle is too low you’ll restrict the pedal stroke where you can produce the most power. If it’s too high your hips will start to rock side to side.

You may also want to take a look at crank arm length, as having the right fit for you can help improve your pedaling efficiency. The correct crank length puts your knee in the correct position at the top of the pedal stroke, and still leaves space between your knees and your stomach.

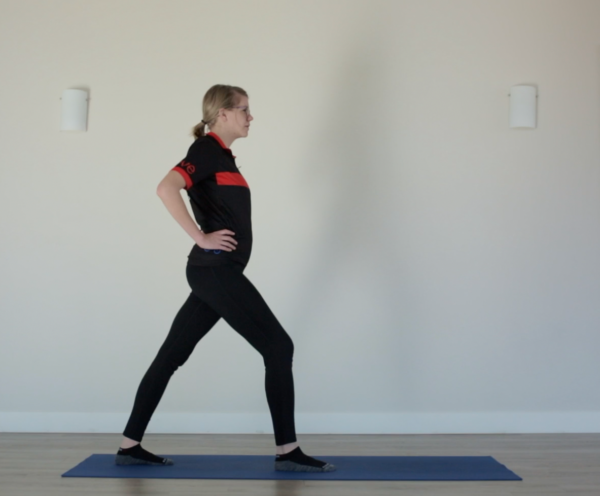
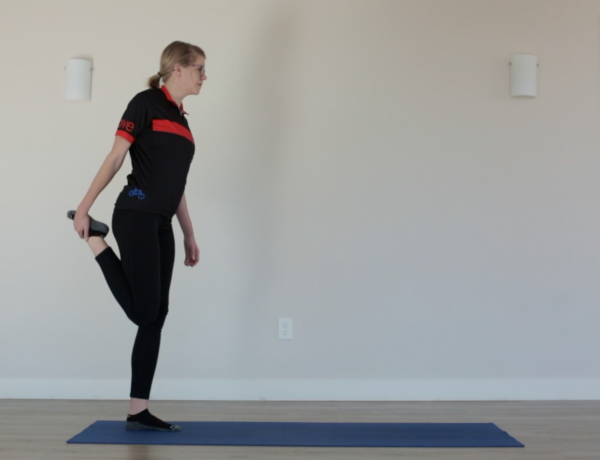
Watch Your Alignment

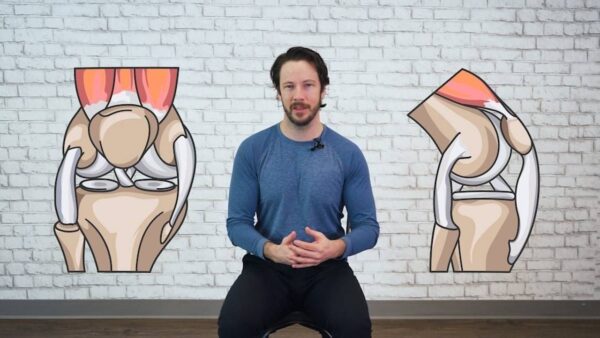
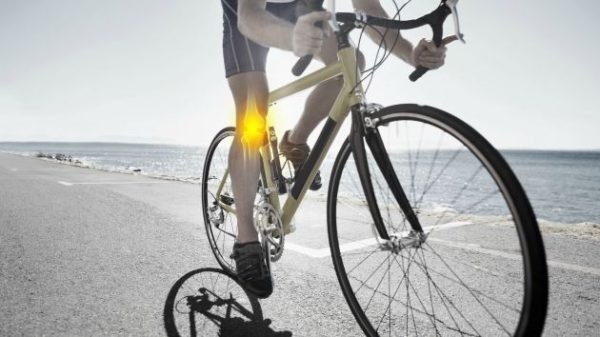
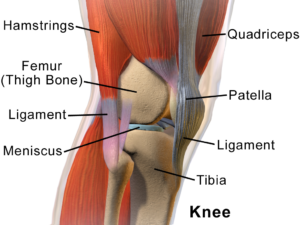
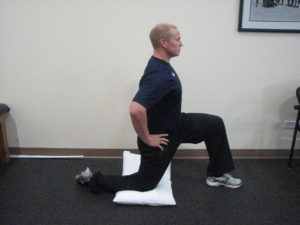
We’ve all seen bow-legged cyclists (or maybe you are one of them). Although it can be difficult to keep your hip, knee, and ankle in a straight line, this is the goal. Bowing your legs out is not only less efficient, but it can also lead to knee injuries.

Pedal in Circles

Running in circles may not be the way to go, but pedaling in circles definitely is. The first thing you need to do is start looking at pedaling as a complete revolution, made up of different angles, muscle groups, and power (much more than just the downstroke). Efficient pedaling technique is something that can come with time in the saddle, but you can speed up the process by focusing on each part of the movement and applying force around the pedal stroke.

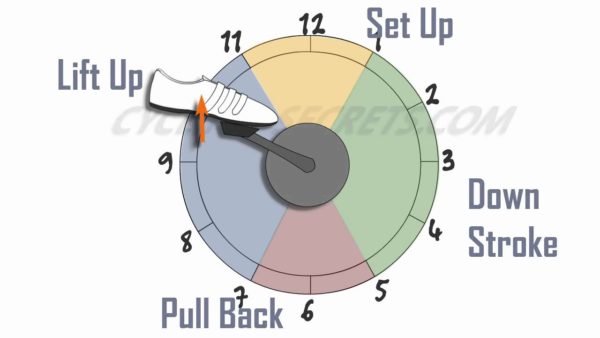
1. The Down Stroke (1 – 5 o’clock)

This is the most natural feeling part of the pedal stroke, and where most of your power comes from. If you think of a single revolution as a clock face, the downstroke happens at about 1 to 5 o’clock. You are pushing down with your heel level to the ground or even about 20 degrees below your toe.

2. The Pull Back (5 – 6 o’clock)

This motion at the bottom of your pedal stroke should feel like scraping your foot back. You should feel the movement in your calf, with your heel lifting slightly. Imagine you have mud on the toe of your shoe that your are trying to scrape off on the pavement.

3. The Lift Up (7 – 11 o’clock)

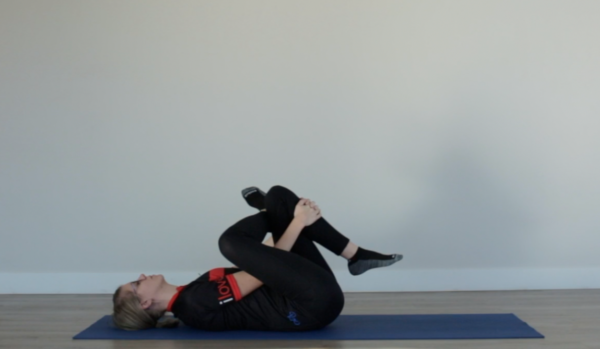
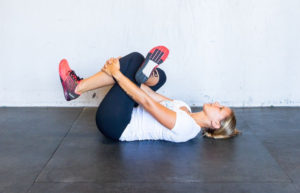
The goal of the lift up is not so much to produce a ton of power, but to lift the weight of your leg so your opposing leg is not lifting it up with the downstroke (especially at a fast cadence). Your ankle should be at about a 20 degree angle with the movement, and be sure to keep your knee from bowing out. This is when you want to engage your core and glutes to stabilize your legs and make for a smooth motion.

4. The Set Up (11 – 1 o’clock)

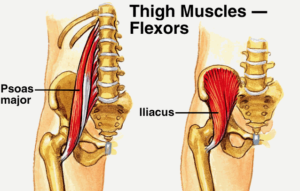
The biggest mistake a lot of cyclists make is not initiating the downstroke early enough. The set up is a very short transition, with the feeling of lifting your knees, involving your hip flexors, and getting into the downstroke as soon as possible.

The Upper Body

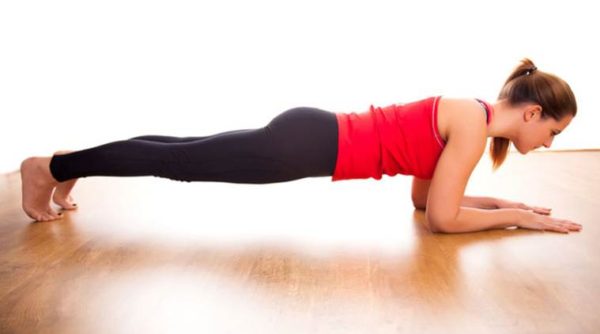
While pedaling, the upper body should be as quiet (motionless) as possible. Upper body movement may make you feel like you’re putting a little something extra in, but it’s a complete waste of effort. Instead, you want to isolate the upper body from the motion of the legs. This will take a conscious effort at first, but will become second nature over time.

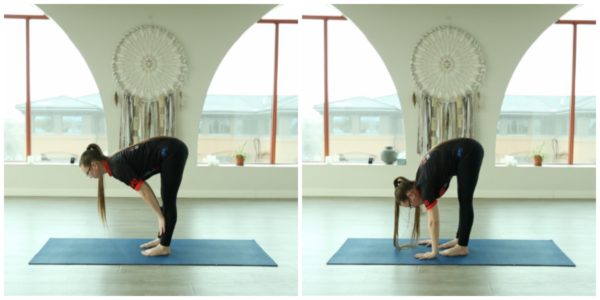
Exercises to Improve Your Pedaling Efficiency

Slow It Down

Find a hill and try climbing at a much higher gear and lower cadence (around 40 rpm) than you normally would. Focus on keeping your upper body still, while taking note of where your naturally strong surges and dead spots are. From there you can work on each aspect of the pedal stroke to get the feel of it being one smooth motion.

Mountain biking is also great for this. If you have large power surges on loose ground, you’ll lose traction, which teaches you pretty quickly not to stamp down on the pedals.

Try a Fixed Gear Bike

Fixed gear bikes force you to pedal in circle, or else you’ll be bouncing around and looking really awkward. This is why track cyclists have some of the most efficient pedaling technique out there. So, if you can get your hands on a fixed gear bike, take it for a spin and focus on making the pedaling as smooth as possible.

One Leg Pedaling

This is exercise is easier on a stationary bike or trainer then out on the road, but it can be done. Start by unclipping one foot from the pedals, while keeping both hips in the normal riding position. Pedal using the clipped in leg for 30 seconds, then clip the other one back in and spin for 15 seconds. Then repeat with the other leg.

This exercise will help you figure out the location of your stroke inefficiency. Pay attention to any part of the movement that is jerky or uneven, then you can start focusing on those areas and making them as smooth as possible.

The Types of Knee Pain from Cycling

January 22, 2020 by Sarah Lauzé

The knee is one of the most complex joints in the body, so it makes sense that it is often the first place we experience pain. Although it’s not a muscle, stretches for cyclists are key to ensuring everything connected to the knee remains flexible and in place.

Many cyclists think knee pain means taking time away from the bike and resting up, but that’s not necessarily true. It could be caused by something as simple as a saddle adjustment or new cleats. So, if you’re experiencing knee pain, figure out what it may be stemming from and adjust your training accordingly.

The Types of Knee Pain from Cycling

Main Types of Knee Pain

Knee pain can show up in a variety of forms and for different reasons. These are some of the main types and common causes:

1. Anterior Knee Pain

Anterior knee pain is at the front of the knee, on and around the kneecap (patella). It is most commonly caused by overuse. The quads are attached to the shin via the kneecap so each time you pedal, forces are transmitted across the joint, essentially squishing it against the thigh bone. The part of the tendon attached to the kneecap can become inflamed and sore to the touch. Often referred to as ‘runner’s knee,’ it can happen to cyclists as well.

2. Posterior Knee Pain

The fair less common posterior knee pain shows up behind the knee and is usually a more simple diagnosis. Overextending the knee, with a saddle that is too high or too far back, causes posterior knee pain in most cases, so make sure your saddle is the proper height and adjustment for you.

3. Medial & Lateral Knee Pain

Pain located at the sides of knee in the collateral ligaments is most commonly caused by the feet. In cycling, this would come down to your cycling shoes or the position of the cleat. How far apart your feet are positioned can stress one of the collaterals, causing medial or lateral knee pain during or after a ride.

4. Iliotibial Band (IT Band) Syndrome

The IT band, running along the outside of the thigh from the pelvis to just below the knee, is a thick strap of tissue that can often become tight or inflamed. This is usually caused by over use, weakness of the gluteus medius muscle, or cleat placement. If the IT band has become inflamed, then rest and ice are in order. If it is tight and sore, then regular stretching and rolling will be your best course of action.

The Types of Knee Pain from Cycling

What can cause knee pain?

Although cycling is a low impact sport, too much of anything can lead to stress and strain on the body. Pedalling is a repetitive motion with the constant bending and extending motions flexing the knees and hips. Naturally, with overuse these are the most common sites of chronic-use injury.

Too much too soon

The number one cause of knee pain with cyclists is going too hard or far too soon. It is great to challenge yourself, but going further than your ligaments and muscles can handle will only hinder you progress. Endurance is something that is built up over time, conditioning your muscles over miles and hours. Ligaments take even longer to develop than muscles, with issues often arising from tightness or inflamation.

Improper bike fitThe Types of Knee Pain from Cycling

The little adjustments you can make to your bike can make all the difference when it comes to addressing or avoiding knee pain. The height and position of your saddle and the placement of cleats on the bottoms of your cycling shoes can cause or help avoid knee pain, depending on how well they are adjusted for you.

Not Enough Stretching and Rolling

Flexibility or lack of, is a cyclists nemesis. Eventually if you do not stretch or roll your muscles will tighten so much that you will have difficulty walking never mind riding. Make sure to do stretches that especially focus on the muscles surrounding the knee.

Knee pain can be disheartening when it comes to cycling, but most cases are not cause to give up on your training. However, if pain persists despite proper rest, stretching, or bike adjustments, then it may be a good idea to see a physiotherapist to see if there is an underlying issue that needs to be addressed.

Knee Rehab Program for Cyclists

Looking for a program that will help you address the muscle imbalance that is likely causing your knee pain? Dynamic Cyclist is an online training platform designed to help cyclists become stronger and faster while riding pain free for years to come. Complete your regimen with an all-inclusive program that addresses mobility, flexibility, strength and injury prevention, all for a fraction of the cost of one physiotherapy appointment. Try out their 6 Week Functional Rehab Program and experience the results for yourself. Click here to try 7 days free!

How Beneficial is Yoga for Cyclists?

December 17, 2019 by Sarah Lauzé

How beneficial is yoga for cyclists? There are a lot of misconceptions around yoga, and you may scoff at the idea of it improving how you feel on your bike. However, more and more pros are using yoga as their secret weapon to get faster and prevent injury.

So, what can the ancient discipline of yoga bring to modern day cyclists? Whether you ride to get stronger and faster, or just because you love it, yoga can be a great tool.

Yoga for cyclists
Pat Bailey | Instagram

4 Benefits of Yoga for Cyclists

Core Strength

A strong core is vital for cycling power, posture, and injury prevention, especially in your lower back region. As a result of the bent over position on your bike, many cyclists have highly developed back muscles, with comparatively weaker abdominal muscles.

This muscular imbalance is normal, but can cause issues in the long run. If you’re tired at the end of a long ride and have poor core strength, you will be more likely to slump in the saddle. This will place undue pressure on your shoulders and wrists, as well as cause lower back pain once off your bike.

Flexibility & Posture

Much in line with your core strength, maintaining proper posture on your bike will prevent injury. The natural inclination is to round your back as you crane your head to look forward. Not only does this create drag, but it will eventually cause pain in your lower and upper back and neck.

Everything in your body is connected. So, to maintain proper bike posture you have to have adequate flexibility in your lower back, hips, glutes, and hamstrings. The flatter your back can be, the less issues you’ll come up against in your training. Yoga can help you not only build the strength and flexibility to hold your posture, but also help you become constantly aware of how your body is feeling.

Breathing

You may not put much thought into your breathing when you’re attacking a hill. The pressing thought for most is to simply keep breathing, even if it looks more like panting. However, when transformed from an automatic function, it can be great training tool.

Yoga can help you learn how to monitor your breathing, making the most of each breath. It can train your body to take slower and deeper breaths to maximize your oxygen intake.

Injury Prevention

Yoga is ideally injury prevention rather than treatment, but it can help on both ends of the spectrum. Regular stretching and yoga will reduce your risk of suffering from the typical overuse injuries that plague cyclists. These include IT band syndrome, tight hamstrings, back pain, and knee problems.

Because your legs never fully extend on the bike, your muscles get little chance to fully lengthy. There is also an imbalance of strength, with so much power coming from certain muscles, while others remain underdeveloped. Ensuring you are working and stretching these muscles off the bike will go a long way to keep things balanced.

There are a lot of different types of yoga, so you can try different ones until you find on that fits. For those that struggle with having the discipline to stretch, it can be a great way to ensure you are giving your body what it needs to recover. Even switching out just one of your rides a week for a yoga session will help your overall strength and power on your bike. A great budget friendly option you can try from home is this online stretching and yoga program called Dynamic Cyclist, specifically for cyclists.

4 Of The Best Strength Training Exercises for Cyclists

October 30, 2019 by Sarah Lauzé

Almost every cyclist wants to be able to produce more power and go faster on their bike. It’s a natural instinct, for amateur and professional cyclists alike. Strength training exercises for cyclists can help build up the muscles used on the bike, but it’s not a shortcut or a replacement. To increase the force of each of your pedal strokes and improve your technique you have to ride. A lot. However, strength training can be a great addition to your cycling training plan, or get you through the winter months when you can’t ride as much as you’d like.

We all know that cycling involves the legs in a big way, but having a strong core is also extremely important for cyclists. Your core acts to stabilize your body and help you control your bike. It also allows you to pedal with a smooth and powerful action, maintain a strong upper body position, and prevent lower back pain. Here are some of the best strength training exercises for cyclists that target areas that will make your stronger on your bike.

REMEMBER: The goal of strength training exercises for cyclists is to build strength to use on your bike, not to bulk up. This is especially important if you are training in a gym. Just keep in mind that you probably have different goals than the person next to you, so just focus on what you’re doing and how it can improve your cycling.

Strength Training Exercises for Cyclists

Plank

Planks are simple and effective when it comes to increasing your core strength. They can be done almost anywhere, so no need to hit the gym. When done correctly, planks will target your shoulders, abdomen, and lower back.

Strength Training Exercises for Cyclists

Place your forearms on the ground with your elbows directly below your shoulders and arms parallel to the body. Keeping your back straight and in line with your bum, resting on your toes. If you find yourself arching your back or sagging your hips toward the ground, try modifying by dropping from your toes to your knees. Start by holding for 30-60 seconds per round. Repeat 3-5 times.

Lunges

Lunges are specifically great for cyclists because they work one leg at a time, just like pedaling. They target your quadriceps, hips, glutes, and hamstrings, which are the major players on your bike.

Strength Training Exercises for Cyclists

Keep your upper body straight with your shoulders back and head facing directly ahead of you (resist the urge to look down). Step forward with one leg and lower your leg until both knees are at a 90 degree angle. Make sure your front knee does not extend beyond your ankle, and keep the weight in your heels as you push back up. Start with 15-30 reps per set, or add weight and do less reps. Try for 3-5 sets.

Burpees

Everyone’s favourite full body exercise! The burpee may be painful, but the movement involves all the major joints through explosive movements. Plus, there’s plenty of room to modify the movement to ensure you are getting all you can from it while maintaining proper form.

Strength Training Exercises for Cyclists

Stand with your feet shoulder width apart, focusing on placing the weight in your heels. Push your hips back, bend your knees and lower into a squat ensuring that your knees do not extend beyond you ankles. Place your hand on the floor in front of you, shift your weight onto them, and jump or step back your feet back into plank position. Keep your body straight as you would in a typical plank. Lower your chest and do a push up. Jump your feet back so they land just outside your hands. Stand up, raise your hands above your head, and jump up into the air. Start with 10 reps, working your way up to 20 per set. Complete 3-5 sets.

Crunches

Crunches are another classic, but effective exercise that you can do anywhere. They target the core like nothing else, so get ready to feel the burn.

Strength Training Exercises for Cyclists

Lie on your back on the floor with your knees bent and feet flat on the the floor. Place your hands behind your head so your fingers are just behind your ears. Tilt your chin slightly so it is off the ground, but leaving a few inches between your chin and chest. Pull your abdominals inward and curl forward so your head, neck, and shoulder blades lift off the ground. Hold, then lower slowly back down. Do 15-25 reps per set, completing 3-5 sets.

Knee Stretches for Cyclists

October 25, 2019 by Sarah Lauzé

Knee pain is one of the most common injuries among athletes. In fact, a 2010 study of professional cyclists found that knee pain was the cause for over half of the time spent off the bike. As one of the most complex joints in the body, it makes sense that it’s often one of the first places we experience pain. That being said, it is always better to try and prevent a problem then it is to deal with it. Knee stretches for cyclists can help keep all the components in the knee remain flexible and in place.

Pedaling requires work from the quads to straighten the knee and push the pedal forward and downward with enough power to propel the bike forward. In addition, the IT band contributes to that same movement, although less intensively. These efforts, although low-impact, can lead to problems with knee pain. Tendinitis of the kneecap can be a painful condition, causing you to lose power in your pedal stroke and even keep you off your bike. Stretching these muscles can both prevent and treat these issues, resulting in a healthy, flexible range of motion.

Many cyclists think knee pain means taking time away from the bike and resting up, but that’s not necessarily true. It could be caused by something as simple as a saddle adjustment or new cleats. So, if you’re experiencing knee pain, figure out what it may be stemming from and adjust your training accordingly. To help in recovery, and to prevent further knee pain, try stretching the muscles surrounding the knee on a regular basis.

The Anatomy of the Knee

The first step to preventing knee pain is to understand how the joint works, and what can go wrong. In simplified terms, the knee is a hinge with the quadriceps pulling the knee straight, and the hamstrings bending it. The iliotibial band (ITB) runs down the outside of the thigh and into the outside of the knee, connected at the other end to the glutes and hip flexors. The patella (kneecap) acts as a hinge and a connection point between it all.

To understand knee pain it is helpful to have a basic idea of what lies beneath the skin. In simplistic terms, think of the knee joint as a hinge where the quadriceps muscles pull the knee straight and the hamstring muscles bend the knee. The quadriceps run from the front of the femur (thigh bone) to the patella (knee cap). The patella acts as a pulley to increase the force generated by quadriceps which creates a greater torque on the tibia (shin bone).

To make matters more complicated,  the ITB runs down the outside of the thigh and blends into the outside of the knee. ITB stands for iliotibial band and is a well known potential source of trouble for cyclists, runners and active people in general. The ITB is also attached to your gluteals (buttock muscles) and a hip flexors. Often when looking for the source of knee pain we have to pay close attention to hip flexibility and control.

Types of Knee Pain

Knee pain can show up in a variety of forms and for different reasons. These are some of the main types and common causes:

1. Anterior Knee Pain

Anterior knee pain is at the front of the knee, on and around the kneecap (patella). It is most commonly caused by overuse. The quads are attached to the shin via the kneecap so each time you pedal, forces are transmitted across the joint, essentially squishing it against the thigh bone. The part of the tendon attached to the kneecap can become inflamed and sore to the touch. Often referred to as ‘runner’s knee,’ it can happen to cyclists as well.

2. Posterior Knee Pain

The fair less common posterior knee pain shows up behind the knee and is usually a more simple diagnosis. Overextending the knee, with a saddle that is too high or too far back, causes posterior knee pain in most cases, so make sure your saddle is the proper height and adjustment for you.

3. Medial & Lateral Knee Pain

Pain located at the sides of knee in the collateral ligaments is most commonly caused by the feet. In cycling, this would come down to your cycling shoes or the position of the cleat. How far apart your feet are positioned can stress one of the collaterals, causing medial or lateral knee pain during or after a ride.

4. Iliotibial Band (IT Band) Syndrome

The IT band, running along the outside of the thigh from the pelvis to just below the knee, is a thick strap of tissue that can often become tight or inflamed. This is usually caused by over use, weakness of the gluteus medius muscle, or cleat placement. If the IT band has become inflamed, then rest and ice are in order. If it is tight and sore, then regular stretching and rolling will be your best course of action.

What can cause knee pain?

Although cycling is a low impact sport, too much of anything can lead to stress and strain on the body. Pedalling is a repetitive motion with the constant bending and extending motions flexing the knees and hips. Naturally, with overuse these are the most common sites of chronic-use injury.

Too much too soon

The number one cause of knee pain with cyclists is going too hard or far too soon. It is great to challenge yourself, but going further than your ligaments and muscles can handle will only hinder you progress. Endurance is something that is built up over time, conditioning your muscles over miles and hours. Ligaments take even longer to develop than muscles, with issues often arising from tightness or inflamation.

Improper bike fitThe Types of Knee Pain from Cycling

The little adjustments you can make to your bike can make all the difference when it comes to addressing or avoiding knee pain. The height and position of your saddle and the placement of cleats on the bottoms of your cycling shoes can cause or help avoid knee pain, depending on how well they are adjusted for you.

Not Enough Stretching

Flexibility or lack of, is a cyclists nemesis. Eventually if you do not stretch or roll your muscles will tighten so much that you will have difficulty walking never mind riding. Make sure to do stretches that especially focus on the muscles surrounding the knee (see below).

4 Best Stretches for Cyclists to Treat Knee Pain

Bilateral Hamstring Stretch

This stretch is effective for all cyclists because of the involvement of the knee flexor muscles in the repetitive pedaling motion. It is also great for those who experience discomfort in the inner or outer face of the knee, which likely originates at the insertion of the hamstring.

Stand with you feet shoulder width apart and slowly bend at your hips towards the floor. Let your arms hang, or place them on the floor if you can. Your knees should be straight, but not overextended or locked  out. You should feel the stretch in your hamstrings and along the back of the knees.

Lunge with Ankle Flex

If you feel tension or strain in your calves, Achilles tendon, or the back of the knee then this is an important stretch.

Stand with your hands on your waist, one leg slightly in front of the other, with your knees straight looking ahead. Slowly lunge forward with the front foot, keeping your rear foot in its original position. Both feet should be making full contact with the floor, including the heel. As your center of gravity moves forward and downward, the rear ankle will act as an anchor and increase the stretch.

Flamingo Position

Because of the involvement of the knee extensor muscles in the pedaling motion, the flamingo position is a great stretch to relieve discomfort in the quads and patellar tendons.

Use a chair or wall the steady yourself, and raise one foot by bending your knee. As you hold the front of your ankle, slowly pull it upwards and gently push your hips forward. As the hip extension increases, you will feel the stretch in the front of the thigh.

Figure Four

Stretching the muscles that rotate the hips, specifically the glutes and piriformis, can have a positive effect on the knees. As mentioned previously, each segment of the leg is connected, and each area can have a domino effect, especially through the knee.

Lie on your back with your neck relaxed and head resting on the floor. Cross your right ankle over the other and place your hands on your left thigh, pulling your legs towards you in a figure four position. Slowly pull on your leg to increase the stretch, feeling it in your glute and hip. Repeat with the left side.

As cyclists, we know how hard it is to stick to a stretching routine. We all want to spend more time on our bike, but maintaining a healthy range of motion and flexibility will, in the long run, keep you on the bike without injury. That’s why we’ve partnered with Dynamic Cyclist to bring you a stretching and strength program that is easy to follow, and is geared towards cyclists. They’re offering our readers a free 7 day trial, just click the link below to get started.


Hip Stretches for Cyclists: Relieve Tight Hip Flexors

October 20, 2019 by Sarah Lauzé

Tight hips and cycling unfortunately go hand in hand. Why? Well, think about your position on the bike, with your upper body tucked forward and your legs hammering down. Your hips are contracting, but the hip flexors are never full extended. Over time, this flexed position can shorten the hip muscles, and cause all sorts of issues down the road. Hip stretches for cyclists can help prevent this shortening of the muscle, as well as counteract how much of our days we spend sitting.

Hip Stretches for Cyclists

What are the hip flexors?

hip stretches for cyclists

The hip flexors are a group of muscles made up of the iliacus, psoas major, and the rectus femoris. These muscles work together to produce the hip flexation, moving the knee up towards the abdomen and down again.

The iliacus starts at the top of the pelvis and runs down to the top of the thigh bone (femur). The psoas major originates on the lumbar vertebrae and attaches to the femur. The rectus femoris is actually one of four muscles that make up the quadriceps, playing a part in both knee extension and hip flexion.

What causes tight hip flexors?

As mentioned previously, the action of cycling involves repeated hip flexion with the hip never full extending, which can cause tightness or even a shortening of the muscle over time. Prolonged periods of time sitting also contribute to tight hip flexors, such as time spent at a desk or driving.

Not only can tight hip flexors cause discomfort in your everyday life, they can also reduce your cycling performance. It can lead to lower back pain and a weakening of the glutes.

Best Hip Stretches for Cyclists

The best plan of attack to both treat and prevent tight hip flexors is regular stretching. Here are some of the best hip stretches for cyclists that you should include as part of your stretching routine. Try holding them for at least 30 seconds to start, and working up in time from there.

Beginner: Figure Four Stretch

Start on your back with your knees bent and your thighs parallel and hip-distance apart. Cross you left ankle over your right thigh, ensuring the ankle clears the thigh. Actively flex your front foot by pulling your toes back. Slowly pull your right knee in toward your chest, threading your left arm through the triangle between your legs. Try avoid creating tension in the neck and shoulders as you open the hips and glutes, so try keep a hold of the front of your shin without rounding your upper back or lifting your shoulders off the ground. If you can’t, then keep your hands clasped around your hamstring instead, or use a strap.

Advanced: Pigeon

Once you are comfortable with the Figure Four Pose, then you can give pigeon a try. Start on your hands and knees, bringing your right knee forward. Place your ankle somewhere in front of your left hip. The more your lower leg is parallel with the front of the mat, the more intense the hip opener. Slide your left leg back, straighten the knee and point the toes. Make sure your leg is behind your body and not drawing outwards and your heel is pointing up to the ceiling. Slowly lower yourself down and use some support under your right buttock if needed, to keep your hips level.

Kneeling Hip Flexor Stretch

Kneel on a mat, putting a cushion or blanket under your right knee. Bring your left knee up so the bottom of your foot is on the floor. Extend your right leg out behind you so the top of your foot is on the floor. Shift your weight forward until you feel a stretch in your hip.

Hip Rehab Program for Cyclists

As cyclists, we know how hard it is to stick to a stretching routine. We all want to spend more time on our bike, but maintaining a healthy range of motion and flexibility will, in the long run, keep you on the bike without injury. That’s why we’ve partnered with Dynamic Cyclist to bring you a stretching and strength program, that is easy to follow, and is geared towards cyclists. If you are suffering from hip pain or discomfort on or off the bike try out their 6 Week Hip Function & Rehab Program and experience the results for yourself. They’re offering our readers a free 7 day trial, click here to get started.

Stay Visible: The Best Use of Bike Reflectors

August 27, 2019 by Sarah Lauzé

Riding at night can be a ton of fun, and it’s unavoidable if you commute on your bike early in the morning or later at night. Ensuring that drivers can see you in tough lighting conditions is the first step in staying safe on your rides. This includes bike lights, reflective gear, and making use of bike reflectors.

Bike Reflectors

Bike Reflectors as a Supplement to Lights

First things first, you’ll want to have a front-facing white light and a rear facing red light (one solid and one blinking is best). These are legally required in many places, and are a very good idea. Reflectors can be used to supplement bike lights, not replace them.

Fortunately, new LED lights are both affordable and long-lasting for those longer rides. Drivers have to 
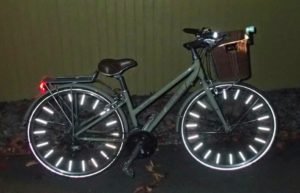
be able to see you to have enough time to react, so better to have too many lights than not enough.
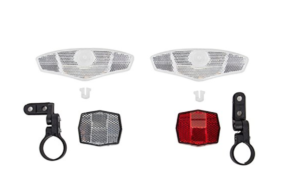
If you’re planning on heading down any low light or country roads, you’ll want to ensure your front light is bright enough to light your path. Be sure that all your lights are fully charged before heading out with more than enough battery life for the duration of your ride, and it’s a good idea to have an extra backup light as well.

The Best Use of Bike Reflectors

Bike reflectors work to bounce light back in the direction of it’s source, in this case a car’s headlights. Depending on your bike, it may already have some reflectors. Most new bikes come with a set of reflectors, but are rarely installed by the bike shop before sale. The most common places will be on the back of the pedals, the fork, handlebars, seat post, and rear rack if you have one.

Front and Back Reflectors

Front and back reflectors usually have a bracket that fits around the stem or handlebar. These will either snap shut, or have small screws that hold it in place. Back reflectors will go on the stem below the seat, but make sure it isn’t so high that the seat or your jacket will block it. Front reflectors will go right on the handlebars, or the front stem. If you don’t want to attach reflectors on your bike, strips of reflective tape can be used instead.

Pedal Strips

It’s been proven that drivers will notice the up and down movement of pedaling before the smoother movement of the whole bike, so it’s important to get something reflective on your pedals or feet. For pedals that don’t have built-in reflectors, you can get a reflector attachment that will bolt into your pedals. Or you can use strips of reflective tape on your pedals and wear reflective ankle bands to ensure you are visible.

Tire Spoke Reflectors

You may not want to have tire spoke reflectors on your favourite road bike or mountain bike, but they are a great idea. The rotation of the wheel will make sure you are seen from the sides as well as the front and rear. Basic plastic tire reflectors will snap on and off easily, so you could just put them on for those rides at dust or in the dark.

Cycling at night doesn’t have to be dangerous and can open up a whole new world of riding, not to mention the additional time available to actually do it. Be prepared and stay smart and you’ll reap the benefits of cycling at night be it commuting or getting some extra training in.

The Perfect Yoga Sequence for Cyclists

August 25, 2019 by Sarah Lauzé

After putting miles in on your bike, it’s important to give your body some relief. Not only does this mean adequate rest days to give yourself time to recover, but a specific yoga sequence for cyclists can help those muscles out a little. Luckily, yoga has your back (and hamstrings and hips).

The key to yoga is to give yourself the adequate amount of time to relax into each pose. Whether you’re a yogi or not, taking time to reach those deep stretch targets and work on your breathing can help you become a more efficient cyclist. Anything less than 30 seconds won’t make a significant difference in lengthening the muscle fibers and tissue, but holding too long too soon can put you at risk of injury.

The Benefits of Yoga for Cyclists

Core Strength

A strong core is vital for cycling power, posture, and injury prevention, especially in your lower back region. As a result of the bent over position on your bike, many cyclists have highly developed back muscles, with comparatively weaker abdominal muscles.

This muscular imbalance is normal, but can cause issues in the long run. If you’re tired at the end of a long ride and have poor core strength, you will be more likely to slump in the saddle. This will place undue pressure on your shoulders and wrists, as well as cause lower back pain once off your bike.

Flexibility & Posture

Much in line with your core strength, maintaining proper posture on your bike will prevent injury. The natural inclination is to round your back as you crane your head to look forward. Not only does this create drag, but it will eventually cause pain in your lower and upper back and neck.

Everything in your body is connected. So, to maintain proper bike posture you have to have adequate flexibility in your lower back, hips, glutes, and hamstrings. The flatter your back can be, the less issues you’ll come up against in your training. Yoga can help you not only build the strength and flexibility to hold your posture, but also help you become constantly aware of how your body is feeling.

Breathing

You may not put much thought into your breathing when you’re attacking a hill. The pressing thought for most is to simply keep breathing, even if it looks more like panting. However, when transformed from an automatic function, it can be great training tool.

Yoga can help you learn how to monitor your breathing, making the most of each breath. It can train your body to take slower and deeper breaths to maximize your oxygen intake.

Injury Prevention

Yoga is ideally injury prevention rather than treatment, but it can help on both ends of the spectrum. Regular stretchingand yoga will reduce your risk of suffering from the typical overuse injuries that plague cyclists. These include IT band syndrome, tight hamstrings, back pain, and knee problems.

Because your legs never fully extend on the bike, your muscles get little chance to fully lengthy. There is also an imbalance of strength, with so much power coming from certain muscles, while others remain underdeveloped. Ensuring you are working and stretching these muscles off the bike will go a long way to keep things balanced.

What a Yoga Sequence for Cyclists Should Look Like

Although we’d all rather be out on our bikes than cross training, given everything listed above taking 20 minutes our of your day to practice yoga can keep you feeling your best while you are out on the road. If you’re not ready to go to an hour long yoga class, whether it be the time or financial commitment, you can piece together your own routines to do at home. Here’s what you should know before getting started.

Same time, same place.

Starting around the same time every time is the best way to turn good intention into a habit. Starting you day off with yoga can be one of the best ways to wake up y our body and mind and get you ready for the day.

From the ground up.

A great rule is to start on your mat, with poses that have your body on the ground, and work your way up. This gives your body time to work up to the more active standing poses.

Be focused.

Remove all distractions if you can. Leave your cellphone in a different room and set aside the time to just stretch. Be patient with yourself in the beginning, as it may take time to quiet your mind.

Keep it simple.

Practicing at home is a wonderful thing, but you’ll want to keep it simple. Start out by following along with the video routine below, or just begin with just these 4 poses. If you want more routines like this one, check out Dynamic Cyclist for more stretching routines for cyclists.

Stretches for Cyclists: Treat and Prevent Knee Pain

August 9, 2019 by Sarah Lauzé

Stretches for Cyclists

The knee is one of the most complex joints in the body, so it makes sense that it is often one of the first places we experience pain. Although it’s not a muscle, stretching is key to ensuring everything connected to the knee remains flexible and in place. Doing regular stretches for cyclists can help prevent and treat knee pain.

Pedaling requires work from the the quads to straighten the knee and push the pedal forward and downward with enough power to propel the bike forward. In addition, the IT band contributes to that same movement, although less intensively. These efforts, although low-impact, can lead to problems with knee pain. Tendinitis of the kneecap can be a painful condition, and can keep you off your bike. Stretching these muscles can both prevent and treat these issues, resulting in a more comfortable and flexible range of motion.

Many cyclists think knee pain means taking time away from the bike and resting up, but that’s not necessarily true. It could be caused by something as simple as a saddle adjustment or new cleats. So, if you’re experiencing knee pain, figure out what it may be stemming from and adjust your training accordingly. To help in recovery, and to prevent further knee pain, try stretching the muscles surrounding the knee on a regular basis.

4 Best Stretches for Cyclists to Treat Knee Pain

Bilateral Hamstring Stretch

This stretch is effective for all cyclists because of the involvement of the knee flexor muscles in the repetitive pedaling motion. It is also great for those who experience discomfort in the inner or outer face of the knee, which likely originates at the insertion of the ischiotibials.

Stretches for Cyclists

Stand with you feet shoulder width apart and slow bend at your hips towards the floor. Rest your hands on your shins, or step your hands down to the floor if you can. Your knees should be straight, but not overextended or locked backwards. You should feel the stretch in the backs of your thighs and knees.

Lunge with Ankle Flex

If you feel tension or strain in your calves, Achilles tendon, or the back of the knee then this is an important stretch.

Stretches for Cyclists

Stand with your hands on your waist, one leg slightly in front of the other, with your knees straight looking ahead. Slowly lunge forward with the front foot, keeping your rear foot in its original position. Both feet should be making full contact with the floor, including the heel. As your center of gravity moves forward and downward, the rear ankle will act as an anchor and increase the stretch.

Flamingo Position

Because of the involvement of the knee extensor muscles in the pedaling motion, the flamingo position is a great stretch to relieve discomfort in the quads and patellar tendons.

Stretches for Cyclists

Use a chair or wall the steady yourself, and raise one foot by bending your knee. As you hold the front of your ankle, slowly pull it upwards and gently push your hips forward. As the hip extension increases, you will feel the stretch in the front of the thigh.

Supine Pull to Chest

Stretching the muscles that rotate the hips, specifically the glutes and piriformis, can have a positive effect on the knees. As mentioned previously, each segment of the leg is connected, and each area can have a domino effect, especially through the knee.

Stretches for Cyclists

Lie on your back with your neck relaxed and head resting on the floor. Cross your right ankle over the other and place your hands on your left thigh, pulling your legs towards you in a figure four position. Slowly pull on your thigh to increase the stretch, feeling it in your glute. Repeat with the left side.

Knee pain can be disheartening, but most cases are not cause to give up on your training. However, if pain persists despite proper rest, stretching, and bike adjustments, then it may be a good idea to see a physiotherapist to see if there is an underlying issue that needs to be addressed. You can also try targeted, daily stretching with Dynamic Cyclist to treat and prevent your knee pain.

How To Choose Bike Stem Length

June 24, 2019 by Sarah Lauzé

When viewed in the context of an entire bike, stem length is one of the more minor adjustments you can make. That being said, it can affect the overall feel and handling of your bike in some not-so-minor ways.

Historically, stems were not adjustable or interchangeable. It wasn’t until the late 19th century when Marshall Taylor invented an adjustable stem, using a sliding clamp to move the handlebars towards or away from the rider. Now bike stem length can vary from 50mm all the way up to 150mm and beyond.

Every part of a bike is connected. So, swapping out the stem on a wrong sized bike can be a quick fix, but you have to take into account that it will effect the bike’s overall feel and handling.

Bike Stem Length

What should decide bike stem length?

The first thing you need to look at is not your bike, but your own priorities when it comes to:

  • Comfort
  • Performance
  • Steering and handling

Generally speaking, race bikes that place the rider in a low, aerodynamic position will need to have a longer stem. This also works to get more weight out in front of the wheel. In contrast, touring bikes will have shorter stems to keep the rider in a more upright position and provide responsive steering at slower speeds.

When choosing bike stem length consider:

1. Weight Distribution

Stem length dictates how much weight is placed on the front wheel . The longer the stem, the more weight will be pushing forward on the bars, making the bike more stable at high speeds. This can, however, make for a less responsive feel.

Bike Stem Length

2. Steering

The steering of a bike is dictated by the head angle and trail, but the length of the stem can enhance or dull these effects. Short stems steer more like a steering wheel, providing immediate response, but can cause a twitchy feel. The longer the stem, the slower the handling can be, making it more difficult to steer at slow speeds, but more stable at high speeds.

Reversing the Stem

Reversing the stem is one of the most effective ways to make your bike more comfortable as it raises your handlebars to a more comfortable position. The majority of stems can be flipped as they are angled for two handlebar heights.

One position is aggressive and flat, the other is angled upward for a more upright torso which can alleviate stress on the lower back as well as the amount of weight on the hands. Take a look at your stem. If it has a high degree of tilt in either direction, it can typically be reversed depending on what you need to get comfortable.

The Long and Short of It

Bike Stem Length

Getting the right bike stem length can make a huge difference to how you feel on your bike. You may be surprised at the difference even 10mm can make! If you have persistent numbing in your wrists or hands, it could be that the stem is too short. In contrast, if you are too stretched out, it can cause injury to your back.

Stem length needs to be looked at in relation to the bike size and geometry, and there is no definite answer of what would be best for you. It is a very individualized thing, and you have to look at your priorities before deciding to switch out your stem. Before experimenting with it too much, visit your local bike shop or try getting a profession bike fit to ensure everything is adjusted just right for you and your riding style.

« Previous Page
Next Page »
  • Facebook
  • Tumblr
  • Twitter

Latest Articles

JOIN Cycling: A New Training Platform for Cyclists

May 27, 2024 By Eric Lister

cold exposure

The Benefits of Cold Exposure for Cycling & Life

June 13, 2023 By Eric Lister

hill climb

The Ultimate Hill Climb Training Guide

May 31, 2023 By Eric Lister

shoulder pain cycling

How to Treat & Avoid Shoulder Pain While Cycling

April 12, 2023 By Eric Lister

psoas stretch

The Importance of the Psoas Stretch for Cyclists

April 6, 2023 By Eric Lister

cycling neck pain

The Ultimate Guide to Cycling Neck Pain: Causes and Solutions

March 21, 2023 By Eric Lister

Useful Info

  • Contact
  • Finally, A Global Cycling Club That Is Focused On Community And Love Of Cycling!
  • Privacy Policy
  • Share Your Story!
  • Terms And Conditions Of Use
  • Welcome to I Love Bicycling
  • What Happened When I Stretched Every Day For a Month

Recent Posts

  • JOIN Cycling: A New Training Platform for Cyclists
  • How to Hang Bikes in Your Garage: 4 Inexpensive Options
  • Gravel Bike Vs. Road Bike: Which One Is Better For You?
  • The 6 Types of Mountain Bikes & How to Choose the Best One for You
  • What Is a Touring Bike Good For? 5 Benefits We Know You’ll Love

Search I Love Bicycling

Connect with Us

  • Facebook
  • RSS
  • Tumblr
  • Twitter

Copyright © 2025 · Magazine Pro Theme on Genesis Framework · WordPress · Log in