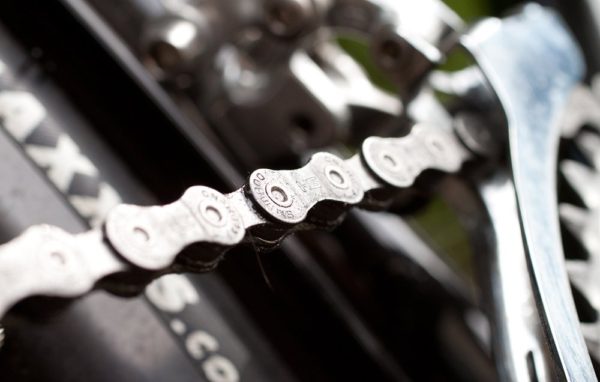
What’s the one part of your bike that has the most individual pieces to it? Not many would guess the chain, but today’s chain has eight parts per link which makes for a lot of moving parts with over fifty links in the average chain. Maintaining your bike chain will make it shift more smoothly and quieter, it will also last longer and help preserve the life of your cassette. With that many moving parts there’s more than one step to keeping it rolling like it should.

Things You Need to Know About Maintaining Your Bike Chain
Bike Chains Wear Out
As with any other part on your bike, chains wear out, often quicker than we would like. Chains wear by ‘stretching’ and no longer lining up perfectly with the teeth of the cassette. This stretch is not the actual metal stretching but rather the pin in each link wearing against the inner and outer plates of the chain causing the hole in each to be ever so slightly larger. This happens the fastest when it is metal on metal when the pin rotates within the plates. To keep this from happening as much, oil keeps these contact points properly lubricated so the metal doesn’t grind into each other and wear out as quickly.
How To Measure Chain Wear
A little bit of chain stretch over time is ok and will always occur. The problem becomes when it stretches too far and the teeth on the cassette begin to wear out as well. Before long you will not only have to replace the chain, but the cassette as well.
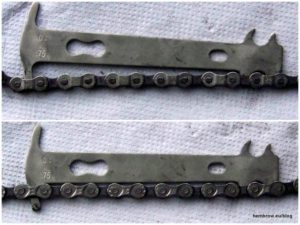
There is a handy tool that measures if a chain is stretched but you can do the same with a tape measure. A full link measures one inch in length when brand new. To account for a number of links, measure one foot from the exact same point on the chain to see how much it has stretched. If the foot mark falls less than 1/16th of an inch from the same point on the link, the chain is still golden. If it’s over 1/16th of an inch you need to replace the chain, but probably don’t have to replace the cassette.
The only real way to test if you have to replace the cassette as well is to ride the bike with the new chain and put pressure on the pedals in a few of the smaller gears. If the chain slips, they don’t line up enough, but if there are no issues, you’re good to go. If the chain measures over 1/8th of an inch off you will need a new chain and cassette.
 How To Wash a Bike Chain
There are a number of approaches to washing a chain including taking it completely off the bike, but the best and easiest way is to clean it while on the bike with a degreaser. Before washing your bike, spin the pedals backwards applying a degreaser. Then with a sturdy bristled brush, scrub the chain to get the degreaser further into the links while also dislodging any grit and grime.
One added effective way to clean your chain is to use a chain cleaner mechanism that has a number of rotating brushes in a small plastic box that is filled with degreaser. Running your chain through this not only coats it with degreaser but also brushes a lot of the grit and old oil off of it easily.
After degreasing and brushing, wash the chain with regular soap and water as you would the rest of your bike and then follow it up with a good spray through the links to make sure all the grit is out of it as well as any leftover degreaser.
Wiping Your Chain
Following a thorough wash, spin the pedals backwards running the chain through a clean rag to get as much moisture out of the chain as possible. This should actually be done after every ride because when you ride, oil seeps onto the entirety of the chain while collecting debris from the road. If left on, this debris will eventually work its way into the moving parts of the chain causing it to wear out even faster. Plus wiping your chain leaves your it looking like new for every ride and not black which can cause a nice mark on your leg if you’re not careful.
A good trick is to leave a rag easily accessible next to where you leave your bike and whenever you finish a ride, give it a quick wipe down. And then any oil that does get on your hands can just be washed off as you go inside.
Applying Chain Lube
Now that we’ve gotten all of the prerequisites out of the way – washing and wiping the chain, we can now apply bike specific chain lube. Chain lube isn’t just oil. Oil specifically for bikes is thin enough to get into the tiny spaces between the pins and links yet thick enough that it doesn’t wear off super quick.
-
Where To Lube and How Much
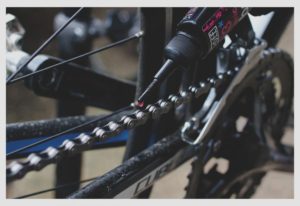
The objective of oiling a chain is to get the oil inside the moving parts of the chain, not on the outside as it doesn’t do anything there. The best way to do this is to use an oil can that has a small nozzle that you can apply directly to the rollers of the chain in the center with a drop or two on each. Do this while spinning the chain backwards; once if you’re certain that you applied enough oil on the first go around, otherwise a second or third time. Once you stop dripping oil on the chain, keep spinning the pedals backwards. This will keep all the parts of the chain moving to get the oil further into the chain itself.
After the oil has made its way inside the chain, take another clean rag and wipe off all of the excess by spinning the pedals backwards through the rag a few times. You need to do this because you don’t need oil on the outside of the chain as it can collect road grit more easily and get into the chain itself along with just being dirty in general.

If you keep your chain properly lubed as well as washed on a regular basis to keep grit from getting inside of it, your chain will last much longer and will shift and sound better. It doesn’t take a lot to keep your chain lubed and running smooth but it does take knowing how to do it. Just keep a rag and bottle of lube next to where you keep your bike and you’ll be sure to remember especially after now knowing exactly what causes your chain to wear out and stretch.