Riding gravel can be one of the best ways to have fun on the bike. It can also be one of the worst experiences on the bike if you don’t know how to ride a dirt or gravel road with grace. Riding down a paved road is relatively simple and straight forward whereas riding a gravel road requires a bit of preparation and know-how. Some stuff is common sense, like riding the smoothest line on the road, but is not always employed in the heat of the moment for one reason or another. We give you the tools you need below to not only have the skills to successfully ride a gravel road but to ride them excellently and seek them out every chance you get.

Equipment Setup for Riding Gravel
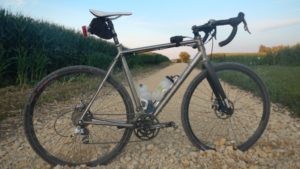
You could go down a mountain bike trail on a road bike but just because you can doesn’t mean you should. If you know ahead of time that you are going to be hitting a gravel road or twenty there are few things you should do prior to leaving home. One large consideration also is what the condition of the road is in. Is it going to be a farm country road that ranges from hard packed dirt to small, loose gravel? Or is it more of a jeep road that will be full of large rocks and other obstacles? For the former, a standard road bike will do but as you approach the later, a full cyclocross bike or gravel bike is a necessity.
Being Prepared For Flats
Regardless of the condition of the dirt road you must be prepared to flat. The best preventative is riding tubeless where there’s no risk of pinch flatting and the sealant inside the tire quickly fills any small punctures. And then if you flat you simply install a traditional tube. If you are running a tube, make sure you put an extra five or so psi in the tire to help prevent pinch flats. This will make your ride a bit more rough; another advantage to tubeless as you can run a lower, more comfortable pressure. With riding gravel you should also bring two tubes as well as a patch kit. If you are really going to be out there you can even strap an extra tire onto your saddlebag.
Securing Your Bottles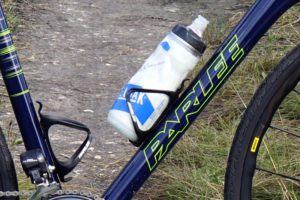
One thing that is not often thought about when riding gravel is that it is much more likely for your water bottles to eject from your cages. If you haven’t planned ahead, take a big swig out of both bottles so they are not full as well as leaving the pop-up top open. This will cause the bottle to become slightly less rigid and have a lower chance of flying out. If you plan on riding dirt on a regular basis, invest in a few water bottles that are softer and easier to squeeze. The cheap, hard bottles are easily ejected. If you have standard metal cages you should bend them in slightly. You will have to pull a bit harder to get the bottle out when you want a drink but it will keep your bottles firmly secure.
If you have carbon or composite cages there are a few different approaches. The first is to wrap a few layers of electrical tape around the tab of the cage that juts out into the indent of the bottle. Once you have a few layers, twist the roll of tape so the sticky side is out and keep wrapping for the last outer layer. The stickyness along with the increased depth will help secure your bottles. The second approach is to get grip tape much like you would find for a skateboard. Place this on the inside contact points of the bottle cage.
Lubing Your Chain
Depending on the road chances are good that dirt is going to fly up and get on your chain. Using a stickier wet lube will cause the dirt to stick to your chain and thus take it’s toll on your drive train. Use a lighter lube and make sure you wipe the chain clean after applying.
Hand Position And How To Absorb the Bumps
There are three main hand positions on standard road or cyclocross bars. They are the hoods, the drops, and the tops (the flat part of the bars closer to the stem). Each one is ideal for different scenarios. In each position you should be holding the bars tight enough for them not to bounce out of your hands but not so tight that your clenching. You want your body to be loose and absorb the bumps as you ride. One of the largest mistakes for new gravel riders is riding too rigidly. This is often because they are nervous and scared of crashing. The bike should be bouncing around underneath you while your body stays relatively stable with your arms and legs doing the majority of the shock absorbing. Although it’s on cobbles the premise is the same in the video below. You can see just how bumpy it is with their arms shaking.
The Tops
The tops are great for straight, flat roads as you can sit more upright and can easily absorb all the bumps. The tops are also great for going uphill as long as it’s not too steep.
The Hoods
The hoods are good where the tops are but when you might need to brake more quickly whether for curves or other riders. The hoods are also good for when you have to get out of the saddle as well as for going down relatively mellow descents.
The Drops
The drops should only really be used on dirt when you are going super fast on a flat section or down a descent. This position gives you the best access to braking quickly and forcefully as well as positions you to handle whatever a descent throws at you be it corners, rocks to bunny hop, or potholes to absorb.
The Physics of Gravel
The physics of gravel you might ask? Yeah. The key characteristic of a gravel road is that it is essentially a surface on top of a surface. The interaction with your tire to the top loose surface and how it adheres to the surface beneath it is what makes it different and challenging. Say you were to have a small rock on a table in front of you. If you push straight down on it with one finger, it’s not going to go anywhere. If you push down from an angle, any angle, front, back, the sides, it’s going to slide across the table. The same premise applies with your tires contacting the loose gravel surface. This means you always want to keep your bike as upright as possible.
Riding Through Corners
So now that you know why you would slide out in a gravel corner if you approached it the same way you did on a paved road, you need to know what that alternative approach is aside from just not leaning your bike. First you want to steer your bike through the gravel corner, not lean it through. This means keeping it upright but still keeping some extra weight on that outside pedal. You will want to equally balance your weight between your front and rear tire as if you over weight the front tire, like you do on a paved surface, it will likely slide out. You have to finesse the bike through the corner. As you get better and better both of your wheels will be sliding slightly laterally but this is just that first surface sliding over the underlying. You kept the bike upright and under you so it doesn’t slide out from underneath you.
Additionally when riding gravel, choosing the best line through the corner is key. This is a combination of starting wide, cutting to the apex, and finishing wide making a graceful arc along with seeing where the most stable surface resides. This will depend on the road but a lot of the time it is in the vehicle tire tracks as the loose rocks are kicked up out of it. You may have to just stay in the tire track through the turn or if you’re good, you can straighten it out on the loose parts and then cut tighter on the more stable parts to hit the apex.
Riding Up Steep Climbs
Going uphill on dirt can be challenging for a number of reasons. The first is that simply, it’s hard. The rough road slows you down so you have to overcome that as well as gravity. As the climb steepens, particularly on looser surfaces, your rear wheel will begin to spin out. This will happen even easier if you try and get out of the saddle. The trick here is to keep your rear wheel weighted by staying in the saddle and even sliding back on it slightly if you can’t get grip. If you are on a super steep gravel climb and have to get out of the saddle, the only way to do it is to drive the rear wheel into the ground almost like you’re trying to ride a wheelie. Even then your wheel still may slip out so it’s best just to stay seated and grind it out.
Riding Descents
Aside from going through corners, described above, there are a few other elements descending on gravel throws at you. The first and probably most important, is that you can’t stop as quick. This means that you have to approach corners with a bit less speed as you would on a paved road. Also, on descents you are going to be bounced around a bit more simply because you are hitting that many more rocks and bumps per second. You will float over more of them but your bike will bounce underneath you at a higher frequency. It’s important that you stay in the drops as you are least likely to have the bars bounced out of your hands here. You also can brake as needed. Also, when going downhill, especially on rougher roads, take your butt slightly off the saddle. This will allow the rear wheel to bounce up over a rock as it hits instead of forcing the tire to absorb the impact, which has a much higher likelihood of causing a flat.
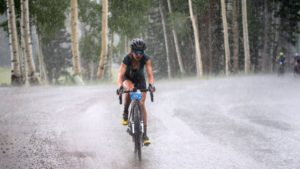
Riding Muddy Roads
Muddy roads can be a ton of fun to ride. It’s like you’re a little kid again out getting dirty in the rain. They do have to be approached with more caution however as on top of the gravel already being a loose surface, the moisture can make them even more slick. Additionally, when descending, your rims are going to be covered in mud so it will take a bit longer for your brakes to engage and when they do, expect a longer stopping time.
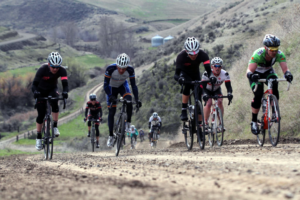
Riding With Others on Gravel Roads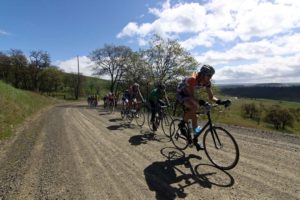
Riding with others on gravel roads can be a lot of fun but it means you not only have to watch out for yourself but everyone else too. When riding through corners or down descents, leave a little bit of extra space just in case they crash. You don’t want to be plowing into the back of them. It will depend on the road but sometimes you will be looking for a wheel to follow out of the wind. Dirt will likely fly up into your face especially if it’s wet. You will want a good pair of sunglasses to keep debris out of your eyes. Additionally, you can ride slightly to the left or right of the wheel in front of you and can cock your head a bit further to get even more out of the debris spray. Doing this also is advised when riding on someones wheel so you can see what’s coming up. You never know when there’s going to be a pothole or rock that comes up.
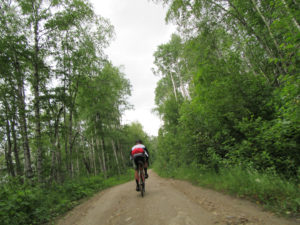
Finding the Good Line
It will depend on the road but normally there is one or a few good lines compared to the rest of the road. This is part of the fun of riding gravel because it’s not just ride straight ahead. Sometimes the tire track on the right will be the smoothest, sometimes it will be the center of the road, while yet other times it will be closer to the ditch. Don’t be afraid to change lines but when doing so, ride lightly over the rougher parts to avoid flatting or sliding out. And also if riding with others, make sure no one is to the side or just behind you that you will take out.
Keeping It Safe
Riding gravel roads can be a lot of fun but at the same time they can also be more dangerous. There’s an increased risk of crashing, especially when descending. Keep your speed within you skill set and as you get better and more comfortable, you can ride faster and faster. Seek out the gravel roads in your area and even take a weekend trip to someplace that has exceptional gravel roads. And if you’re up for it, check out a gravel event. There are more and more of them popping up all over the country and world.
 Step 1: The Gear