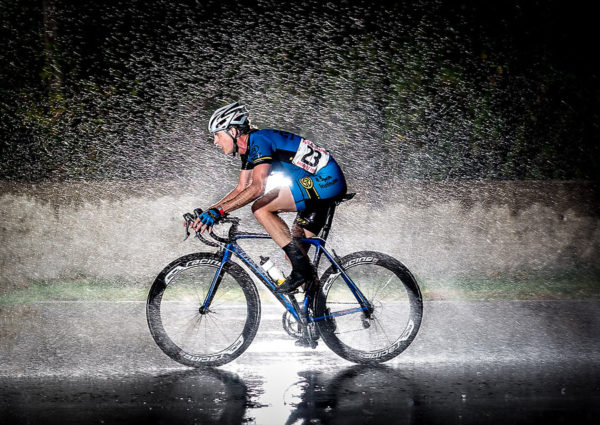
The group ride starts at 8:00am but when you open your eyes in the morning it’s dark, cold and raining outside. The snooze button is a few feet from your head but that’s how far away you were from first place at last season’s key race. That’s why you pull yourself out of bed, make your coffee extra hot and get out in the rain to ride. Riding in the rain doesn’t have to be miserable, some of the best cycling is during the winter on the West Coast, also known as the Wet Coast for all the rain, and you don’t want to miss any training days this year. Here are a few tips for making riding in the rain a little more ‘fun’ so that you can ride all year round.

Safety First
The most important thing is to check your brakes. Rain will exaggerate the negative wear of brake pads, meaning if the pads are worn down and too far away from the rim of the tires, the braking reaction will be slower and less powerful.
Stopping control should not be compromised due to poor bike maintenance.
If you are going to be riding in the rain often you will need to replace your brake pads more often. Make sure that as your brake pads wear down you use your micro adjust on your cable to bring the pads in closer to the rim for optimal stopping action. Your rear brake pads should wear faster than the front so keep an eye on what is behind. Another thing to check is that there is an equal distance between right and left brake pad for simultaneous contact on the rim while braking.
 Front and Rear Fenders
A lot of people when they start riding use only a rear fender for the rain (and to keep their friends riding behind them), but totally miss out on the benefits of a front fender. A rear fender is obvious to keep your back from getting the rooster tail spray and also helps the rain and mud the group that you’re pulling behind you (remember you’re training so you want to be in the front). However, what works for you might not work for the rider behind you. How long should your rear fender be?
Your rear fender should be as close to the ground as possible, try 4 inches from the pavement.
When buying fenders make sure they will fit your tire size. A skinny road tire fender will not suit a wider cyclocross or recreation road bike tire. Buy your fenders as long as possible, even then you might have to do your own modification to be suitable for your next rainy day group ride. Sometimes you can buy fender compatible extenders that you easily attach to reach the 4 inch rule. Other times, you can take an old water bottle, cut it in half, punch out two holes and zap strap it to the end of your fender. You can make this attachment as wide and sweeping as you want either to make more friends or add more resistance to your ride.
The same principles apply to your front fender. The front fender does miracles for delaying the wet penetration of road spray into your booties. The day after I got a front fender I came home after my rainy day ride and was surprised that I could actually feel my feet touch the floor when I took them out of my shoes!
Protect Your Head, Hands and Feet

You lose the most heat through your head so a rain hat with a brim not only keeps the water off your glasses, but also traps in some heat – unless it is made out of cotton, which soaks up the rain and stays cool. Choose a synthetic, quick-dry hat or better yet, a brimmed fleece cycling beanie that fits under your helmet and cuddles your ears to protect them from the cut of the wind.
The point to keeping your hands and feet warm is solely purposed for your riding comfort and greatly increases your happiness factor. If your hands or feet go numb it doesn’t matter how many times you stop for coffee, you will hate riding in the rain. Choose wool socks, maybe even two pairs! Even if they get wet they will stay warm. Buy a good pair of shoe covers, wind-proof is NOT rain-proof. A silicone or rubber pair will protect against the rain but have no additional thermal properties. A pair that is fleece lined and wind-proof will delay the wetness but can have enough of a barrier effect for your wool socks to maintain a warm enough temperature (and, if you’ve made it this far your front fender will help too!).
Wind-proof is NOT rainproof.
Use the double glove technique: a thin inner wool layer with a bulky winter snow glove on top. The lobster claw gloves came from the idea to have multiple fingers together in order to share body heat, but they don’t work for everyone because they feel different when shifting and braking. The outer glove layer needs to be a water-proof layer while the inner glove, as the insulated layer, than can be thicker or thinner depending on what weather you are expecting.
Layer-Up!
Your base layer should not be a base layer cycling shirt but a thick layer of embrocation cream. This stuff is incredibly popular for Belgian cyclocross races and during the wet Spring Classics. At the moment of application the lotion doesn’t seem to do anything but once rain or wind reach the cream it gives off a delightful glow of warmth on your skin. If on a rainy day ride you get stopped by a train crossing, the emobrocation layer keeps you from shivering, instead you wait at the railway crossing feeling tingly and warm! Just remember to put your chamois cream on first, then embrocation, and wash your hands after so you don’t burn your eyes from touching your face.
Apply chamois cream BEFORE applying embrocation lotion.
The next layer is a merino long-sleeve undershirt, short-sleeved jersey and water repellent rain jacket. If you get too warm on the ride and take off the rain jacket the merino wool can get wet while staying warm. Finish layering with a jersey and a waterproof-breathable jacket and get out riding in the rain!