• Training
    • Injury Prevention
    • Training Tips
  • How To
    • Bike Fit
    • Gear
  • Nutrition
    • Nutrition Tips
    • Weight Loss
  • Repair
  • Reviews
  • Stories
    • Funny Stories
    • Jokes
    • Quotes
    • Videos
    • Funny Videos

I Love Bicycling

I Love Bicycling is a website that is geared towards cycling for beginners with road cycling tips, training articles, nutrition tips, weight loss, how to’s and bike repair articles.

How To Clean Your Bike in 5 Minutes or Less

January 3, 2018 by Adam Farabaugh

Having a clean bike that looks good and works flawlessly is something that all pro riders have for every single ride. Their trick though is that they have a mechanic who keeps their bike looking and working like new. You too can have that clean, smooth working bike without spending ages working on it after every ride. The trick is to know what to do and having everything set-up and ready to use when you clean your bike.
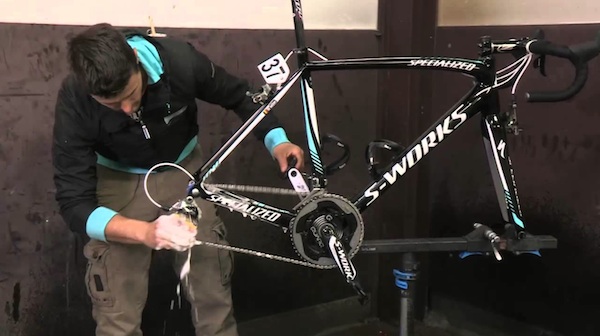
How to clean your bike

Washing

After a ride in the rain, mud, or other gnarly elements, using water on your bike is the easiest way to get your bike clean. It gets the big stuff off without having to wipe your bike a million times with a towel or rag.

The Hose Approach

If you have a hose, leave it set up so all you have to do is turn on the water and hose down your bike. Leave the wheels on as you aren’t doing a top to bottom scrub. You just want to hose everything off and get the grit out of the nooks and crannies.  Do a once over on the whole bike but when you get to the drivetrain put the spray on the chain and run the pedals backwards. After a few revolutions, keep spinning the pedals backwards but move the spray to the cassette and then the pulley wheels on the rear derailleur. Also get both brakes good.

The Bucket Approach

If you don’t have a hose, a bucket is your next best alternative. Get a sponge, or an old t-shirt, and get it sopping wet and wipe down the bike starting with the handle bars, then frame, then wheels, and then drive train to get to progressively dirtier and dirtier areas of the bike. You’ll have to ring out the sponge, or t-shirt, a few times depending on how dirty your bike is. When you get to the drivetrain you’ll spin the pedals backwards with the sponge in your other hand cupping the chain.  This will get a good bit of any gunk that has built up off. Then scrub what you can off both derailleurs. After you are done scrubbing, take the remaining water and dump it slowly over the whole bike washing away anything that was left behind.

Wiping Down
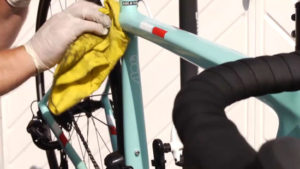
If your bike wasn’t too dirty you didn’t have to hose down or use a bucket luckily. Whether you just used water on your bike or it wasn’t too dirty, you will now wipe down the bike. The best approach to this is to get a dry rag and some simple degreaser.  Start with the dry rag and run it over the shifters and handle bars. Then spray a little degreaser (such as Simple Green which is light enough on everything) on a corner of the rag and wipe down the frame, scrubbing a little where it needs it. The degreaser will easily remove any dirt and grime on the bike and leave it shining like a pro’s bike. After you’ve gone over the frame, go over the rims but since you still want ample use of your brakes, don’t wipe the braking surface since the degreaser is quite slippery. A little bit won’t hurt it though if you do accidentally rub a little bit on it.

Next is the drivetrain. Take the degreaser and spray a little on both the front and rear derailleurs in their smallest gear and then again in the biggest. This allows the degreaser to get into the moving parts. Then wipe down both. Now that your rag has a descent amount of degreaser on it, run the chain backwards with the rag grasped around it. This will help to get it clean and shiny again. If you used a bit too much degreaser, take another clean dry rag and wipe down the bike again as you don’t want a slippery frame. Doing this will get your bike looking clean. How long it stays clean though is up to you.

Lubing the Chain

A smooth working bike, provided you’ve taken proper care of it with parts that aren’t too warn out, keeps it staying smooth and feeling like new due to proper lubrication. You should lube your chain every few rides at least but definitely after cleaning your bike. Since you already ran the chain through a rag when you were cleaning the bike you don’t have to do that again. If you didn’t and you’re just lubing the chain, run the chain backwards through a rag.

Take your bottle of lube and tilt the bottle slightly placing the nozzle so it just touches the top of the chain and a single drop comes out of the bottle. Now turn the pedals backwards getting roughly a drop on each link. The key to lubing a chain is that you want the lube inside the pins, not on the surface. Once you’ve gone around one to three times depending upon how dry you chain is, take the bottle away but continue running the pedals backwards. This will help to get the lube inside the chain itself. Now take a rag and run the chain backwards once again wiping off any excess lube. Your chain should now look sparkling clean.

Smooth Shifting

To keep your shifting working smooth you now want to put the bike in its biggest gear and then littlest putting a few drops of lube at all of the pivot points. Shift the gears from the biggest to the smallest and vice-versa a couple of times and then wipe off any excess lube. Now, assuming you have old school cables, flip your bike upside down, taking care not to scratch the shifters, and put a couple drops of lube underneath the bottom bracket on the cables where they slide through the plastic sleeves. Many bikes today have different cable routing designs so you’ll have to look at your bike and see where the friction points occur. They are going to be right around here where they make the bends to their respective derailleurs. Once you do this shift through all the gears a few times and add a few more drops if needed.

Now you have a clean, well-oiled machine that you obtained with minimal effort. Keep your sponges, rags, degreaser, and lube together in a convenient spot where you can grab it and be done with it five minutes after your ride. And if your bike tends to get a bit more dirty, keep a hose or bucket handy so you can do a once over on it quickly while still in your kit. Not only will you now show up on all your rides with a bike that looks like a pro mechanic took care of, it’ll work like one did too. Keeping your bike clean and lubed will also help your parts last longer too!
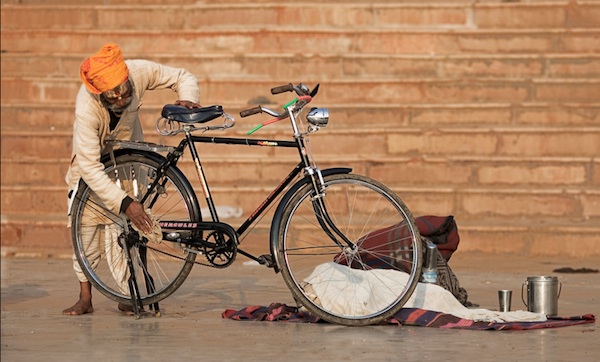
Bike Cleaning 101 –The Dry Wash

November 27, 2015 by Wade Shaddy

Bike Cleaning 101 --The Dry WashIt’s partly psychological, but a clean bike just seems to ride better. Some cyclists clean their bikes after every ride. Some clean their bike only when it’s dirty. It’s a given that, if you can see dirt and gunk on your bike, it needs to be cleaned. But too much water is not a good thing. And with the onset of winter, it’s almost impossible to wash your bike with soap and water, and then expect it to dry instead of freeze. Maybe a dry wash is all it needs.

Delicate Machine

Road bikes are delicate, complex machines. The lighter they get, the more delicate they are. Washing them with a hose is sometimes necessary, but the less water on your bike the better. Water won’t hurt your bike, but constant immersion in water should be avoided when unnecessary.

Bike Shops

You might have noticed that bike shops have spotlessly clean, shiny bikes. They don’t wash each and every one with soap and water. They use ordinary household products to dry wash their bikes when needed, without soaking them.

Rust Forms

Water seeps into cable housings and between moving parts. Rims can rust, especially where brake pads wear them down. The chain is another steel part, if it’s wet, and you don’t have sufficient lube, it can rust overnight.

Don’t Blast It

Mountain bikes are one thing. They get caked with dirt and mud, and there’s nothing you can do but hit them with everything you’ve got. But unless you’ve been caught in the rain or rode a stretch of dirt covered pavement, your expensive road bike collects nothing in the way of dirt and grime that requires you to blast it with a garden hose.

Furniture Polish

Motorcycles really have little to offer cyclists, but borrowing a few secrets from them can’t hurt. Motorcycles collect bugs like you wouldn’t believe. Motorcycles have complicated electronics that shouldn’t get wet over and over again. Dealers sell expensive products that are specifically designed to remove bugs and road grime without spraying the motorcycle with water. But guess what, it’s more like common furniture polish. Some bicycle shops also sell bike-specific dry wash to customers, but when it comes down to polishing their own bikes, they often use common furniture polish instead.

Abrasive Particles

Wiping your bike with a dry cloth is not a good idea. Sand, grit and debris attached to the bike surface can scratch paint. By spraying the bike first with furniture polish, it helps to lift abrasive particles onto the cloth, and prevents them from scratching.

Clear Coat

Even though most household furniture polish works just fine to dry wash your bike, it’s always wise to read the instructions printed on the can. If it prohibits using it on leather, cloth or other components on your bike don’t use it. Get something else. Note that if the product can be used on delicate furniture finishes, it’s not likely going to hurt the clear coat on your bike.

Citrus Scent

Dry washing your bike is almost as easy as it sounds. Work in manageable sections by spraying it with furniture polish — after vetting it of course. Lemon-scented is nice, it gives your bike the pleasant citrus scent of summer.

Foam it Up

Spray the frame until it’s foamy. Allow the foam to soften bugs, dirt and grime for a few minutes and then wipe it off with a soft cloth. If the foam begins to deteriorate and disappear before you can wipe it off, work in smaller areas.

Repeat as Needed

Don’t scrub hard initially, it’s still possible to scratch your paint or clear coat with abrasive grit that your rag has picked up. If you feel that the rag has particles, shake it out or use a different rag. It’s fine to go over the top tube, down tube or steering tube individually, and then repeat if needed until it gleams.

Polish to Shine

Hit the grips, seat and handlebars with the furniture polish if you desire. But be aware that furniture polish will make things slick; don’t use it on your rims where they contact the brake pads. Slick brakes are dangerous — it feels nice on the seat though. Allow the bike to dry for about 15 minutes, and then bring out the luster by polishing it shiny with a soft, dry cloth.

Pedal Power

Don’t forget your clipless pedals. Foam them up. Use a toothbrush or other small brush to get the sand out of them. Furniture polish has just the right amount of lubricant for these delicate parts. If you’ve ever hit them with oil, you know that they can release when you don’t want them to. Furniture polish has just enough slick stuff to keep them working like they should.

Handy Wipes

Car detailing products are other options to furniture polish. They come in handy wipes, similar children-safe baby wipes, but they have a silicone protectant that provides a bit of armour to your bike’s finish. Keep a container of these handy, they’re good for quick touch ups right before or right after you ride. Just wipe the bike with them and it shines, it’s almost too easy.

The Last Resort

If you’ve hit a patch of mud, ridden on soft dirt or wet gravel, dirt and gunk can get into the brakes, collect on the chainstays, splatter the down tube or pack into the derailleur. A dry wash isn’t going to do it in this instance. A garden hose and bucket of soapy water is in order.

Soap and Water

Tutorials for washing a bike are all over the internet. It’s just like washing a car, with a few exceptions: Remove your saddle bag and computer for starters. Washing it is easy enough, but make sure it’s dry. Air compressors are handy if you have one, they can dry your bike in minutes.

Lube Tips

One of the big issues with soap and water is that it removes lubricants, and then they need to be replaced. Some cyclists tend to over-lubricate. It leads to poor performance and excessive component wear when dirt and grime attach to the extra lube. Go easy on the lube.

Ride It

Under normal riding conditions, your bike will remain cleaner longer if you ride it. Dust from your garage is a common reason bikes need to be cleaned in the first place.

  • Facebook
  • Tumblr
  • Twitter

Latest Articles

JOIN Cycling: A New Training Platform for Cyclists

May 27, 2024 By Eric Lister

cold exposure

The Benefits of Cold Exposure for Cycling & Life

June 13, 2023 By Eric Lister

hill climb

The Ultimate Hill Climb Training Guide

May 31, 2023 By Eric Lister

shoulder pain cycling

How to Treat & Avoid Shoulder Pain While Cycling

April 12, 2023 By Eric Lister

psoas stretch

The Importance of the Psoas Stretch for Cyclists

April 6, 2023 By Eric Lister

cycling neck pain

The Ultimate Guide to Cycling Neck Pain: Causes and Solutions

March 21, 2023 By Eric Lister

Useful Info

  • Contact
  • Finally, A Global Cycling Club That Is Focused On Community And Love Of Cycling!
  • Privacy Policy
  • Share Your Story!
  • Terms And Conditions Of Use
  • Welcome to I Love Bicycling
  • What Happened When I Stretched Every Day For a Month

Recent Posts

  • JOIN Cycling: A New Training Platform for Cyclists
  • How to Hang Bikes in Your Garage: 4 Inexpensive Options
  • Gravel Bike Vs. Road Bike: Which One Is Better For You?
  • The 6 Types of Mountain Bikes & How to Choose the Best One for You
  • What Is a Touring Bike Good For? 5 Benefits We Know You’ll Love

Search I Love Bicycling

Connect with Us

  • Facebook
  • RSS
  • Tumblr
  • Twitter

Copyright © 2025 · Magazine Pro Theme on Genesis Framework · WordPress · Log in