Your bike is a finely tuned piece of machinery that allows you to travel at great speed and distances all under your own power. Compared to a motor vehicle there are not very many parts and each one has a specific job. Without almost any one of them, your bike will not work. The good thing with a bike is that they are relatively easy to work on and fix, provided you have a few tools and a little know how.
Knowing these few simple fixes and how-to’s will get you out of the majority of breakdowns. Practice them before you need to perform them on the side of the road in a cold, wet rainstorm.

Taking the Wheels On and Off
You may never have had to before, but knowing how to take your wheels on and off will not only allow you to change a flat tire if the need arises, but also if you need to take them off to place them in your vehicle. Most bikes have a “quick-release” skewer that holds the wheel in place through the axel. If your bike has “nuts” on the end of the axel you will need two Metric wrenches of the same size. Typically 15mm. Otherwise you need to open the lever on the quick release to loosen its grip on the frame. Sometimes this will open the skewer enough and you can slide the wheel out. If it is still too tight, the opposing side of the skewer is just a threaded nut. Turn it counter-clockwise to loosen it.
On most bikes you are going to have to open up the brake in order for the tire to fit through the brake. On road bikes, this is done by flipping the little lever up which will loosen the cable tension. On other, more  recreational, rimmed braked mountain or cyclocross bikes, you will have to disengage the “L” shaped noodle that holds the brake cable to the brake. You do not need any tools to do this so don’t loosen any bolts. Your brake may still be a bit different so learn and understand how your brake works to open and close it safely.
Once this is done you can easily pull the front or rear wheel down and out of the frame. For the back wheel you are going to have to move the derailleur (device that changes the gears) down and out of the way to give enough space for the wheel to exit the frame. Putting the bike in its hardest gear (gear you would go downhill on) will make this easier.
Now that the wheel is off, you need to put it back on. Make sure both sides of the axel are in the hooks on the frame for the axel. The best way to do this is to have the wheel sitting on the ground, vertical, and set the bike over top of the wheel onto the axel. Once in place you can then push the quick-release lever into its closed position. It should become firm half-way and then snug when it is pressed down all the way. If it is too tight or lose you need to tighten or loosen the nut on the opposing side. (counter-clockwise if it’s too tight, clock-wise if it’s too loose)
Once the wheel is tight in the frame reattach the brakes as they were prior. Lift the bike and spin the wheel and test the brakes to make sure they are working properly as well as to ensure that the wheel is installed properly and will not fall out.
Fixing a Flat
Another important fix that will be hugely beneficial when it’s raining and cold on the side of the road is knowing how to fix a flat tire. You first need to remove the wheel (that is flat) by following the instructions above. Once you have the wheel off you need to take your tire levers (item number one that is needed) and hook one underneath the side of the tire to pull it back over the rim. You only need to do this on one side. Expose the inner tube all the way around and then pull out the inner tube with your hands. You will need to push the valve through the hole in the rim to take the tube completely out.
Now take your hand pump (item number two that is needed) and pump up the tire to determine where the hole is. Once you have found it, find that same place on the inside of the tire and make sure there is no glass or any other debris in there that can cause the new tube to go flat again. If the tube has “snake-eyes” or a pinch flat, there’s no need to do this as the flat was caused by too low of air pressure and the tube was pinched causing it to flat.
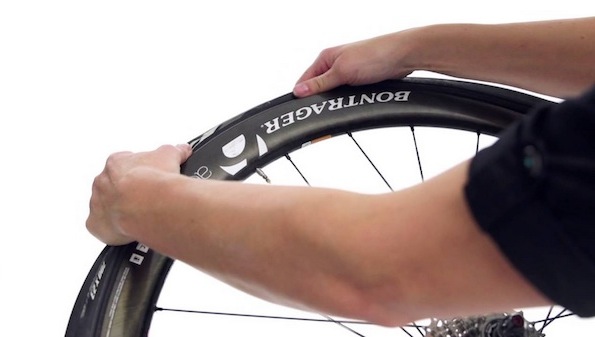
Once you are sure that there is no glass or anything still in the tire, place the new tube in the tire. First though, put a little bit of air in the tire to make it easier to work with. Then place the valve through the hole in the rim and then work the rest of the tube into the tire all the way around. Once the tube is completely inside the tire, start at the valve stem and press the tire back inside the rim. This works best with your thumbs. Now work your way all the way around until you get to the last few inches. Now make sure the tube is still pressed all the way up into the tire.
This last part is the most difficult. You need to push the remaining bit of tire onto the rim except it is going to be tight. You may be able to do it with your thumbs but you may need a tire lever again. If you can’t get it on with your thumbs, or by grabbing the other side of the wheel and rolling it over with your palms, then place the tire lever on the inside of the rim, making sure the tube is not pinched between the lever and the rim. Then “lever” the tire up and over the rim into place. This will take some trial and error and some time so practicing ahead of time will be beneficial. Once the tire is on, and before inflating, work your way around the tire on both sides of the rim and make sure that you can’t see the tube anywhere. It should be pushed up inside the tire out of site. Once you are sure of this you can then inflate the tire with your hand pump. Try and get it to your original pressure but this may be difficult with a hand pump. Get as much in as you can as this will help prevent any additional flats. Put your wheel back on, make sure your brakes are working properly, test them both, and off you go.
Making Sure the Bolts are Tight
Safety is priority number one when riding. Checking to make sure everything is tight and ready to ride should be done frequently, especially if it’s been a while since the bike was ridden. Take a Metric allen key (pretty much all bikes use Metric bolts so you must use Metric wrenches otherwise you risk stripping the bolts) and check and make sure the bolts holding the handle bar on are tight. Then make sure the bolts holding the stem (the part that connects the handle bars to the bike) are also tight. They should be hand tight. Don’t over tighten them as that can be just as bad as under tightening them.
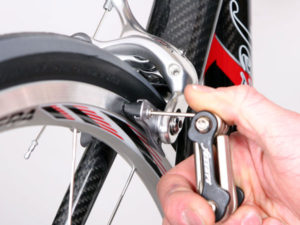
 The next bolts to check are the bolts holding the brakes to the frame. There are many different styles of brakes but you can look and figure out how it connects to the frame. Most have an allen bolt on the backside of the frame from the brake. Then make sure the bolt holding the brake cable is tight. If this bolt is loose, when you engage the brakes the cable will slip and you won’t have any brakes. Make sure this is properly tightened.
The last important bolt, or sometimes quick-release, to make sure is tight is the seat post clamp. This is the bolt that tightens down on your seat post ensuring that it doesn’t slide down when you sit on it. If it is a quick release, refer to the above piece about removing a wheel as it’s the same style quick-release as your wheel axel.
Knowing how to do these few simple things on your bike will help you in a lot of ways as well as save you money at the bike shop. If you don’t know or are not completely sure if you did something right, take the bike to your local bike shop and they will make sure that it is done properly and that the bike is safe. Riding a bike can be extremely dangerous and having a malfunctioning bike can be catastrophic so take the necessary steps to ensure that it is a safe machine to ride. Once you get good at these simple fixes on your bike you’ll be able to get out of most situations thrown at you while out on the road.