• Training
    • Injury Prevention
    • Training Tips
  • How To
    • Bike Fit
    • Gear
  • Nutrition
    • Nutrition Tips
    • Weight Loss
  • Repair
  • Reviews
  • Stories
    • Funny Stories
    • Jokes
    • Quotes
    • Videos
    • Funny Videos

I Love Bicycling

I Love Bicycling is a website that is geared towards cycling for beginners with road cycling tips, training articles, nutrition tips, weight loss, how to’s and bike repair articles.

8 On-the-Road Bike Repairs You Need to Know

February 20, 2020 by Sarah Lauzé

Cycling is beautiful for its simplicity, but that doesn’t mean things don’t go wrong. When you’re out on a ride and you get a flat or your chain breaks, it shouldn’t mean the end of your ride. Although these things can be fixed with ease back in your garage with all the right tools (or at your local bike shop), it’s important to learn some of the most common on-the-road bike repairs that will come up. Being stranded miles from home is no fun, and although it may be easier to call for a ride home, you’ve got what it takes to do a quick fix and keep riding!

On-the-Road Bike Repairs

Tools to Bring

You should be prepared with the right tools on the road or trail and know how to use them should a mechanical or flat tire occur. The tools to bring are:

  • Spare Tube
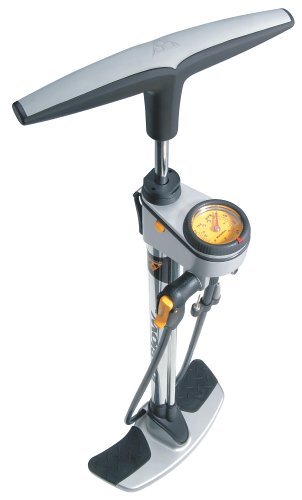
  • Pump or CO2 Inflator with an extra cartridge just in case.
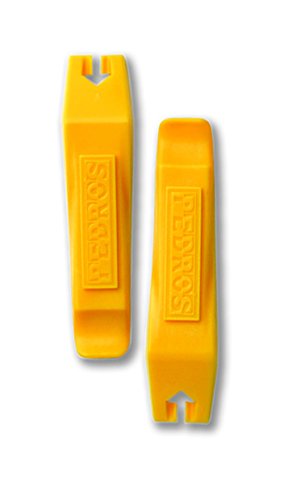
  • Tire Levers
  • Patch Kit
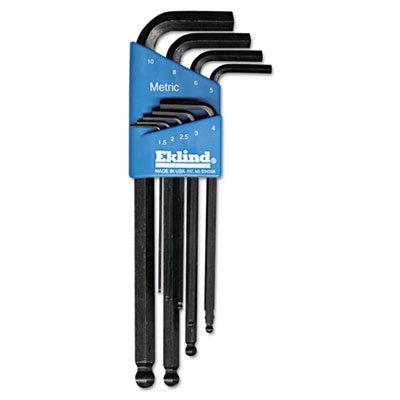
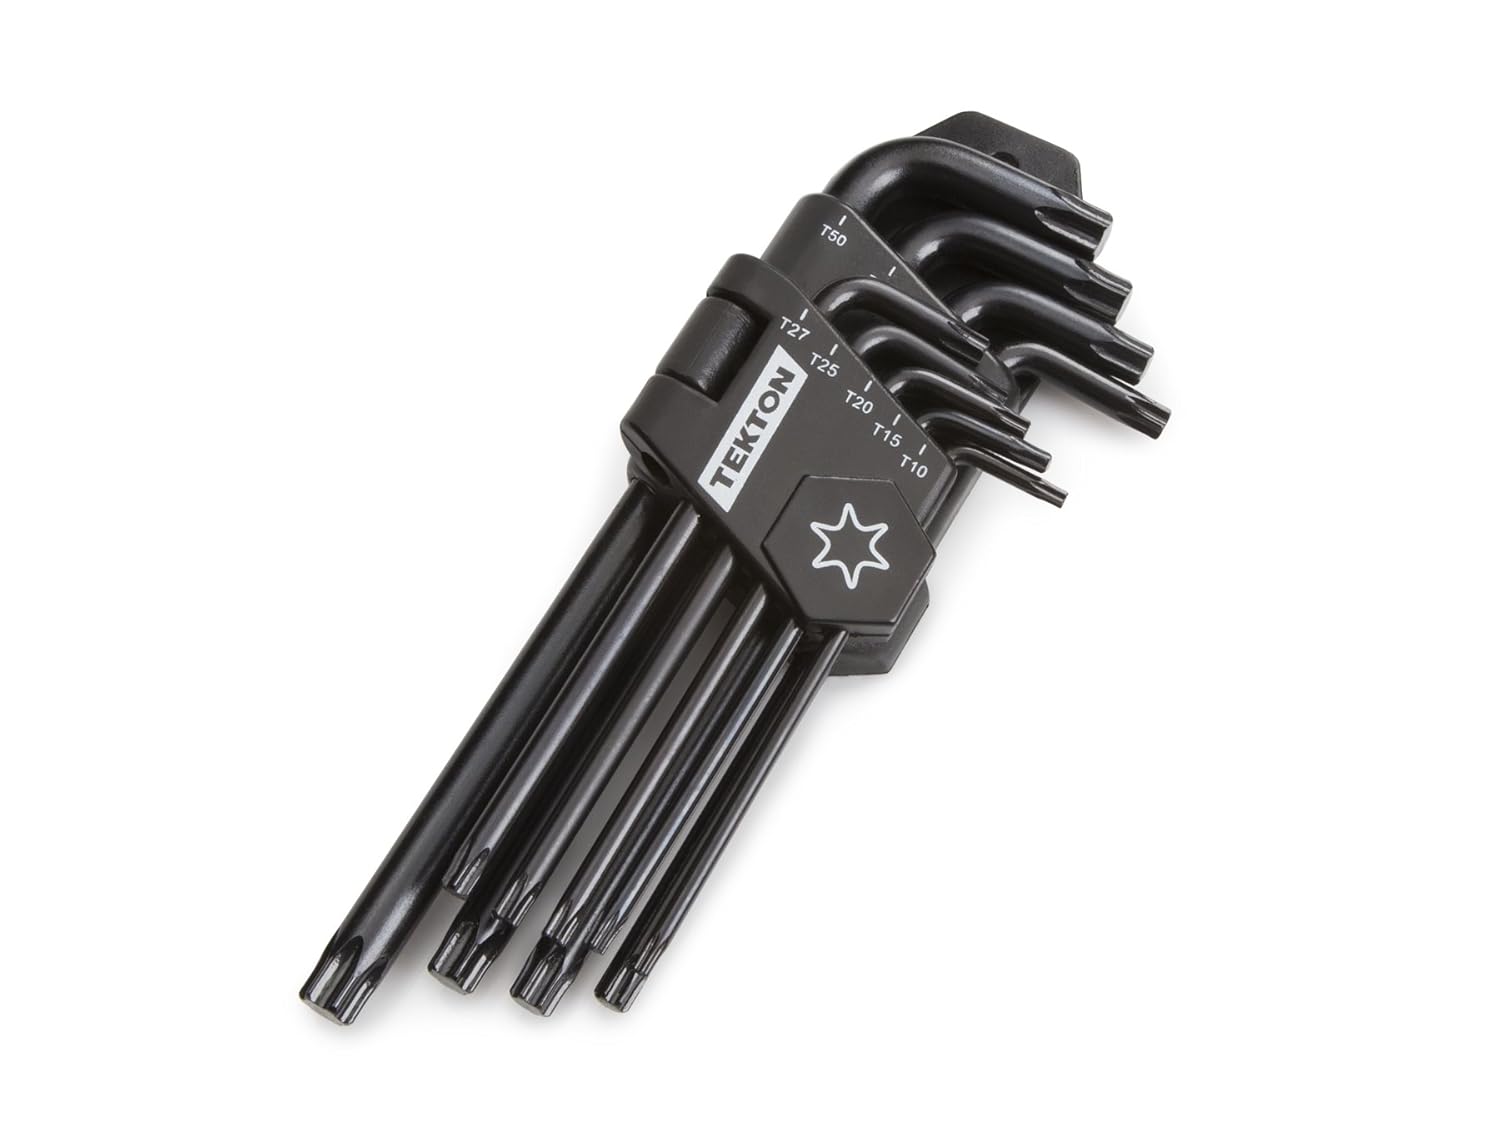
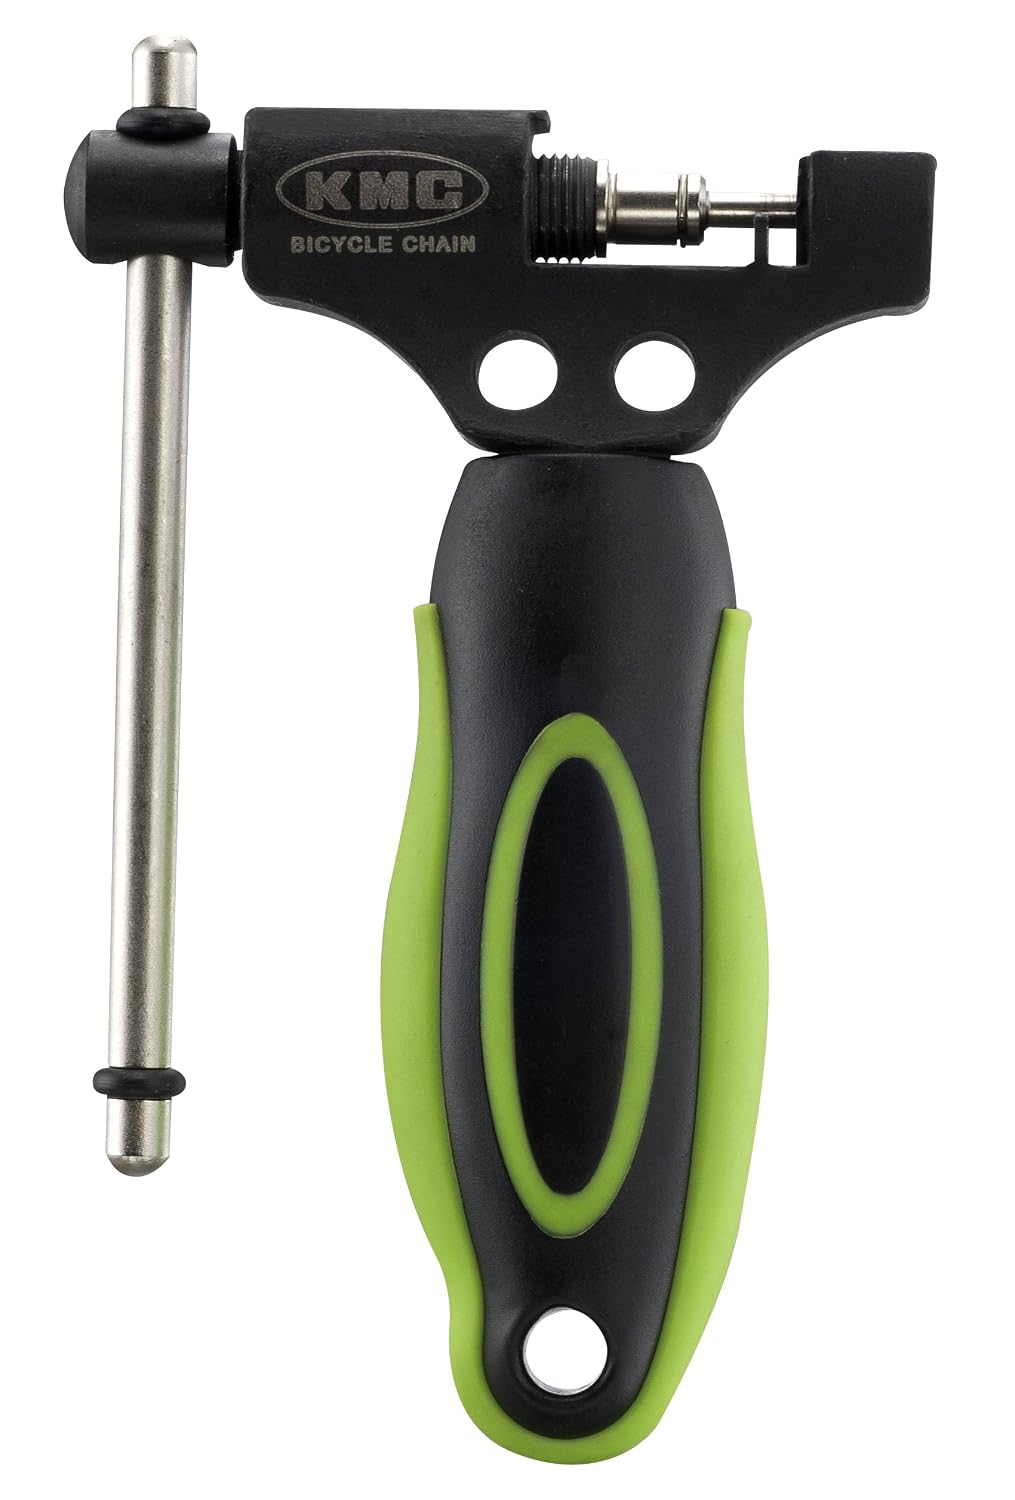
  • Multi-tool with a chain tool on it

8 On-the-Road Bike Repairs

1. Fixing a Flat

If you ride a bike more than just around town you should know how to fix a flat. Fortunately it’s pretty easy:

2. Broken Chain

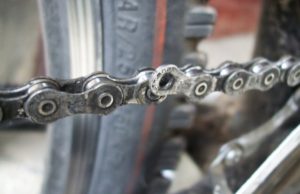
Broken chains don’t happen too often when riding but when they do, you’re not going very far until you fix it. A chain will either break completely or a link will become kinked. To fix it, all you need to do is to remove that link.

  1. First locate the broken link. There should be two plates that are loose, and flapping around or a link that has a bend in it. These are the ones that get removed. You do not need to remove the chain from the bike. Keep the chain threaded through the derailleurs if you can as it will save you time.
  2. Examine the chain breaker tool. You’ll notice a circular cradle that the push-pin moves through. Rest the link in this cradle where the pin lines up with the push-pin of the link you’re removing.
  3. Turn the push-pin to push the pin through and out the other side. If you’re using a master link, you will need to have both ends of the chain an inner link as the master link is an outer link. If you don’t have a master link or another connector pin, do not push the pin all the way out the other side of the chain. Leave it so the pin is over enough to remove the inner link but not so far that it falls out. This will be important in the next step. Now do the same one full link removed, one inner link followed by one outer link or vice-versa, from the pin you just pressed out with the broken link being in-between.
  4. If you removed the chain from the derailleurs, thread it back through being sure that it’s going the right way. Then place the chain in the smallest gear in the back and rest the chain to the inside of the chain rings on the front against the bottom bracket to give enough slack.
  5. Now install the master link if using one through both the inner links and lock into place. If you have a connector pin, line up the ends of the chain and press that through breaking off guide end with your chain tool. If using the same pin that you just pushed out and left on the outer link, line the end up and push the pin back in. You want it so both sides of the pin are flush with the outer plate of the chain. If you pushed the pin too far through when you were removing it, line the chain up in the chain tool and set the pin on the resting plate to then press the pin in. It may be a bit off at first but it should line up as you continue to push it through the hole.
  6. That’s it. The link with the pin you just installed may be a bit stiff but if you bend it laterally slightly with your fingers, it should loosen up to where you can’t even tell which link it was. The chain is now one link shorter, unless using a master link, but will still be good to go.
  7. One note is that reinserting a pin is now the week point of the chain. When you do make it home, take out that pin and put in a connecting pin which will better strengthen the chain. The problem is you may not be able to tell which link it was so it’s recommended that you replace the entire chain.

3. Tire Tear

A tear in a tire can end your ride. If it’s not extremely big however, you can fix it with a few little tricks. The first is the dollar bill trick where you fold up a dollar bill and place it between the tube and the tire where the hole is. This will only work if the hole is small enough. Once the hole is past a few millimeters in size, you are going to need a tire boot which should also be carried in your saddle bag. This rubber strip will be large enough to place over the hole and not allow the tube to poke out. The problem with both the dollar bill trick and the tire boot is that the tire can continue to split particularly if you’re on rough roads or terrain. Adding a piece of electrical tape in place of or in conjunction with, will help to hold the tire in place and not have the hole continue to grow.
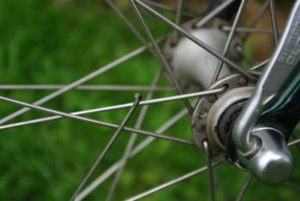
4. Broken Spoke

First, you need to get the spoke out of the way so that it doesn’t interfere with your wheel turning. If you have a broken spoke on the front wheel, you should be able to just slide it out of the hub. If it’s on the rear wheel, bend the broken spoke around one of the spokes adjacent to it. Then you can adjust the tension on the rest of the spokes in your wheel.

To adjust the other spokes to accommodate for one missing spoke, you’ll need a spoke wrench, conveniently on many multi-tools, to tighten or loosen them by turning their nipples at the rim. Turn each spoke on either side of the one that just broke clockwise as if you’re looking from the hub of the wheel toward the rim. This will loosen those spokes. If this doesn’t move the rim back to center enough, ie. it’s still bouncing off the brake pads, go one more spoke in either direction and turn them counter-clockwise. This will tighten the spokes pulling the rim back toward the side of the broken spoke.  fIf the rim is moving too far to the right, you’ll want to either tighten the spokes that attach to the left side of the hub or loosen the spokes that attach to the right side of the hub. You’ll make this decision by testing the spokes and determining whether they feel too loose or too tight.

Never make drastic changes to the tension of a spoke at any one time. Just make half-turns with the spoke wrench each time and check and see how true the wheel is. It is easy to go too far. Once you get it roughly straight, you can ride the wheel. If the rim is still slightly touching the brake pads, open the brake quick-release to allow for more space. Once you get home, check out this article on how to finish up the repair.

5. Broken Front Derailleur Cable

With a broken front derailleur cable you are going to be stuck in the little ring for the rest of the ride. With a triple chain ring, you might be able to turn the limit screws enough to line up the derailleur up with the middle chain ring but it depends on your derailleur and set-up.

6. Broken Rear Derailleur Cable

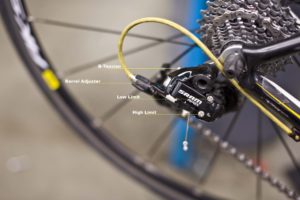
With a broken rear derailleur cable you are going to be stuck in your smallest gear, normally an 11 or 12 tooth. To get the chain up to a bigger, easier gear, turn the H or high speed limit screw in as far as it can go. This should push the derailleur up at least a cog or two. You may have to back it back out a tad if it doesn’t line up well.

7. Broken Brake Cable

It’s going to be rare that you have a broken brake cable as they’re made not to fail. If you’re riding anything other than perfectly flat roads without many intersections or traffic you might be able to gingerly make it home otherwise it’s best to get a ride and not risk needing to stop quickly and not being able to.

8. Shifting Becomes Off

A lot of times, particularly after a new cable is installed, your rear derailleur shifting will become slightly off. This is because the cable stretched ever so slightly. To tighten it, simply turn the barrel adjuster on your derailleur counter-clockwise a quarter turn until the pulley wheel lines up exactly with the gear. You won’t have to turn it much unless it’s way off.

7 Essential Bike Tools Every Cyclist Should Have

October 10, 2019 by Sarah Lauzé

Working on your own bike can be satisfying, plus it can save you a bunch of money and trips to the bike shop. Having the essential bike tools for the job is necessary on both accounts. Seeing as you are the one who rides your bike all the time, only you really know what’s going on with it. If it’s making a certain noise, or feeling weird in a way, it can be tough to describe those smaller issues to a bike mechanic. With the right tools and general know-how, you can diagnose and fix the problems– and even have fun doing it!

That being said, botching a quick repair or making it worse because you’re trying to get through it with some multi-tools you had lying around can make for an embarrassing trip to the bike shop. Make sure the tools you have are up to the task, and ensure your also know how to use them. Seek out someone to teach you, watch videos online, read articles and practice on an old beater in a low-stakes repair before moving on to your top bike.

7 Essential Bike Tools

1. Floor Pump

While a floor pump is not the most exciting bike tool, proper and regular use can avoid the most common bicycle repair: a flat tire. Correct inflation pressure for the rider/tire/rim/surface condition combination can lead to fewer flats, along with better handling for your bike. Pressure that is too low risks pinch flats and pressure that is too high can lead to more puncture flats. Finding the right pressure will keep your bike rolling, keep you more comfortable on the bike, and more confident in your bike handling.

2. Tire Levers

Bad tire levers are really frustrating. If you’re out on a ride and get a flat, struggling to get your tire off with your bare hands can be tough, so you reach for your tire levers. If they proceed to break, then you’ll most likely be ready to pull your hair out. Good tire levers are the difference between a simple fix and the above situation. It is not a huge investment, so get the good ones and they will last you.

3. Hex Keys/Torx Keys

Most bolts on bicycles have metric hex bolts, so a good set of hex keys with ball-end drivers will make repairs a breeze. They will fit in your bolts securely, minimizing the chance of stripping the bolts. The ball end allows you to tighten and loosen hard to reach bolts at angles other then perpendicular. The set should have a full range of sizes to accommodate all of the bolts you will work on. Again, this is not a huge investment.

More and more bike parts have Torx bolts, six pointed star heads that give their wrenches more surface area, reducing the chance of stripping them. The same rules that apply to hex keys apply to Torx keys, except that they cannot accommodate ball-ends.

4. Cable Cutters

Replacing cables is not a complicated job with the right cable cutters. And there is only really one right cable cutter, which is often copied. With the wrong cable cutter, you risk fraying the cable or housing you are working with. A frayed cable is useless as the frayed section can spread and will not go cleaning through the housing, compromising its function.

5. Chain Tool

Cutting your a new chain to the correct length and installing it is one of the most satisfying repairs to do. It increases the longevity of your drivetrain if done at the correct intervals and makes it more efficient with crisper shifting. The only way to push the pins through a chain is with a chain tool.

6. Screwdrivers

There are a few adjustment screws on bikes, usually for derailleur limits (although some have moved to small hex heads) and usually number two Philips heads. But not all screwdrivers are equal, a good fit goes a long way to preserving your screws. Additionally, you should have a flat head screwdriver around, but this is mostly for scraping clean derailleur pulleys and other hard to reach places.

7. Torque Wrench

The last tool, the torque wrench, is a recent necessity. With the explosion of lightweight parts that require a certain torque to both hold fast and not fatigue prematurely, a torque wrench is the only tool for the job. Fortunately, most bike parts that require a certain torque have it printed right on them. Make sure you get the right bits for your bikes. Lots of people say they can do it by feel, but that has been proven wrong time and again.

Your own work is always more satisfying than relying on someone else’s, and it can also give you a sense of ownership of your bike. These bike tools should get you on your way to mastering most basic repairs. Remember to learn how to use a tool properly before attempting any repairs.

Seven Bike Tools Every Rider Should Have

September 9, 2016 by Josh Friedman

bike-tools

Working on your own bike can be satisfying and can save you a bunch of money. Having the right bike tools for the job is necessary on both accounts. You and only you know exactly what is wrong with your bike; there is no need to attempt recreating the malfunction for your local mechanic if you repair the bike yourself. You can diagnose and fix your own problems and have fun doing it.

But there is nothing more frustrating than trying to bodge your way through a repair with inferior tools, or worse, make the repair more complex and then you have an embarrassing trip to the bike shop. There you will have to explain, in detail, how your attempt to make your bike right went very, very wrong.

Before Touching the Tools

Even more important than having quality bike tools fit for the tasks you will encounter, you need to know how to use them. Seek out someone to teach you, watch videos online, read articles and practice on an old beater in a low-stakes repair before moving on to your top bike. Always check your work.

Finally, the Tools

This is a list of bike tools that every rider should have and know how to use well. Having them on hand will save you money because you will not have to pay your shop, nor will you have to bring your bike to the shop for most repairs.

Floor Pump

While a floor pump is not the most exciting bike tool, proper and regular use can avoid the most common bicycle repair: a flat tire. Correct inflation pressure for the rider/tire/rim/surface condition combination can lead to fewer flats, along with better handling for your bike. Pressure that is too low risks pinch flats and pressure that is too high can lead to more puncture flats. Finding your Goldilocks pressure will keep your bike rolling, keep you more comfortable on the bike and more confident in your bike handling.

Tire Levers

Bad tire levers are really frustrating. Picture it: you are thirty seven miles from home and you catch a flat. You try to struggle your tire off of your rim with your bare hands, but it is too hard. You reach for your tires levers and you proceed to break all three before you can get the tire off of the rim. You then wrestle the tire with your bare hands again for half an hour, resulting in either A) Great success! Your tire came off (but your hands are bloody and bruised or B) You call for a ride, wait an hour to get picked up and another hour drive home.

Good tire levers are the difference between a simple fix and the above situation. It is not a huge investment. Get the good ones and you will actually save money because you will not break them nearly as frequently.

Hex Keys/Torx Keys

Most bolts on bicycles have metric hex bolts. A good set of hex keys with ball-end drivers will make repairs a breeze. They will fit in your bolts securely, minimizing the chance of stripping the bolts. The ball end allows you to tighten and loosen hard to reach bolts at angles other than perpendicular. The set should have a full range of sizes to accommodate all of the bolts you will work on. Again, this is not a huge investment.


More and more bike parts have Torx bolts, six pointed star heads that give their wrenches more surface area, reducing the chance of stripping them. The same rules that apply to hex keys apply to Torx keys, except that cannot accommodate ball-ends.

Cable Cutters

Replacing cables is not a complicated job with the right cable cutters. And there is only really one right cable cutter, which is often copied. With the wrong cable cutter, you risk fraying the cable or housing you are working with. A frayed cable is useless; the frayed section can spread and will not go cleaning through the housing, compromising its function.

Chain Tool

Cutting your a new chain to the correct length and installing it is one of the most satisfying repairs to make. It increases the longevity of your drivetrain if done at the correct intervals and makes it more efficient with crisper shifting. The only way to push the pins through a chain is with a chain tool.

Screwdrivers

There are a few adjustment screws on bikes, usually for derailleur limits (although some have moved to small hex heads) and usually number two Philips heads. But not all screwdrivers are equal; a good fit goes a long way to preserving your screws. Additionally, you should have a flat head screwdriver around, but this is mostly for scraping clean derailleur pulleys and other hard to reach places.

Torque Wrench

The last tool, the torque wrench, is a recent necessity. With the explosion of lightweight parts that require a certain torque to both hold fast and not fatigue prematurely, a torque wrench is the only tool for the job. Fortunately, most bike parts that require a certain torque have it printed right on them. Make sure you get the right bits for your bikes. Lots of people say they can do it by feel, but that has been proven wrong time and again.

Get Wrenching

Your own work is always more satisfying than relying on someone else’s. These bike tools should get you on your way to mastering most basic repairs. Remember to learn how to use a tool properly before attempting any repairs.

Bike Fitting Tools – What They Are and How to Use Them

December 2, 2015 by Adam Farabaugh

Bike Fitting Tools - What They Are and How to Use ThemA bike fit is a game of millimeters and half angles with the objective of lining everything up perfectly for your body to achieve its optimal position on the bike. These bike fitting tools will help you get those millimeters and half angles. There are a lot of approaches to getting the best bike fit, one being an expert looking at your fit and from their years of experience they can accurately say if something is off.

Unfortunately these individuals are harder and harder to come by and even if they are right our faith in them being right has diminished. Using accurate bike fitting tools is one way that the individual or less experienced bike fitter can get an accurate fit. These bike fitting tools can range from a simple tape measure to a fit specific bike costing thousands of dollars. As with any tool, knowing how to use it properly is where its real value lies. These few tools can give you an accurate set up in determining your perfect position on the bike.

Tape Measure

The first bike fit tool to have whether a professional bike fitter or do it yourselfer in the basement, is the tape measure. You can get by with any old tape measure but having a good one will help ensure accuracy and consistency. The best tape measure for bike fitting is a metric flexible cloth or plastic one that does not stretch whatsoever.

The flexibility is key as it is easy to work with and can be placed very accurately instead of having a big hook on the end of a conventional tape measure. Also, using metric is much easier to read, write down, and duplicate with less chance for error.

The big draw to a flexible tape measure is that you can easily take it wherever you go so if you need to rebuild your bike or even ride a different one, you can easily measure it to your exact specifications.

Find a tape measure.

Level

Part of having an accurate bike fit is starting with a bike that is positioned perfectly level. If your front wheel is slightly higher or lower than level, when you ride on the road everything is going to be tilted a little bit forward or back. If you have a short level, get a long, perfectly straight piece of wood or even a string to lie exactly across the skewers at the exact same point to make sure the bike is level.

A second great thing to measure with a level is your saddle tilt. It’s generally ideal to start with a perfectly level saddle and go from there based upon comfort. The trick here is that saddles are almost never perfectly flat so make your best guess on where you sit on the saddle and position it so it’s perfectly level.

A final area that a level can be helpful with is measuring saddle set back. Saddle set back is measured from the center of the bottom bracket. Getting an accurate straight line up to measure back from is key and is where having a level is ideal. If you don’t have a level for this however, lining up your bottom bracket with a door frame can be beneficial because the majority of the time they are constructed to be exactly vertical. Unless you live in an old house, then you might need that level to straighten your door frame.

Find a level.

Plumb Bob

A plumb bob is a simple contraption but is highly useful in creating an exactly vertical line. The key area that this is used in is seeing where the front of the knee falls relative to the spindle of the pedal. It can also be used in place of a level to determine saddle set back. Due to its simplicity, it is easy to make but high end ones have a pointy bottom to mark exactly where the center lies.

Find a plumb bob.

Goniometer

Probably the most well-known tool with bike fits is the goniometer (or g-meter or even angle finder) as it’s big and looks precise and professional. This tool measures angles to accurately position knee, hip, and ankle angles as well as other key areas.

What an experienced bike fitter has a knack for without any tools is the angle which is created particularly by the knee. There are exact measurements which your knee angle should fall between which can be found under the “Holmes Approach” in “How to Do a Proper Bike Fit”. The key to using a goniometer is to find the exact position of the joint and measure consistently from the same exact point every time an adjustment is made on the bike.

Find a goniometer.

Body Targets

An easy way to ensure that you’re measuring from the exact same point is to use markings placed on the joint so you can measure precisely from the same exact point. You can make your own or use pre-made ones which stick in place where you want them. The key here again is to make sure they are placed in the correct position on the joint not only to measure from the same point but to make sure your measurement is the same measure that you are comparing your angles to.

Find body targets.

Forefoot Measuring Device

Another cool angle measuring device measures the angle at which your foot naturally tilts. Everyone is different and feet almost never fall exactly flat. The average shoe and pedal system position the foot so it’s exactly level with some minor accounting for arch support with foot beds. A Foot Measuring Device is placed on the bottom of your foot while it is in its natural position and measures how much tilt it has. This can then be accounted for in your fit with cleat wedges which are wedges that raise one side or the other of your cleat to angle your foot to its natural position.

Find a foot measuring device.

Bike Fitting Tools

There are a lot of tools that can be used to achieve a perfect fit on the bike but having these few can give you the accuracy and consistency in determining your fit as well as replicating it on other bikes. With these bike fitting tools, be sure you know how to use them properly as without the proper know how they can create other issues which will then need to be corrected for.

  • Facebook
  • Tumblr
  • Twitter

Latest Articles

JOIN Cycling: A New Training Platform for Cyclists

May 27, 2024 By Eric Lister

cold exposure

The Benefits of Cold Exposure for Cycling & Life

June 13, 2023 By Eric Lister

hill climb

The Ultimate Hill Climb Training Guide

May 31, 2023 By Eric Lister

shoulder pain cycling

How to Treat & Avoid Shoulder Pain While Cycling

April 12, 2023 By Eric Lister

psoas stretch

The Importance of the Psoas Stretch for Cyclists

April 6, 2023 By Eric Lister

cycling neck pain

The Ultimate Guide to Cycling Neck Pain: Causes and Solutions

March 21, 2023 By Eric Lister

Useful Info

  • Contact
  • Finally, A Global Cycling Club That Is Focused On Community And Love Of Cycling!
  • Privacy Policy
  • Share Your Story!
  • Terms And Conditions Of Use
  • Welcome to I Love Bicycling
  • What Happened When I Stretched Every Day For a Month

Recent Posts

  • JOIN Cycling: A New Training Platform for Cyclists
  • How to Hang Bikes in Your Garage: 4 Inexpensive Options
  • Gravel Bike Vs. Road Bike: Which One Is Better For You?
  • The 6 Types of Mountain Bikes & How to Choose the Best One for You
  • What Is a Touring Bike Good For? 5 Benefits We Know You’ll Love

Search I Love Bicycling

Connect with Us

  • Facebook
  • RSS
  • Tumblr
  • Twitter

Copyright © 2025 · Magazine Pro Theme on Genesis Framework · WordPress · Log in