Cycling is beautiful for its simplicity, but that doesn’t mean things don’t go wrong. When you’re out on a ride and you get a flat or your chain breaks, it shouldn’t mean the end of your ride. Although these things can be fixed with ease back in your garage with all the right tools (or at your local bike shop), it’s important to learn some of the most common on-the-road bike repairs that will come up. Being stranded miles from home is no fun, and although it may be easier to call for a ride home, you’ve got what it takes to do a quick fix and keep riding!
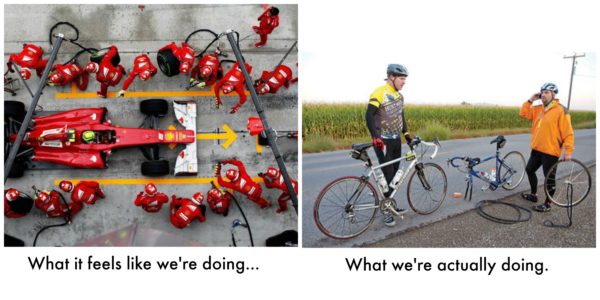
Tools to Bring
You should be prepared with the right tools on the road or trail and know how to use them should a mechanical or flat tire occur. The tools to bring are:
- Spare Tube
- Pump or CO2 Inflator with an extra cartridge just in case.
- Tire Levers
- Patch Kit
- Multi-tool with a chain tool on it
8 On-the-Road Bike Repairs
1. Fixing a Flat
If you ride a bike more than just around town you should know how to fix a flat. Fortunately it’s pretty easy:
2. Broken Chain
Broken chains don’t happen too often when riding but when they do, you’re not going very far until you fix it. A chain will either break completely or a link will become kinked. To fix it, all you need to do is to remove that link.
- First locate the broken link. There should be two plates that are loose, and flapping around or a link that has a bend in it. These are the ones that get removed. You do not need to remove the chain from the bike.
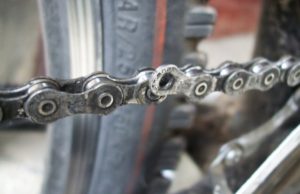 Keep the chain threaded through the derailleurs if you can as it will save you time.
 - Examine the chain breaker tool. You’ll notice a circular cradle that the push-pin moves through. Rest the link in this cradle where the pin lines up with the push-pin of the link you’re removing.
- Turn the push-pin to push the pin through and out the other side. If you’re using a master link, you will need to have both ends of the chain an inner link as the master link is an outer link. If you don’t have a master link or another connector pin, do not push the pin all the way out the other side of the chain. Leave it so the pin is over enough to remove the inner link but not so far that it falls out. This will be important in the next step. Now do the same one full link removed, one inner link followed by one outer link or vice-versa, from the pin you just pressed out with the broken link being in-between.
- If you removed the chain from the derailleurs, thread it back through being sure that it’s going the right way. Then place the chain in the smallest gear in the back and rest the chain to the inside of the chain rings on the front against the bottom bracket to give enough slack.
- Now install the master link if using one through both the inner links and lock into place. If you have a connector pin, line up the ends of the chain and press that through breaking off guide end with your chain tool. If using the same pin that you just pushed out and left on the outer link, line the end up and push the pin back in. You want it so both sides of the pin are flush with the outer plate of the chain. If you pushed the pin too far through when you were removing it, line the chain up in the chain tool and set the pin on the resting plate to then press the pin in. It may be a bit off at first but it should line up as you continue to push it through the hole.
- That’s it. The link with the pin you just installed may be a bit stiff but if you bend it laterally slightly with your fingers, it should loosen up to where you can’t even tell which link it was. The chain is now one link shorter, unless using a master link, but will still be good to go.
- One note is that reinserting a pin is now the week point of the chain. When you do make it home, take out that pin and put in a connecting pin which will better strengthen the chain. The problem is you may not be able to tell which link it was so it’s recommended that you replace the entire chain.
3. Tire Tear
A tear in a tire can end your ride. If it’s not extremely big however, you can fix it with a few little tricks. The first is the dollar bill trick where you fold up a dollar bill and place it between the tube and the tire where the hole is. This will only work if the hole is small enough. Once the hole is past a few millimeters in size, you are going to need a tire boot which should also be carried in your saddle bag. This rubber strip will be large enough to place over the hole and not allow the tube to poke out. The problem with both the dollar bill trick and the tire boot is that the tire can continue to split particularly if you’re on rough roads or terrain. Adding a piece of electrical tape in place of or in conjunction with, will help to hold the tire in place and not have the hole continue to grow.
 4. Broken Spoke
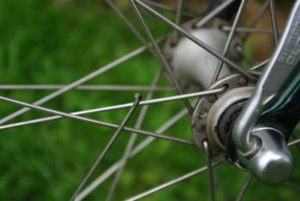
First, you need to get the spoke out of the way so that it doesn’t interfere with your wheel turning. If you have a broken spoke on the front wheel, you should be able to just slide it out of the hub. If it’s on the rear wheel, bend the broken spoke around one of the spokes adjacent to it. Then you can adjust the tension on the rest of the spokes in your wheel.
To adjust the other spokes to accommodate for one missing spoke, you’ll need a spoke wrench, conveniently on many multi-tools, to tighten or loosen them by turning their nipples at the rim. Turn each spoke on either side of the one that just broke clockwise as if you’re looking from the hub of the wheel toward the rim. This will loosen those spokes. If this doesn’t move the rim back to center enough, ie. it’s still bouncing off the brake pads, go one more spoke in either direction and turn them counter-clockwise. This will tighten the spokes pulling the rim back toward the side of the broken spoke. fIf the rim is moving too far to the right, you’ll want to either tighten the spokes that attach to the left side of the hub or loosen the spokes that attach to the right side of the hub. You’ll make this decision by testing the spokes and determining whether they feel too loose or too tight.
Never make drastic changes to the tension of a spoke at any one time. Just make half-turns with the spoke wrench each time and check and see how true the wheel is. It is easy to go too far. Once you get it roughly straight, you can ride the wheel. If the rim is still slightly touching the brake pads, open the brake quick-release to allow for more space. Once you get home, check out this article on how to finish up the repair.
5. Broken Front Derailleur Cable
With a broken front derailleur cable you are going to be stuck in the little ring for the rest of the ride. With a triple chain ring, you might be able to turn the limit screws enough to line up the derailleur up with the middle chain ring but it depends on your derailleur and set-up.
6. Broken Rear Derailleur Cable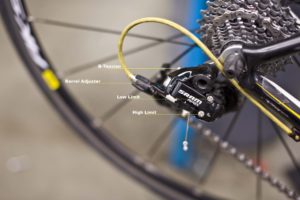
With a broken rear derailleur cable you are going to be stuck in your smallest gear, normally an 11 or 12 tooth. To get the chain up to a bigger, easier gear, turn the H or high speed limit screw in as far as it can go. This should push the derailleur up at least a cog or two. You may have to back it back out a tad if it doesn’t line up well.
7. Broken Brake Cable
It’s going to be rare that you have a broken brake cable as they’re made not to fail. If you’re riding anything other than perfectly flat roads without many intersections or traffic you might be able to gingerly make it home otherwise it’s best to get a ride and not risk needing to stop quickly and not being able to.
8. Shifting Becomes Off
A lot of times, particularly after a new cable is installed, your rear derailleur shifting will become slightly off. This is because the cable stretched ever so slightly. To tighten it, simply turn the barrel adjuster on your derailleur counter-clockwise a quarter turn until the pulley wheel lines up exactly with the gear. You won’t have to turn it much unless it’s way off.
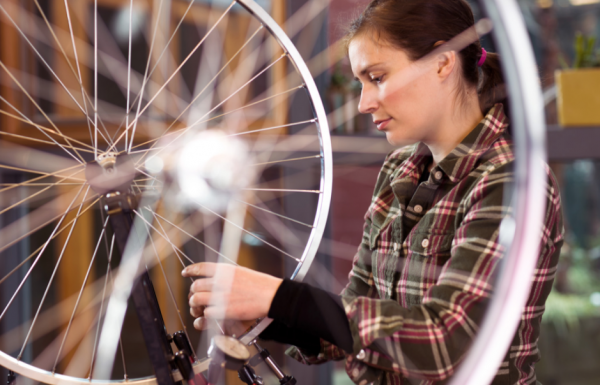 Bike repairs are an inevitable part of life if you’re a regular cyclist. Some repairs can be costly and time-consuming, but not all problems require a trip to the shop. Here are ten common bicycle troubles that you can fix yourself with a few tools and some good know-how.