• Training
    • Injury Prevention
    • Training Tips
  • How To
    • Bike Fit
    • Gear
  • Nutrition
    • Nutrition Tips
    • Weight Loss
  • Repair
  • Reviews
  • Stories
    • Funny Stories
    • Jokes
    • Quotes
    • Videos
    • Funny Videos

I Love Bicycling

I Love Bicycling is a website that is geared towards cycling for beginners with road cycling tips, training articles, nutrition tips, weight loss, how to’s and bike repair articles.

How To Brake Efficiently on a Road Bike

April 10, 2020 by Sarah Lauzé

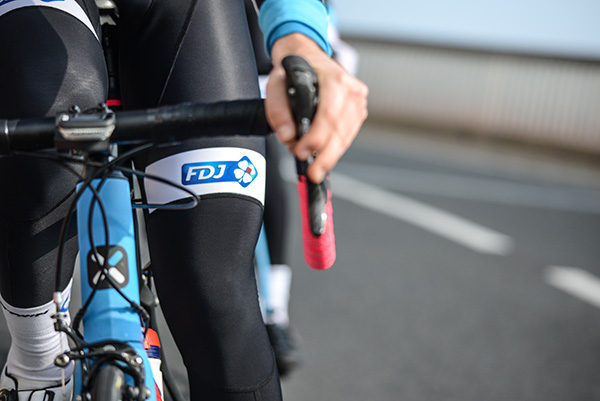
When you’re starting out cycling, the first thing you need to do is master the basics. You may watch pro riders that make everything look effortless, but unfortunately there’s a lot more to it than may meet the eye. Once you’ve got the basics down, then it’s time to start getting specific. Although your fitness level will remain your most powerful weapon, don’t underestimate the gains from focusing and developing aspects of your bike handling skills. Learning how to brake efficiently on a road bike can not only make you faster, but it will make you feel more comfortable and confident on your bike.
Brake Efficiently

How To Brake Efficiently on a Road Bike

Step 1: Beware of the Front Brake!
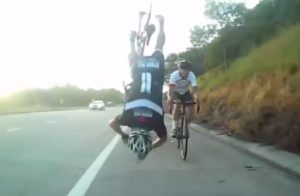
Tip: Don’t do this.

You’re front brake may be there to stop you, but your back brake is there to shave off speed. Roughly 70% of your stopping power comes from the front, which is why you never want to slam on just the front brake (pitching you over the handlebars). The best way to get the hang of how much to use each break is to go to a quiet section of road and practice. If you are skidding out, then you are putting too much pressure on the back brake. However, if you’re back wheel is lifting off the ground altogether, then you need to ease of that front brake.

Step 2: Get the Timing Right

When you’re wanting to come to a stop on your bike, you want to start slowing you speed by pulling the back brake. Look up at the spot you want to stop at rather than your front wheel. Slowly start to ease the front brake to further reduce your speed. Keep your shoulders relaxed and arms slightly bend, while focusing on that same stopping spot. Release the front break once you’re going slow enough and use the back brake to bring yourself to a complete stop.
Step 3: Master the Weight Shift

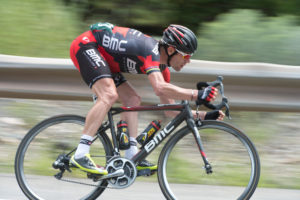
One of the most common beginner mistakes is distributing body weight incorrectly. This will not only effect your braking efficiency, but also your bike response and handling. If you’re on the drops, your center of gravity will be lower than if you’re on the hoods. The hoods feel safer, as you can brake harder with your weight shifting towards the rear of the back.

Being able to pedal through corners may be the most efficient, but it will also take some time and practice to master. You want to do all of you slowing down BEFORE the corner, and you should be able to to leave your brakes untouched through the corner. If you find yourself skidding, shift your weight as far back on the bike as you can.

Step 4: Adapt to the Road Conditions

If the roads are wet and slick, you’ll want to reduce the amount of pressure you put on the breaks. Your technique should be a lot softer then it is on dry roads, and you need to remain especially aware of obstacles. Road markings and manhole covers become very slippery, and you won’t be able to stop as quickly.

Step 5: Give Your Brakes a Little Love
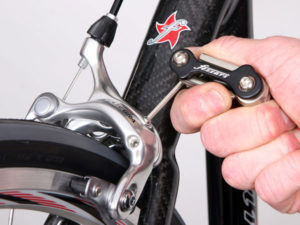
Before heading out on a ride, make sure your brakes are clean, dry and well adjusted. If your brakes are too loose, and you have to squeeze the levers all the way to the handlebar to get any kind of stopping power, you’ll want to loosen your barrel adjusters a few turns. This actually tightens the brake cables and therefore tightens the brakes. If your brakes are so tight that they don’t let your wheels turn, then you can tighten the barrel adjusters back down and make some room.

Step 6: Practice, Practice, Practice

Mastering certain techniques will take time, and braking is no different. Find a quiet area or section of road that you can use to practice your braking technique. Start by building up speed, then stop yourself with the brakes. See how long it takes you to stop, and pay attention to the feedback from the tires. Are they skidding? Are you loosing grip? You will have to experiment to find what works best for you, and to get a feel for how your bike handles when braking.
Advantages of an Unbroken Bike Path

December 17, 2014 by Dyani Herrera

Advantages of Riding on an Unbroken Bike Path

unbroken bike path, continuous bike path

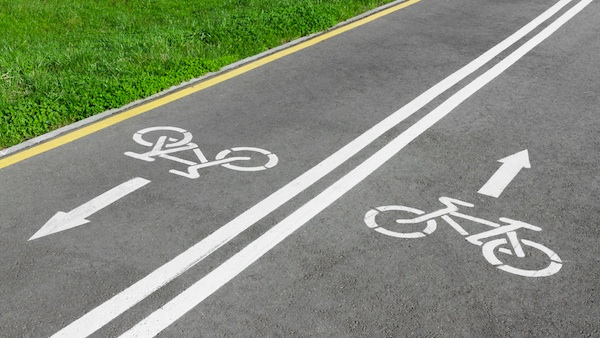
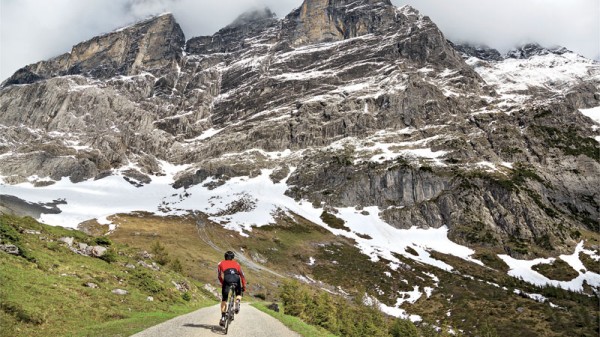
One of my favorite aspects of cycling is the feeling of freedom, and ability to take in my surroundings while exercising. Although I love long paths in my city that take me either along the beach or farmlands, these routes typically require several stops due to traffic lights and traffic overall. When I’m in training mode one of the most practical routes I use is a local golf course that goes around in a four mile loop, with no traffic lights or stops. There are several advantages I’ve found with this route as a beginner cyclist and now avid rider. Here are some advantages for riding on an unbroken bike path despite what level of experience you have riding.

Bike Handling

Riding on a continuous route allows you to practice several things required when riding, in particular if you are just learning how to ride. For one, you are able to practice the maneuvers required in turning, such as slightly leaning your body, weight distribution, and bringing up the leg closest to the turn. You can also practice wide turns versus sharp turns, because both skills are needed in different riding situations. It is ideal to practice this along a continuous stretch with no concerns for oncoming traffic, or having to clip and unclip. Also, it gives you the ability to play around with your gear shifters and familiarize yourself with the different speeds and your comfort level with each one. This is even better if your unbroken path is a flat one so you don’t have the resistance of any rolling terrain. Typically, with this type of route you will experience a tailwind and headwind, which may affect which gear you use when going into a headwind, depending on your fitness level. Playing around with gear shifting will teach you which gear is most efficient in each situation.

Bike Position

This type of path also lends itself to practicing bike positions without having to be as vigilant as you would be if riding in a higher traffic area. If you’ve recently purchased a tri bike, you can practice getting down in the aero bars, and still maintaining balance. I remember as a beginner I had a difficult time with this as I attempted practicing in a bike lane next to oncoming traffic. I was so nervous, and white knuckled on my aero bars I nearly rode off the bike lane into trees that were on the right of me. After this experience, I decided to practice in a low traffic area like my neighborhood. I would practice staying aero and gear shifting in this position as well as reaching down for my water bottle without having a tragically, embarrassing fall. Also, if you own a road bike you can play around with the position that is the most comfortable for you, and leaning forward on the road bars when going into a headwind.

Another position that is important to practice is pedaling off the saddle as this offers a few advantages as well. This requires some practice so you may become comfortable with the “dancing” motion required with this technique. When I ride on this route, I use this motion a lot to gain more speed after turns. Additionally, to simulate climbing since it is a flat route. This specific exercise helps your legs get stronger, and makes you more comfortable whenever you are actually climbing a hill or bridge. Since it is a continuous path I tend to time myself and do intervals of one minute pedaling off the seat and two minutes of riding with high rpms.

Training

Having a continuous path is ideal for interval training because you don’t have to interrupt your work sets by stopping at traffic lights or signs. You’re able to experience the advantages of interval training, and have a great workout. Also, you can fully focus on your gear shifting, pedal stroke, and RPMs. It is especially beneficial if you are completing a ride in a cycling group, and take turns drafting and pulling.

It is also great to practice different cycling drills within a workout without interruption. Some examples may include “spin-ups” where you’re in an easy gear and are working on maintaining high RPMs; Also, “pick-ups” where you do work intervals faster than your race pace. Another good drill to complete on this route is “isolated leg work”, where you complete intervals pulling with one leg, while the other one is “resting.”

Safety

When comparing this route to one which requires me to ride with traffic or alongside a busy road, I find this one to be a lot safer. As a beginner or someone who is still not comfortable riding with traffic you can still enjoy cycling without the constant worry of being hit. These paths typically are in low traffic areas with several signs indicating it’s a bike path and to respect cyclists. Therefore, the few cars that drive in these areas are aware that it is a common cycling location. There are also minimal, if any parking lot entry/exits so you don’t have to be in a constant high alert environment. Lastly, many cyclists ride on these routes so if you have any bike trouble such as a flat tire, you can count on someone being nice enough to stop and help you.

Although riding on an unbroken bike path may not be the most scenic route, as you can see it does have its advantages for all levels of cyclists. All of which, can improve your riding ability and make you a stronger cyclist.


Bike Handling Tips for Early-Season Riding

February 28, 2014 by Aaron Robson

bike handling tips for early season ridingEarly season riding conditions can be very challenging. During the winter, a ton of grit and salt gets dumped on roads to keep them grippy and snow-free, and, come spring time, all of that stuff ends up in one place – the shoulder where you want to ride. Spring is also pothole season, as water seeps into cracks in the road and freezes overnight, opening up holes the size of the Grand Canyon on your favorite roads. There are a few simple bike handling tips to keep your skin off the road and your bike in one piece.

SLOW DOWN!!!

This seems obvious, but it is easy to forget in the middle of one of your favorite descents. Slower speeds mean more time to react to what is in front of you. Slow down well in advance of corners so you aren’t braking hard while turning – doing so increases the chance of losing traction.

Take your lane.

Most of the road grit accumulates on the shoulder of the road, and you can avoid this by moving out into the travel lanes. Be VERY careful when doing this – think ahead, and don’t try to move out in front of a line of cars just before your corner. Wait for a large gap in traffic, and move out well into the lane, so cars aren’t tempted to try and squeeze by you. On long, switchbacking descents, I will usually just stay in the travel lanes to avoid having to move back and forth.

Relax.

Hitting a small patch of gravel or wet spot won’t necessarily cause you to crash. Overcorrecting for a small skid of your back tire will. Staying relaxed and confident will help you ride through small skids instead of tensing up and turning the small skid into a huge wipe-out. You can build this confidence through other types of cycling – mountain and cyclocross riding will both give you the experience of feeling your bike sliding through turns, which will help you become a more confident road rider.

Obstacle avoidance.

Be it potholes, glass, or ice, there is a lot of stuff on the roads that you and your bike would rather avoid. Your first key to avoiding this nasty stuff is to look ahead – the earlier you see something, the easier it will be to avoid. When you know what you want to avoid, doing so requires a bit of practice. Anyone who has managed to hit the only pothole on a clear stretch of road knows what I am talking about – your bike will tend to go where you are looking. If you are looking at that one pothole, there is a good chance you are going to hit it. Instead, work on keeping your eyes focused on the clear path you want to take, and your bike will follow.

Bunny-hops.

Sometimes, despite your proactive road reading and all of your best obstacle avoidance techniques, you just can’t ride around something. Often this has something to do with the 2 ton hunks of metal passing by on your left. This is when the bunny-hop comes in handy. Bunny-hopping is like jumping on your bike – both wheels lift off the ground for a split second. If you have never done this before, practice at slow speeds first. Clipless pedals make it much much easier and safer as well. When you do encounter something you can’t ride around, don’t try to jump too high – for potholes, your wheels barely need to leave the ground.

Keep these tips in mind when you head out on your next ride, and you will be well equipped to deal with whatever the spring roads will throw at you!

  • Facebook
  • Tumblr
  • Twitter

Latest Articles

JOIN Cycling: A New Training Platform for Cyclists

May 27, 2024 By Eric Lister

cold exposure

The Benefits of Cold Exposure for Cycling & Life

June 13, 2023 By Eric Lister

hill climb

The Ultimate Hill Climb Training Guide

May 31, 2023 By Eric Lister

shoulder pain cycling

How to Treat & Avoid Shoulder Pain While Cycling

April 12, 2023 By Eric Lister

psoas stretch

The Importance of the Psoas Stretch for Cyclists

April 6, 2023 By Eric Lister

cycling neck pain

The Ultimate Guide to Cycling Neck Pain: Causes and Solutions

March 21, 2023 By Eric Lister

Useful Info

  • Contact
  • Finally, A Global Cycling Club That Is Focused On Community And Love Of Cycling!
  • Privacy Policy
  • Share Your Story!
  • Terms And Conditions Of Use
  • Welcome to I Love Bicycling
  • What Happened When I Stretched Every Day For a Month

Recent Posts

  • JOIN Cycling: A New Training Platform for Cyclists
  • How to Hang Bikes in Your Garage: 4 Inexpensive Options
  • Gravel Bike Vs. Road Bike: Which One Is Better For You?
  • The 6 Types of Mountain Bikes & How to Choose the Best One for You
  • What Is a Touring Bike Good For? 5 Benefits We Know You’ll Love

Search I Love Bicycling

Connect with Us

  • Facebook
  • RSS
  • Tumblr
  • Twitter

Copyright © 2025 · Magazine Pro Theme on Genesis Framework · WordPress · Log in