• Training
    • Injury Prevention
    • Training Tips
  • How To
    • Bike Fit
    • Gear
  • Nutrition
    • Nutrition Tips
    • Weight Loss
  • Repair
  • Reviews
  • Stories
    • Funny Stories
    • Jokes
    • Quotes
    • Videos
    • Funny Videos

I Love Bicycling

I Love Bicycling is a website that is geared towards cycling for beginners with road cycling tips, training articles, nutrition tips, weight loss, how to’s and bike repair articles.

Neck Pain Cycling

May 10, 2015 by Dyani Herrera

Neck Pain Cycling

neck pain cycling 
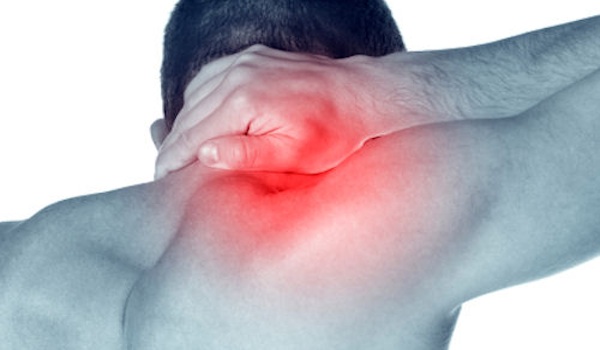
One of things that takes getting used to when you first start cycling is the neck and shoulder discomfort. Even an experienced rider who has taken a short hiatus, and is returning to a regular regime can suffer from these aches. Typically, the discomfort is localized in your anterior deltoids, upper trap muscles and neck extensors. This can be attributed to a few causes such as bike fit, head positioning when riding and tightness of aforementioned muscles.

Bike Fit

If you’ve read our previous articles you will understand how many issues can be initiated due to an improper bike fit. As a beginner cyclist it’s important to work with a bike fitting specialist and tweak one thing at a time, ride for about a week, and assess the changes. This allows you and the fitter to pinpoint the exact solution or cause in order to improve riding conditions. Often neck and shoulder pain is linked to having a high seat post in relation to your bars. When the seat post is too high it can place you in an aggressive position, which as a beginner cyclist you are not ready for. It’s a better tactic to gradually increase the aero position as you get used to cycling. Additionally, if your road or aero bars are too far away causing you to overreach you can place unecessary strain on these muscles. The solution would be to place the bars closer in relation to your body so you’re in a “tucked” position when riding.

Head Position

When I first started riding solo I remember how afraid I was of either riding off the road, or going over debris that would make me fall, that I looked up for the entire duration of my ride. Although I would finish my rides in one piece I had a soreness in my neck and shoulders that would last for days. I remember, constantly moving it side to side while riding to try to minimize the discomfort. I mentioned this to the bike fitter and he told me to keep my head down and only use my eyes to look up. What a difference this made! I practiced this on my rides as I was in the aero position and I no longer felt the pain in my neck. I would only look up with my head if I knew I was coming up on an intersection or bump in the road. During long rides it’s best to look up with your eyes and only tilt your head up when necessary or intermittently. Not only will this decrease your neck discomfort, but it will also make you slightly more aero.

Tight Muscles

As a beginner cyclist you are now forcing your body to use muscles either it hasn’t in other activities or in a different way. This leads to tightness, muscles spasms, and pain. However, there are a few stretching exercises that can be completed which will lead to disruption of the pain-spasm cycle. One exercise involves a lacrosse ball as demonstrated in “Massage Tips for Tight Muscles.” You place the lacrosse ball between you shoulder blades and roll side to side as well as up and down on the floor. Another variation is to do the same thing, but against a wall instead. Make sure to put your body weight over the knot and roll over it a few times for 20-30 seconds. This will typically release the restriction and cause the trap muscles to relax. There are two stretches that can be done to release the upper traps and neck extensors. Complete each stretch for 20-30 seconds a total of 3 times, several times a day. The first stretch requires you to put your arm behind your back of the side you are stretching. Then, use the other hand to tilt your head to the opposite shoulder.

1st stretch
1st stretch

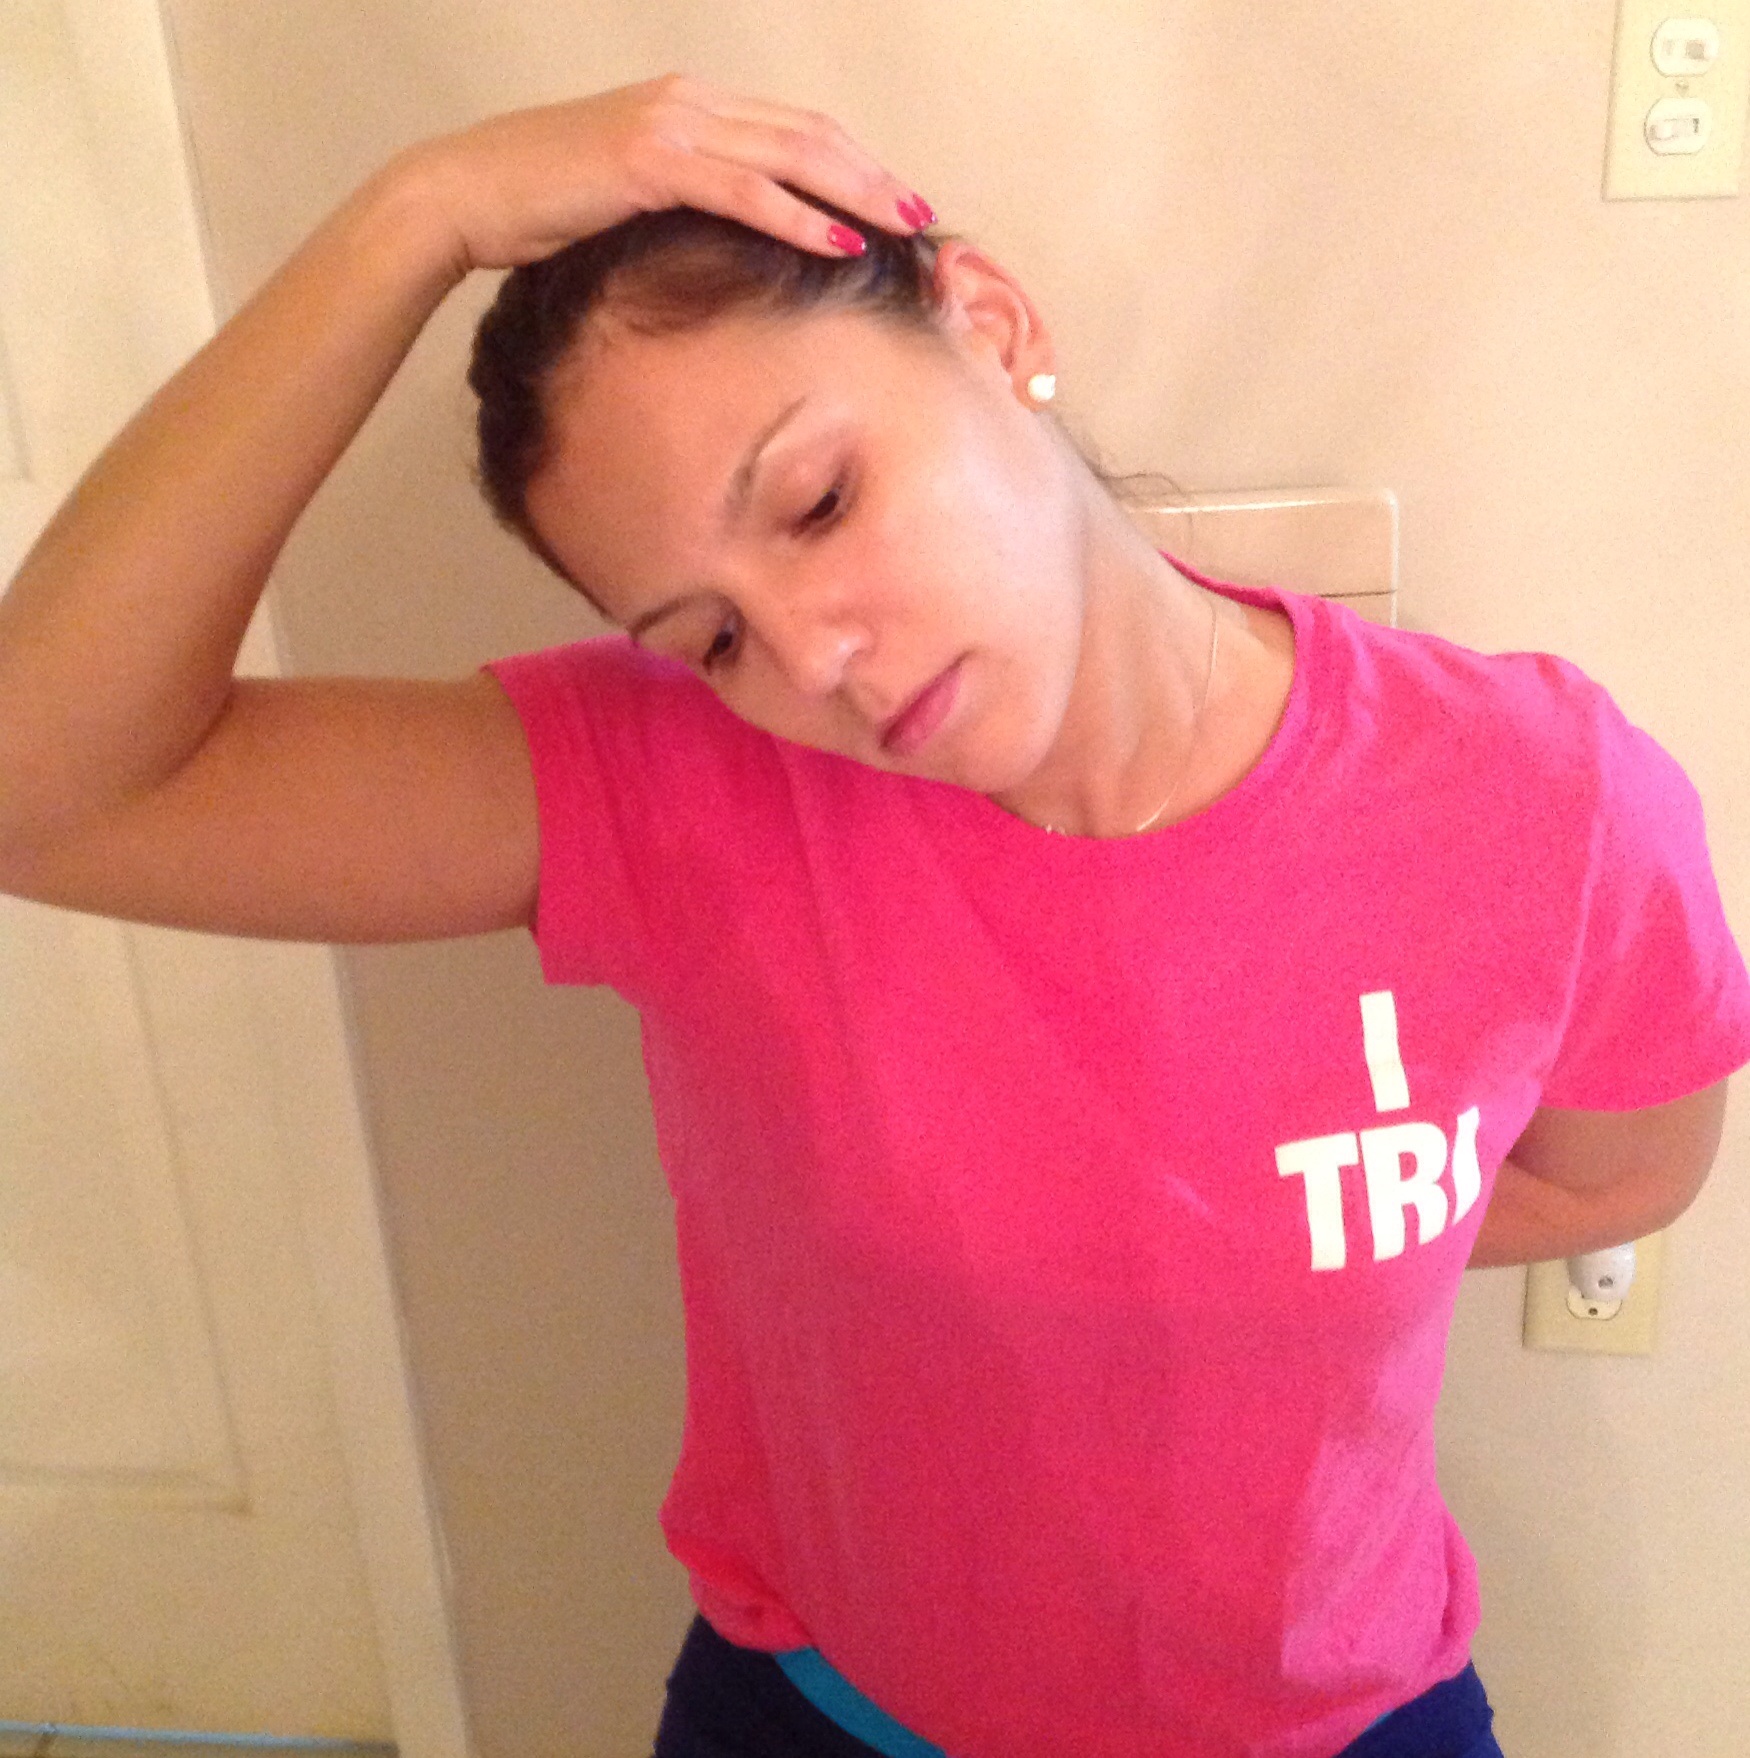
Stretch two, requires you to look down at a 45 degree angle, and place the arm of the side you’re stretching behind your back. After, use the opposite hand to push the back of your head down further in that 45 degree angle. You may refer to the pictures for further demonstration.

2nd Stretch
2nd Stretch

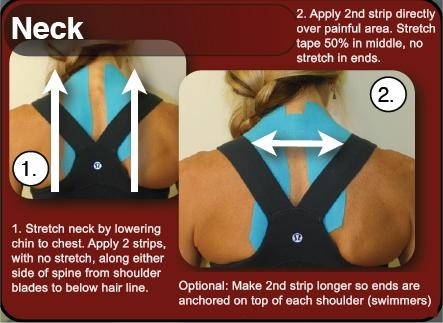
Another helpful tool is to have a partner help you in placing rock tape/kinesio tape along your posterior neck muscles and upper traps. Rock taping offers several advantages such as added support, increased blood supply, and propioceptive feedback. The latter works on nerves which alert your brain to where a particular body part is, and offers feedback to either adapt a movement pattern, or execute it properly. Usually when purchasing rock tape it comes with a pamphlet that teaches you how to apply the tape for different injuries. Nevertheless, YouTube offers plenty of videos teaching how to apply it correctly. It is important to initially wipe the area with rubbing alcohol to remove any oil on the skin, then wipe off the alcohol. Next, make sure to cut the tape with rounded edges, not straight across. Then, break the tape in the middle and slowly apply it with no extra tension. Last, rub the tape to activate the adhesive with the heat generated. In following these steps you’re ensuring the tape lasts for several days and even through showers. You may refer to the photo for further demonstration.

image

If after following all these steps you’re still experiencing discomfort remember that there’s an adaptation process involved as a beginner cyclist. Just like in any other sport it takes time for the muscles to adapt to these new demands and with time they become accustomed. Once your body becomes used to your cycling position, your rides will be neck and shoulder pain free.

Saddle Tilt

May 16, 2014 by Lee Agur

Saddle tilt

The saddle tilt angle up or down while cycling on a road bike can make a big difference. If improperly adjusted it can cause knee or back pain
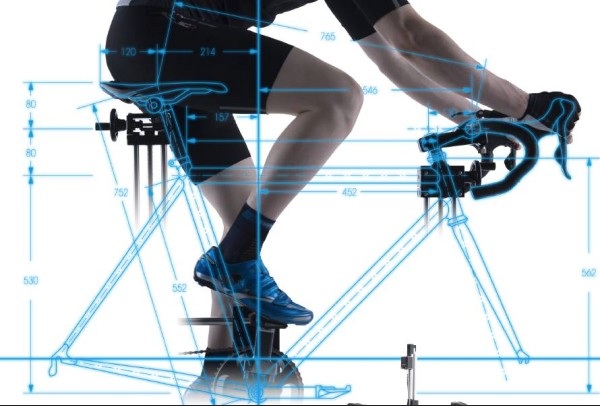
The saddle tilt is an important adjustment that needs to be taken into consideration. Lets take a look at what happens when the saddle angle is in the up, neutral and down positions.

Saddle Tilted Down

If the saddle angle is pointed down too much then there will be unnecessary pressure on your knee and upper body. Your knees are trying to hold you from sliding forward and are more susceptible to injury. Additionally, your upper body is now being enlisted to hold you back as well, instead of being relaxed and focused on proper breathing.

How much of an angle is too much? As little as a 3% saddle angle downwards is too much.

If you find yourself riding on the front part of the saddle often it is usually to alleviate the pressure on the knees, shoulders, arms and hands; however, you do not have adequate support from the saddle and this will cause problems.

Why Do People Tilt Their Saddle Too Far Down?

The most common reason people tilt the saddle angle down is to alleviate pressure on the groin, this is not a wise solution, find a saddle that fits properly and is able to support your weight without pain or numbness.

Many people have no idea that saddle tilt is a very big deal at all and take the bike as it comes from the shop… I did not have a clue when I bought my first bike.

Saddle Tilted Up

When the saddle angle is tilted upwards you may earn some unwanted lumbar pain as your pelvis is angled backwards and you forced reach forwards to the handlebars – this creates a weird and unnatural angle and stress point causinging lower back pain.

Since the pelvis is tilted back it will feel as if you have to reach for the handlebars and this can cause neck and shoulder pain. Another symptom the saddle angle is too far up is groin pain or numbness caused by unnecessary pressure around the soft tissue by your “special” area.

Why Do People Tilt Their Saddle Too Far Up?

The most common reason people tilt the saddle angle too far up is to keep from sliding forwards. It can be a vicious cycle, you tilt the saddle down to alleviate pressure on your groin, but then you start to slide forward too much and so you raise it too much… buy a proper fitting saddle and only make adjustments 1 degree at a time.

Saddle In the Neutral Position

A saddle in the neutral position allows you to keep your pelvis in a neutral position, which in turn, allows the proper alignment of your knees and optimizes the efficiency and enlistment of the quadriceps, gluteus maximus, gluteus medius, soleus, gastrocnemius, and hamstrings muscles.

As you can see, a small thing like the proper saddle tilt can make a big difference in comfort, efficiency and injury prevention. Make sure you have your saddle in the neutral position, or as close to it as possible.

If you climb a lot, perhaps you will want the nose to tilt down a slight bit, or vice versa for downhills. I ride with my saddle tilted down 0.5 degrees and find it just right. If you have a saddle tilt of more than 2 degrees up or down then you need to make other adjustments to feel comfortable as it is not the tilt that is the problem.

Fore Aft Saddle Position

May 15, 2014 by Lee Agur

Fore Aft Saddle position

Fore aft saddle position road biking and mountain biking should be found by the balance point method and not the KOPS method generally used. Knee pain
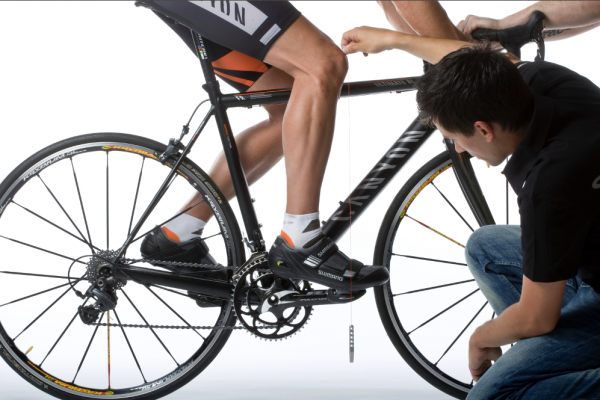
The fore aft saddle position corresponds to how close or how far the seat is in relation to the handlebars. This positioning is important because it affects your balance as well as your overall comfort level, power and efficiency.

The Knee Over Pedal Spindle Method

The generally accepted way to find the proper saddle position is called knee over pedal spindle (KOPS). To find KOPS sit on the bike with the pedals at the 3 o’clock and 9 o’clock position. Hold a plumb bob at the front of your forward kneecap and see where it hits in relation to the pedal spindle. The line should intersect the pedal spindle/axel. If it falls in front, adjust the saddle rearward. If it falls behind, adjust the saddle forward.

Although the knee over pedal spindle method is quick and easy to do, it does not take into account your individual body type, flexibility or pedalling style.

The Balance Point Fore Aft Saddle Position Method

Grab a friend and warm up on an indoor trainer for 10 minutes, once you have sufficiently warmed up have your friend stand in front of the bicycle and wait. Get into the drops and start pedalling at approximately 80% of maximum effort (a pace you could maintain for an hour) and then swing your hands back behind your butt. You should be able to balance on that point WITHOUT falling forward (that is why your friend is there) or arching your back.

To find the ideal fore or aft saddle position it should be adjusted just forward enough so that your friend barely has to help your torso from falling (a bit forward of the centre of gravity). This is your ideal fore and aft saddle position assuming that your saddle height, saddle tilt and reach to the drops is approximately in the correct position. Ie. If your saddle height is too low or the saddle tilt is up, then it is easier to balance.

Signs That Your Fore Aft Saddle Position is Set Too Far Back

If your saddle is set too far back then you are going to have a lot of power on the flats and slight inclines because you will be able to produce a lot of power; however, once the road turns up (steep grade) then you will not have enough weight over the pedals and you will be forced to stand up to climb. Additionally, a saddle that is adjusted too far back will make it more difficult to maintain a high cadence. Knee pain in the back of the knee can also be caused by a saddle position located too far back.

Signs That Your Fore Aft Saddle Position is Set Too Far Forward

If your saddle is set too far forward then you may be using your upper body too much causing tension in the shoulders and arms as well as having sore hands. You will be able to have a quicker cadence but you will tend to sit back on the saddle up climbs. Additionally, you will be using your upper body muscles to support yourself, wasting valuable energy, and not allowing the torso be relaxed to be able to breathe deeply and properly. Knee pain in the front of the knee (under the knee cap) can be caused by a saddle that is set too far forward.

The Balance Point Method vs the KOPS Method

The whole point of finding the balance point is to allow your upper body to be relaxed and focused on breathing (feeding the engine) while the lower body is focused on propelling the bike forward. You want to optimize feeding the engine with as much fuel (oxygen) as you can so it can go as fast as possible.

If you use knee over pedal spindle method then differences in the lower and upper body are not taken into account. For example: if you are not flexible in the lower back then your centre of gravity is going to be more rearward; therefore, the saddle should come forward more than that of a flexible cyclist. As noted above  having a saddle too far back or too far forward is not a benefit.

I would recommend using the balance point method to find your fore aft saddle position as it takes in to account individual differences in body types, flexibility and riding style.

How To Do a Basic Bike Fit

December 30, 2013 by Lee Agur

How To Do a Basic Bike Fit

Here is a quick video on how to do a basic bike fit.

how to do a basic bike fit

« Previous Page
  • Facebook
  • Tumblr
  • Twitter

Latest Articles

JOIN Cycling: A New Training Platform for Cyclists

May 27, 2024 By Eric Lister

cold exposure

The Benefits of Cold Exposure for Cycling & Life

June 13, 2023 By Eric Lister

hill climb

The Ultimate Hill Climb Training Guide

May 31, 2023 By Eric Lister

shoulder pain cycling

How to Treat & Avoid Shoulder Pain While Cycling

April 12, 2023 By Eric Lister

psoas stretch

The Importance of the Psoas Stretch for Cyclists

April 6, 2023 By Eric Lister

cycling neck pain

The Ultimate Guide to Cycling Neck Pain: Causes and Solutions

March 21, 2023 By Eric Lister

Useful Info

  • Contact
  • Finally, A Global Cycling Club That Is Focused On Community And Love Of Cycling!
  • Privacy Policy
  • Share Your Story!
  • Terms And Conditions Of Use
  • Welcome to I Love Bicycling
  • What Happened When I Stretched Every Day For a Month

Recent Posts

  • JOIN Cycling: A New Training Platform for Cyclists
  • How to Hang Bikes in Your Garage: 4 Inexpensive Options
  • Gravel Bike Vs. Road Bike: Which One Is Better For You?
  • The 6 Types of Mountain Bikes & How to Choose the Best One for You
  • What Is a Touring Bike Good For? 5 Benefits We Know You’ll Love

Search I Love Bicycling

Connect with Us

  • Facebook
  • RSS
  • Tumblr
  • Twitter

Copyright © 2025 · Magazine Pro Theme on Genesis Framework · WordPress · Log in