• Training
    • Injury Prevention
    • Training Tips
  • How To
    • Bike Fit
    • Gear
  • Nutrition
    • Nutrition Tips
    • Weight Loss
  • Repair
  • Reviews
  • Stories
    • Funny Stories
    • Jokes
    • Quotes
    • Videos
    • Funny Videos

I Love Bicycling

I Love Bicycling is a website that is geared towards cycling for beginners with road cycling tips, training articles, nutrition tips, weight loss, how to’s and bike repair articles.

Stories

  • Funny Stories
  • Jokes
  • Reviews
  • News

The Best Inspirational Cycling Quotes

August 4, 2019 by Sarah Lauzé

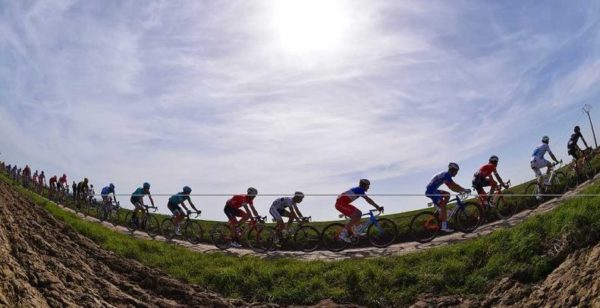
Cycling is something different to everyone. It can be a mode of transportation, a way to de-stress from everyday life, or the means to push yourself to the limit of your ability. There is nothing quite like the exhilarating feeling of riding a bike, a kind of universal emotion that anyone who has hopped up on those two wheels can relate to.

As something that inspires so many, there have been a lot of quotes that have come out of the world of cycling over the years. From professional cyclists to cultural icons, here are some of the best cycling quotes to get you inspired.


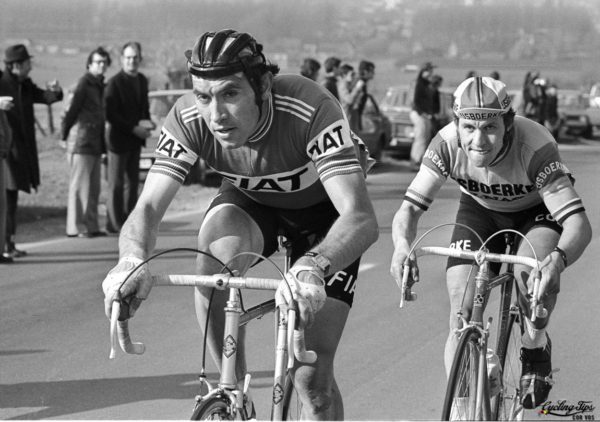
“Ride as much or as little, as long or as short as you feel. But ride” – Eddy Merckx, Belgian cyclist

“The race is won by the rider who can suffer the most” – Eddy Merckx, Belgian cyclist

“When it’s hurting you, that’s when you can make a difference” – Eddy Merckx, Belgian cyclist

The Best Inspirational Cycling Quotes

“Cycling isn’t a game, it’s a sport. Tough, hard and unpitying, and it requires great sacrifices. One plays football, or tennis, or hockey. One doesn’t play at cycling” – Jean de Gribaldy, French cyclist

“As long as I breathe, I attack.” — Bernard Hinault, French cyclist

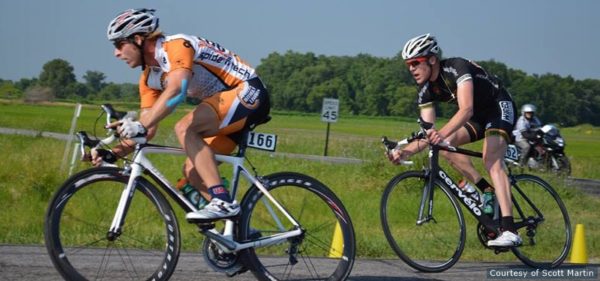
“It doesn’t matter if you’re sprinting for an Olympic gold medal, a town sign, a trailhead, or the rest stop with the homemade brownies. If you never confront pain, you’re missing the essence of the sport” – Scott Martin, American Paralympian

The Best Inspirational Cycling Quotes

“When your legs scream stop and your lungs are bursting, that’s when it starts. That’s the hurt locker. Winners love it in there” – Chris McCormack, Australian triathlete

“When my legs hurt, I say: “Shut up legs! Do what I tell you to do!” – Jens Voigt, German cyclist

“It never gets easier, you just get faster” – Greg LeMond, American cyclist

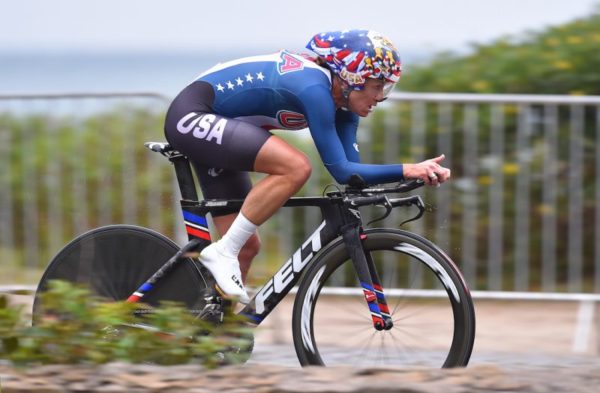
Embrace your sweat. It is your essence and your emancipation. —Kristin Armstrong, American cyclist

The Best Inspirational Cycling Quotes

“Nothing compares to the simple pleasure of riding a bike” – John F Kennedy, President of the United States

“It is by riding a bicycle that you learn the contours of a country best, since you have to sweat up the hills and coast down them” – Ernest Hemingway, American novelist

“The bicycle has done more for the emancipation of women than anything else in the world.” — Susan B. Anthony, American women’s rights activist

“Life is like riding a bicycle. In order to keep your balance, you must keep moving.” — Albert Einstein, genius

The Best Inspirational Cycling Quotes

“Bicycling is a big part of the future. It has to be. There’s something wrong with a society that drives a car to workout in a gym.” — Bill Nye, American scientist

“Cyclists see considerably more of this beautiful world than any other class of citizens. A good bicycle, well applied, will cure most ills this flesh is heir to” – Dr K.K. Doty

“You can. You should. And if you’re brave enough to start, you will.” — Stephen King, American novelist

“When the spirits are low, when the day appears dark, when work becomes monotonous, when hope hardly seems worth having, just mount a bicycle and go out for a spin down the road, without thought on anything but the ride you are taking.” – Arthur Conan Doyle, Sherlock Holmes author

The Best Inspirational Cycling Quotes

“You are one ride away from a good mood.” – Sarah Bentley

“My eight-year-old old daughter: ‘this hill is so steep, my legs are out of breath.”’ – Mike Griffiths

“Give a man a fish and feed him for a day. Teach a man to fish and feed him for a lifetime. Teach a man to cycle and he will realize fishing is stupid and boring.” – Desmond Tutu, South African clergyman

Wide Cycling Shoes: Finding the Best Fit

June 3, 2019 by Sarah Lauzé

If you have wide feet, you know the feeling. A numbing pain and screaming pinky toes that have had enough of being crushed into the side of an ill-fitting cycling shoe. The good news it: you’re not alone. There are specifically made wide cycling shoes to cater to your aching toes.

Clipless pedals are a must when it comes to efficient pedalling on a bike, but their coinciding cycling shoes can be a little unforgiving. Unlike regular shoes, cycling shoes are rigid, most often made from materials that do not stretch out over time. So, if you’re feet measure somewhere in between hobbit feet and flippers, then here are some of the best options out there.

Wide Cycling Shoes

Before You Buy New Shoes

Wide Cycling Shoes

Getting a pair of specific wide cycling shoes, or at least a brand that has a bit more breathing room, is going to be your best option. However, before you make the investment, make sure you’ve tried everything to make your current shoes work.

  • Try ultra-thin socks – Assuming it’s not below freezing where you’re riding, trying a super thin pair of socks could help create enough space in your shoes to make them work. Check out Castelli’s line of thin cycling socks, or Swiftkick Aspire. Even if they don’t fix the shoe problem, they are great cycling socks to have.
  • Get a bike fit – Make sure the problem really is being caused by shoes that are too tight, and not an improper bike fit. If your cleats are not in the right spot, or if your saddle isn’t adjusted properly, it can cause pain in your feet. It’s worth a visit to your local bike shop for a bike anyways if you haven’t had one.

Finding The Right Fit

If you’re buying shoes in a store, you can actually take the insole out and measure it against your foot if you’re not sure how the shoe should feel. Your heel should be right at the back of the insole, and there should be 3-5mm from the end of your toes the top of the insole.

If you’re buying online, you will need to measure your foot. Get a regular piece of paper and put it on the floor, right up against a wall. Place your foot on the paper, with your heel pushed against the wall. Draw a line at the end of your big toe. Measure the length in cm, and add 5mm to the number to establish the length of shoe you need. You will also want to measure the circumference of the widest part of your foot. You can then reference these numbers with sizing charts from the manufacturer you choose to buy your shoes from.

Wide Cycling Shoes

It can be tempting to just go a size bigger when you’re purchasing cycling shoes for some extra room, but this can actually cause even more problems. The extra length may feel good on your toes while you’re in the store, but it will cause your feet to slip within the shoe when you’re clipped in. Not only will this feel awful, but it can cause your cleat to be placed too far forward, taking a toll on your power and efficiency.

That being said, there are shoes made specifically for wide feet that will ensure your toes are nice and comfy, but keep your foot is locked into the correct position. See the following for some of the best options out there.

Shimano Men’s RP3

Wide Cycling Shoes

$109

Shimano has the most options when it comes to the wider fit, offering regular and wide sizes on most of their shoes. The Shimano RP3 cycling shoes are a great entry level shoe, with a fiberglass reinforced nylon sole and three adjustment points for the perfect fit.

Lake CX 237 Wide Road Shoe

Wide Cycling Shoes

$289

Exactly the same as the CX237 shoe, the wide version gives an additional 15mm wiggle room compared to the regular width. With a carbon sole, and two micro-adjustable Boa dials, you have the ability to make adjustments to the fit of the heel and forefoot so you get a secure fit without sacrificing your circulation.

Bont: Riot or Vaypor

Wide Cycling Shoes

Riot: $99

Vaypor: $199+

They may be harder to find, but Bont Cycling has a few heat-molding shoe options that make them popular for those with wide feet. The Riot and Vaypor models both offer a custom fit through heat-molding that can be repeated until you are happy with the result.

Shimano R321

Wide Cycling Shoes

$299

The Shimano R321 was released in 2016 with heat moldable Custom-Fit technology applied through to the upper, insole, and heel cup. This does not, however, allow for a widening of the shoe in general, so they have a wide version available in each size. The sole construction itself gives an extra 11mm of adjustment range, so you can find the ideal shoe-pedal connection.

Best Bicycle Phone Mounts

March 26, 2019 by Sarah Lauzé

Smart phones are an incredible tool that can be a great way to start tracking your rides and navigating new areas. If you’re not ready to invest in a specific cycling computer, or just prefer to use your phone, then you’re going to need a way to attach it to your handle bars. You could break out the duct tape, but we don’t recommend it. There a ton of great bicycle phone mounts out there that can keep your beloved phone safe.

Bicycle Phone Mounts

Cycling Computer vs Smartphone

With the Strava app, you can track data similar to on a GPS unit, and there are even ANT+ receivers for smartphone to integrate data from heart rate monitors, power meters, and cadence sensors. However, the main issue will be your battery life. Most phones will not last a long ride while running GPS the entire time. Also, if you take a tumble, your phone can be at risk. That being said, a handlebar mount can be a great way to start including technology in your ride without the investment of a cycling computer.

Types of Bicycle Phone Mounts

  • Case & Mount – A case and mount will be your safest option as it specific to your phone make and model. The phone is held in a case, which is then clipped securely in a block on your handlebars or stem. You can get waterproof cases, as well as adjustable mounts so the phone can be portrait or landscape orientation.
  • Universal Bracket – If you have a less common phone, then you may have to go with a universal bracket. These are the same idea as the case and mount, but feature a mount that will grip any phone, even if it’s already in a protective case. The advantage here is that you don’t have to switch your mount every time you get a new phone, and you can keep your phone in its everyday case.
  • Frame Bag – If you don’t like the idea of having something as large as your phone on your handlebars, then you can opt for a frame bag. This will sit on your top tube, just behind the head tube. It is a simple transparent sleeve that your phone will slide into, that allows easy access and control of the touchscreen. The downside of this design is if you are using your phone for navigation, as you will have to look and reach down further than if your phone were on your handlebars.

Best Bicycle Phone Mounts

Lezyne Smart Dry Caddy Handlebar

Price: $34

This simple case and mount gets the job done with no hassle or fuss. It’s tough and weatherproof once the seal is fastened and the flap rolled down, and comes in a variety of version for various models. It is a clear polyurethane cover fastened by a velcro flap. The mount is a strong plastic band that is tightened by a thumb screw. It takes all of 30 seconds to put on, and it stay nice a secure. You can then clip the case in place in either landscape or portrait orientation. It’s one downfall is accessing the iPhones power button up top when it’s in the case, but this isn’t a huge deal.

Topeak Weatherproof Ride Case with mount

Price: $39

There are a couple versions of this case and mount available, the most popular being the weatherproof version for the Iphone 6. It’s snug design is meant for the perfect fit and protection against dirt and rain while riding. The weatherproof shield allows easy touch screen access in both wet or dry conditions. The mount is fully adjustable for viewing in landscape or portrait, and it’s quick and easy to unclip the case from the mount at anytime.

RAM Mount with Universal X-Grip Phone Holder

Price: $29

This universal rubber ball and socket mount system will fit any phone you throw at it. It’s easy to instal, easy to use, and tough. The one con is that the spring loaded holder can end up hitting the volume buttons on the side of some phones, but that can easily be avoided with precise placement.

Quad Lock Bike Kit

Price: $70

The Quad Lock Bike Kit includes a slim case for a variety of phone models, a mount, and a weather resistant cover. The patented lock system makes for a secure connection, while maintaining a quick and easy release built right into the case. The case itself is tough enough, and yet desecrate enough for day-to-day use so you don’t have to switch out your case every time you ride.

A Guide To Spring Cycling Clothing

February 28, 2019 by Sarah Lauzé

It’s an exciting time when the snow starts to melt off the roads and the look of bare pavement has you dusting off your bike. Spring riding can be some of the best of the season, but the unpredictable weather can present a bit of a challenge. When it goes from sun to rain to snow within the span of a couple hours, dressing for the elements takes some planning. Your spring cycling clothing list will look a little different than any other time of year as it needs to be adaptable.

As with most things, there’s no ‘one-size-fits-all’ solution. It depends on your type of riding, how long you’re going for, and how hot or cold you typically are when on your bike. Layering is the best way to ensure you can stay warm enough, but also won’t overheat if the temperature rises while you’re out. If you do get too warm, you can simply peal off a layer and continue on.

Main Articles of Spring Cycling Clothing

Base Layer

If you’ve been rocking a long sleeved base layer all winter, it may be time to switch it out for a short sleeved. Combined with a jersey and arm warmers, a light base layer can be just enough to keep your core warm. It also serves to wick moisture away from your skin to avoid getting chilled when you hit a descent.  Try choose a base layer made from polypropylene or merino wool, like the Castelli Seamless Base Layer.

Long Sleeved Jersey /Lightweight Shell

Depending on your preference, you’ll likely switch out the thick winter coat for either a lightweight shell or a long sleeved jersey. A long sleeved jersey is a great option for those warmer days as it offers much more breathability. There are also options in material that include a wind breaking fabric. Most will offer a full zipper down the front, making it easy to take on or off, and three pockets in the back to stash your snacks. A light weight shell can be worn over a regular cycling jersey, and rolled up into a pocket when not needed.

Arm and leg warmers

These simple Lycra accessories are great if you’re cold when heading out, but know you will be heating up quickly. They are easy to take on and off, and roll up small for easy storage in a jersey pocket. You’ll want to try them out before hand and make sure the fit properly. They need to loose enough to be comfortable, but tight enough to stay in place (especially important for leg warmers).

Gloves

Time to ditch the winter gloves and opt for a lightweight pair that won’t have your hands sweating 10 minutes into your ride. A lightweight, breathable pair of gloves are just enough to keep your fingers warm on that chilly morning commute.

Cycling Cap

A cycling cap is for both function and style. During spring riding, it can keep your head warm and help keep rain out of your eyes. Click here for some of the best cycling caps out there for every type of rider.

Ensuring you are prepared both technically and physically with the right clothing will have you jumping into the cycling season in no time. Spring riding can be some of the best rides, so don’t let the conditions deter you from getting out there!

The Best Cycling Podcasts

December 20, 2018 by Sarah Lauzé

How do you stay motivated and stoked to get out and ride? Podcasts can be a great resource because you can listen to them anytime, anywhere. If you haven’t already jumped on the podcast train, it may be time. There are a ton of cycling specific programs that can help you learn more about the sport, your bike and how to best train. Rather than getting sucked into the popular world of true crime podcasts, join the cycling community instead! It’s the perfect thing to listen to on your commute or while cleaning, cooking, doing maintenance, lazing around and pretty much anything else. Here are some of the best cycling podcasts to get you started.

Best Cycling Podcasts

4 Of the Best Cycling Podcasts

The Cycling Podcast

Okay, The Cycling Podcast seems obvious. The name may be a little on the nose, but the production and quality of their content is one of the highest in the game. Sponsored by Rapha, each 30 minute weekly episode features authors and journalists Richard Moore, Lionel Birnie and Daniel Friebe. UK based, The Cycling Podcast cover the world of professional cycling with race reports, speculation and cycling news.

The Slow Ride Podcast

Another show about racing, but with a comic slant. The Slow Ride Podcast gets funny sarcastic, and a little weird sometimes, but it’s a ton of fun to listen to. So, if you want to take a breather from the seriousness that can be the cycling world, this show is a great breath of fresh air.

Velocast

As one of the longest running cycling podcasts, Velocast is just two guys who took their passion for watching and talking about cycling and made it into a show. A pro-level commentary on all things cycling, it’s the perfect blend between facts, knowledge and banter. You have the option of limited free shows, or you can subscribe to gain access to a ton of material.

The Paceline Cycling Podcast

The Paceline is a cycling podcast aimed at roadies, mountain bikers, commuters, cyclocross enthusiasts , those who grind gravel—indeed anyone who claims cycling for their own. The bicycle is more than a thing, discusses the bike’s place in society. The hosts love bike gear so expect some banter about what works and what does not on the road and trail. The show is backed by the Fatcyclist and Red Kite Prayer.


The Best Step Through Bikes for City Riders

August 28, 2018 by Sarah Lauzé

If you’ve ever struggled to get your leg up and over your bike, then you understand the reason for step through bikes. More and more manufacturers are coming to realize that there is huge market potential for easy to board bikes. Typically, even the best step through bikes suffered from weight bearing limitations, but with recent design breakthrough, they can make cycling more accessible to a lot of people.

What Are Step Through Bikes?

Step through bikes are pretty self explanatory. They are bikes with no top tube, making them easy to “step through” to mount. They often use a pedal forward design, with the pedals slightly forward of the seat tube. This makes it easier to maintain the proper seat to pedal distance, while also being able to put their feet flat on the ground while remain seated. The wheelbase will be a bit longer, which can effect handling, but it enhances the overall comfort.

Pro and Cons of Step Through Bikes

Historically, step through bikes have been regarded as women’s bikes as they allow the rider to wear a dress or skirt. However, more and more seniors, commuters, and heavier riders are opting for the easy to mount option. If you’re not quite as flexible and limber as you once were, then it’s a great option to keep you riding.

The biggest disadvantage of a step through frame is the weight, strength and stiffness. The regular diamond shaped design of most bikes is so widely used because it is the better design. The top tube gives the frame strength and stability, while allowing for the use of lightweight materials. To achieve the same strength, step through bikes have had to use heavier materials.

For city cruisers and commuters, the step through design can actually make the most sense. Stopping at stop lights and being able to remain seated while placing you feet on the ground can be plus for a lot of riders. Much more common in Europe, finding a step through bike can be a little tough depending on where you live. However, a lot of manufacturers will ship, so here are some of the best step through bikes.

The Best Step Through Bikes

Public C1

$395

If you live in a relatively flat area, the single speed Public C1 can be a great affordable option. Under $400, it has the iconic European style perfect for comfortable cruising.

Bike ID Step Through

$800

The Bike ID Step Through is made of Hi-Ten steel tubing, weighing in at 15.5kg or 34 lbs. It’s equipped with both a hand brake and a foot brake. Both brake and lever is made of aluminum, and due to a smart quick-release you can remove and replace the wheel without having to change the break settings. It is strong and durable, and will last through years of city cruising!

Shinola Bixby

$1950

The Bixby is offered in both a classic men’s and women’s frame design, with thoughtful touches like gender-specific saddle design and proportional geometry. The Bixby riffs off the fun look of the curved top tube, but improves on the fit and function with nimble frame geometry, a Shimano 3-speed internal hub and disc brakes. The Bixby is more of a hybrid between the step through and diamond design, giving the rider the best of both worlds.

Electra Amsterdam Royal 8i

$1400

The Royal 8i is a lightweight aluminum premium-edition Dutch bike: well-bred for stylish luxury and yet practical everyday cycling. Top-of-the-line Shimano Nexus 8-speed internal hub, smooth and powerful front and rear roller brakes and durable tires with Kevlar puncture-resistant casing are a few of the special upgraded features that make the Royal 8i worth every penny.


Best Road Bike Pedals

July 2, 2018 by Sarah Lauzé

When you’re riding your bike, you make contact with it at three main points: the handlebars, the saddle, and the pedals. As your legs are working to drive the bike forward, the road bike pedals are arguably one of the most important components on a bicycle.

When we talk about road bike pedals, we are generally talking about the clipless cleat and shoe system. There are over the toe straps that can work great for some, but for the purposes of this article we are referring to the clipless (or strapless) system.

What are Clipless Pedals

Clipless pedals have a spindle just like a normal platform pedal, but the plastic or metal platform is shaped in a way to allow the second part of the system, a matching cleat, to snap into it. A spring-loaded mechanism then secures the cleat in place so it doesn’t slide around or release. A cleat is then attached to the cycling shoe, made specifically for these cleats to be attached to the bottom via bolts.

How they work

On the pedal there is a spring mechanism that holds the cleat to the pedal. To clip in, line the cleat up with the pedal and then push down, just like a ski binding. To release the shoe from the pedal, a simple twist of the heal outward releases the cleat.

Why go clipless?

Why go clipless? Clipless pedals with cycling shoes is the most efficient and comfortable system out there when it comes to road biking. The stiff sole of the cycling shoe provides a rigid platform to transfer power from your legs to the drivetrain and propel the bike forward. Softer shoes lose some of that power as the flexible sole deforms around the pedal (and also makes your feet sore).

As well as having stiff soles, being clipped in encourages proper pedalling technique, using power through every part of the pedal stroke. Not only are you pushing down, but you are also pulling up to complete the 360 degree motion, making the switch to clipless pedals well worth it.

What to look for when buying pedals

  • Cleats – The majority of  road cycling cleats are three bolt (SPD-L), with two bolt (SPD) being more appealing for commuting, touring, and mountain biking. Some cleats are a compatible with both.
  • Tension Adjustment – When you’re first switching to clipless pedals, the most intimidating thing is not being able to get unclipped quickly when you need to stop. The slow motion topple over is almost a right of passage, but it can be lessened by decreasing the tension. Be sure to get pedals that allow you to adjust this tension, starting low and increasing the tension as you become more confident.
  • Float – Float refers to the wiggle room you have while clipped into the pedal to get into the most comfortable position for your legs. Most pedals have about 3-9° of float, but keep in mind the more float you have the more you will have to twist your foot to release. Some pedals are zero float, but you will want to make sure you’ve had a detailed bike fitting before locking in with zero wiggle room.
  • Stack height – Stack height is the measurement from the middle of the pedal axle to the bottom surface of the shoe. The smaller the stack height, the more efficient your pedaling will be as your foot is closer to the axle.

The Best Road Bike Pedals

Best All-Round Pedal: Shimano Ultegra PD-R8000 SPD-SL Pedals

Price: $120

Before going into any of the features that make this pedal great, the ease of use is its greatest selling point. They require little to no maintenance, are durable,  and remain easy to clip in and out of even when mud and snow is involved. They also hang well when unclipped to make for a quick and easy clip in.

With a carbon composite body, these pedals are a great choice for competitive and casual cyclists alike. Evolved from the Pd-6800, the R-8000 has a 0.7mm lower stack height and a lighter weight at just 248g.

Most Adjustable Pedal: Speedplay Zero Pedals

Price: $189

If you struggle with knee pain, then these are the pedals for you. The twisting motion to release the pedal can be painful on the knee joint, so the Speedplay Zero allows the widest range of tension adjustment to ensure this isn’t a problem. All three foot-axis adjustments can be set independently of each other for a precise and comfortable fit. The locking mechanism does not rely on spring tension for security, so entering and exiting Zero pedals is easy, and they are dual-sided entry to allow for an easy clip in.

Most Budget-Friendly Pedal: Shimano PD-R550

Price: $56

The Shimano PD-R550 are the perfect pedal for cyclists looking to transition to the clipless system. Not only are they extremely affordable, but that have a wide platform that feels more like a traditional platform pedal while giving you the efficiency of being clipped in. There is a wide range of tension adjustments so you can start with a lower tension and build up your confidence. Made from a resin body with a stainless steel cover, they are durable and have a large entry point to keep from struggling to get your foot in just the right position.

Pros and Cons of Tubeless Tires for Road Cyclists

May 14, 2018 by Sarah Lauzé

Tubeless tires have been a mainstay of the mountain biking world for years, and have inevitably made their way into road cycling as well. With mountain biking, tubeless tires allow riders to run their pressure much lower, providing enhanced surface area and grip without the risk of pinch flats. Road tires, however, are more efficient when run at a higher pressure, so what is the benefit of going tubeless?

Traditionally there have been two main options for road cycling tires: clincher and tubular. Clinchers are the best option for the majority of riders, as they are easy to use and fix by swapping out or repairing the inner tube. Tubular tires are lighter and are used by a lot of racers, but unless you have a support vehicle following you on every ride, then replacing a tire is a painfully long and technical process.

Now there is a third option with tubeless tires, but are they worth the leap?

Pros and Cons of Tubeless Tires for Road Cyclists

How do tubeless tires work?

Pros and Cons of Tubeless Tires for Road Cyclists

As the name suggests, tubeless tires do not have an inner tube, and are setup similar to a car tire. The open rubber tie sits firmly on the wheel’s rim, with the air sitting in the cavity between the rim and inside of the tire. In addition, a liquid sealant is used inside the tire to preemptively plug any small cuts in the tire without losing pressure at all.

Tubeless wheel setup

The nice thing about tubeless wheels is that they can be used with both a tubeless tire and the typical clincher (inner tube) setup. The shoulder in the inner rim will have a much more pronounced recess that the tire bead fits securely into (see diagram), rather than the traditional U-shaped rim bed on clincher wheels.

Tubeless tires themselves are designed with a tougher bead to provide an immediate seal with as perfect airtight fit. If you try to fit a tubeless tire on a clinched rim, it will come off as you add pressure.

Are tubeless tires worth it?

Pros

  • Speed – clincher tires have a level of friction between the tube and the tire that tubeless tires eliminate, lessening rolling resistance and making them faster.
  • Less flats – The tubeless setup rules out pinch flats completely, and dramatically lessens the danger of blowouts with the liquid sealant. This has a huge impact on the number of flats you’re likely to experience. Plus, if you do have a flat out on a ride that the sealant can’t handle, you can use a tube to get you home.
  • Comfort – Tubeless tires can be run at a lower pressure (dropping about 15-20 psi) without sacrificing performance. This can enhance your corner grip, traction, and overall comfort. You can even venture off road with the tires being a lot more forgiving than if they were running at full pressure.

Cons

  • Difficulty in fitting – As a system that depends on tight seals and high pressure, installing or removing the tire can be a difficult and frustrating job. So, while the likelihood of flats may be reduced, the process to fix it in the case of total failure can leave you swearing on the side of the road. You may even need an air compressor to get a proper seal.
  • Weight – Tubeless tires are largely heavier than a clincher setup, with thicker sidewalls that add weight.
  • Racers don’t use them – This may or may not matter to you, but racer’s do not use tubeless because of the added weight with minimal gain. However, for the recreational cyclist, the lower risk of flatting may be worth the sacrifice.

Tubeless tires are by no means taking over the roading cycling world (as they have with mountain biking), but as technology advances we may see them grow in popularity. Having tubeless-ready wheels is a great way to go, as it leaves the choice up to you whether you want to stick with clinchers or give tubeless a try.

The Difference Between Freewheel and Cassette

April 21, 2018 by Sarah Lauzé

If you’ve been using the two terms (freewheel and cassette) interchangeably, don’t worry because you’re not alone. If you don’t know which you have on your bike, you can end up wasting a lot of money due to the error. We’re going to help remove some of the confusion by explaining the difference between freewheel and cassette freehubs.

freewheel and cassette

Freewheels (for Threaded Hubs)

Traditional rear hubs have a standardized set of threads that a freewheel or sprocket cluster can be screwed onto. This meant any brand of freewheel could be mounted on any brand of hub. The extractor splines do not turn when the sprockets are spun backwards.Freewheels come with sprockets bolted together, without possibility of swapping them. Pretty much all bikes made through the late 80s used this system.

Cassettes & Freehubs

Over the past few decades, the cassette replaced the conventional threaded rear hub. This newer style hub works so well that they have replaced the traditional freewheel and have become the new standard for contemporary road bikes. One of the major differences between a freewheel and a freehub is the location of the coasting mechanism

It incorporates the ratchet mechanism into the hub body, so you can replace the sprockets only, rather than the ratchet mechanism. Unlike the freewheel and threaded hub system, the lockring splines will turn with sprockets when spun backwards. Additionally, many  freehubs will have a distinctive bulge on the right end of the hub barrel.


freewheel and cassette

Whereas freewheels come with sprockets bolted together, without possibility of swapping them, cassettes come with loose sprockets that have spacing between them. Some cassettes do come with sprockets held together with bolts or rivets, but these are just for easier mounting – they can be removed without affecting functionality, so that individual sprockets can be swapped.

Which One Do I Have?

If you’re still not sure what you have on your bike, it’s possible to ID it by how it looks. Freewheel axles are typically recessed slightly into the axle. Cassettes are typically flush with the face of the gears, and you can see the splines, appearing as the rays of the sun around the perimeter. Freewheel axles may also show splines, but not as many as a cassette, and are recessed into the body deeper, around the axle itself, not the gear like a cassette.

Not all Freehubs have this bulge, but whenever you see it, you can be sure that it is, in fact, a cassette Freehub.

Buying and Changing Sprockets

Attention should be paid to this when buying and changing sprockets, so that the right ones are used. Freewheel is screwed onto the rear hub, while cassette is just slid onto the hub splines, held in place with a special lockring. The very end of the (rear) hub differs for each type, so it is easy to identify the standard, even before removing sprockets.

Easy Tricks for Tubeless Mountain Bike Tires

February 20, 2018 by Ryan Taylor

There is no doubt that the emergence of tubeless mountain bike tires and rims have changed the industry for the better. Riding tubeless enables the rider to run less pressure, giving the rider more grip, better ride feel and also less weight. Adding a sealant to the system adds an extra measure of security as many small holes or cuts in the tire can be patched internally by the sealant. Should a cut happen that is too large for the sealant to do its magic, then the rider can install a tube as normal to get home!

Tubeless Mountain Bike Tires

Tubeless has come a long way since the emergence of UST (universal system tubeless) over 10 years ago by Mavic and Hutchinson (two french companies, hence the french abbreviation). Now most rims and tires on the market can be made tubeless very easily, BUT there are few hidden tricks that both shop and home mechanics can use to make the system easier and more affordable.

Editors note: Most Bontrager rims do not apply to these tricks!

Gorilla Tape:

Tubeless rim companies have developed their own tape to ‘tape’ over the spoke holes on the inside of the rim causing it to be sealed. The valve is then poked through the tape. When sealant is added, the combination of these things is what makes the system air tight.

This tape is on the expensive side as it is designed to work with the specific rims. Many professional  mechanics, from local shops to World Cup DH, tend to use ‘Gorilla Tape‘. This tape is basically duct tape on steroids and can be bought on the cheap at any local hardware store. Not only that, it comes in many widths to accommodate different rim widths and tends to be thicker than the proper tape. In some opinions, it can lead to a more solid tire seal.

One of the main benefits to Gorilla Tape is how easy it can be found. Being able to buy it at Wal-mart at 10:30pm the night before a race is handy when you break a spoke on the course pre-ride! The key to it working well is to make sure the rim surface is clean for proper adhesion.

Tubeless Valves:

Like tubeless tape, specific valves are recommended to go tubeless. The main benefit of the specific valves is that the rubber base (what hugs the rim) is built up. This works to prevent sealant from going into the valve, clogging it, and also preventing it from pulling through. If you are on a very tight budget or in a pinch, you can cut up an old presta tube. This valve is very similar and can work. If you have a couple of extra bucks you can buy the proper tubeless valve.

Patching Tires:

We have all been there. Installing a new tire and cutting it on the first ride. Tubeless tires don’t come cheap these days and it is very frustrating to cut one before you get your moneys worth! It is possible to patch tubeless tires, but it is very tricky. It’s recommended to buy patches in the automotive isle of the hardware store as they tend to be thicker, more stiff, and generally cheaper. Your DON’T want a flexible, thin, patch with some stretch to it.

Be sure to clean the inner part of the tire thoroughly with alcohol and scuff it up with sandpaper. Once clean, buy the best crazy glue you can find. A favorite is ‘KLEBFIX’ from Wurth brand. It is a fantastic glue and doesn’t corrode rubber. Be careful as it will bond ANYTHING in a matter of seconds. Traditional patch glue doesn’t work well. Keep in mind, this is to get the remaining life from your tires. If you are concerned about it holding up before the biggest race of the year, you should error on the side of caution and buy a new tire.

The Rim-Pop technique:

Lets face it: Tubeless is annoying to set up without a compressor. Thankfully Bontrager has come out with a pump that stores air inside of it causing a burst of quick air popping the tire into place. This is the definition of “Why didn’t someone think of this sooner?” type products.

However, there is another way! Once the tire, valve, tape, sealant are all installed, run your tire lever just under the bead of the tire, gently pulling it up onto the high spot of the rim (where it should sit when inflated). Run the lever all the way around the tire. You will feel it getting tighter and tighter as the lever approaches your starting point. From here, gently pull the lever out and do the same to the other side.

The goal here is to pre-set the tire on the high point of the rim so when you start pumping there are fewer places for the air to escape which aids in the force of the air ‘popping’ the tire into place so the sealant can do its magic.

You will almost always make a mess with this system, but it works. Once you get good at it, it usually works the first attempt. Again this is handy for those without a compressor or who happen to be at a race or on the road. Another good method is before you put the sealant in, install the tire with a tube and inflate it to seat the bead. Then carefully remove one side of of the tire to remove the tube, install the tubeless valve, and add sealant. Then do the above trick on the one side. Also wiping the bead of the tire with a warm, wet, soapy sponge will help the tire to seal.

The bicycle industry has come a long way from UST over the past 10 years. Tubeless tires are more accessible, more affordable, and much lighter compared to then. Is the ‘Stans’ system easier to use than UST? Depends who you ask, but these tips will help you out if you’re in a pinch.

« Previous Page
Next Page »
  • Facebook
  • Tumblr
  • Twitter

Latest Articles

JOIN Cycling: A New Training Platform for Cyclists

May 27, 2024 By Eric Lister

cold exposure

The Benefits of Cold Exposure for Cycling & Life

June 13, 2023 By Eric Lister

hill climb

The Ultimate Hill Climb Training Guide

May 31, 2023 By Eric Lister

shoulder pain cycling

How to Treat & Avoid Shoulder Pain While Cycling

April 12, 2023 By Eric Lister

psoas stretch

The Importance of the Psoas Stretch for Cyclists

April 6, 2023 By Eric Lister

cycling neck pain

The Ultimate Guide to Cycling Neck Pain: Causes and Solutions

March 21, 2023 By Eric Lister

Useful Info

  • Contact
  • Finally, A Global Cycling Club That Is Focused On Community And Love Of Cycling!
  • Privacy Policy
  • Share Your Story!
  • Terms And Conditions Of Use
  • Welcome to I Love Bicycling
  • What Happened When I Stretched Every Day For a Month

Recent Posts

  • JOIN Cycling: A New Training Platform for Cyclists
  • How to Hang Bikes in Your Garage: 4 Inexpensive Options
  • Gravel Bike Vs. Road Bike: Which One Is Better For You?
  • The 6 Types of Mountain Bikes & How to Choose the Best One for You
  • What Is a Touring Bike Good For? 5 Benefits We Know You’ll Love

Search I Love Bicycling

Connect with Us

  • Facebook
  • RSS
  • Tumblr
  • Twitter

Copyright © 2025 · Magazine Pro Theme on Genesis Framework · WordPress · Log in